Hey guys!
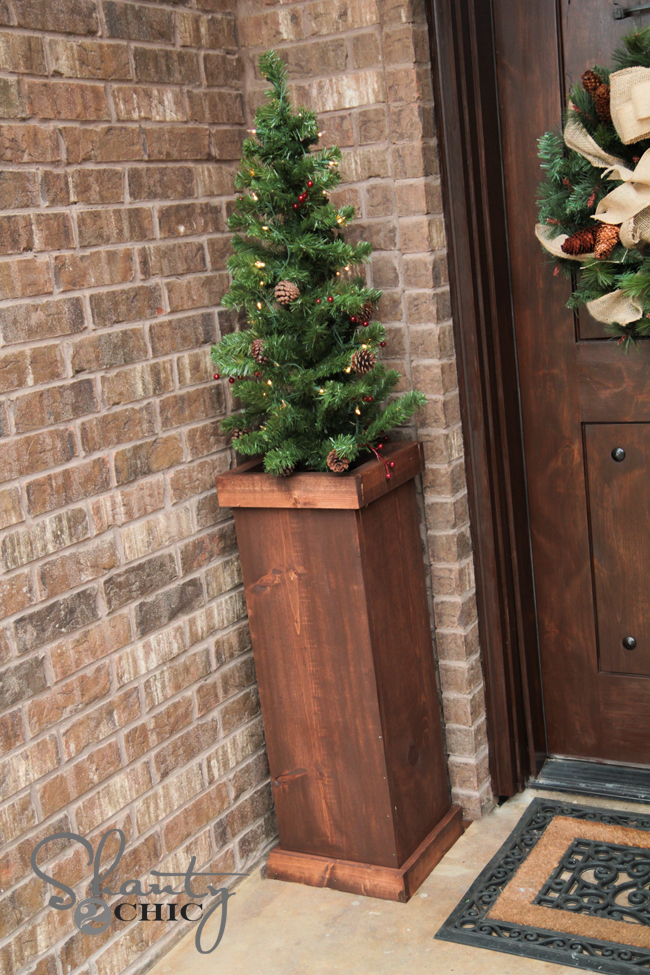
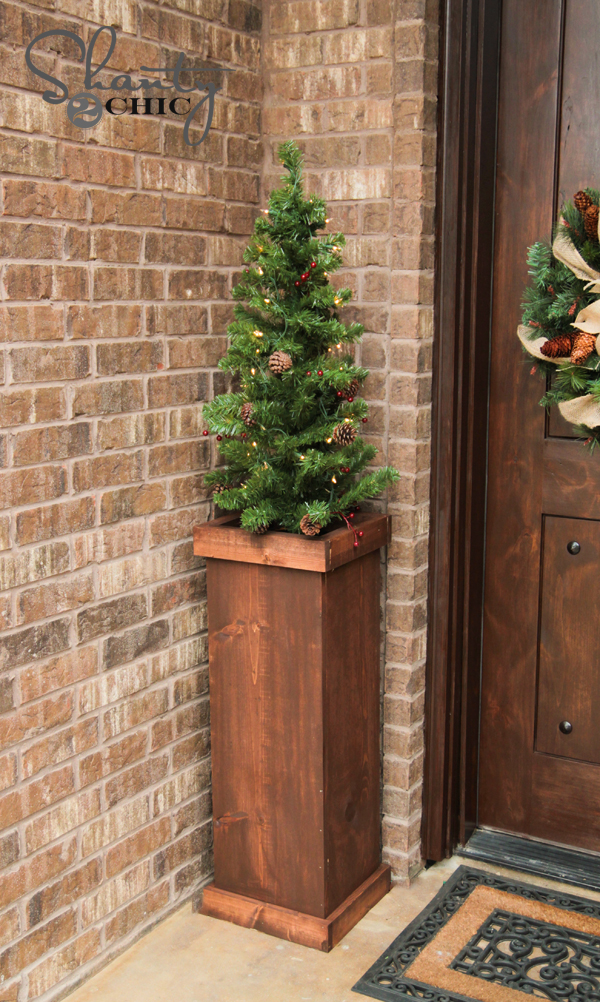
Happy Friday! Those of you that follow us on Instagram have seen my little front porch makeover. I’m so excited about how this latest project turned out! I got my entryway dressed up for Christmas this week. I have a narrow entryway, but a tall door. I wanted something that didn’t take up too much space, but could also give me some height. So… I created these $25 Christmas tree plant stands!
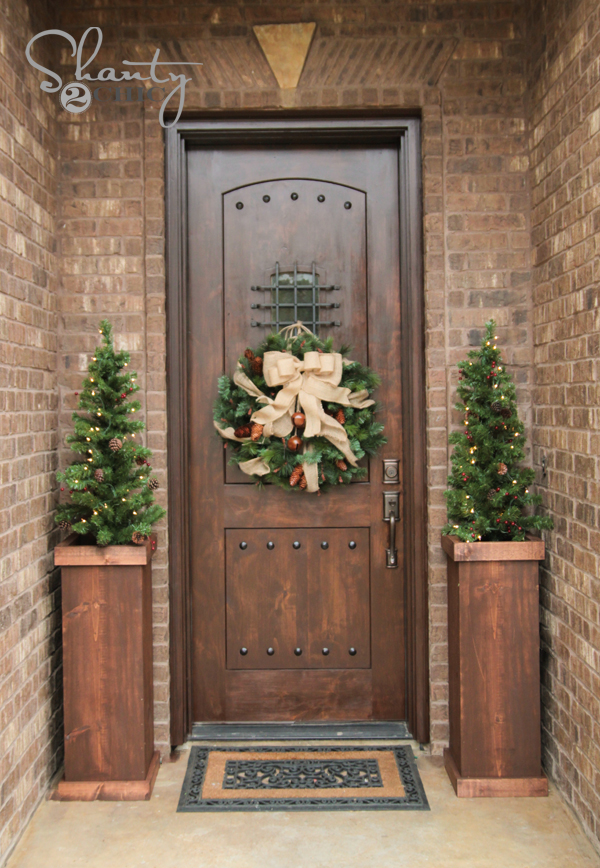
How fun are those? The best part? I already told you… $20. 🙂 But, they can also be used year-round with lots of different plants. They will easily hold a standard 8 or 9″ pot. I built both of mine during nap time. Super simple and so cute!
Let’s get started!
Supply List for 1 Plant Stand
1 – 1x12x6′ Whitewood Board
1 – 1x10x6′ Whitewood Board
1 – 1x3x8′ Whitewood Board
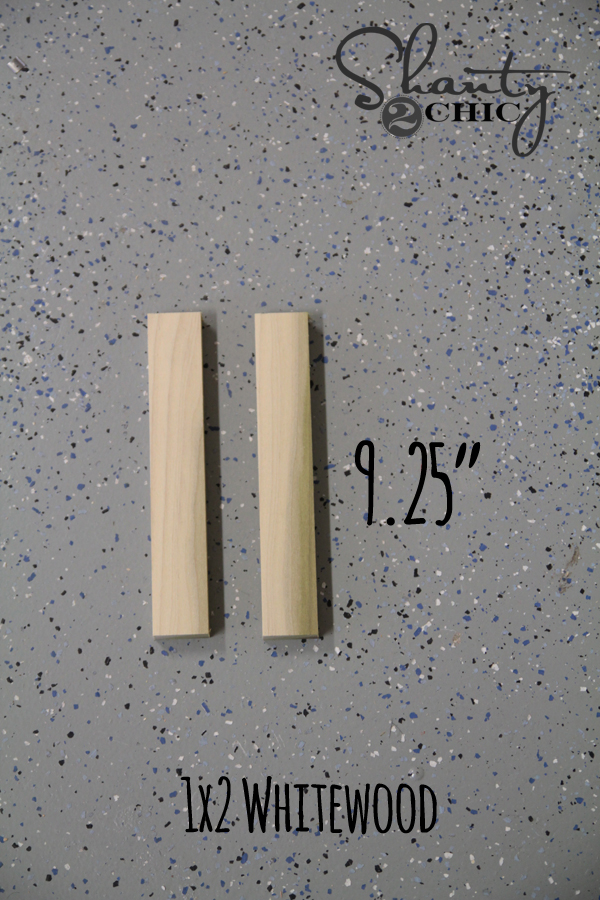
1 – 1x2x6 Whitewood Board
Total cost of wood = Around $25… Woohoo!
Cuts


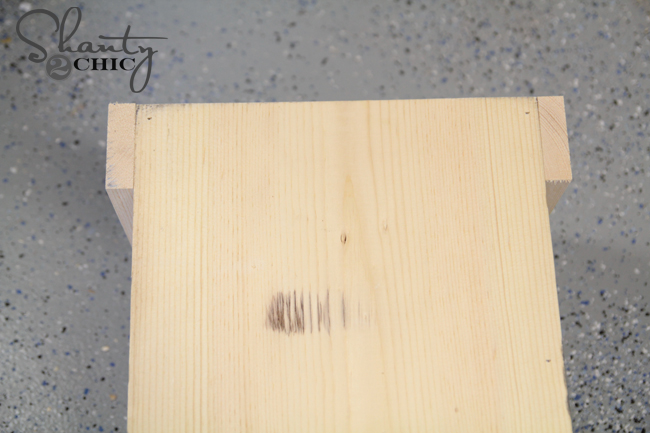
These are your initial cuts. You will also have trim pieces to cut, but I like to wait and measure each of those after I get this part assembled.
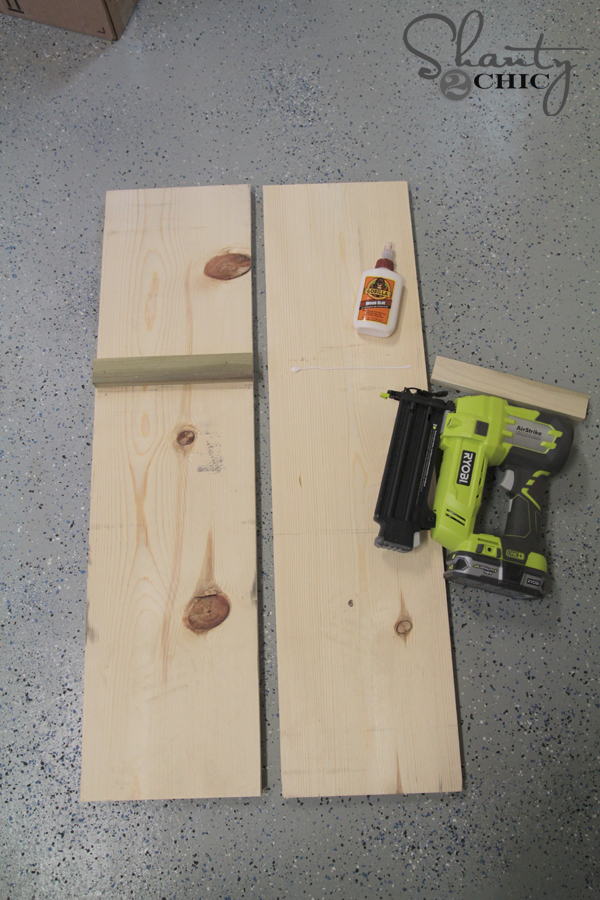
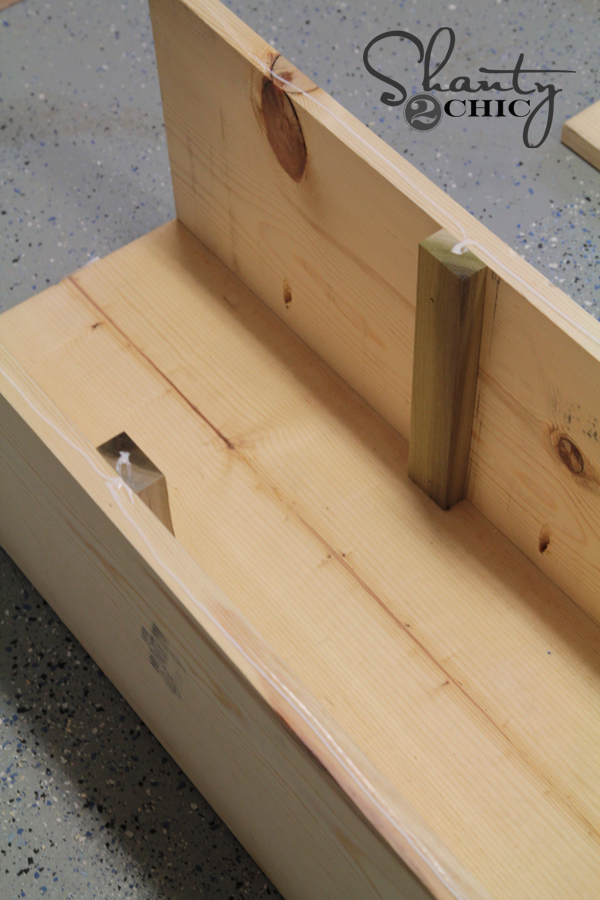
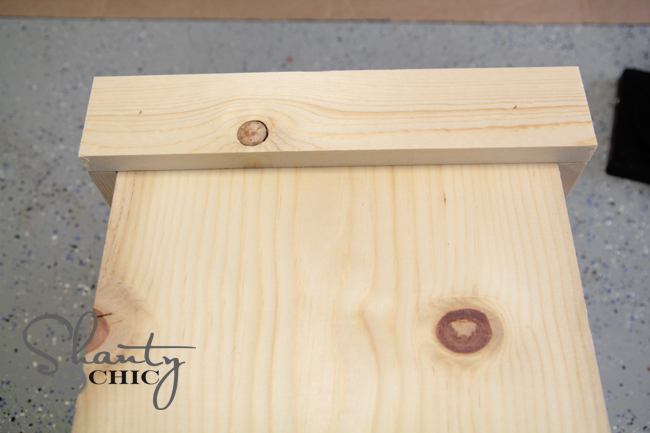
I started by attaching my cleats to the inside of the 1×10 boards. I did mine 12″ from the top. You will want to know what tree or plant you are putting in your stands and make your cleats fall at the right distance from the top. I found my trees really cheap at Target this week. It was a pack of 2 and they come in urns.
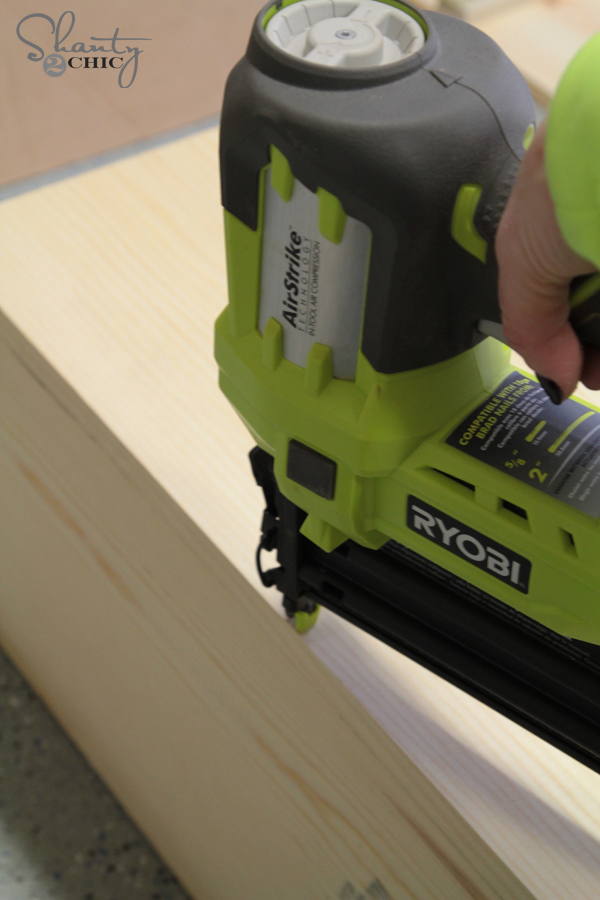
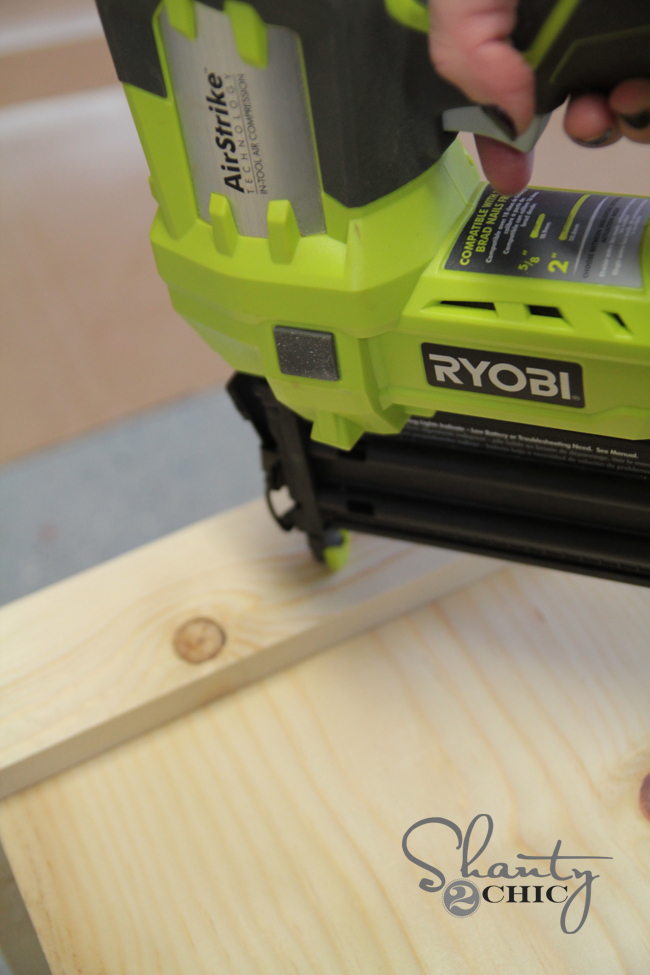
I used Gorilla Wood Glue and my Ryobi Airstrike Nailer to attach the cleats on this part.
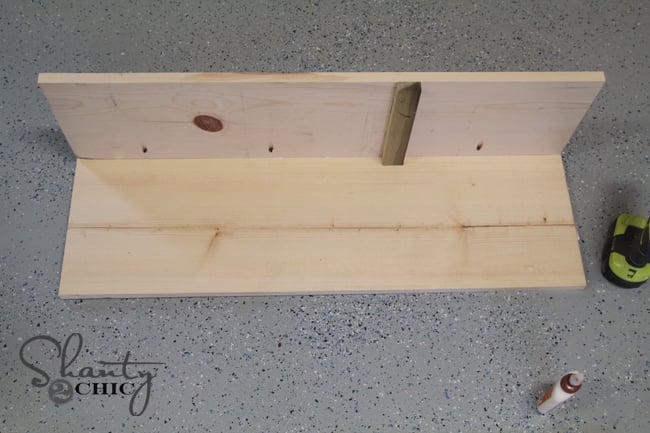
I used my Kreg Jig to attach my first 3 boards. This is entirely optional. I like how easy it makes it to put together, and I also like the added stability I get from it. You can also use wood glue and finish nails for the entire thing.

I used 3/4″ pocket holes and 1 1/4″ pocket hole screws for this part. I just made 3 along one side of each of my 1×10″ boards.
Once I had the first board attached it looked just like this…
I attached the second board the same way.

Because this is a tight space, I used wood glue and my nailer to attach the 4th board. Just run a line of glue down the sides first.
And use the nailer to hold it in place!
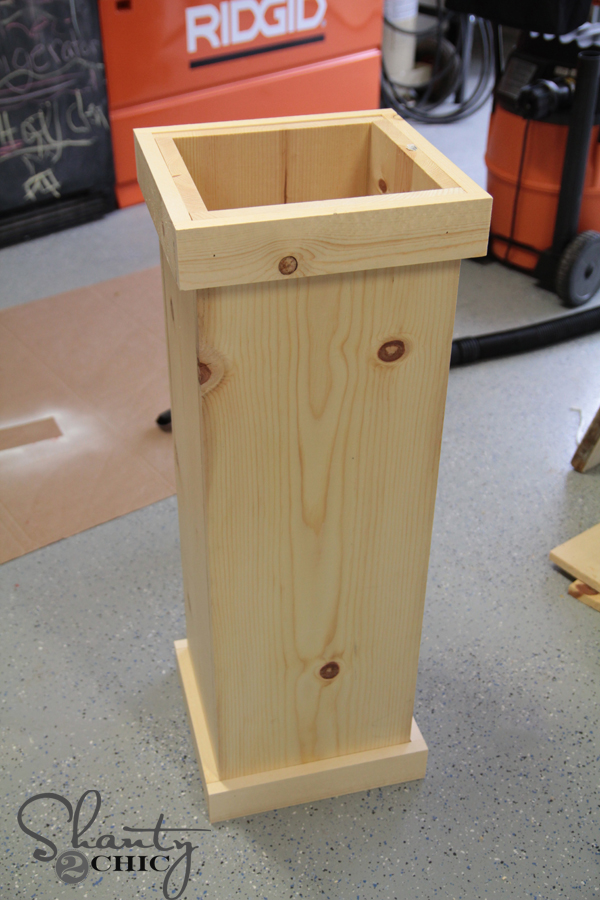
Ready for trim!
I like to measure each of these as I go. Wood can vary in size. I trimmed the 1×10 sides out first. You will use the 1×3 board for your trim. Here is what my first piece looked like. I just used wood glue and my nailer to attach all of the trim.
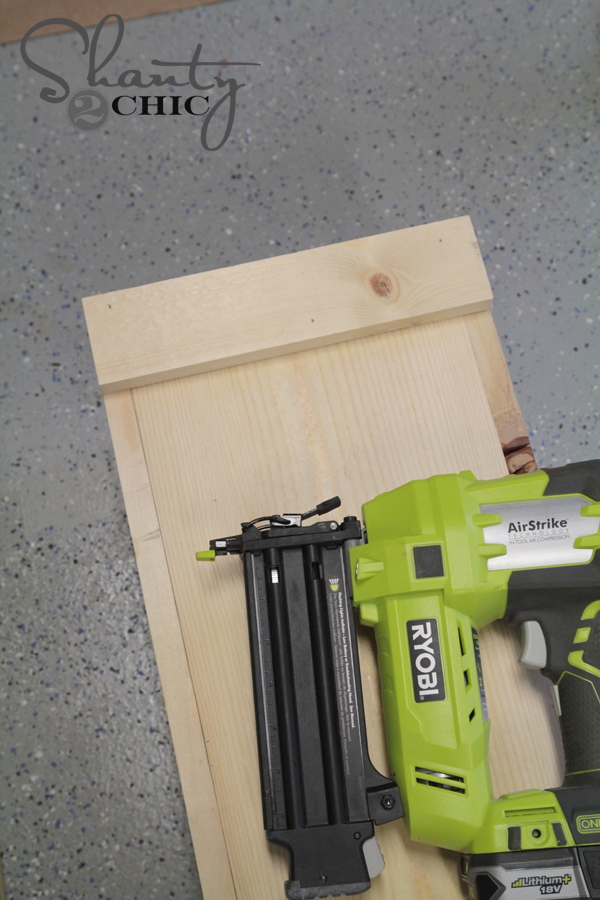
Once I finished those sides, I moved to the 1×12 sides. Measure the entire length including your trim pieces.
Then, attach your trim!
So darn easy peeps!
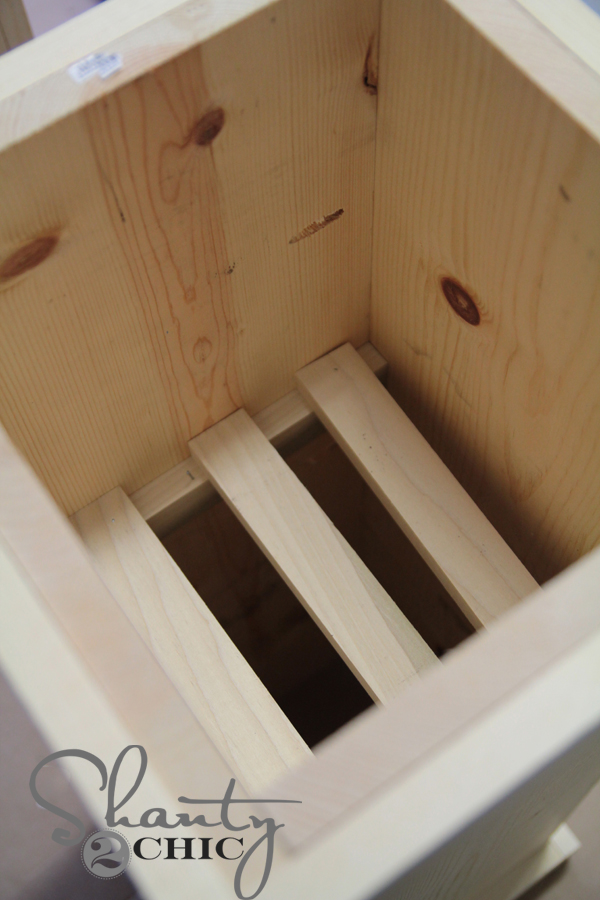
Now the top and inside should look like this…

Just cut a few pieces of your 1×2 to and lay them on the cleats. This will hold your plant or Christmas tree!
Voila!
Time for stain!
I used a new color that I am LOVING for mine. It’s called Carrington.

I also used a coat of Polyurethane over the entire thing when I was done.
My final step was dropping my trees in and putting them on the porch. What do you think??

Thanks so much for stopping by! I hope you love them as much as I do!
I would LOVE for you to share these and PIN them with your friends below!
Have an AWESOME weekend!
~Whitney


Love these! Where did you get the trees – they are exactly what I’m looking for.
Where did you get all your items for wreath on door? New to your site working on this look this weekend for my entry way ! Love all your projects.
Where did you get the front door…I love it!
Very nice.
Super awesome!! They just tie the whole porch together. I am assuming you made your wreath just like the rectangular wreath except used a round form. Can you tell me what is hanging in the center? I love your wreath too! What a cute entryway!
where do you find the whitewood boards from? I was at Lowes….couldn’t find…I asked and they sent me to “white wood composite”
Looks like white pine boards to me.
Whitewood typically refers to whatever softwood the big box store can get cheapest and varies by region and season. Generally it is “SPF” or spruce/pine/fir (looks to be pine in this case), but can also be tulip, basswood, cottonwood, or sometimes even hemlock. It’s like the mystery meat of woods.
Typically both Lowes and Home Depot have about half an aisle dedicated just to whitewood boards of various sizes, right across from the hardwood boards.
Great job! Looks beautiful.
OMG…this is beautiful! Great job!
It turned out great! Love the simplicity of the porch,
Have you seen the new Driftwood and Wheat colors? So excited about the new stuff!
I just found that stain too. It is a gorgeous color. Great job!