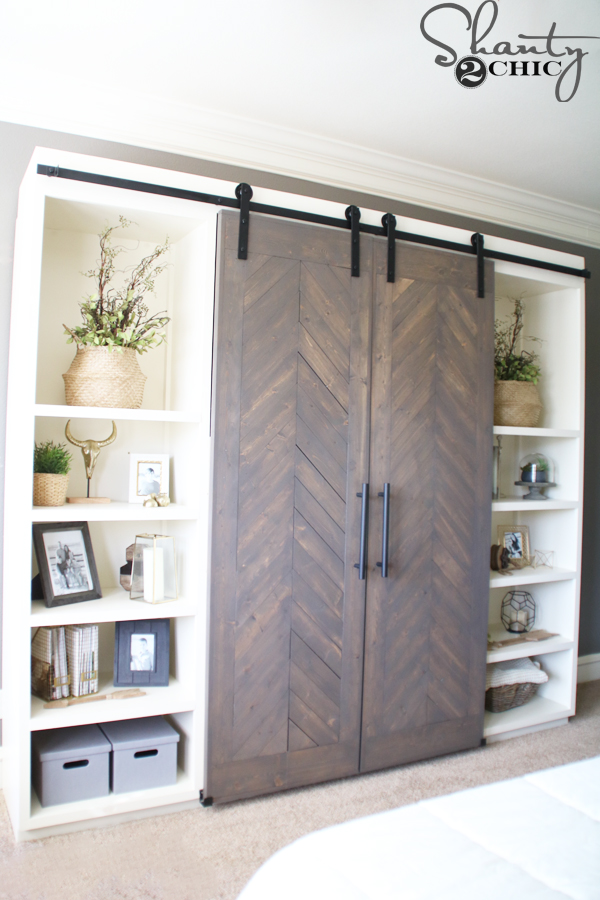
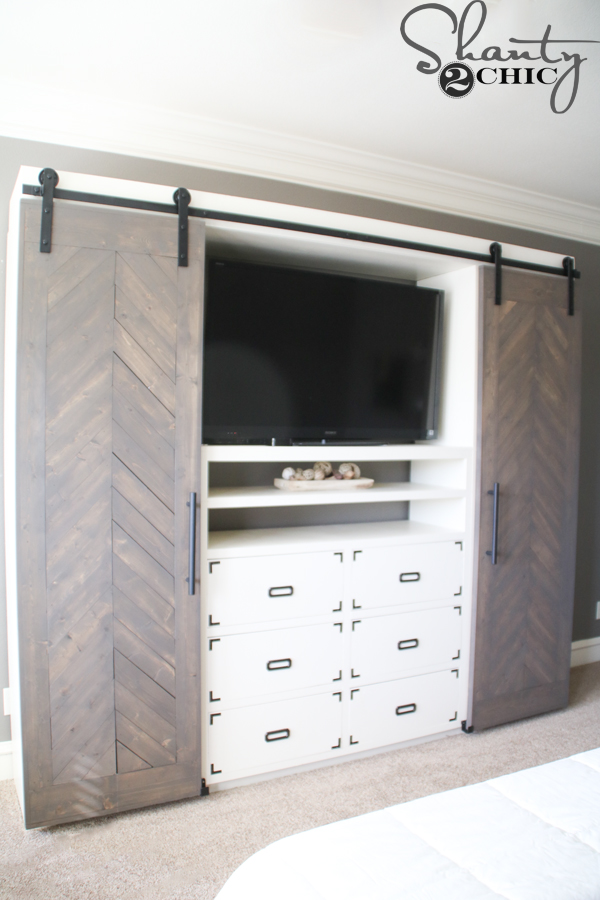
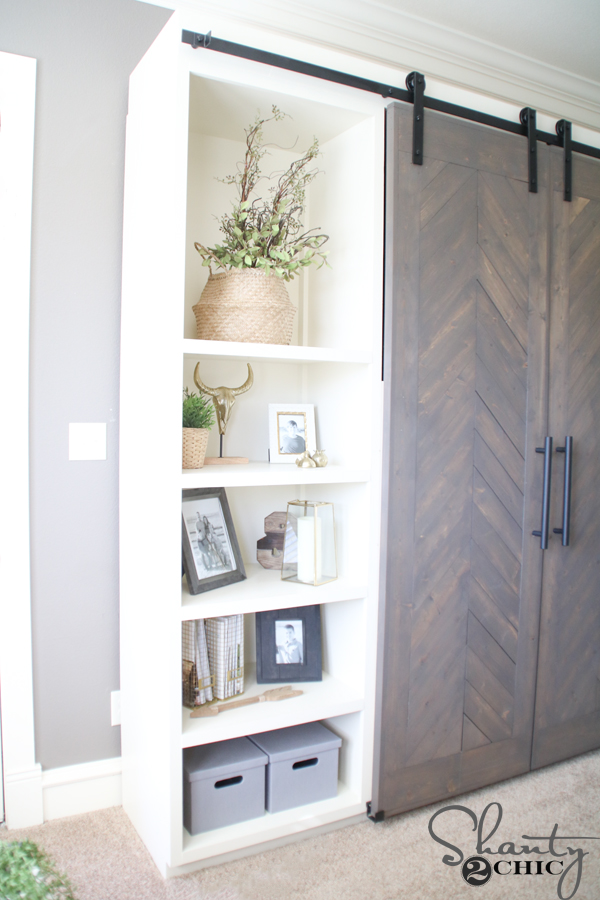
Well, I finally got around to finishing my giant Sliding Barn Door Media Console! If you remember the dresser and bookcase components, you probably notice that I gave the entire piece a paint job. I did this because we decided to upgrade to a king bed and I wanted to stain the new bed that I was building with the new Briarsmoke stain by Varathane. The previous stain, on this piece, was Early American and it totally clashed with the Briarsmoke. I also wanted a good contrast between the barn doors and the console – so paint it was!
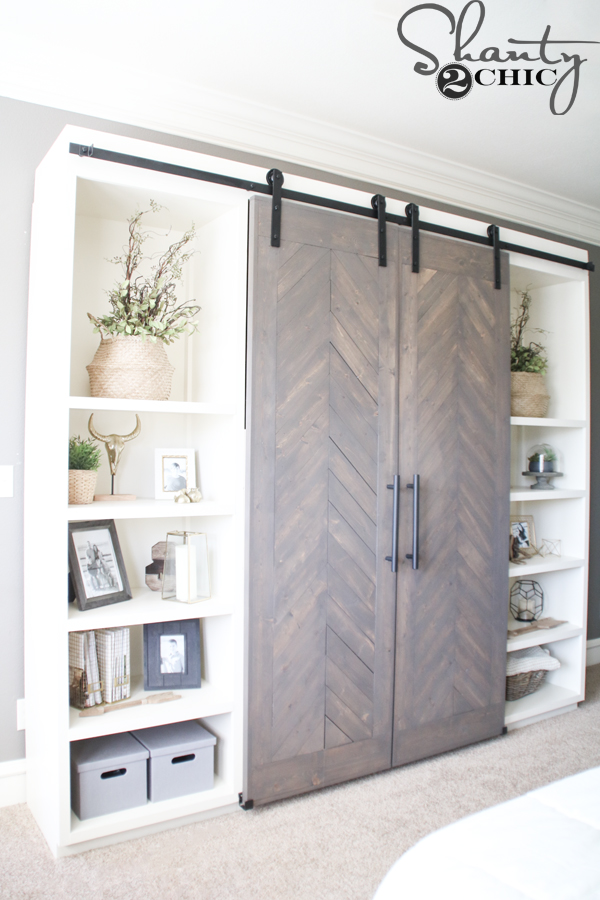
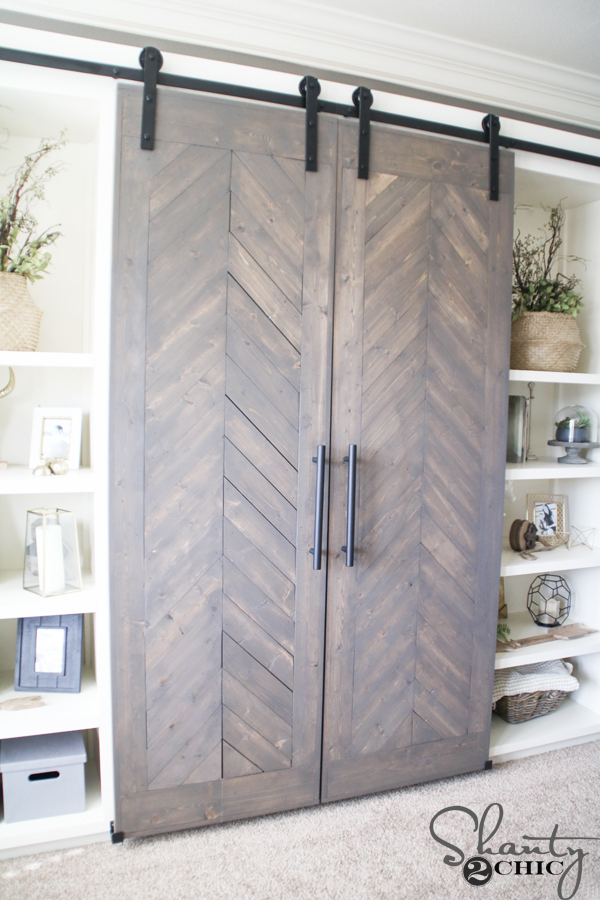
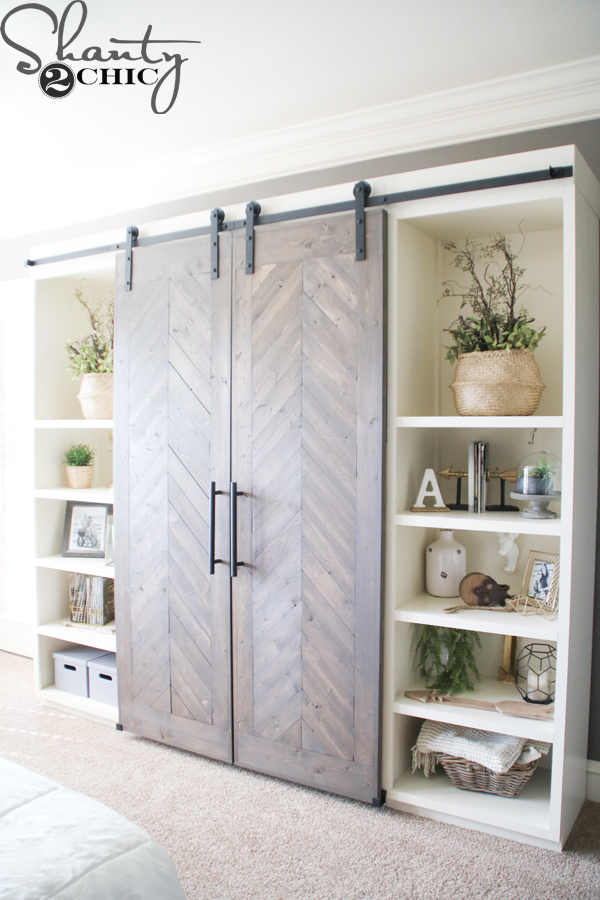
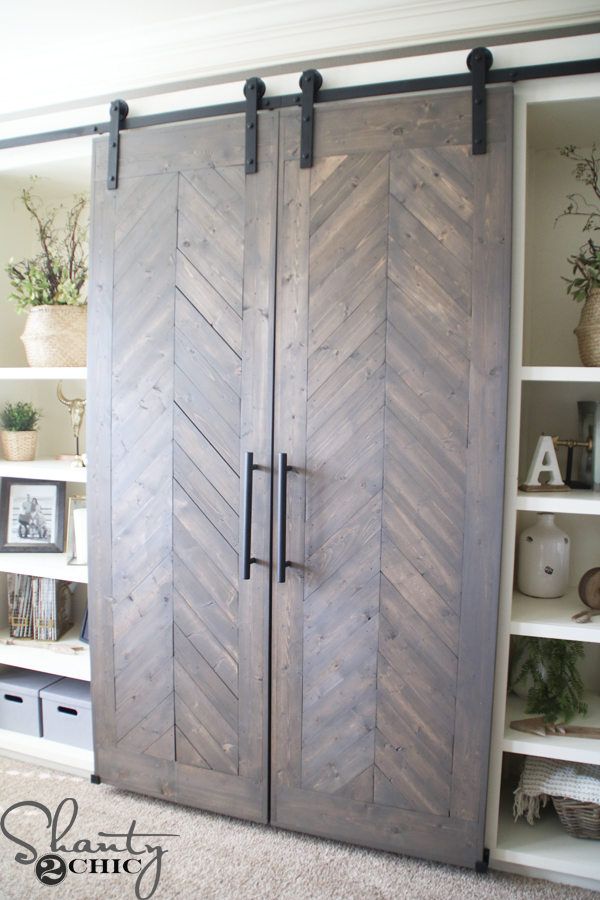
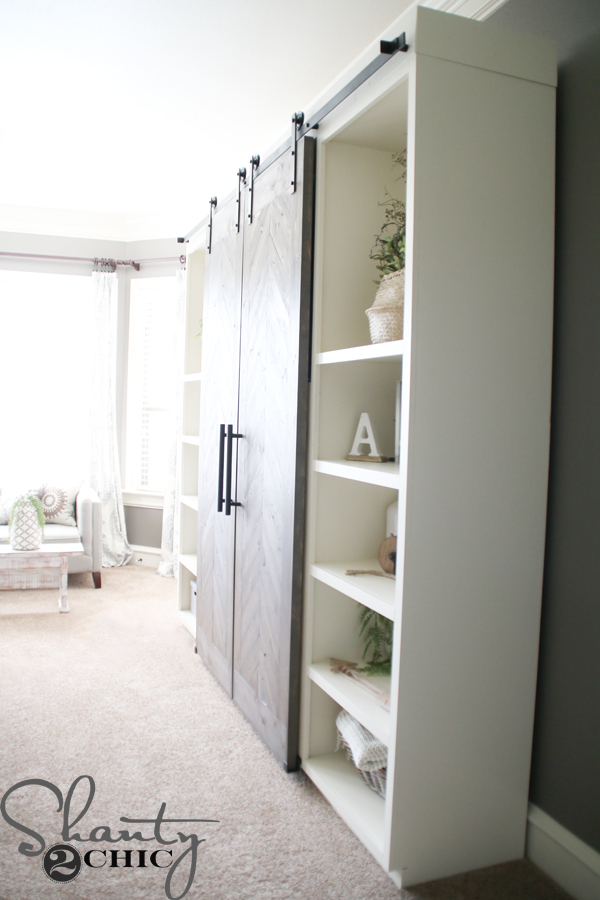
Here is the piece with the barn doors shut.
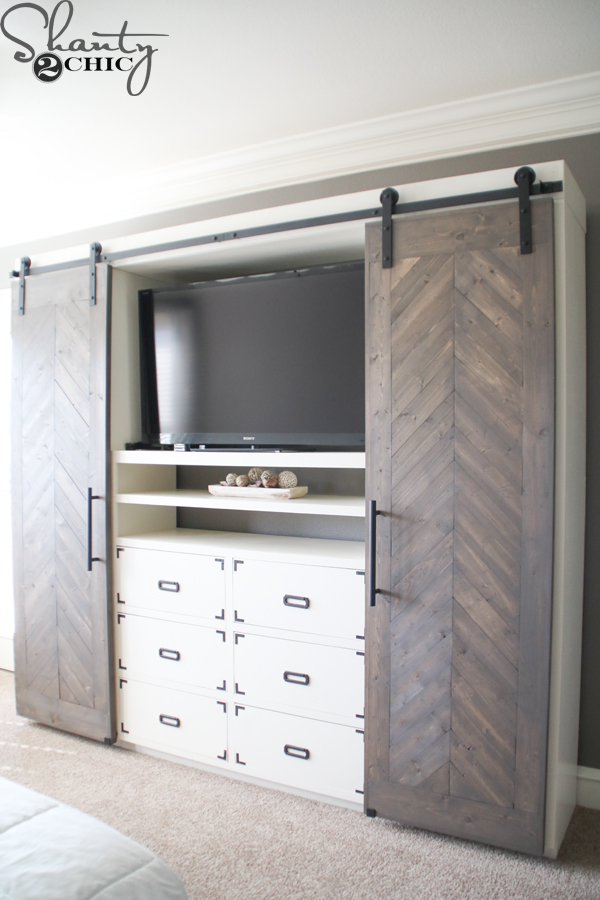
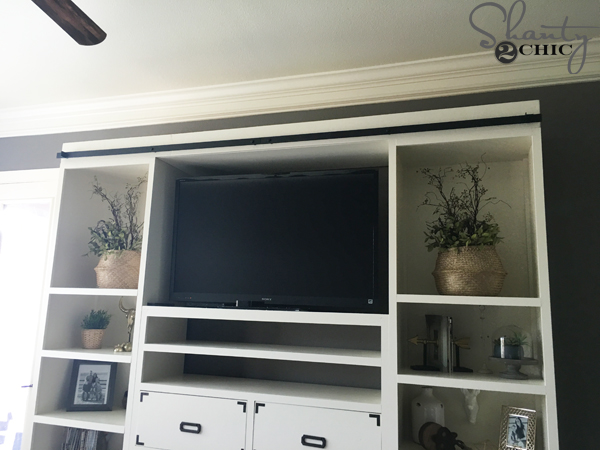
And here she is with them open!
I built this piece for our master bedroom because I wanted to hide our TV and we needed the dresser storage. I love that when it’s closed, it looks like a decorated bookcase.
Today, I’m sharing the plans for the bridge, that the barn door track is attached to, and the barn doors! You can find the barn door track that I purchased, from our fired Tyler Wayne, HERE!
Building the Bridge – Print the free plans HERE.
Sliding Barn Door Media Console
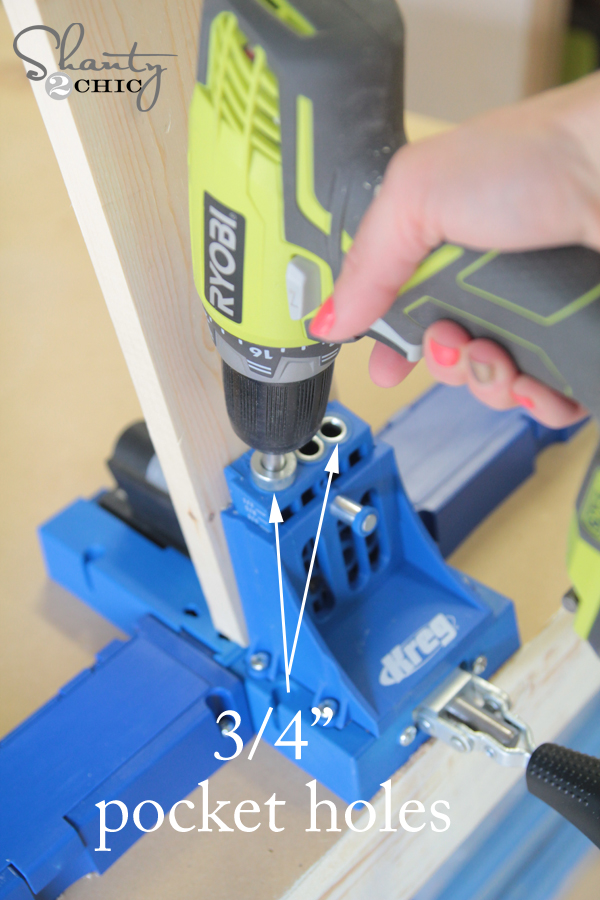
To start, I made all of my cuts for the bridge. Make sure to measure the span of your console from bookcase to bookcase to get an exact fit. After I made the cuts, I drilled 3/4″ pocket holes into the short 1×4 pieces my Kreg Jig. You can find our favorite Kreg Jig model HERE on Amazon.
Now, they are ready to attach to the frame.
Attach the 1×4 pieces to the long 2×4 frame piece with 1 1/4″ pocket hole screws and wood glue. Refer to the printable plans for correct placement of the 1×4 pieces.
Here is the bridge after the 1×4’s are attached to the 2×4 frame.
Next, attach the long 1×4 frame piece to the other side of the bridge.
Now, lay the long sheet of plywood on the bridge
and attach it to the bridge frame with 1 1/4″ brad nails and wood glue.
Then, attach the small piece of plywood, to the end, the same way.
Now, to make the miter cuts for the trim pieces. Start with the long front pieces and cut off a 45° angle from one end. Then, hold it in place and mark where the second cut should be and make your cut. This will help give you the most precise cut.
Attach it to the front of the bridge (2×4 side) with 1 1/4″ brad nails and wood glue.
To cut the side trim pieces, make a 45° cut on one end, hold it in place and mark the other end where the cut should be. This will be straight cut.
The bridge is done, time to put a finish on it.
Securing the Console to the Wall
Because these barn doors are heavy and the console is so tall, I wanted to make certain that the entire unit wouldn’t fall forward crushing everything in it’s path 😉
To do this, I cut scrap 2×4 pieces just a little shy of the width of both book cases. Then, I used my new Quiet Strike Pulse Driver to attach the 2×4’s to the studs behind the wall. The quiet strike is awesome! It works just like the impact drive, hammering and drilling at the same time so that you have to use less elbow grease, but it is much quieter. I use it whenever I am attaching anything to the wall!
Studs are typically 16″ apart, so if you make your 2×4’s longer than that, you should be able to hit 2 studs. I used 3 1/2″ Spax screws to attach the 2×4’s to the wall. You can find these Spax screws HERE on Amazon.
I attached 2, 2×4 cleats behind each bookcase tower. Don’t forget to use your level 😉 Next, I just attached the bookcases to the 2×4’s with 3 1/2″ Spax screws. They won’t budge now 🙂
For one last added security, I attached the dresser to each bookcase. I did this by removing the drawers and driving 1 1/4″ Spax screws from inside the dresser, through the drawer cleats and into the bookcase. I did this a few times on each side, front and back of the dresser.
Once the paint was dry on the bridge, I attached it to the book cases with 1 1/4″ Spax screws.
Building the Barn Doors: You can print the free plans HERE!
To build the barn doors, I started with sheets of 3/4″ Purebond Plywood. I used Birch because it’s the cheapest but it doesn’t matter which species you use. I had the hardware store rip them to size for me.
I started by cutting the pieces for my top and bottom face trim. Then, I applied wood glue to the back of the trim piece
and attached it to the bottom and top of the plywood with 1 1/4″ brad nails and wood glue. The edges of the trim should be flush with the edges of the plywood.
Next, I measured and cut the side trim pieces to size and attached the the same way.
Pretty easy, right?
At this point, I marked the very center of the plywood and drew a line from top to bottom. This will be the guide we use to make the cuts for the design.
To measure for the first slats in the design, cut a 45° angle off of one end of a 1×4.
Hold it in place and mark for the second cut.
You can see where I put the marks for my 45° cut.
Make the miter cut on the other end of the slat.
Attach the first slats with 1 1/4″ brad nails and wood glue. Notice that I started with the second row of slats. I did this because I wanted them to meet at the very top center point of the door.
Now mark for the top corners the same way as you did for the first slats. Cut these pieces from left over 1×6 boards
and attach with 1 1/4″ brad nails and wood glue.
Here is is so far. Now, you will mark for the next row of slats. This cut will be the same for the next 13 rows.
When you get the the second to last row, mark and make cuts for that row, then attach.
The bottom corner pieces will be cut from scrap 1×6.
That’s it for the pattern on the door! Now to trim the sides!
We are covering the sides of the door with 1×2, so that we can’t see the rough plywood edges and because it gives a nice clean look. Measure and cut the side trim pieces and attach them with 1 1/4 brad nails and wood glue. The edges of the 1×2 should be flush with the side of the door.
Then measure for the bottom and top trim pieces and attach the same way.
That’s it! Now, just give it a nice sanding all over. I used a 120-grit sanding pad on my Ryobi 18V Orbital sander.
For the finish, I applied one coat of Briarsmoke stain by Varathane. I used a lamb’s wool applicator to apply (this is our very FAVORITE tool to stain with when we are staining large pieces. You can find them at Home Depot with the stain). Let the stain sit for about 5 minutes, then wipe the stain with a clean cloth, blending as you wipe. *Tip: We have heard it is hard to find Briarsmoke in most areas. You can get the same look mixing Weathered Gray and Dark Walnut 50:50. You can find a variety of Varathane stain colors HERE on Amazon.
Varathane is our favorite stain to use because you don’t need to use a wood conditioner prior to staining and it is dry to the touch in about 1 hour!
Attaching the Barn Door Hardware
I bought the barn door hardware from our friend, Tyler Wayne. He is a local metal worker (Dallas area) and he designed this hardware to fit this console. You can find the hardware for sale on his Etsy shop HERE.
First, I decided exactly where I wanted my doors to be hung. I wanted them to stop right at the bottom of the face frame, just above the toe kick. I measured the height of the door, marked that, then I gave a few inches for door straps. I marked where I wanted the wheels to touch the top of the barn door track and using my level, I drew a line from one side of the console to the other. I would install the track right under below this line.
Next, I marked the holes in the track.
Then, I put some temporary wood screws in place and slid the barn door track over the screws. This eliminates the need for someone to be holding the track in place while I attach the bolts and it predrilled holes for the bolts 😉
I removed one wood screw and placed a spacer behind a bolt hole.
Then, I drove the bolt into the barn door track, into the spacer and though the front of the bridge. I used my Quiet Strike with a hex bit for this part too!
I did this for each hole in the track.
There will be two stops that look like this. These go on the holes at both ends of the barn door track. They stop the door from flying off the track – minor details right;)
The stops face in so that the are on the inside of the hex bolts.
I attached the wheels and hung the doors on the track. You can see in this picture that I also attached guides to the bottom of the console. This keeps the doors from swinging forwards and backwards.
That was it! Lots of steps but not too hard at all!
Here are links to plans for the other pieces of this console:Middle DresserBookcase TowersHere’s a run down of the items on the shelves:
Baskets at the top – Ikea
Stems in baskets – Pier 1
Gold Steer Head – Target
Green Plant – Ikea
Gold Lantern – Target
Gold Magazine Holders – Target
Small Gold Paper Weights – Target
Canvas Storage Boxes – Target
Ampersand – Spice Waco
Arrow Book Ends – HomeGoods
Deer Head Hook – Hobby Lobby
Gold Geometric Shapes – Target
White Vase – Save On Crafts
Basket with Blanket – At Home
Thanks so much for stopping by!
Ashley
Become a VIP Insider
Stay up-to-date on all the new project, free plans and new products available for you!

 And here she is with them open!
 I built this piece for our master bedroom because I wanted to hide our TV and we needed the dresser storage. I love that when it’s closed, it looks like a decorated bookcase.
Today, I’m sharing the plans for the bridge, that the barn door track is attached to, and the barn doors! You can find the barn door track that I purchased, from our fired Tyler Wayne, HERE!
Building the Bridge – Print the free plans HERE.
I built this piece for our master bedroom because I wanted to hide our TV and we needed the dresser storage. I love that when it’s closed, it looks like a decorated bookcase.
Today, I’m sharing the plans for the bridge, that the barn door track is attached to, and the barn doors! You can find the barn door track that I purchased, from our fired Tyler Wayne, HERE!
Building the Bridge – Print the free plans HERE.
 Now, they are ready to attach to the frame.
 Here is the bridge after the 1×4’s are attached to the 2×4 frame.
 Varathane is our favorite stain to use because you don’t need to use a wood conditioner prior to staining and it is dry to the touch in about 1 hour!

 I built this piece for our master bedroom because I wanted to hide our TV and we needed the dresser storage. I love that when it’s closed, it looks like a decorated bookcase.
Today, I’m sharing the plans for the bridge, that the barn door track is attached to, and the barn doors! You can find the barn door track that I purchased, from our fired Tyler Wayne, HERE!
Building the Bridge – Print the free plans HERE.
I built this piece for our master bedroom because I wanted to hide our TV and we needed the dresser storage. I love that when it’s closed, it looks like a decorated bookcase.
Today, I’m sharing the plans for the bridge, that the barn door track is attached to, and the barn doors! You can find the barn door track that I purchased, from our fired Tyler Wayne, HERE!
Building the Bridge – Print the free plans HERE.
 To start, I made all of my cuts for the bridge. Make sure to measure the span of your console from bookcase to bookcase to get an exact fit. After I made the cuts, I drilled 3/4″ pocket holes into the short 1×4 pieces my Kreg Jig. You can find our favorite Kreg Jig model HERE on Amazon.
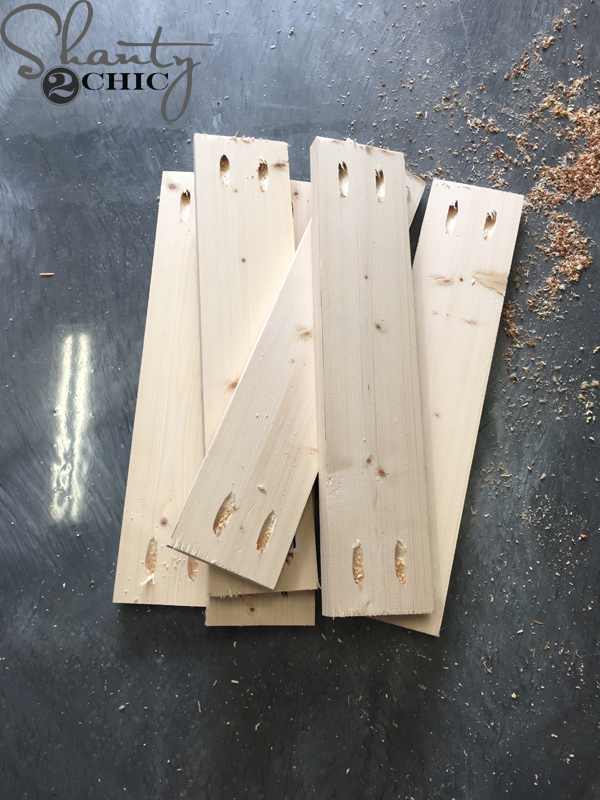 Now, they are ready to attach to the frame.
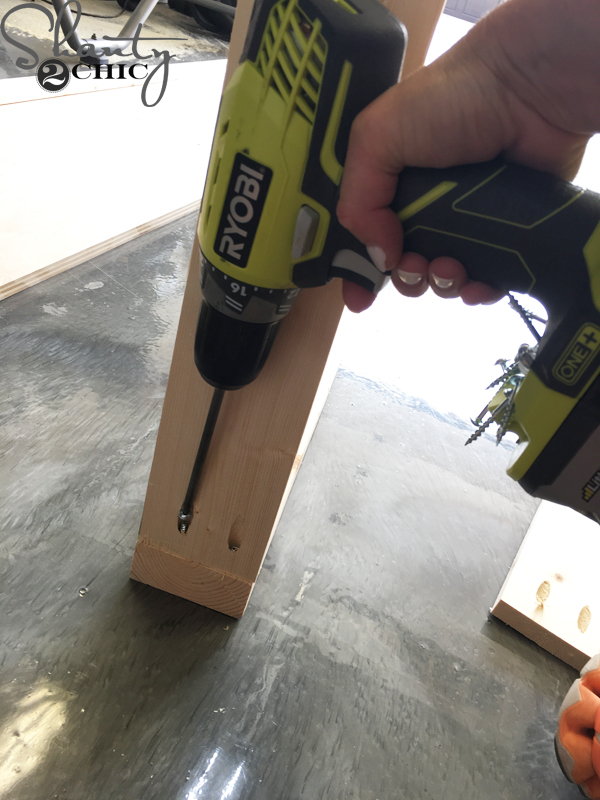 Attach the 1×4 pieces to the long 2×4 frame piece with 1 1/4″ pocket hole screws and wood glue. Refer to the printable plans for correct placement of the 1×4 pieces.
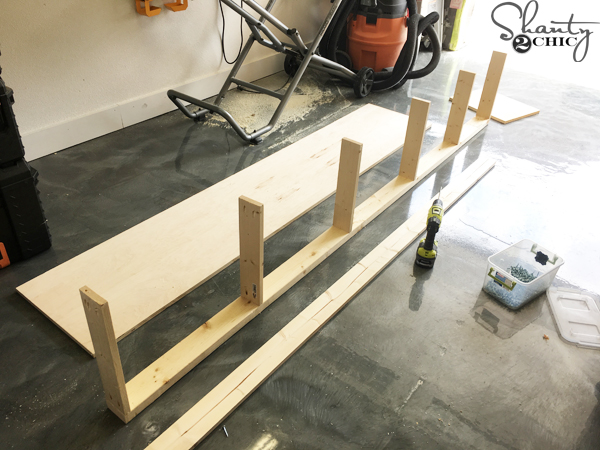 Here is the bridge after the 1×4’s are attached to the 2×4 frame.
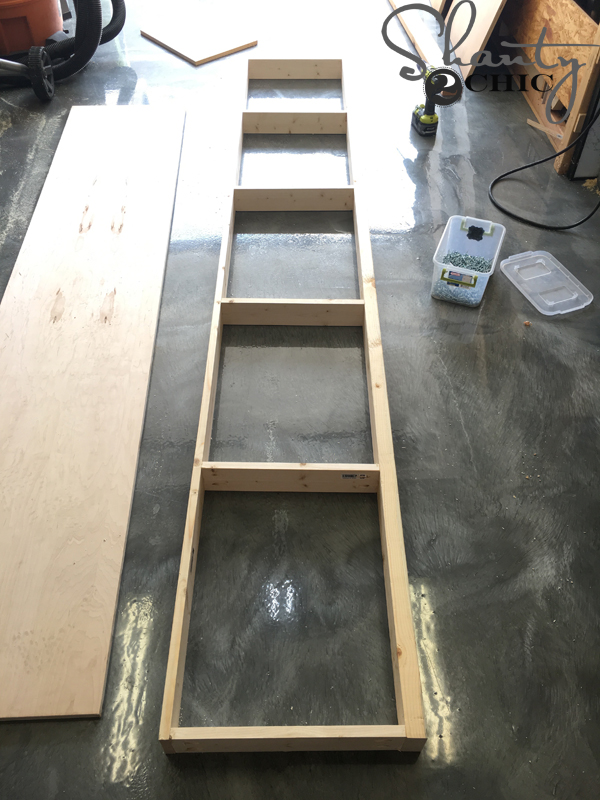 Next, attach the long 1×4 frame piece to the other side of the bridge.
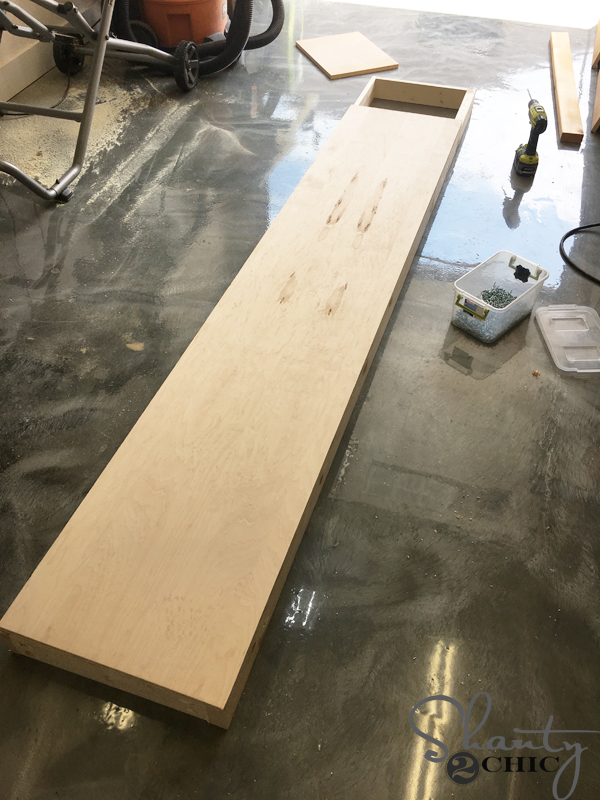 Now, lay the long sheet of plywood on the bridge
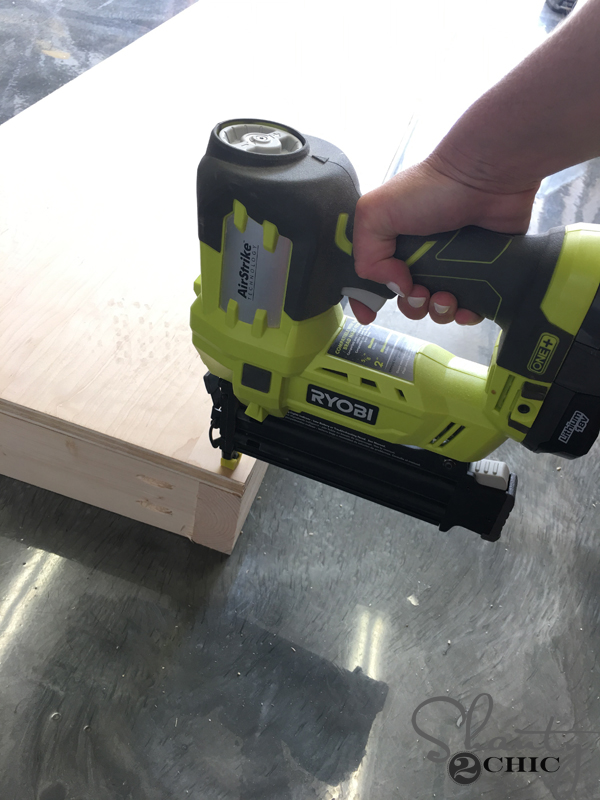 and attach it to the bridge frame with 1 1/4″ brad nails and wood glue.
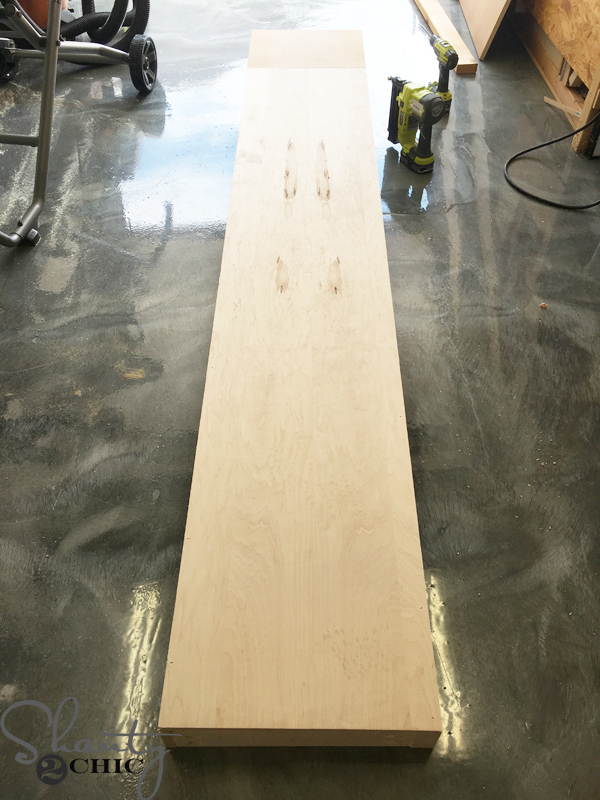 Then, attach the small piece of plywood, to the end, the same way.
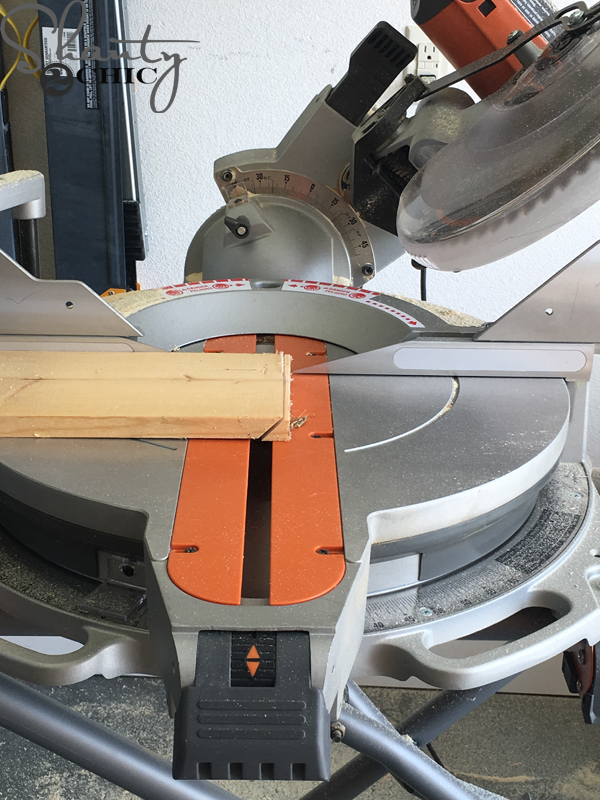 Now, to make the miter cuts for the trim pieces. Start with the long front pieces and cut off a 45° angle from one end. Then, hold it in place and mark where the second cut should be and make your cut. This will help give you the most precise cut.
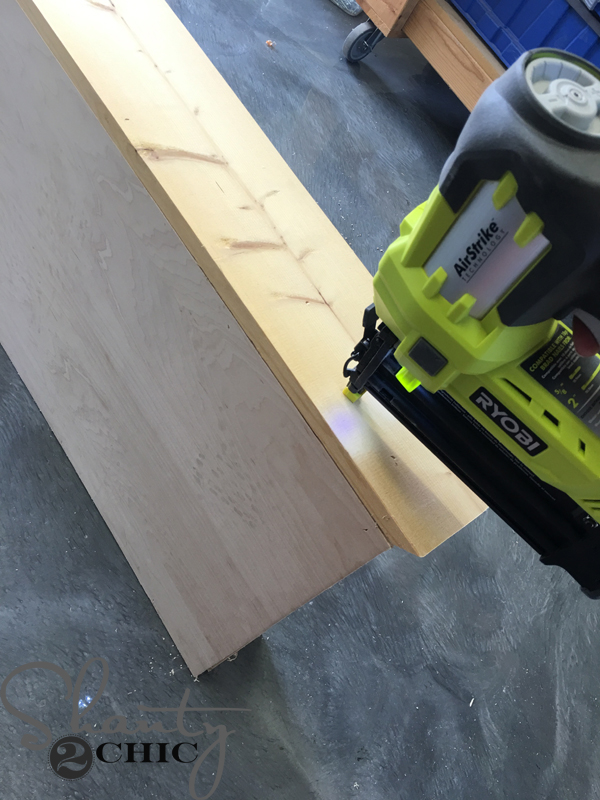 Attach it to the front of the bridge (2×4 side) with 1 1/4″ brad nails and wood glue.
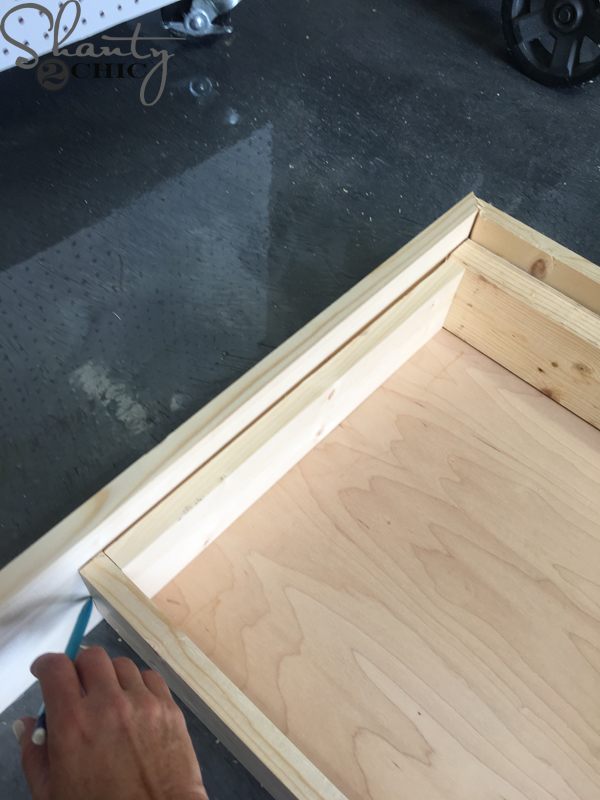 To cut the side trim pieces, make a 45° cut on one end, hold it in place and mark the other end where the cut should be. This will be straight cut.
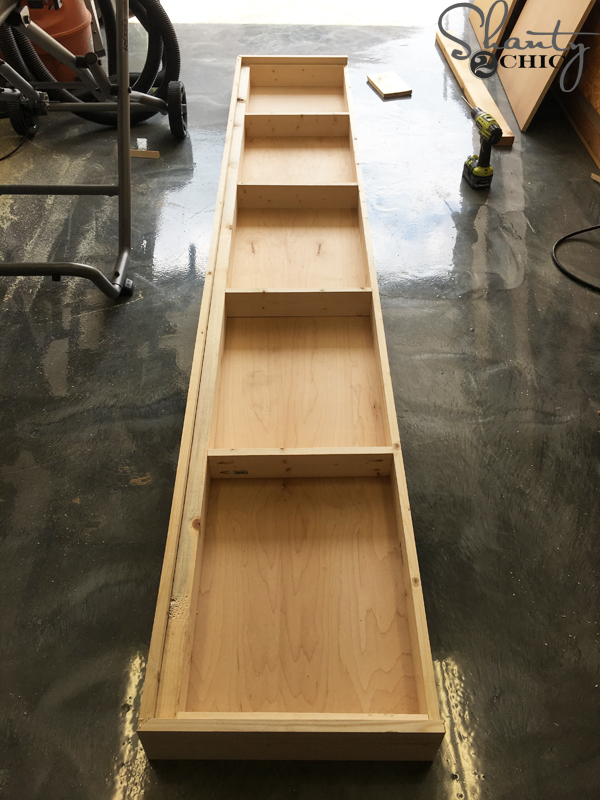 The bridge is done, time to put a finish on it.
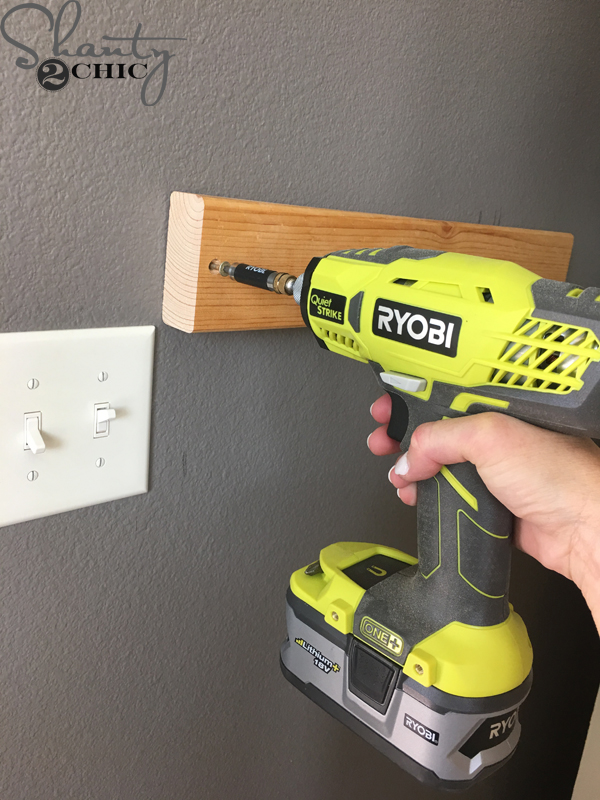 To do this, I cut scrap 2×4 pieces just a little shy of the width of both book cases. Then, I used my new Quiet Strike Pulse Driver to attach the 2×4’s to the studs behind the wall. The quiet strike is awesome! It works just like the impact drive, hammering and drilling at the same time so that you have to use less elbow grease, but it is much quieter. I use it whenever I am attaching anything to the wall!
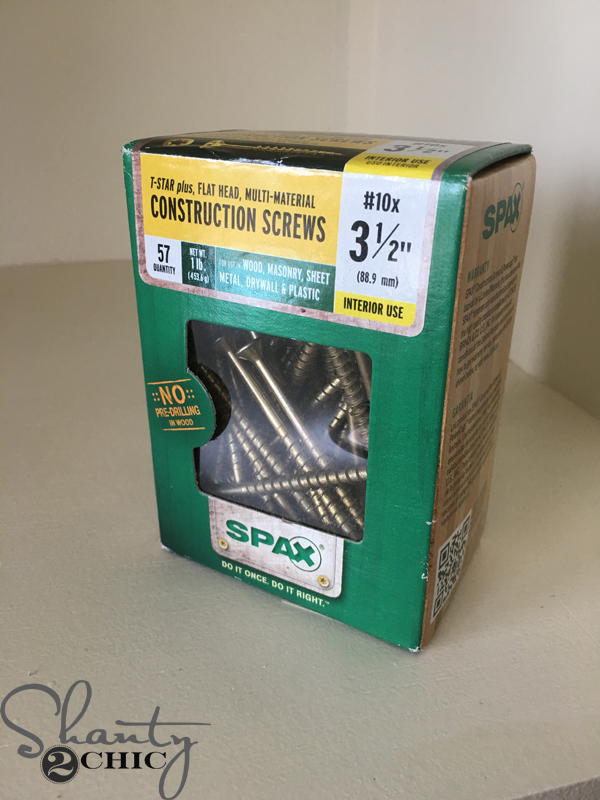 Studs are typically 16″ apart, so if you make your 2×4’s longer than that, you should be able to hit 2 studs. I used 3 1/2″ Spax screws to attach the 2×4’s to the wall. You can find these Spax screws HERE on Amazon.
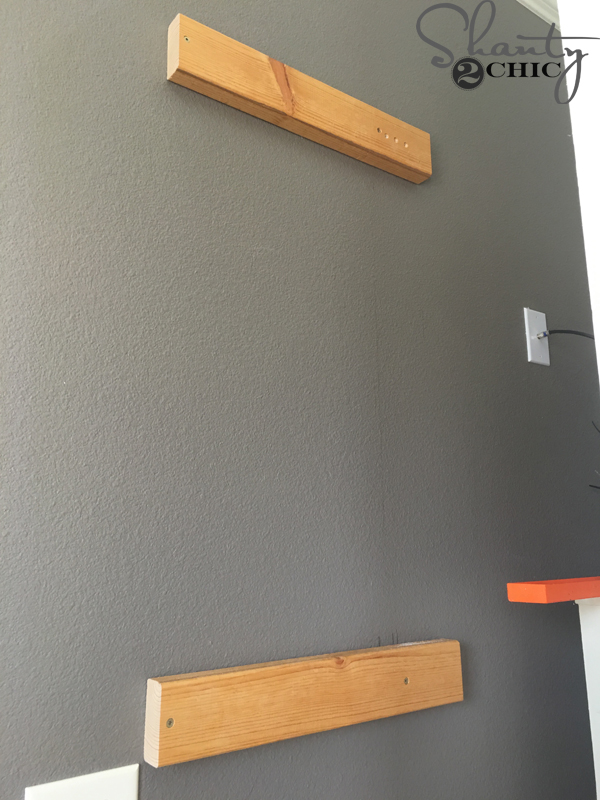 I attached 2, 2×4 cleats behind each bookcase tower. Don’t forget to use your level 😉 Next, I just attached the bookcases to the 2×4’s with 3 1/2″ Spax screws. They won’t budge now 🙂
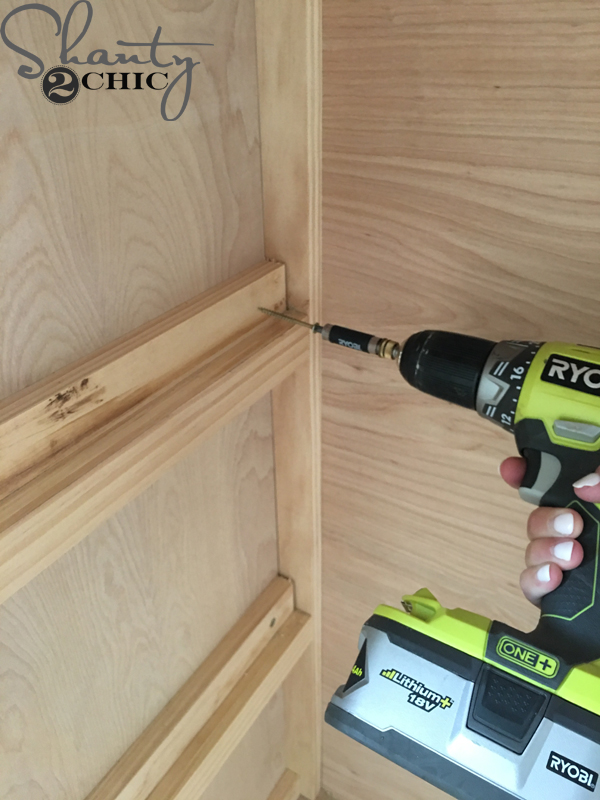 For one last added security, I attached the dresser to each bookcase. I did this by removing the drawers and driving 1 1/4″ Spax screws from inside the dresser, through the drawer cleats and into the bookcase. I did this a few times on each side, front and back of the dresser.
Once the paint was dry on the bridge, I attached it to the book cases with 1 1/4″ Spax screws.
Building the Barn Doors: You can print the free plans HERE!
For one last added security, I attached the dresser to each bookcase. I did this by removing the drawers and driving 1 1/4″ Spax screws from inside the dresser, through the drawer cleats and into the bookcase. I did this a few times on each side, front and back of the dresser.
Once the paint was dry on the bridge, I attached it to the book cases with 1 1/4″ Spax screws.
Building the Barn Doors: You can print the free plans HERE!
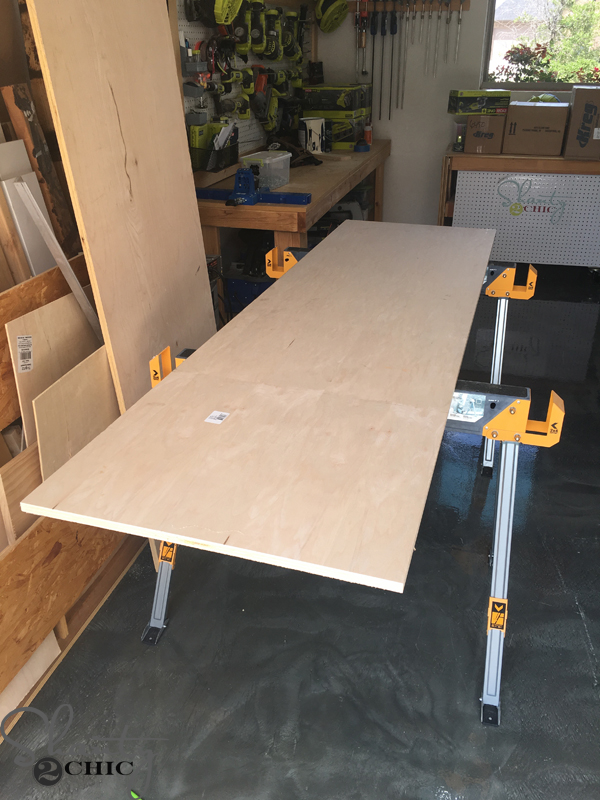 To build the barn doors, I started with sheets of 3/4″ Purebond Plywood. I used Birch because it’s the cheapest but it doesn’t matter which species you use. I had the hardware store rip them to size for me.
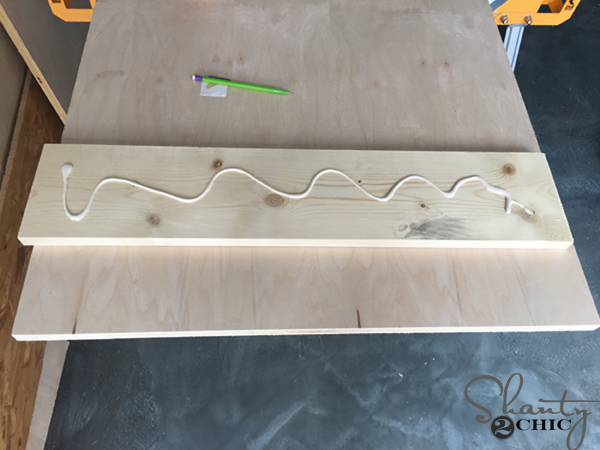 I started by cutting the pieces for my top and bottom face trim. Then, I applied wood glue to the back of the trim piece
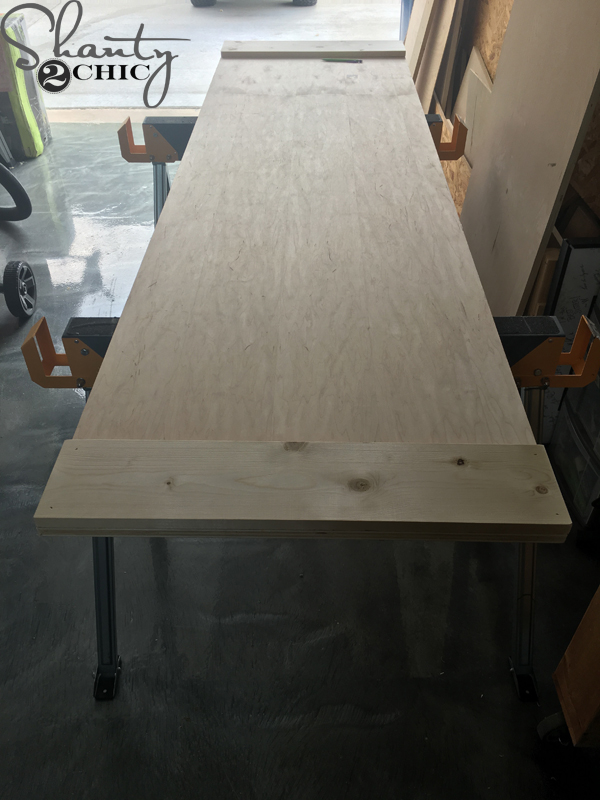 and attached it to the bottom and top of the plywood with 1 1/4″ brad nails and wood glue. The edges of the trim should be flush with the edges of the plywood.
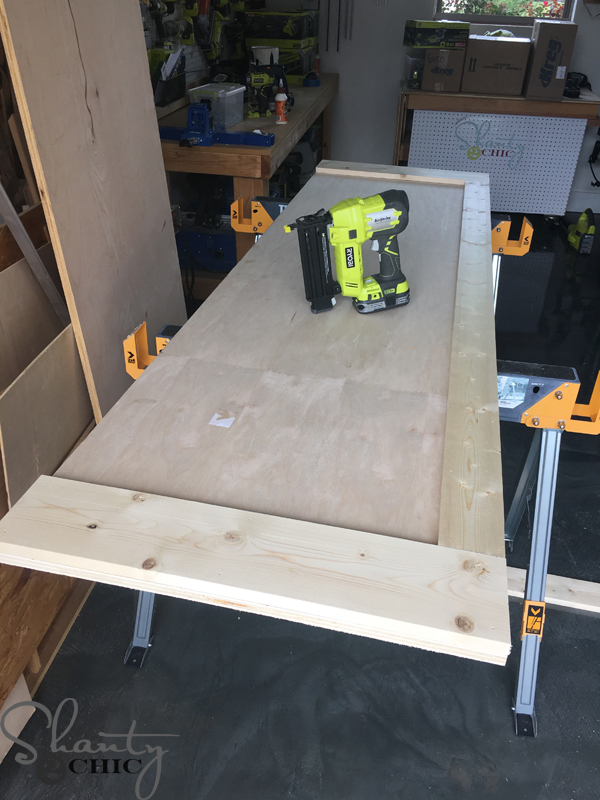 Next, I measured and cut the side trim pieces to size and attached the the same way.
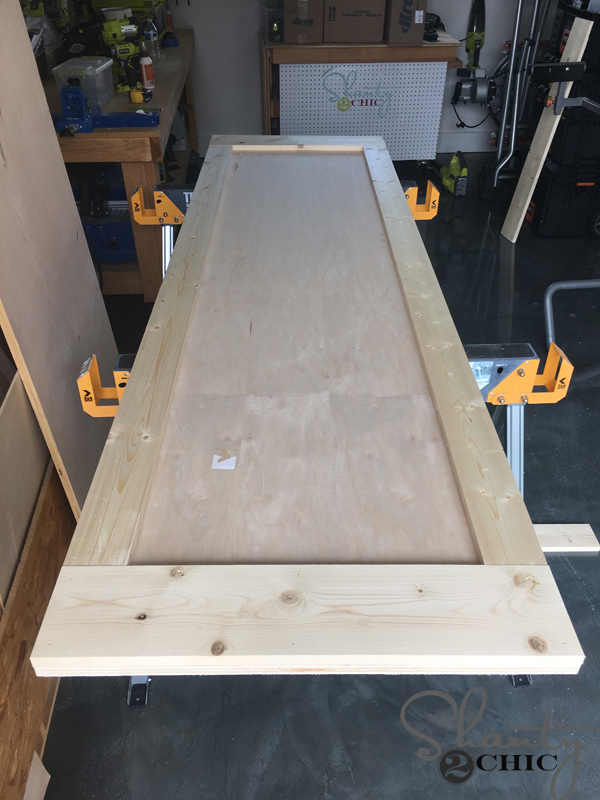 Pretty easy, right?
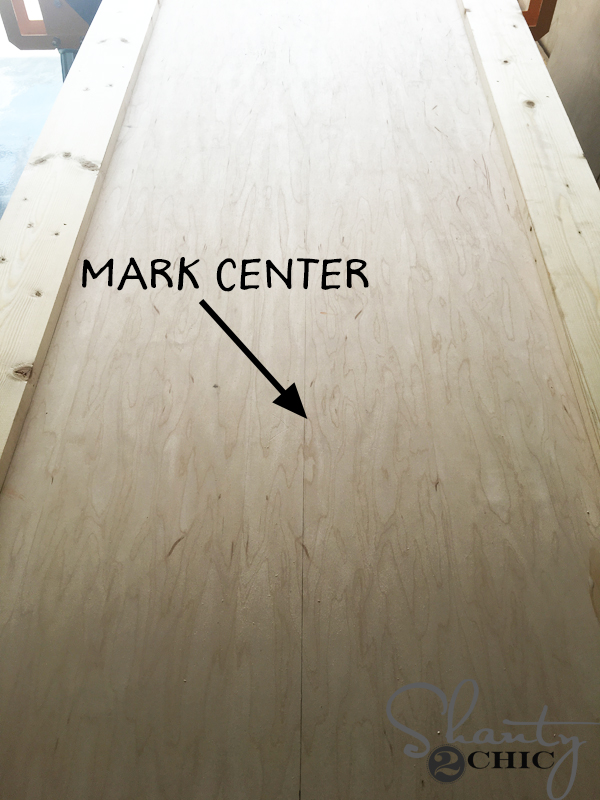 At this point, I marked the very center of the plywood and drew a line from top to bottom. This will be the guide we use to make the cuts for the design.
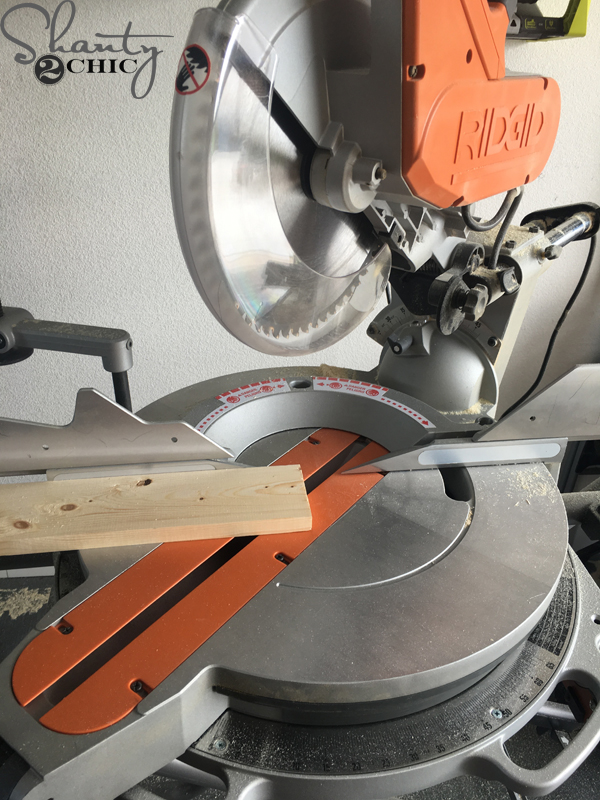 To measure for the first slats in the design, cut a 45° angle off of one end of a 1×4.
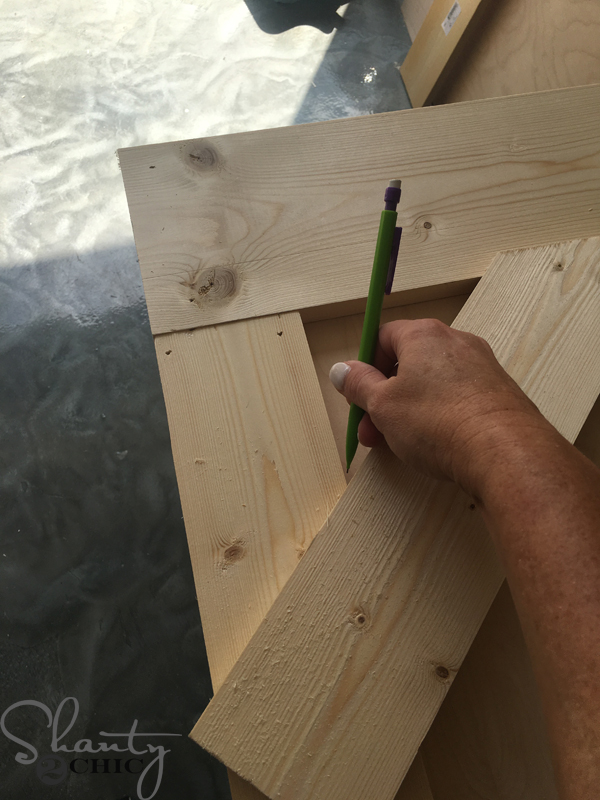 Hold it in place and mark for the second cut.
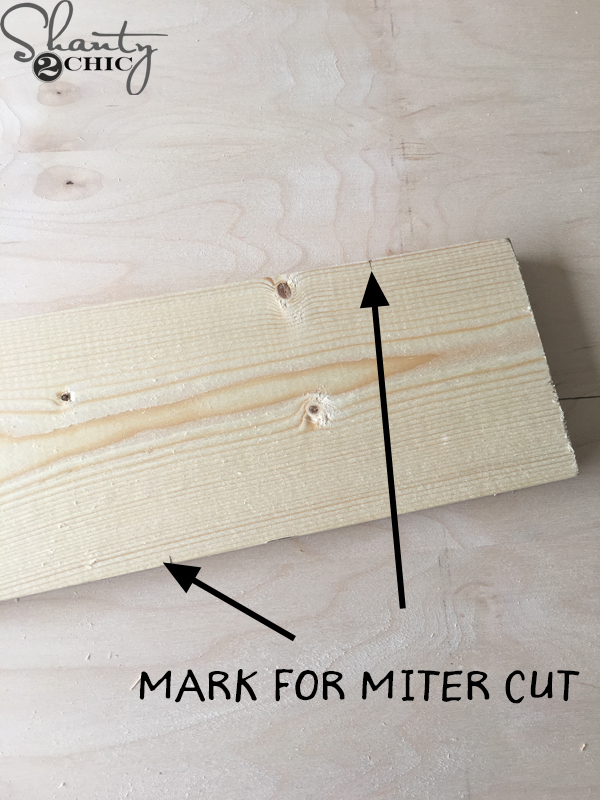 You can see where I put the marks for my 45° cut.
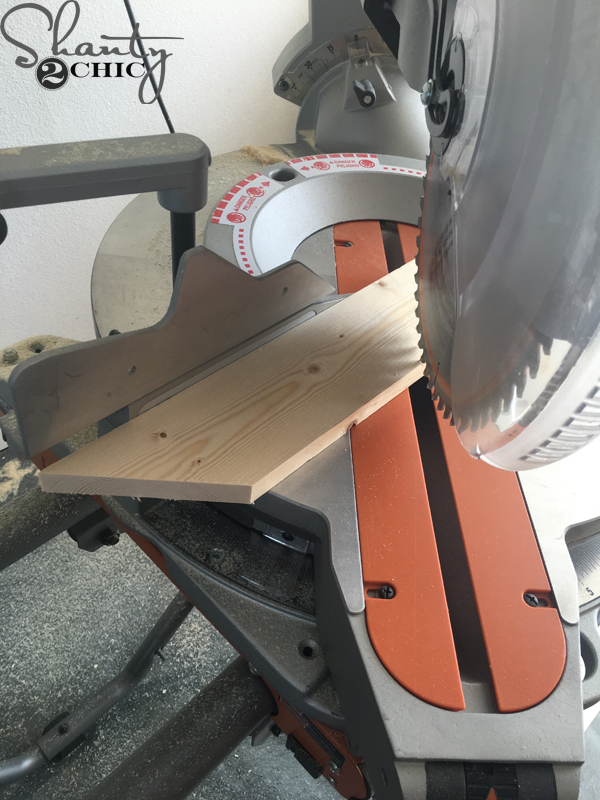 Make the miter cut on the other end of the slat.
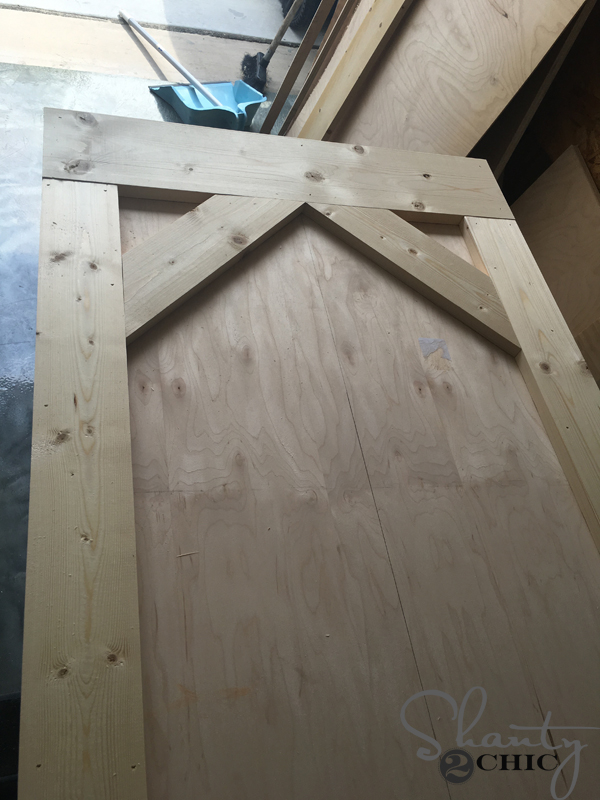 Attach the first slats with 1 1/4″ brad nails and wood glue. Notice that I started with the second row of slats. I did this because I wanted them to meet at the very top center point of the door.
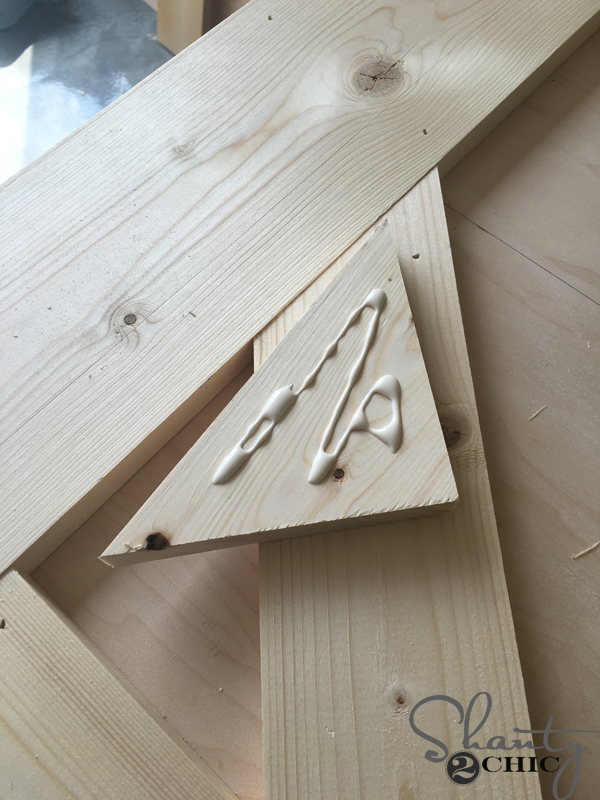 Now mark for the top corners the same way as you did for the first slats. Cut these pieces from left over 1×6 boards
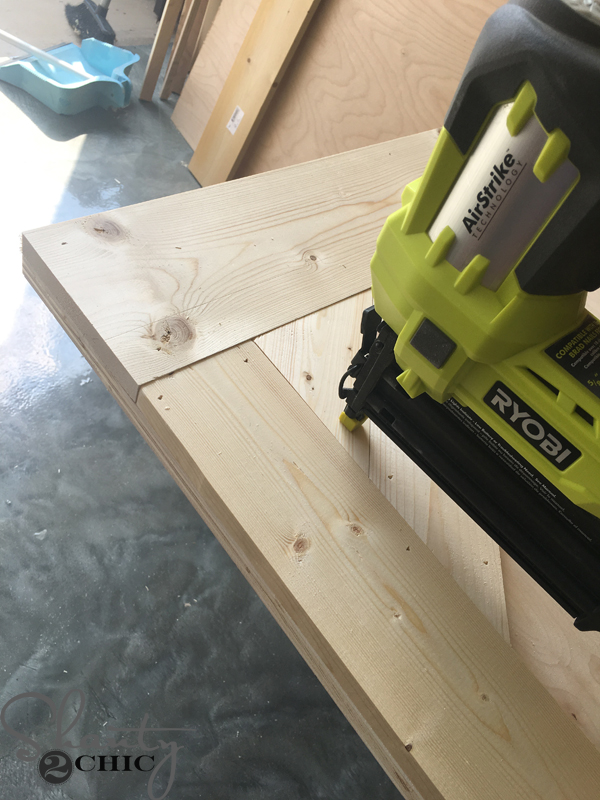 and attach with 1 1/4″ brad nails and wood glue.
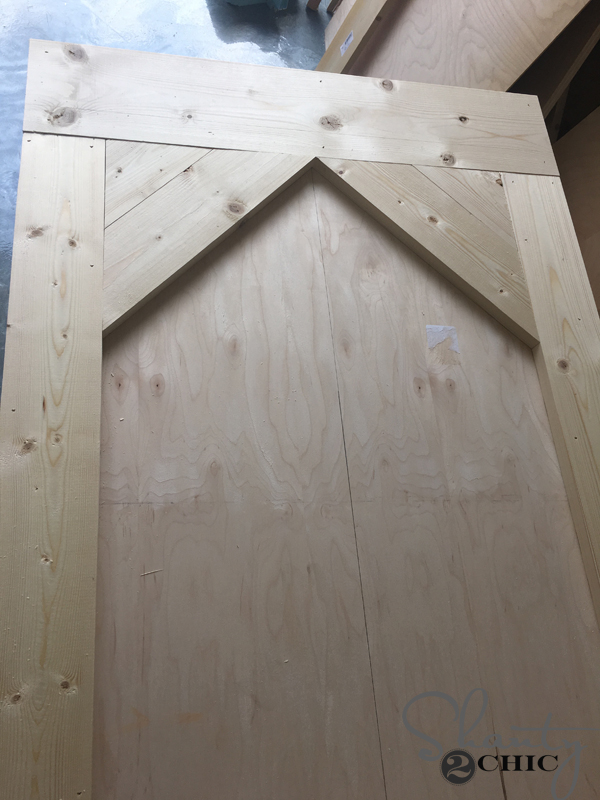 Here is is so far. Now, you will mark for the next row of slats. This cut will be the same for the next 13 rows.
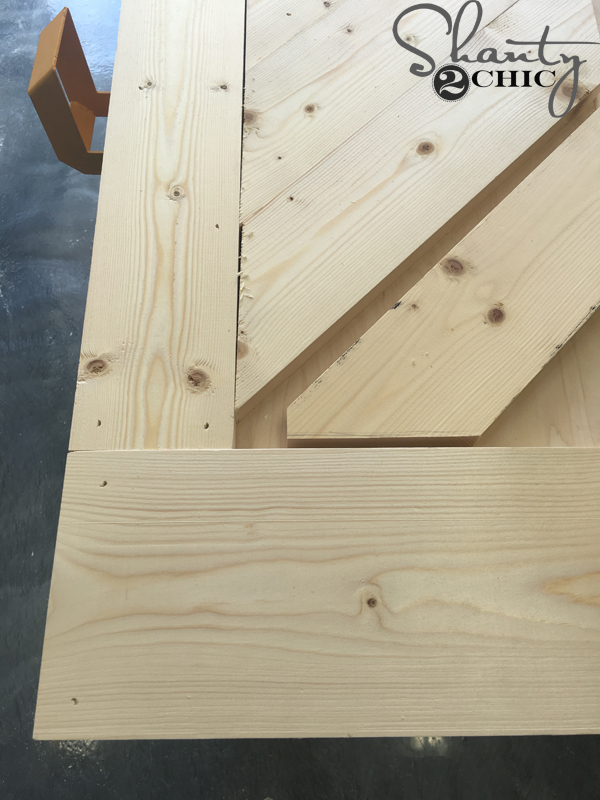 When you get the the second to last row, mark and make cuts for that row, then attach.
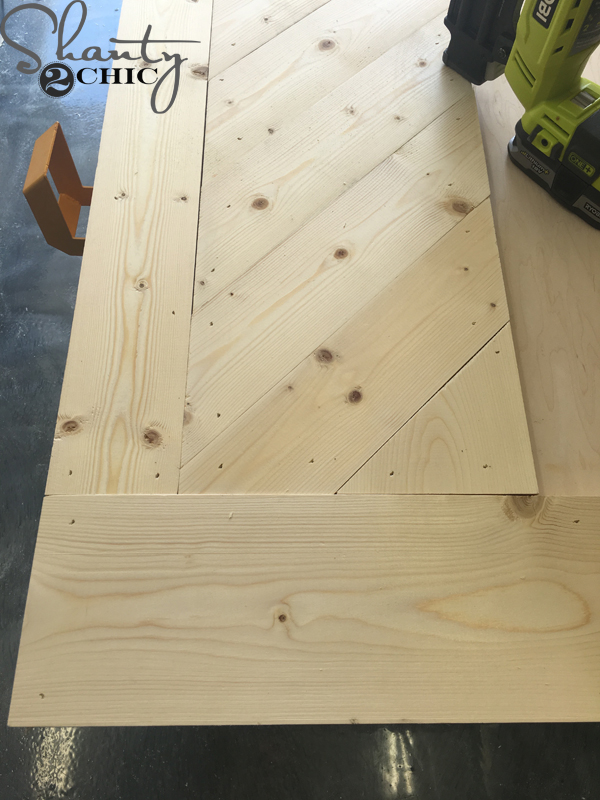 The bottom corner pieces will be cut from scrap 1×6.
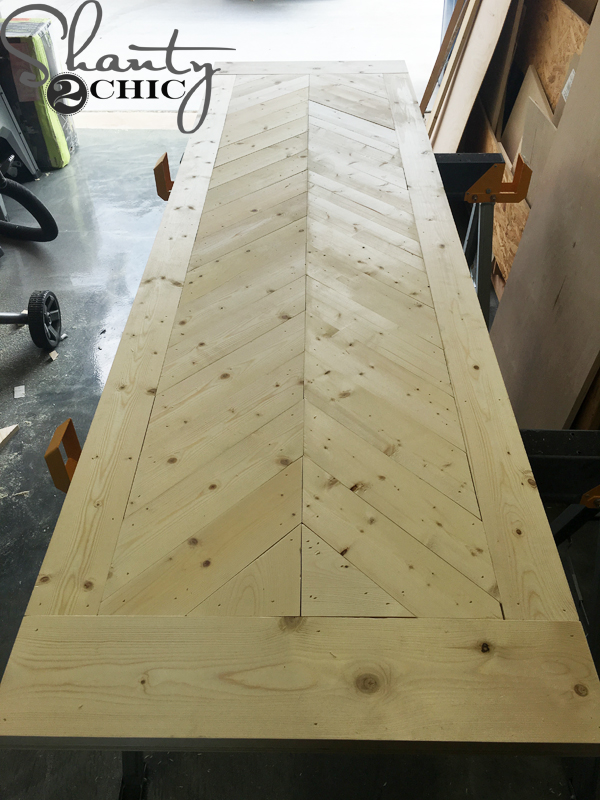 That’s it for the pattern on the door! Now to trim the sides!
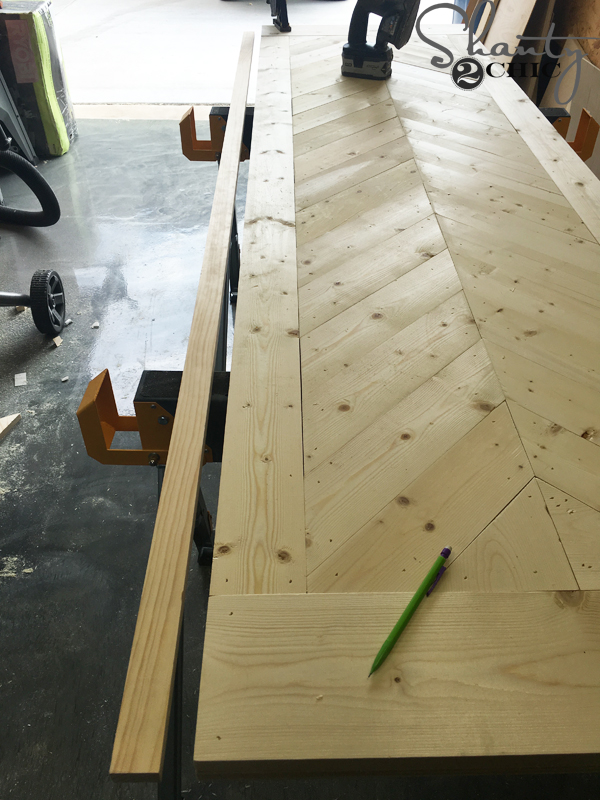 We are covering the sides of the door with 1×2, so that we can’t see the rough plywood edges and because it gives a nice clean look. Measure and cut the side trim pieces and attach them with 1 1/4 brad nails and wood glue. The edges of the 1×2 should be flush with the side of the door.
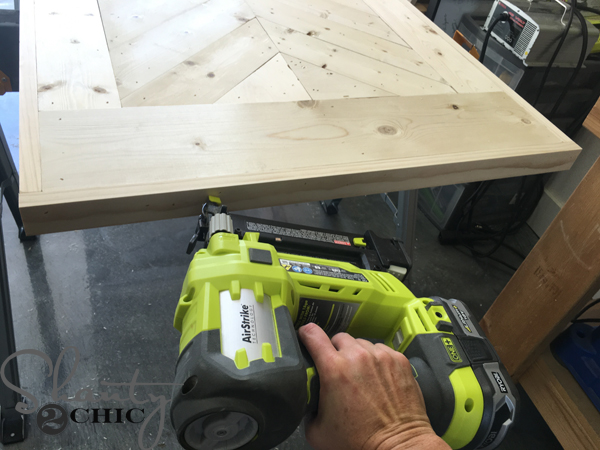 Then measure for the bottom and top trim pieces and attach the same way.
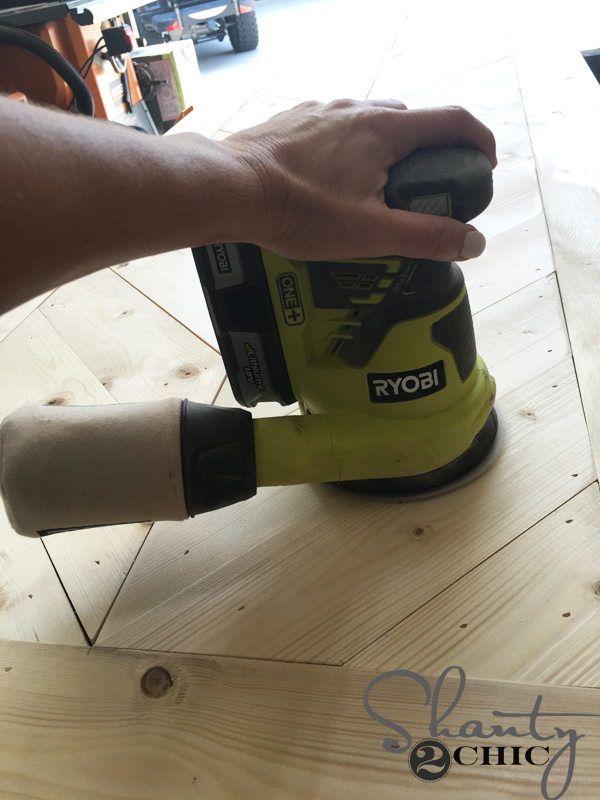 That’s it! Now, just give it a nice sanding all over. I used a 120-grit sanding pad on my Ryobi 18V Orbital sander.
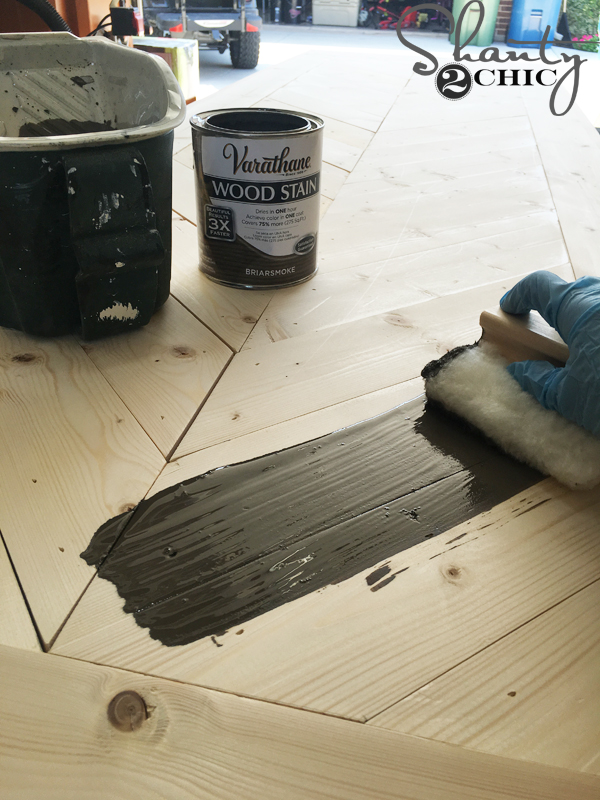 For the finish, I applied one coat of Briarsmoke stain by Varathane. I used a lamb’s wool applicator to apply (this is our very FAVORITE tool to stain with when we are staining large pieces. You can find them at Home Depot with the stain). Let the stain sit for about 5 minutes, then wipe the stain with a clean cloth, blending as you wipe. *Tip: We have heard it is hard to find Briarsmoke in most areas. You can get the same look mixing Weathered Gray and Dark Walnut 50:50. You can find a variety of Varathane stain colors HERE on Amazon.
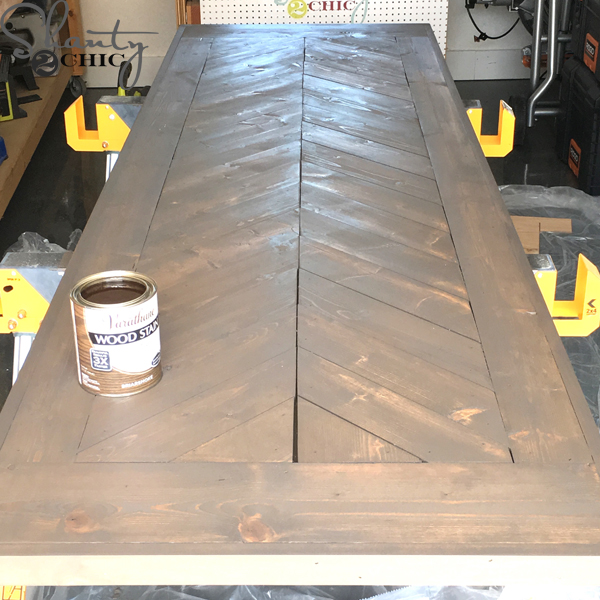 Varathane is our favorite stain to use because you don’t need to use a wood conditioner prior to staining and it is dry to the touch in about 1 hour!
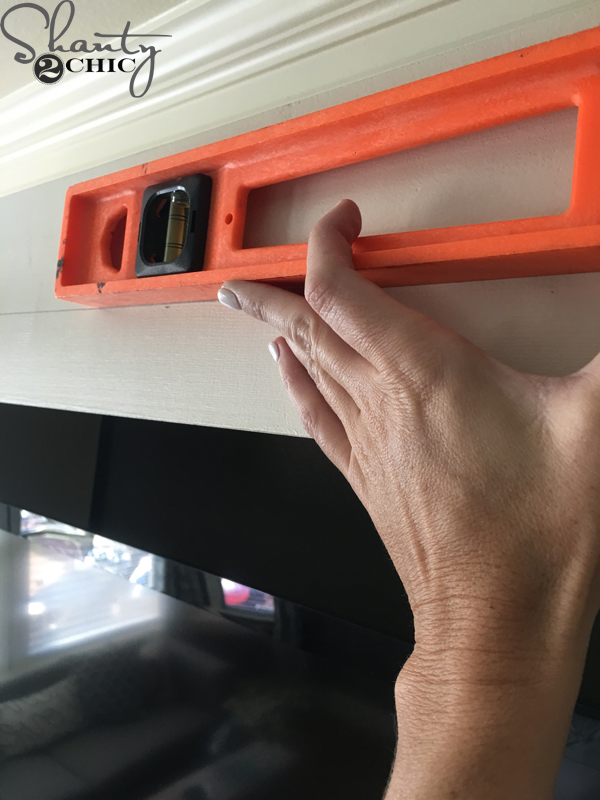 First, I decided exactly where I wanted my doors to be hung. I wanted them to stop right at the bottom of the face frame, just above the toe kick. I measured the height of the door, marked that, then I gave a few inches for door straps. I marked where I wanted the wheels to touch the top of the barn door track and using my level, I drew a line from one side of the console to the other. I would install the track right under below this line.
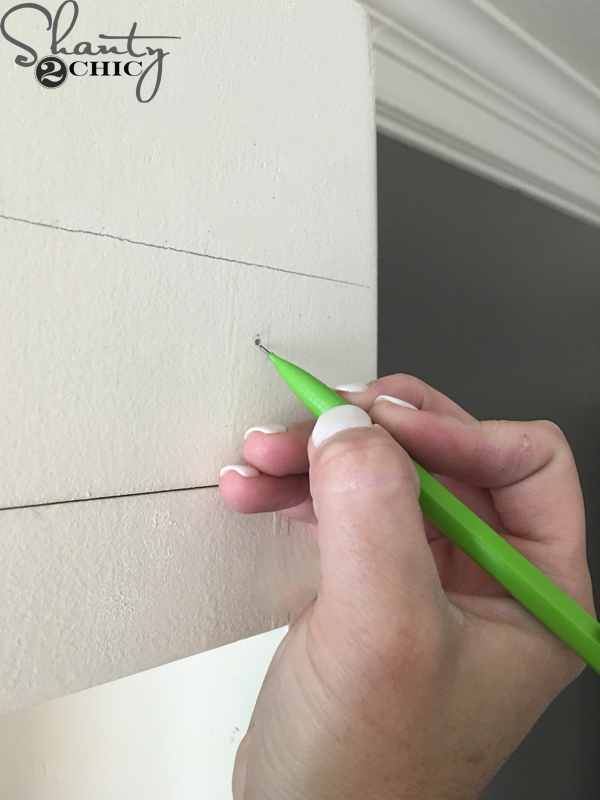 Next, I marked the holes in the track.
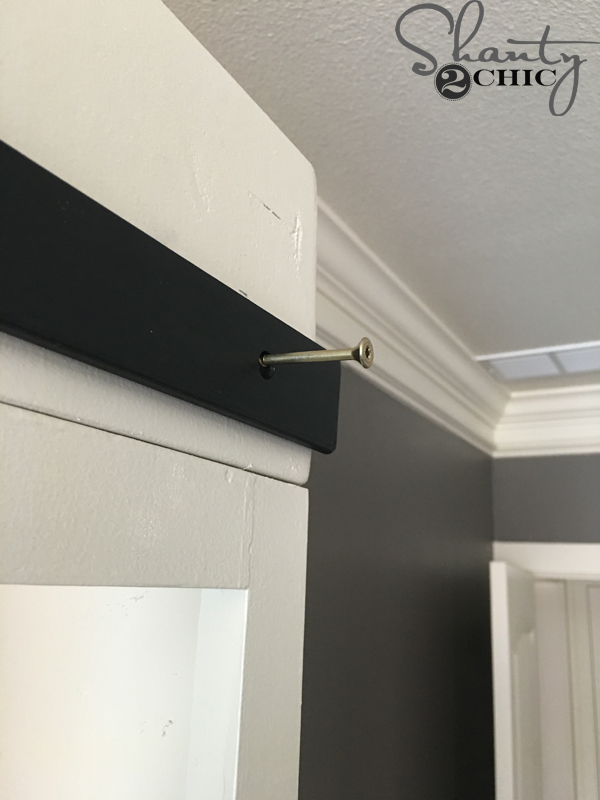 Then, I put some temporary wood screws in place and slid the barn door track over the screws. This eliminates the need for someone to be holding the track in place while I attach the bolts and it predrilled holes for the bolts 😉
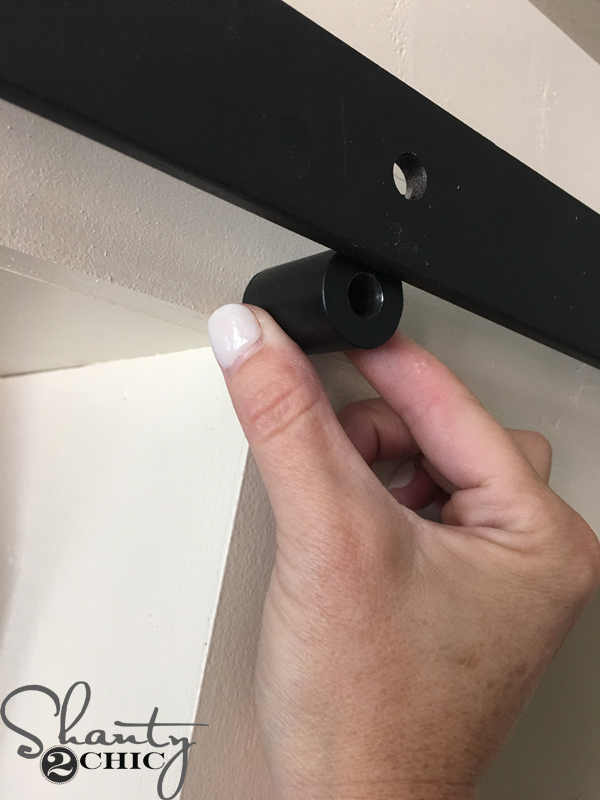 I removed one wood screw and placed a spacer behind a bolt hole.
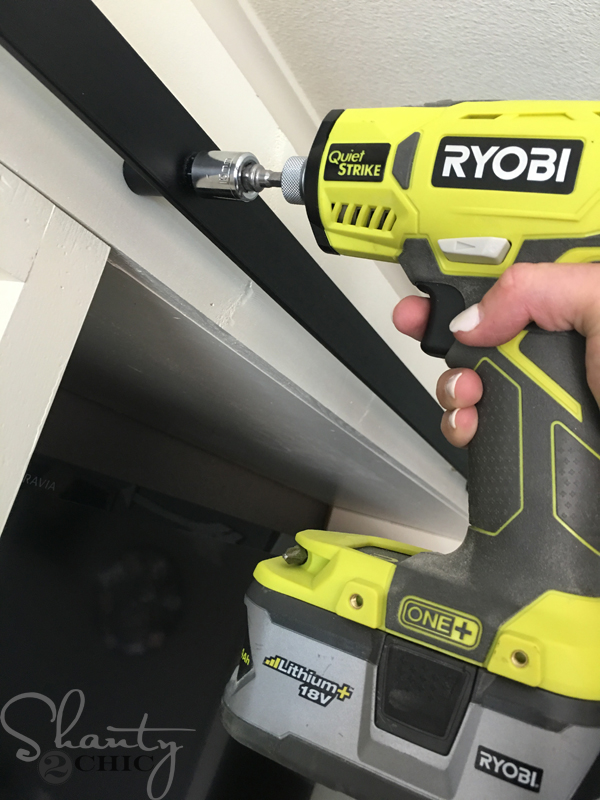 Then, I drove the bolt into the barn door track, into the spacer and though the front of the bridge. I used my Quiet Strike with a hex bit for this part too!
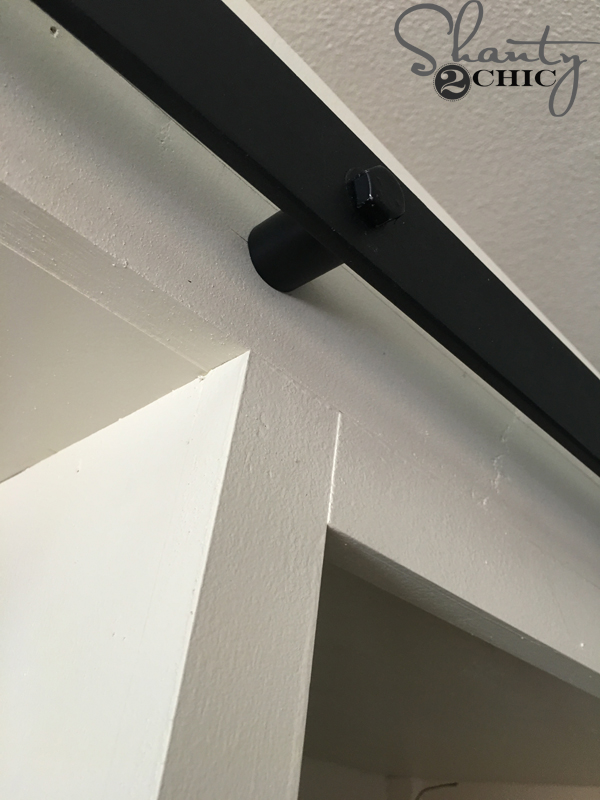 I did this for each hole in the track.
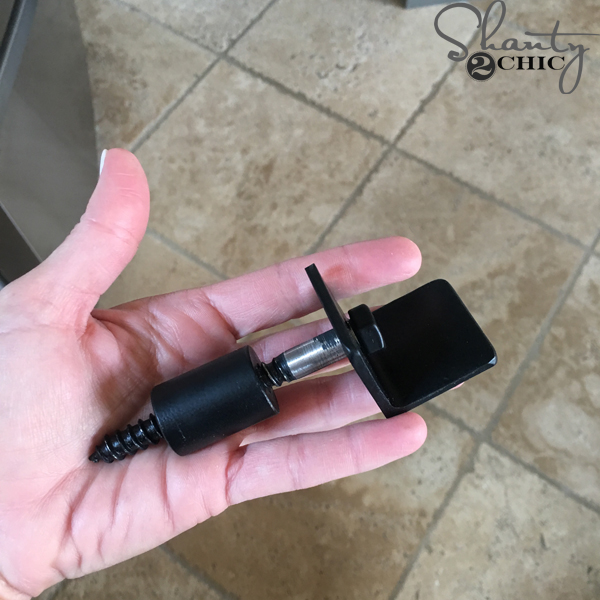 There will be two stops that look like this. These go on the holes at both ends of the barn door track. They stop the door from flying off the track – minor details right;)
 The stops face in so that the are on the inside of the hex bolts.
 I attached the wheels and hung the doors on the track. You can see in this picture that I also attached guides to the bottom of the console. This keeps the doors from swinging forwards and backwards.
 That was it! Lots of steps but not too hard at all!