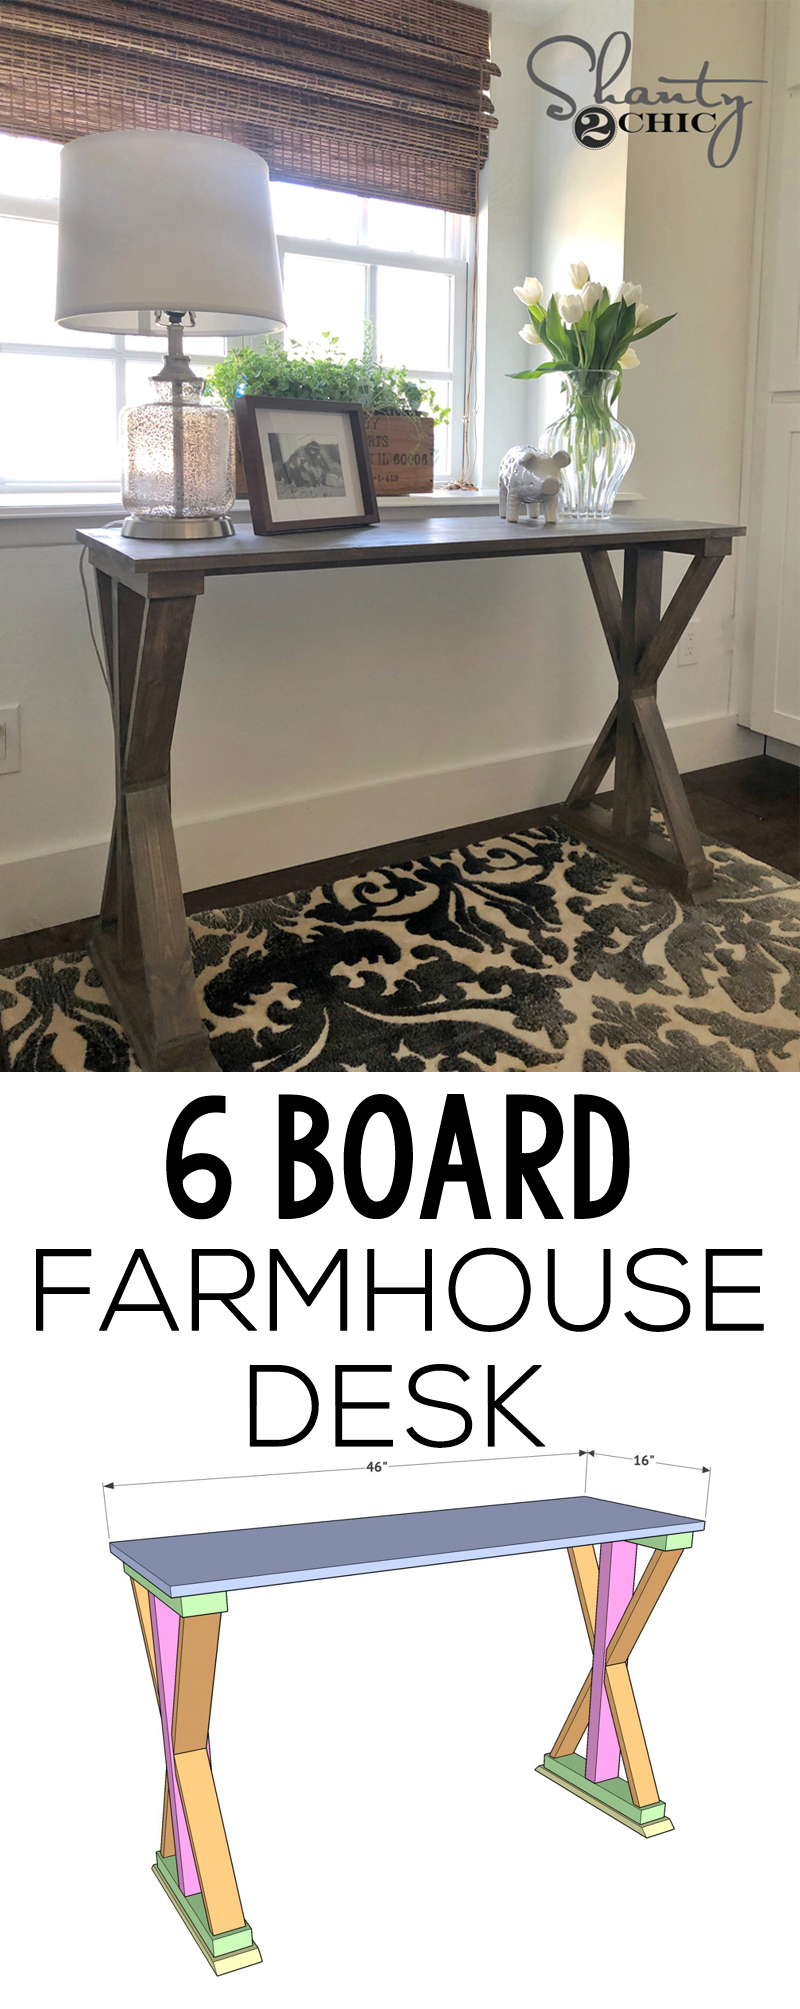
We are back with round 3 of our Alvarez Series! They are our good friends who also happen to be our producers. They recently moved to this area and purchased an outdated ranch house, and have spent the last several months turning it into a glam farmhouse. They have done an amazing job, and now we get to go in and build them lots of furniture! YEAH 😉 Lauren needed a small writing desk for her butler’s pantry, so we came up with this $30 DIY farmhouse desk you can build with just 6 boards. Check out the DIY 6 Board Farmhouse Desk Video HERE or below!
How cute is this desk??
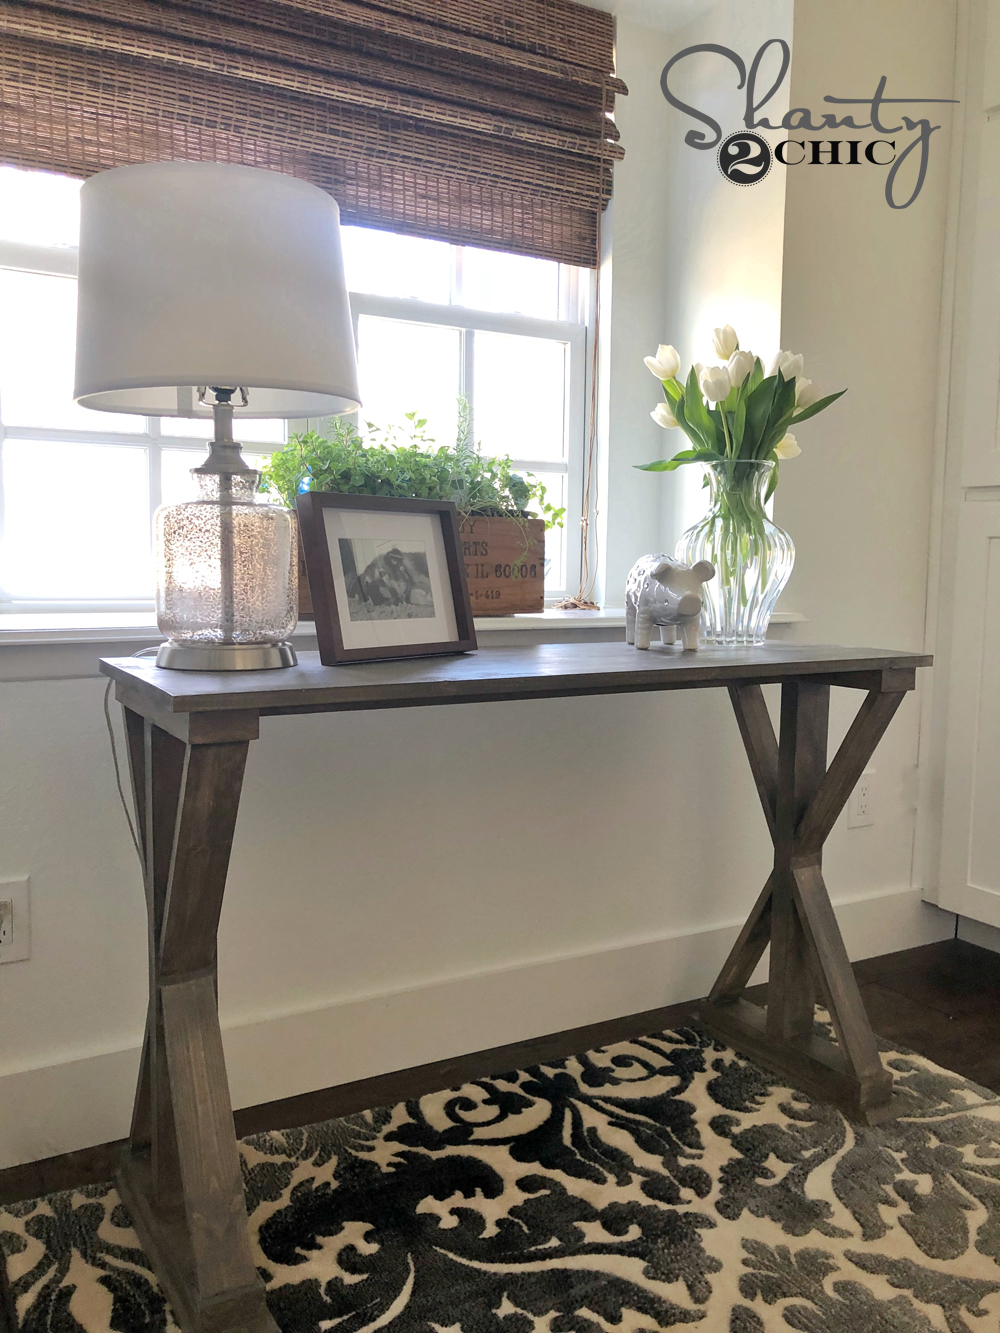
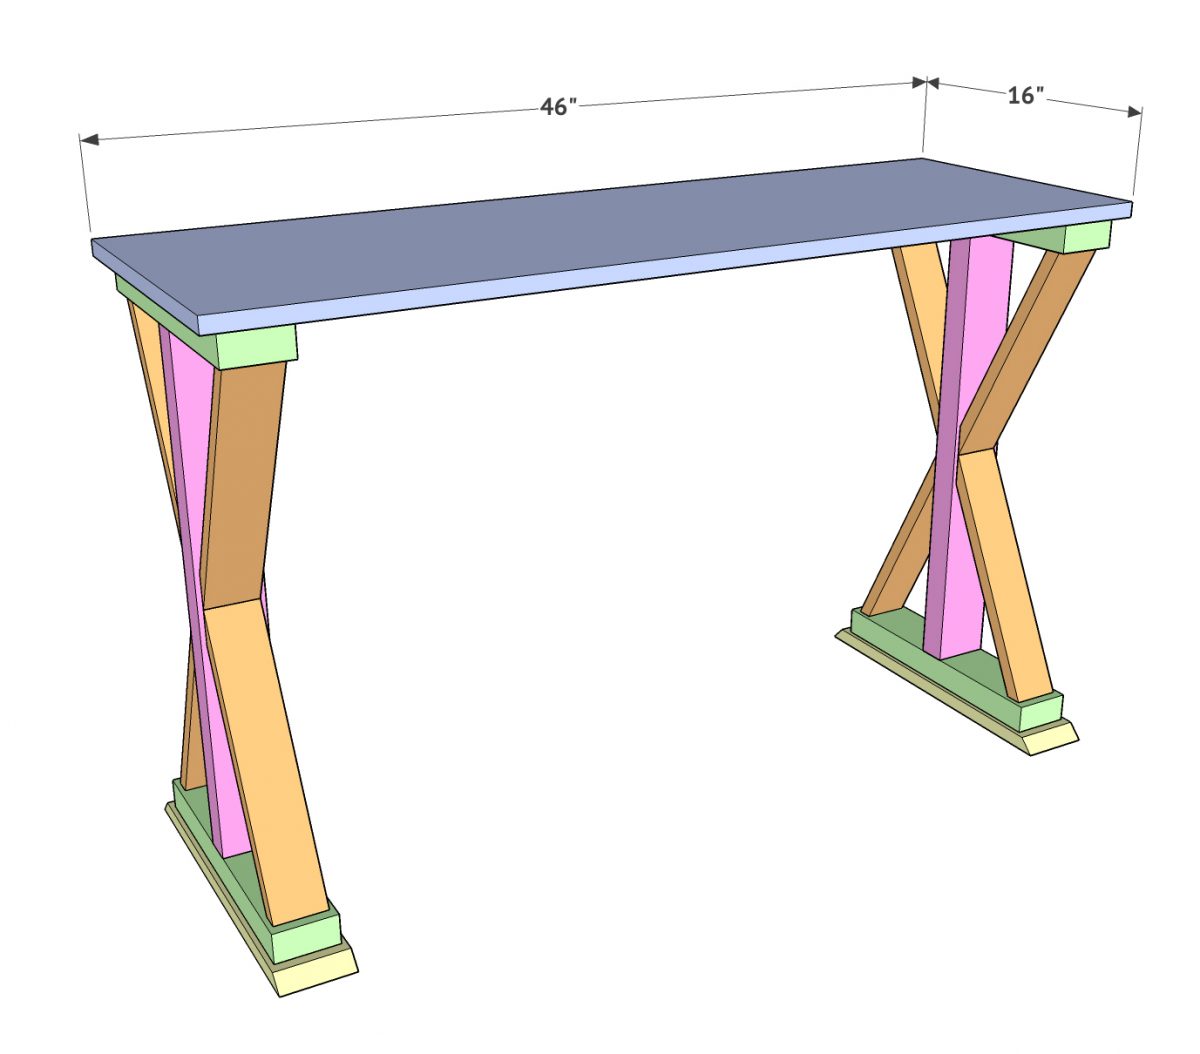
DIY 6 Board Farmhouse Desk
Before we get started, be sure to download and print the FREE PLANS by clicking HERE!
And… Here are links to all the goodies!
Glu-Bot (You’re welcome… It’s amazing)
Rug is from At Home Stores
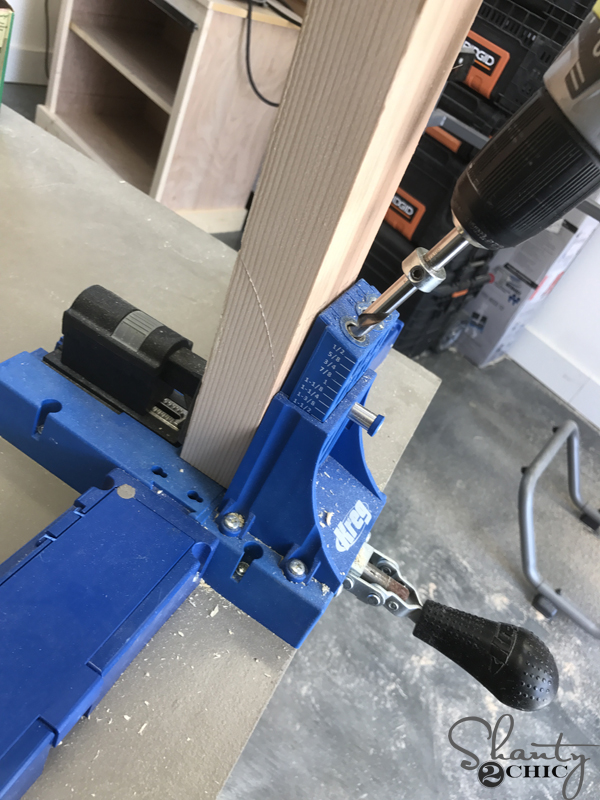
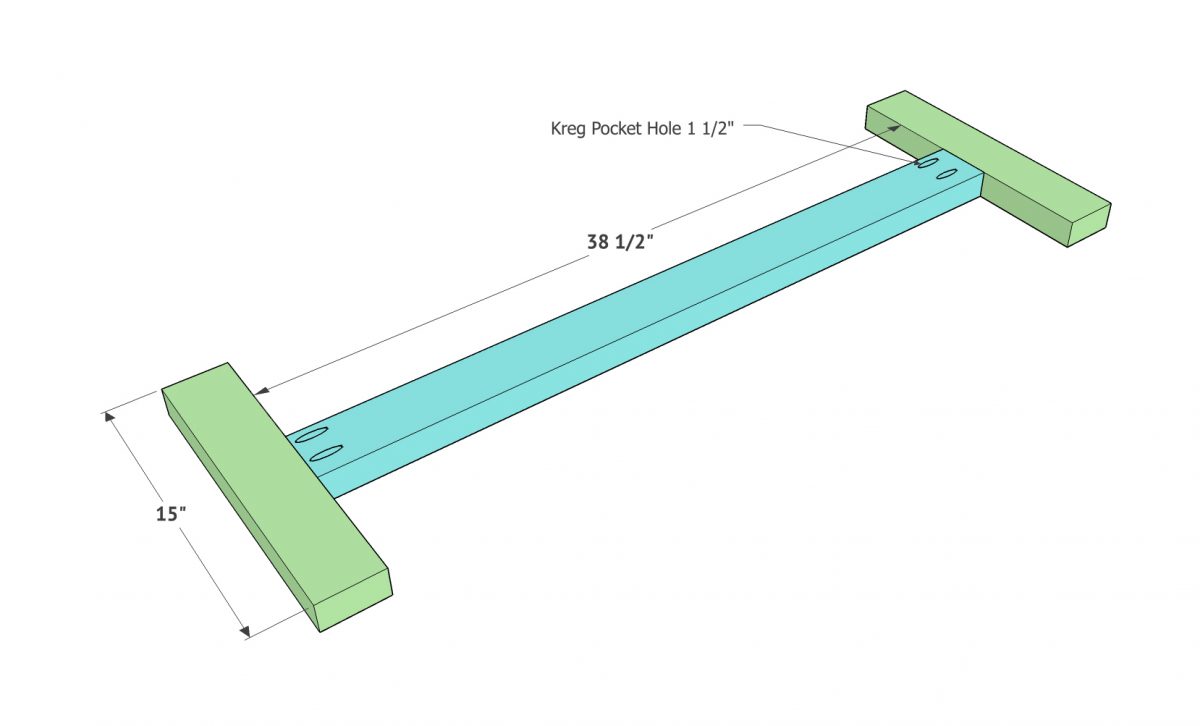
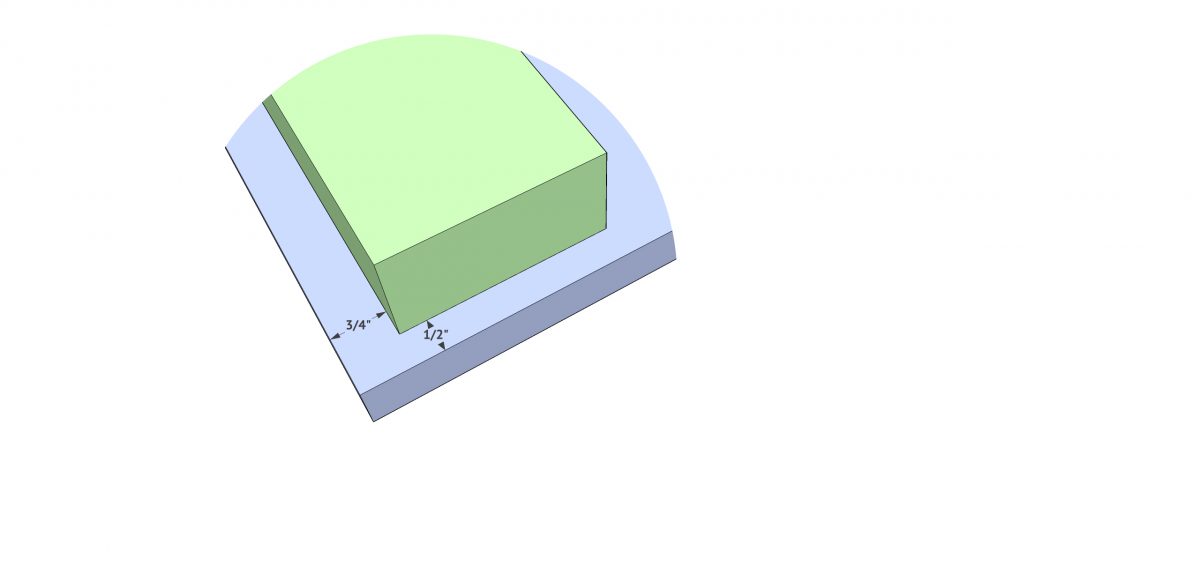
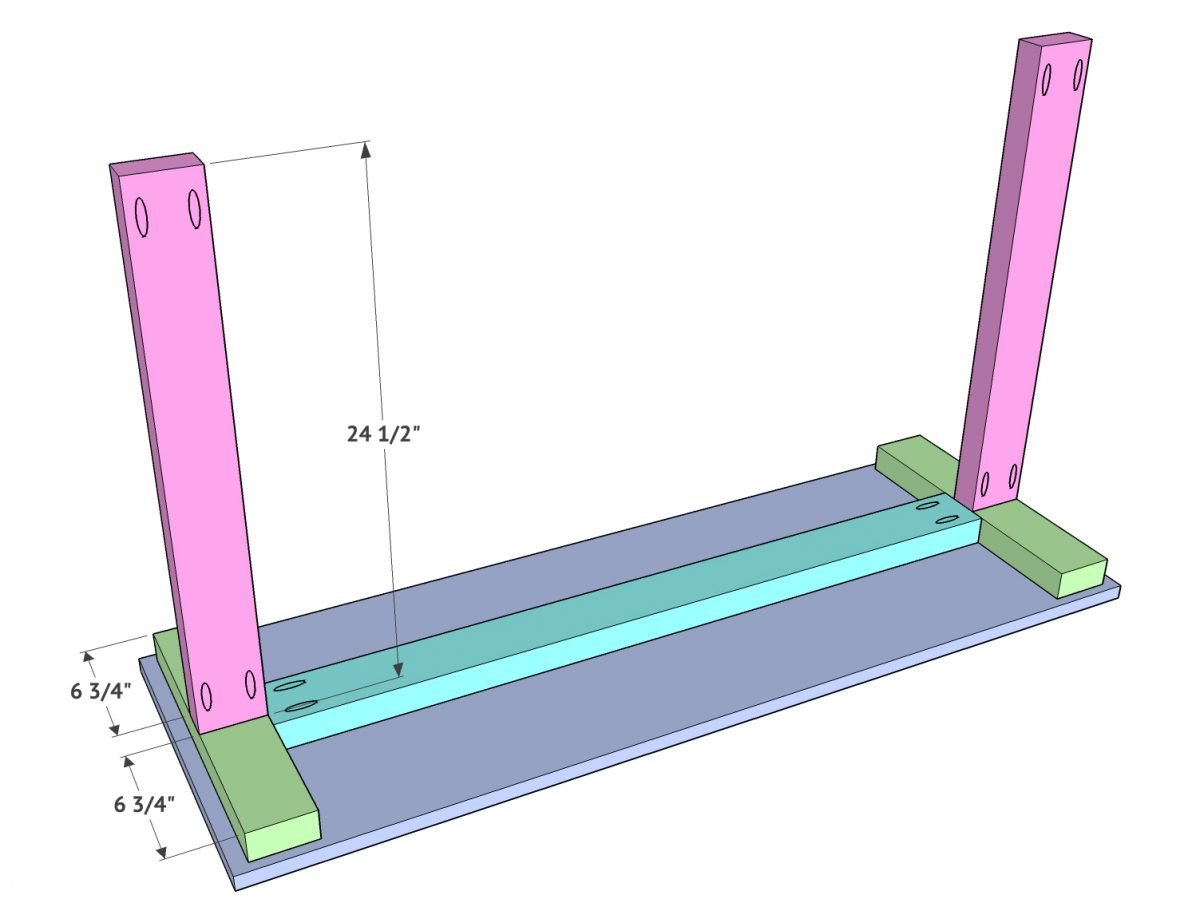
Start by attaching the runner to two of your foot pieces. These are 2×4 boards that we ripped down to 3” wide. You don’t have to rip your boards down, but it will change the overall look of the desk. Attach the runner to both boards using wood glue and 2.5” pocket hole screws through the 1.5” pocket holes. We used our Kreg K5 Jig for this part!
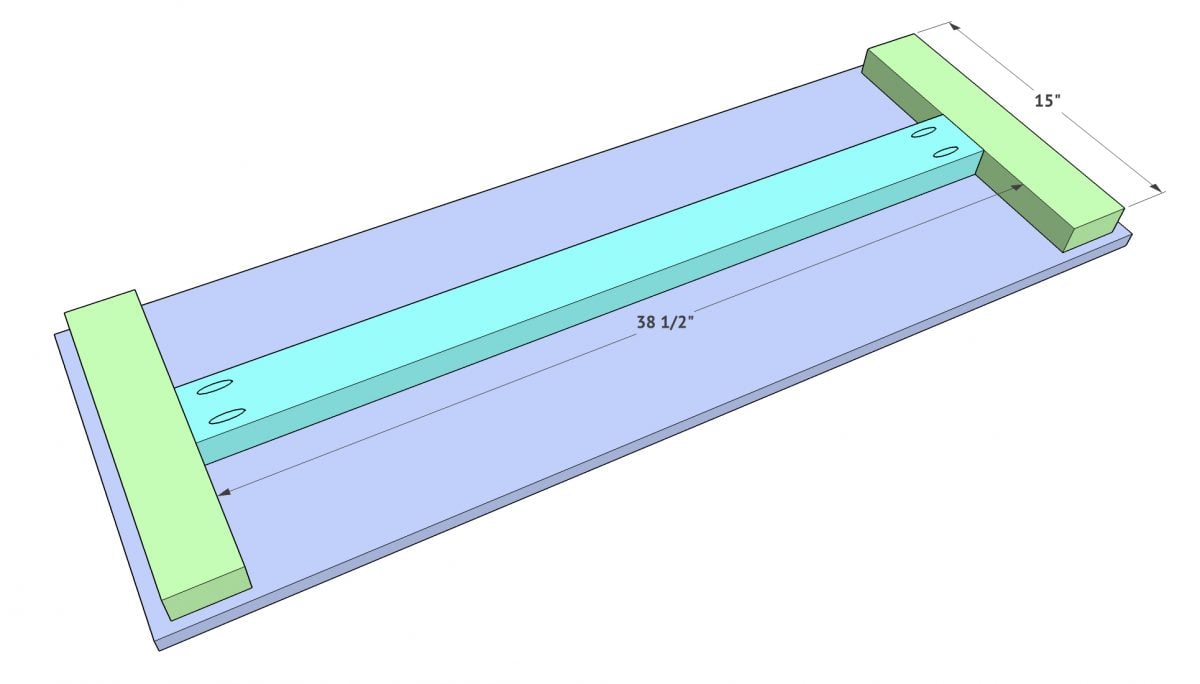
Next, attach the “I” you just made to the desk top. using wood glue and 2” Spax or wood screws. The desk top is a laminated pine board. I purchased a 16”wide board and cut the length to size using my miter saw.
Now attach both leg pieces. These attach to the “I” boards using wood glue and 2.5” pocket hole screws through the 1.5” pocket holes. These will line up flush with the outsides of the “I” piece and centered on them as well.
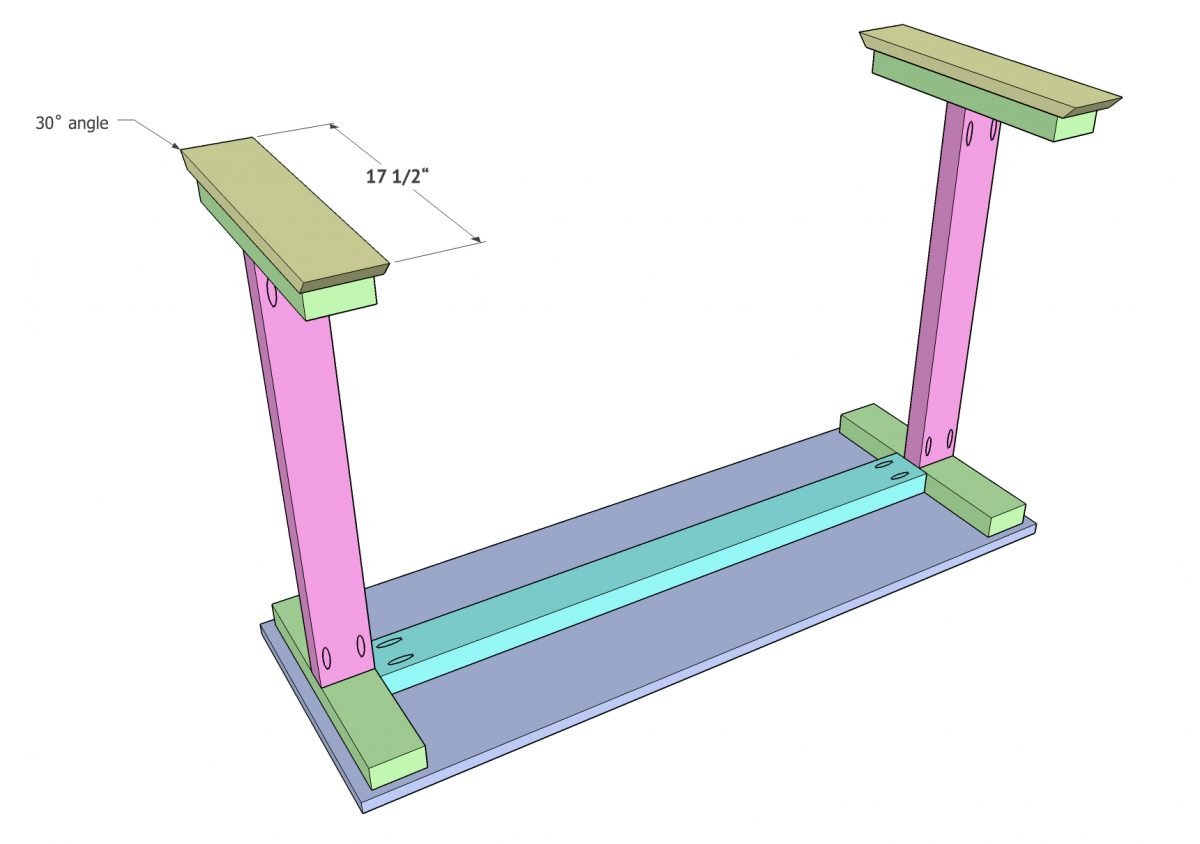
Attach the other two foot pieces next. These will attach to the legs using wood glue and 2.5” pocket hole screws through the 1.5” pocket holes. Make sure your pocket holes are facing the same direction on each leg because this will be the back of the desk that you won’t see, so there will be no need to fill these pocket holes.

Now attach the decorative 1×4 boards to each foot board. These will have a 30˚ angle on each end. Attach the boards to the foot pieces using wood glue and 1.5” Spax or wood screws.
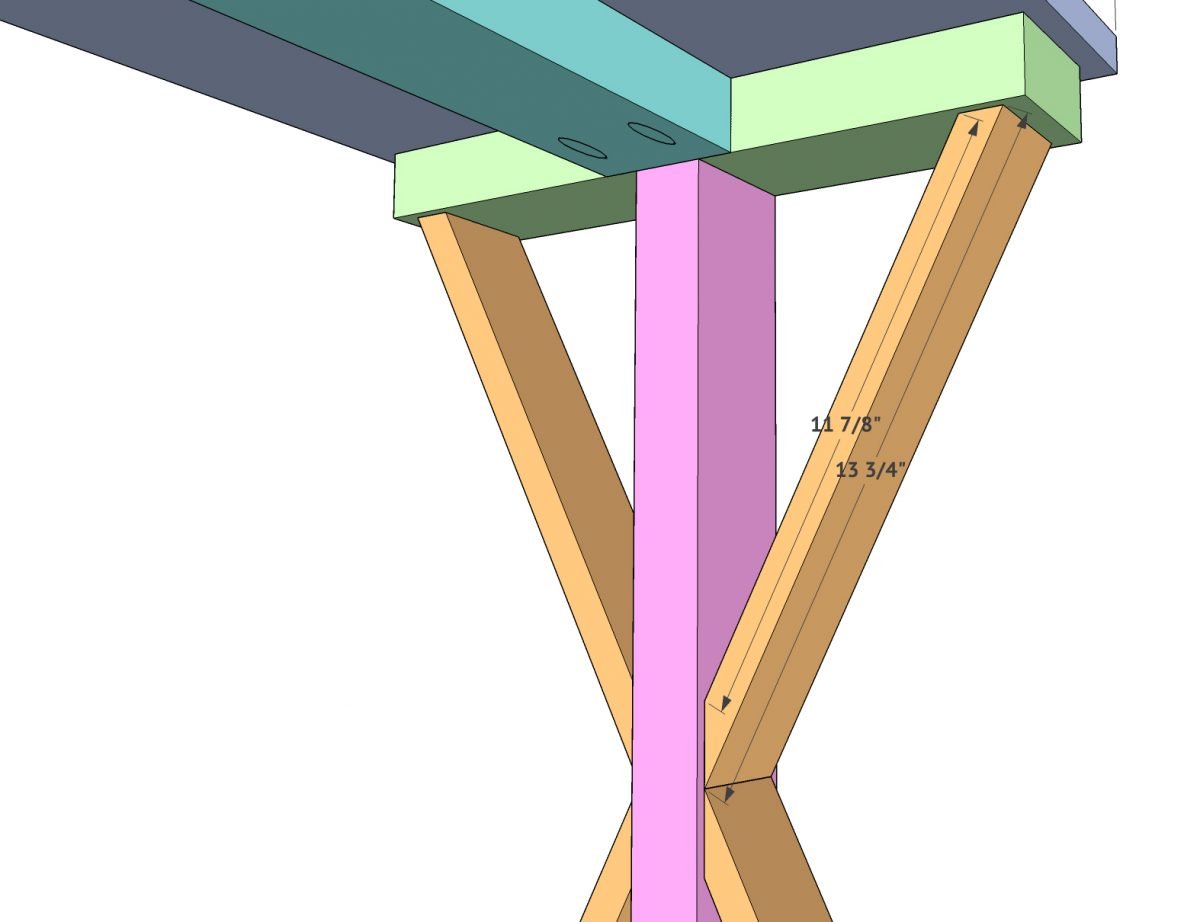
Final step is attaching the decorative diagonal pieces. These are 1×3 boards. To get the exact measurement, hold the board in place and mark the exact cut. Then, set your miter saw to that cut. Attach the boards to the leg and foot boards using wood glue and 1.25” nails.
DIY 6 Board Farmhouse Desk – Paint, Stain, Style!
All finished! You can paint or stain yours to fit your style. One of the great things about this desk is how easy it is to customize in length. If you need it longer or shorter, just adjust the size of your runner and desk top and you’re done! Be sure to share pictures of your finished desk and use #shanty2chic so we can share!
And let’s look at it one more time!


This is a very practical and well-designed project. The 6-board farmhouse desk has a clean, sturdy structure that makes it ideal for everyday use, whether for work or study. I like how the design keeps things simple while still offering a strong farmhouse character. It’s always inspiring to see workspace furniture ideas alongside broader interior and material trends here: https://plywoodbazar.com/
A solid and stylish DIY build.
I also think the angled cuts for the decorative pieces should be included in the instructions