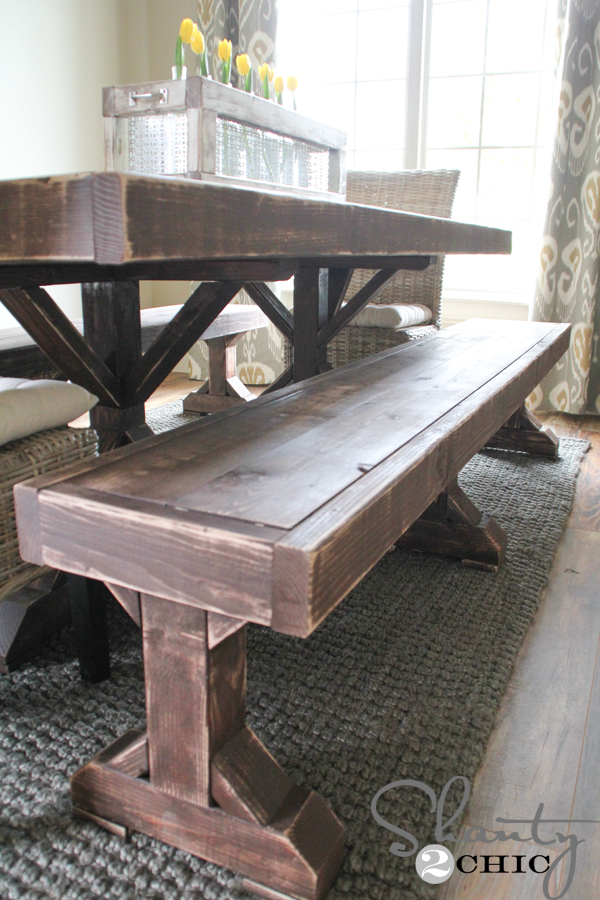
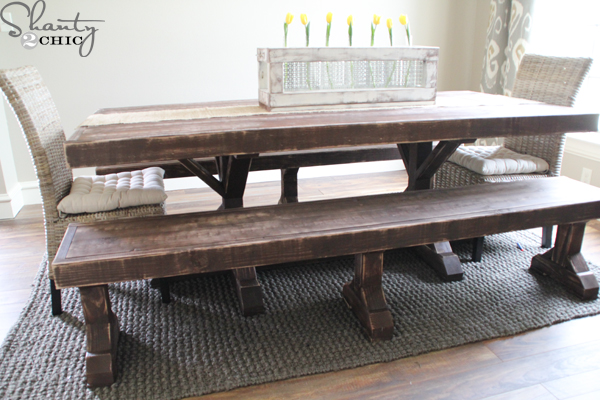
Hey guys!! I’m back to share the new DIY benches that I built for my new dining table!
 If you missed the Restoration Hardware Dining Table that I built for $110 you can see that HERE!
The benches are just a small piece of the massive amount of furniture that I’m building for our new home but each room is starting to fill up 🙂 They are very easy and I was able to build 2 for about $70 making my entire dining set about $180!!
As always, we have the FREE Printable Plans available for you HERE or you can click the image below 🙂
 And, of course, I’m sharing my how-to steps to help!
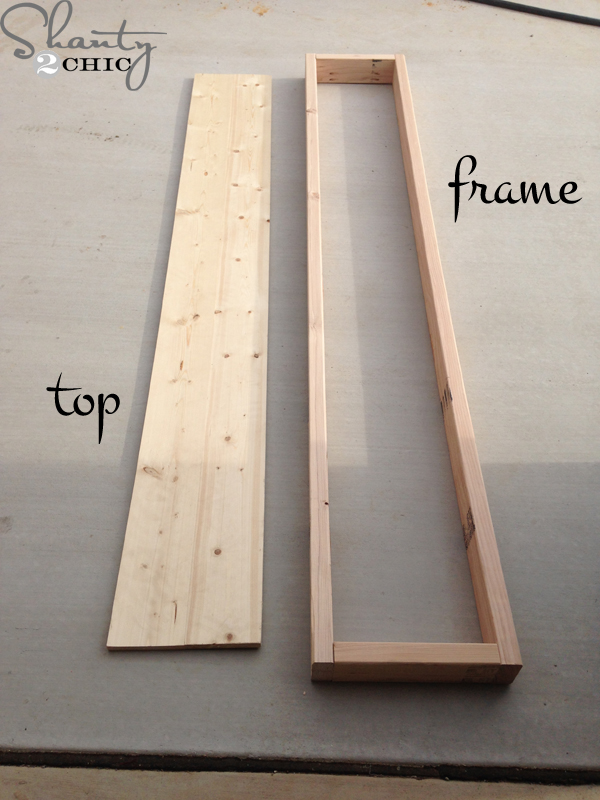 I started making the top of the benches first. This part is very easy!
 Bench tops – done 🙂 Now time for the legs.
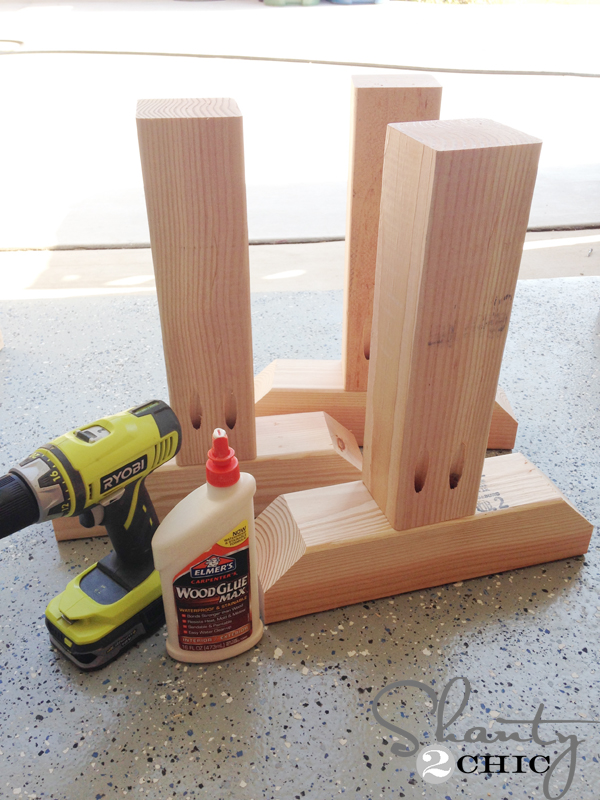
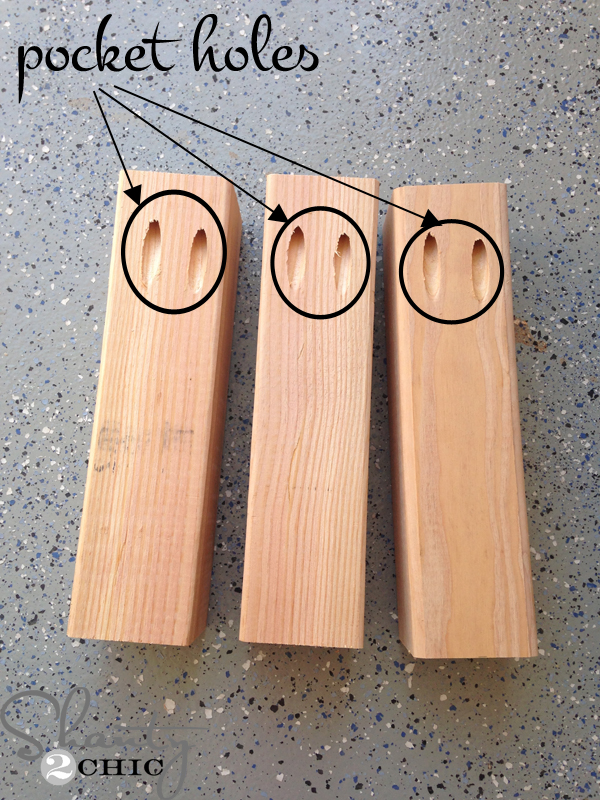 I cut the legs and drilled pocket holes in to them.
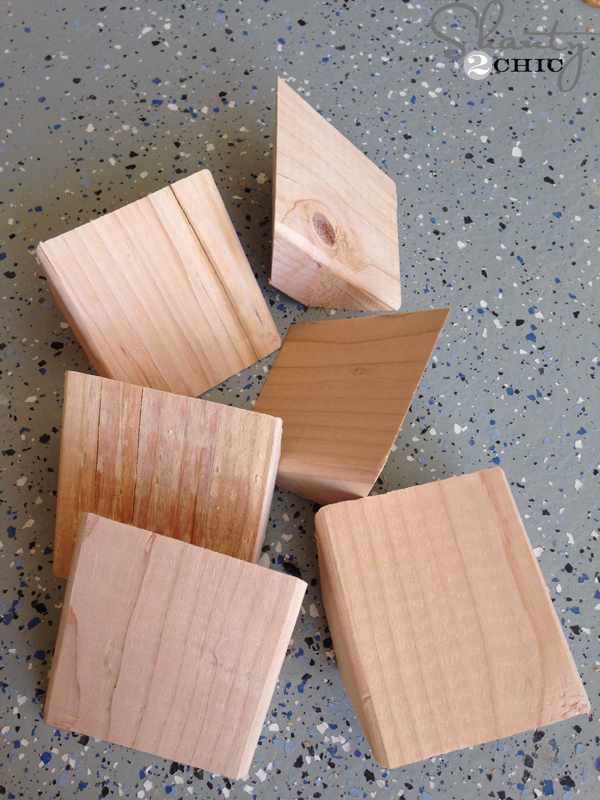
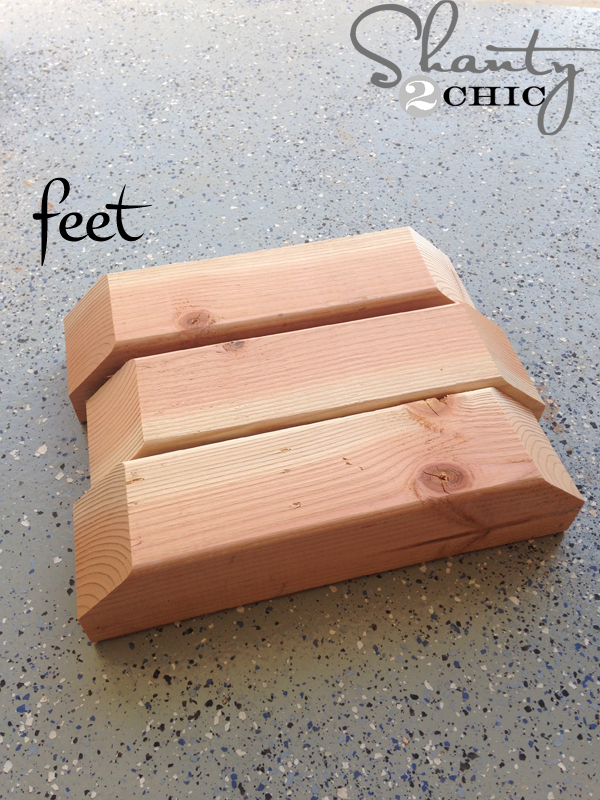 Then, I cut the feet. Don’t let the angles scare you. If you haven’t cut angles, these are easy 🙂 You just cut a 45 degree angle on half of each end.
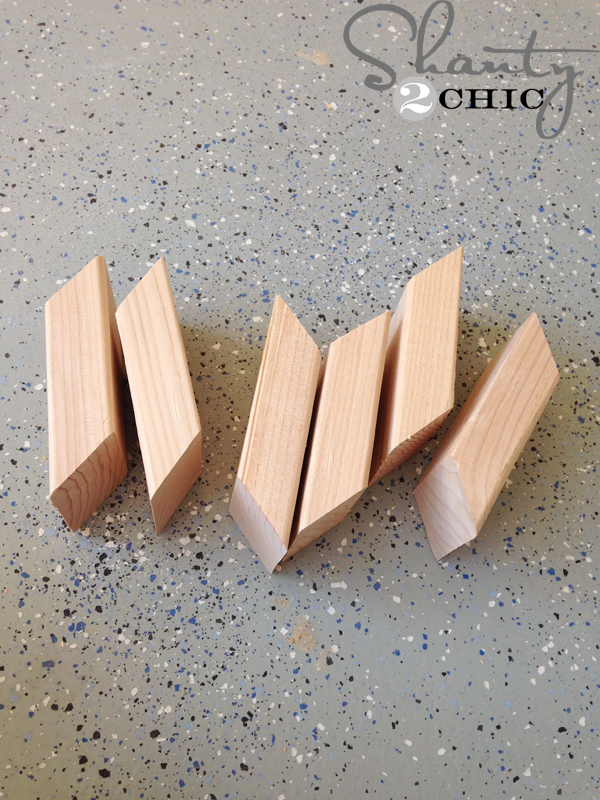 Here are all of my little angle pieces that give the benches so much character!
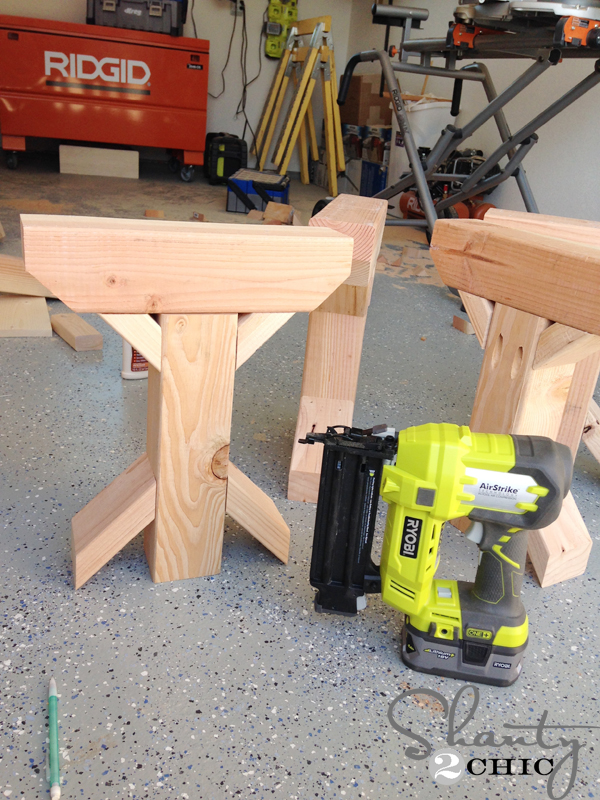
 I attached the legs to the feet with wood glue and Kreg pocket screws.
 I attached the small angle pieces first with wood glue and my brad nailer. If you don’t have a nailer, you can use finishing nails or drill pilot holes for wood screws.
 Then, I flipped them upside down and attached the longer angle pieces the same way
 And added the foot pads with wood glue and my nailer.
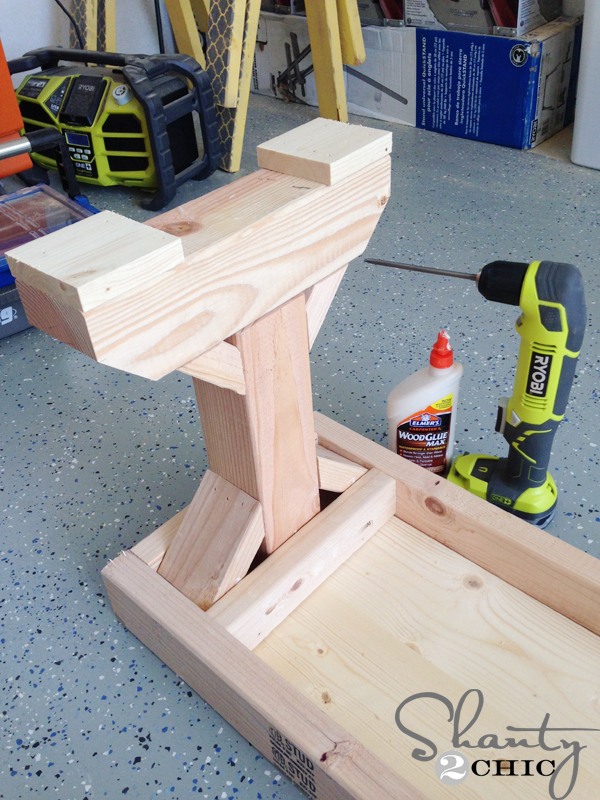 After all of the legs were assembled, I attached them to the bottom of the bench tops with wood glue and pocket hole screws. I used my right angle drill to attach the braces to the frame.
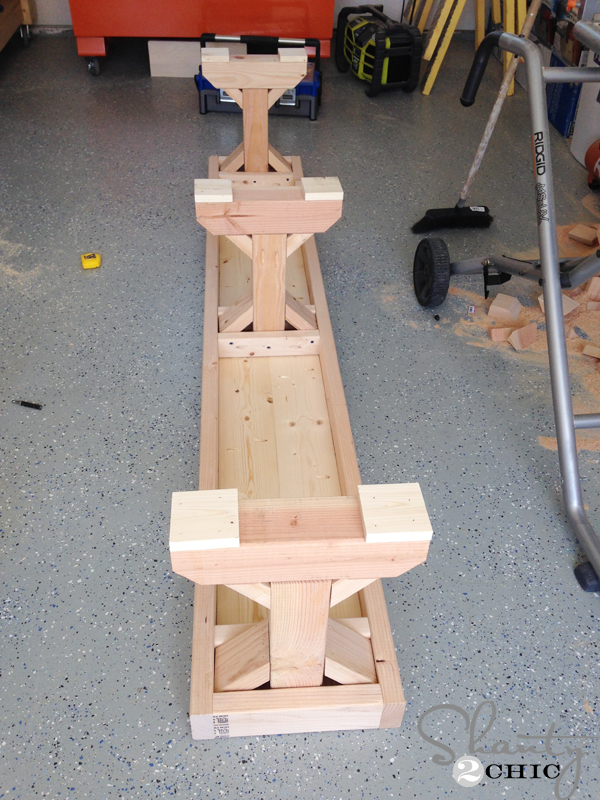 That’s it! Time to finish!
 I stained both benches with one coat of Carrington stain to match my table.
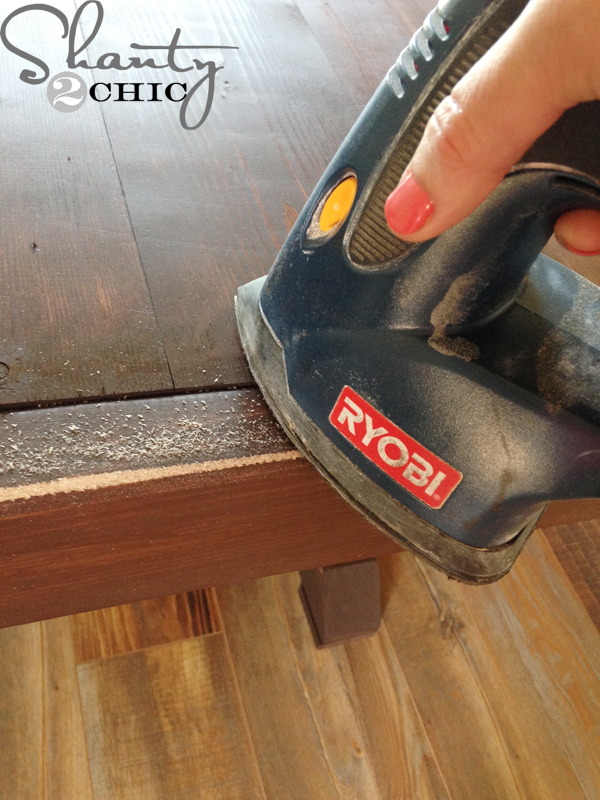 When the stain was dry, I used my favorite sander to distress the benches, all over.
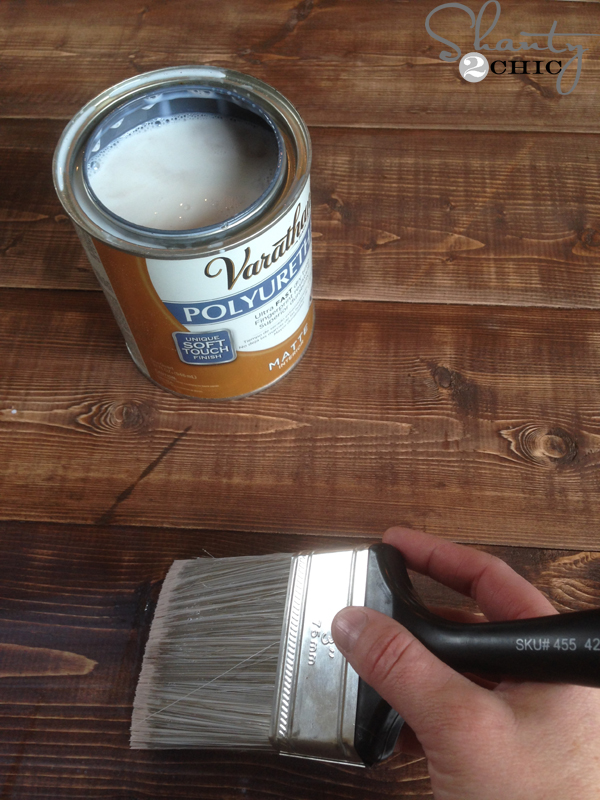 I wiped the dust with a wet cloth and applied 2 coats of polyurethane (paying special attention to the tops because my kiddos will be eating here).
 That was it 🙂 One reason we love DIY is because it frees up our budget to spend more on accessories! I found the rug at World Market for about $150 for a 6×9 (Charcoal Basket Weave Jute Rug) and I found those awesome wicker chairs at Pier 1 for $99 each 🙂
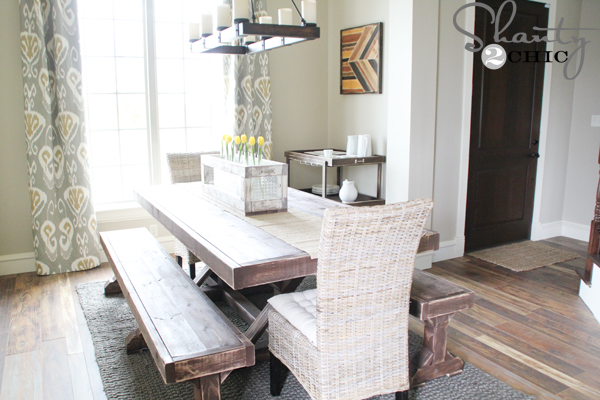
Loving how my dining room is coming along! I still have several more projects planned for this room but I am going to step away and move to another room for now 🙂 I’ll be back soon too share!
Thanks so much for stopping by and building these DIY benches with me!
~Ashley
Like anything else you see in this room? You can click the links below to get the info 🙂


I know this is a very old post but I hope you’ll still answer a question. Will this bench fit completely under the table?
I don’t know about anyone else. But i can’t seem to find bench cushions for this. The dimensions are a little strange. The skinniest length I have seen is 17”. But the bench seems to be 14”. Wider planks seem to be the only option
Loved your plan for the table. Built and now moving onto the bench! We made the table 4′ X 8′ and can fit 12 around the table!!!
Would love to send pic of table. How do I share a pic?
I just made this bench with my fiance this weekend. Though i spend a lot of time in the wood shop i still ran into a few issues with this build. I am going to make a youtube video that will show the build and what i learned (the hard way). If anyone is interested the video should be up in a week or two.(channel name NothingToDoCrew)
Note-We built this bench for our dining room table, but we are also going to use it as our guestbook at our wedding. Im glad we figured this thing out because it turned out amazing.
do you still have this video up? I cannot find it. Thanks!
Hey shanty2chic have you ever thought of doing a round table? I have 8 people in my family and have always wanted a round table. I love the plans to this table and thought with a few modifications with the base it could probably work. I’d love know what your thought are? You do such a great job! Thanks for sharing your ideas for DIY’ers like me!
I would be interested in a 6 person round table! 🙂
How tall are the benches when finished?
18.5
Im building this table and benches right now using mitered finish trim and select 1 &1/8″ pine. Check out my profile if you want to follow along just send me a friend request.
I may have missed something but I could not use the pocket holes i drilled on the 2x3s for the brace of the legs or the 2x4s for the frame of the top. My cordless drill would not fit or give me the right angle to screw the pocket holes in
You can buy the smaller drill bit that is half the size of the one that it comes with.
I also do not have the right-angle drill (yet). So, I used a multi-bit screwdriver with a longer #2 square bit, that I bought from Lowe’s for $2, and did it the hard way. If you have a ratcheting, multi-bit screwdriver, that would be even better for your wrist and forearm. In addition, I also anchored in the 2×3 braces with wood screws to help hold in place while I manually inserted the pocket-hole screws.
In reference to the Kreg HD jig that others commented about, I drilled the same depth pocket holes with my Kreg R3, as was shown in the plans. I just marked a line for where I wanted them, used a pocket hole screw in the hole on the R3 jig (you have to remove the round clamp thing), and attached it to the the 4×4. However, to beef it up a little bit, I also added 1 additional pocket-hole (of same depth) on two of the remaining 3 sides. This may have been excessive, but I am just starting out and I want to make sure that my bench (and accompanying table) doesn’t fall apart in the future. 🙂