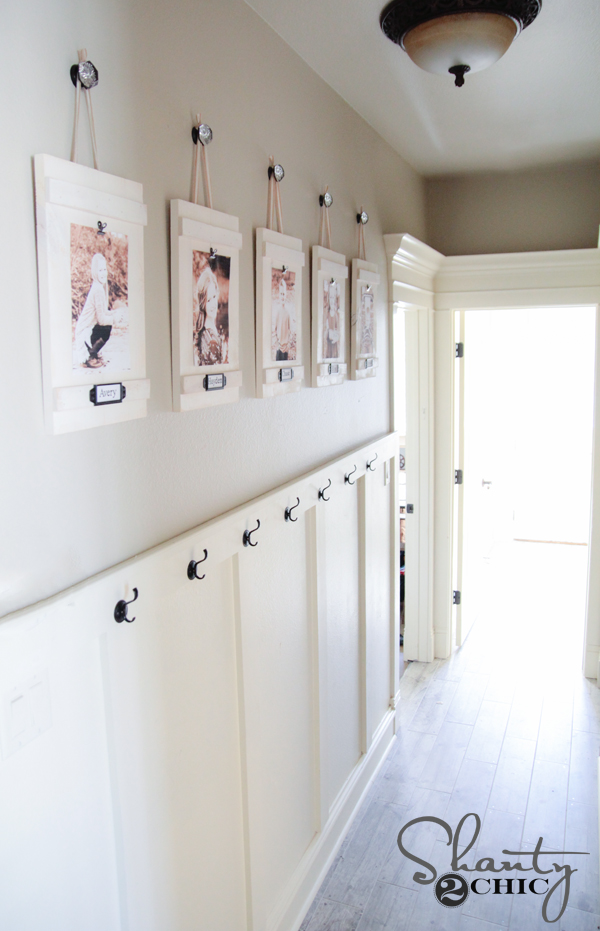
I recently updated my wall in my hallway with some new frames. I shared the old frames a few years back, and I was ready to lighten things up a bit! Here is how my DIY Hanging Frames turned out…
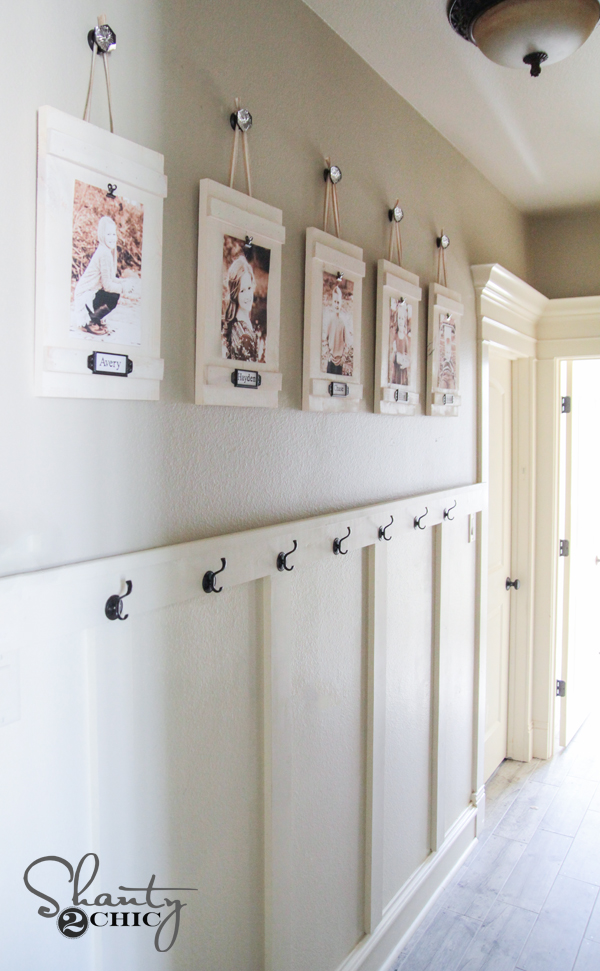
This is a crazy simple tutorial! I had all 5 done and hung in a couple hours.
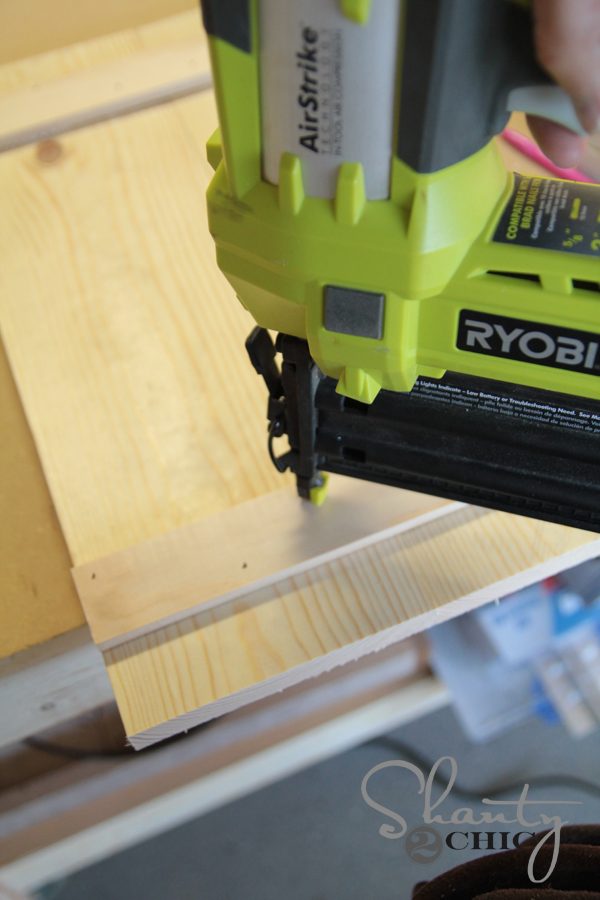
Each frame uses 1×6 white wood and 1/4″ pine boards. You can also use 1×2 in place of the 1/4″ boards if you have trouble finding them. Here are the cuts…

Start by laying your 1.6 pieces side by side. Then, run a line of Gorilla Wood Glue down one side of both of your smaller boards.

I used my Ryobi Airstrike brad nailer to attach mine to the boards. I lined mine up 1.5″ from the top and bottom of the boards. I actually used the smaller boards as a guide to make the lines. I used 5/8″ brad nails for this part.
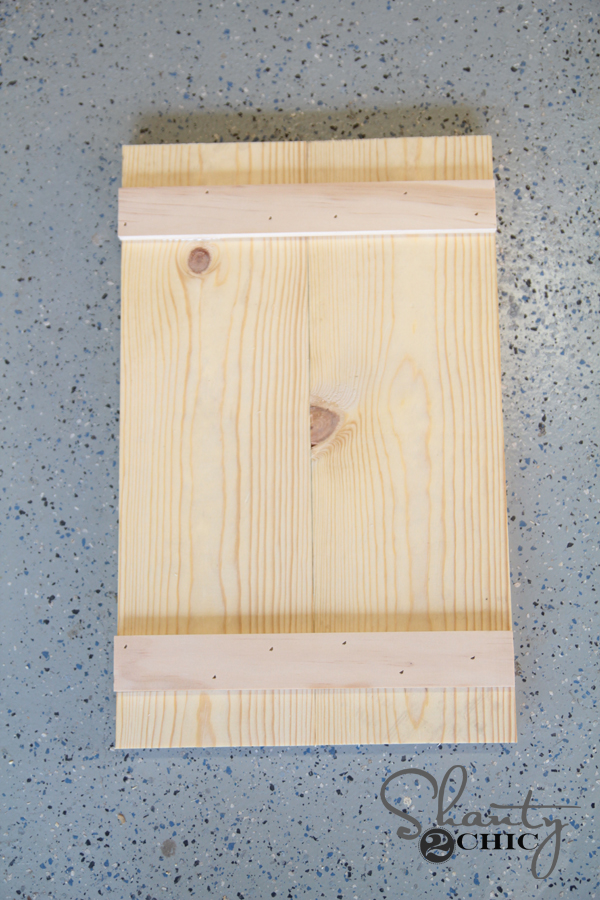
At this point, your boards should look like this.
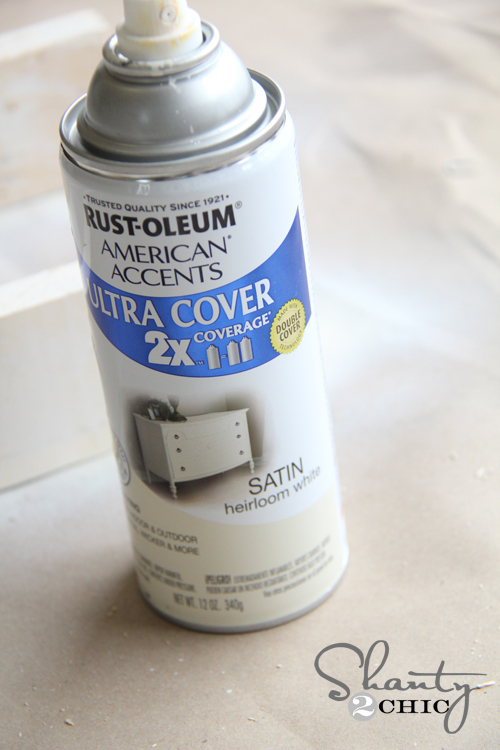
Before moving on, I painted my frames using Rust-Oleum Heirloom White spray paint from the Home Depot.
Once it dried, I used my Ryobi Corner Cat sander to distress each of my frames. I just sanded enough to let some of the wood show through all around. I used 120-grit sand paper.
Now to add some hardware!
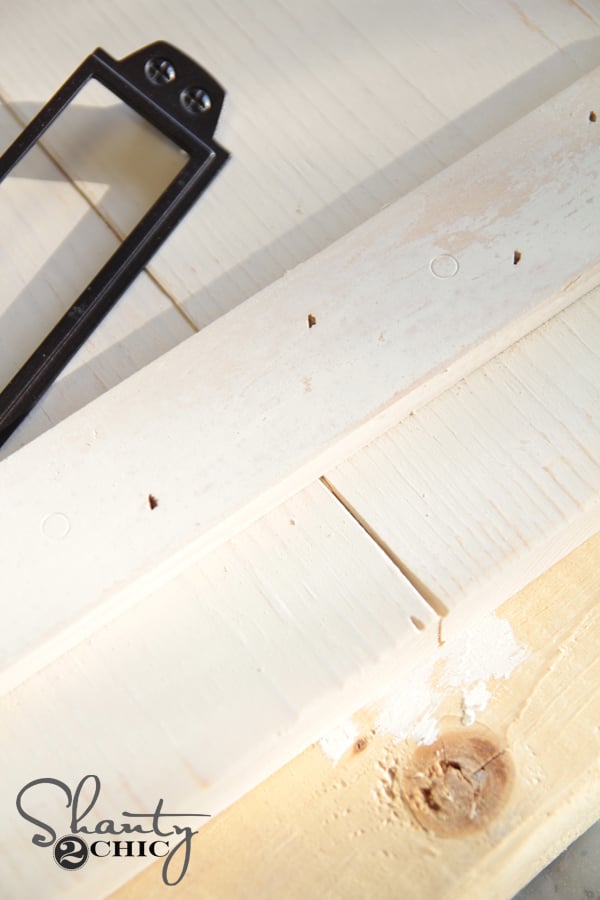
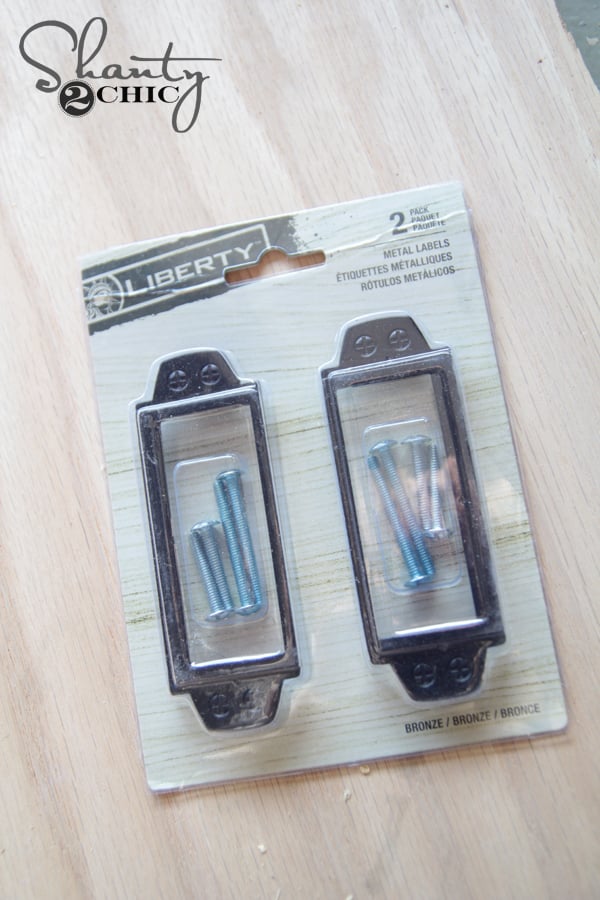
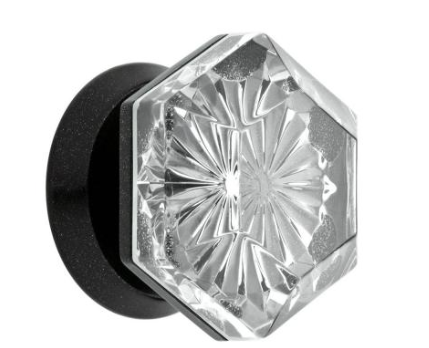
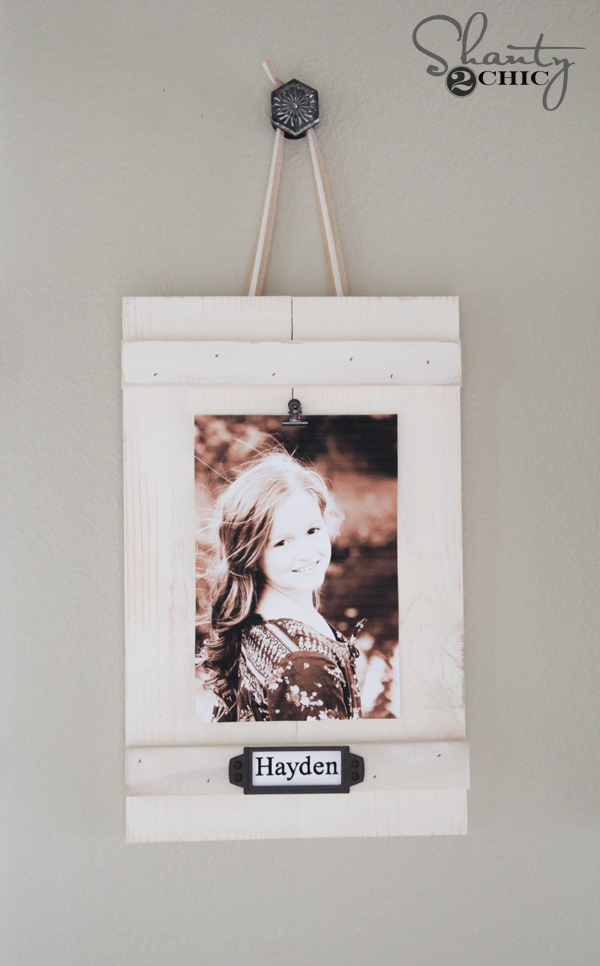
I flipping LOVE this hardware. Liberty Hardware has launched a new vintage inspired line at Home Depot. It is some of the cutest hardware I have seen in Depot yet. I decided to add a metal label to each frame. You can find these online HERE. These are so cute and come in 3 finishes.
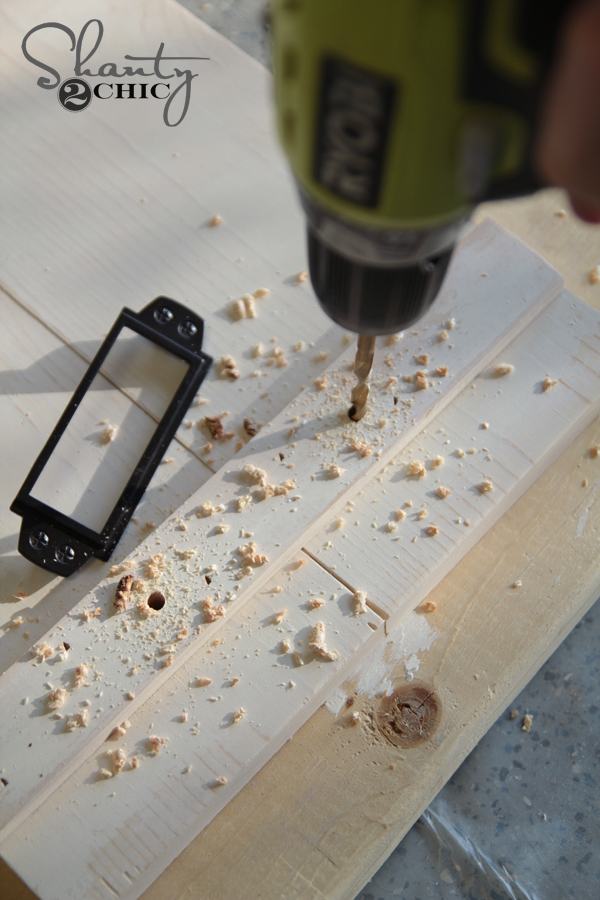
I first used my drill to add the holes. Then, just place the label on and attach the screw through the back of the frame.
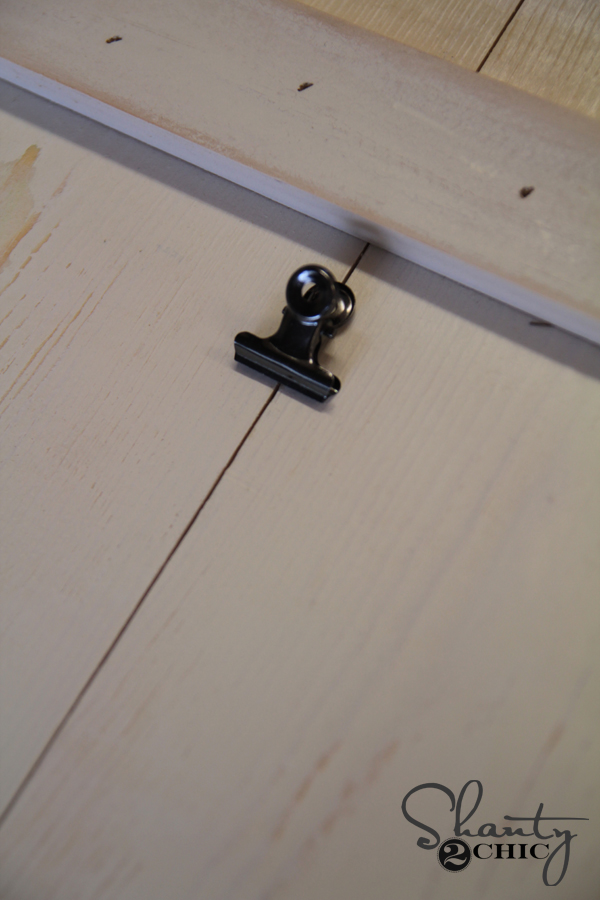
My final step was adding my clip. Any clip will do, but I used these cute mini bulldog clips I find at Hobby Lobby. You can also find them HERE on Amazon!![]()
.
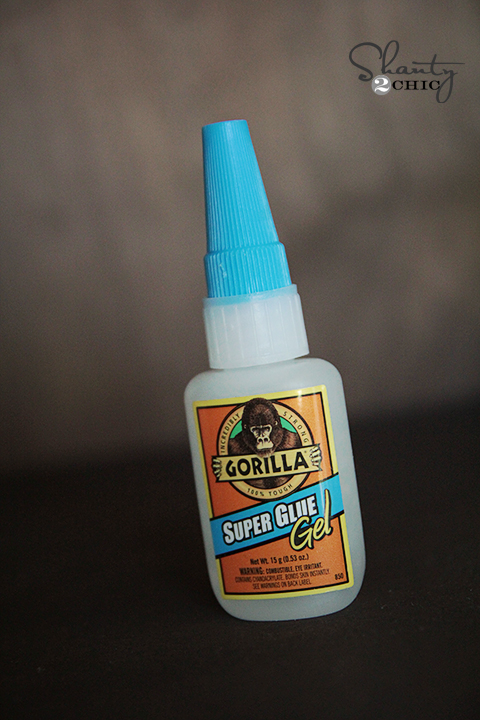
Just use a drop of Gorilla Super Glue Gel on the back of each clip and attach them to the frame. It dries in minutes.
Done! To hang mine, I used another awesome piece of hardware that Home Depot is carrying. Our sweet friends from Young House Love designed these fun hangers with Liberty Hardware and you can find them HERE at Home Depot. They are super easy to attach to the wall.
I just stapled some ribbon to the back of each frame and hung them from my hooks.
Finished! Here are a few more shots…
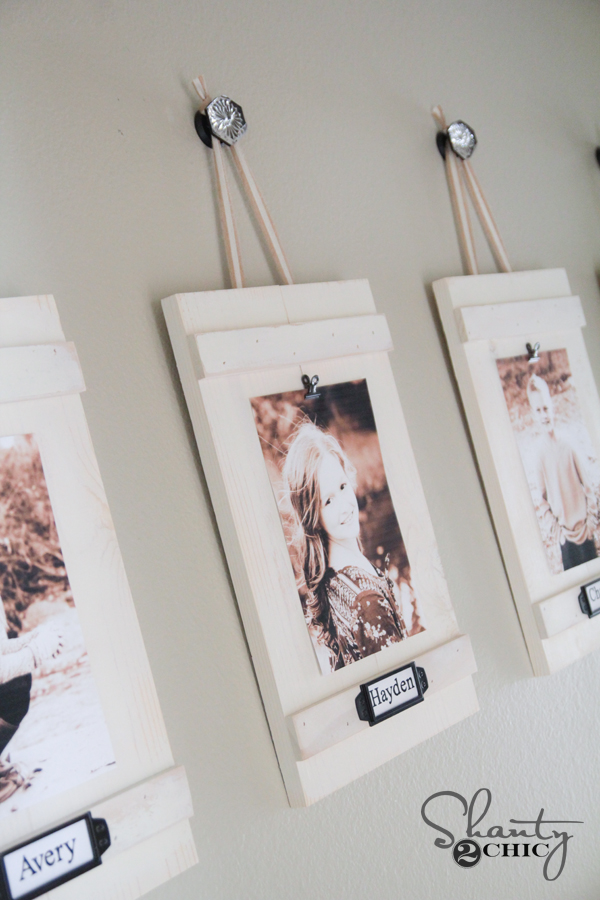
Hope you love them! This is a crazy simple project that adds lots of fun to any wall… And, you can easily change out the pictures which means my kids faces won’t stay the same for the next 3 years 😉
Thanks so much for stopping by!
Whitney

I am planning on building the farmhouse table you made and these will be perfect with it as coordinating decor. I changed the appearance slightly but you gave the inspiration.
What size are the photos?
?
?
✌?✌
?
??
??????? I built my own using the plans at www. WoodworkPlans.info – highly recommended you check those out too. They are detailed and super easy to read and understand unlike several others I found online. The amount of plans there is mind-boggling… there’s like 16,000 plans or something like that for tons of different projects. Definitely enough to keep me busy with projects for many more years to come haha
www. WoodworkPlans.info
????????
What size of picture u use?