Oh hey guys! Happy hump day!
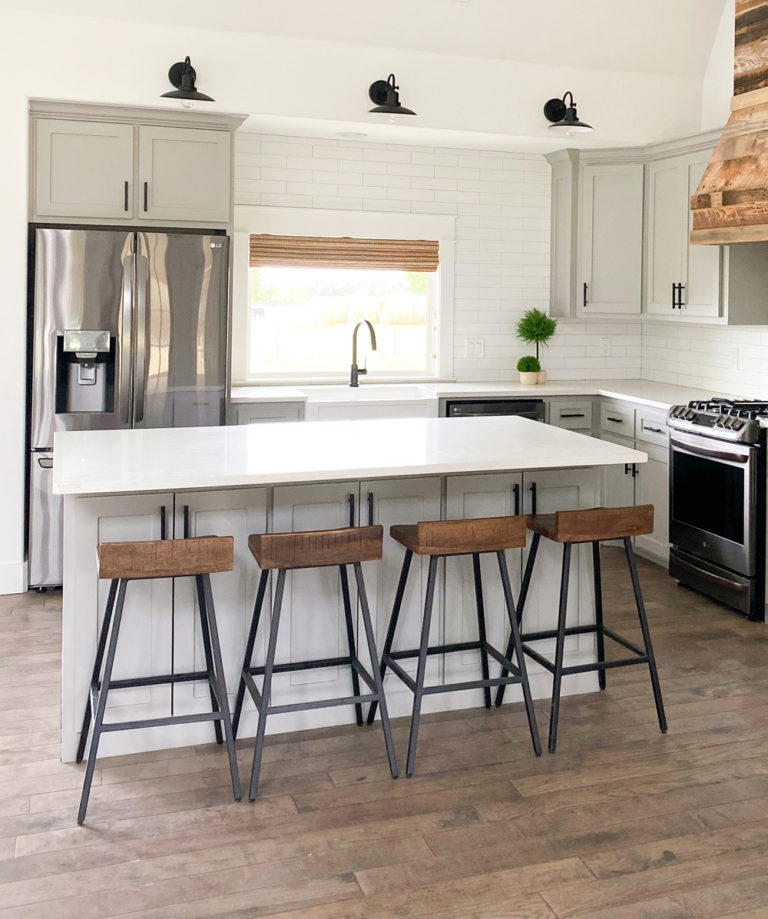
I’m really excited to show you how this last project turned out. I have been in need of a larger, more functional kitchen island, so I designed one that fit the bill! Check out my new DIY Kitchen Island!
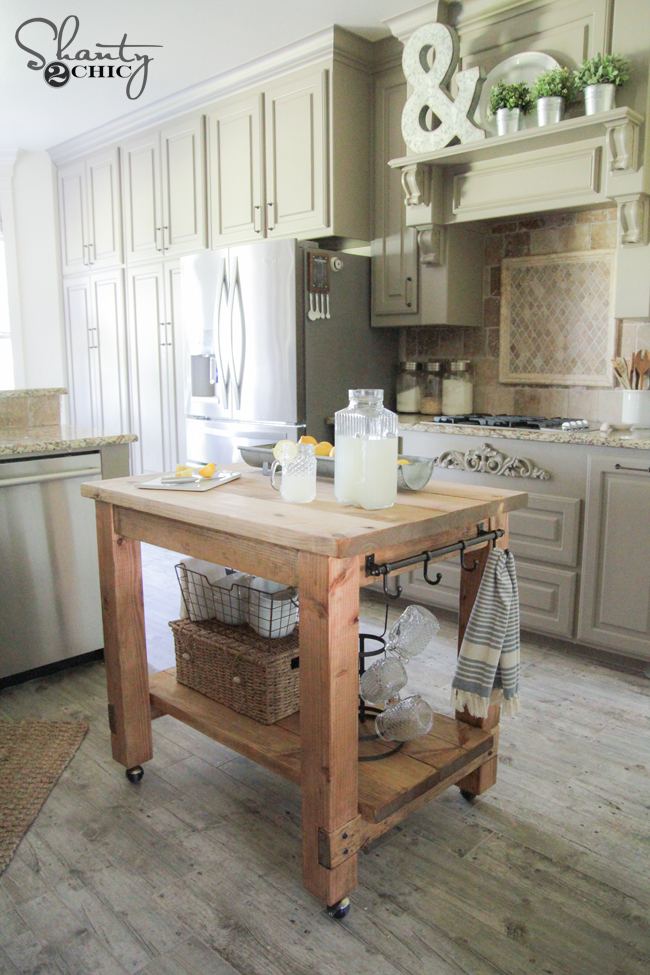
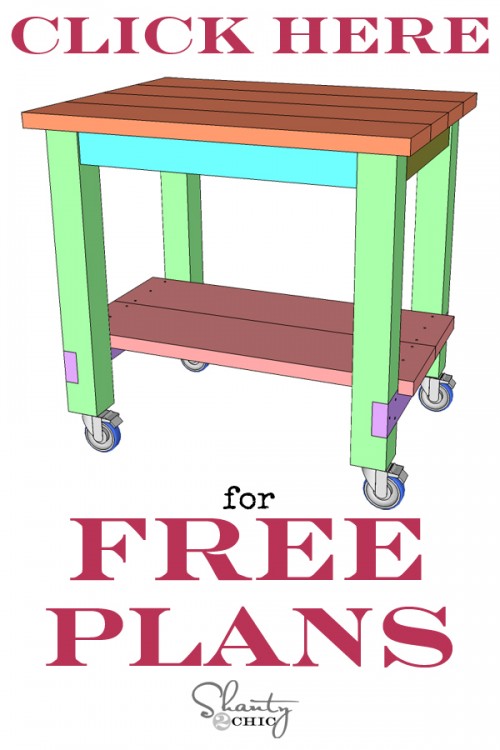
What do you think? I would consider this an easy build… very few cuts and all are straight, but you will need to have certain tools to keep it easy. As always, I will walk you through the entire build here and you can also download and print the FREE plans for this baby by clicking HERE or the button below.
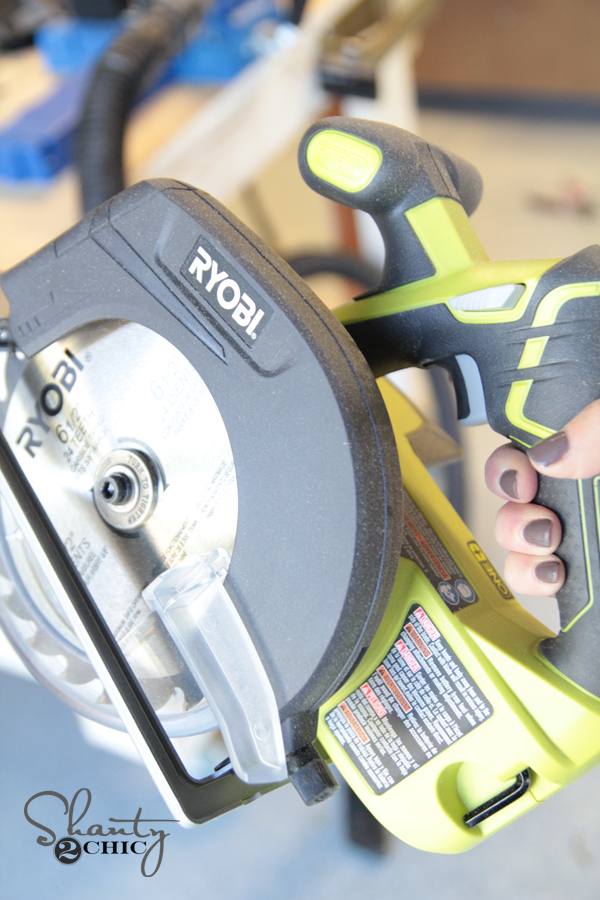
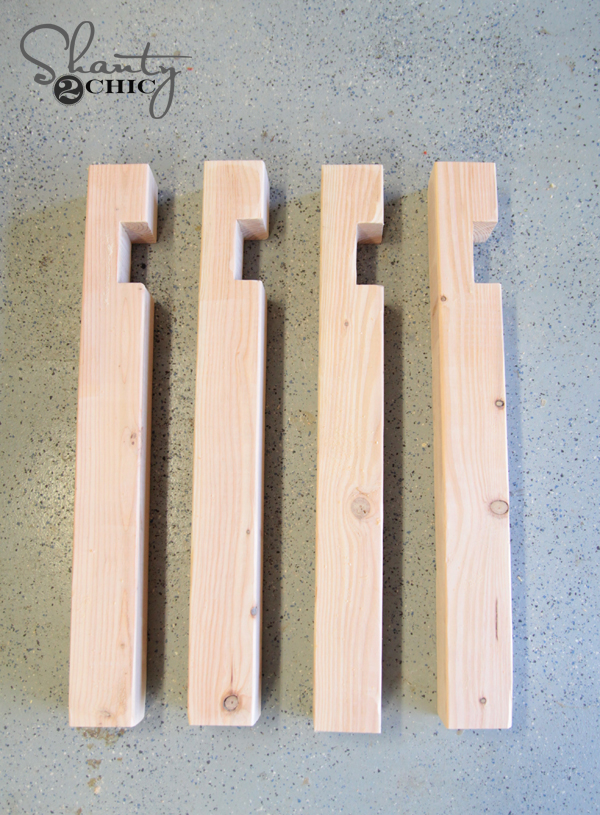
The first step is cutting the legs for the island which use 4×4 lumber. You want to be sure your saw cuts 4×4 if tackling it. Some 10″ saws are not big enough to fit the 4×4 under the blade. Another option is using a manual hand saw with a bit of elbow grease or having someone at the hardware store cut it for you. Ryobi just came out with a new 12″ sliding miter saw that we LOVE. Cuts through 4×4 like butta… Check it out HERE.
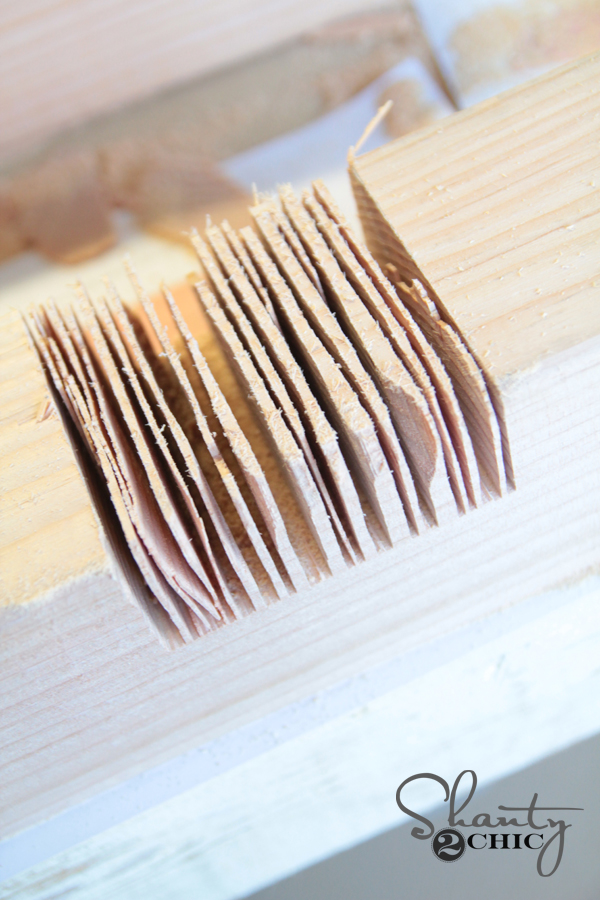
The next step is cutting the notches on the sides of the legs. I really love how much character these give the island. This is a simple (and messy) part. I’m pretty sure I had sawdust on every inch of me after finishing 🙂 Start by marking where the notches will be according to the plan. I used my circular saw to make these cuts.
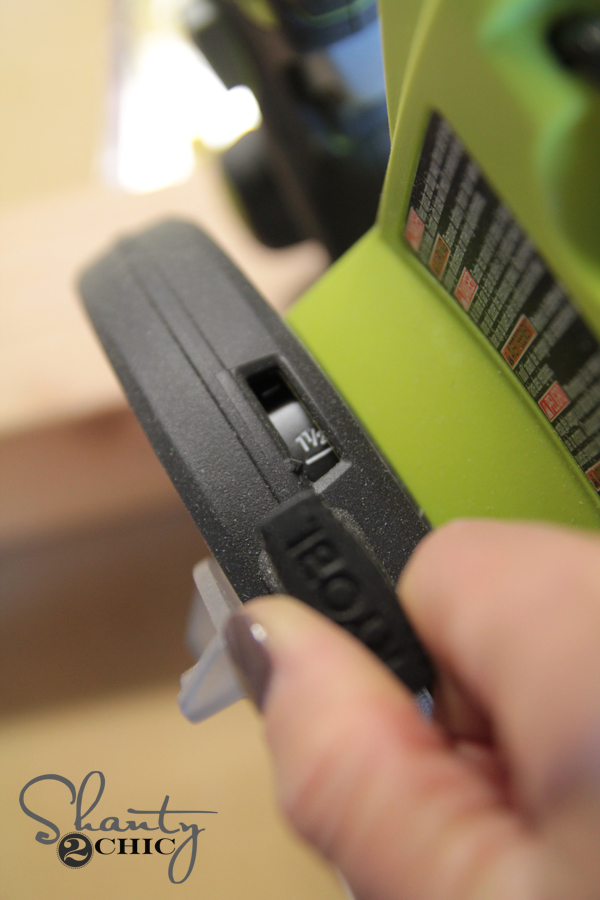
First, I adjusted the blade to 1.5″ which is the thickness of the side boards.
Next, I made several different passes between the lines I had marked. Make sure to clamp your board down on this part. When I was finished it looked like this…
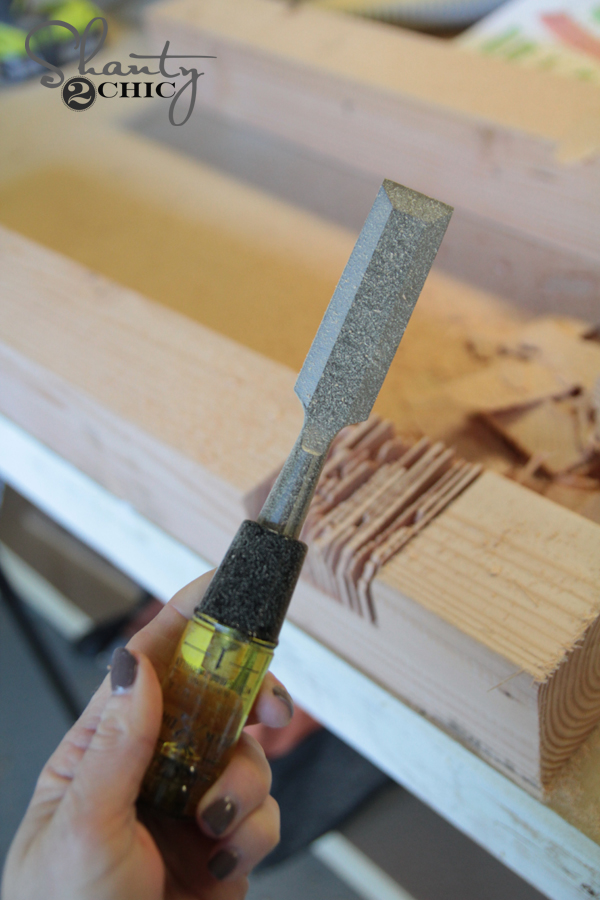
Then, I used a chisel to quickly take out those extra pieces left behind. I found this one at Home Depot. This is my first time using a chisel (I loved it) and I felt like a real woodworker ;-)!
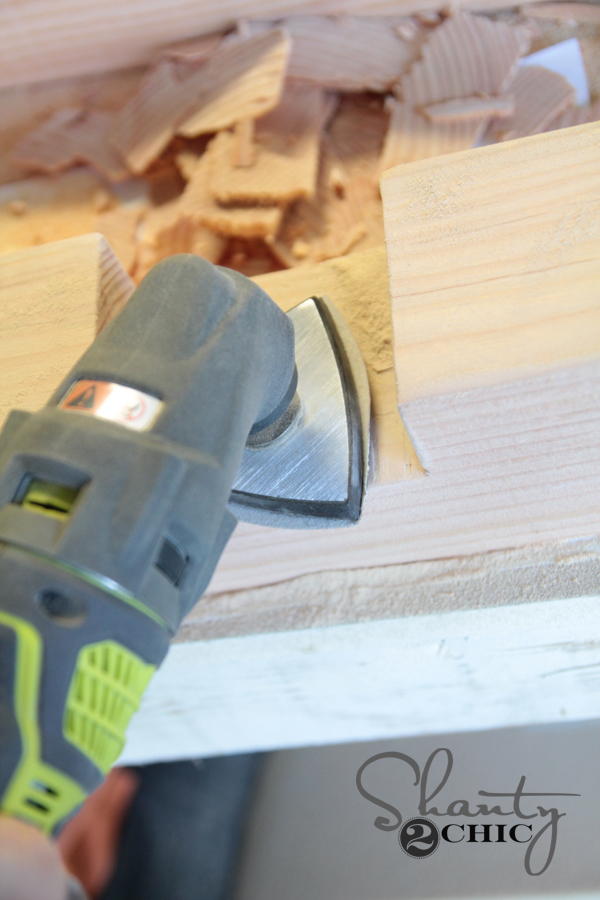
Once I had it chiseled out, I used my JobPlus tool with the sanding attachment to smooth the inside of the notch.
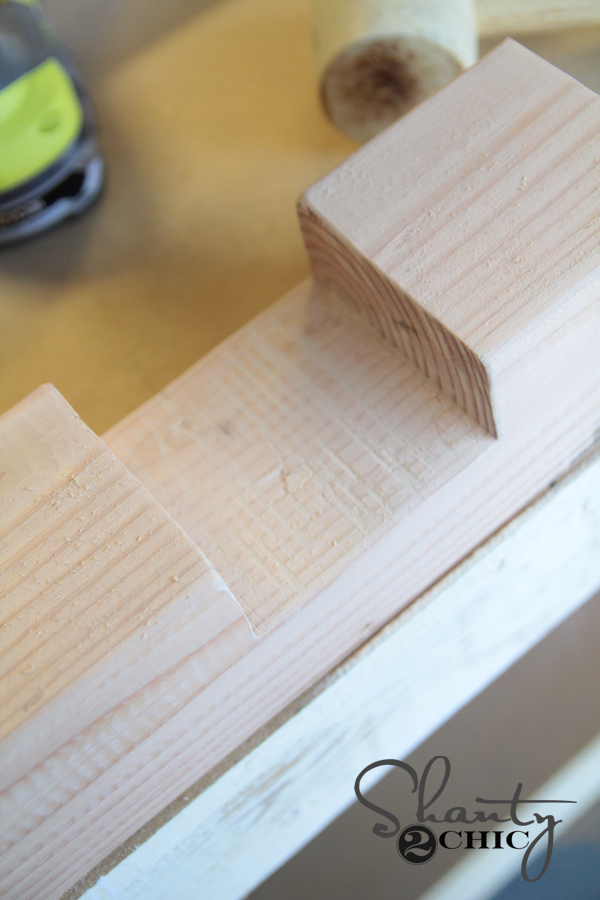
That left my notch looking like this.
And 4 legs later…
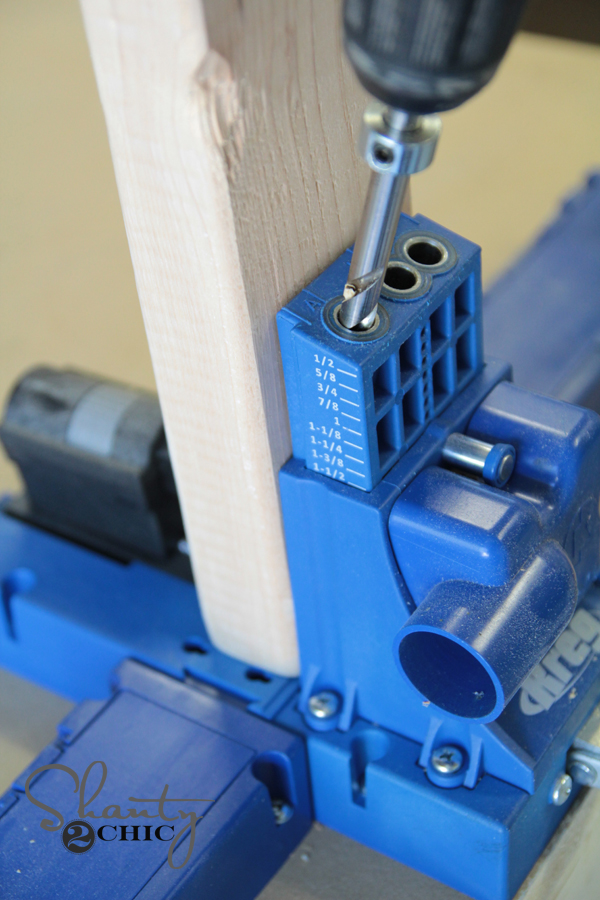
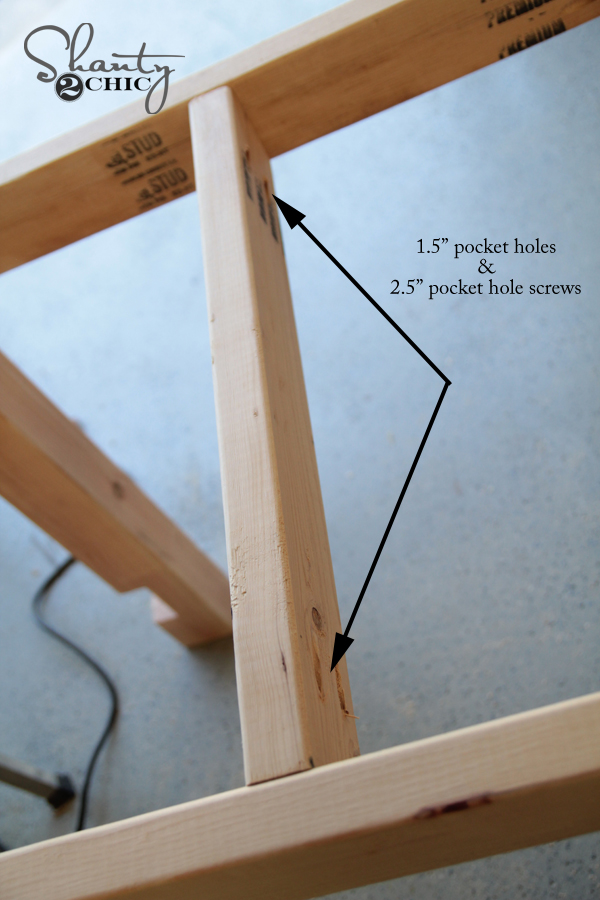
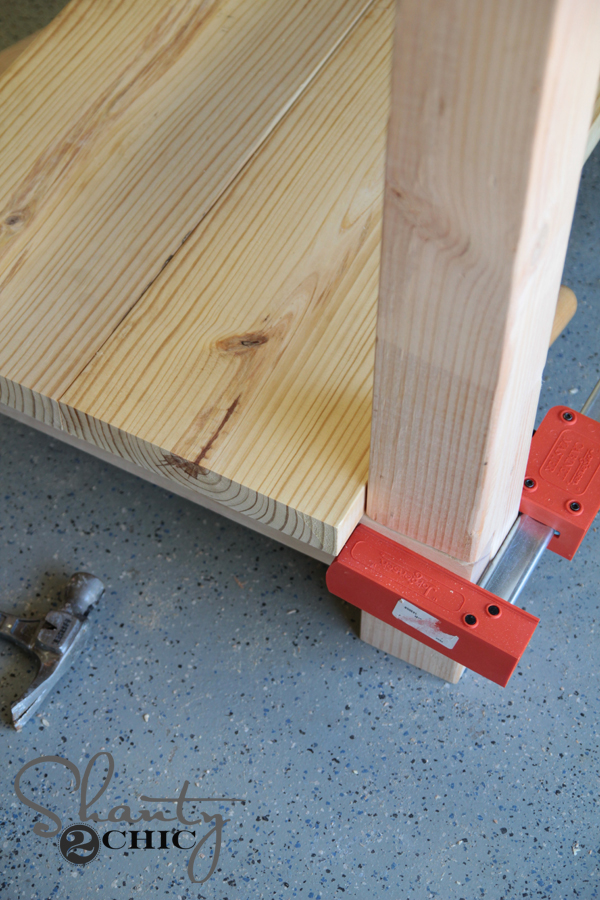
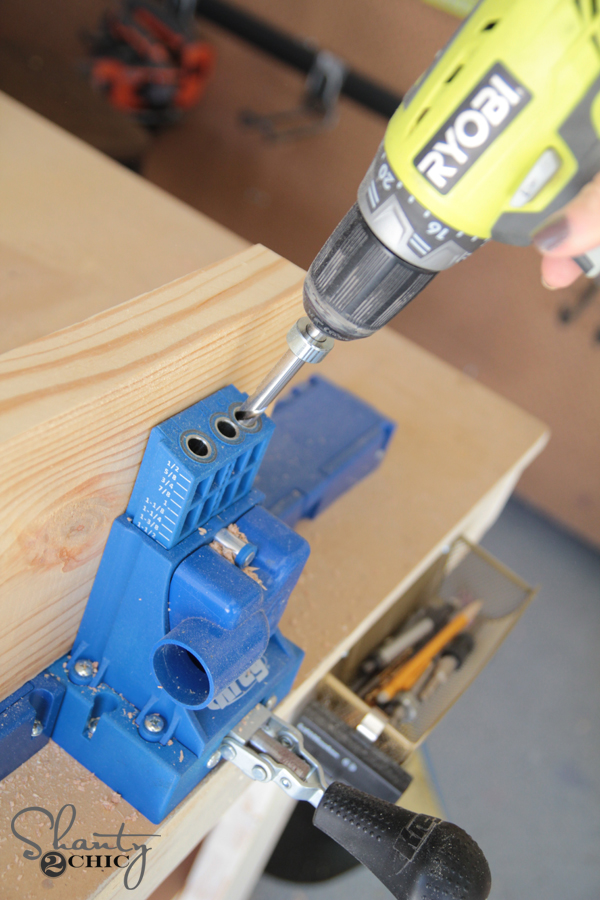
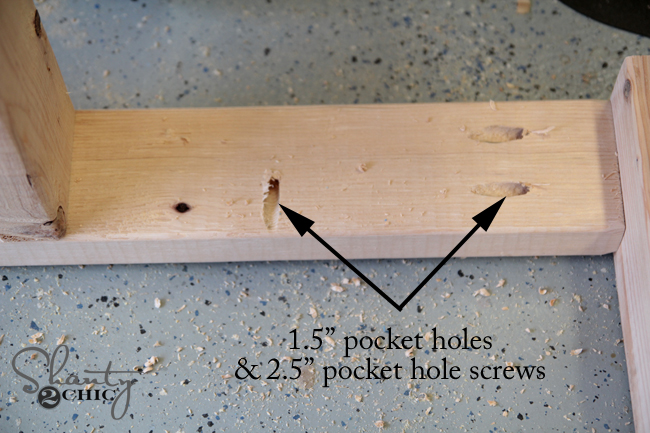
Next, I cut the pieces for the apron of the island according to the measurements in the plans. These are all constructed from 2×4. Once I cut them, I used my Kreg Jig to make 1.5″ pocket holes on each end.
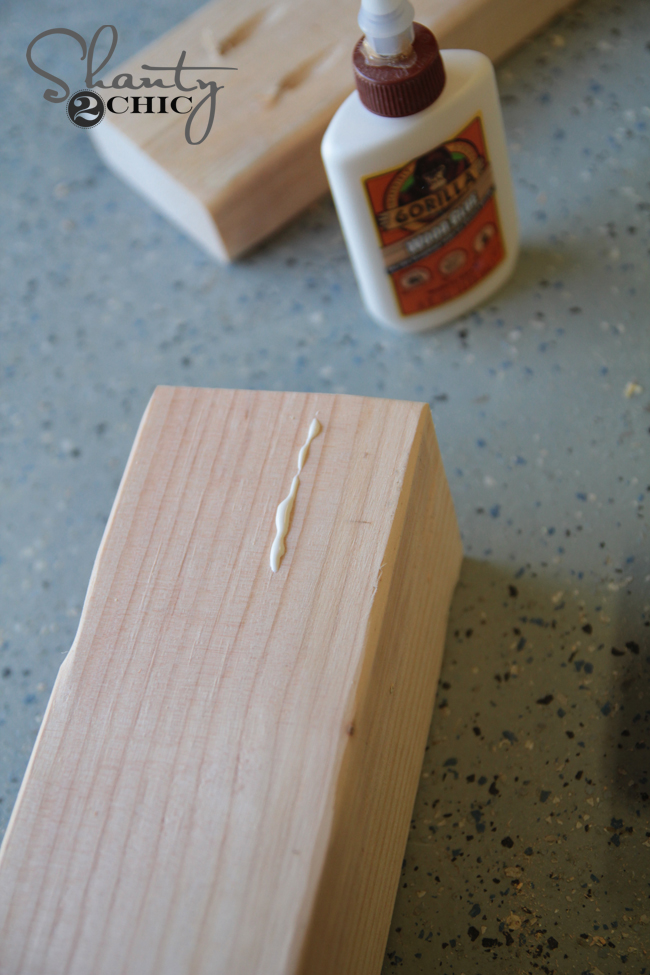
I attached each piece to the legs using Gorilla Wood Glue and 2.5″ pocket hole screws.

I attached all sides of the aprons the same way lining each on up 1/4″ from the outside edge of the 4×4 leg.
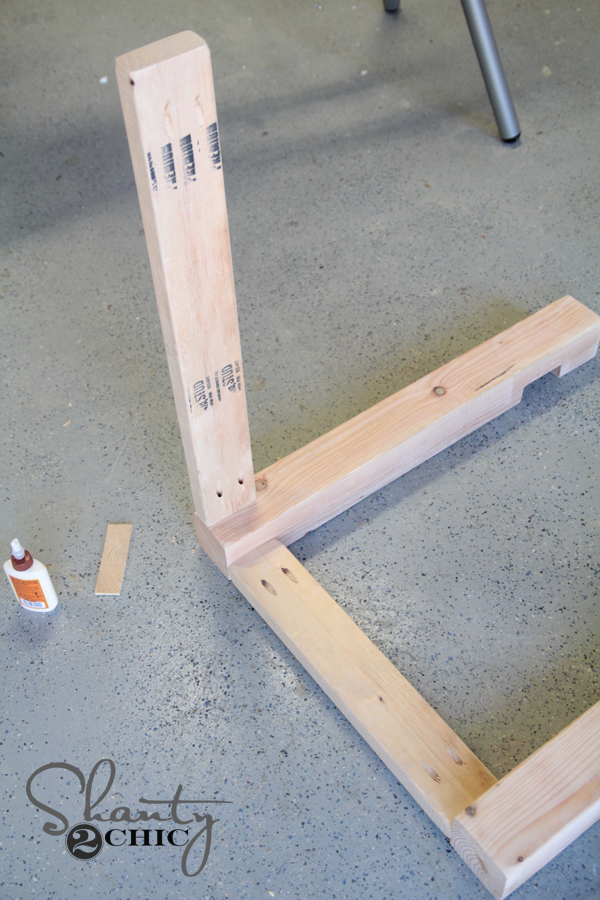
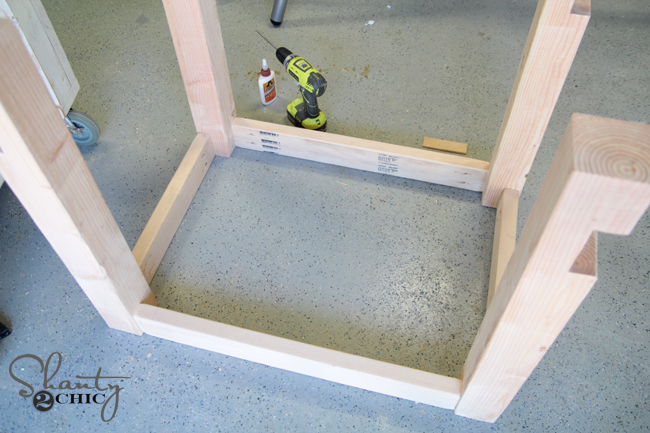
Next, I attached the middle support piece also using 2.5″ pocket hole screws.
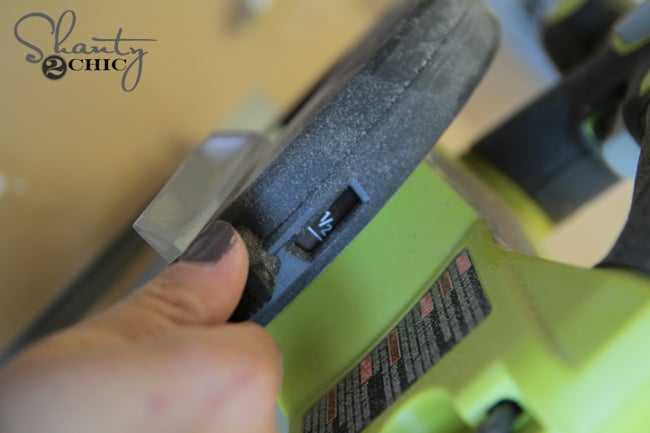
Before constructing the island top, I added the two bottom shelves. You will also notch out the bottom of these the same way you do your legs, but set the circular saw at 1/2″.
The bottom of the shelf boards looked like this.
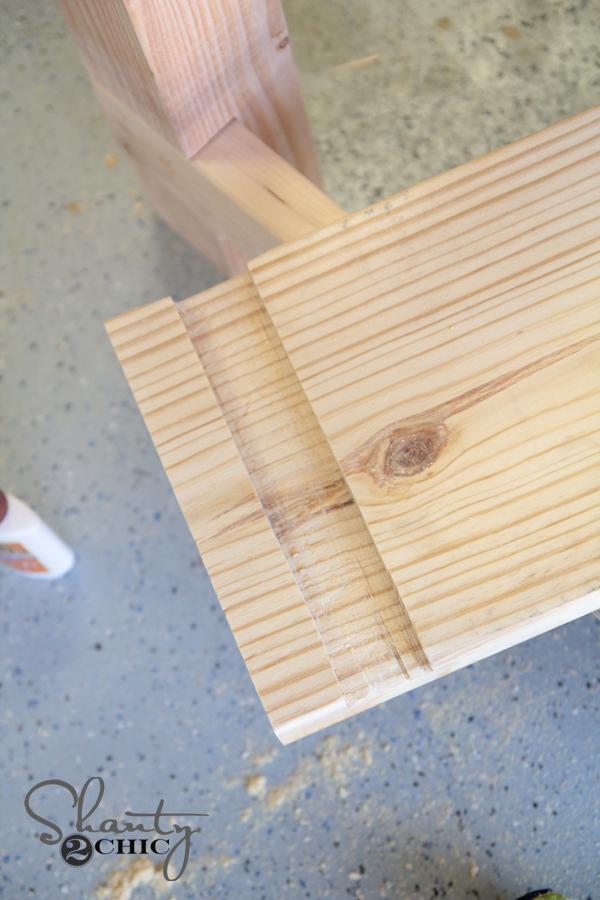
I attached the small side pieces into the notches before attaching these. I used my nailer and wood glue to hold them in place, and also used a clamp. I did go back and add big black decorative screws over the nails because I like the way they look. Here it is all attached.
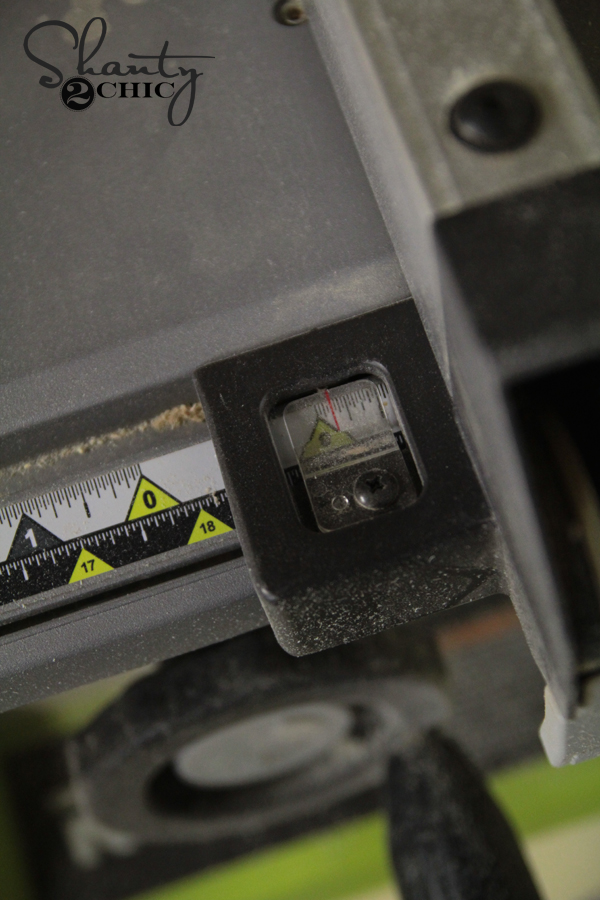
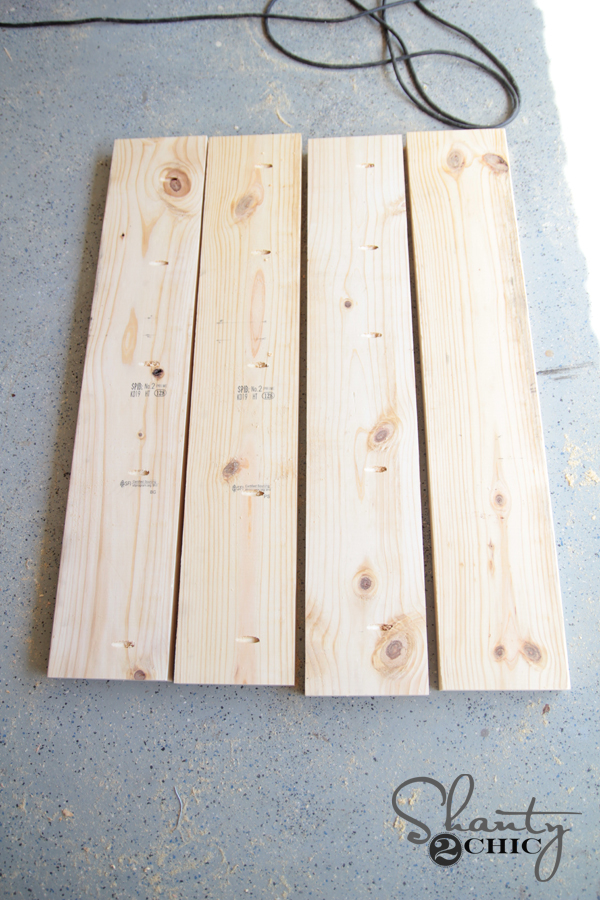
Time for the top! I decided to cut the edges of our 2x boards straight using a table saw. It gives the tabletop a really smooth finish and I LOVE the outcome. First, I just set my table saw fence to 1/8″.
Then, I just ran both sides of each piece through the table saw to cut off the rounded edge.
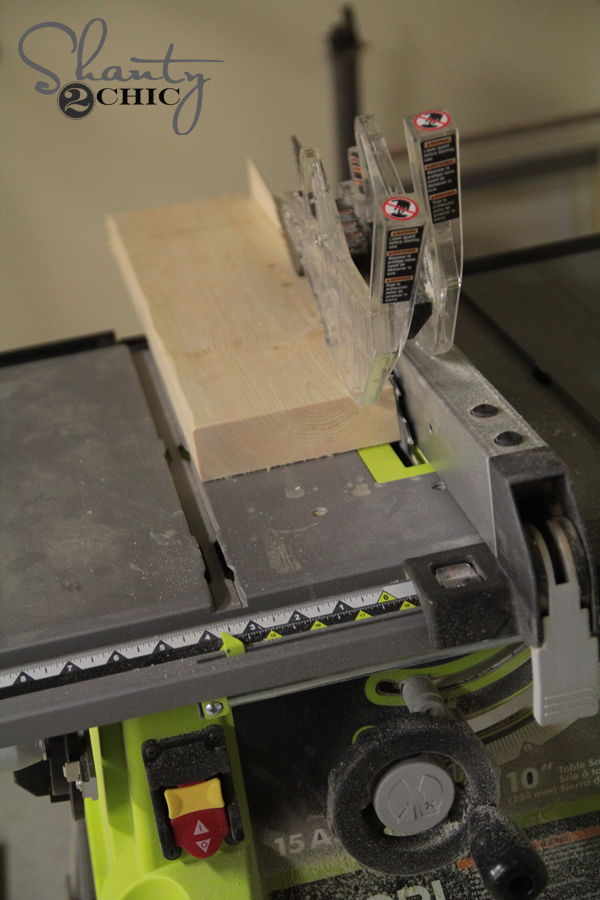
The outcome is a straight edged board which I love. This does cut a small length off of each board, so make sure to keep that in mind when building your pieces. It didn’t make too much difference on this project.
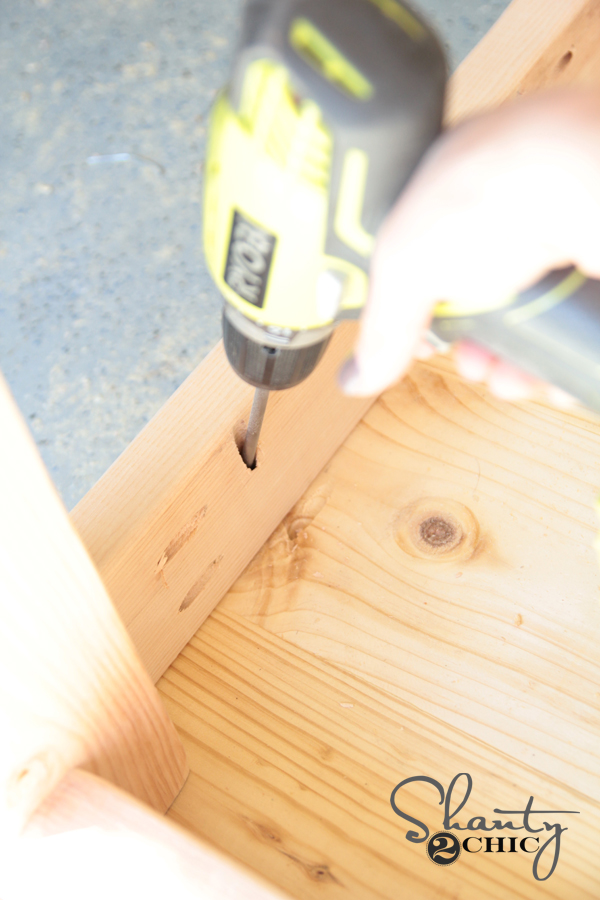
I added all of the pocket holes to the table top pieces after that.
I chose to attach my island top to the island using pocket holes and screws. Some people in certain climates have trouble with wood expanding and warping over time. I don’t have this issue, but if you do, we have noted another way to attach the table top in the plans to help prevent this.
You can see here the pocket holes I have added to the apron.
Then, I just used my drill to attach through the apron and into the tabletop using 2.5″ pocket hole screws.
Finished! My final step was staining it. I used a new color I love called Varathane Summer Oak. I found it at Home Depot.
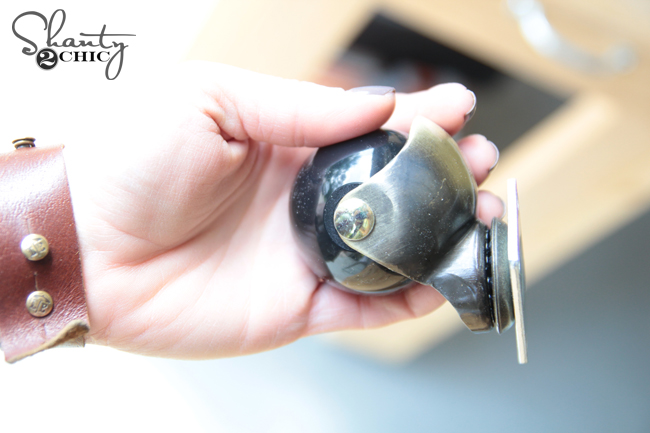
Next was hardware! I used these Liberty casters, but any caster will work.
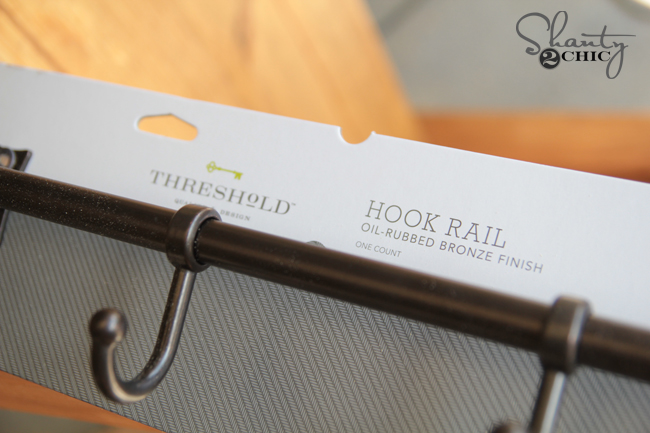
For the side I found this great hook rail at Target.

All finished! What do you think??

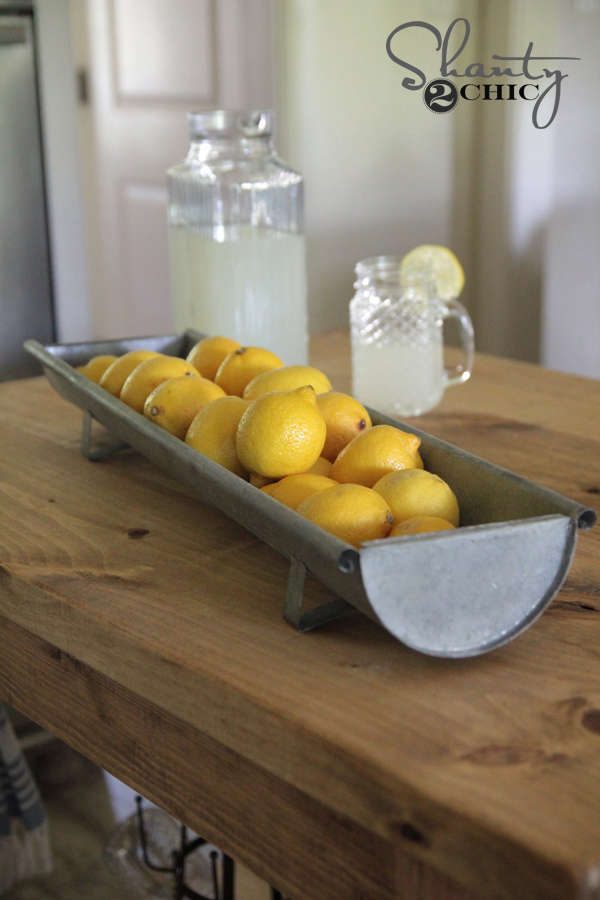
How cute is this metal tray from Save on Crafts?? Makes a perfect lemon holder 😉
Thanks so much for stopping by! For those of you wanting to know…
My flooring is Cottage Grey Faux Wood tile by The Tile Shop. You can see it HERE!


Im sure you wont answer as this project is several years old now, but i am curious why you didnt use the 2×10’s on the bottom shelf like your plan shows. Also, you dont have any close up shots of the bottom shelf like you do of the lemons on the top shelf. I assume because most 2×10’s are cupped to hell and back and that doesnt look good for staged, final photos? But why dont you just say in your instructions to use a mixture of 2×4 and 2×6’s? I would assume most people wont do glue ups with full on clamps which would make this project more of an intermediate thing? Im really not trying to sound like the asshole Im probably making myself out to be. I just wish there were more honesty in woodworking photos and not all just sponsorship promos.
Hi! I am Having trouble finding those casters! Or 4 inch ball casters in general. Can you please link me?!
Thought I’d tackle this project, but pine isn’t available to me locally. The big box stores only have “green Douglas Fir” or Redwood in these board dimaensions.
Which of those that would stain nicely would you recommend?
We used this tutorial to make a kitchen island for my daughters dorm room. The instructions were easy to follow and my daughter and her roommates loved how it turned out!! I was even able to find the side hook rack at Target. This was the first time we ever built a piece of furniture, but now we have to confidence to try another project. Thank you!!
Hey! Great bones for a DIY tutorial! The main issues I’ve seen with it (adapting it for my own measurements) is that there’s not a lot of information going into *why* certain cuts (such as the middle support beam) are cut to that length, and diagrams don’t have the pieces labelled, making it difficult (and at that, frustrating) to figure out what piece is exactly what and going where and why. It’s definitely brought me back to my high school days of finding X where Y (in a good way)! If you have the time, please go back through this and add details that were otherwise looked over.
Just made this with 6 different hardwoods. It come out great! Thanks for the idea.