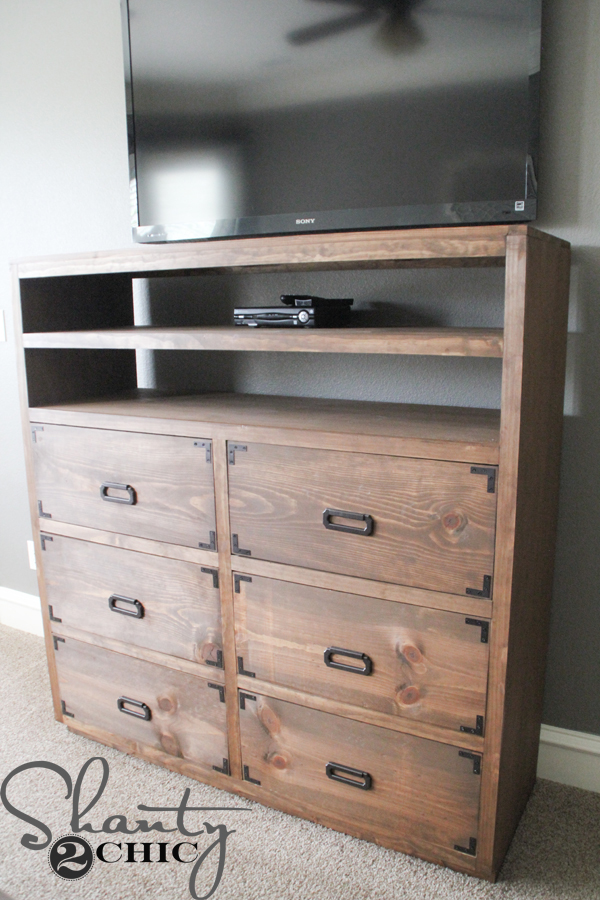
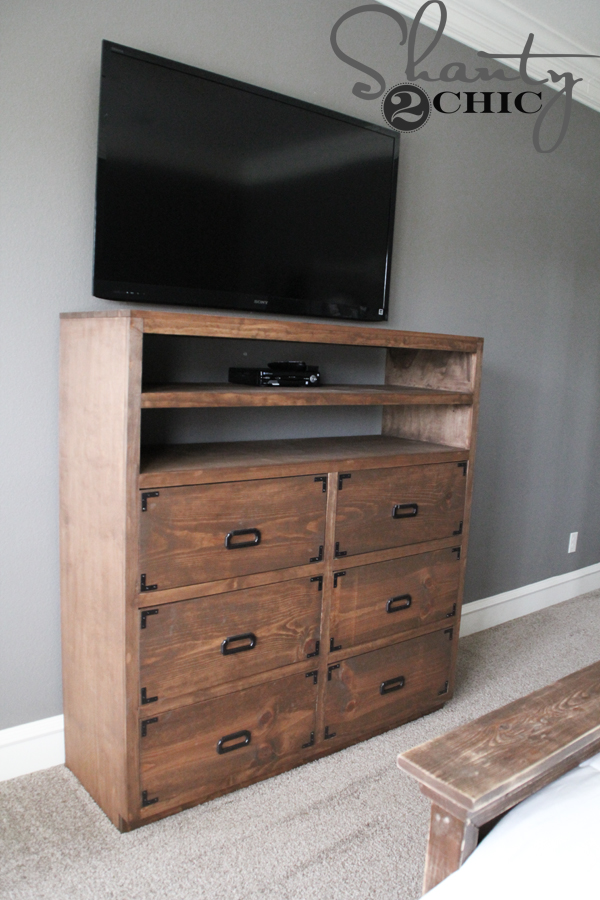
This is a giant piece with 6 glorious giant drawers! And, it is part of a 6-piece unit that I am so excited about building for my master bedroom!
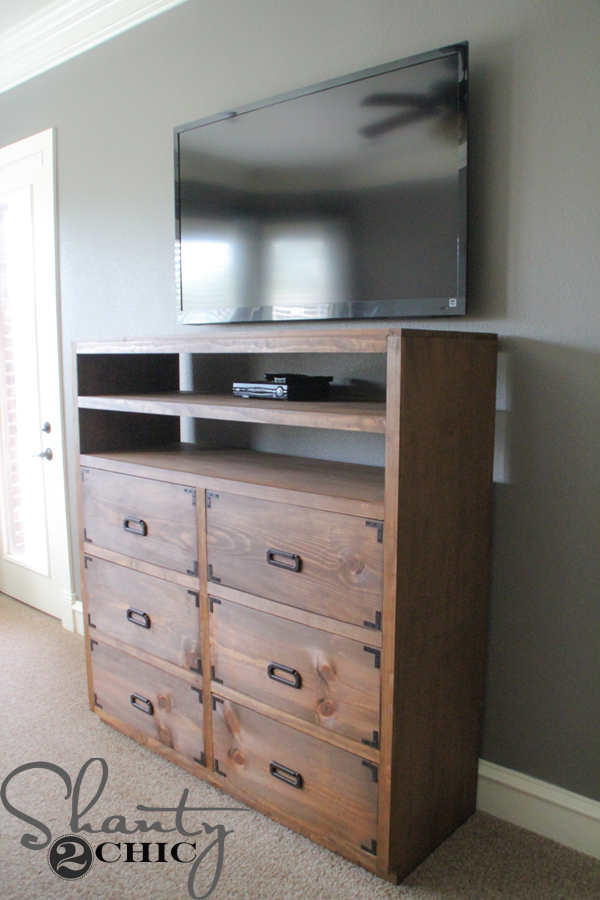
It’s one of the largest single pieces of furniture that I have built but that does NOT mean it is difficult. It’s still easy to build it’s just really…BIG 😉

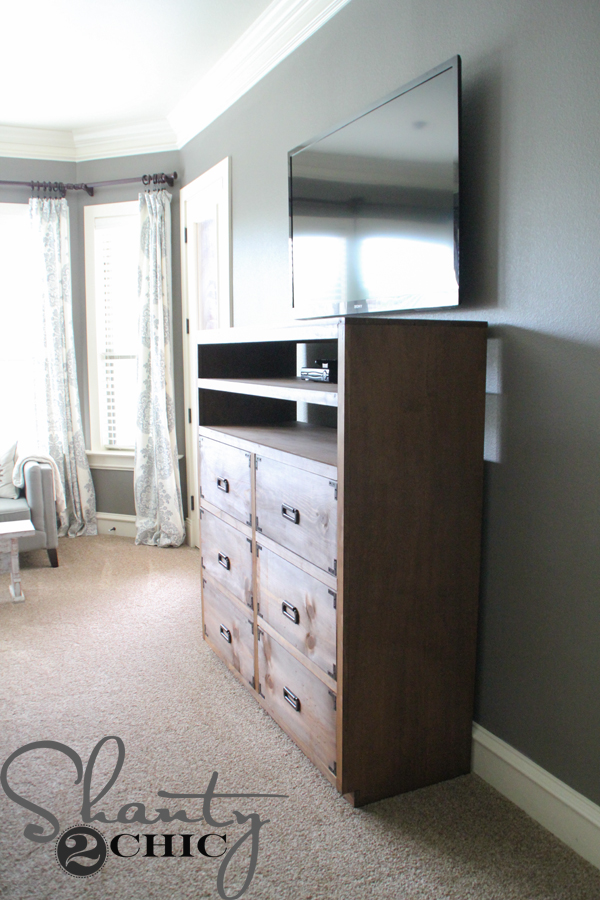
I had my son take a pic of me with it, before I installed the drawers, to share on our Instagram!
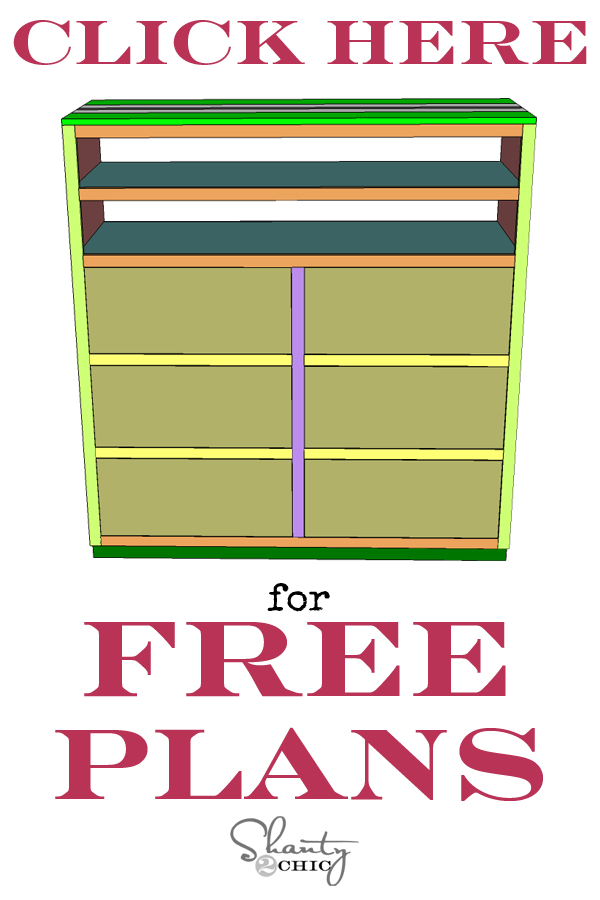
As always, we have the FREE plans for you! You can click HERE or the image below to print.
And, you can follow along with my build below!

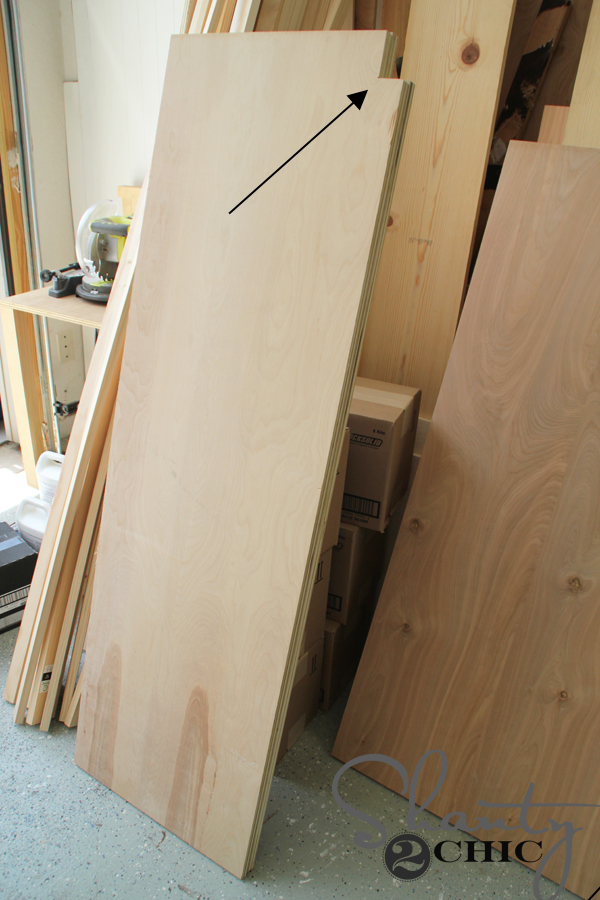
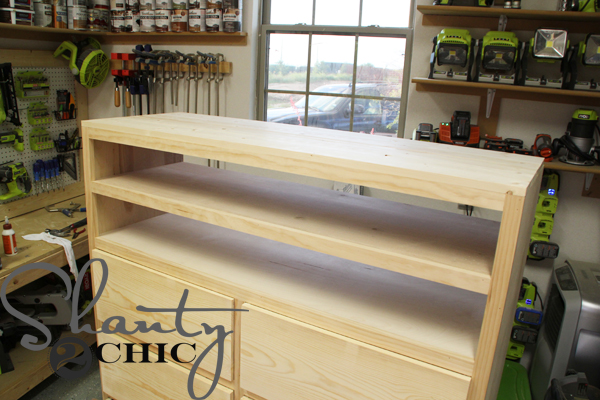
Here is the before 😉 I think the worst party of a build is unloading the lumber! I used our favorite Purebond plywood for all of the plywood in this piece. Purebond is our go-to plywood because it is a formaldehyde-free product. This means Whitney and I aren’t breathing in harmful chemicals while we build and when we bring the pieces in the house they won’t be harmful to the air our family is breathing. AND, it looks AMAZING when it is stained! You can learn more about the Purebond pledge we took HERE.
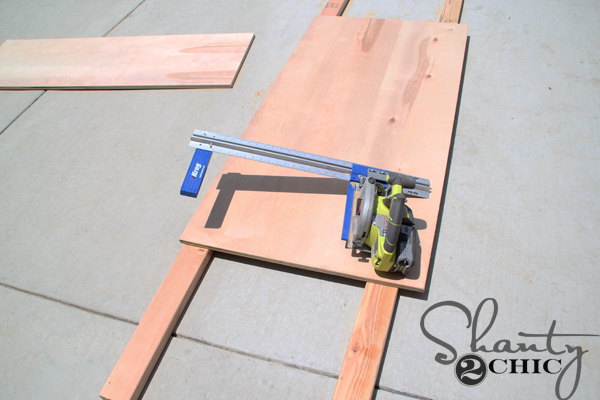
I had the nice guys at Home Depot rip my Purebond boards so that I could fit them in my car then, I brought them home and cut them down more with my Kreg Rip Cut. This is a great tool to have in your shop. It is inexpensive and it doesn’t take up very much space. It just attaches to your circular saw and allows you to rip a straight cut with the guide! You can check it out in the Amazon box below.
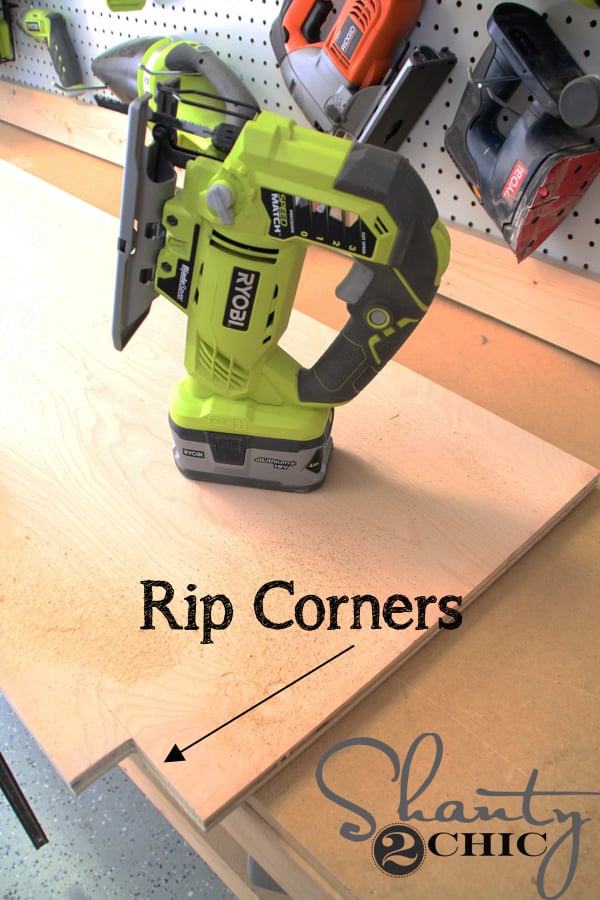
I cut my side pieces first the, I used my jigsaw to cut out notches in the front corner of each piece.
So, each side piece will look like this.
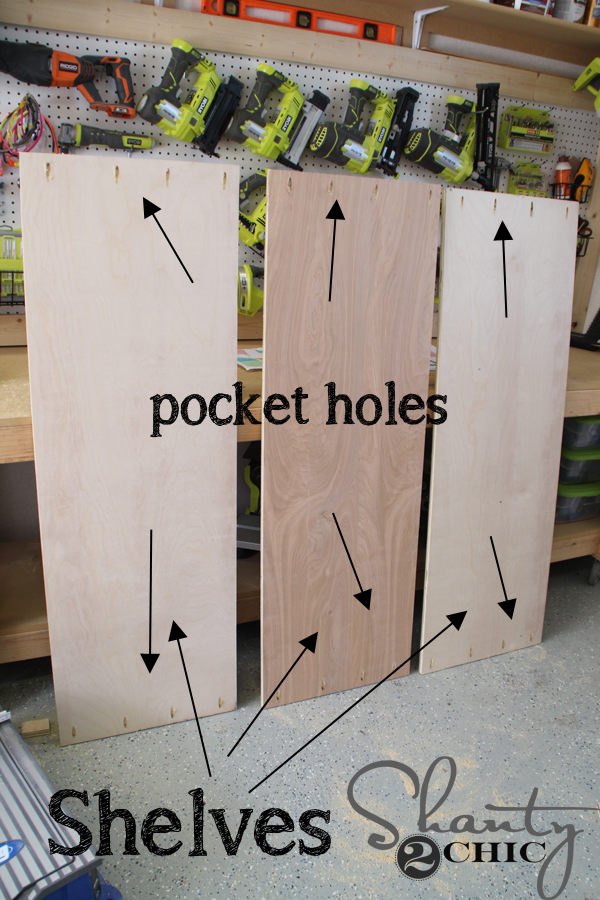
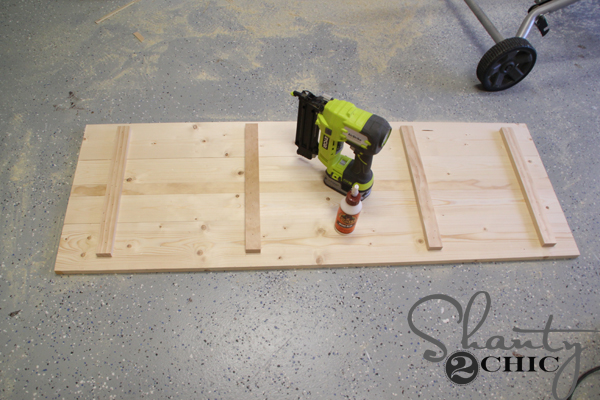
Then, I cut the shelf pieces and drilled 3/4″ pocket holes at each end of the boards.
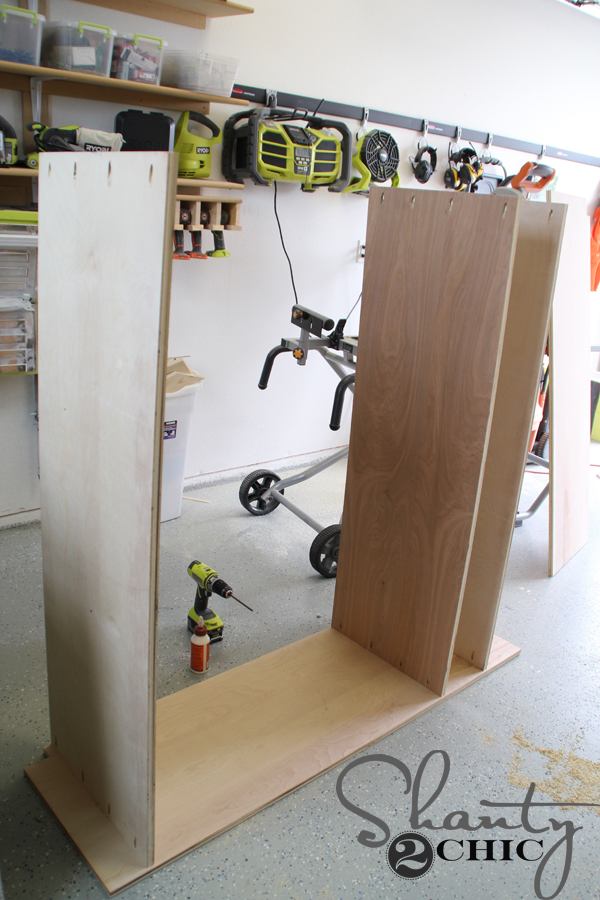
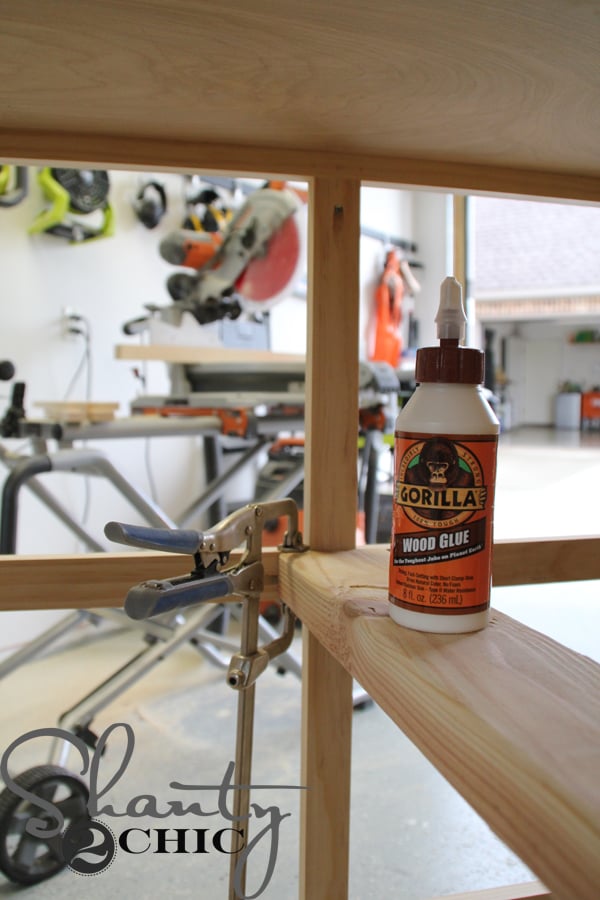
Next, I attached each shelf piece to one side piece with 1 1/4″ pocket screws and wood glue. *Make sure to keep the notch on the side piece in the correct place when attaching the shelves.*
Then, I attached the second side piece the same way. *Again, make sure the notch in the side piece is in the right location when you attach the shelves.
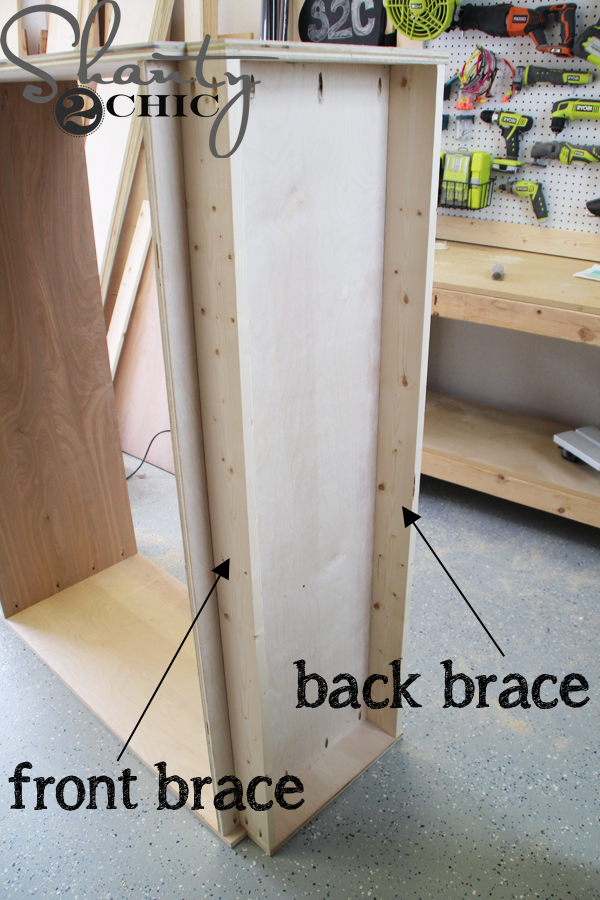
Now, add the front and back braces to the bottom of the piece.
The back brace will be flush with the back of the bottom shelf.

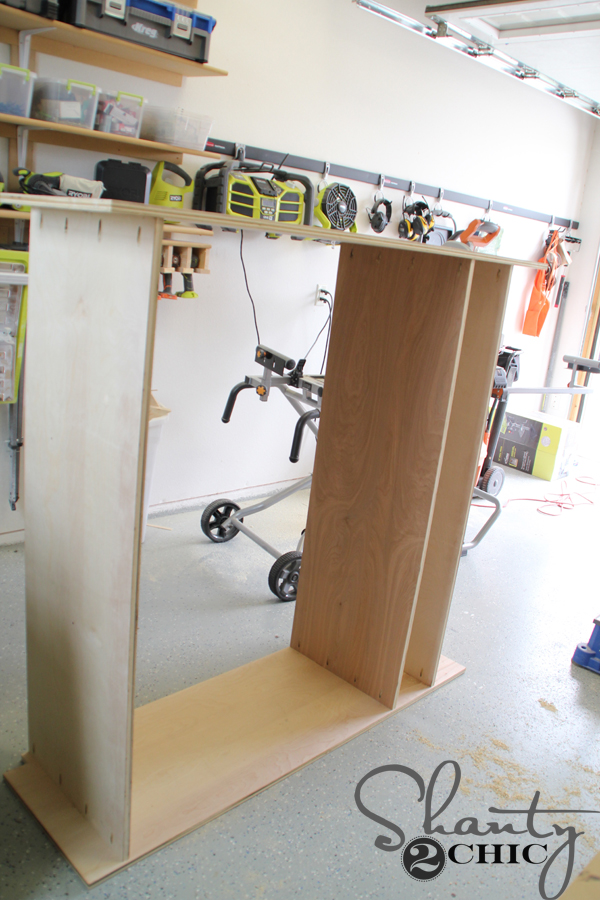
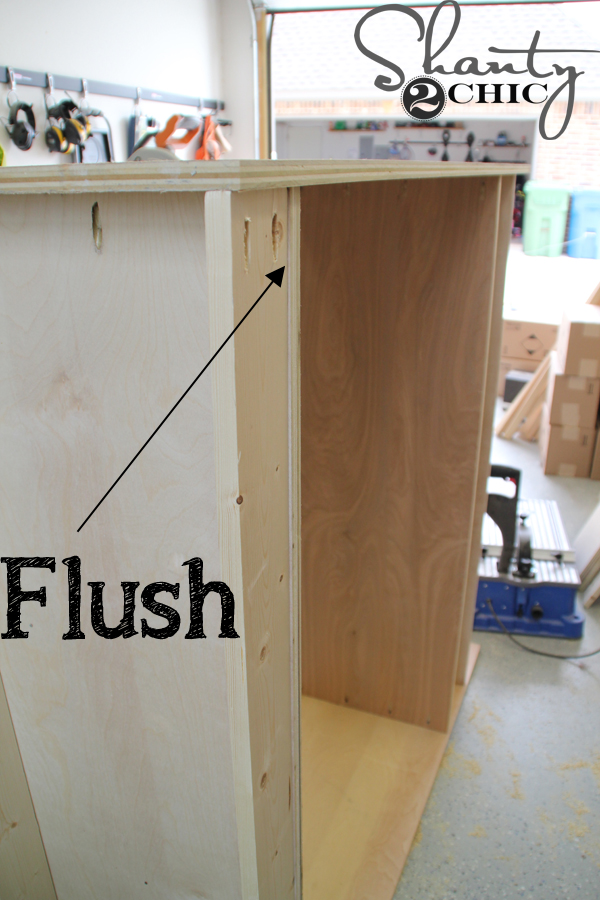
Attach the front trim piece after you notch the top corners to fit the sides of the dresser. I didn’t get a picture of this part but I used my jigsaw and cut a 3/4″x3/4″ notch out of each of the top corners of the 1×4 trim piece. You can see it in this picture at the bottom of the dresser.
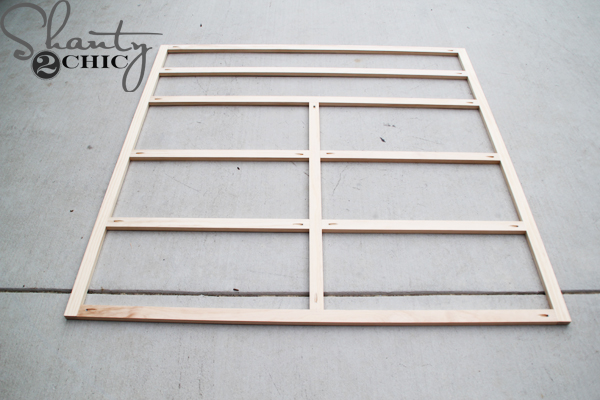
Build your face frame with 3/4″ pocket holes and 1 1/4″ pocket hole screws. Follow the diagram on the pdf plans for placement of the 1×2 pieces.
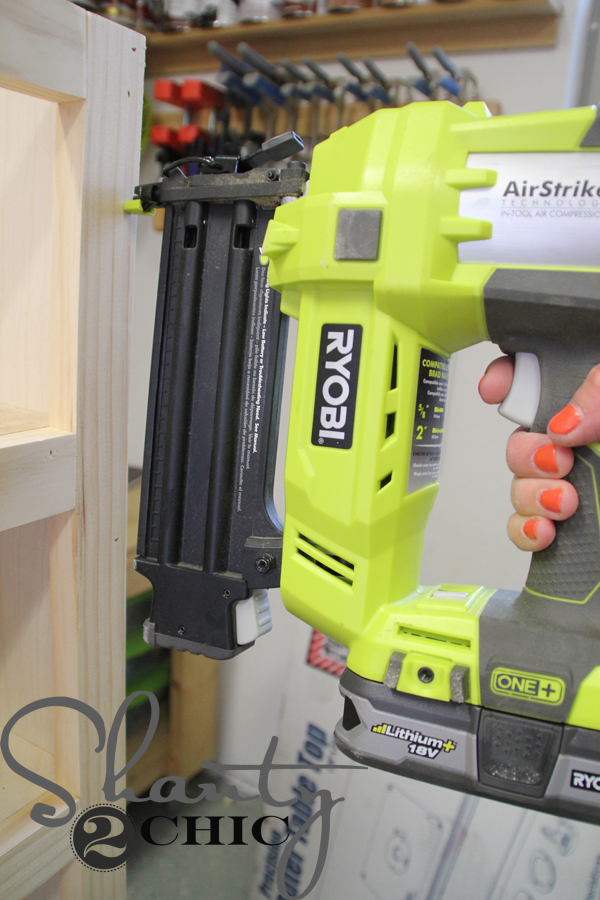
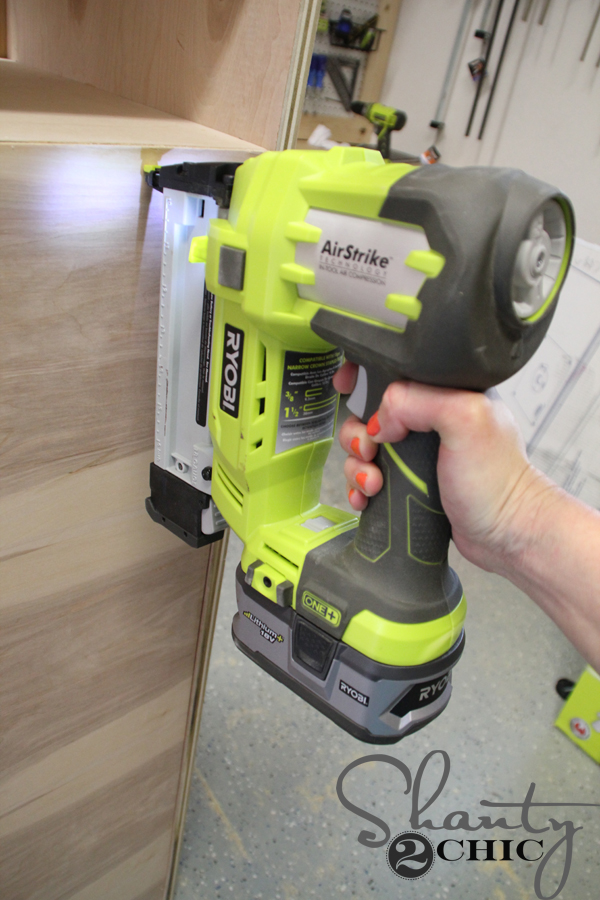
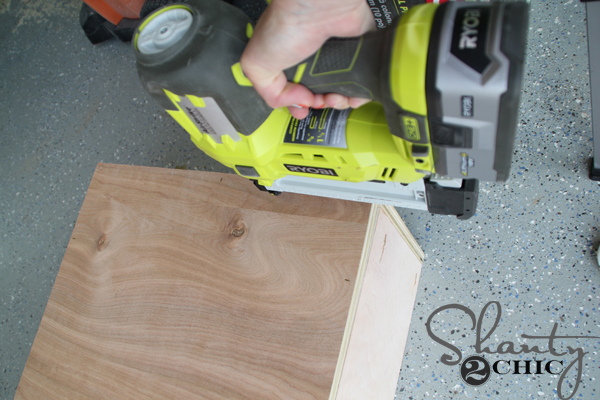
Then, attach the face frame to the dresser with 1 1/4″ brad nails a wood glue. I used my 18 gauge brad nailer. You can also use a hammer and finishing nails here.
Now, attach the top horizontal braces and the back vertical braces. I don’t have a picture of this either. Attach them with 1 1/4″ pocket screws and wood glue.
Next, attach the drawer runners according to the placement on the plans. A clamp will help hold the board in place while you attach it with 1 1/4″ pocket screws and wood glue.
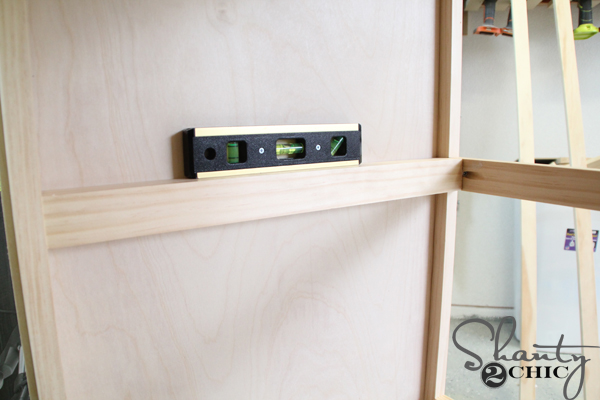
Use a level to make sure your drawers slide and fit easily.
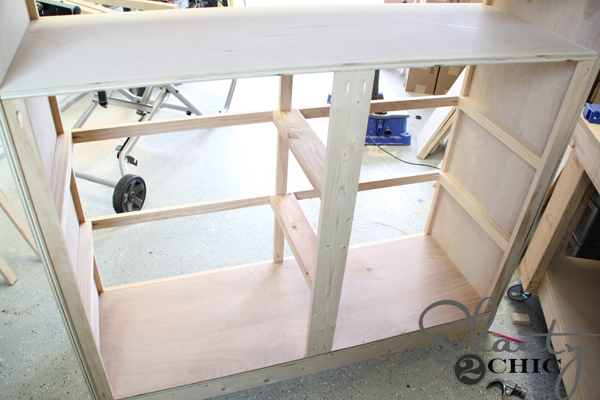
Here are the runners installed.
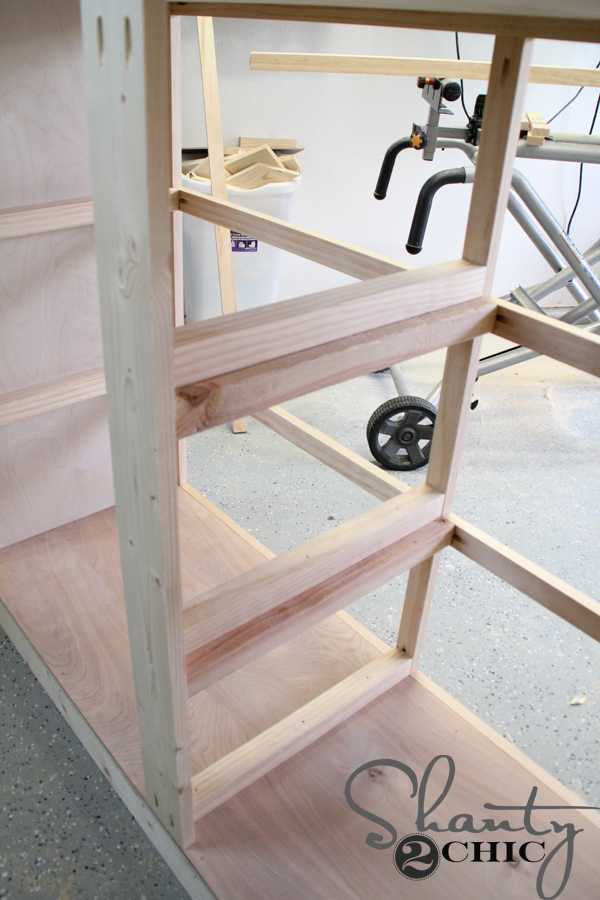
Now, add the drawer guides.
Now, attach the plywood to the back of the dresser. I used my 18-volt stapler. I like to use staples when I attach 1/4″ plywood because it grabs the board better but you can definitely use finish or brad nails for this too. Make sure to use wood glue here too.
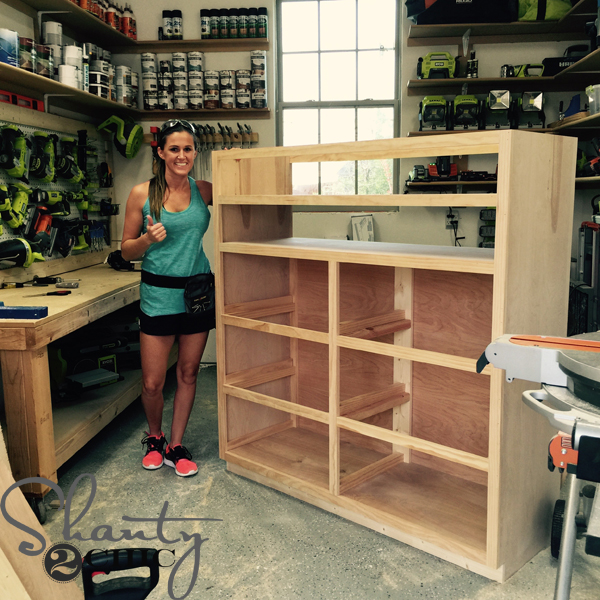
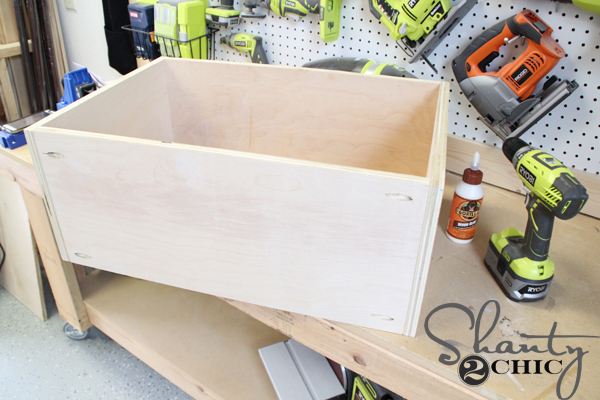
Now, we are at this point and ready for drawers!
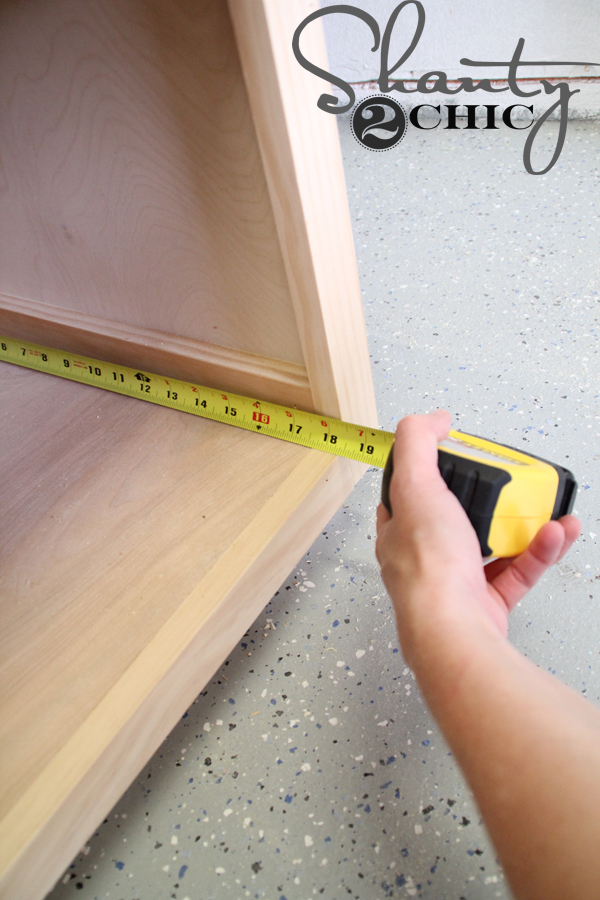
ALWAYS measure for the drawers before you cut them!!!! I can not stress this enough! Measure the length and the width then cut to fit. You will not be happy if you cut them all the same, build them and then try to slide them in – trust me…. I’ve learned the hard way many times!
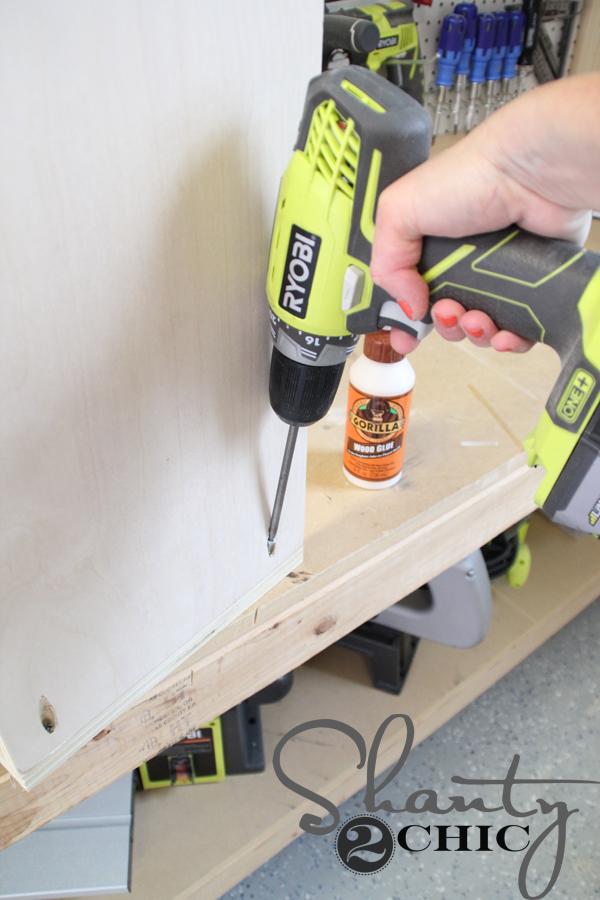
After you have measured and cut your drawers (and drilled the 3/4″ pocket holes) you can build them with 1/4″ pocket screws and wood glue.
You’ll have six that look like this 😉
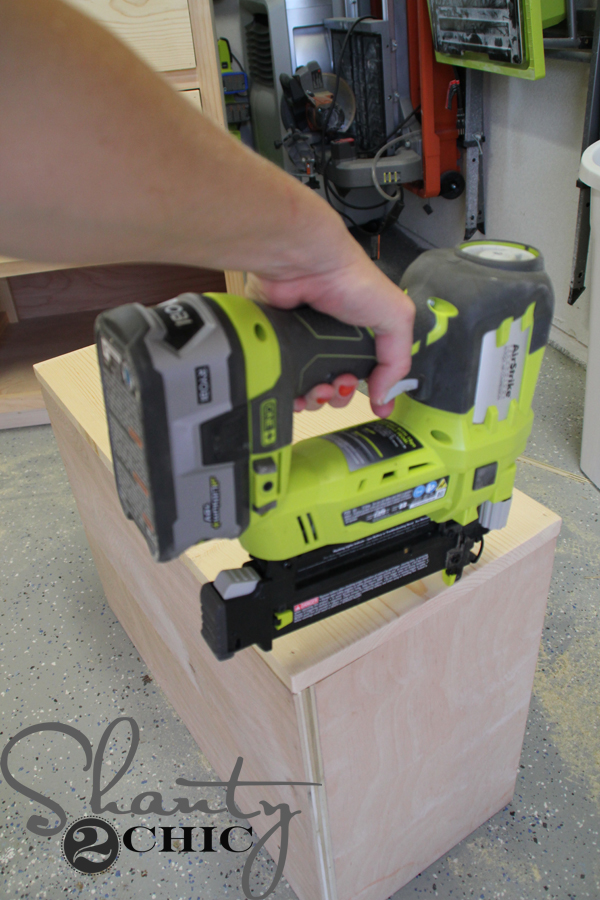
Then, attach the 1/4″ plywood to the bottoms. Just like the back of the dresser, I used my stapler but finish or brad nails will do here too – and wood glue 😉

Ahhhhh nothing like 6 drawers that fit nicely 🙂 Now for the faces!
Again, measure the drawer faces and cut to fit them! I attached them with wood glue and a few nails through the front of each drawer then I turned the drawer over and put lots of nails from the inside into the drawer face (less nail holes).

Tip here – number your drawers before you take them out to stain so you don’t have to play musical drawers when the stain is dry and they are ready to slide back in.
The final step is to build the top of the dresser. I used wood glue and my 18 gauge nailer.
Then just attach it!
Time for stain!

I used a favorite color, Early American by Varathane, to stain the entire piece.
If you watched our live Coffee Talk on Periscope, you probably saw that we love to stain with the lamb’s wool stain applicators (found at Home Depot). You can check that Periscope out on our Youtube channel now but make sure to follow us on Periscope so you can chat with us live! We are having so much fun with it! You can find us @shanty2chic. Click the box below to check out the lamb’s wool on Amazon.

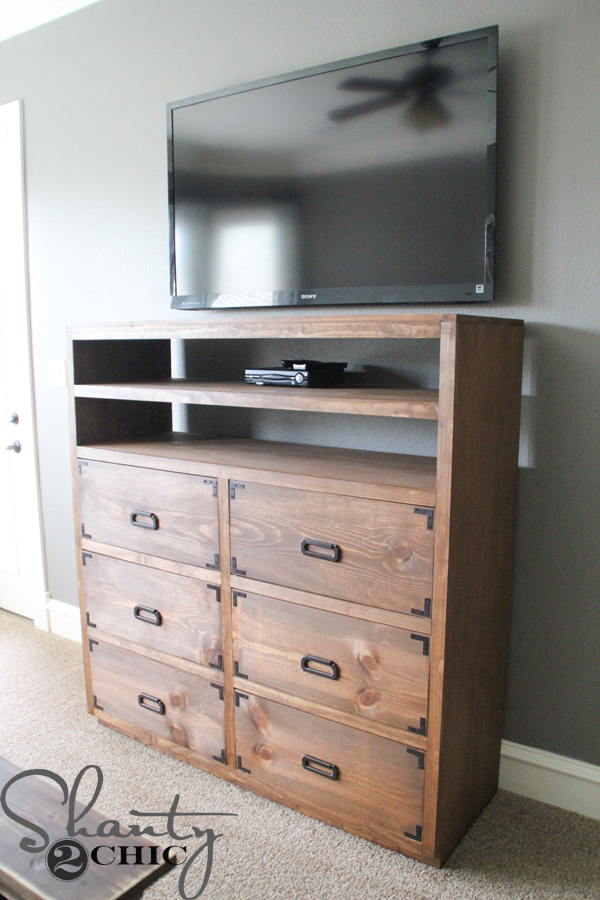
Once the stain dried, the hubs and I brought this sucker in the house! We believe that the hardware on a piece really makes the piece special and this is no exception! I added another favorite – the Campaign Hardware from Liberty Hardware. You can check it out HERE from Home Depot. I used the same hardware on the nightstands that I built for our bedroom too and I LOVE it so much 🙂
That was it!
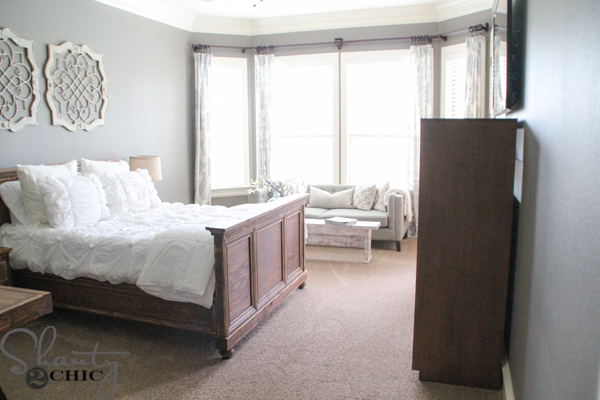
You can get the free plans to the bed in this picture HERE. And that bench/coffee table in front of the couch is also a DIY and only $20! You can get the plans HERE.
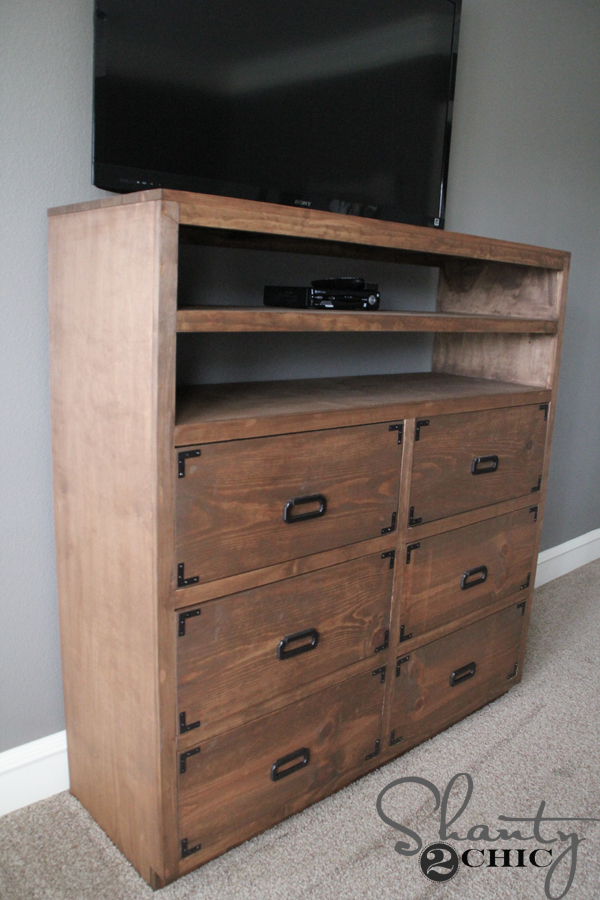
I can’t wait to build the rest of this set!
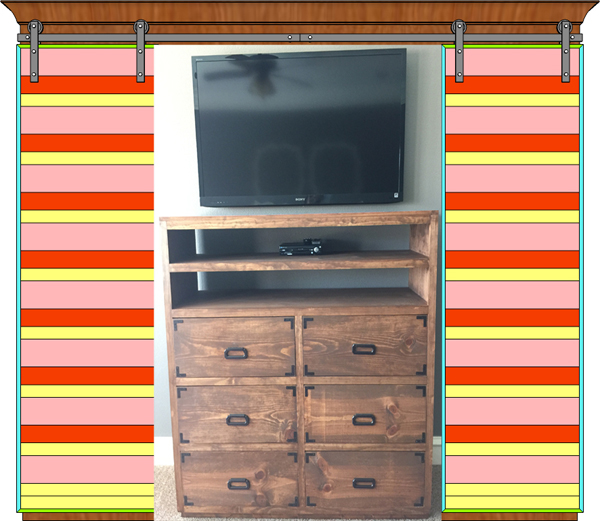
It should look something like this – and I can’t wait 🙂 There will be bookshelves on either side of the dresser and the entire piece will have sliding bard doors that either cover the dresser and TV or cover the bookshelves!!
Until then, I have this really pretty dresser with tons of storage 😉
Thanks so much for stopping by!
~Ashley


Hi, you usually state what the piece cost you. I don’t see a cost. I’m deciding whether to buy a chest or build a chest. Love all you work.
Any chance of the barn doors coming soon? ????
Hello, I just finished making you King Size bed and will be making this dresser for the master bedroom as well. I have a random question. My girlfriend loves the color of the walls in your pictures. Could you tell me what brand and color it is?
Just want to say your projects are fabulous and are doable even by me.
I’d like to use European drawer slides for the drawers, do you think the construction would change significantly? Other than the drawers being narrower to account for the needed gap?
about how much does this piece weigh?
Is the rest of the set tutorial up yet?
When do you think the plans for the bookshelves will be ready? I have plenty of projects to keep me busy in the mean time, but I have the perfect place for this system and I love it!
Hopefully within the next couple of weeks! I am done building them just have to stain 😉
Wheeeeeee! Great! Can’t wait to see them!
Any chance the remaining pieces are coming soon?
Bookshelves are coming this week!
Perfect – thanks so much!
I think there is an error in the plans, but I’m not sure: The total depth is 19 3/8 ” (which is the 18 5/8” side piece + the 3/4” front face frame). The depth of the shelf is 17 5/8”, and you add the 3/4” front panel, plus the 1/4 ” back. This adds up to 18 5/8”, which is a full 3/4 ” short. Am I missing something here? Ashley cautions to ALWAYS measure your drawer, so anyone who follows this advice should be okay. I’m just trying to work it out in my head.
I’m seeing the shelf is 18 3/8″ deep. Would this make the difference?
18 3/8″ would be right, but on the plans on the link it lists the depth as 17 5/8″.
How many DVDs do you think this will hold?
Lots 😉
Good job!
Thank you, Grant!
A lovely woman, power tools, a DIY project. What’s not to love? 🙂
Thank you, Rob!!
Absolutely beautiful….I love the hardware and the stain you used. Great job!!
Thank you so much!
Very nice. When I first looked at it, I was thinking…’How does she open the drawers?’ as the drawer pulls looked like the little content holder thingys (that is a woodworker term you know!! 😉 ) like you used to see on library card holders. Then I looked harder and saw they were some very nice pulls. This, my Dear, was a very nicely done and is a very nice looking ‘cabinet’!! Keep posting things for us!!
Thank you so much Karl 😉
So, you don’t use the metal drawer slides on your drawers? I always have such a hard time getting them lined up correctly.
Hey Dona,
We didn’t on this piece and some other pieces 🙂 it kind of depends on the build!
It’s a beautiful piece.
Thank you, Dona!