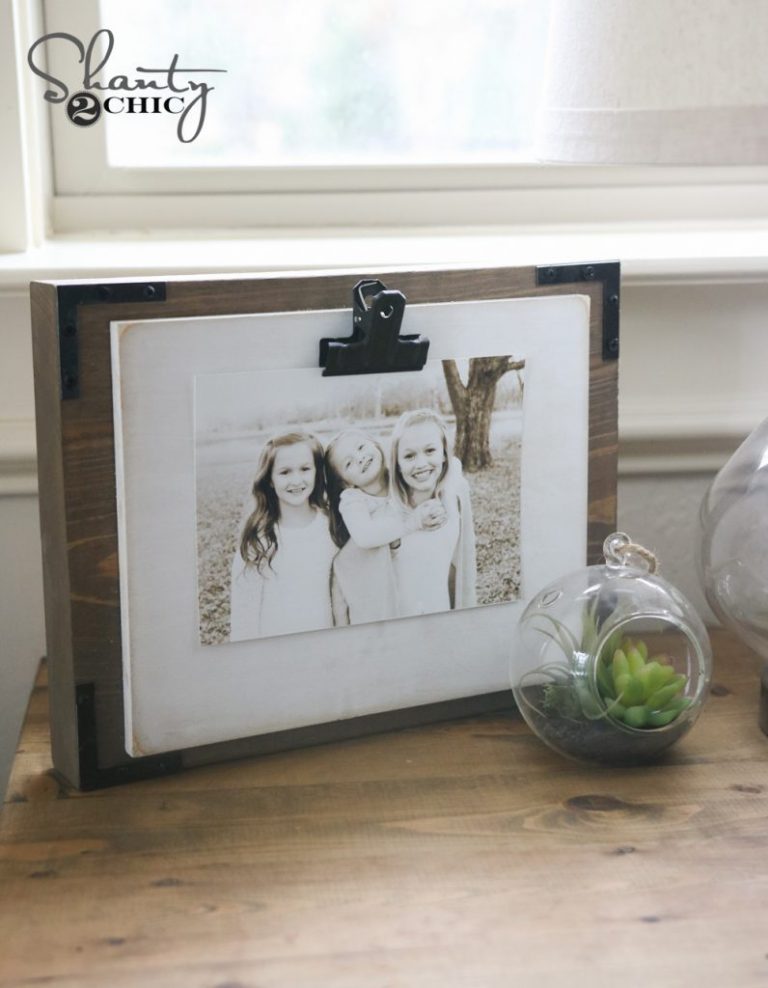
This DIY Engineer Print Frame is probably one of the easiest projects I have done and it makes such a huge statement in a room! It also only cost me about $20 to make – HECK YAH!
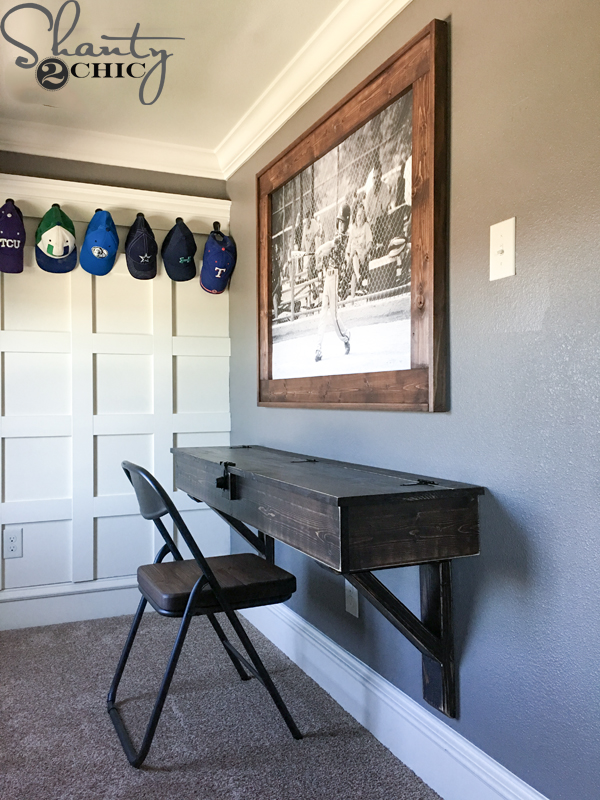
I made this as part of the “baseball” theme room that my son asked for. He LOVES baseball and what teenage boy wouldn’t love a giant 3’x4′ picture of themselves doing what they love?
Here are the supplies you will need:
1 scrap piece of 1/4″ plywood (at least 36″x48″ in size)
1 engineer print
Double-sided tape
2 – 1×4 common (or pine) boards @8ft. long
2 – 1×2 pine boards @8ft. long (I used premium pine)
Kreg Jig and pocket screws
Nailer/Stapler (hammer and finish nails work too)
Stain or paint for the finish
3″ Screws to hang
Drill
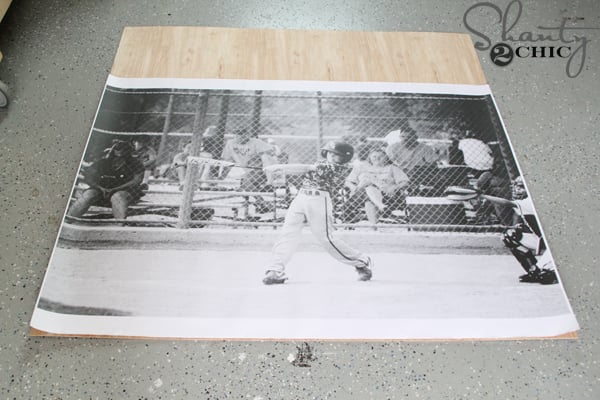
I started with a picture that I took, myself. Then, I uploaded it to Staples and ordered a 36″x48″ engineer print. You can see where I ordered it HERE. It was ready the same day and it was only about $8!

Next, I found a piece of scrap 1/4″ plywood. It just needs to be long enough and wide enough to fit the entire picture.
Next, I trimmed the white border off of the engineer print, with scissors, and cut the plywood to size. I used 1×4 pine boards for the frame, so make sure that the plywood is long enough for the frame pieces too.

Once the plywood was cut to fit, I used double-sided tape to attach the picture to the plywood. The 1×4 frame will hold the picture on as well, so all you need to do is have it taped for now.
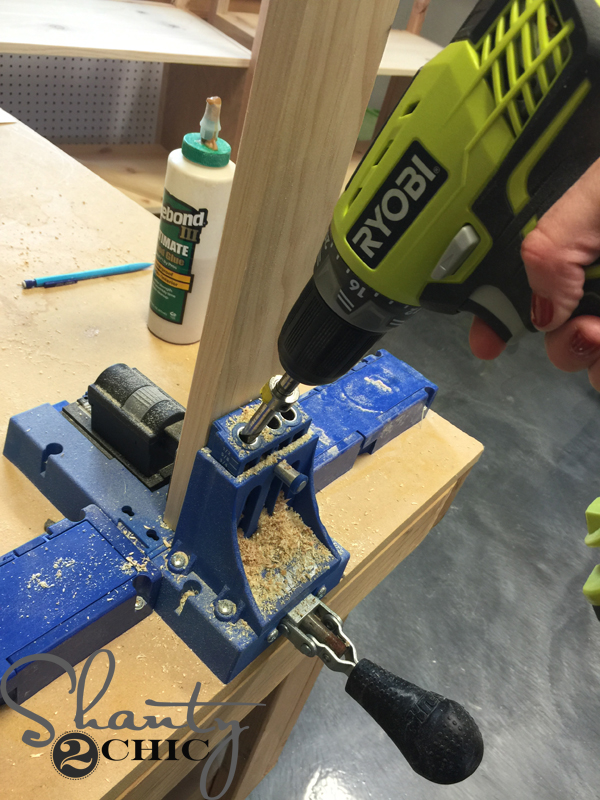
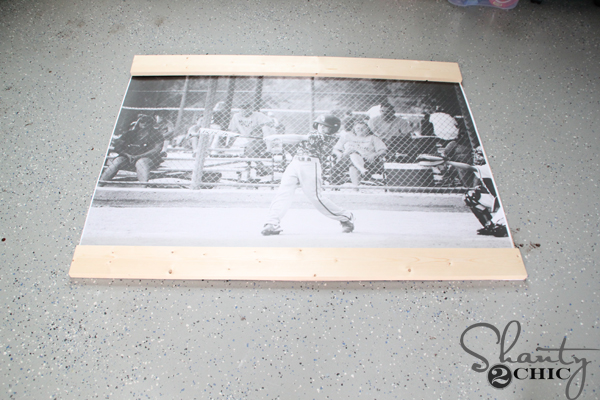
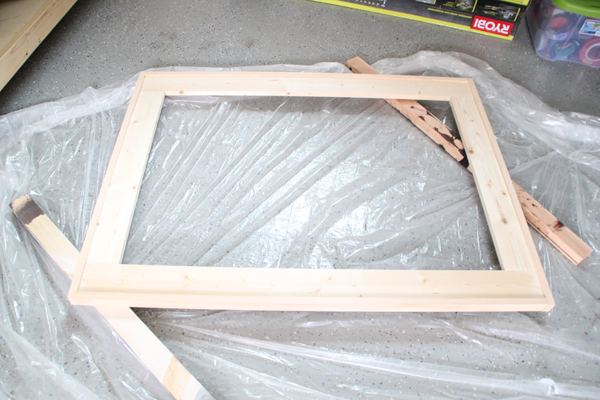
Next, I cut the top and bottom 1×4 boards for the frame. Measure and cut to fit your picture. I cut mine at 48″. Then, measure to cut the two side pieces. Mine were 29″. Then, I drilled 3/4″ pocket holes into the side 1×4 boards, on both ends. You can find the Kreg Jig K5 jig that we use on Amazon, HERE. You can also check out our How to Use a Kreg Jig video tutorial HERE.
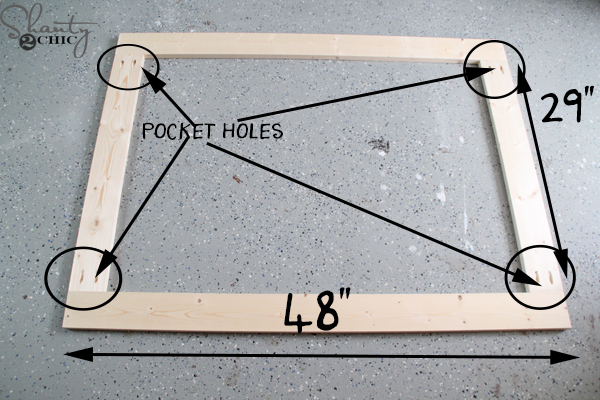
I assembled the frame with 1 1/4″ pocket hole screws. Here is how the frame will look , assembled, from the back side. Notice where the pocket holes are.
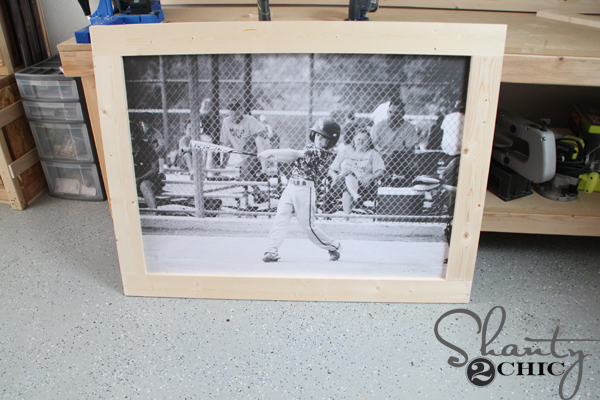
Now to attach the 1×2 border. Don’t attach the frame to the picture yet, you will want to put your finish on the frame before, so you don’t mess the picture up. Just hold the frame up to the picture so you know where to attach the 1×2 pieces. The top and bottom 1×2 pieces will be the same length as the top and bottom 1×4 pieces. Then measure and cut the side pieces to fit.
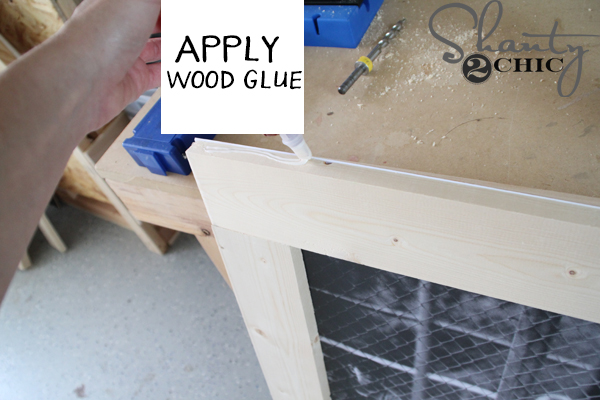
Apply wood glue to the top edge of the 1×4 pieces
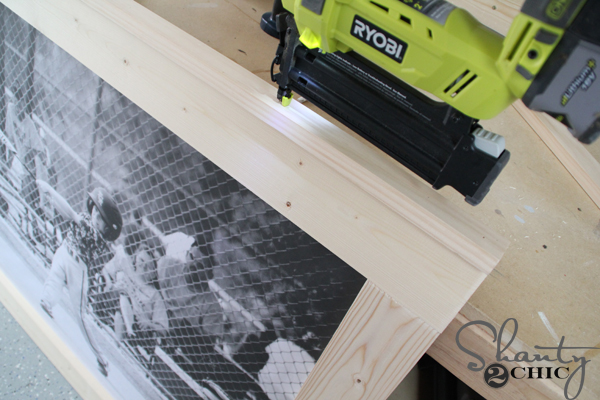
and use 1 1/4″ brad nails to attach the 1×2 pieces. Notice the 1×2 piece on the top is flush with the outside edges of the frame, the back of the 1×2 will be flush with the back of the plywood. You can use a hammer and finish nails here if you don’t have a nailer.
Here the frame is ready for the finish!
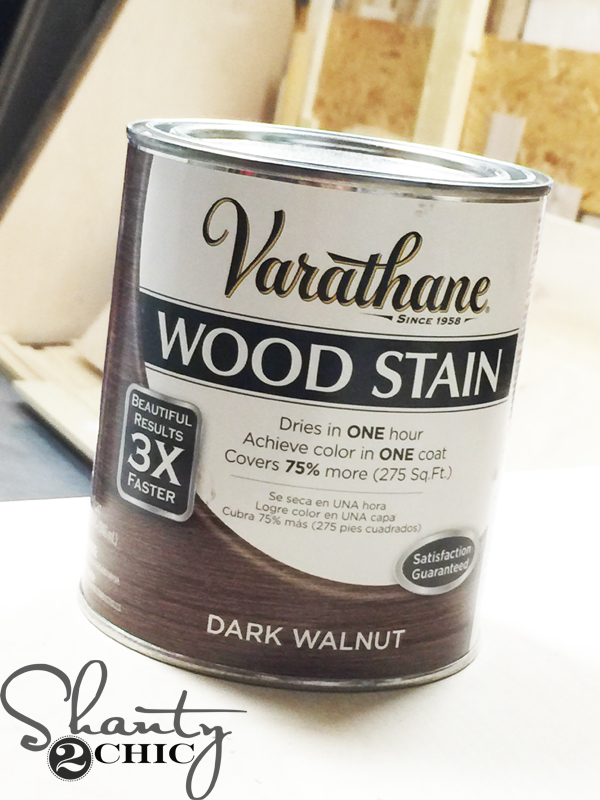
I applied one coat of Varathane Dark Walnut stain, to the entire piece, with a clean cloth. This is our favorite stain because it achieves color in only one coat! Wait about 5-minutes for the stain to soak in, then wipe the stain with a clean cloth to blend the stain evenly. It should dry, to the touch, in about an hour.
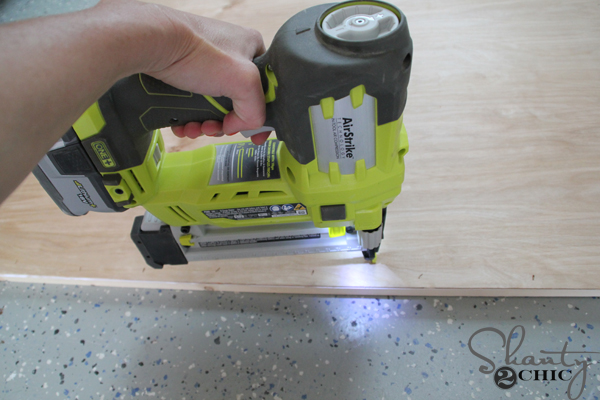
When the stain dries, just attach the plywood (with the picture) to the back of the frame. I used 3/4″ staples and my Ryobi Airstrike stapler. You an use a staple gun here or finish nails and a hammer.
That was it!
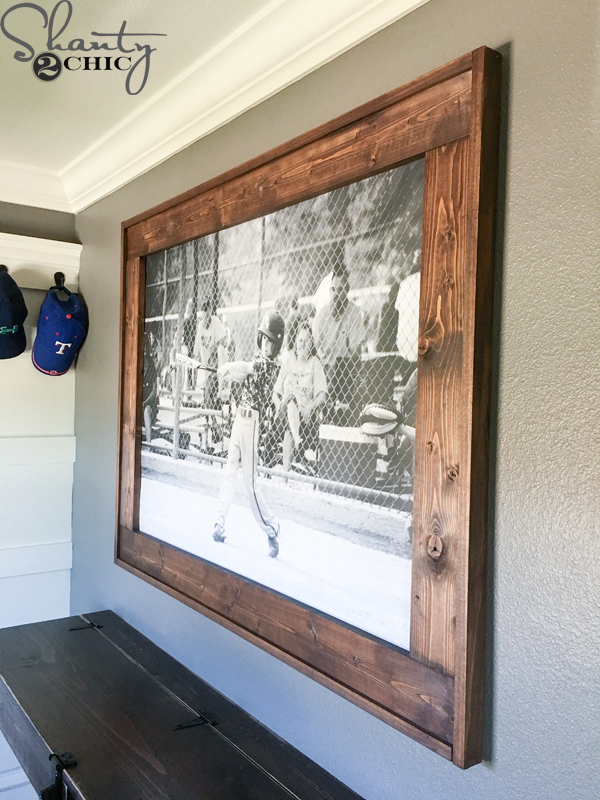
To hang it, I located the studs on the wall and attached the frame to the studs, through the front of the frame. This will leave holes in the frame, so just fill them with wood filler, let the filler dry and dab a little stain over the wood filler 🙂

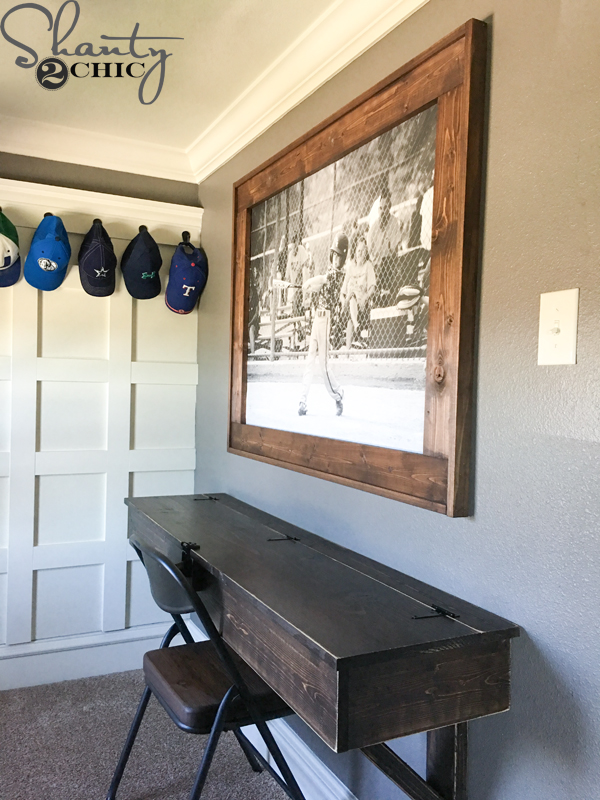
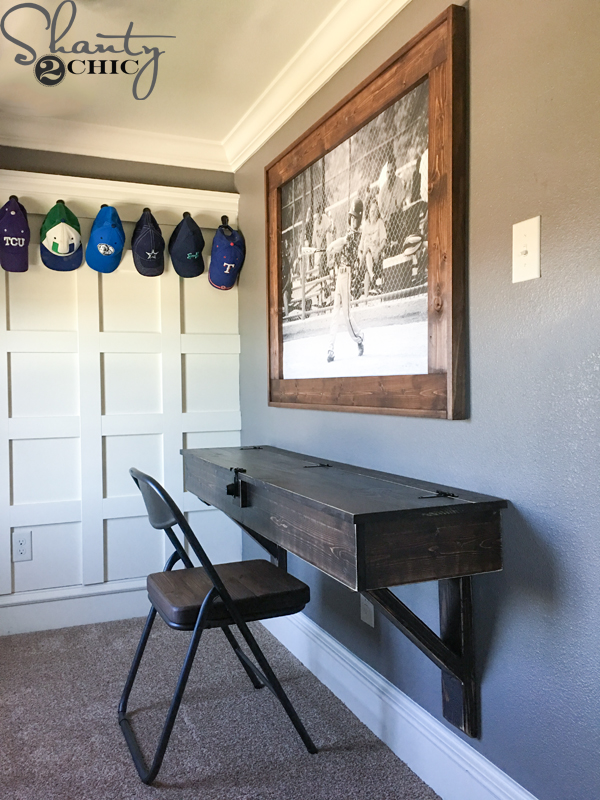
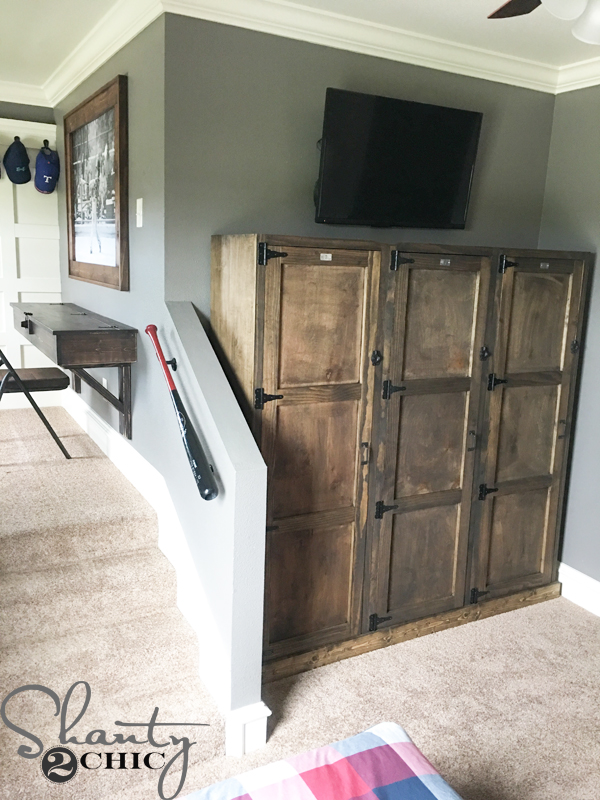
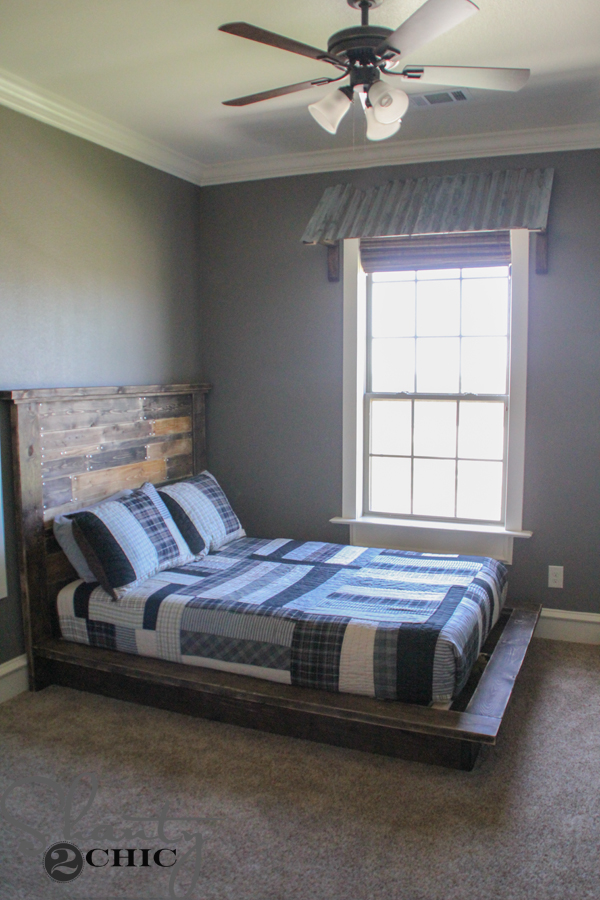
I had so much fun making this for my son and he LOVES it too! Win, win! I’ll share the floating desk plans soon but you can check out the rest of his room in the images below! Everything is DIY, so just click the links below the pictures for the how-to’s!
Thanks so much for stopping by!
~Ashley
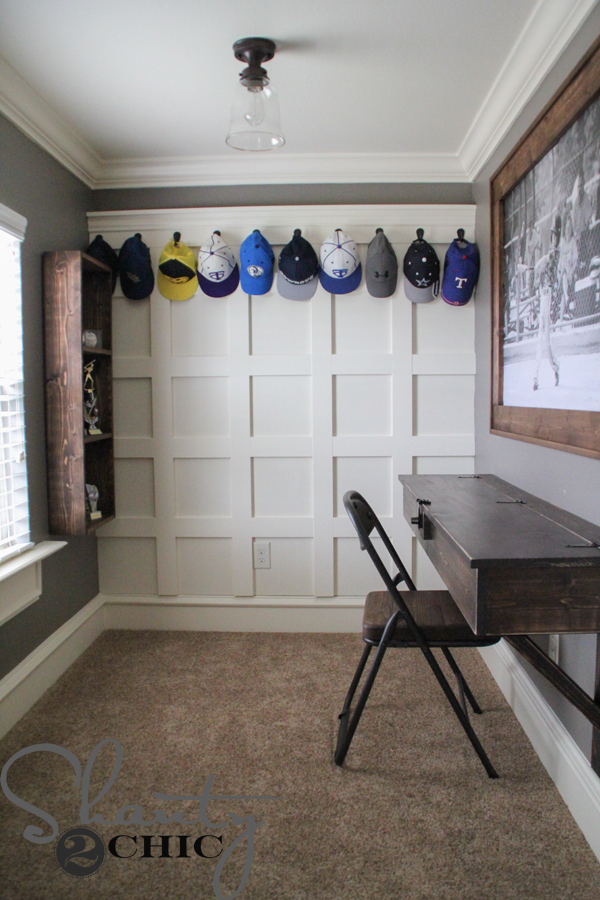
Board and Batten Hat Rack


I can’t wait to try this. I’ve bought several canvas art pieces and I want rustic frames and this will be perfect! Great style!
Fantastic easy plans. I used them to frame an old map I found in my house after I bought it. It ended up being huge 4 feet by 4 and a bit. I love it. Wish I could share a picture. Mounted with a metal French cleat.
Did you make or purchase the desk under the photo? I love it and it would be perfect in my son’s room!
Curious which Staples printed the pic for you? None of the staples near me will print pictures for the engineering print price!!
I had this problem too! I am curious which option they choose.
How would I adapt this to add a piece of glass/plexiglass?
Did you ever figure this out?! Curious about the same thing!
Question it’s asking me if I want to scale to fit? Should I choose yes or no?
I would say no first and see what it looks like. Then say yes and compare. I’m sorry, I don’t remember it asking me that.
@Shanty2Chic what size photo did you use to order the engineering poster? I clicked on the link for Staples and checked it out and it said not for photos. I use my crappy phone for pictures of my son at baseball, my camera died awhile back and every time I try to order prints that are 5×7 or 8×10 the images are way too blurry. I’d be afraid it would turn out a huge blur, please help. I would love to do this for my boys room, my living room and as a gift for my daughter of my grand babies.
I did the 3’x4′ size. It should tell you if the resolution isn’t high enough. It sounds like it might not be if you can’t print 8×10 🙁 it’s not a super crisp image – that’s probably why they say it’s not for photos but it’s perfect for a black and white large print!
@Shanty2Chic Thank you so much! I just saw that you replied. I don’t really know how I am not getting notifications for anything. But thank you again!
What kind of poly do you use to get the natural finish like that?
Love Love this! I have the perfect picture too! thank you!!!