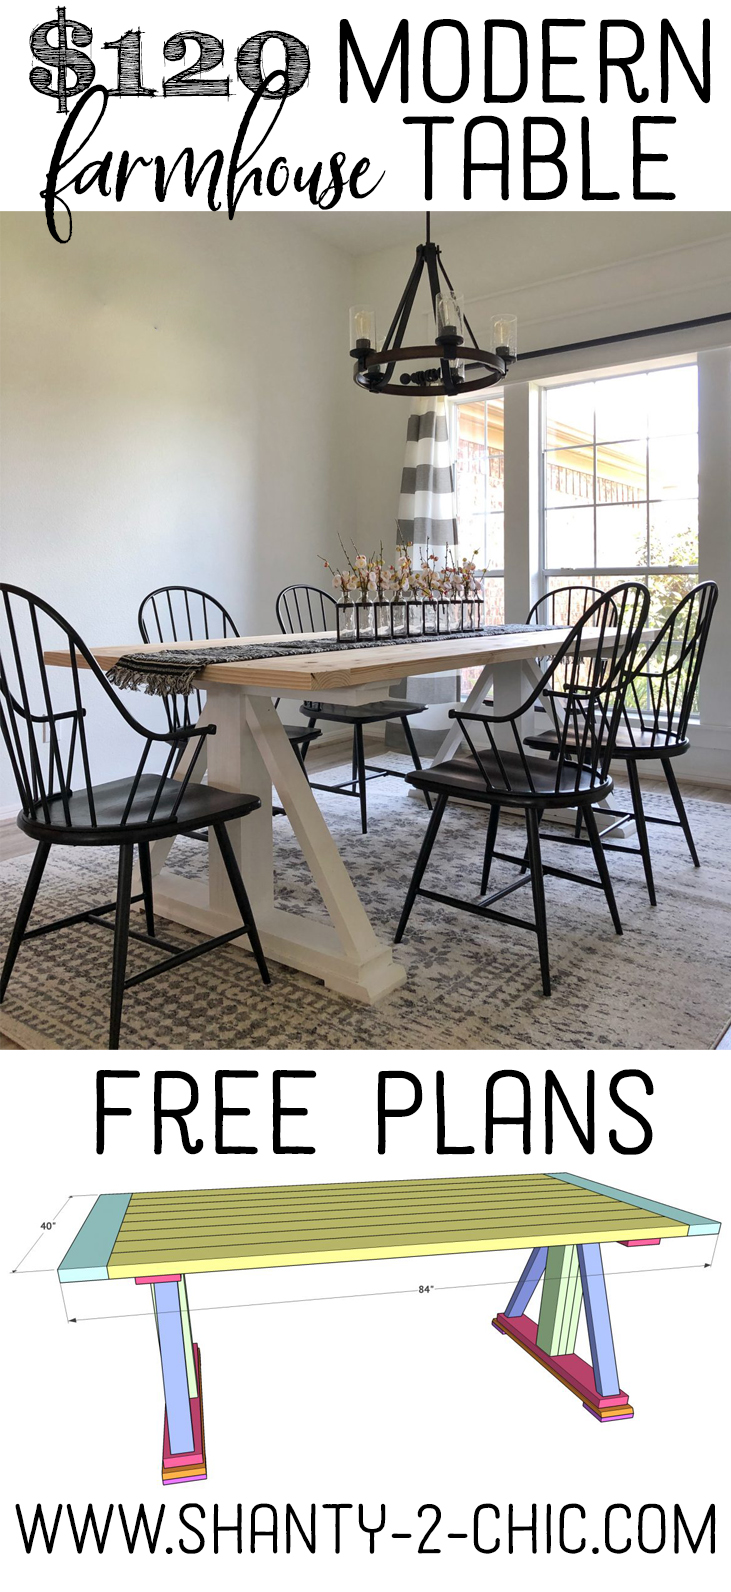
Hey friends! We teamed up with Enterprise on today’s awesome build! We rented a truck and drove to our sister’s new house in Houston to fix it up for her! We had so much fun! We built her a TON of stuff, but our favorite project has to be this awesome DIY modern farmhouse dining table that we call the Leasha Table! Before we get started, be sure to check out our YouTube video on it HERE or below!
Look how cute this table turned out! WE LOVE IT! Before we get started, you can download and print the FREE PLANS by clicking HERE!
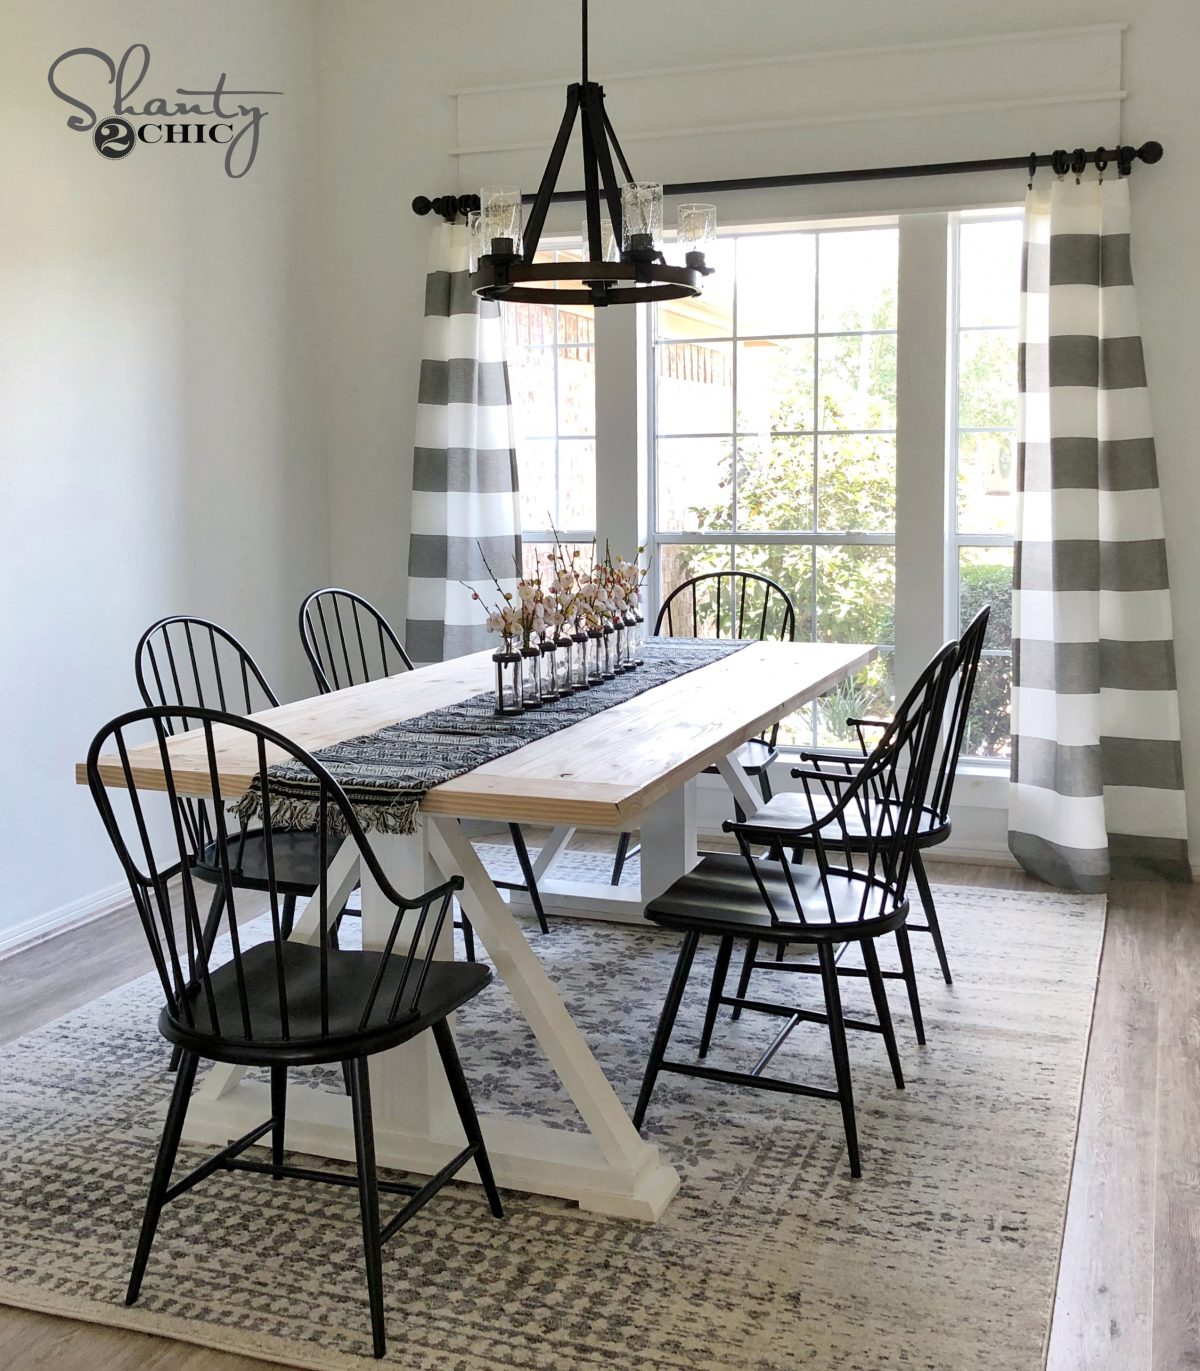
DIY Modern Farmhouse Dining Table – Free Plans
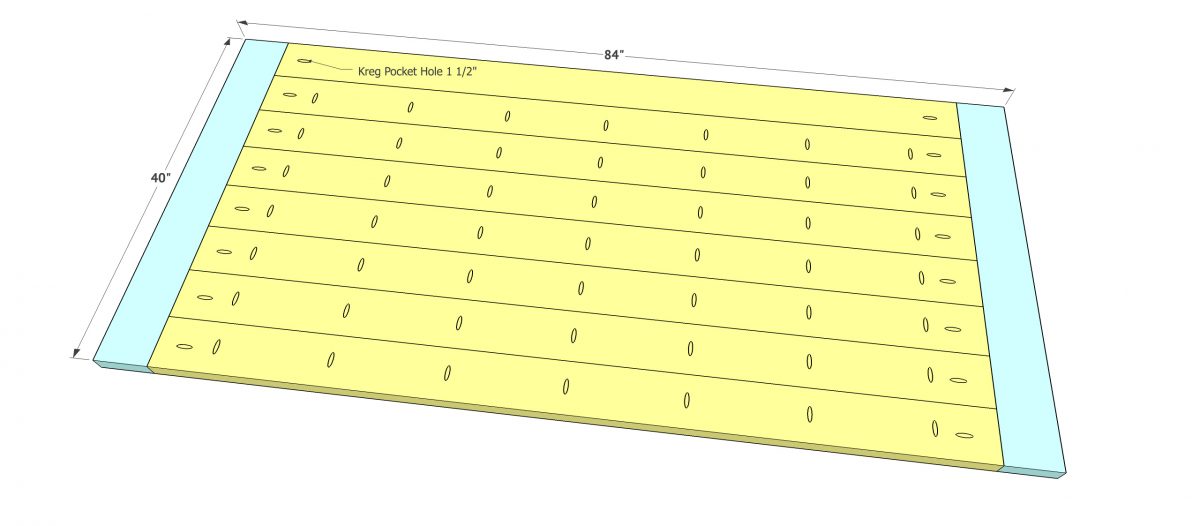
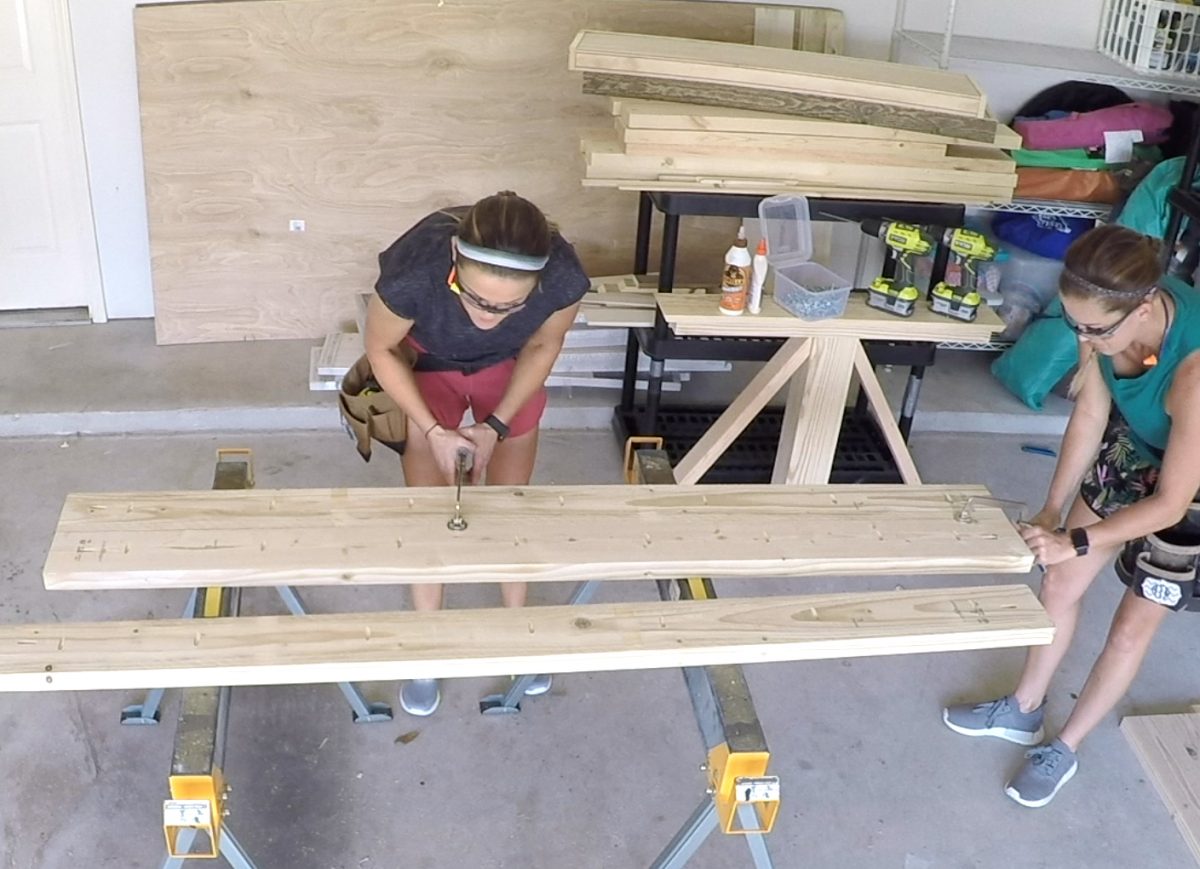
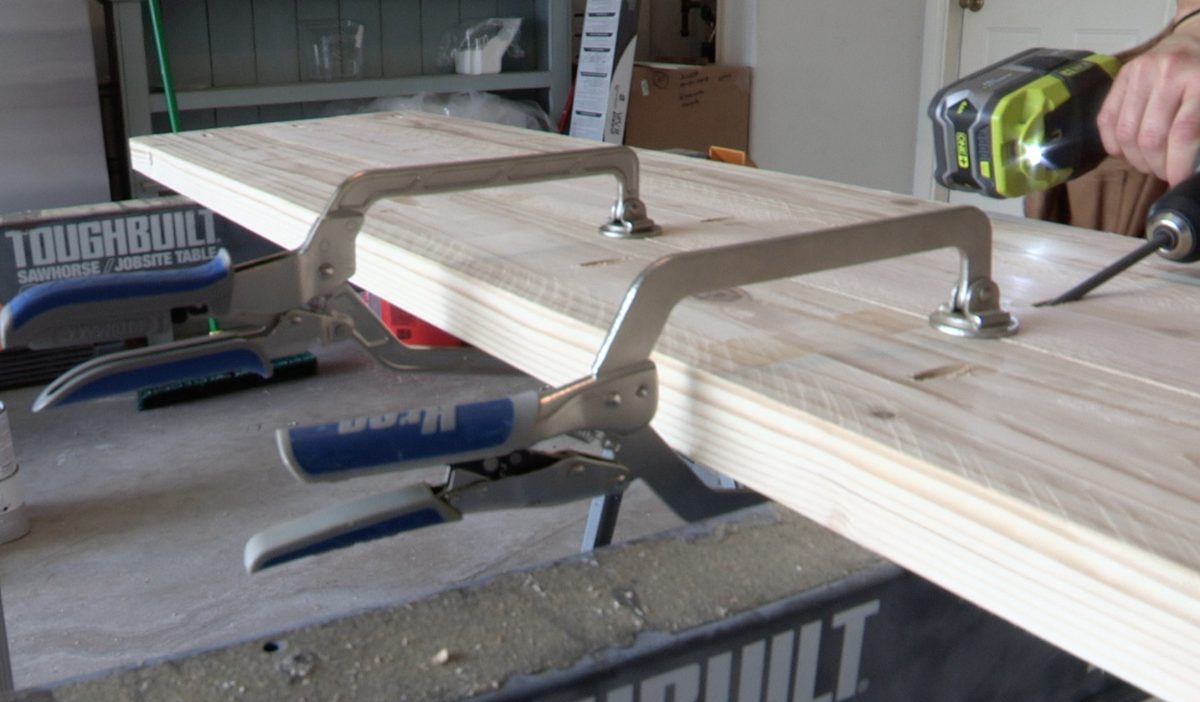
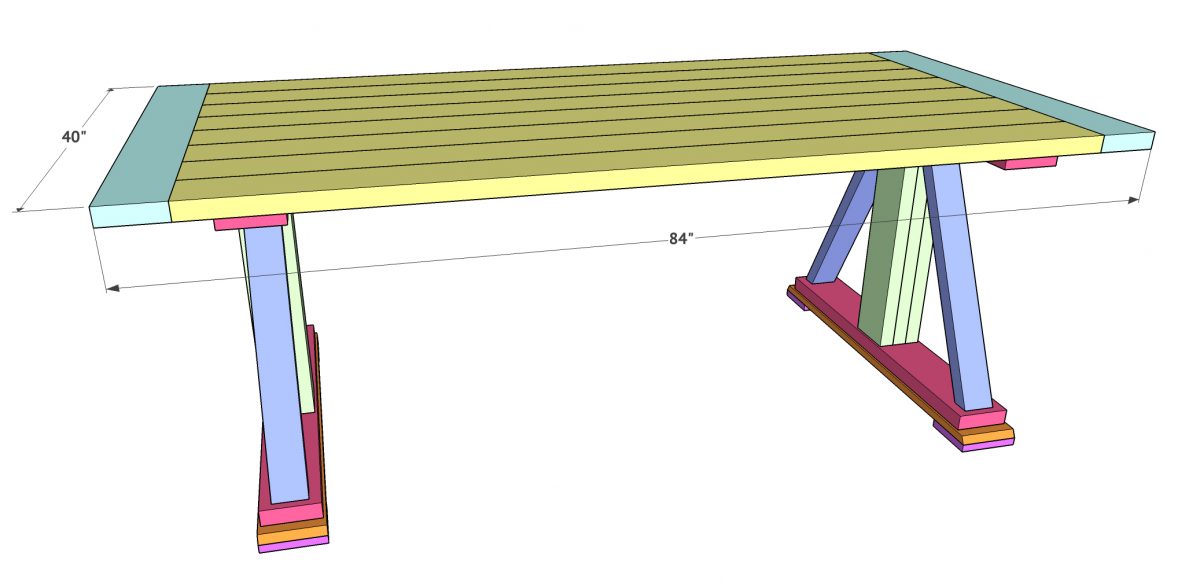
The first step to building this table is creating the table top. These are 2×6 boards that we ripped down to 5”. We added 1.5” pocket hole screws down one long side of all but 1 of our plank boards, and also at the ends of each plank board. We attached the plank boards together first using 2.5” pocket hole screws. Once all plank boards are attached, line of the boards on each end and mark the exact measurement of the breadboards. Attach the breadboards using 2.5” pocket hole screws.
DIY Modern Farmhouse Dining Table – The Legs
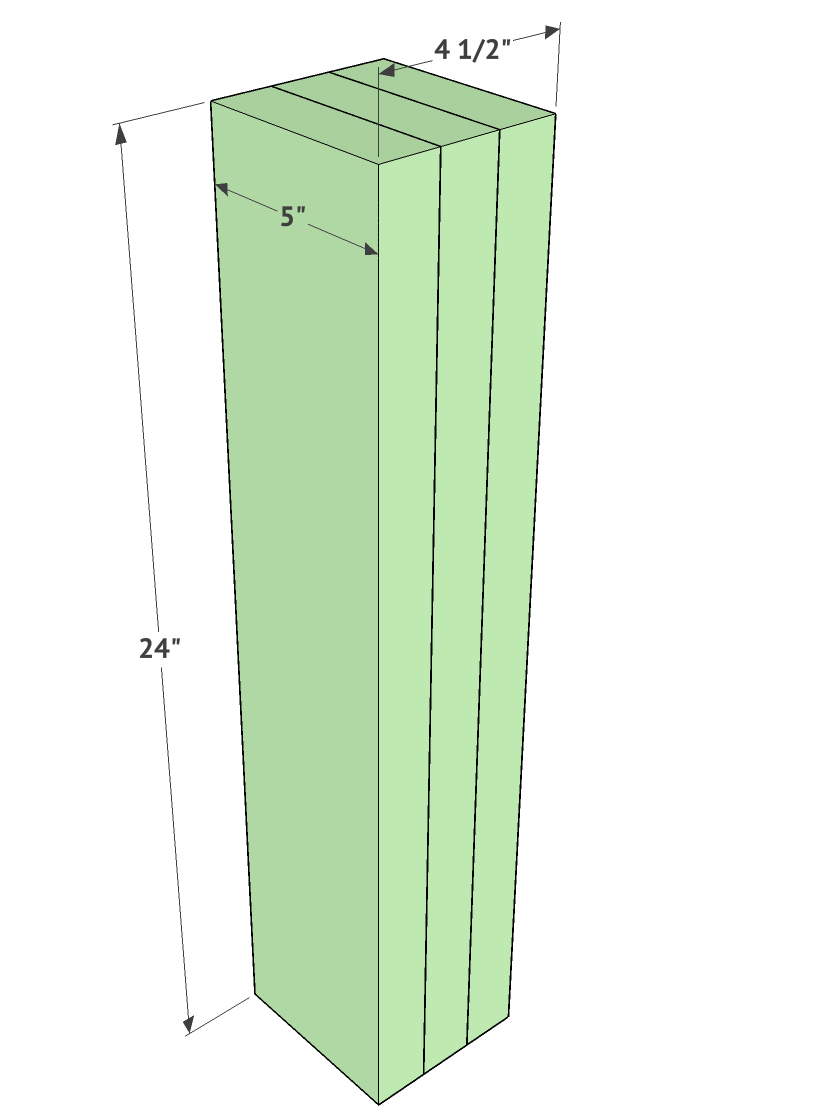
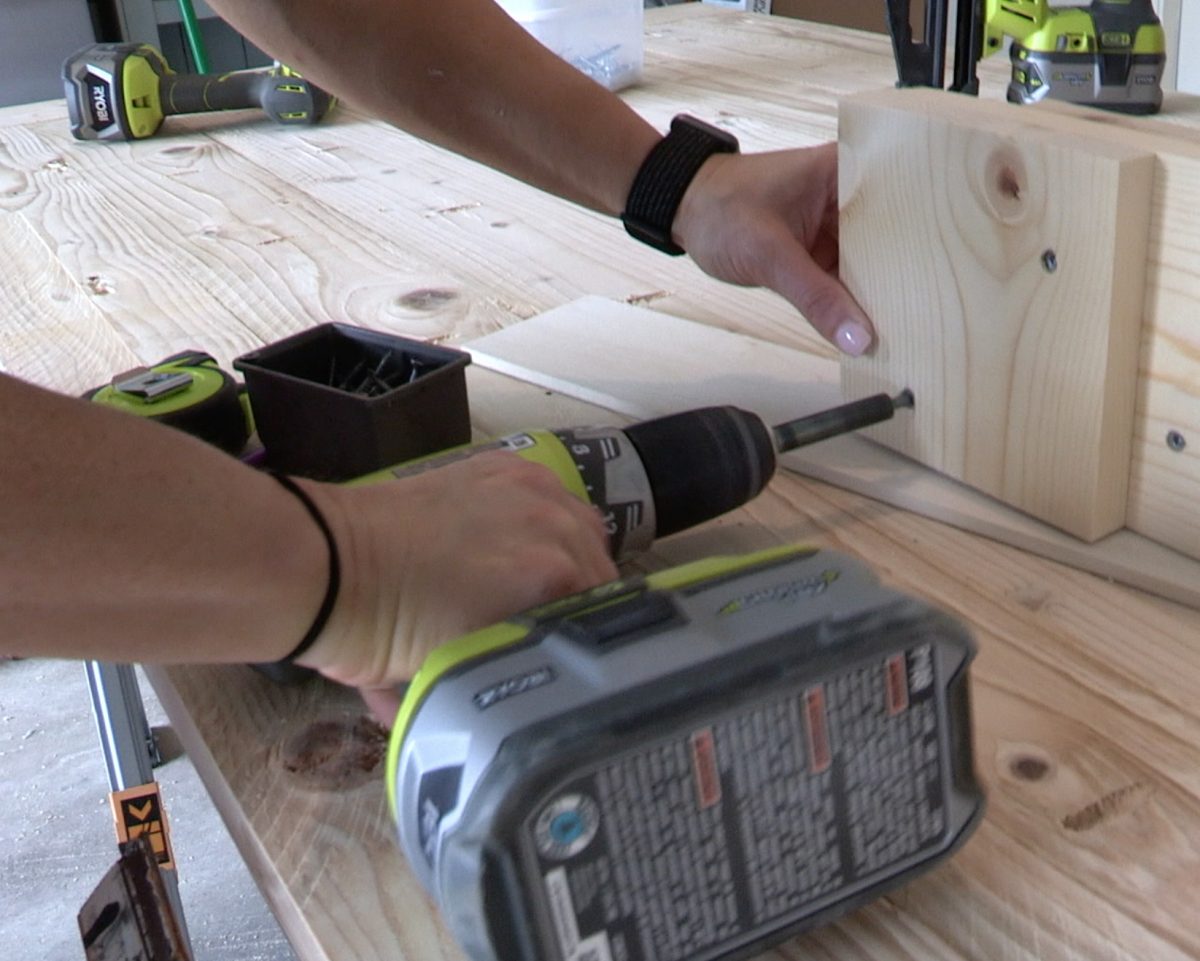
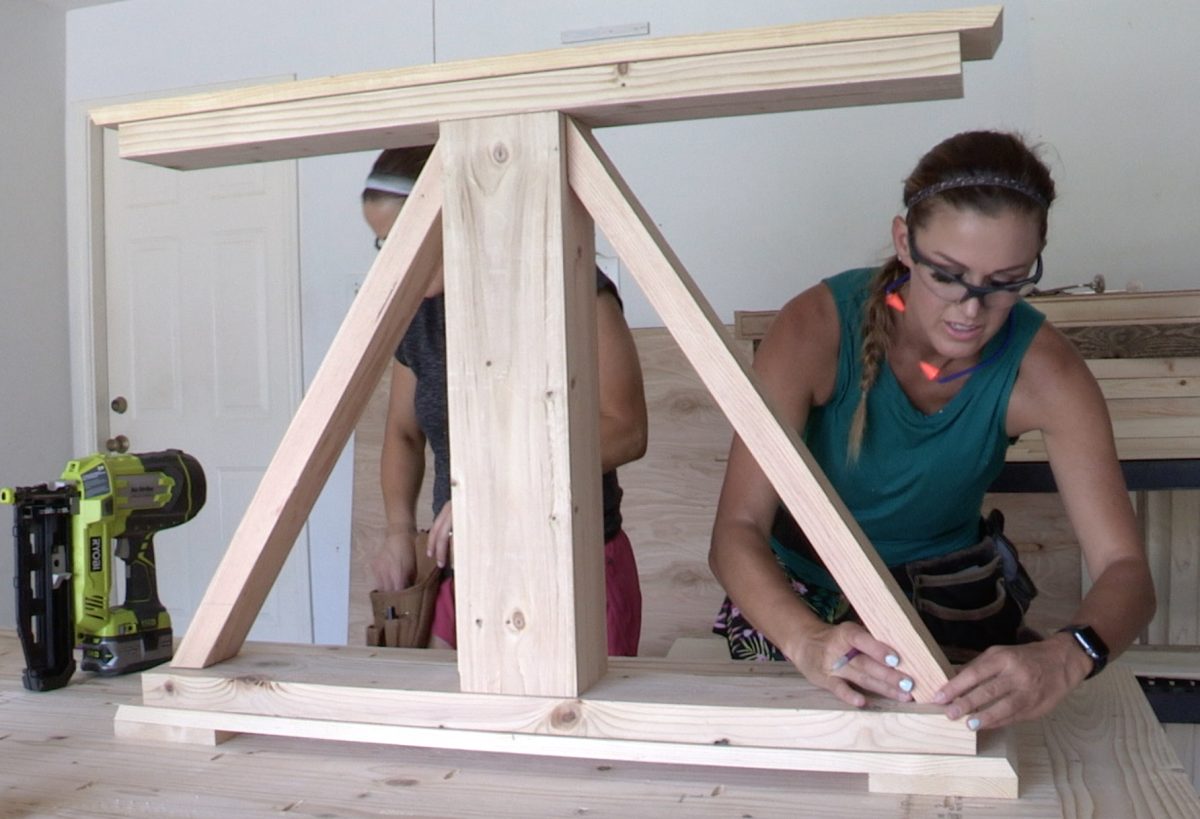
Now it’s time to build the legs of this table. The center of these legs are also 2×6 boards that we ripped to 5”. You will create two identical leg assemblies. Start by cutting the 3 leg base pieces and attach or laminate them using lots of wood glue and nails. You can use clamps to hold them tight in place until the glue dries. We like to let these set overnight, but you don’t have to!


DIY Modern Farmhouse Dining Table – The Legs
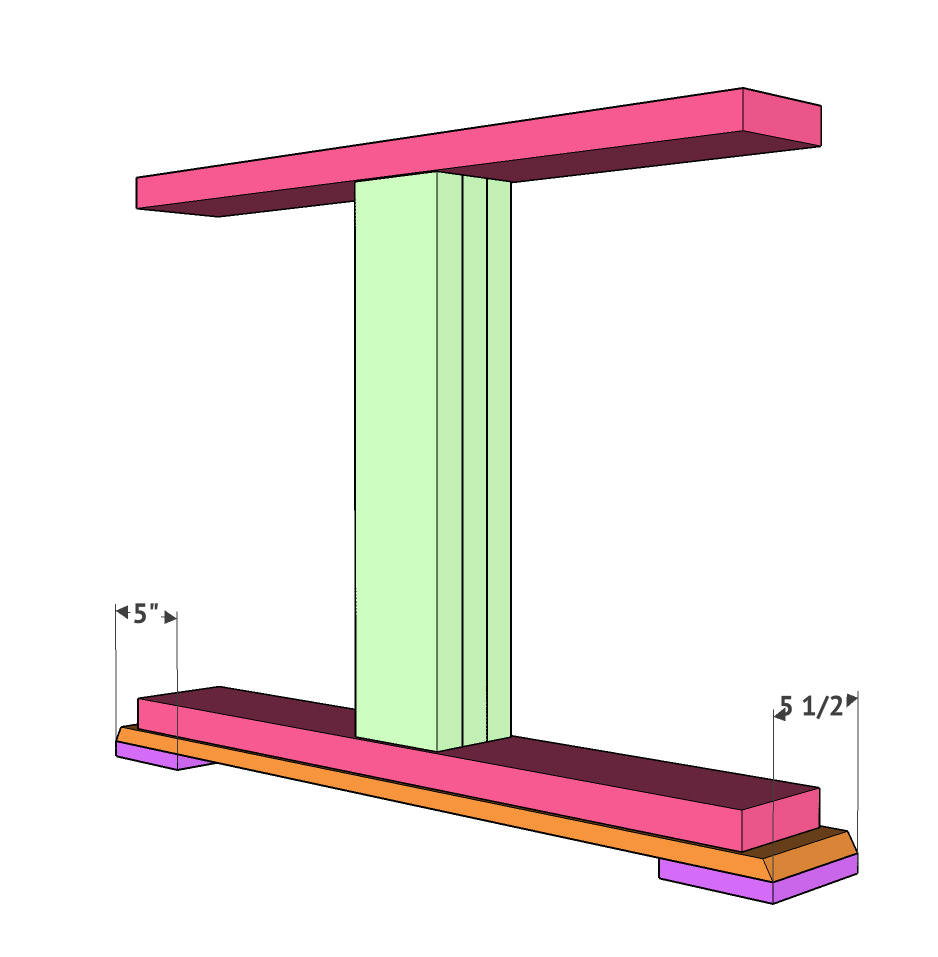
Now we are adding the feet to the legs. These are also 2×6 boards ripped to 5”. It helps to use a 1/4” spacer to hold the legs in place while you attach them. We attached the 2×6 boards using wood glue and 2.5” Spax screws. Mark center of each foot piece before attaching to make sure you have everthing evenly placed.
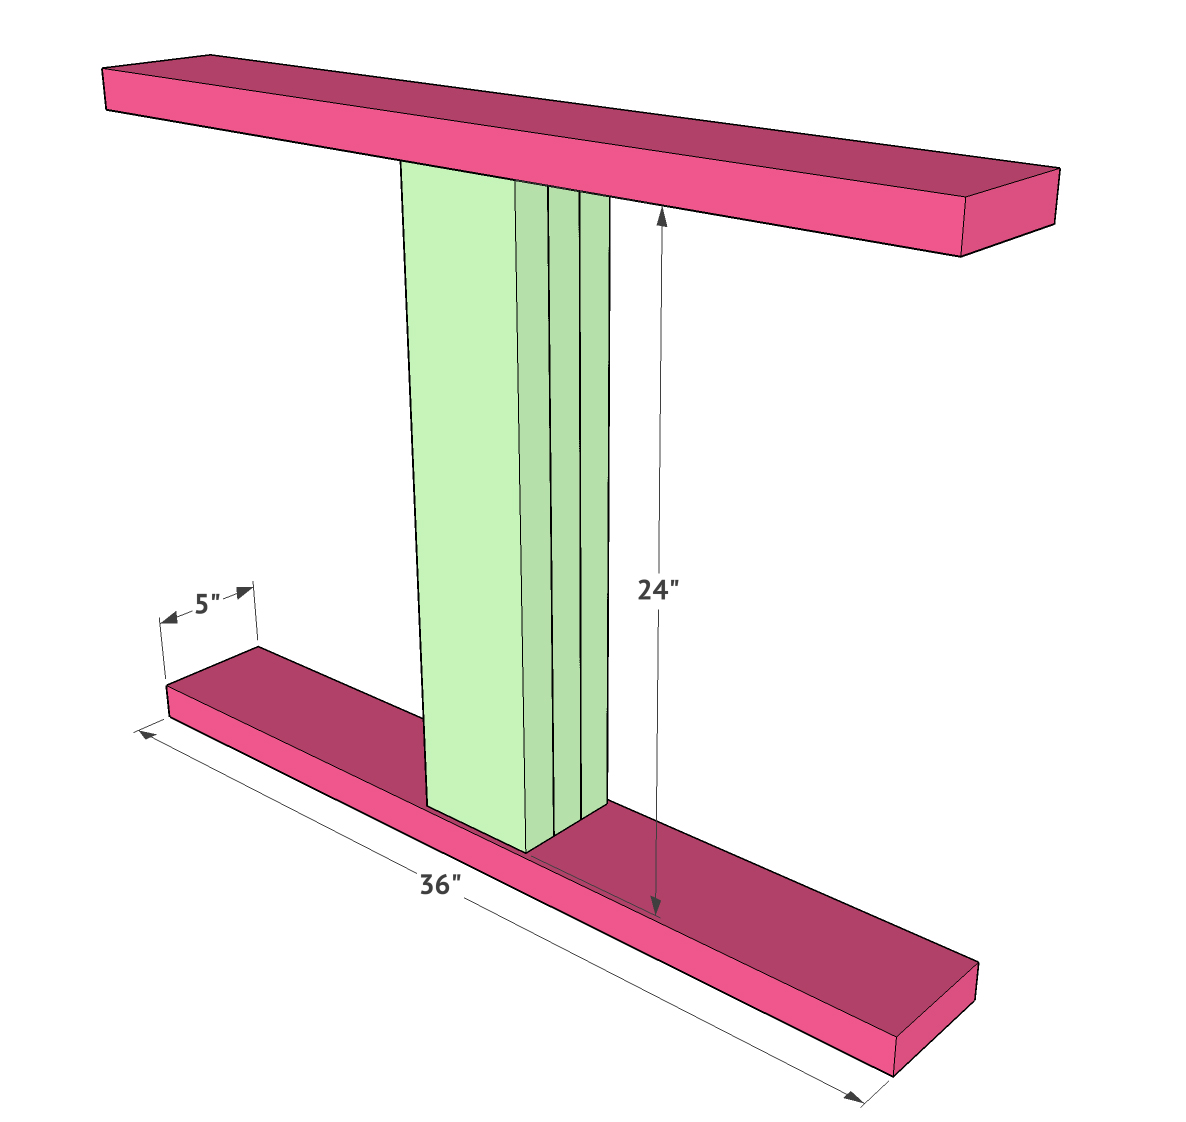

On one end of each leg assembly, attach the 1×6 foot board. These are cut at a 30 degree angle on each end. Because this is a 5.5” board, you will have a 1/4” overhang on each side again. It does help to prop the leg assembly up on a 1/4” spacer or scrap to hold it in place. Make sure you also center the 1×6 board on with the 2×6 foot board, and attach it using wood glue and 2.5” Spax screws.
Time for foot pads! These are just square blocks we cut from the 1×6 board that will hold the table off the ground. We attached each foot pad flush with the end of the longer 1×6 board with wood glue and 1.5” Spax or wood screws.
DIY Modern Farmhouse Dining Table – Diagonal Pieces
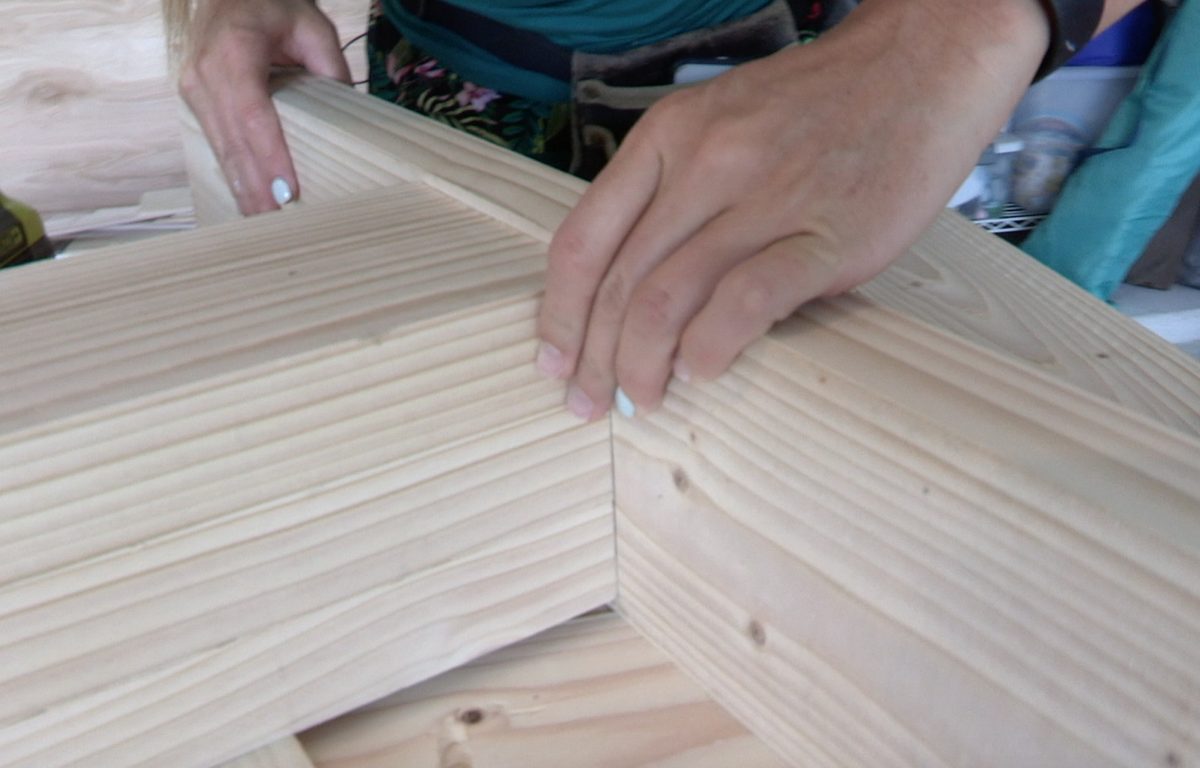
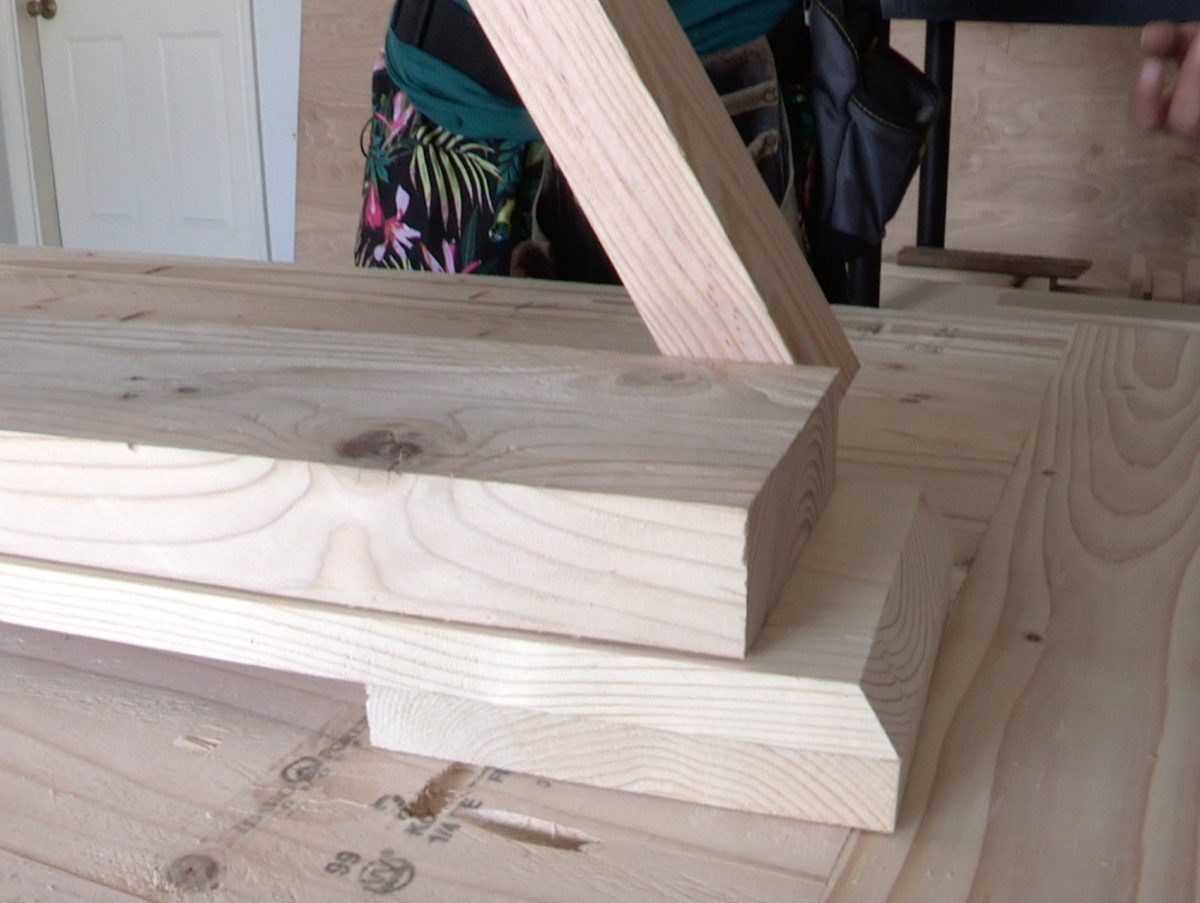
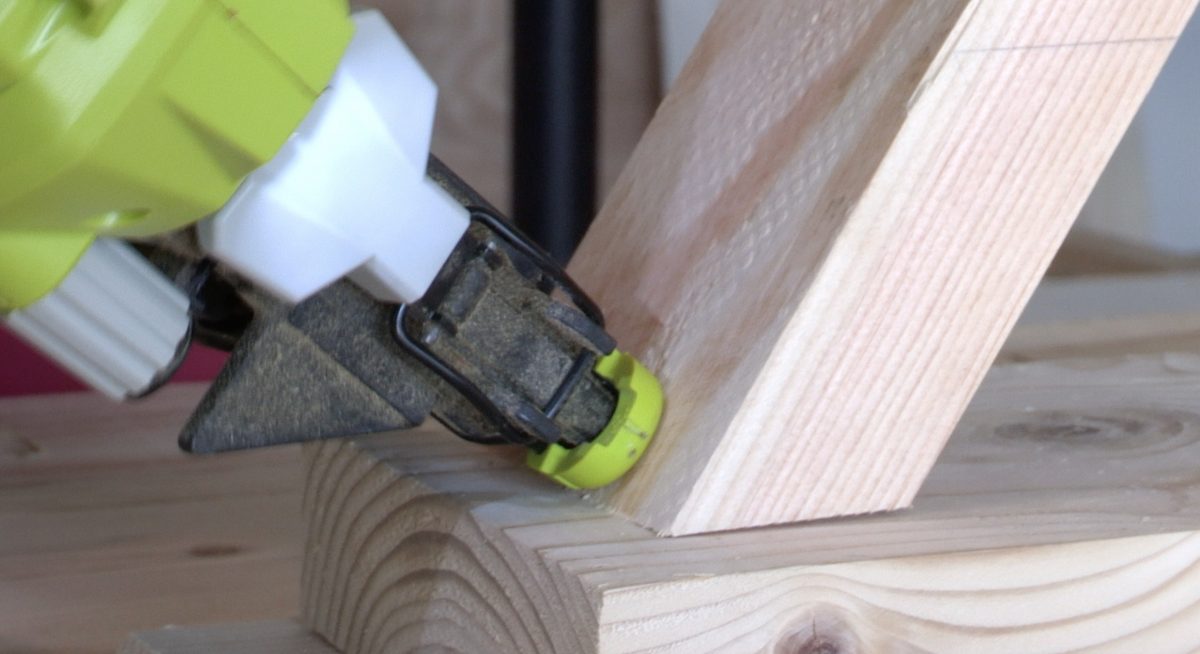
Next cut and attach the diagonal pieces. These are 2×4 boards that we ripped to 3”. The easiest way to get this measurement is to hold it up in place and mark your cuts. Attach each diagonal piece using wood glue and 1.5” nails.
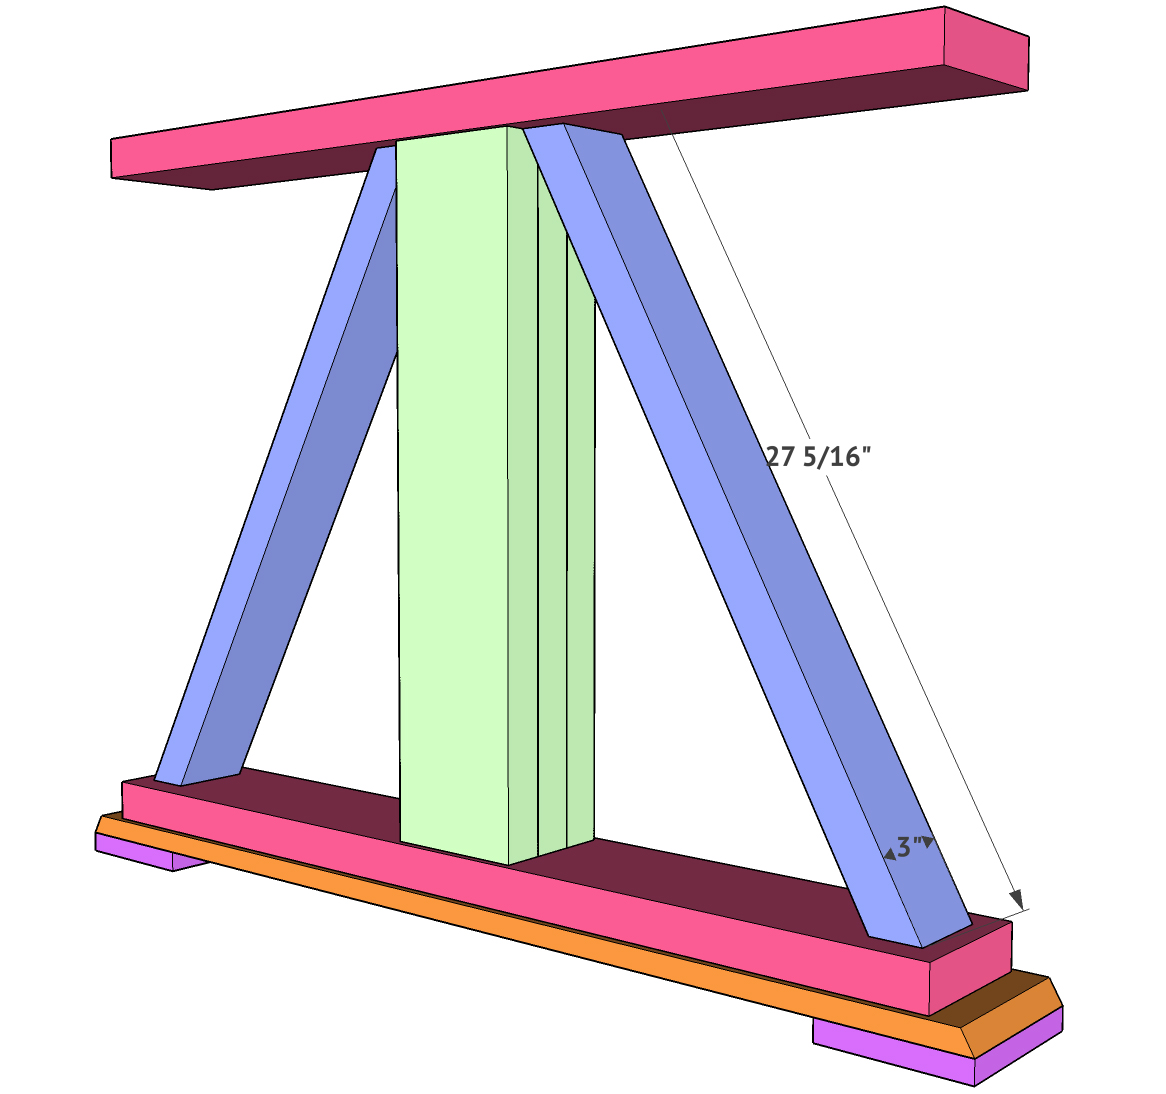
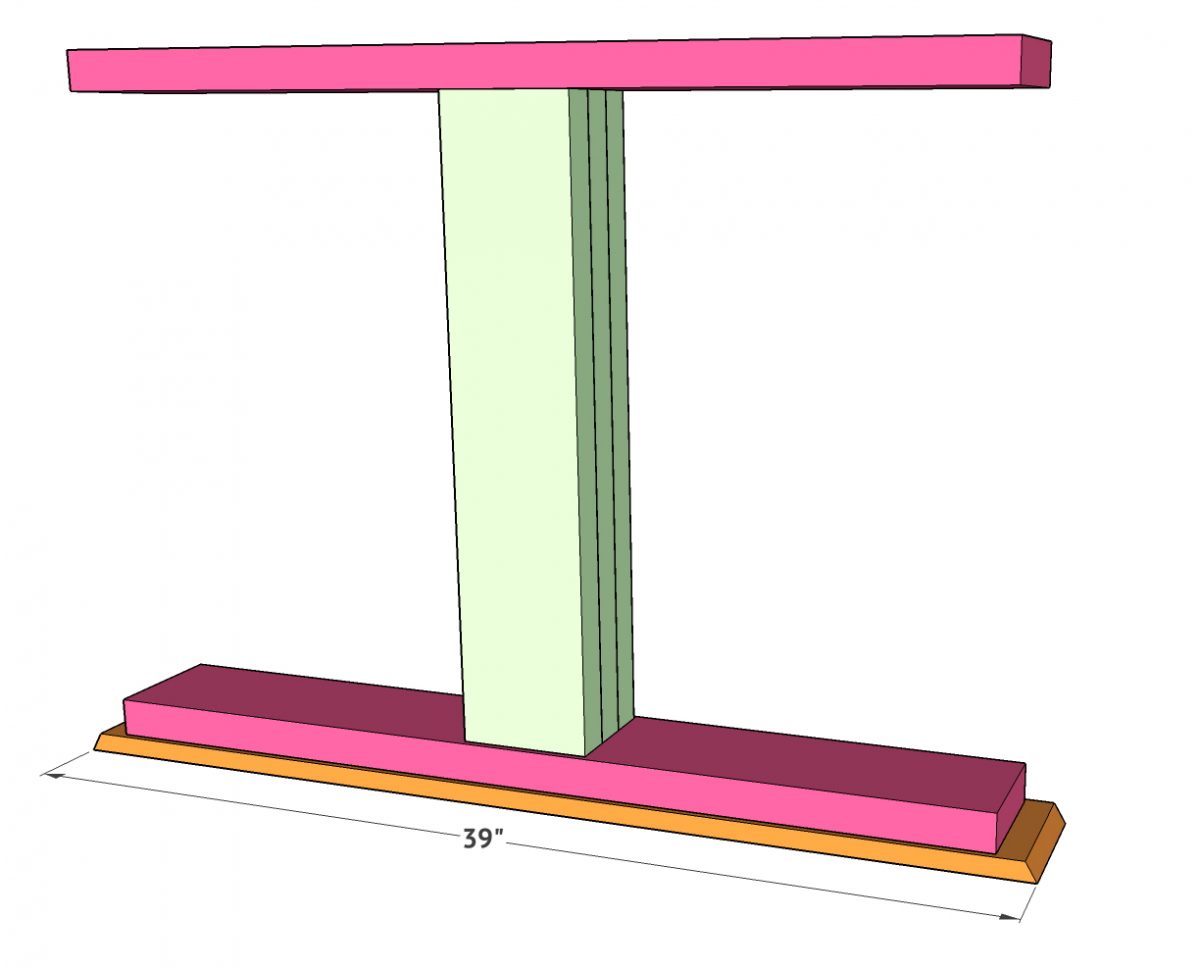
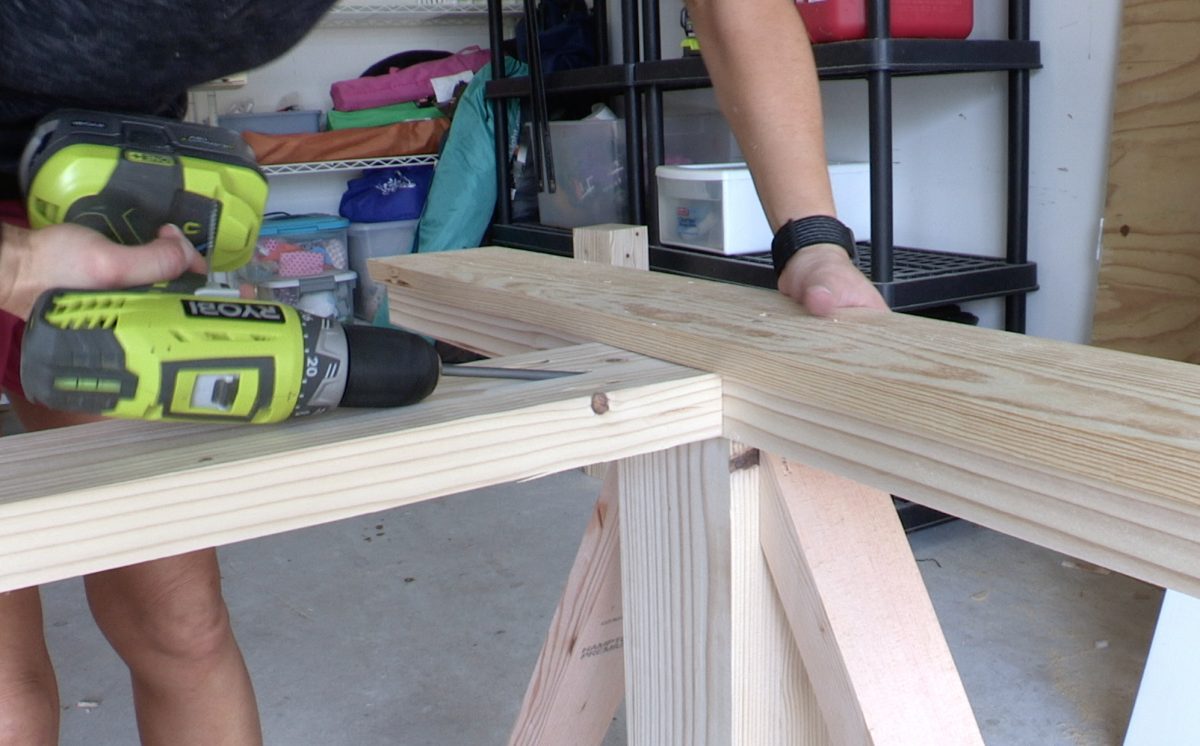
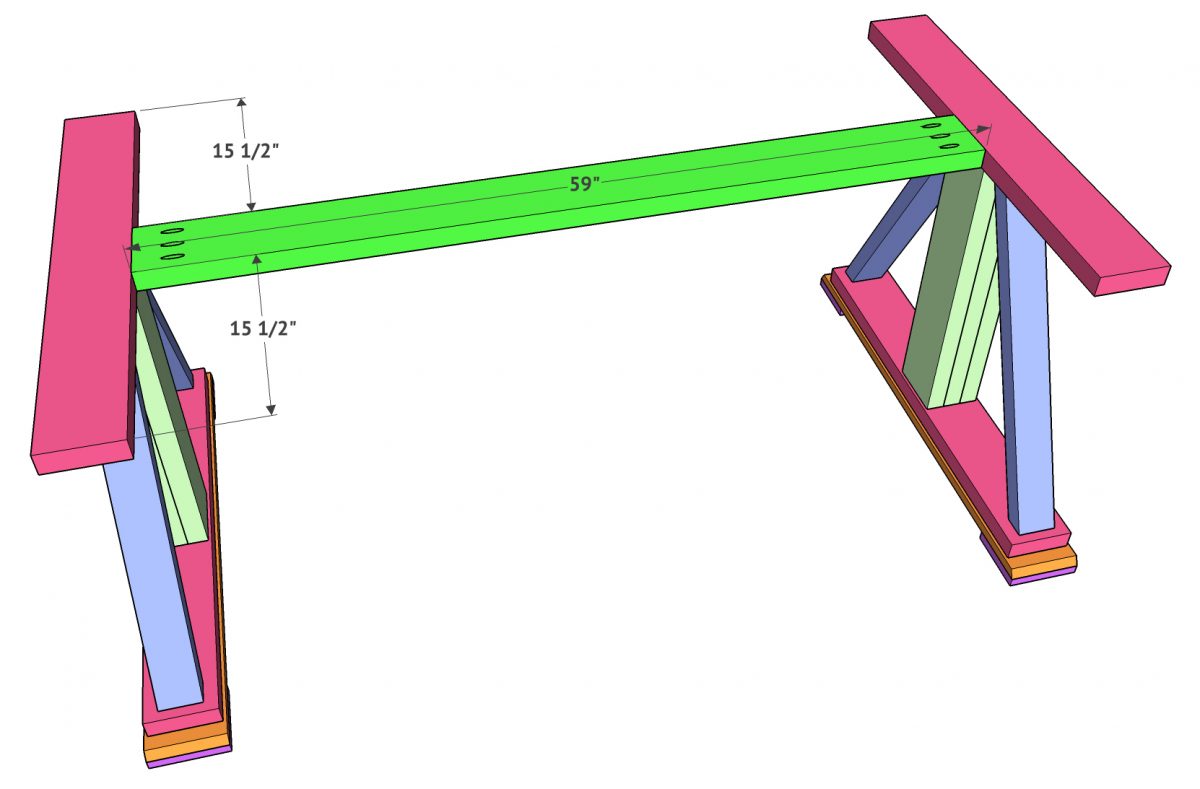
It’s time to attach each leg assembly. Cut the runner to size and add 1.5” pocket holes to each end. Attach the runner to the center and flush with the top of each leg assembly. Use wood glue and 2.5” pocket hole screws to attach the runner.
DIY Modern Farmhouse Dining Table – Attach the Base
Final step is attaching the base of the table to the table top. See the measurements to know where to line it up. Attach the base to the top using 2.5” Spax or wood screws through the runner and top 2×6 boards and into the table top. Don’t use glue on this part so that you are able to get the table in and out of the room easily.
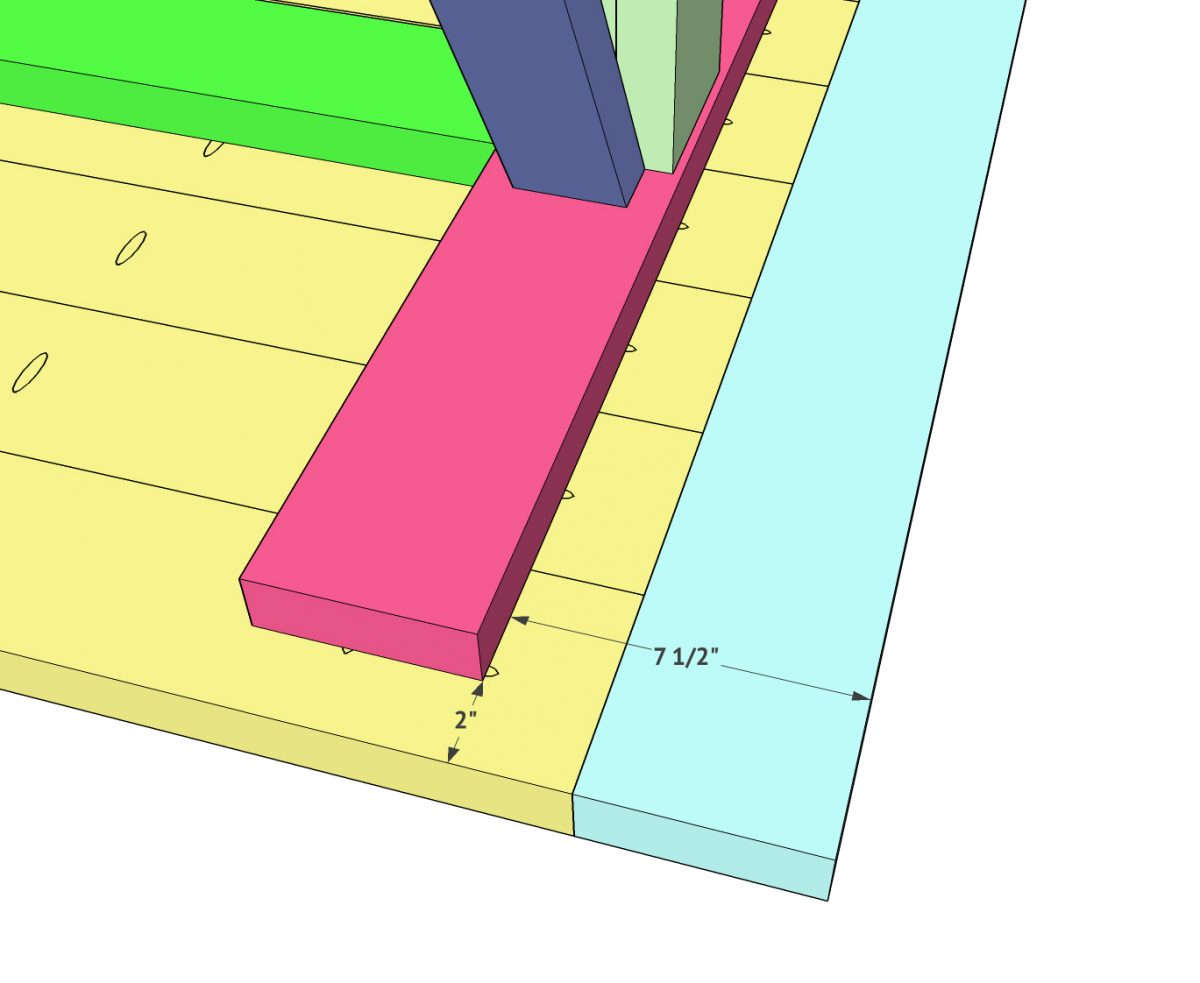
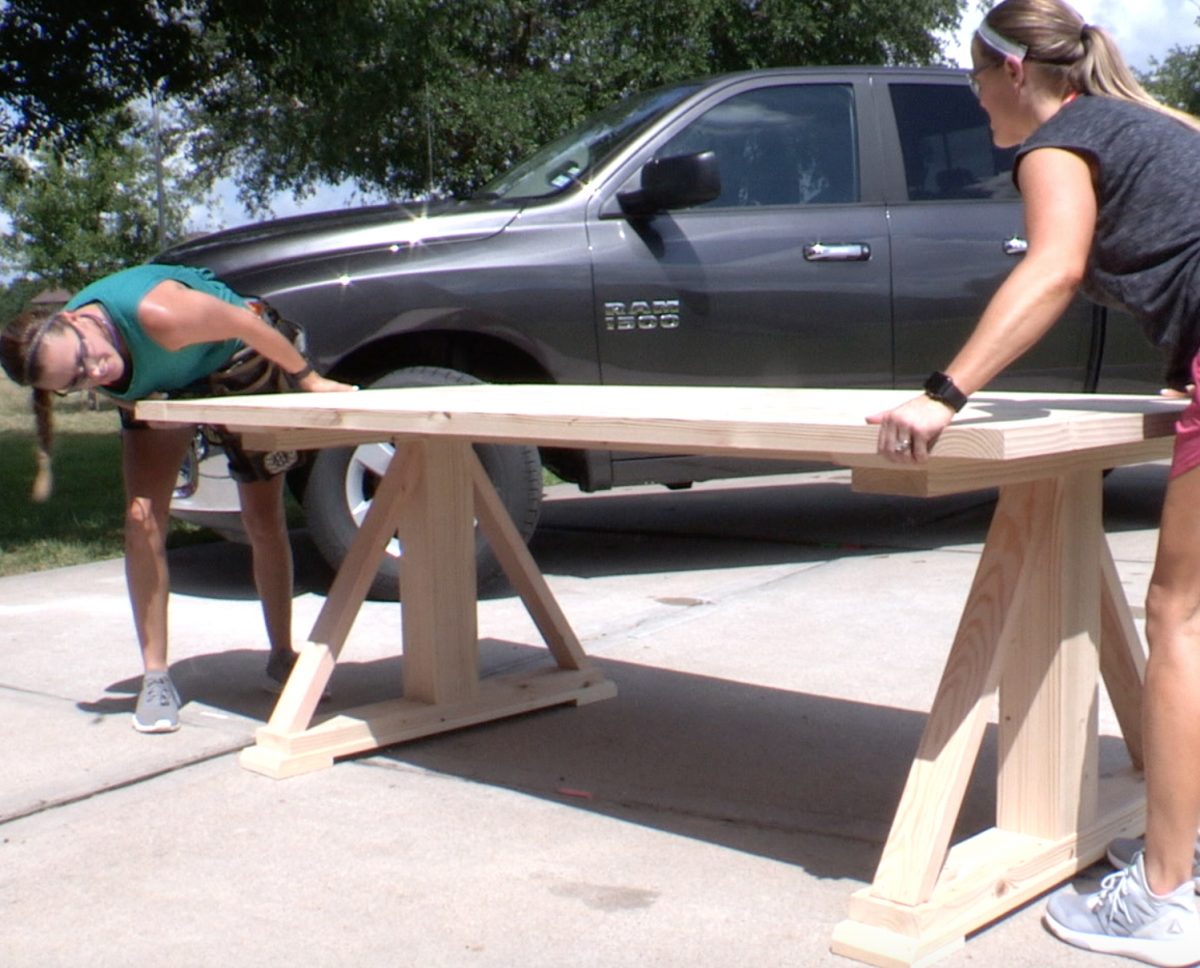
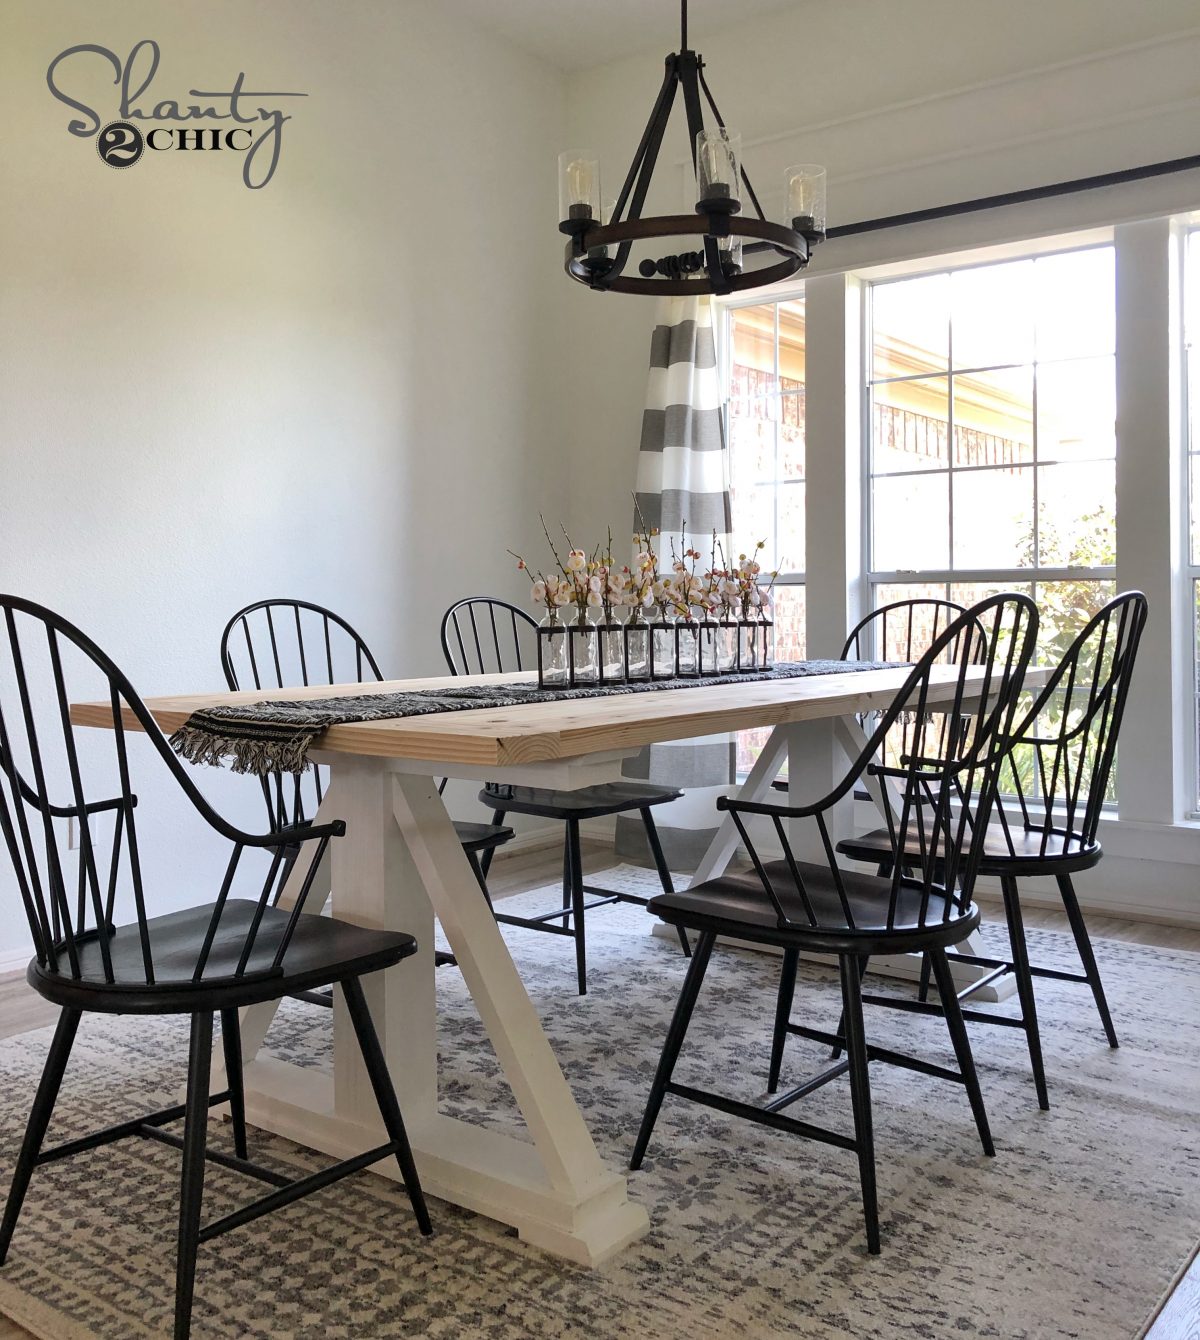
Table is done! You can paint or stain yours. Check out our website to see how we finished ours. Make sure to share your builds with us on social media and use hashtag #shanty2chic!
Here are links to all the goodies in the pic!
Finish for tabletop click HERE
Paint for base of table click HERE
As we mentioned, this awesome project was sponsored by Enterprise! We LOVED working with them! Our opinions, words and experience was entirely our own!
Find a ton of different styles in our complete collection of over 25 DIY dining table builds!


I appreciate the content as well as your efforts. Please continue to share similar blogs with us.
nice post
What are the final dimensions of this table? Thanks!
Hi! I love the design of this table. I want my husband to build it for me 🙂
My question is, is it really necessary to put breadboards to the ends of the table?
I’ve been reading a lot about the movement of the wood and I’m worried.
Thank you!
Pilar Neff
This looks amazing and I love having a farm house. We have a 3 acre land in our village and willing shape it up to a farm house.
Hi so this is our project what tools do we need apart from the obvious (drill, and saw)??
Thank you so much!
Do you think I could move the legs in towards the centre a bit more to allow for leg room for the persons sitting on the ends? If so, how far?
I was wondering the same thing!! like maybe set the legs 12″ in… would that be okay?
In the plans there’s no 1×6 under the table top but in the video there is. I made this table without the 1×6 and it rocked and was pretty unstable I wonder if the 1×6 helps with this
This is one of my concerns – how sturdy is this table from rocking end to end, with there only being the 1 brace right under the table top? Most farm house style tables have a mid brace or bottom brace running the length of the table…
Hi Jena! I put a brace 1”X 6” across at about 12”off the ground. Works great! Super sturdy!! High enough to vacuum under and no one rests their feet on it… almost;)
where are the dimensions on the cut list? Did I miss it somewhere on the plans. I purchased the wood and when I was ready to cut, they weren’t were they usually were. Please advise.
I love all of your projects and the fact that the downloadable plans are so easy to follow. The color coding is great for someone like myself trying to learn to build these pieces. Great work ladies and thank you!
What would I need to do to extend the size to 10″ long?
Where did you buy the chandelier?
I’m new to nailers, but eager to learn. What size nails did you use to laminate the leg bases?
Can you build a banquette?
My concern always with ax breadboard table is the breadboard end itself. Most people lift tables from the ends. I am concerned that the breadboards are not secure enough to support the weight of the table when the table is lifted but them.
I would love to see this table done as a 60″ round table!