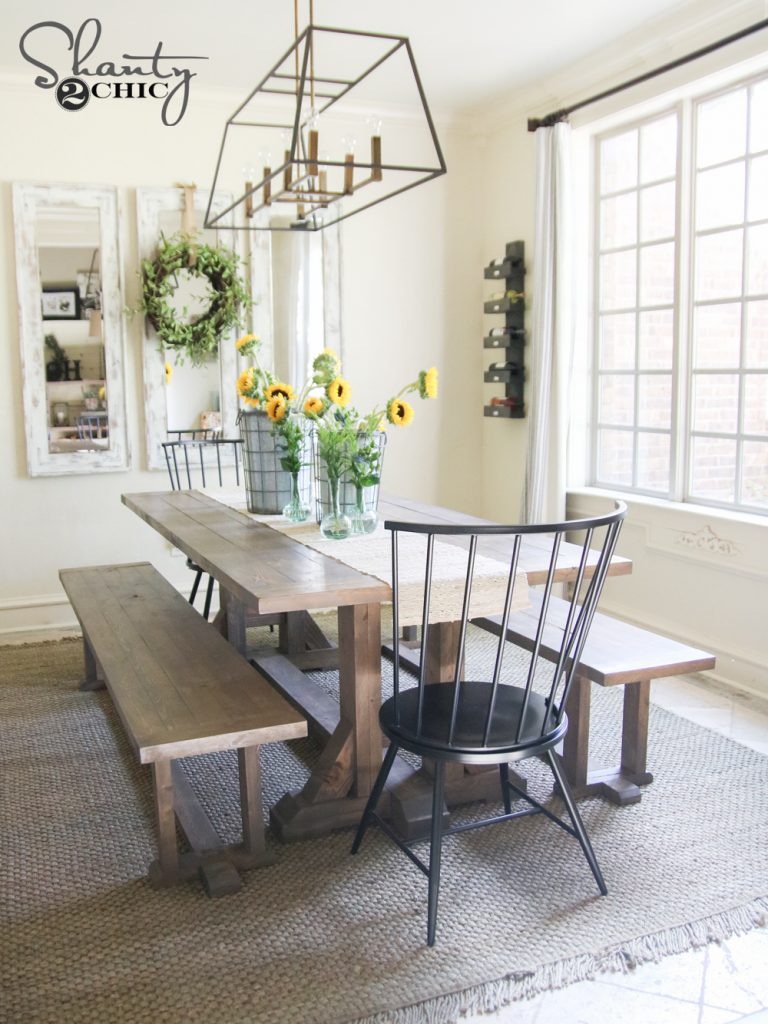
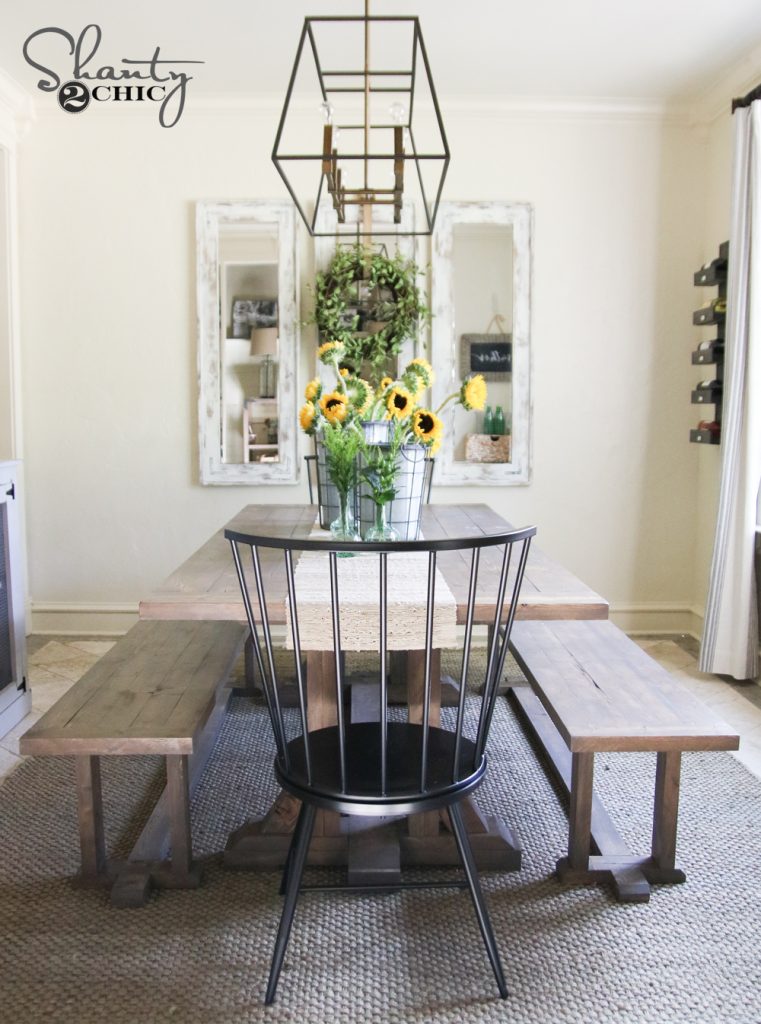
Guys. To say that I am excited about this build would be an enormous understatement. When I opened the Pottery Barn catalog a few weeks ago my jaw dropped. I saw the prettiest table and HAD. TO. HAVE. IT. So, in typical fashion, I started planning. Here is how she turned out! Check out my Pottery Barn Inspired Dining Table!
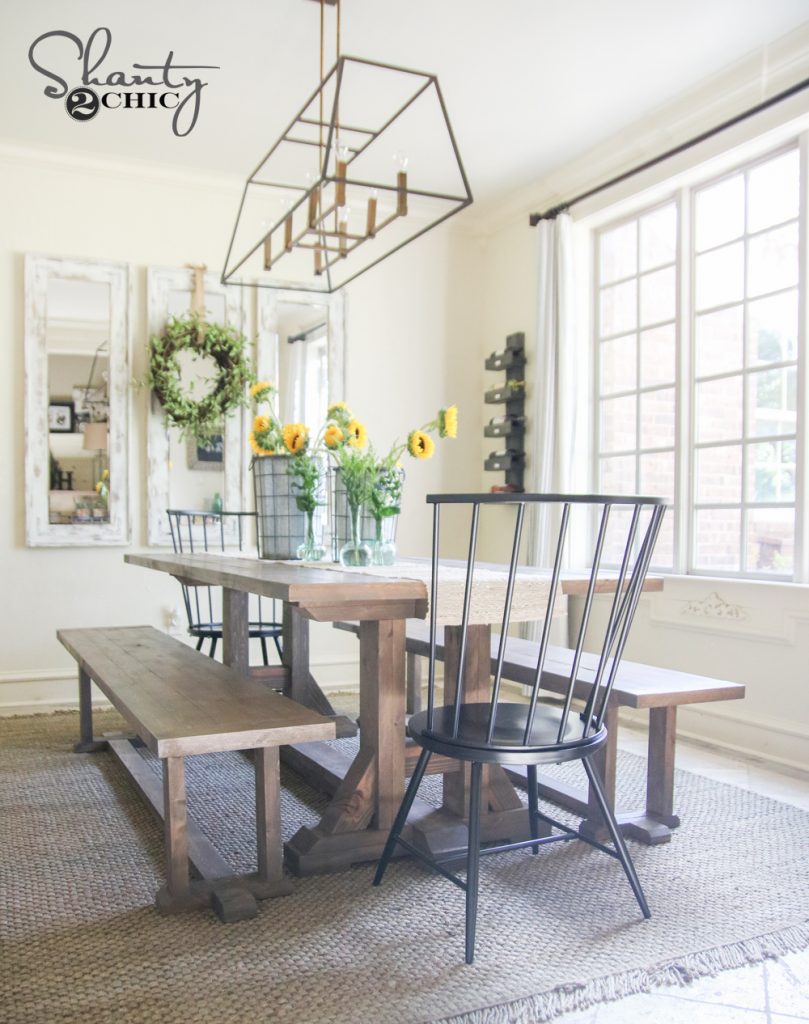
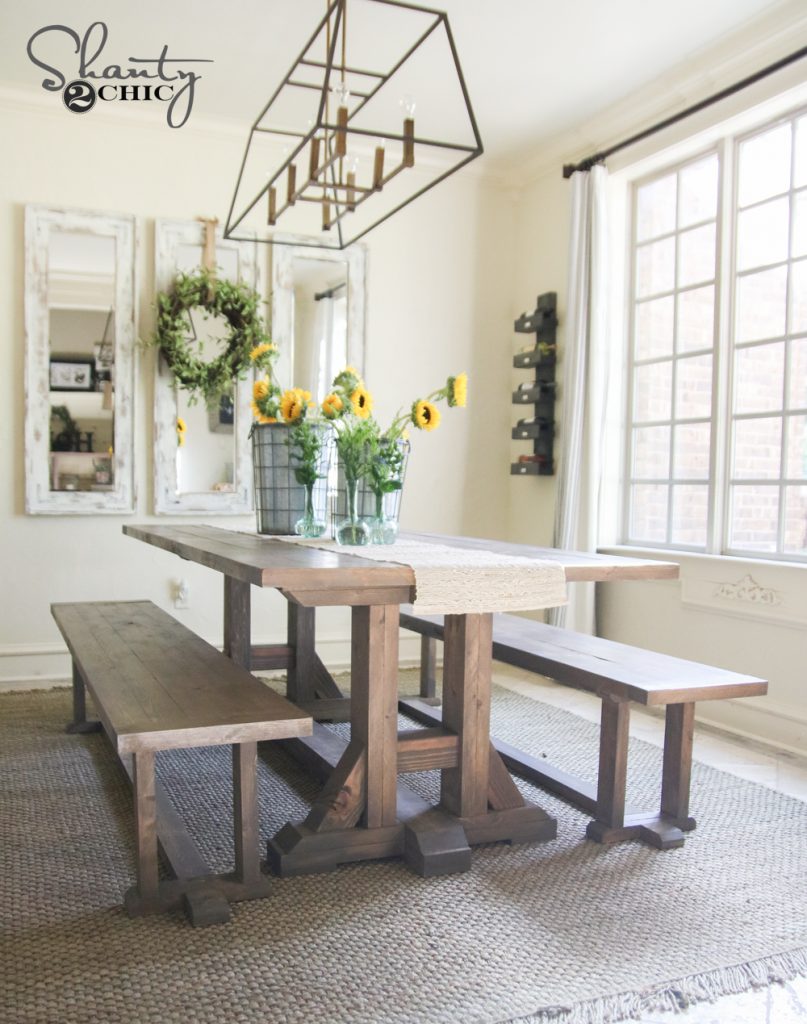
DIY Pottery Barn Inspired Dining Table
A few of my favorite things about this table…
A. Cost – The lumber total was $101 at Home Depot. See for yourself in the copy of the receipt I shared on Instagram!
B. Size – I like em chunky. This one fits that bill. Nearly the entire thing is constructed from 2×6. It’s beautiful.
C. Simplicity – I won’t call this a beginner build, BUT we have simplified the plans to allow you to use a regular Kreg Jig and not the HD. My brother-in-law received the plans from me about a week ago (perks of being family 😉 ) and this is his VERY first build. It took him a few days, but he completely nailed it. So, I feel like its totally attainable at any level with the right tools.
So, let’s go! As always, I will walk you through the entire build below and you can download and print the FREE plans by clicking HERE!
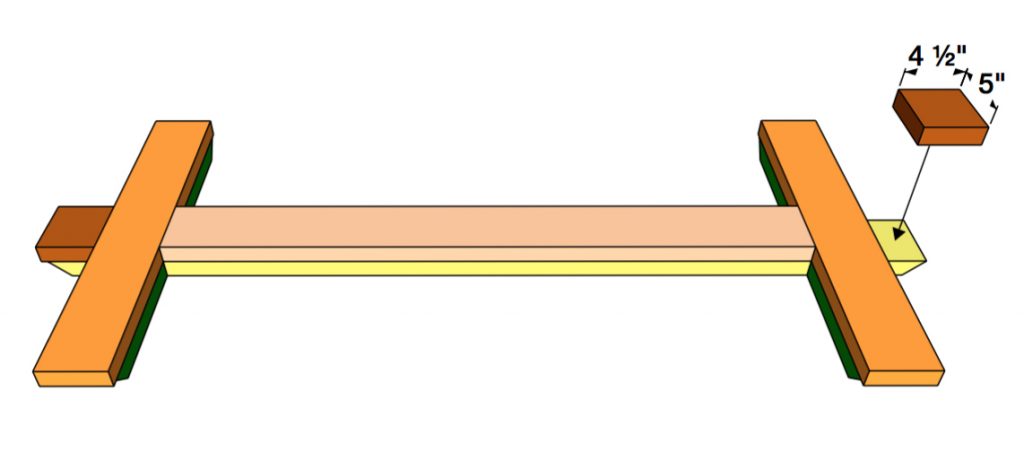
Find the matching bench plans here!
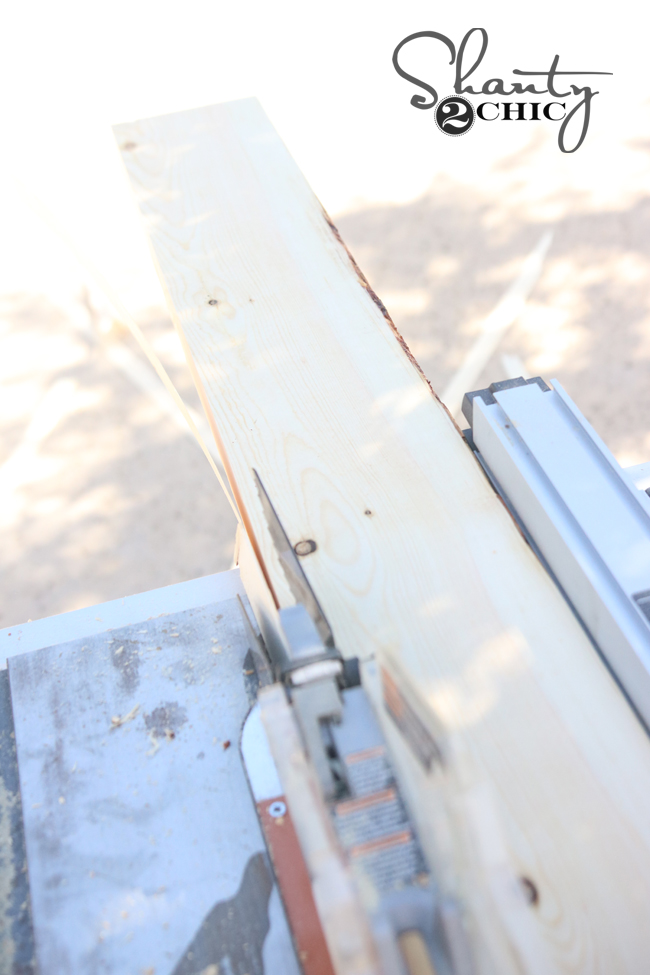
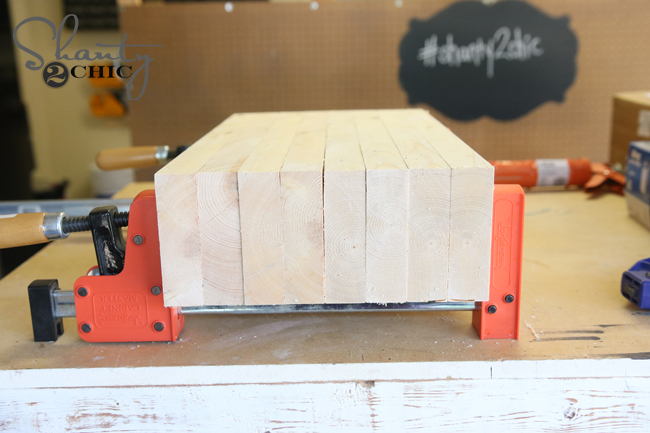
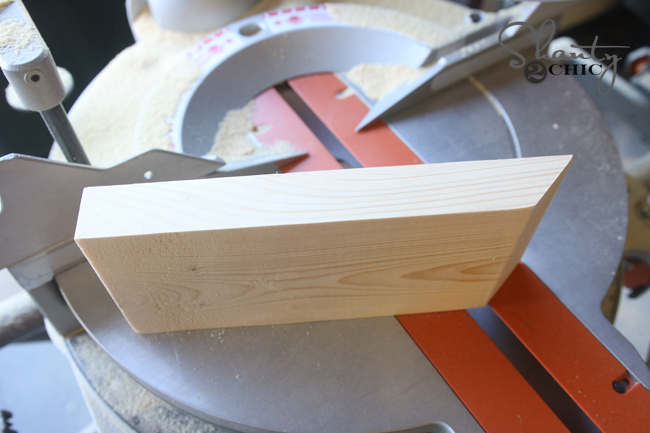
This table uses 2×6 framing lumber. On several parts you will “laminate” the boards together to form the larger looking pieces. To get a really high end look on this piece, I chose to rip all the rounded edges from the boards. I did this using my table saw. This takes a little extra time, but it’s SO worth the outcome. You will run each rounded edge through, leaving you with 5″ width boards.

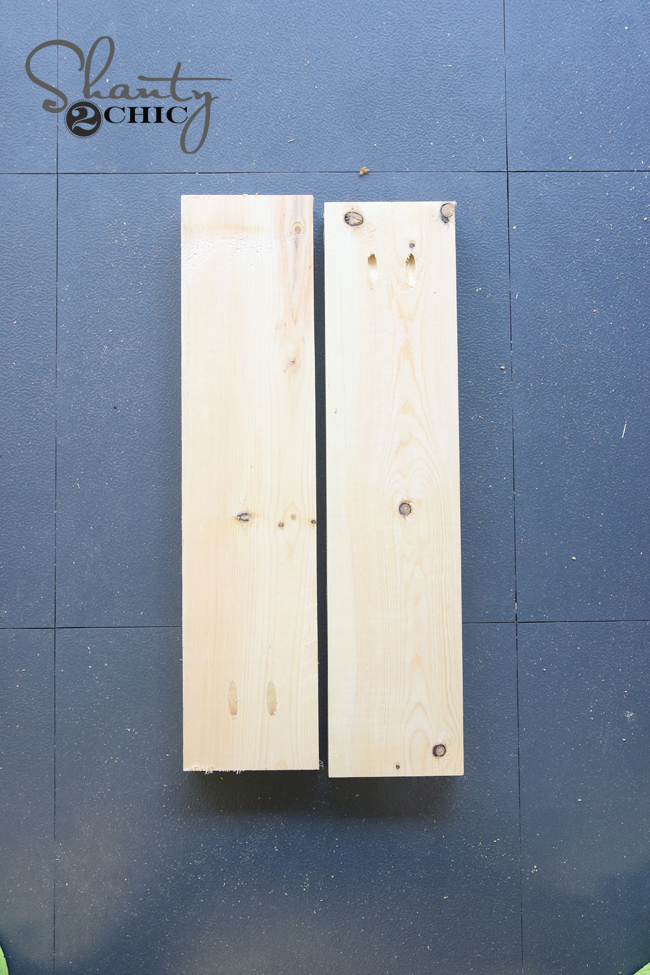
Once you have that finished, it’s time to prep the boards for the legs.
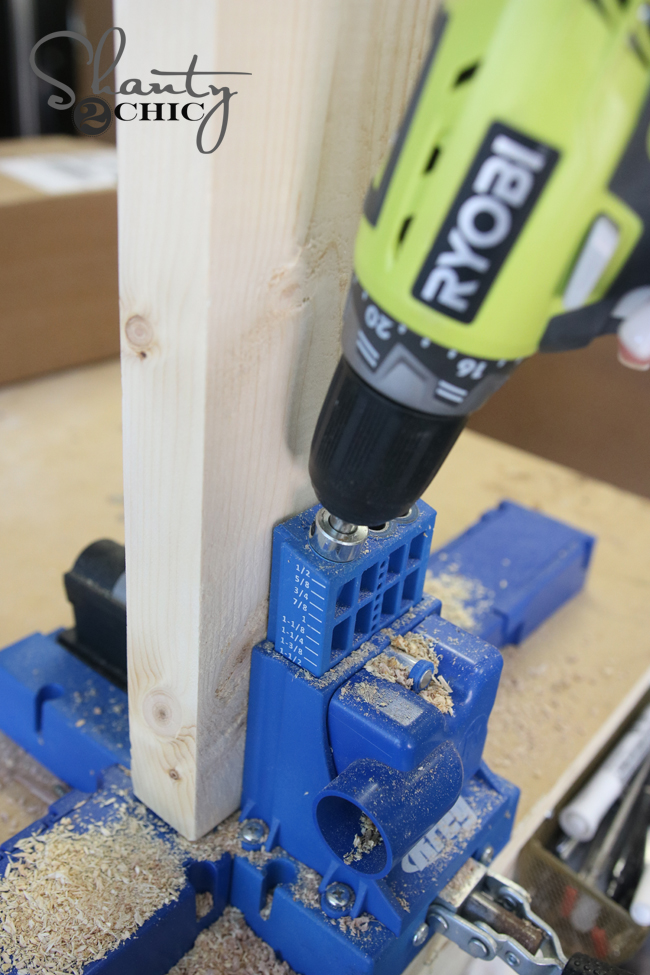
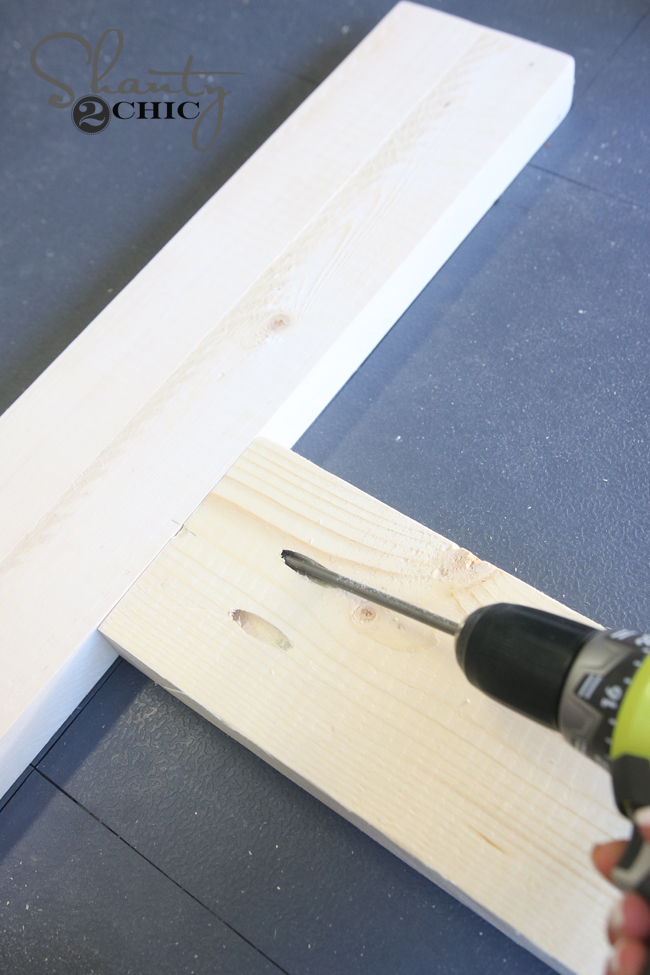
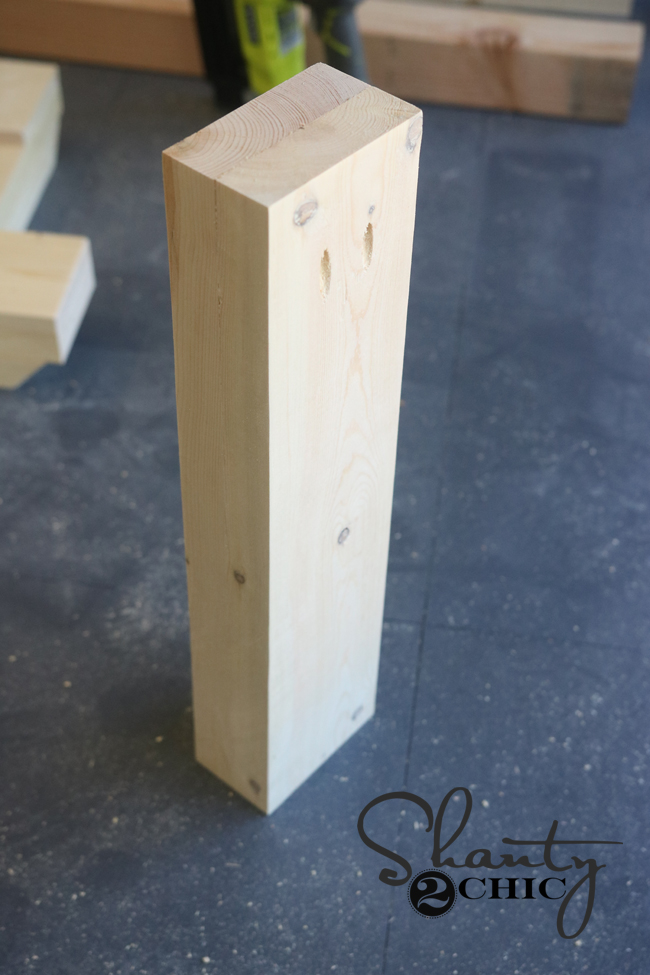
I cut the leg pieces next before laminating them together. I did this so that I would be able to add pocket holes to the legs without having to use the HD jig. Each leg is two 2×6 with 1.5″ pocket holes on one side and end of each board. I used my K5 Kreg Jig to make these pocket holes. This is FOR SURE the Kreg Jig model we would recommend starting with. You will thank us 🙂 You can find it on Amazon HERE!
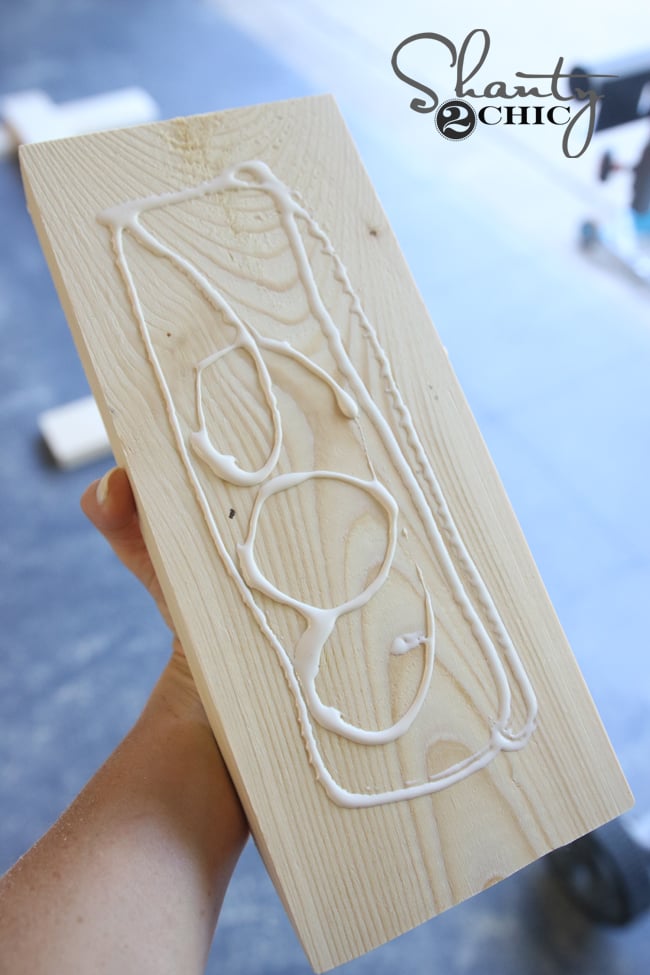
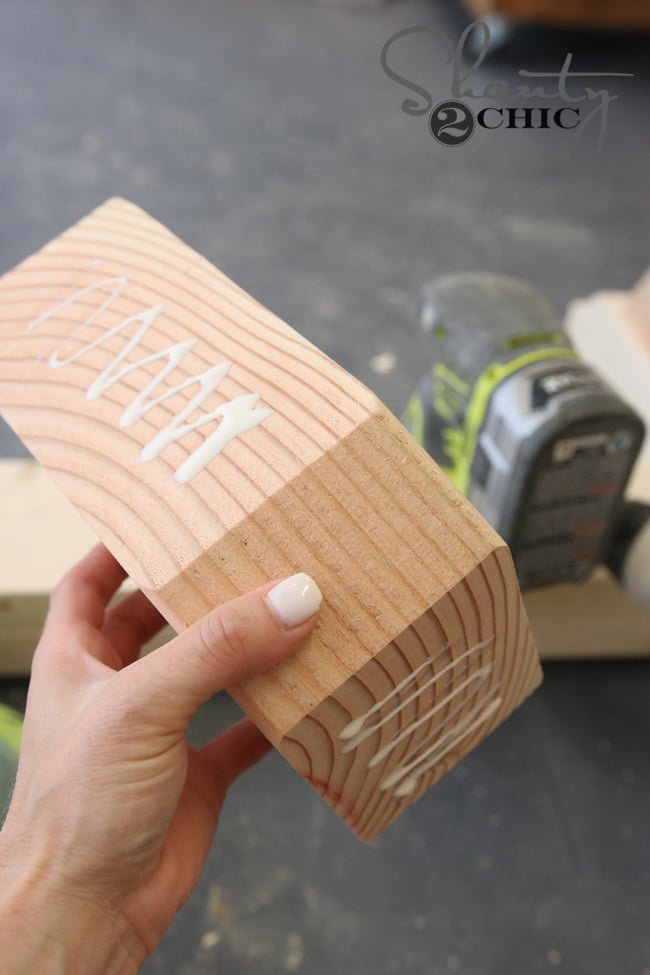
Next, add a ton of wood glue to your legs…
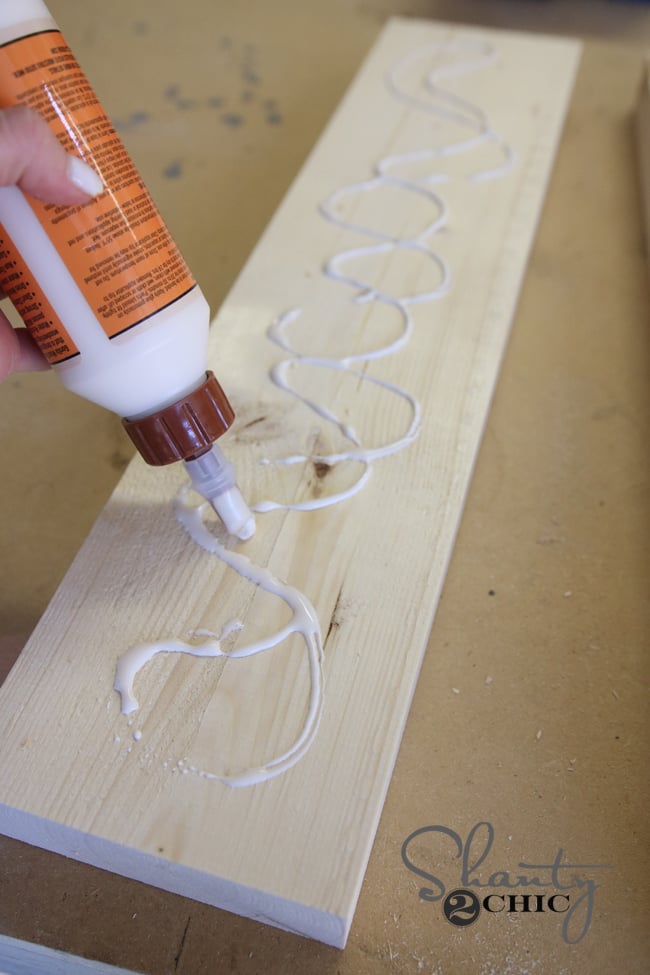
And, clamp them together. The tighter you can get them on this part, the smaller your seams will be. BE SURE to attach them the right direction with pocket holes facing out and at opposite ends!

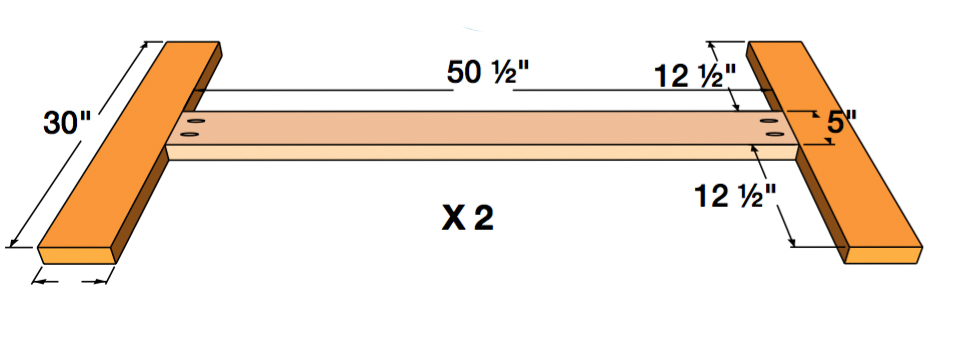
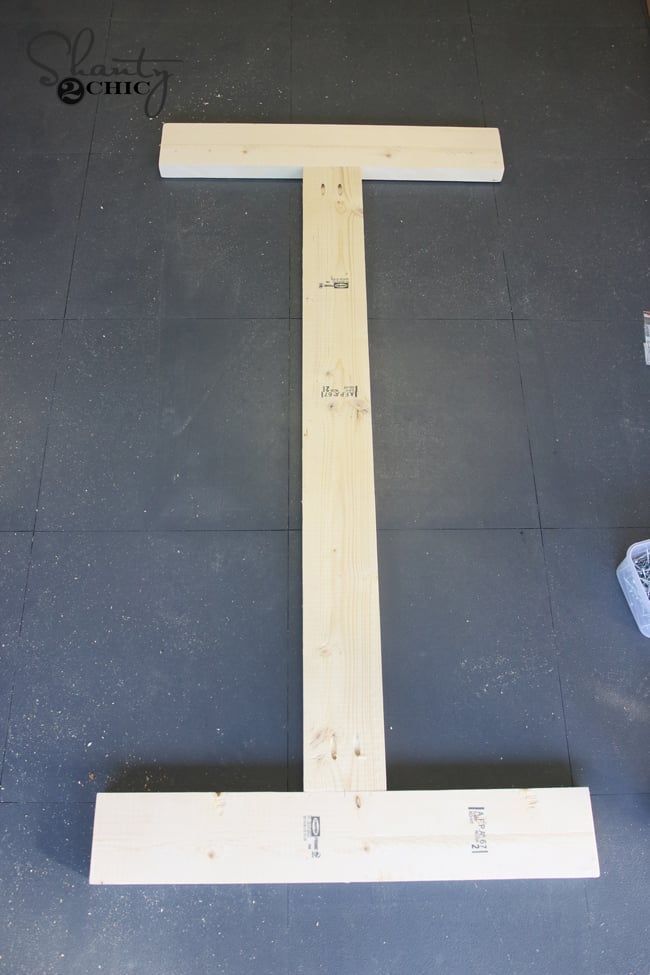
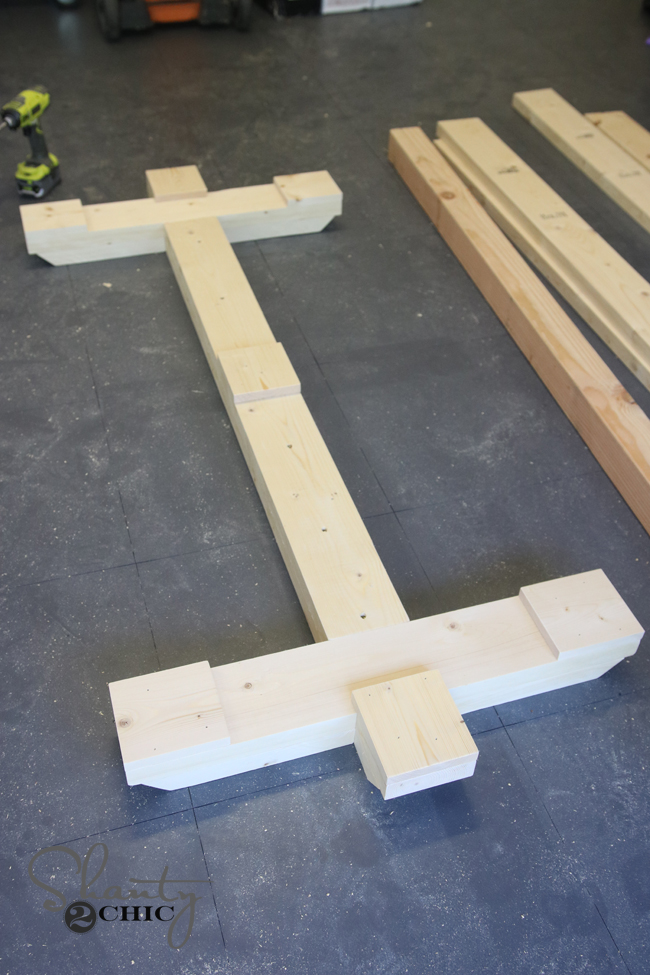
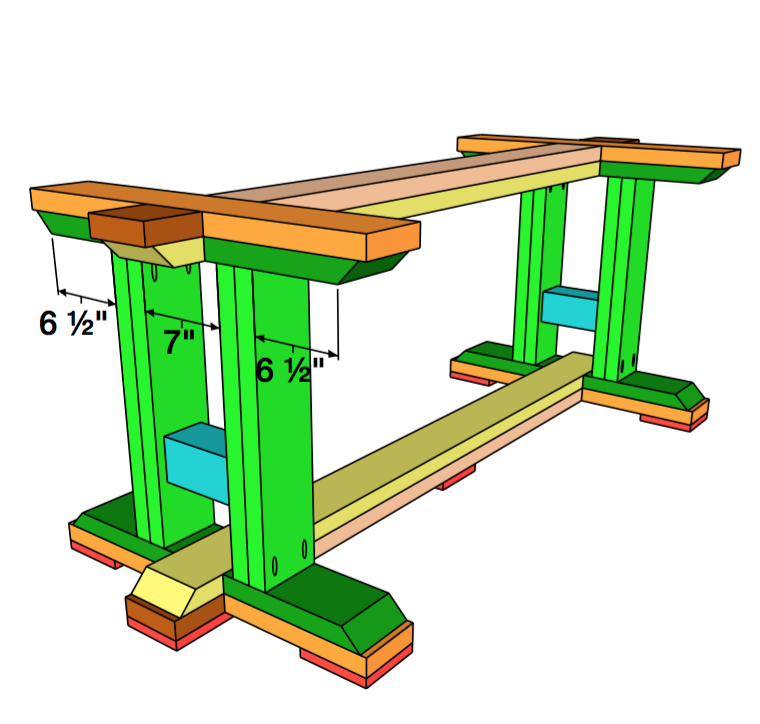
While those were drying, I got started on the base of the table. You will actually make two identical base pieces. One will be the actual base that sits on the floor and the other will be the part that supports the table top.
You are basically forming the letter “I” on this part.
I attached both ends using wood glue and 2.5″ pocket hole screws through the pocket holes.
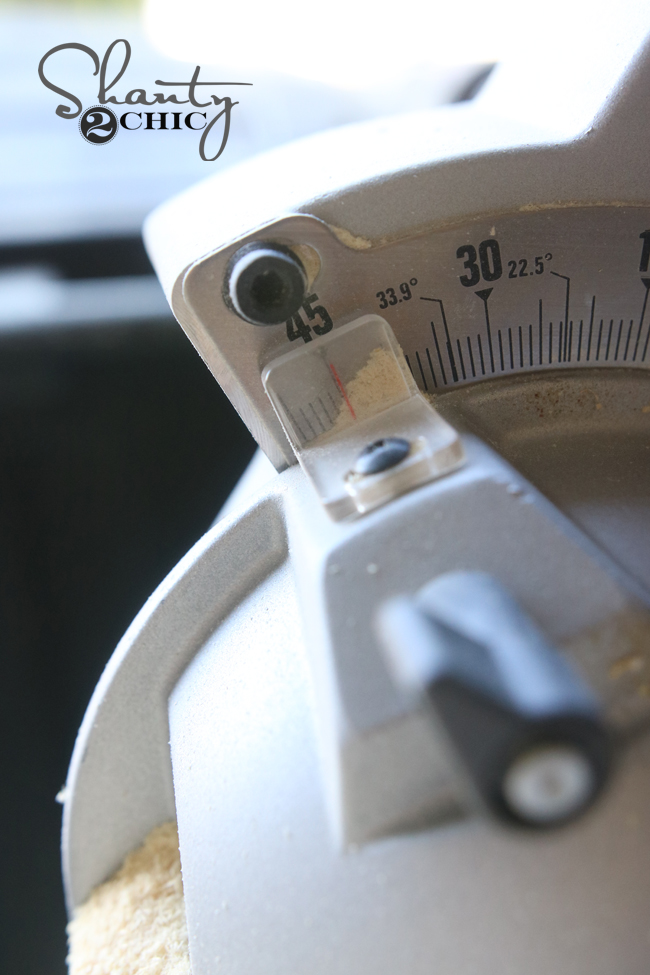
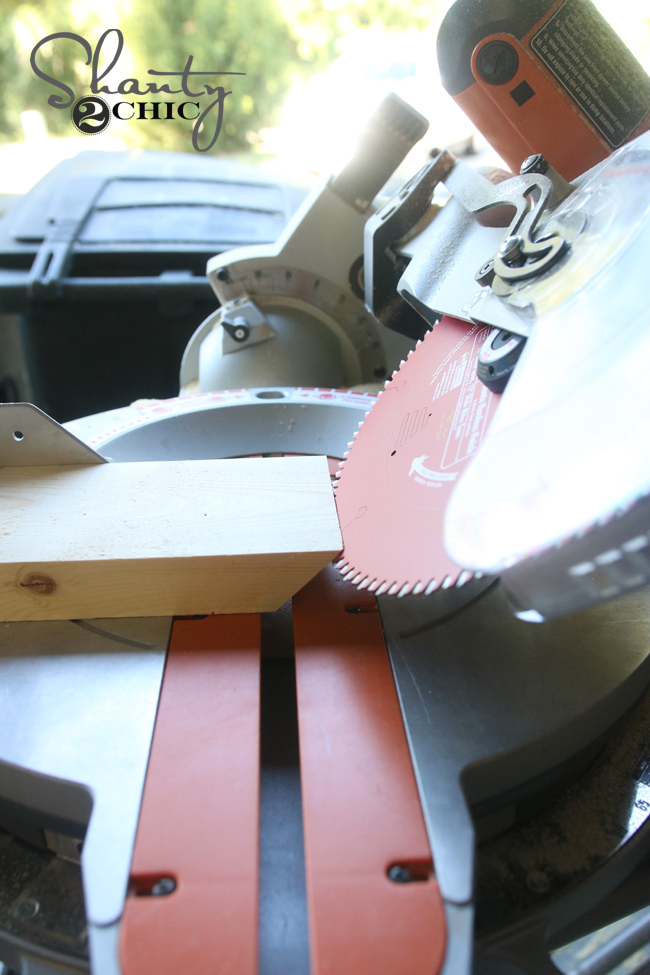
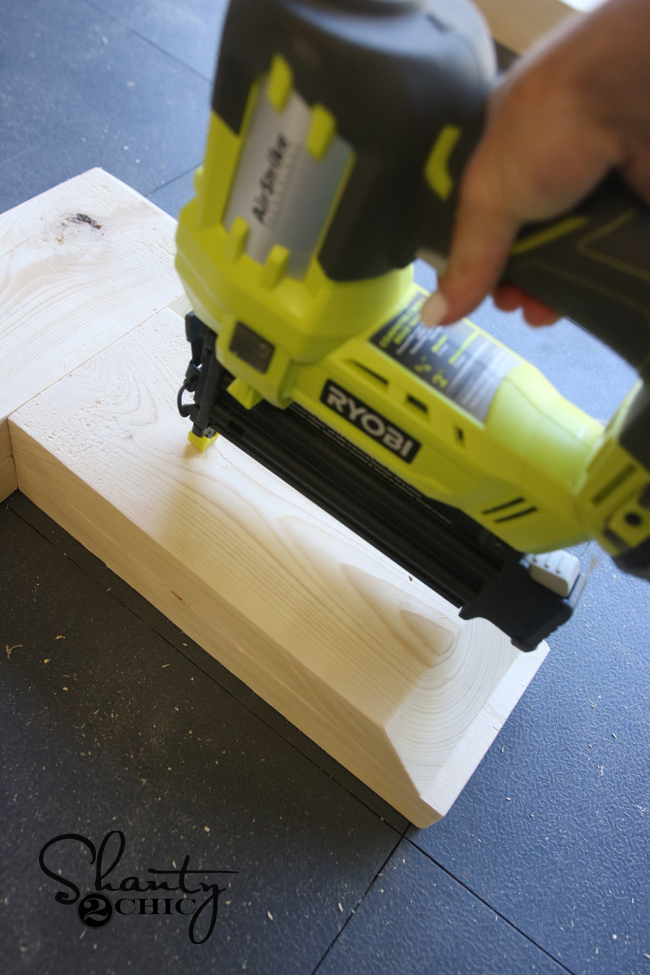
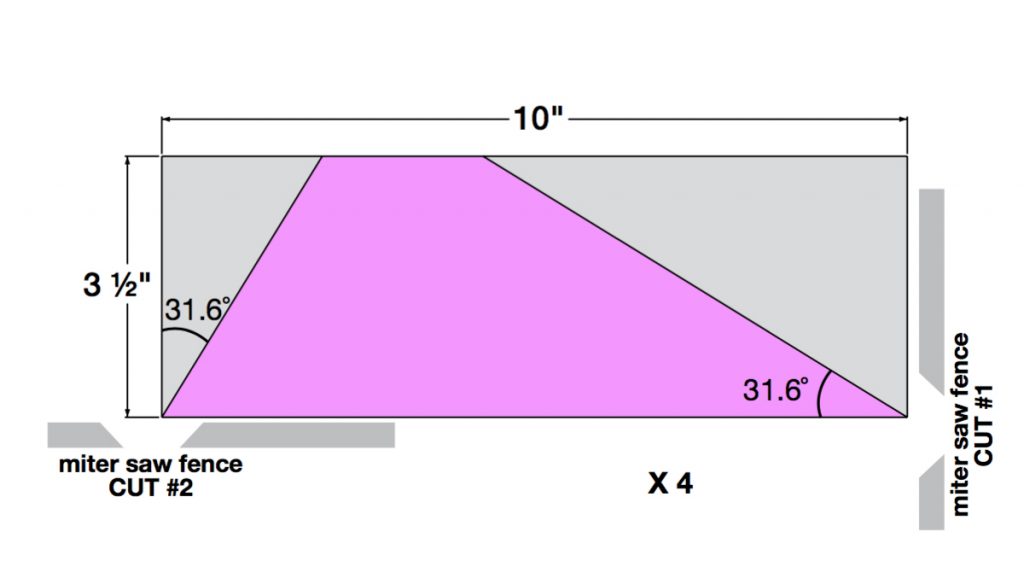
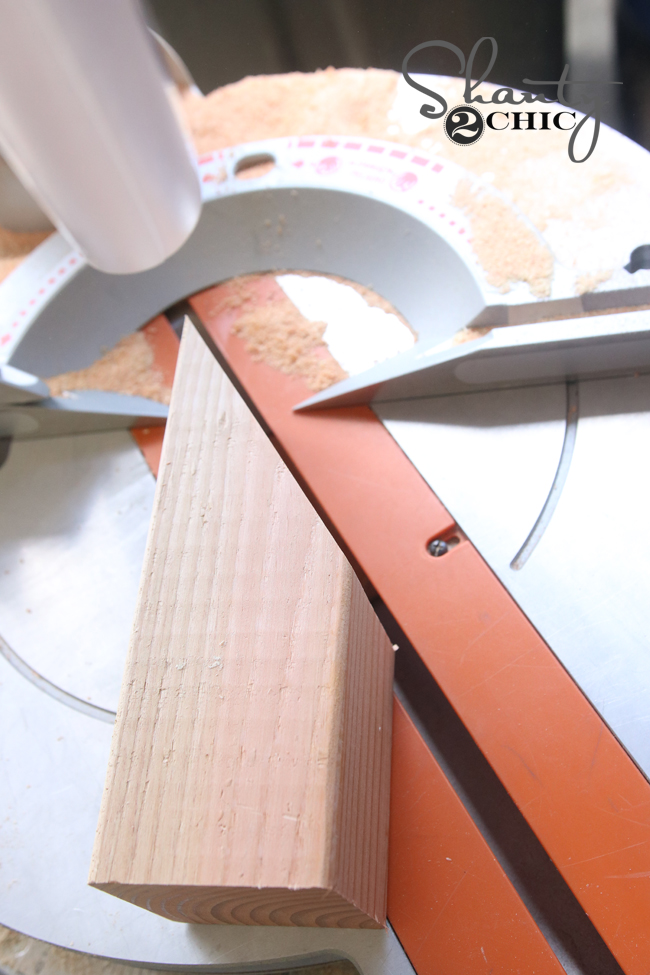
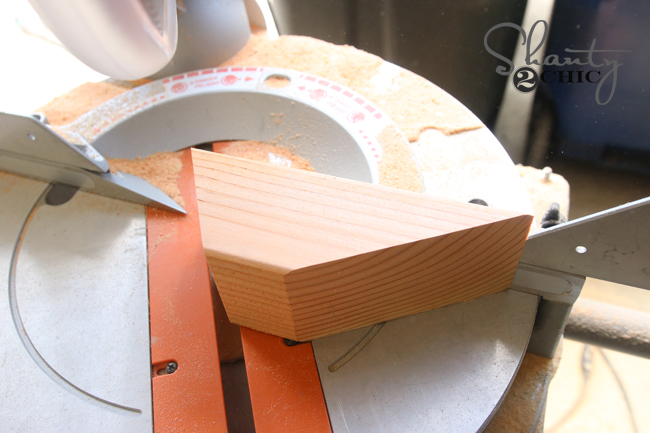
Next, I cut the additional pieces. Each of these will have 45˚ bevel cuts. I used my miter saw for this part.
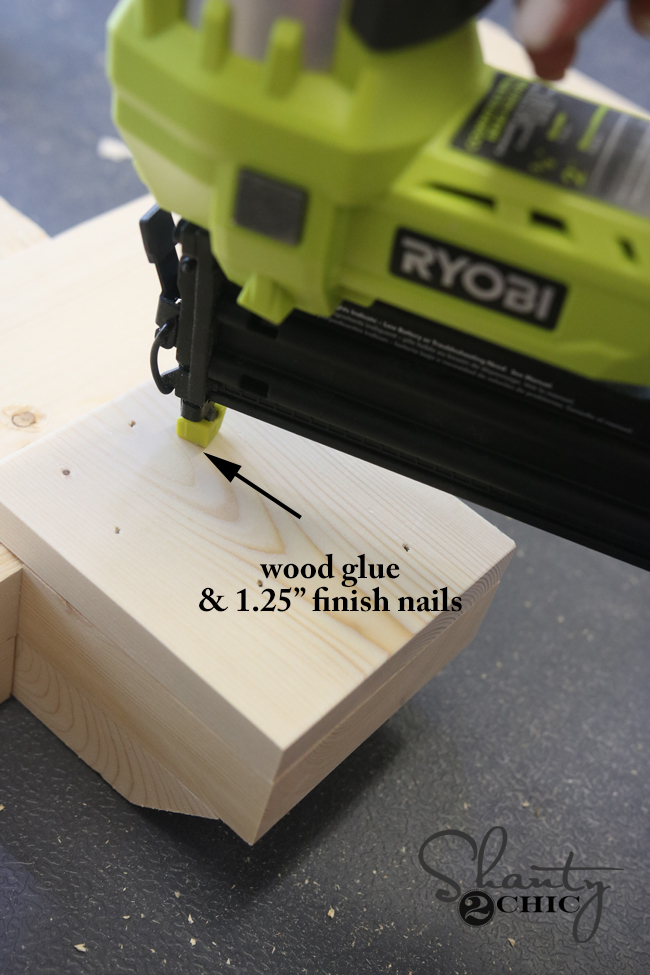
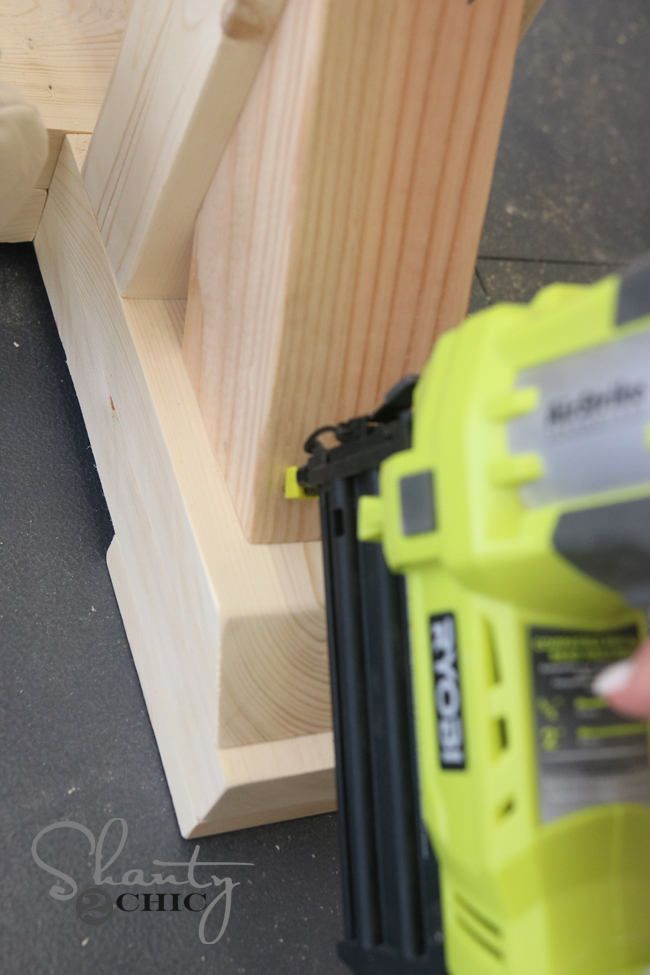
I attached these pieces using lots of wood glue and 2″ finish nails with my Ryobi AirStrike finish nailer.
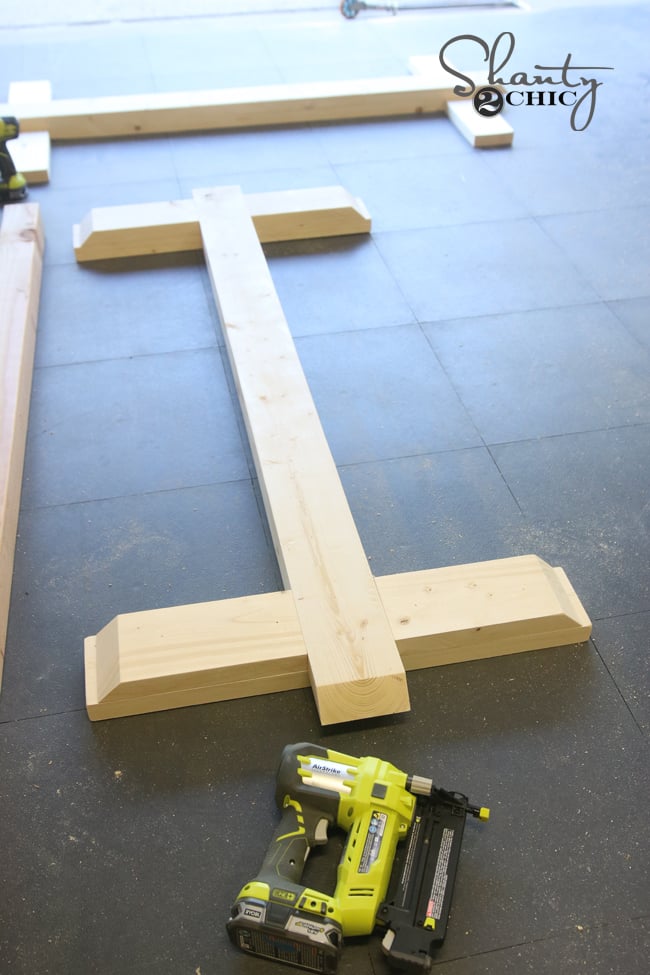
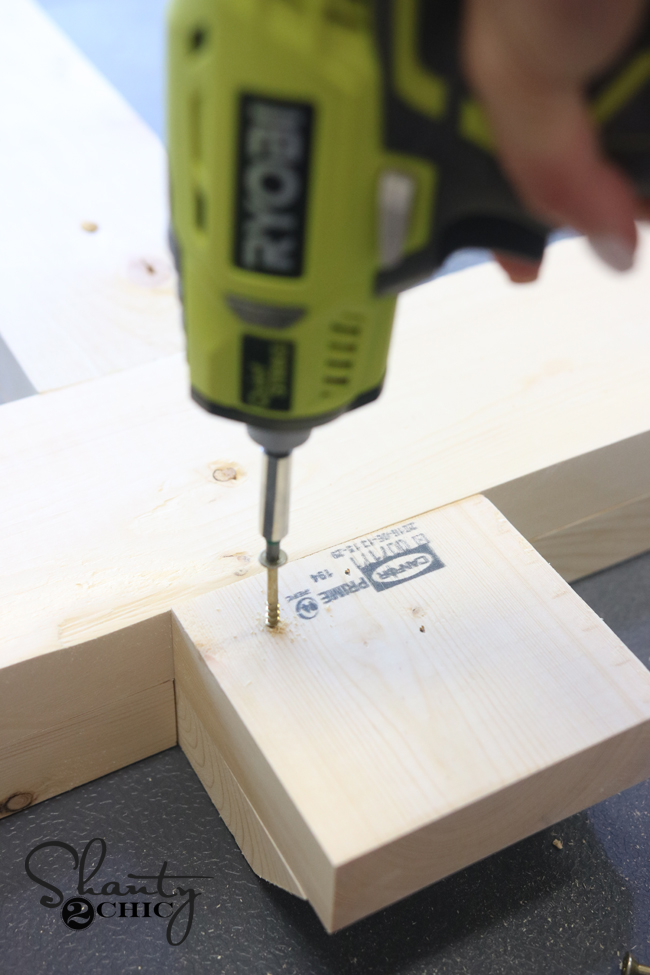
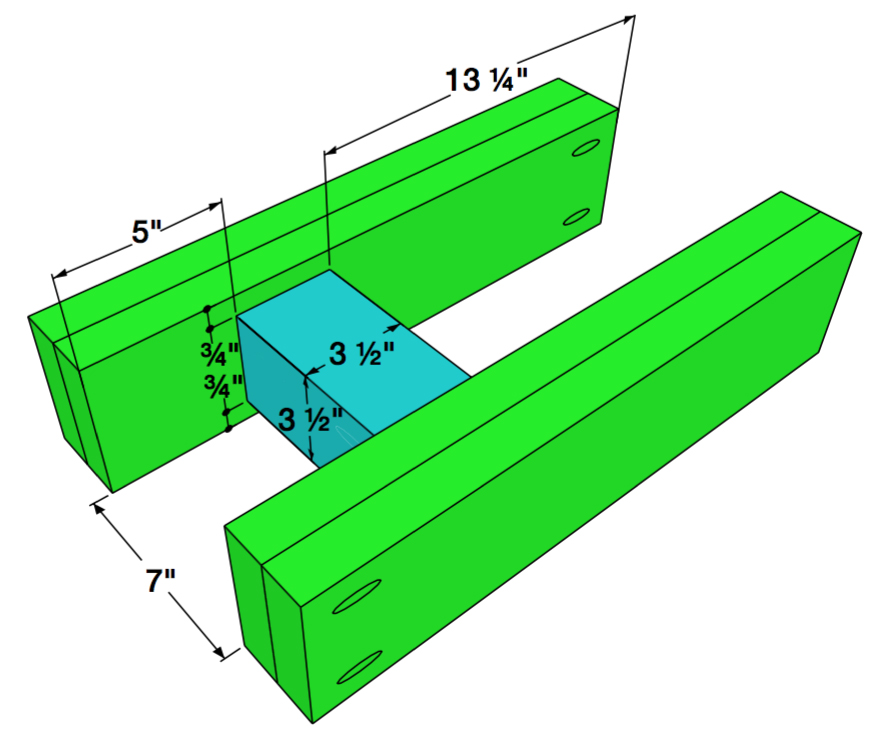
Next, you will cut and add them small squares for each end. I flipped each base assembly upside down on this part.
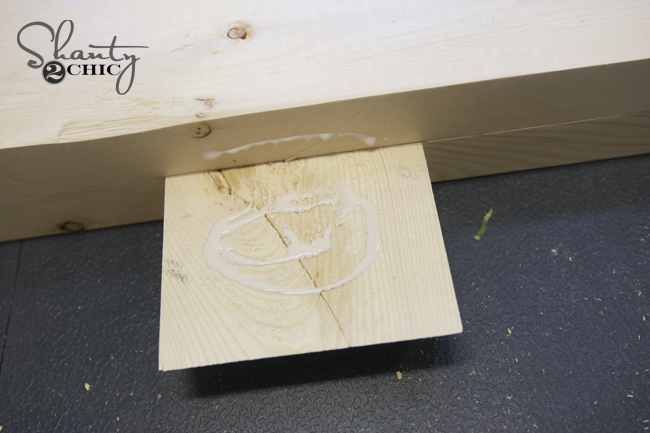
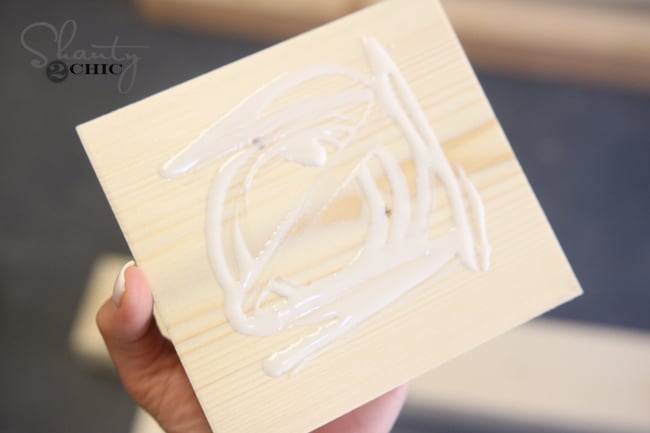
Then, I added wood glue to each end.
I attached these squares using 2″ Spax screws. You can use a drill on this part, but I used my new Ryobi driver that I LOVE. It’s called the Quietstrike and I am shocked at how much quieter it is than my other driver.
It’s foot pad time! These are small squares cut from a 1×6 that will attach to the bottom of one of the base assemblies.

I also used wood glue and 1.25″ finish nails on this part as well.
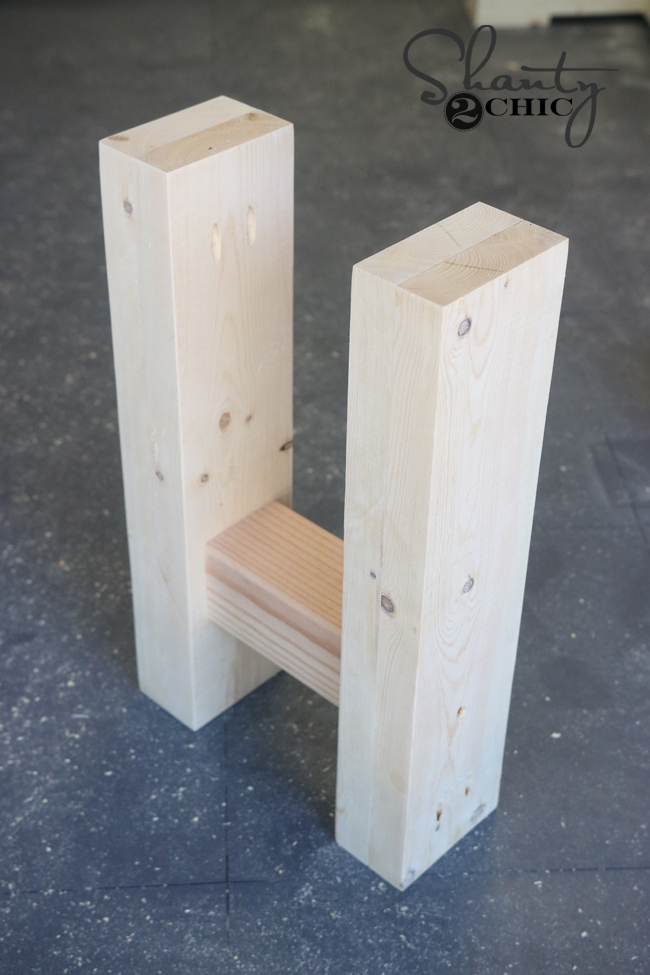
Now back to the legs! I unclamped all the legs and started building each leg assembly.
This will consist of two legs and a small 4×4 runner that goes between each leg. This is what they will look like.
*Small Note* Some saws will not be able to cut through a 4×4. If that is the case with your saw, you can use a 2×4 for this part and laminate it the same way you did the 2×6 in the above steps!
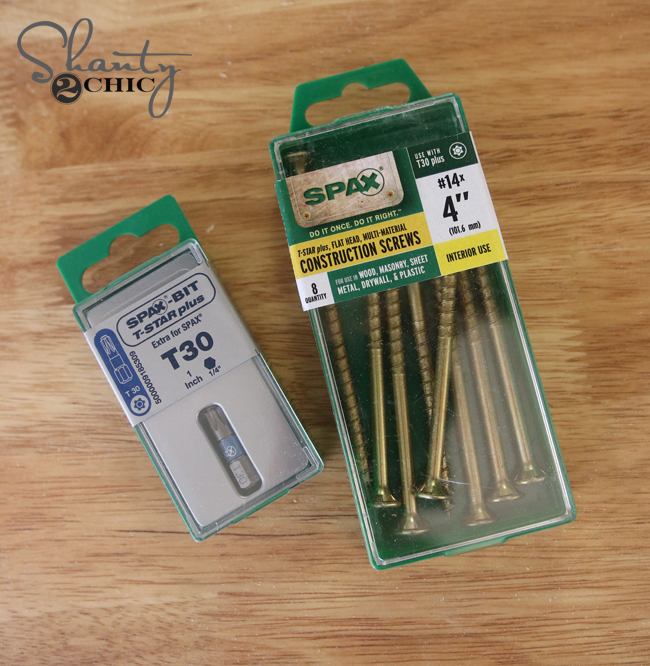
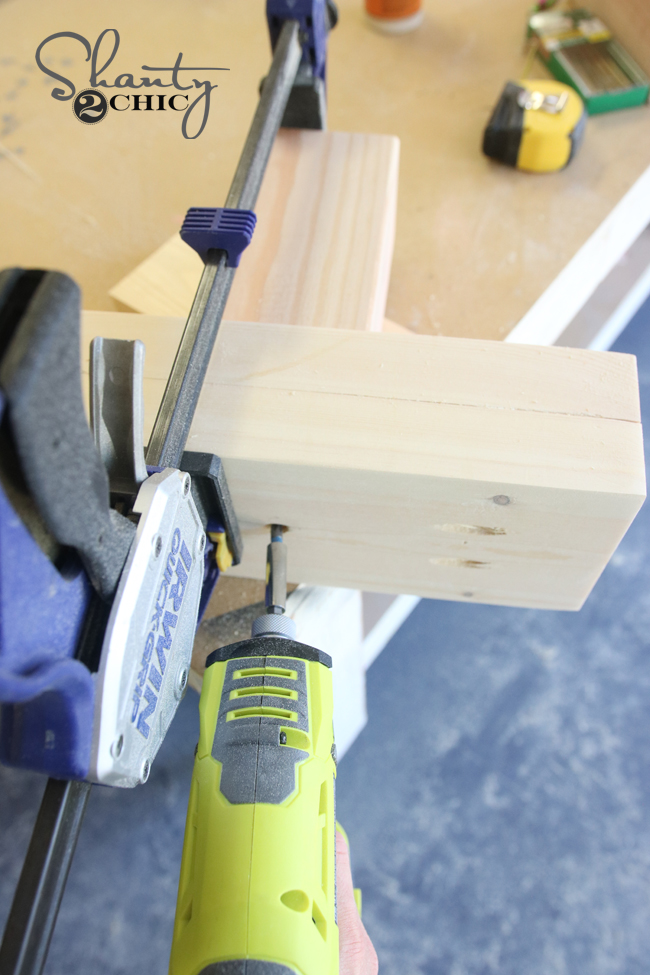
I glued and clamped one leg to the 4×4 to begin with. You will need 4″ Spax screws for this part! These are by far one one of our favorite brand of fasteners. We use them in multiple sizes for different projects. The T-star head is one of our favorite features. You can find out more info on Spax brand HERE.
I used my driver to attach the legs to the runner. I put two screws into each side. These screws will be covered in one of the next steps.
I attached the other leg the same way.
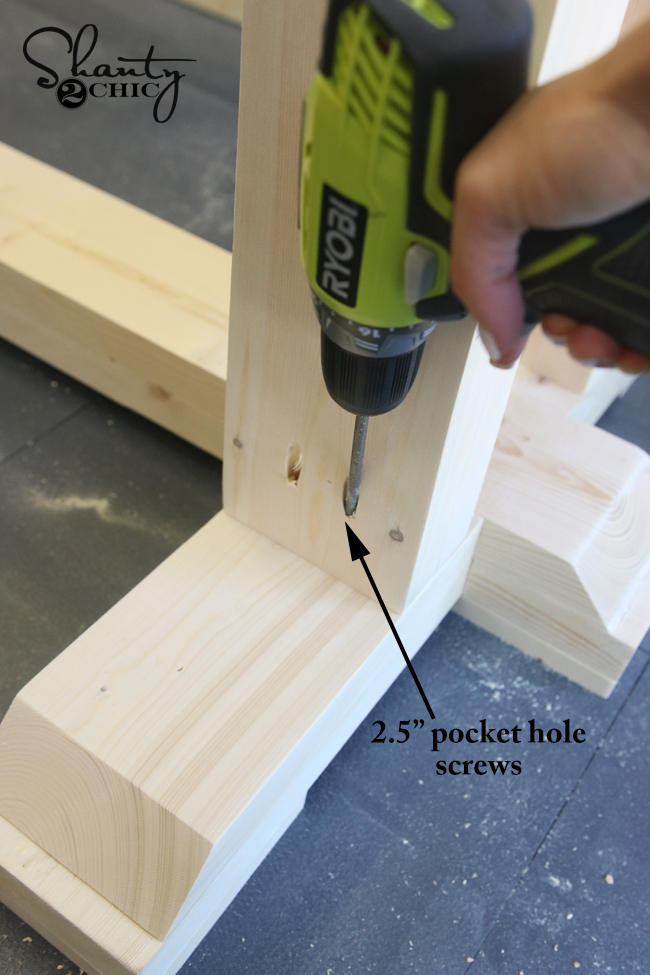
Next, I attached each leg assembly to the base. You will attach these to the base with the foot pads using 2.5″ pocket hole screws and wood glue.
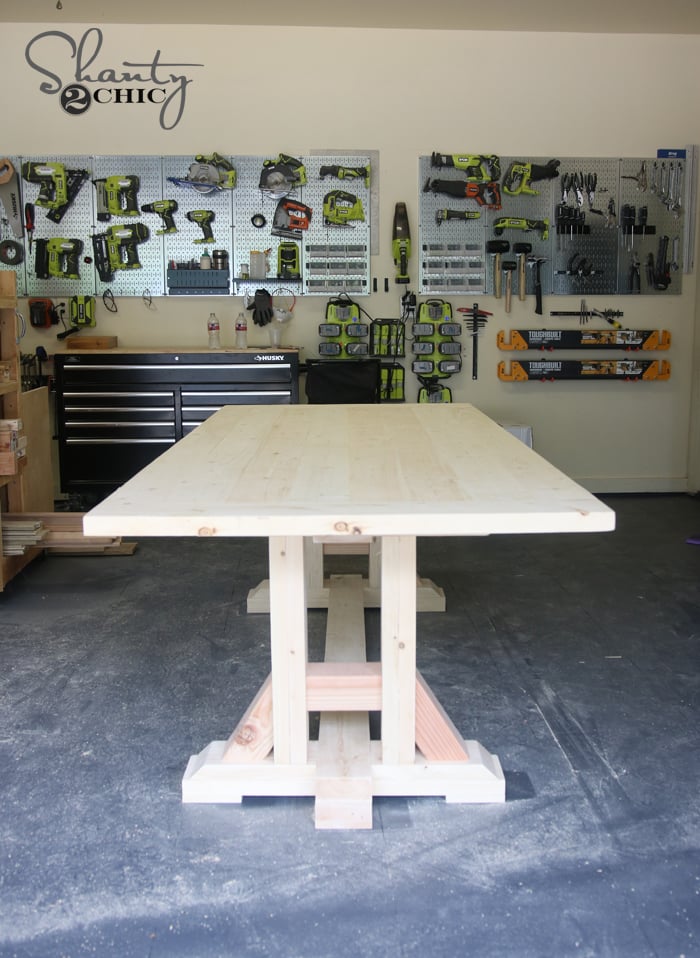
You will attach your top base assembly on top of the legs next and the entire pieces should look like this….
Now for the slightly tricky part…
Again, you will need to get creative here if your saw won’t make a pass on a 4×4. I would suggest using a 2×4 on this part to achieve a similar look if you get stuck. Be very careful making these cuts on the 4×4 and try to clamp your wood as best you can when you cut it. I cut my 4×4 at the angles noted in the plans.
I used wood glue and 2″ finish nails to attach these pieces to the base of the table.
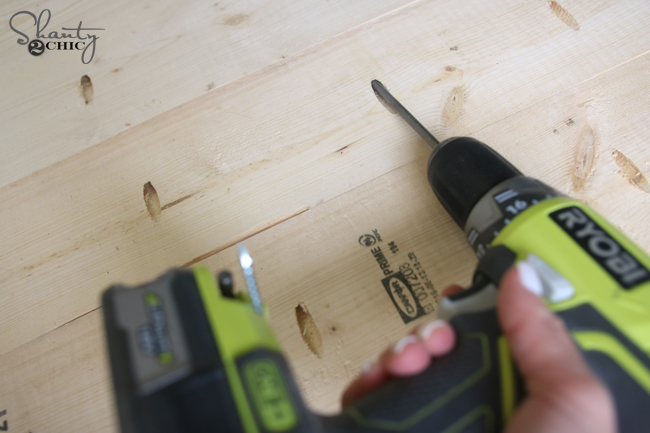
The table top is next! I added all my 1.5″ pocket holes to my planks and attached them to each other using 2.5″ pocket hole screws.
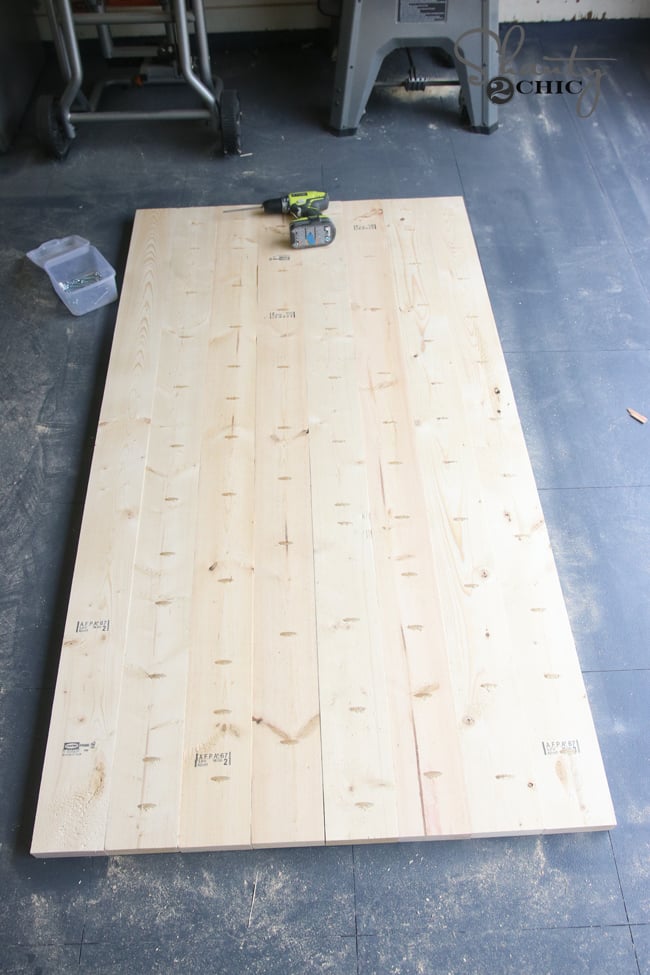
I attached the breadboards the same way and I was done! I set the top on the base for photos but waited to get the albatross in the house before attaching them.
I shared my pride on Instagram 🙂
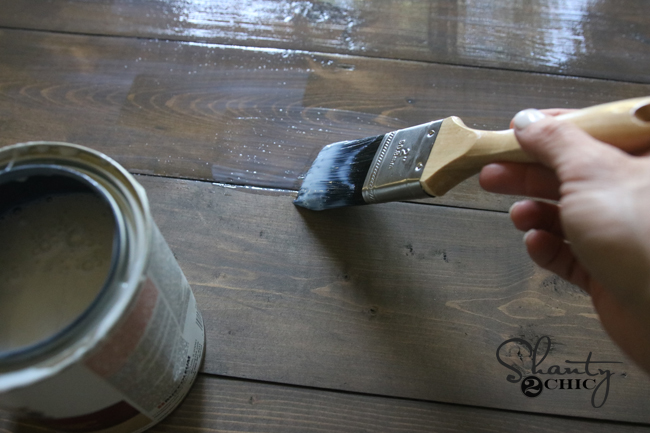
Before staining the table I sanded everything down really good. This makes the wood take the stain even better.

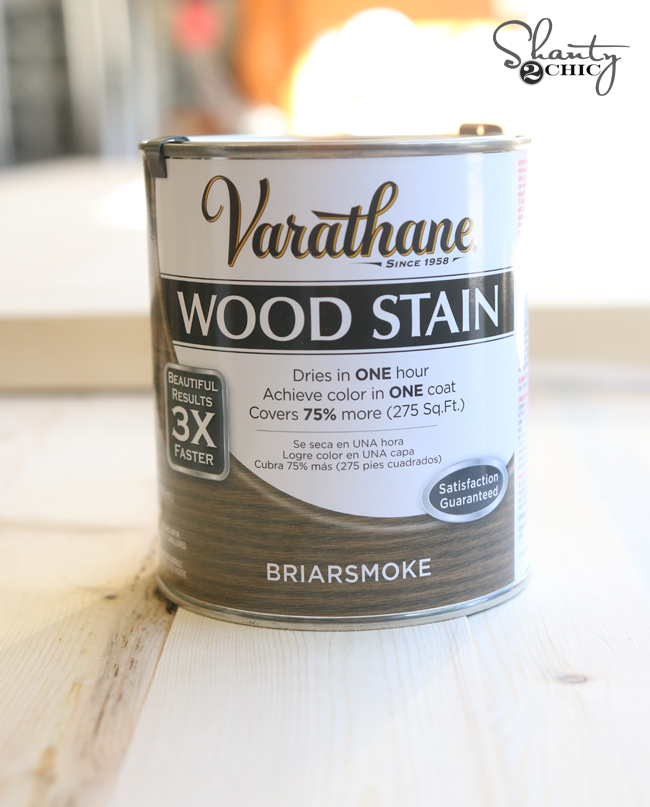
I chose to use Varathane Briarsmoke stain for my table. It’s amazeballs. You will love it. Best color ever.
After staining it, I talked my hubby into helping me move her inside so I could get it attached. I used 4″ Spax screws on this part. You can find them at Home Depot or on Amazon HERE. I went through the table base runner and into the table top using 8 screws.

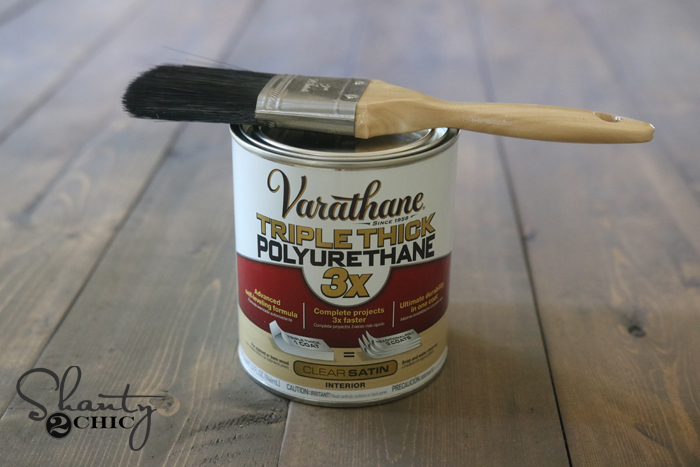
After assembling the table I gave the top a coat of Varathane Triple Thick in Satin to protect the it. This stuff has an awesome finish to it. You brush it on and let it dry. It goes on white and dries clear.
Whewwwww that was a lot of pictures. For those of you that are still with me, here she is again all finished!
I’ve had lots of questions about the centerpiece bottles and vases.
The vases can be found HERE on Wayfair.
The vintage bottle set can be found HERE on Wayfair.
And, let’s talk about the chairs… I’m in love. They are super cheap too! You can find them HERE on Wayfair!
The rug can be found HERE on Wayfair.
The chandelier can be found HERE on Wayfair.
The wall color is Antique White by Sherwin-Williams.
The window panels can be found HERE on Pottery Barn.
The bench plans are coming soon!
Thank you! I would SO appreciate you sharing this project with all your friends. Let me know if you have any questions at all!
Whitney
Check out our complete list of over 25 free DIY dining table designs!


The link to the table plans doesn’t open anything but a blank page. How can I get my hands on the printable plans?
Is there a place on your website where you explain your technique for ripping the rounded edges of boards with a table saw? I’m about to attempt this, but am not how to keep the boards steady while ripping since they’re on the longer side. Thanks!
Andy – your best bet is to get a couple of roller stands to support the weight of the 2×6 as it comes off the table saw. You could also build or buy a feather board to hold it tight to the fence as you guide it through – it’ll be safer that way too…less chance of moving the board and causing a kickback.
Hey does anyone know if this would work if making it into a 12′ table? Would one support in the middle be enough to hold it.
Has anyone done 48 by 108 yet? We are about to start this project soon and would love if anyone has the plans updated for that size.
Did you figure out how to make this table bigger? I’m wanting to do the same. I was thinking of using a 2×10 across the bottom, but thinking it might be too big. Wondering what you ended up doing.
What kind of wood did you use? I am having a hard time finding wood any where close to the price you paid.
Fir or Pine at your local big box store… current Home Depot prices for wood put this table at about $110 plus tax (minus glue, screws, etc)
17- 2x6x8 @5.74 = 97.58
1 – 4x4x8 @10.26 = 10.26
1 – 1x6x6 @3.45 = 3.45
Total……………………….111.29
Are the bench plans now avalialble?
awesome table
Can someone verify if it’s 2.5′ wood screws or 2′ wood screws? I believe in the instructions above she mentioned using 2′ wood screws which is not on the material list… thanks!
What size rug do you typically buy for this size table
it would be nice to have an actual downloadable plan with a wood list and tool list
I want to make one in this style but would my fiance wants a 10 foot table what modifications to the plans would I need to be made to accommodate these three extra feet?
Have the bench plans been posted yet?
Building the table now! Where can I find the bench plans at?!
Did you find the plans for the benches?
I am in the middle of this project. I love the plans as they are very detailed and well thought out. I am at the point of assembling the table top, but I the 2×6’s I bought are warped and twisty, so the table top is already looking pretty uneven. I am about to attach the bread boards, but wanted the glue to dry and assess the damages before I do that. Fortunately, I have a friend with a giant CNC machine that agreed to plane the whole thing for me once it dries out and settles.
Please be highly selective of the boards you buy. Don’t just pick the first 17 2×6’s you can find. Also – I bought a tool to attach to my skill saw to rip the boards to 5″. It worked pretty well and I got a serious shoulder workout in the process.
I have read in several other blogs about attaching table tops in a way that the boards can expand, suggesting NOT to just screw the top into the base because when the boards expand with seasons and humidity, it will pull out from the screws or bow up. Can you suggest how to attach the table top so that it will be able to handle these fluxuations? Other articles suggested Z-clamps, but I don’t know how that could work in this application.
Thanks!
Lowes is notoriously more expensive than HD
I know nothing about woodworking but my dad is willing to build me a table. Can this pretty easily be altered into a longer table? I have a larger family and we also love to entertain.