After many, many requests, on our social media accounts, for a how-to on this DIY Large Hand Painted Sign, we had to give it to you guys 🙂
Not only do we have the free plans and how-to tutorial for you, we also have a how-to video on our Youtube channel for it too! Just click the image below to come build it with us in our shop!
Click HERE for the free printable plans and follow along, as we build it, below!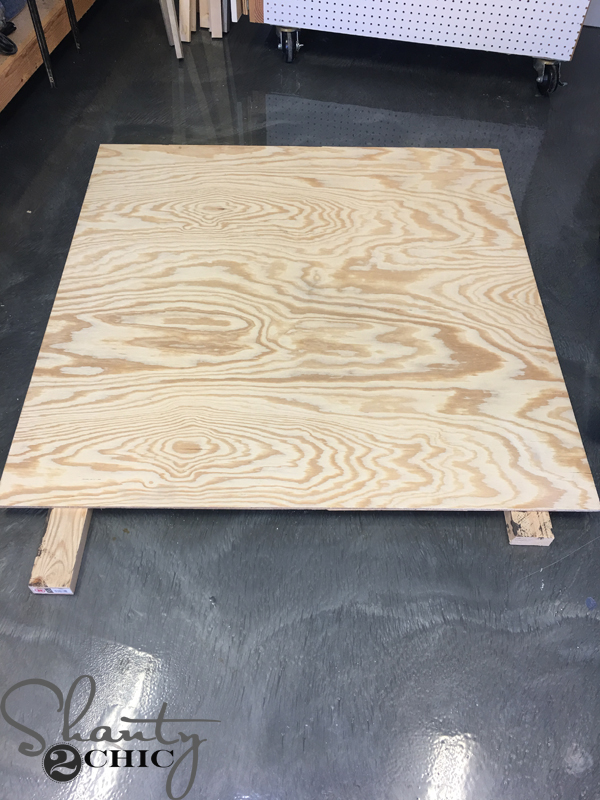
Start with a 4′ x 4′ sheet of 1×2″ plywood. You can buy it just like this from the hardware store (no cutting needed) or you can have it cut from a larger sheet of plywood.
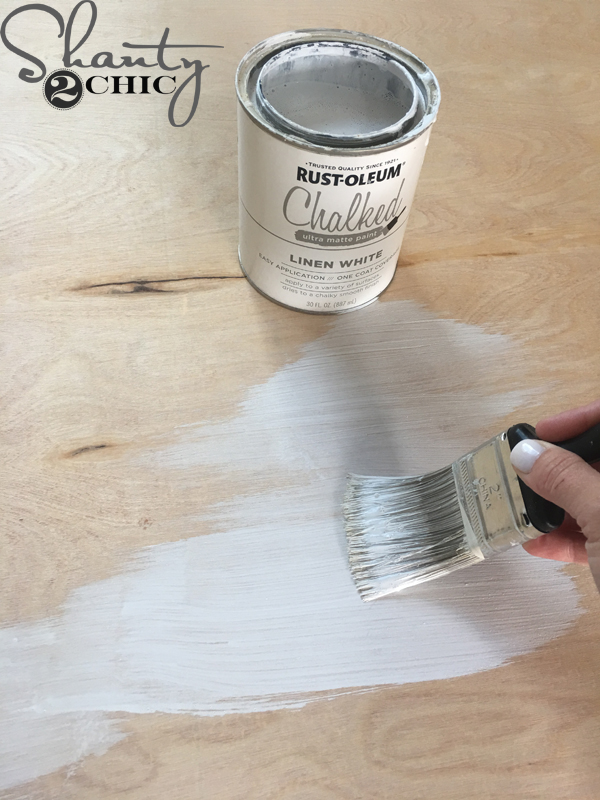
Paint the plywood white. We used Linen White Chalked Paint, by Rust-Oleum. It’s a good flat paint and it sands really well.

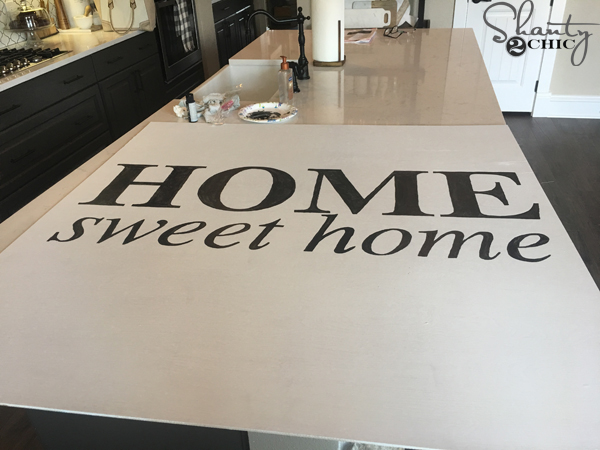
While the paint is drying, download the “Home Sweet Home” file by clicking HERE.
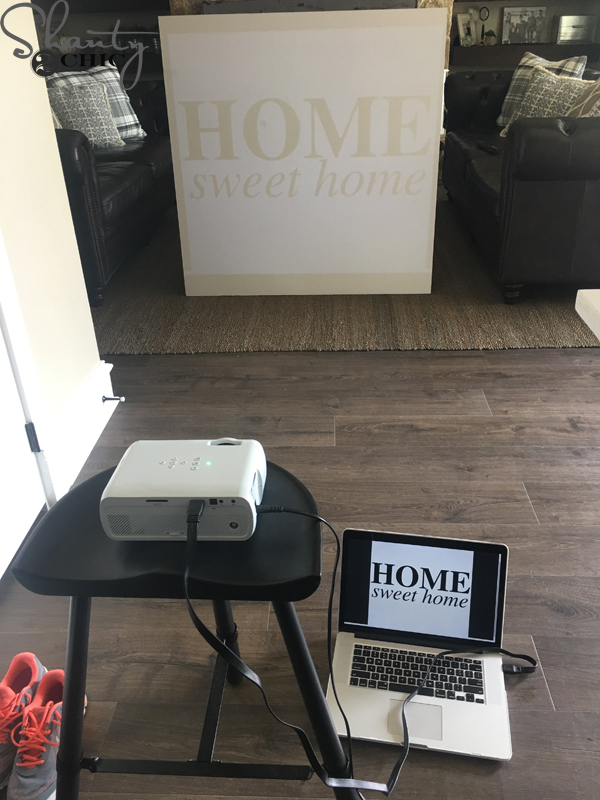
Then, connect a projector to your computer. You can find the projector that we use HERE on Amazon. Adjust the projector so that the letters are positioned how you like them on the sign.
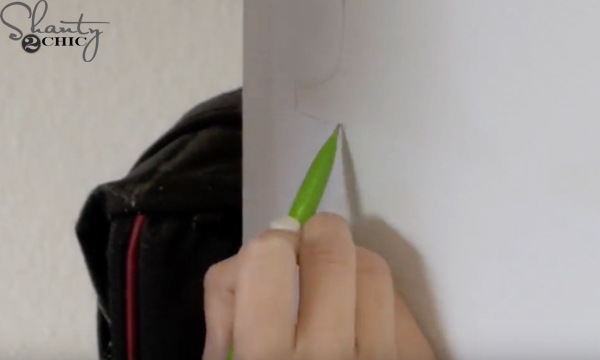
Next, trace each letter, lightly, with a pencil.

Once the letters are traced, use an angled craft brush and acrylic paint to fill in each letter. If you don’t have a steady hand, it helps to trace the letters with a paint marker before painting them. You can find the paint marker we used HERE on Amazon.
Ready for the frame!
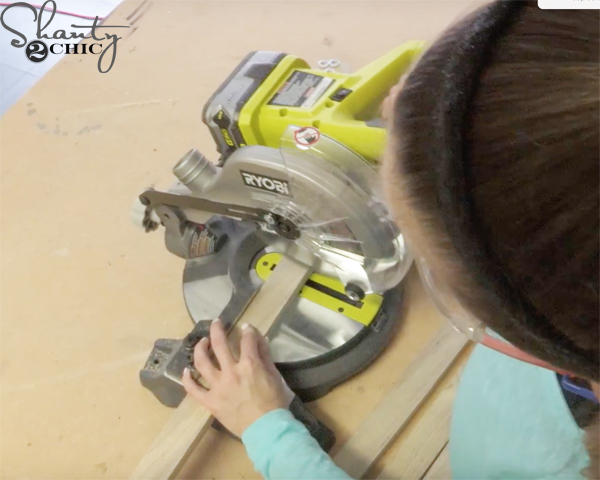
Measure the sides for the frame first, then cut the 1×2 trim to size. Then cut the top and bottom trim to size. Stain the trim pieces before you attach them. You can refer to the printable plans for the measurements and assembly. Make sure to measure and cut as you go because not all of the plywood sheets are exactly 48″x48″.
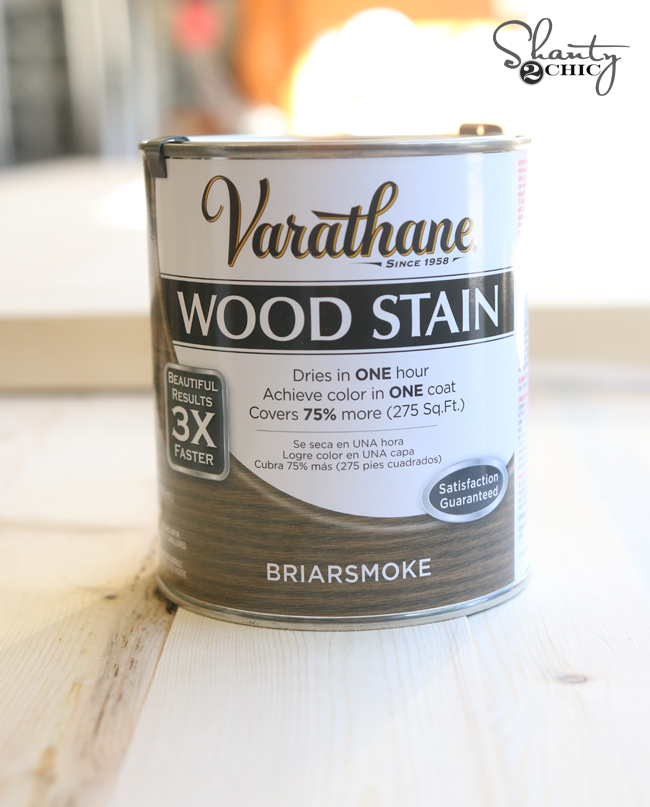
We stained our trim Briarsmoke by Varathane.
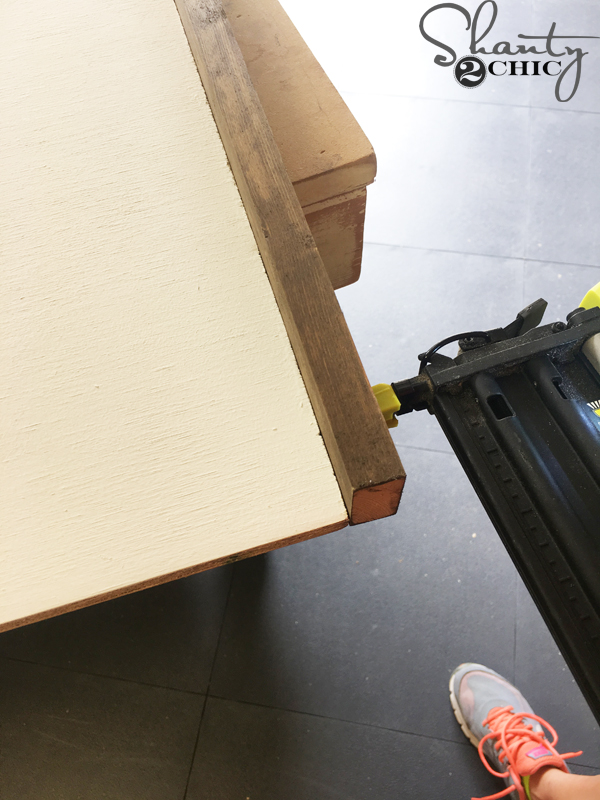
Attach the side pieces first. We used wood glue and 1 1/4″ brad nails in our Ryobi 18 Volt brad nailer. Follow up with the top and bottom trim.
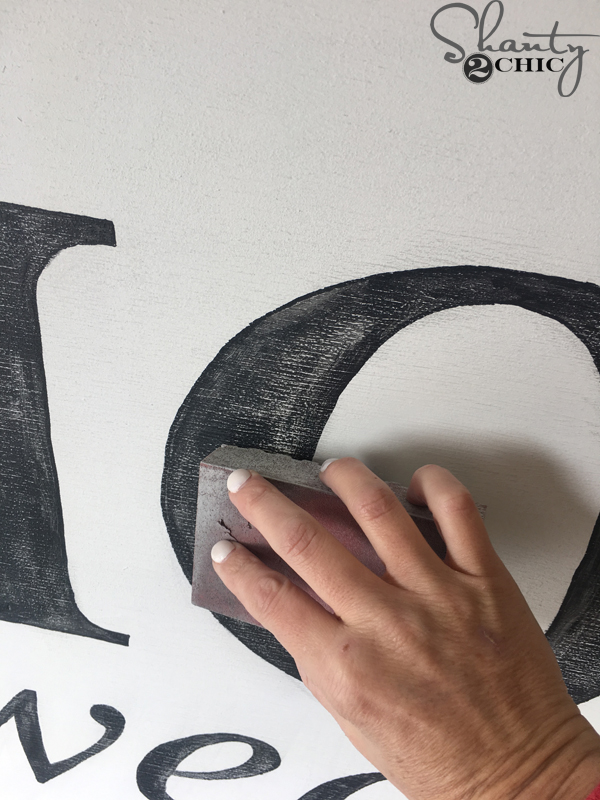
If you want your letters to have that vintage, distressed look, use a sanding pad (120-grit) to distress the acrylic paint. Make sure the paint is dry first 😉
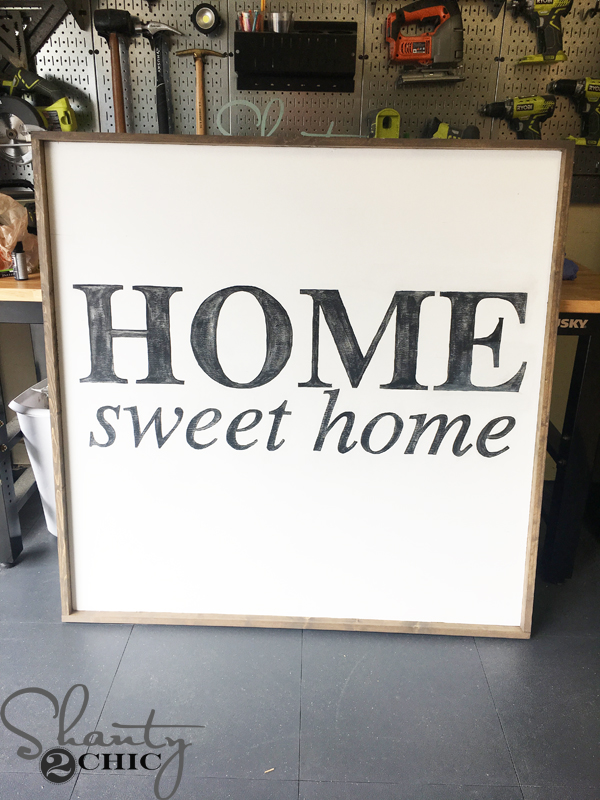
All done! Time to give it a home 😉
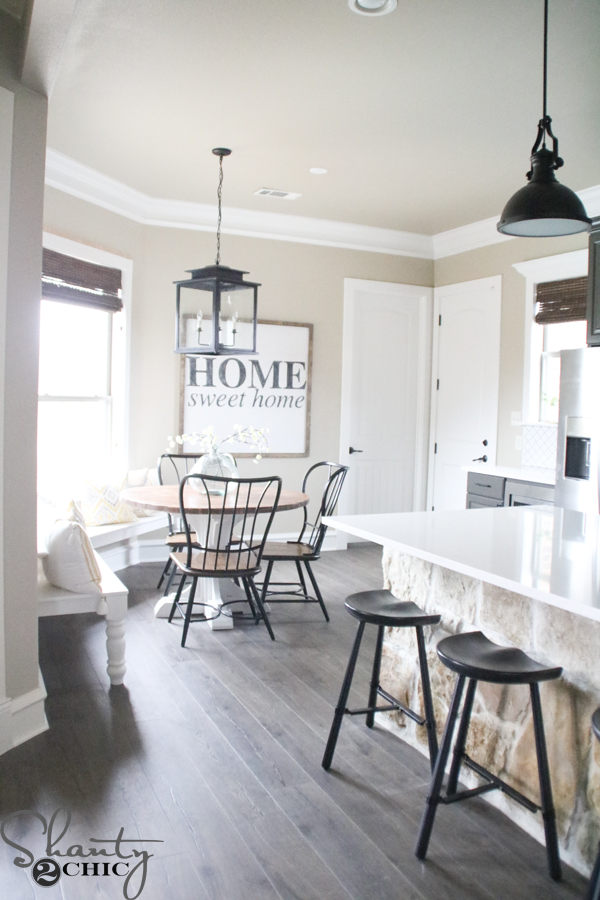
We used 3″ self-tapping wood screws to attach the signs to the wall. Mark the studs and drill into the frame and into the studs behind the wall. If you don’t want to put holes in your sign, you can use a French Cleat, like this one on Amazon, to hang your sign. It’s an easy installation and it makes hanging large wall pieces super easy!
If you make your own sign be sure to share it on social media and use #shanty2chic so that we can see it and share it too!
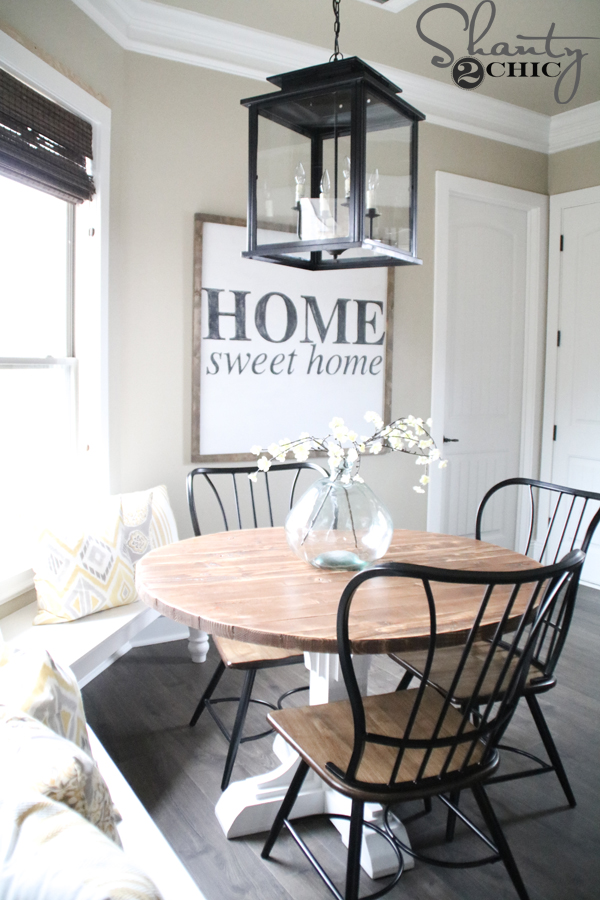
Here is more info on the items in the pics 🙂
Glass Vase – HERE
Stems in Vase – HERE
Tassel Pillow – HERE
Other pillows – HomeGoods
Chairs – HERE
Bench – HERE
Stools – HERE
Chandelier – HERE
Paint Colors – HERE
Window Shades – HERE
Thanks for stopping by and Happy Building!


Quick question. Does the frame attach and stay strong? Nailing into the side of plywood doesn’t seem like it would hold well. Plywood is heavy.
How much did it cost total to make this?
awesome! what font did you use?
I’ve purchased the materials and have a question about the plywood. I bought 1/2 inch plywood (didn’t know what (1 x 2 meant Home Depot thought 1/2″ when I showed them the directions) and now I’m second guessing it. It is not very flat. I couldn’t find a piece that was not perfectly flat. Will it straighten out?
HI, I tried to open the file to download the Home sweet home image but the page is not loading. Can someone please help me.. I was really looking forward to making this and I got all the materials from the hardware store already. Thank you in advance!
Hi girls, how big is the image? Like if wanted to print it and transfer it onto the wood instead of using the projector.
ThankYou
I don’t know if you ever went ahead and made this or not, but I just did it last week and used my cricut to make stencils for the letters. I did the letters for HOME at 11.5” tall x 11” wide. The “sweet home” letters are I did at 5” tall x 4” wide with the exception of the “t” and the “h,” I made those 8” tall so they would match up with the other letters. I hope this helps! 🙂
Beautiful! I’ve really been wanting to make this style of sign, thank you for the great instructions! Do you have a price estimate for this project?