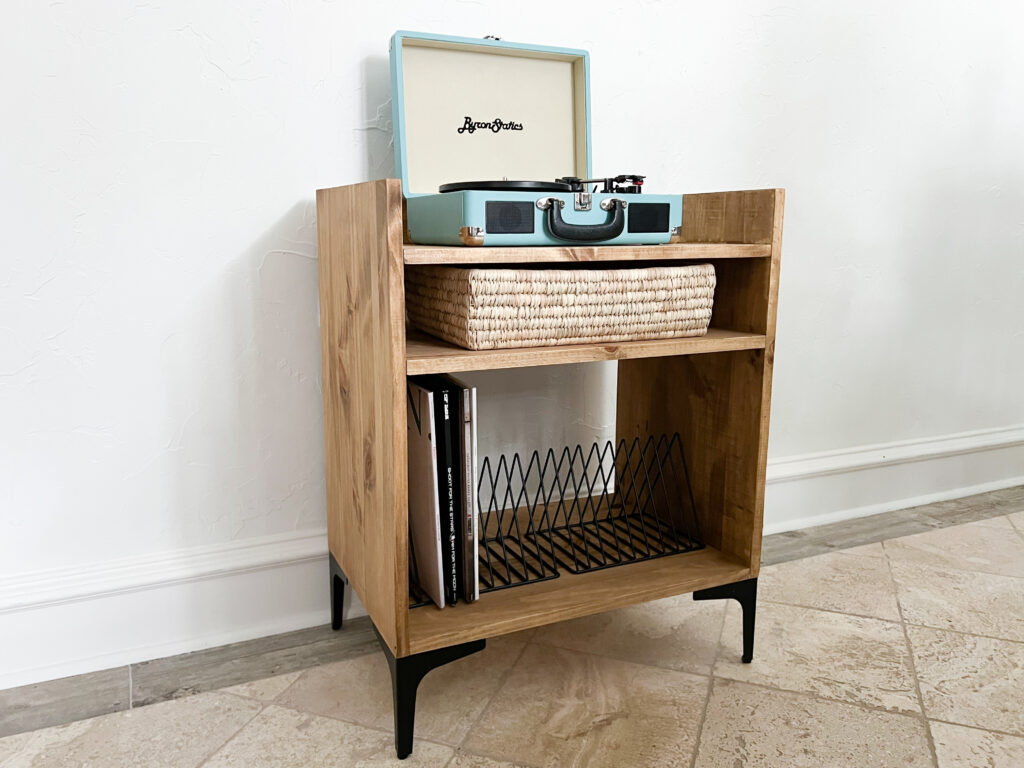
My oldest son asked for a record player for Christmas. I was so excited! I decided that he also needed the perfect spot to put it. Today I am sharing the free plans with step-by-step instructions and a video tutorial on how to build this super cute DIY Record Player Stand. These are also called a turntable stand, audio cabinet or a record stand. When I was searching for inspiration online, I found that most have a vintage, mid-century modern look which I love, but I needed to fit the look of his room as well.
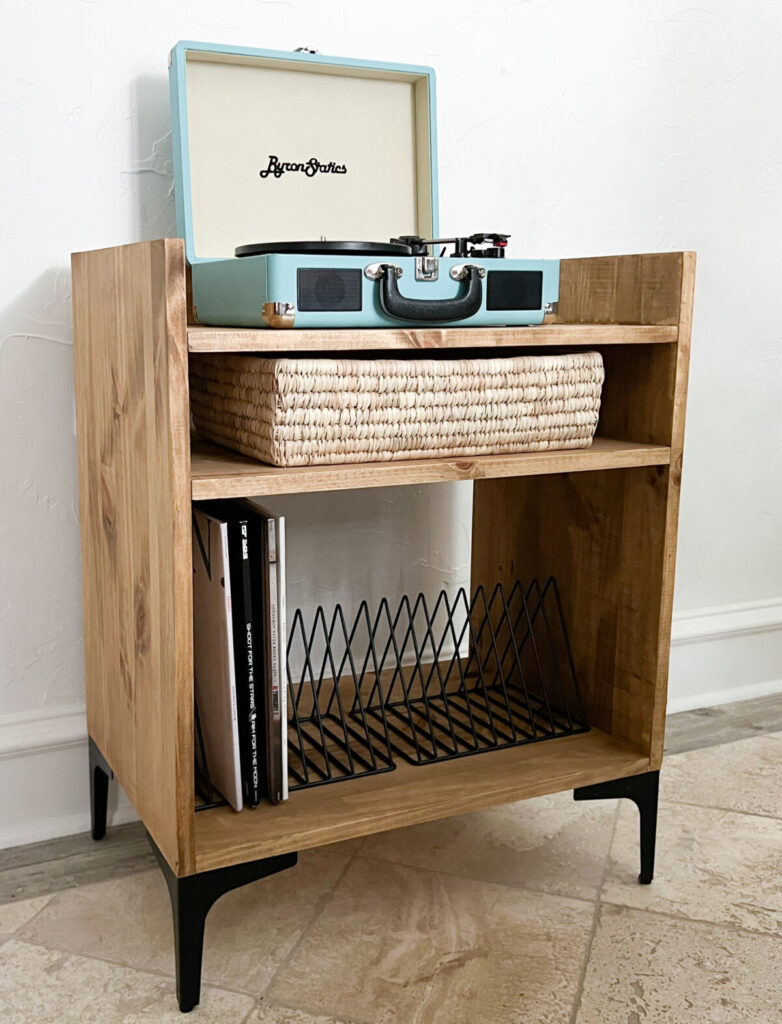
Table of Contents
DIY Record Player Stand Video Tutorial
Check out our video tutorial below on how we built this record player stand! Be sure to grab the free printable plans at the bottom of this post!
What wood should I use?
The first step is making your cuts. I used laminated pine boards to build this
stand. These can typically be found by other dimensional lumber at the hardware
store. I purchased two 16” x 48” boards to build this.
Make the cuts for the sides
Cut two sides to 24” long each. The side boards won’t require any pocket holes. I used my table saw for this, but you can also use a miter saw to make these cuts.
Cut the shelf boards
Next, cut the boards to create the shelf pieces. You will have 3 of these boards identical to one
another.
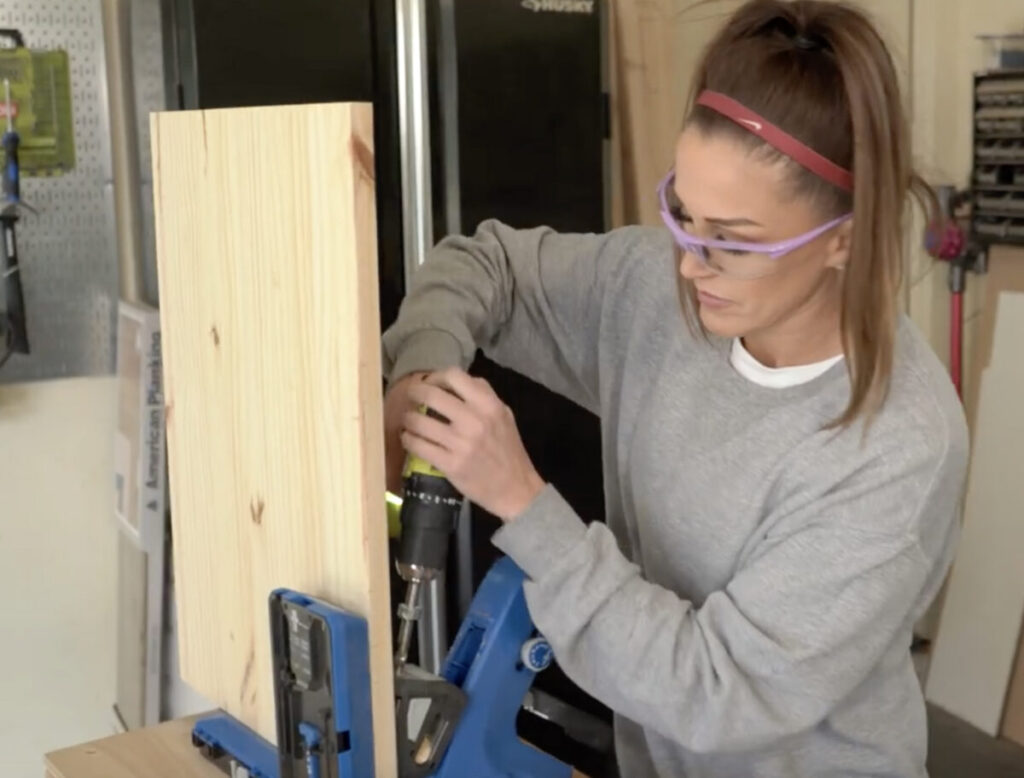
Use a Kreg Jig
We used our Kreg Jig for the next part of this build! WE LOVE our Kreg Jigs! We used the 720PRO for this build. The Kreg Jig 720Pro is hands-down our favorite pocket hole jig! The Automaxx dual Clamp self-adjusts to your material thickness making it so fast and efficient for furniture building! It has built-in material support wings on the docking station for large panels like plywood, tons of storage features and includes a clamp to hold it in place to your workbench. Some additional accessories are a dust port with a vacuum adaptor, 160 pocket hole screws, It also folds up compact so it’s perfect for small shops.
You can see our post HERE where we share a post on what model is best for you!
Add pocket holes to shelf boards
Add 3/4” pocket holes with your drill to the shorter sides of all 3 boards. You want the pocket holes on the side of the board that will face down on all 3.
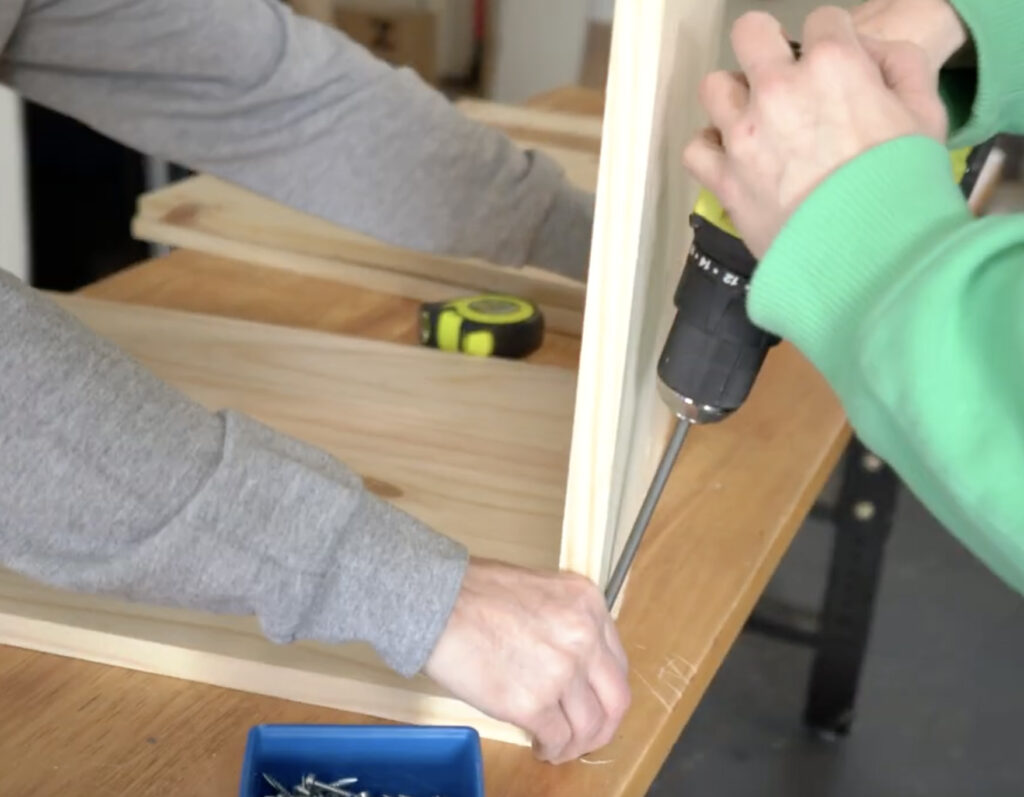
Attach shelf boards to the sides
Now attach the shelf boards to the sides of the record player stand. These will attach through the pocket holes
of the shelf boards and into each side using wood glue and 1.25” pocket hole screws. Attach the top shelf first to make the pocket holes easier to access.
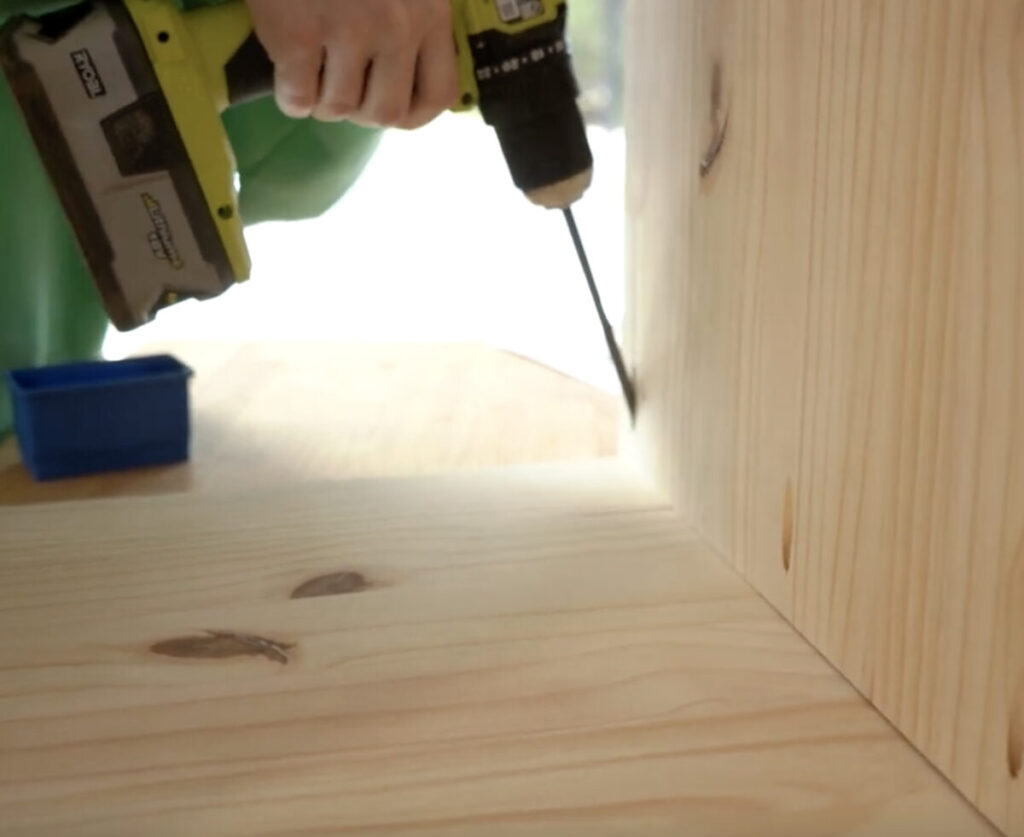
Attach the top trim piece
The final step is attaching the top trim piece. Add 3/4” pocket holes to one side and both short sides of the trim piece. Attach it to the stand using wood glue and 1.25” pocket hole screws through the pocket holes and into the stand.
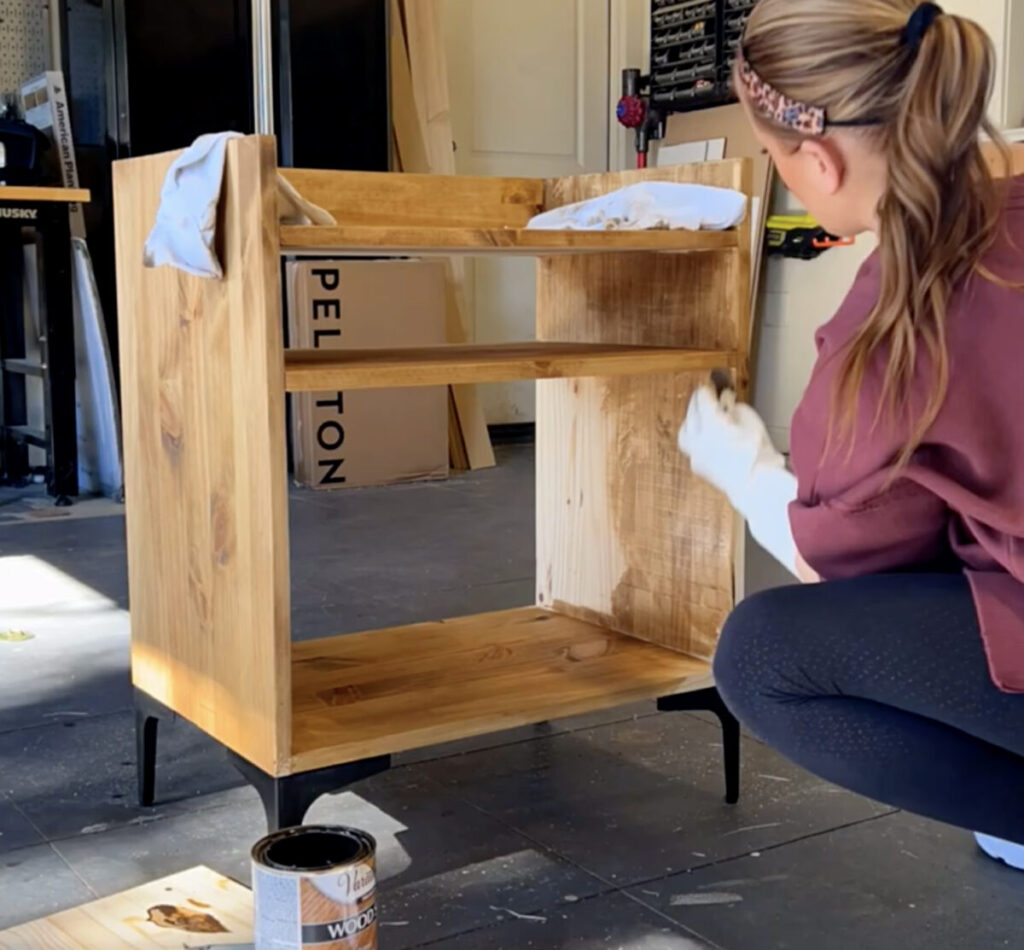
Stain the record player stand
I chose to stain this record player stand with Golden Oak stain. You can find it HERE. I love this stain because it goes on so evenly with one coat only and dries super fast.
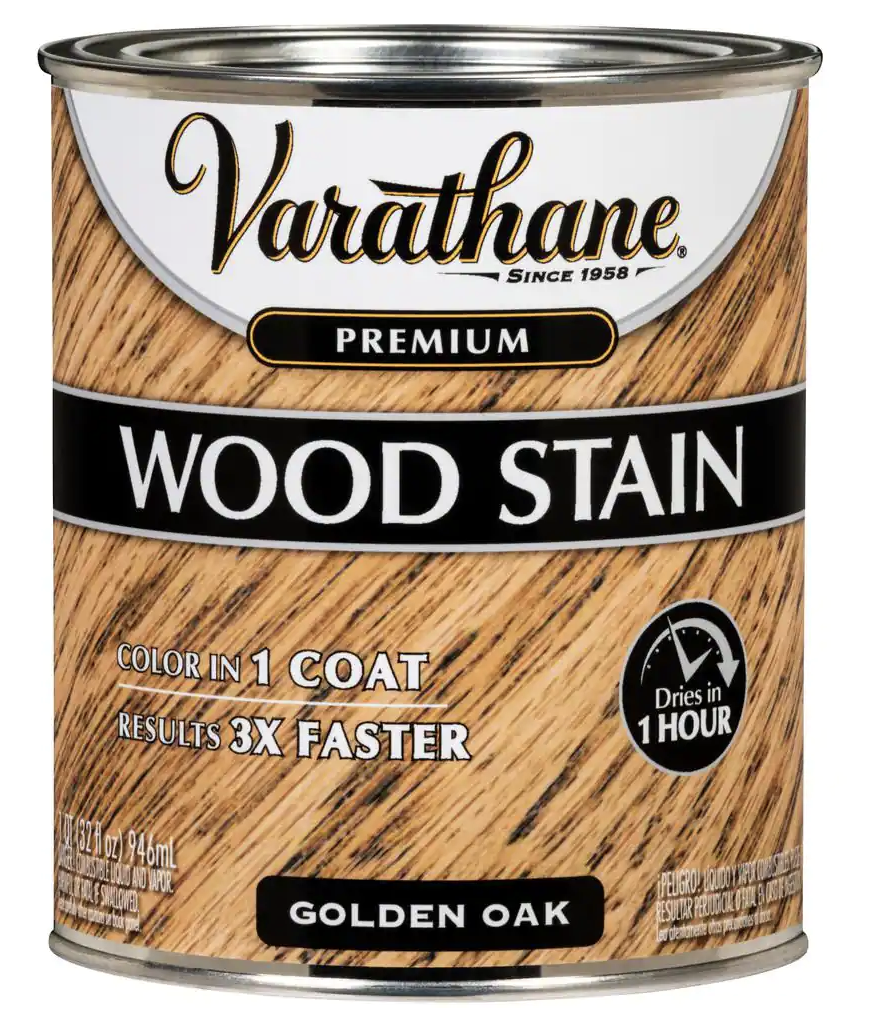
If you want to add a top coat to your piece, I like to use THIS ONE.

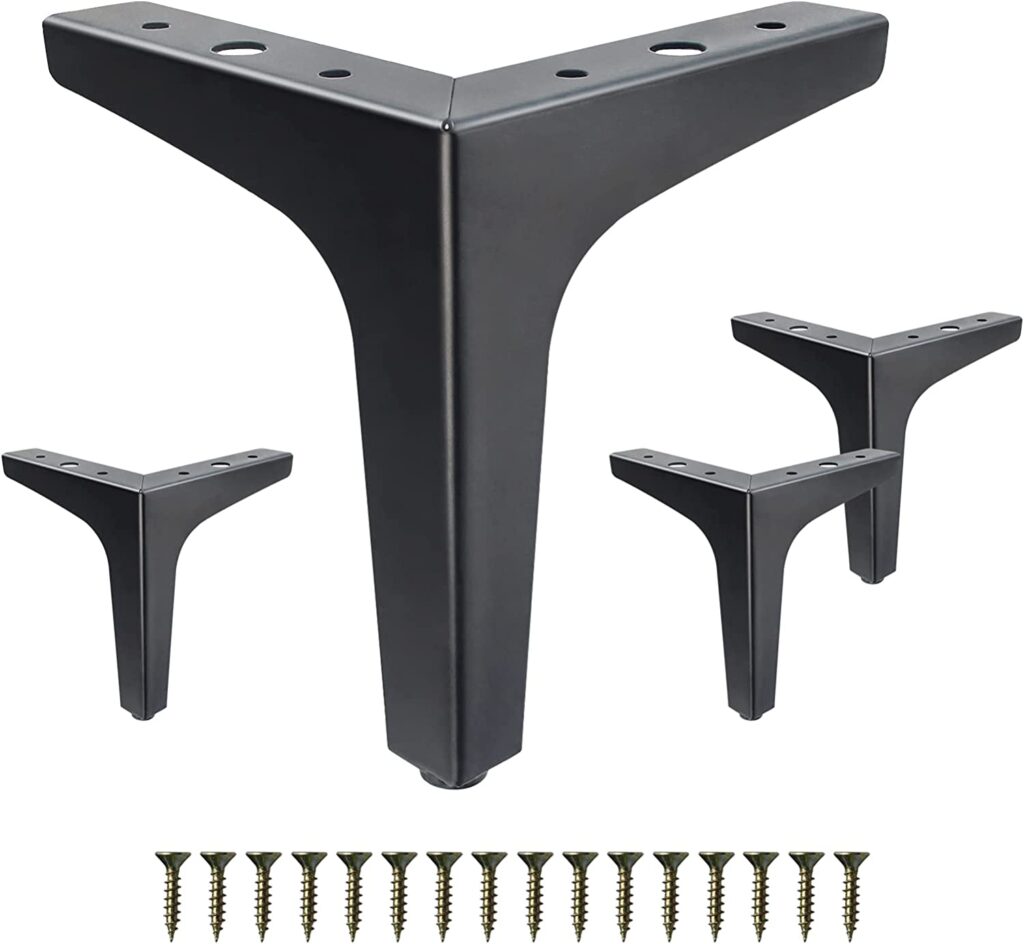
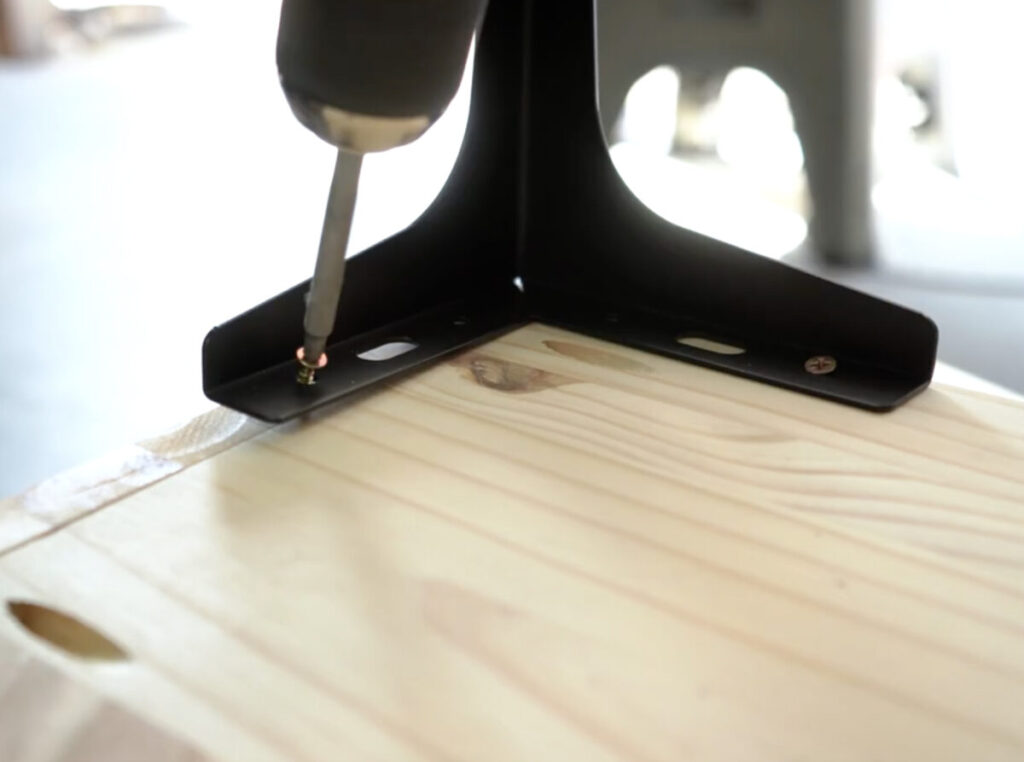
Add the feet to the record player stand
I found the CUTEST feet on Amazon for this record player cabinet. They come with the screws to attach them as well. I love how they look on the piece! You can find them HERE on Amazon! I love them because they remind me of hairpin legs with a more industrial feel!
Add the Vinyl Record Storage
I wanted to find something great to use as a divider to hold his albums. I wanted something that accented the feet and I found THESE on Amazon! They are a perfect fit and love how they add to the aesthetic of the piece! I think they look so good housing his record collection inside.

The Additional Shelf
I added the additional shelf with the basket to hold any cables, headphones or other accessories he might have.
The Finished Piece
Checkout how this record player stand turned out! I think it is such a cute piece of furniture and I love the unique look. He has plenty of space to grow his collection and easy access to all of his LP albums.
Record Player Stand Free Plans
Grab the FREE PLANS HERE!


This plan is awful as it doesn’t add up! At all. If you buy what it says 16×48 panels, you dont have nearly enough. If you buy what you should which is 24×48 it’s way more expensive. Not sure how you put a plan out and not double check everything
Could you please share the final measurements?? 😊
Hello! I think your cut or part list might be off. You said you used a 16×48 but your cut list shows a 24×48
Made this stand today, 16×48 definitely doesn’t work. You will need two 24×48 boards.