Learn how to build this Countertop Spice Rack with just two tools and free plans and step-by-step tutorial from Shanty2Chic!
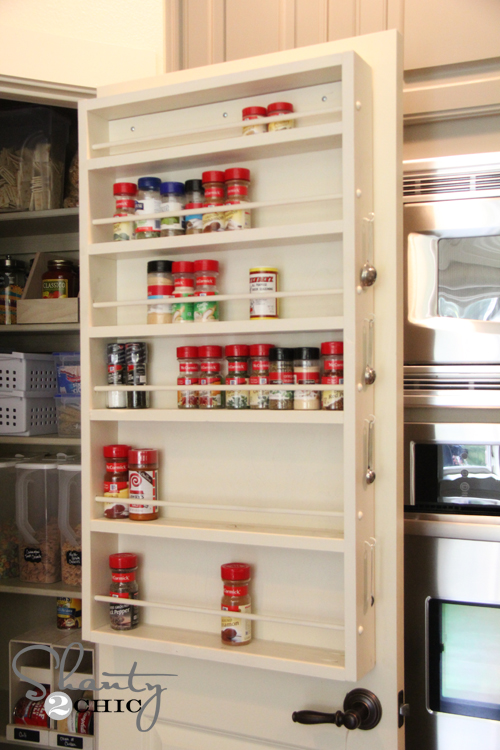
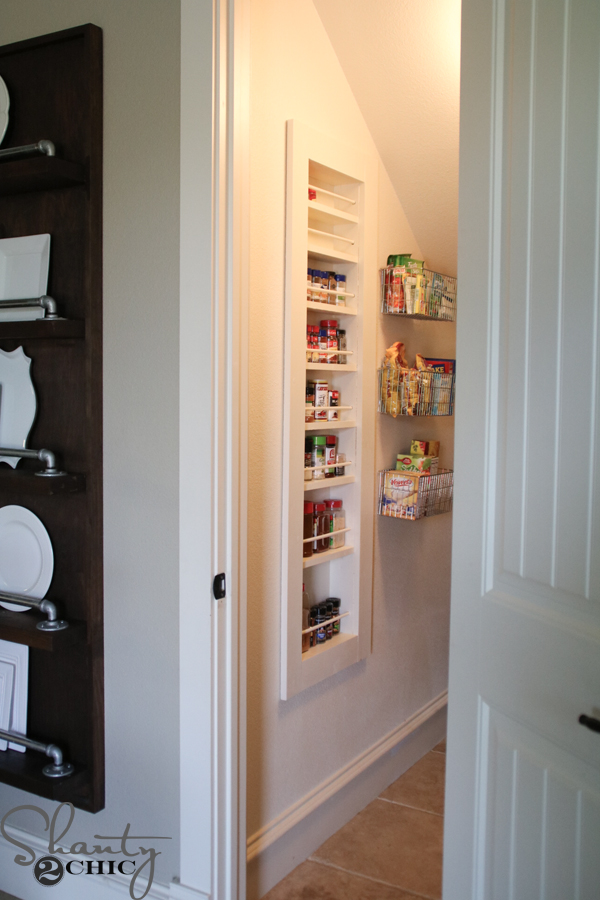
I love organizing in the Spring and this project is one that’s been on my to-do list for a while! A few years ago, I built a great Built-in Spice Rack that I designed for my pantry but I’ve wanted to build a smaller countertop version for easy access to our favorite spices, that we use when we cook! I was inspired by my Glowforge for this design, after I discovered bamboo lid spice jars! This is a very simple, inexpensive build that’s perfect for a beginner woodworker, so let’s get to building! Just follow the how-to instructions below
Table of Contents
DIY Wooden Spice Rack
Tools:
- Miter Saw (or circular saw)
- Pin Nailer (you can also use a brad nailer)
Supplies:
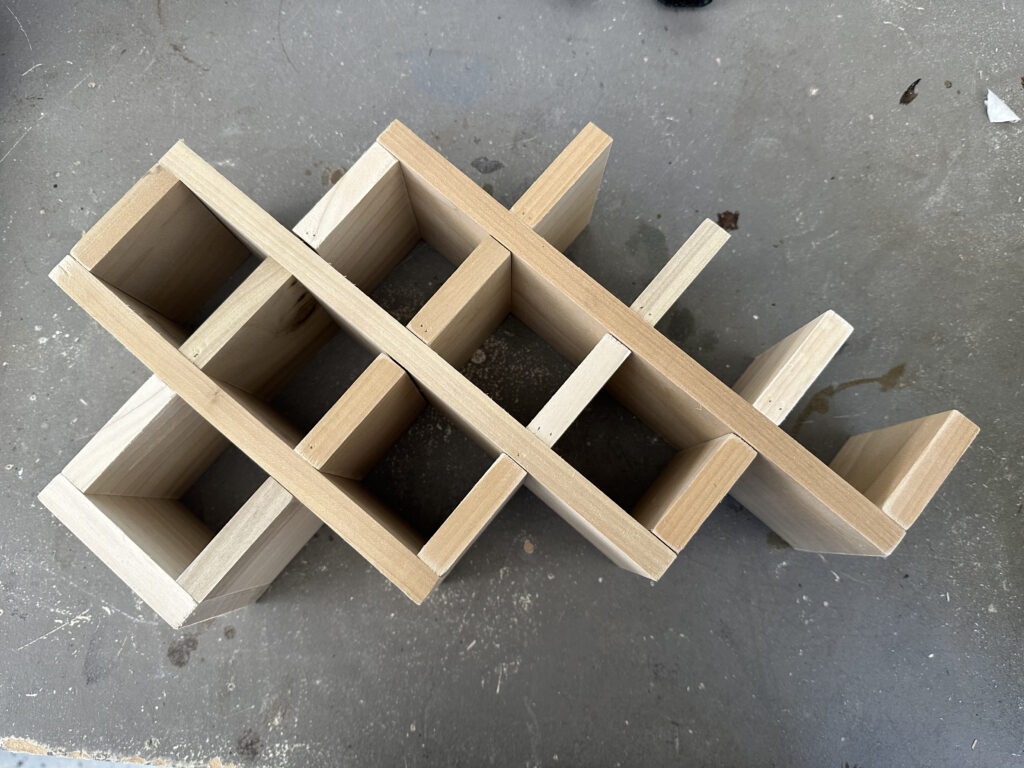
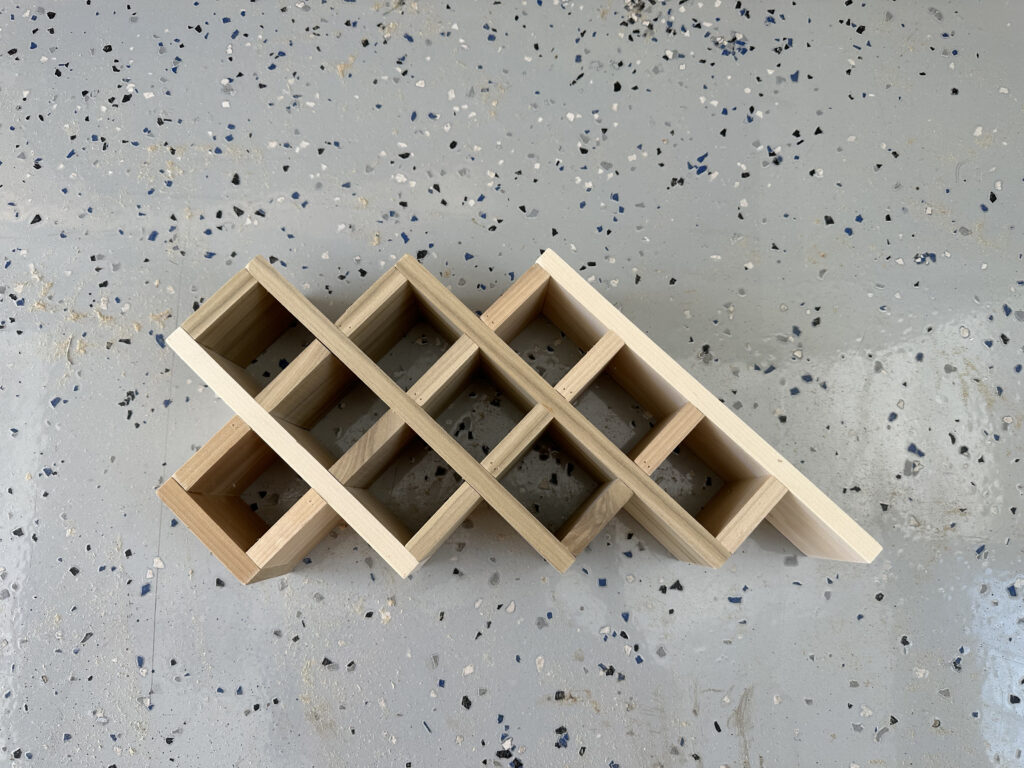
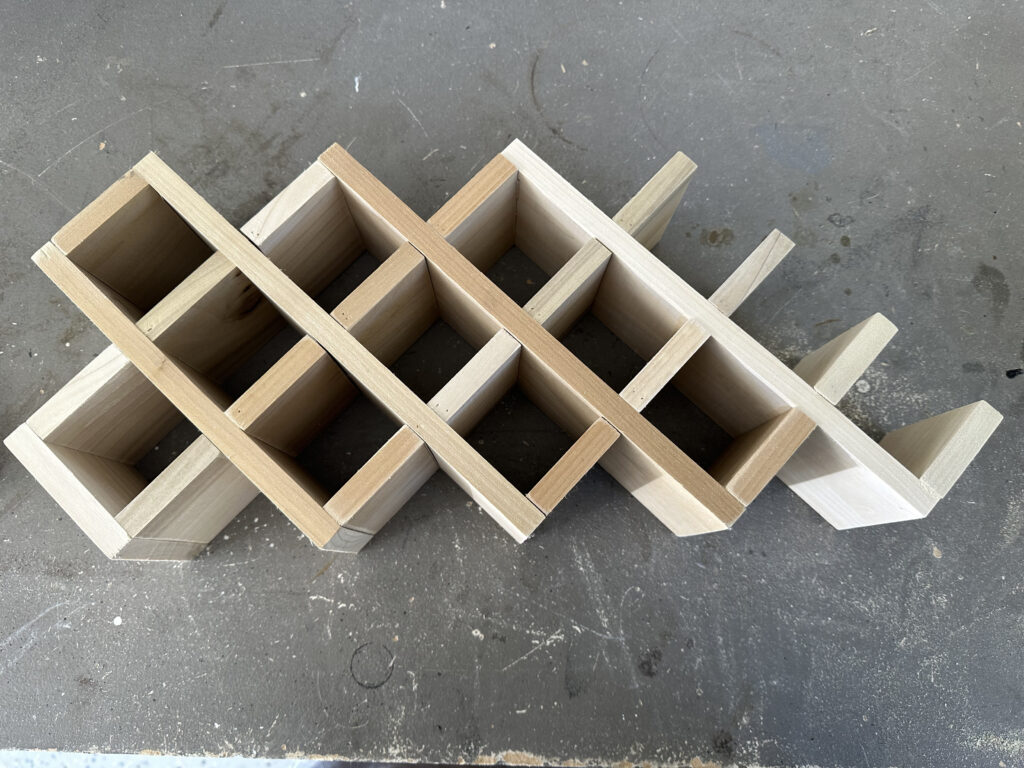
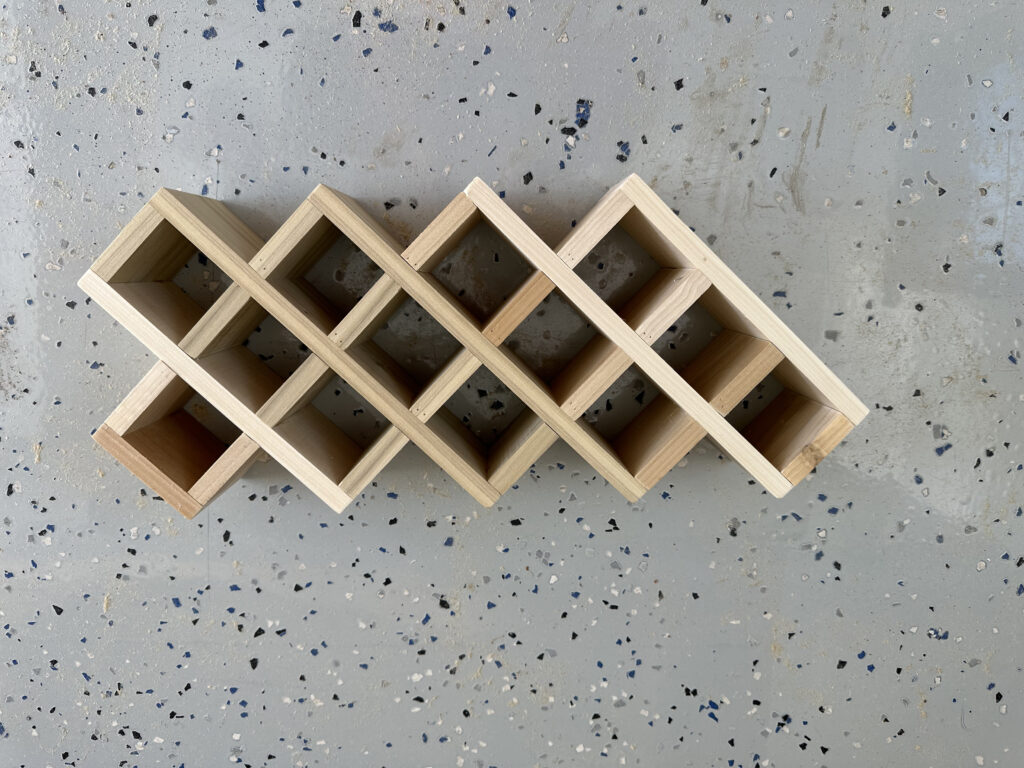
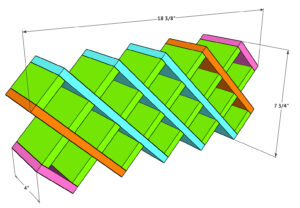
Building the Countertop Spice Rack Frame
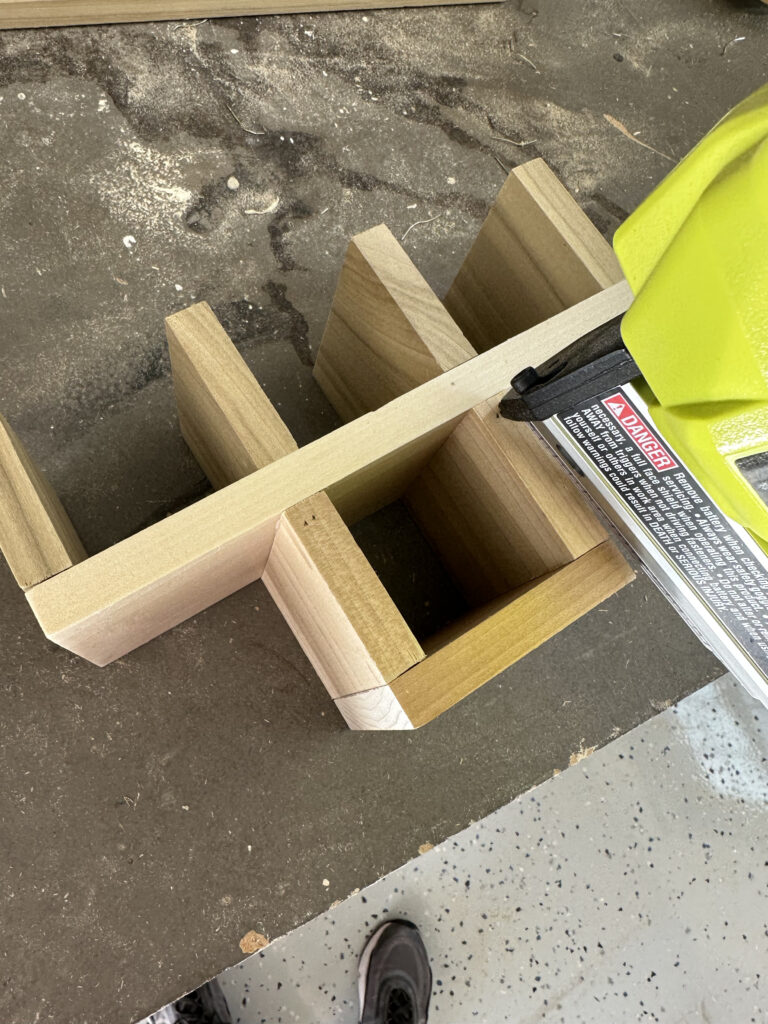
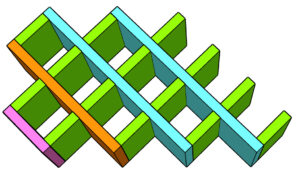
Step 1:
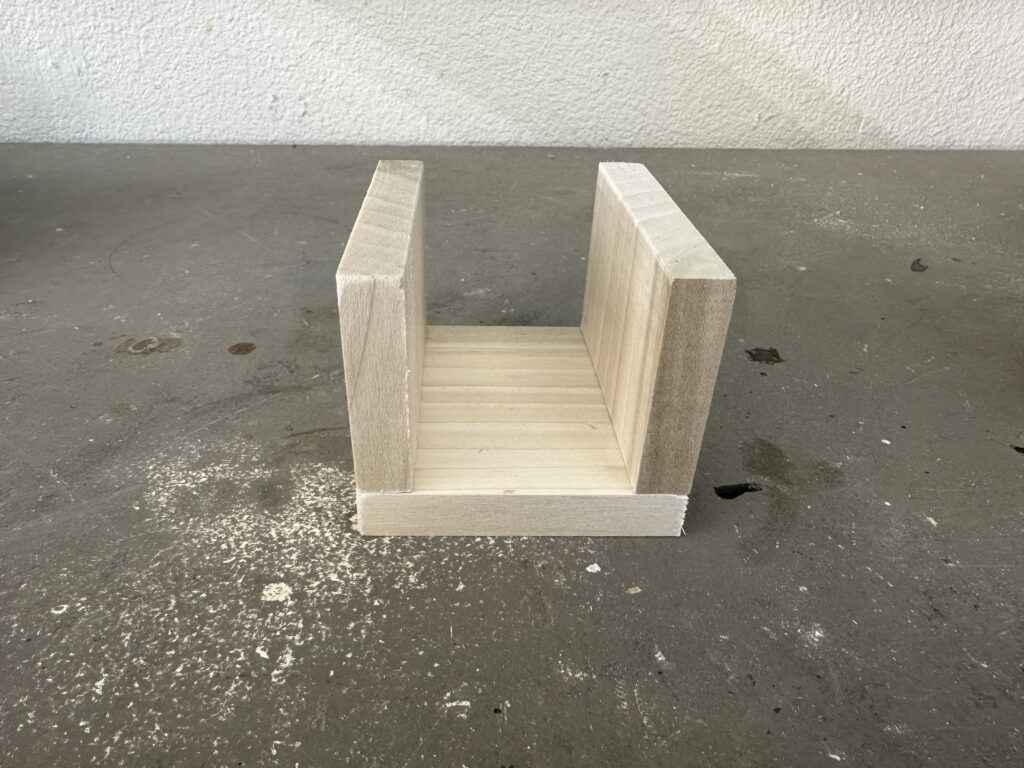
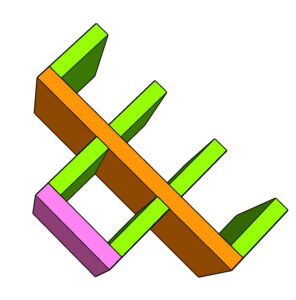
To start, cut all of the poplar pieces to size. Attach the first set of end pieces together with 1″ pin nails and wood glue.
Step 2:
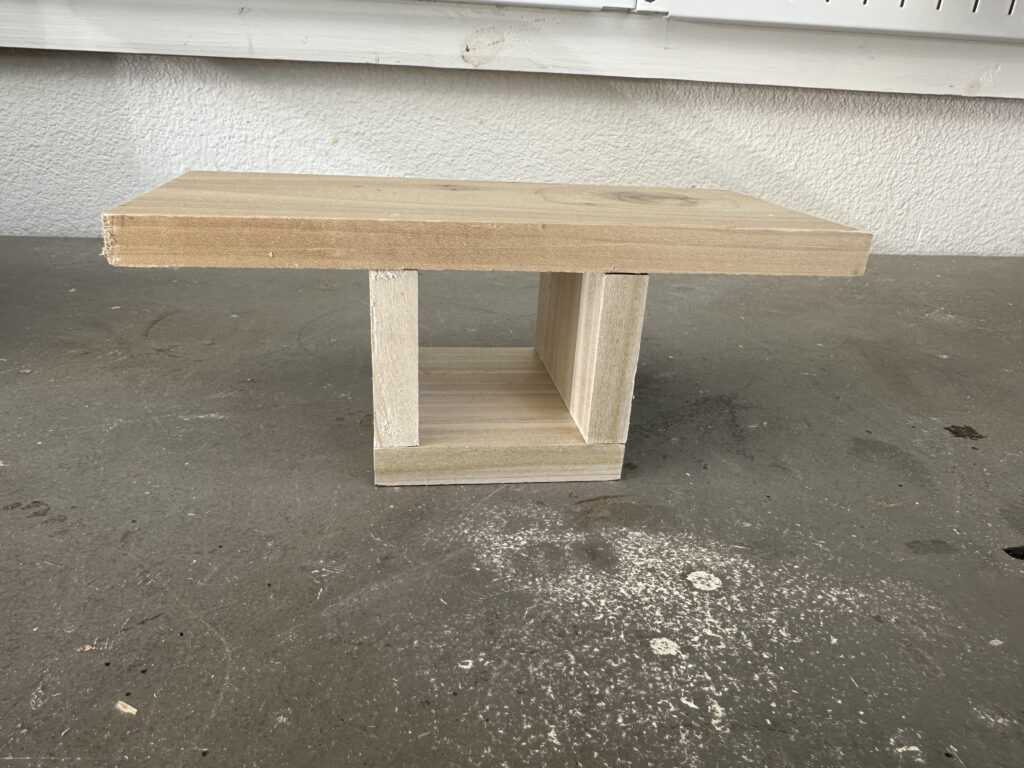
Next, center the end piece on an orange piece and attach it with 1″ pin nails and wood glue.
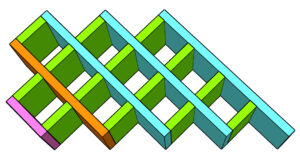
Step 3:
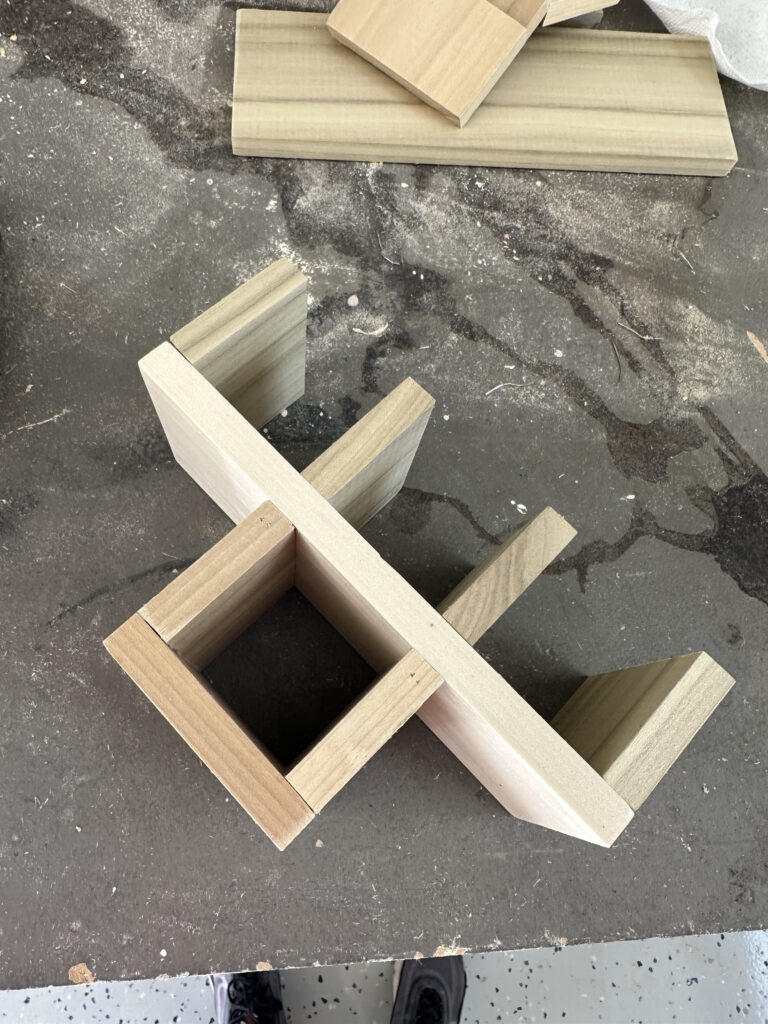
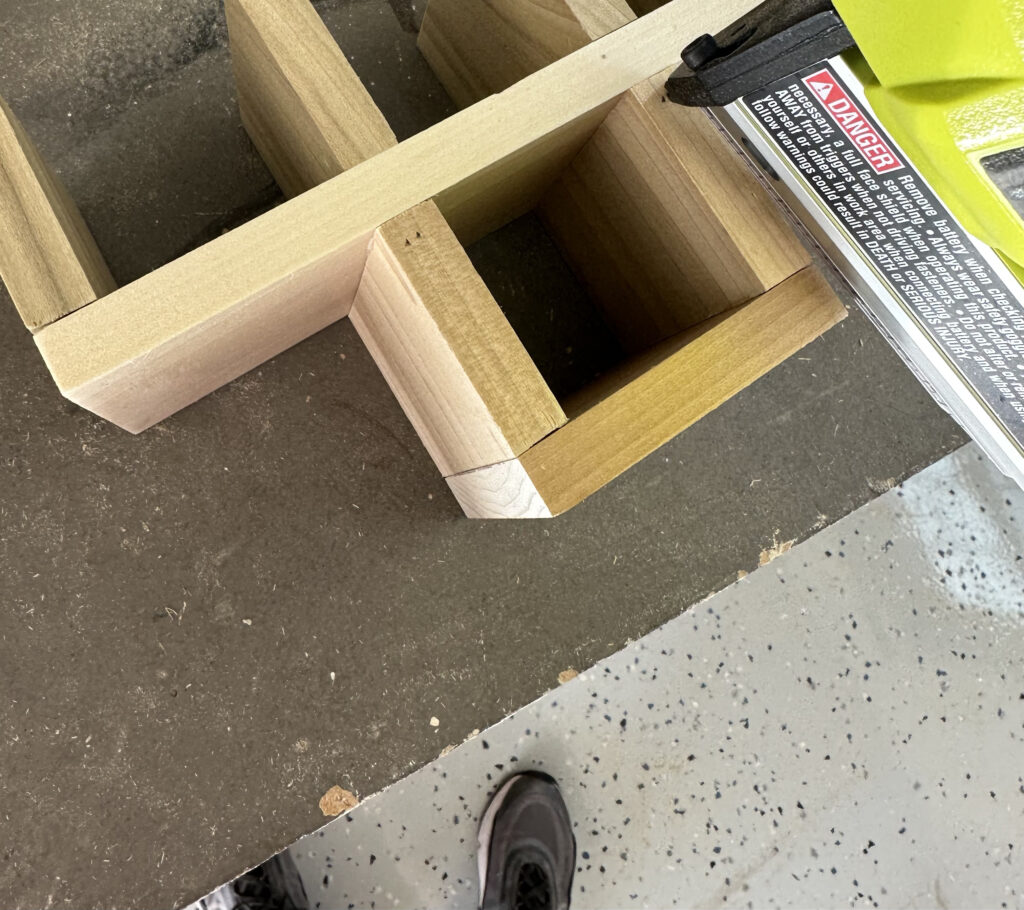
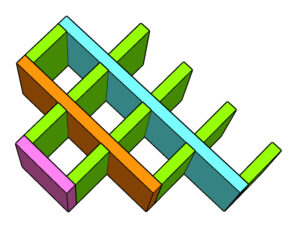
Once that is complete, add the next 4 short pieces to the orange piece with 1: pin nails and wood glue.
For the two middle pieces, you will need to shoot your nails at a diagonal from the front of the boards.
Step 4:
Now, attach the next blue piece, flush with the top green piece, with 1″ pin nails and wood glue.
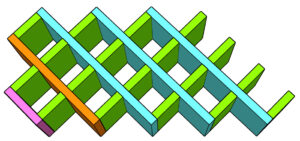
Step 5:
Next, attach the next green pieces the same way, starting flush with the bottom of the blue piece.
Step 6:
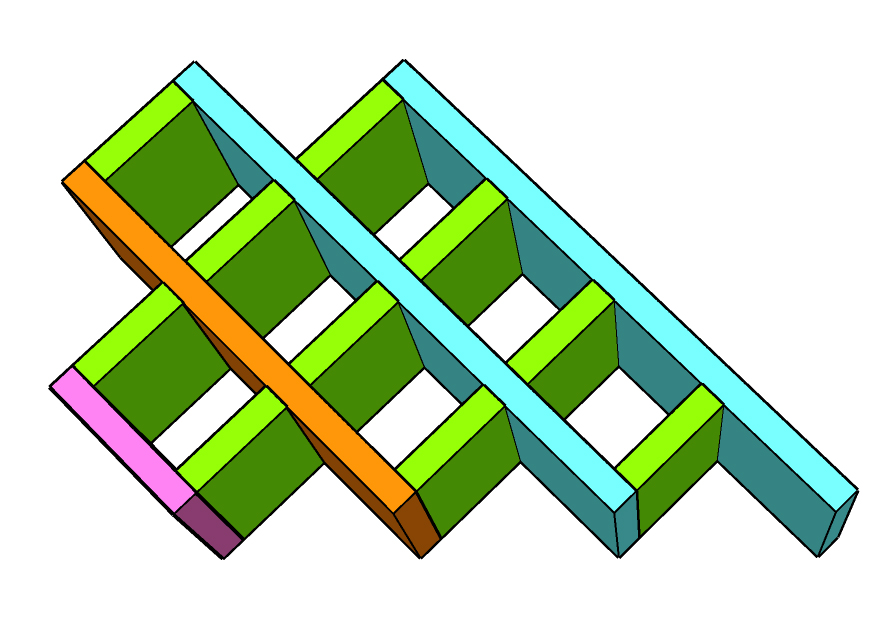
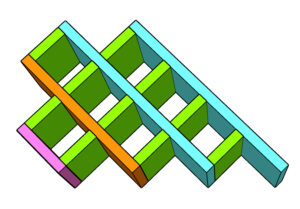
Follow up with the next blue piece, attaching it flush with the top green piece.
Step 7:
Now, attach the next green pieces with 1″ pin nails and wood glue, starting from the bottom of the blue boards.
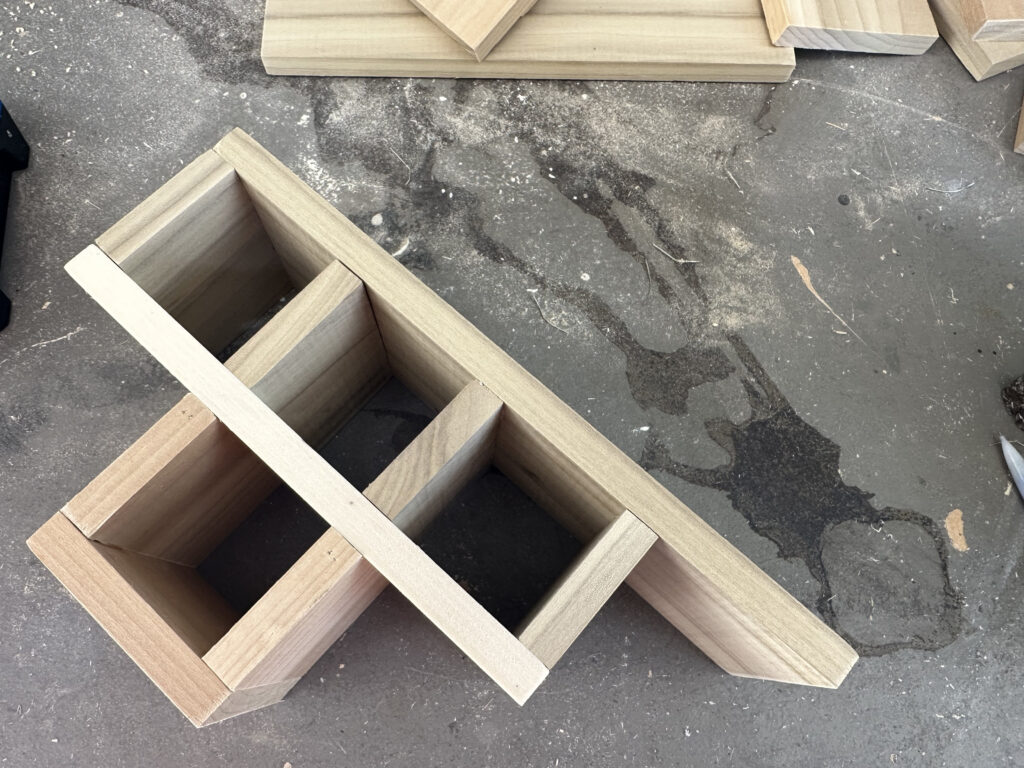
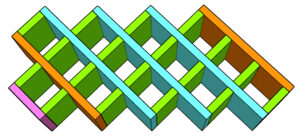
Step 8:
At this point, continue attaching the final blue board, flush at the top with 1″ pin nails and wood glue.
Step 9:
Attach the next 4 green pieces the same way.
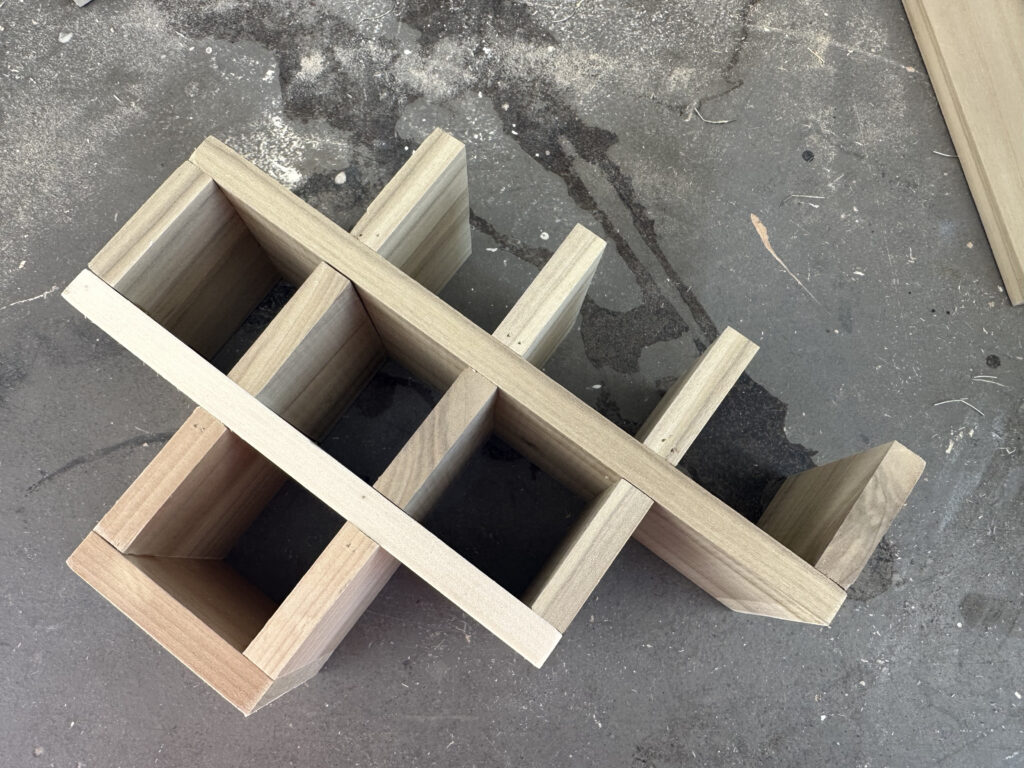
Step 10:
Attach the final orange piece with 1″ pin nails and wood glue.
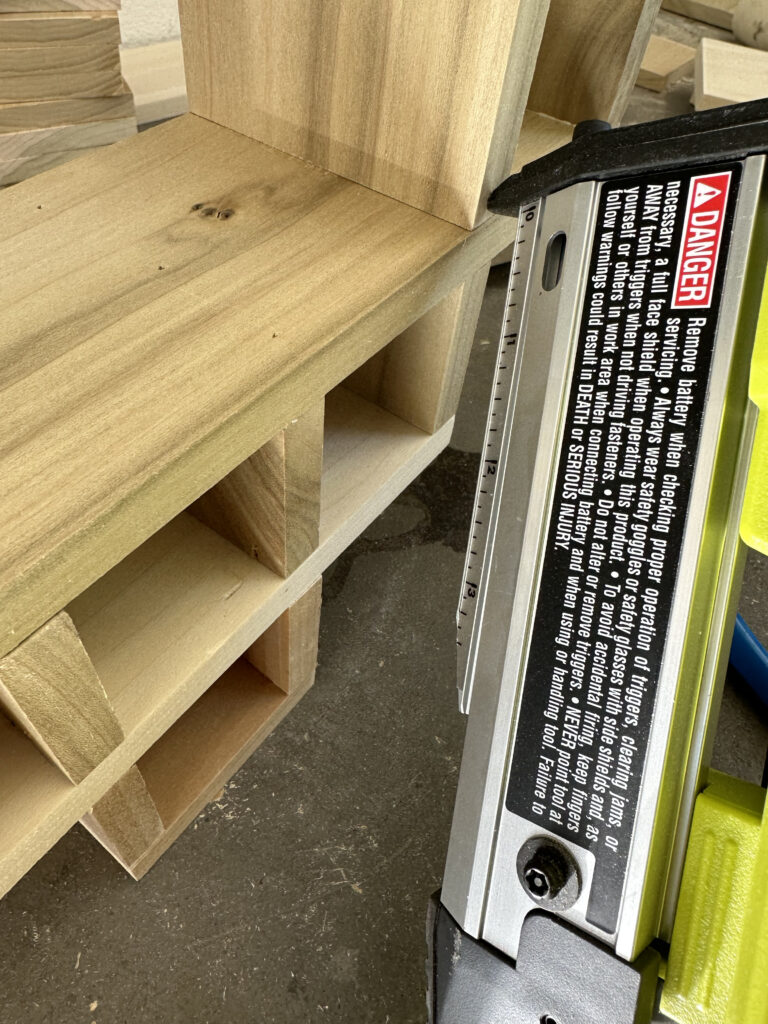
Step 11:
Assemble the final end piece with 1″ pin nails and wood glue and center it on the end of the spice rack with 1″ pin nails and wood glue.
Giving a Finish to the Spice Storage
Step 12:
Fill in any nail holes that are exposed, sand the entire piece down and give it a finish!
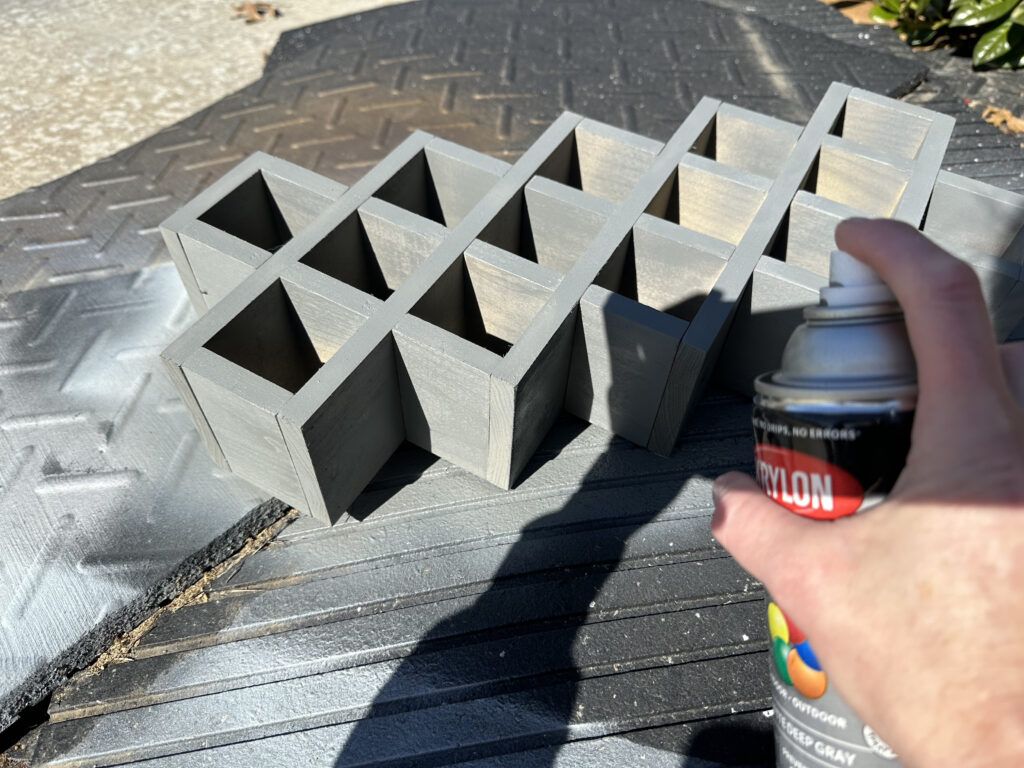
I chose to paint mine with a gray spray paint, to match my kitchen cabinets, but you can also stain these poplar boards and they look amazing!
Engraving Spice Labels for the Jars
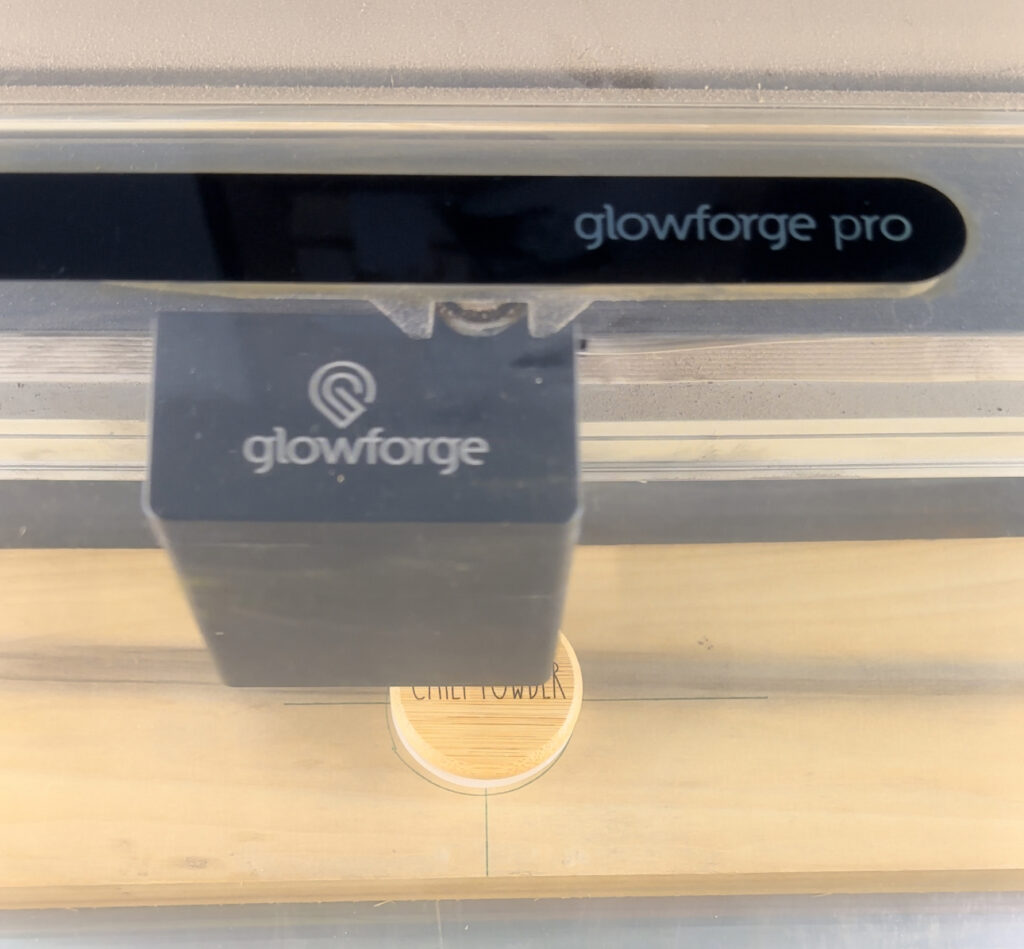
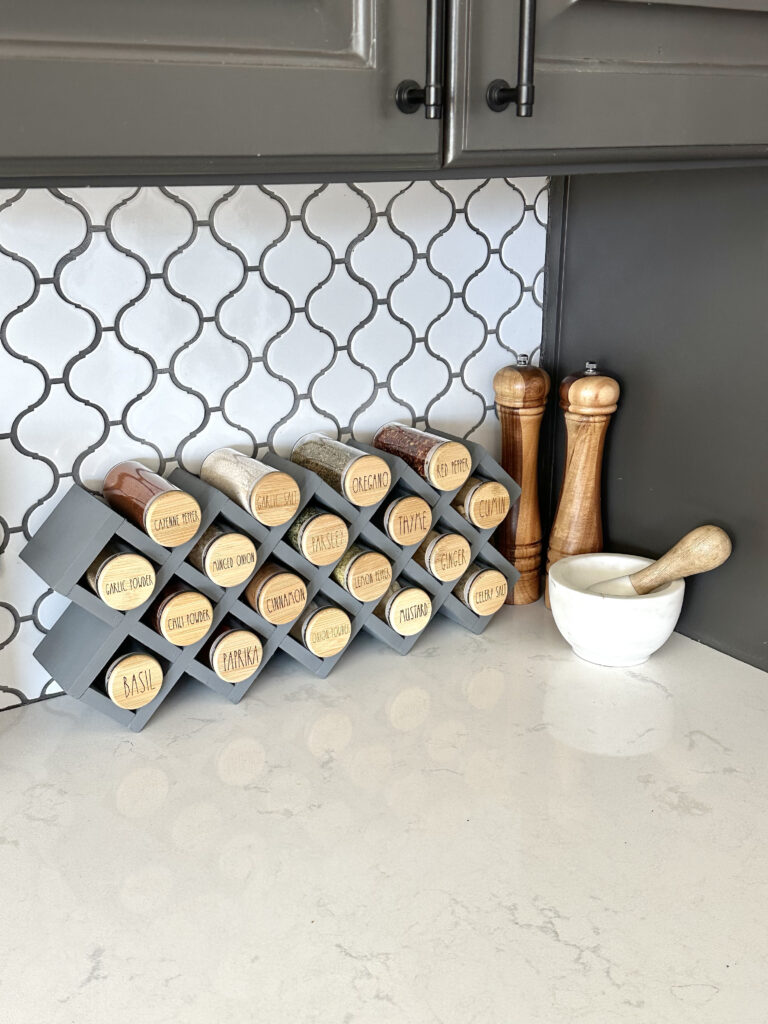
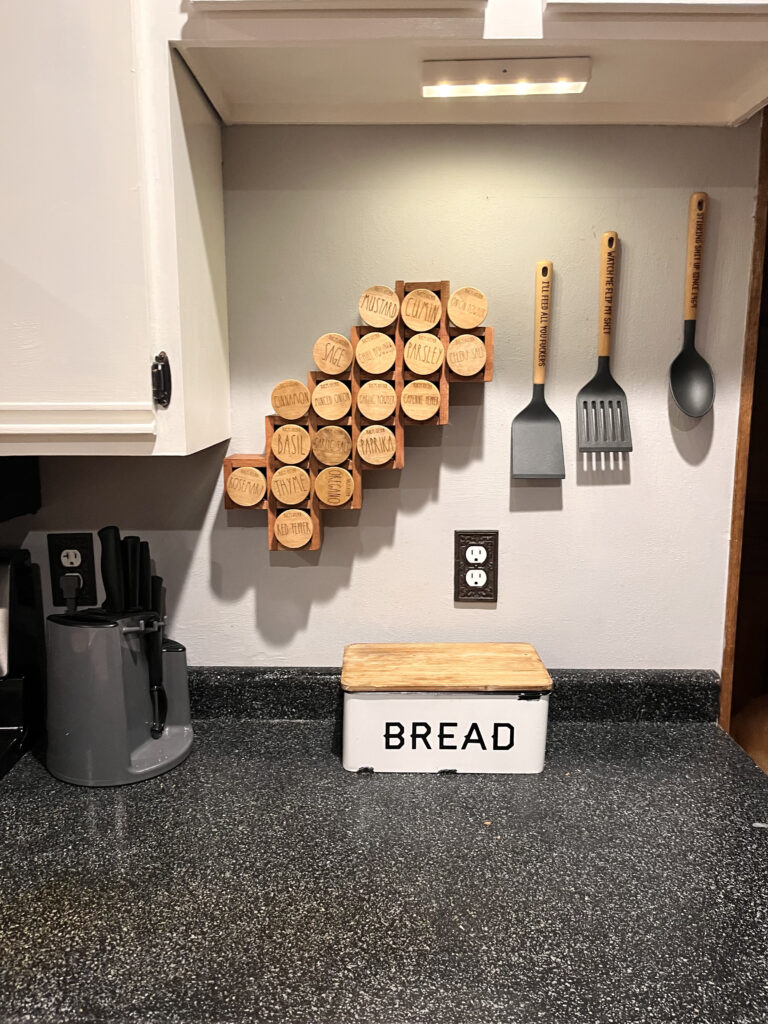
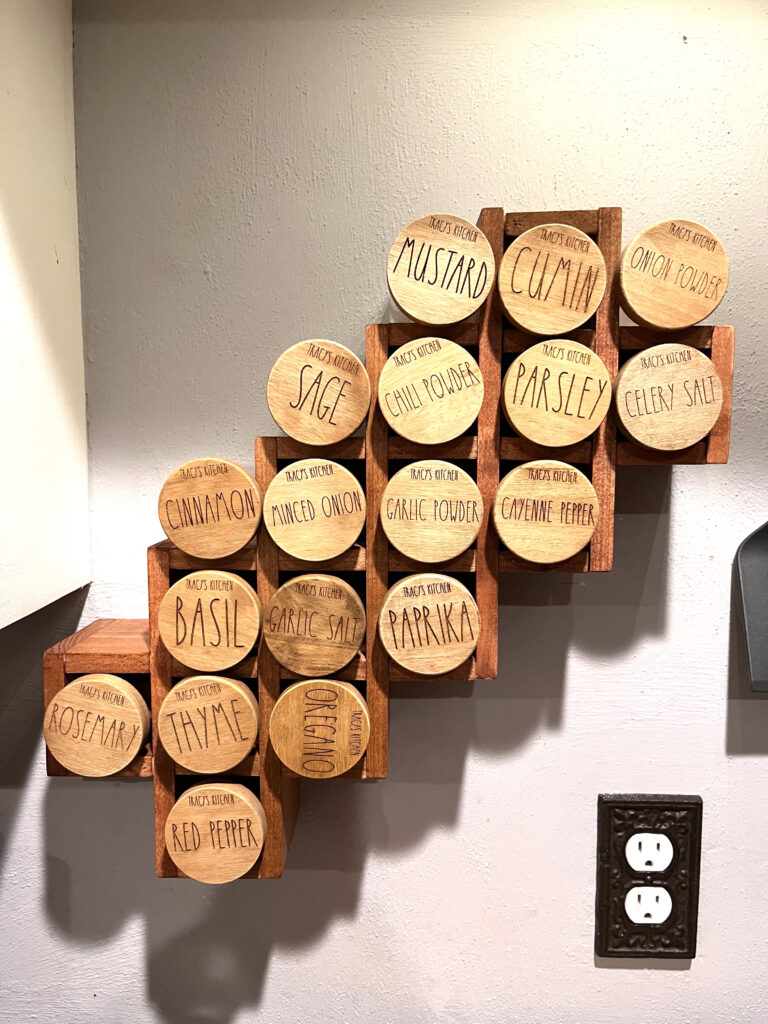
For the labels, I chose to use my Glowforge to engrave the bamboo lids! It’s the perfect way to organize the herbs for these spice containers because the lids are the only thing exposed!
Filling the Glass Jars with Spices
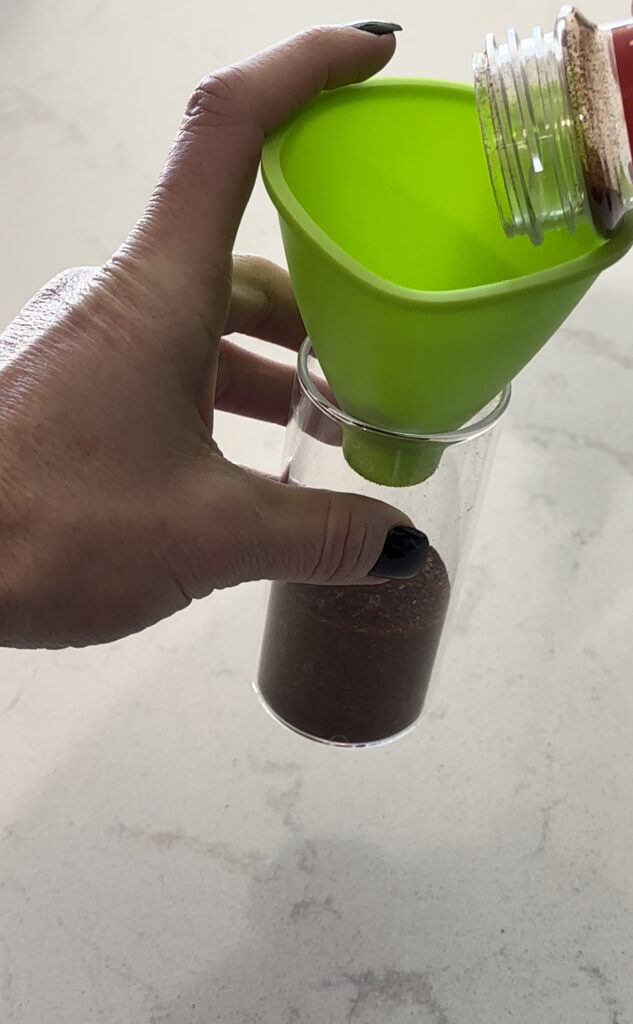
After I engraved all of the spice jar lids, I filled them up with our spices.
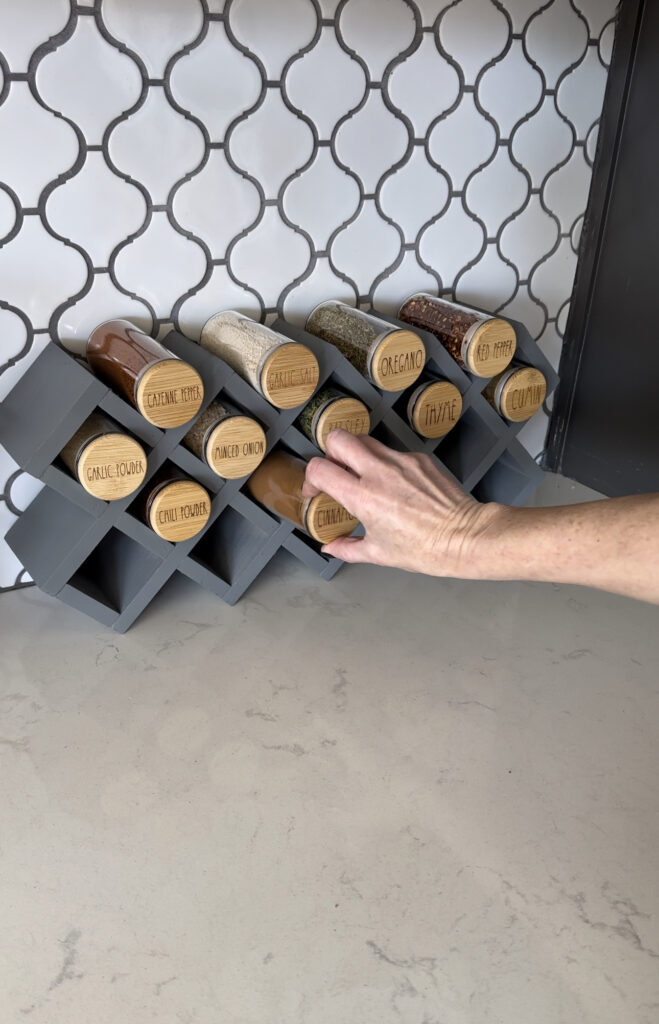
Then, I placed each jar inside the rack!
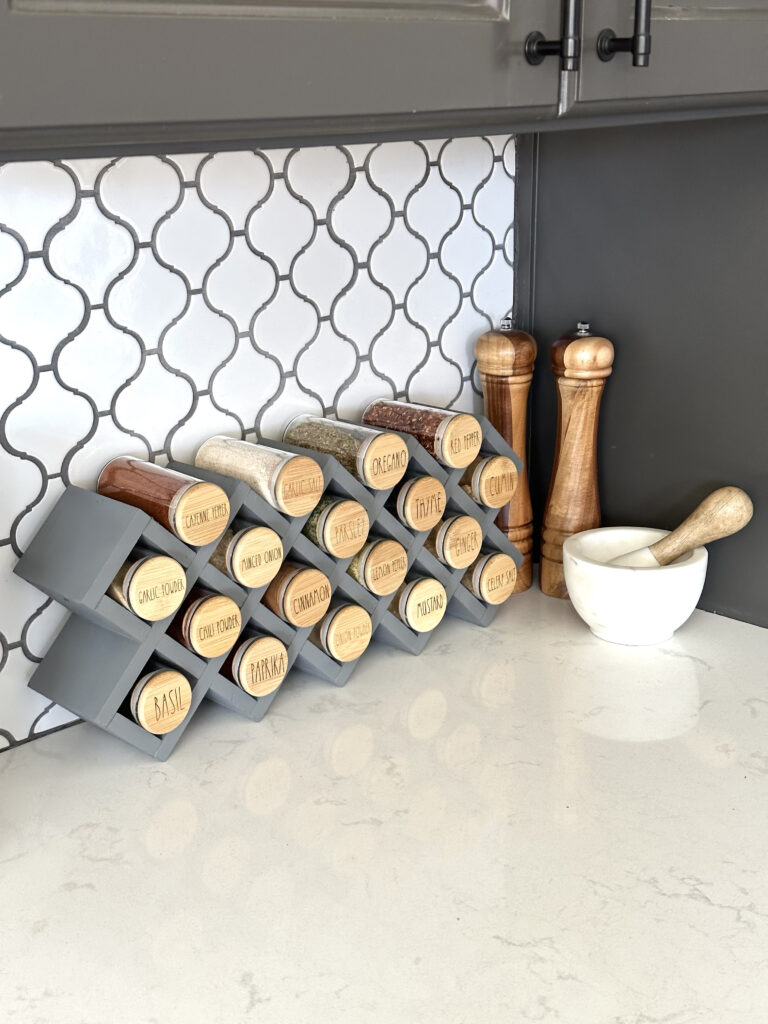
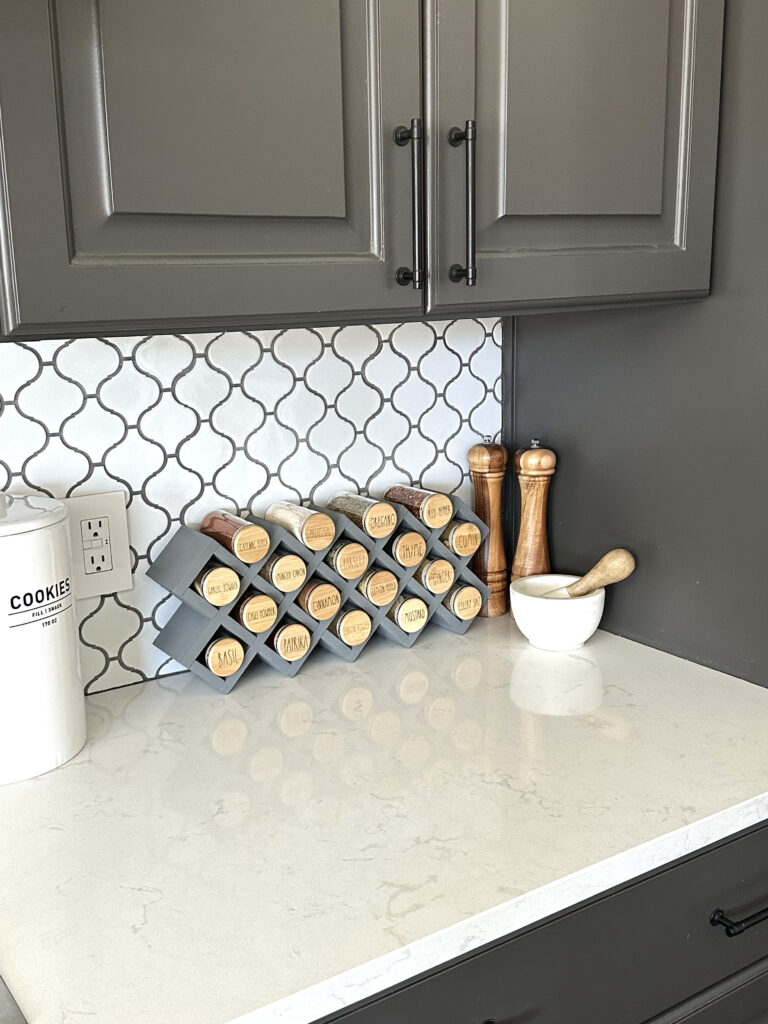
I love how this spice rack looks against my kitchen wall backsplash and I love a well-organized kitchen!
I made one to surprise my friend with for Christmas and she sent me what she did with hers! It’s perfect and I love how she used brackets to hang it on her backsplash to create a Spice Rack Shelf!
The best part about DIY is that you can use your creativity! Make sure to share your own DIY Spice Rack with us on social media and use #shanty2chic so we can share them too!
Happy Building!
Check out our other Spice Rack Ideas!
We have a few other free plans that are great if you don’t have counter space, cupboard space or you have limited storage space in a small kitchen!

How to Build a Countertop Spice Rack
Tools
- Miter Saw
- Pin Nailer (optional)
Supply List
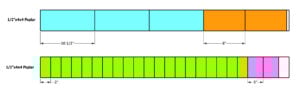
- 2 1/2x4x4 Poplar
- 1" Pin Nails
- Wood Glue
- Spice Jars – Link in Post on our Site
Instructions
Cut List
- Cut List 1

Building the Spice Rack
- Cut all of the poplar pieces to size. Attach the first set of end pieces together with 1" pin nails and wood glue.

- Center the end piece on an orange piece and attach it with 1" pin nails and wood glue.

- Add the next 4 short pieces to the orange piece with 1: pin nails and wood glue. For the 2 middle pieces, you will need to shoot your nails at a diagonal from the front of the boards.

- Attach the next blue piece, flush with the top green piece, with 1" pin nails and wood glue.

- Attach the next green pieces the same way, starting flush with the bottom of the blue piece.

- Follow up with the next blue piece, attaching it flush with the top green piece.

- Attach the next green pieces with 1" pin nails and wood glue, starting from the bottom of the blue boards.

- Attach the final blue board, flush at the top with 1" pin nails and wood glue.

- Attach the next 4 green pieces the same way.

- Attach the final orange piece with 1" pin nails and wood glue.

- Assemble the final end piece with 1" pin nails and wood glue and center it on the end of the spice rack with 1" pin nails and wood glue.

- Fill in any nail holes that are exposed, sand the entire piece down and give it a finish!Make sure to share your builds with us on social media and use #shanty2chic so we can share them too!Happy Building!


I always want my kitchen to be neat and this will make our kitchen neater and more beautiful.
How do you decide on the spacing and placement of the hooks and screws on the spice rack?
Am I missing the cut list somewhere? What do I cut the boards to?
The cut list is on the pdf plans as well as the bottom of this post in the box ☺️
Ok I love this so much. It’s amazing how little space it takes in the kitchen counter. Mine are organized too (not THAT good though) but I always end up knocking them down