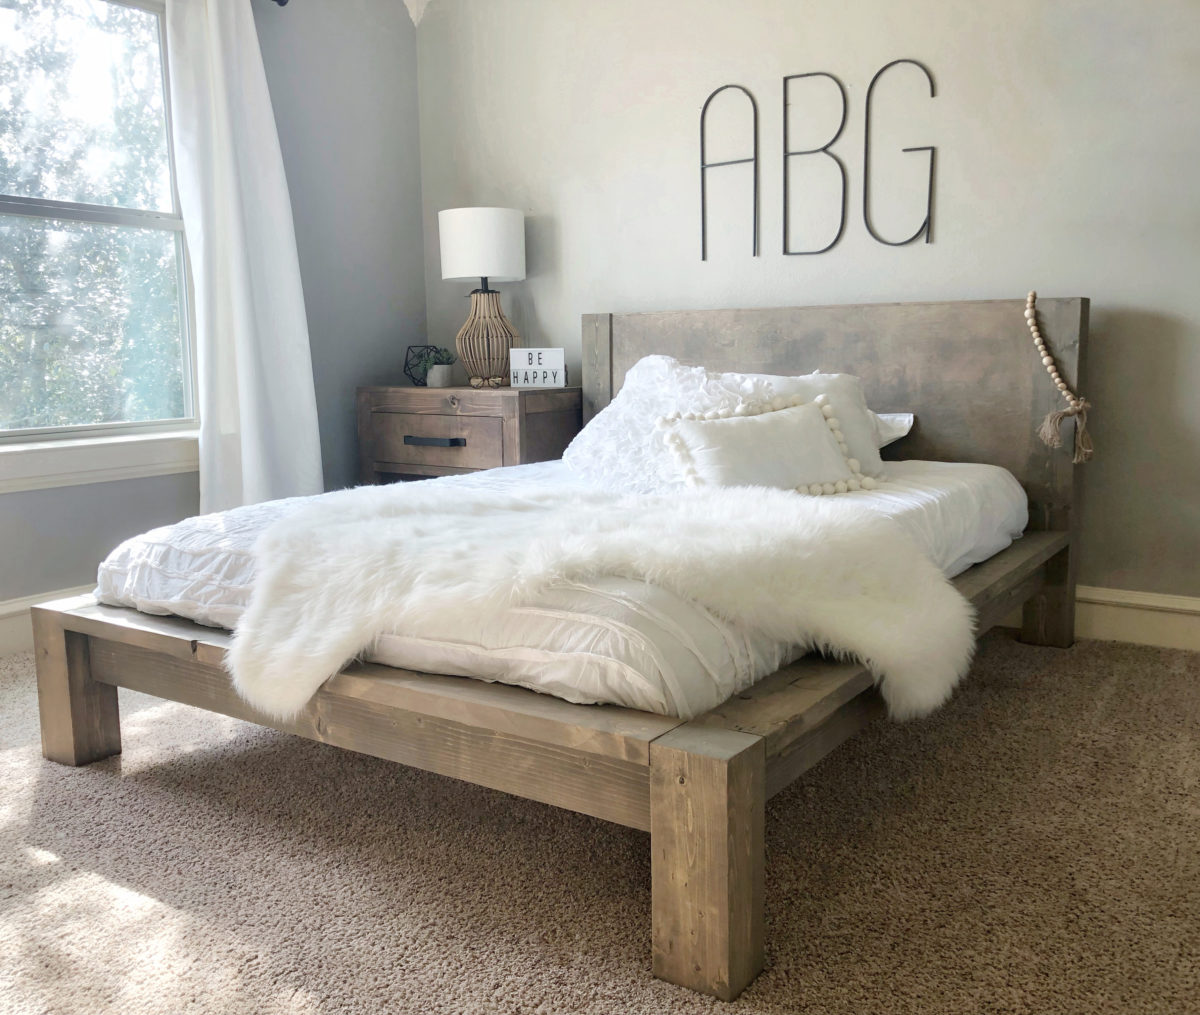
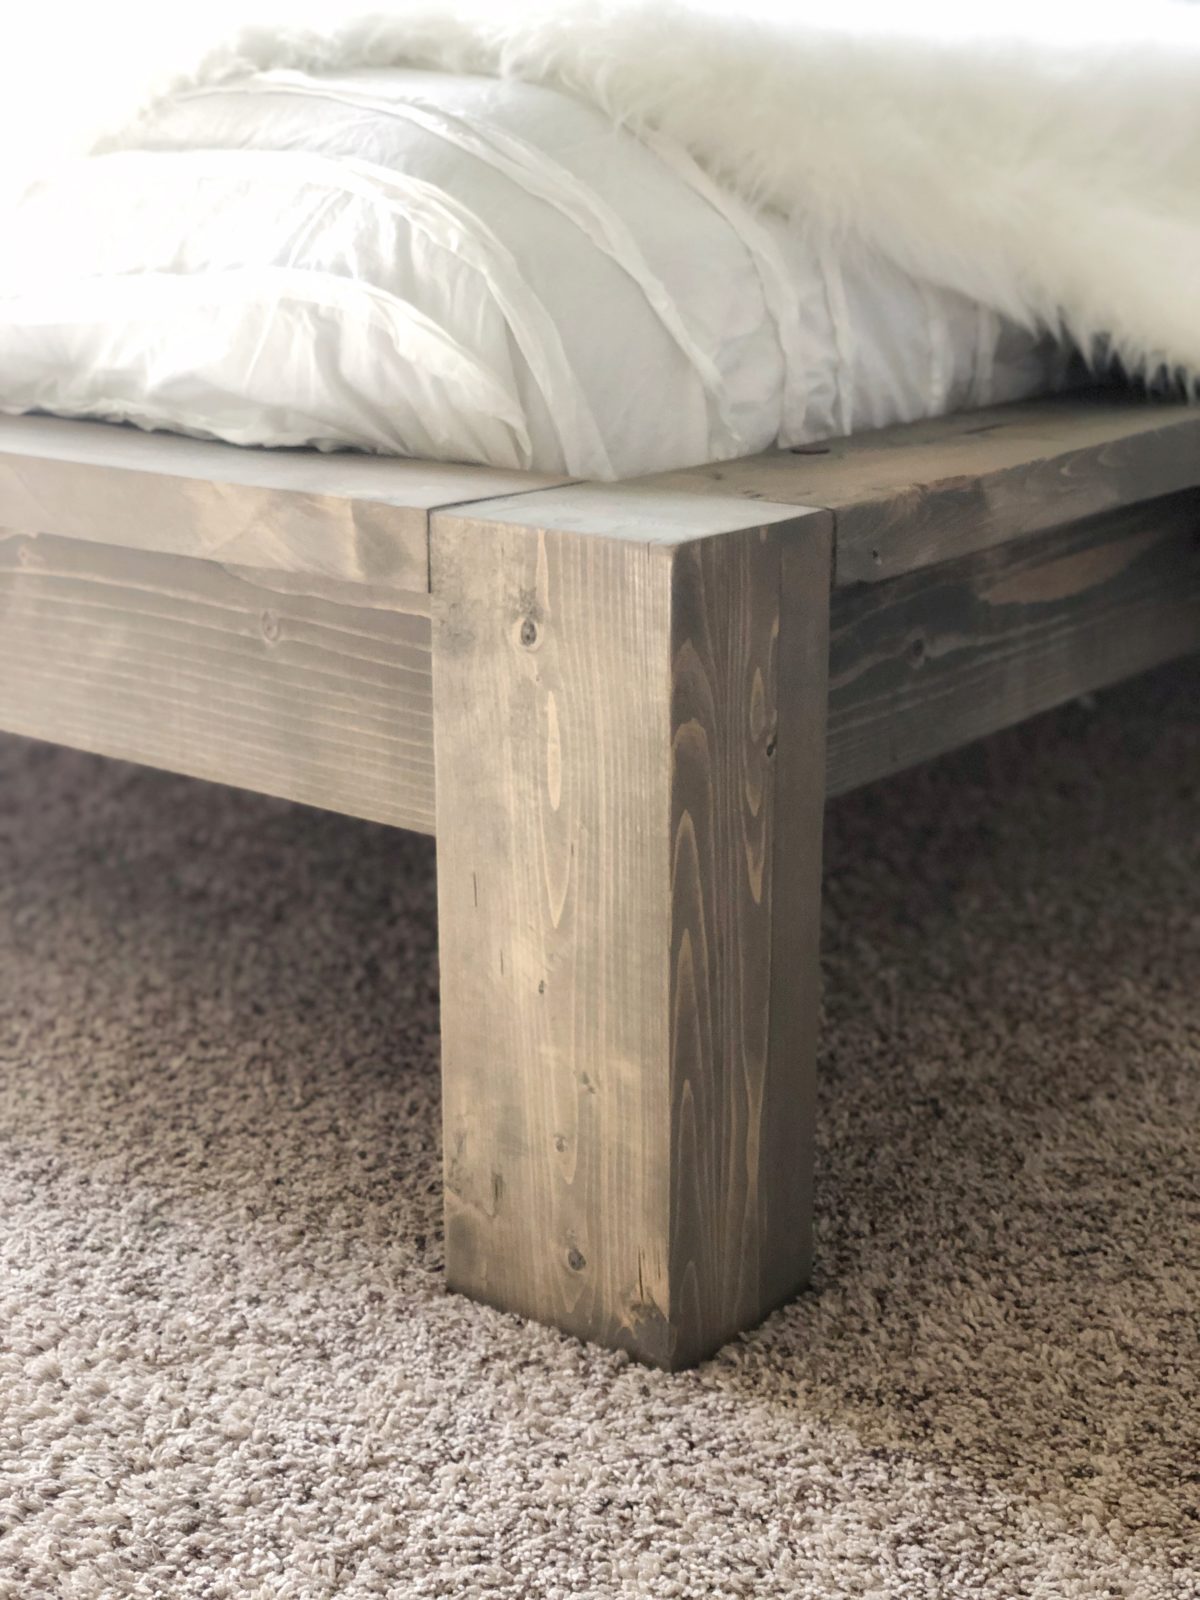
My oldest princess turned 16 this month and decided she needed a queen bed. So, I got to designing and came up with the cutest bed that I was able to build for under $100 of lumber! This bed is so darn cute and perfect for kids or adults. I love the clean lines and modern yet super rustic look. Check out how we built this bed by watching the video below!
How cute did this thing turn out??
Before we get started, be sure to download and print the FREE PLANS by clicking HERE!
DIY Rustic Modern Queen Bed
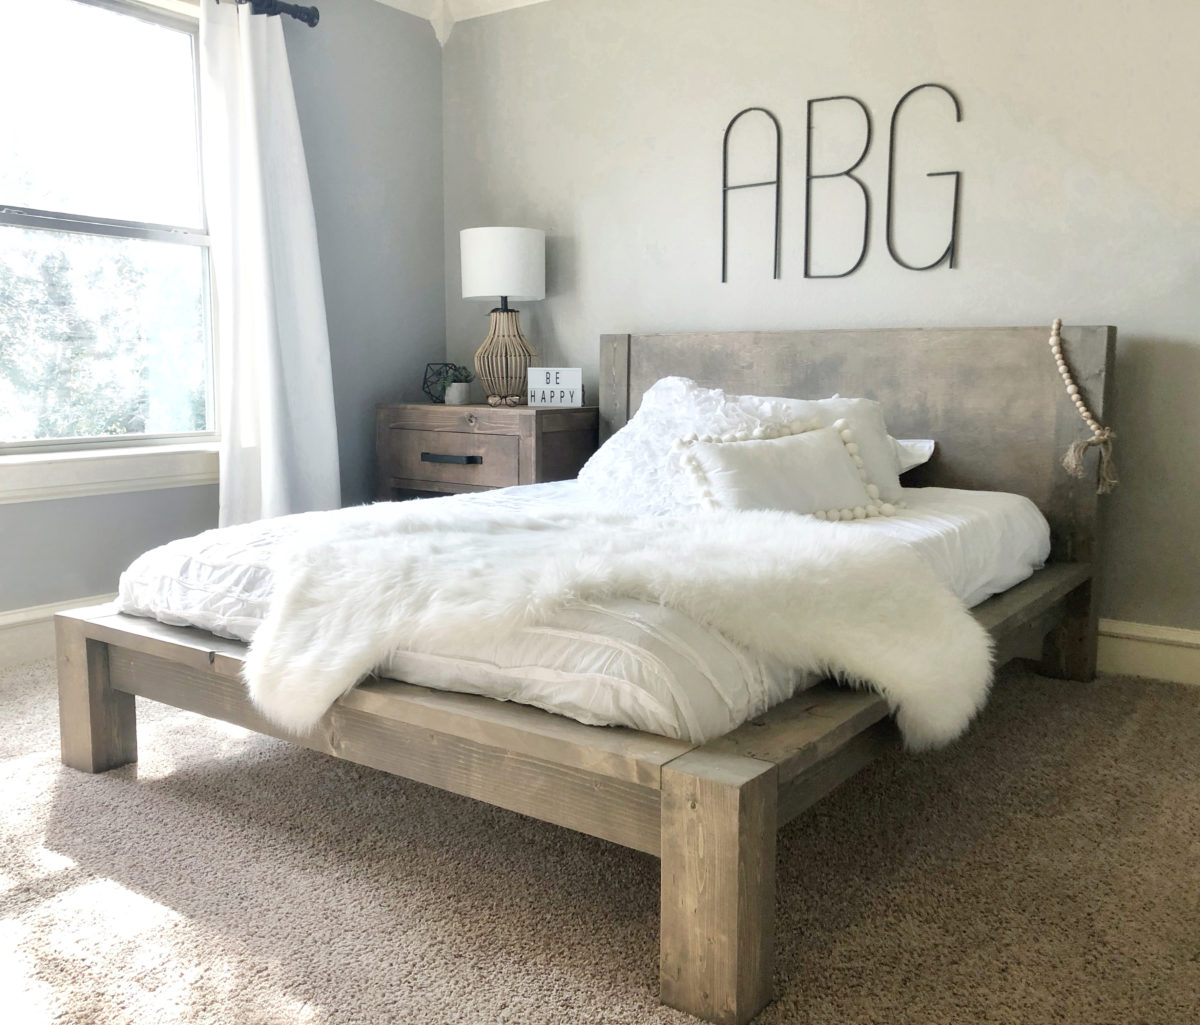
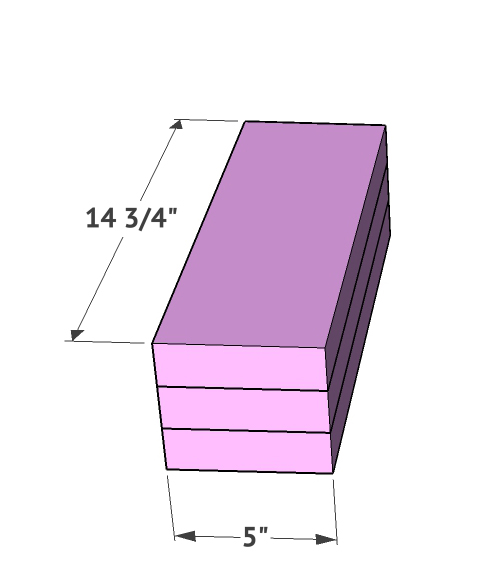
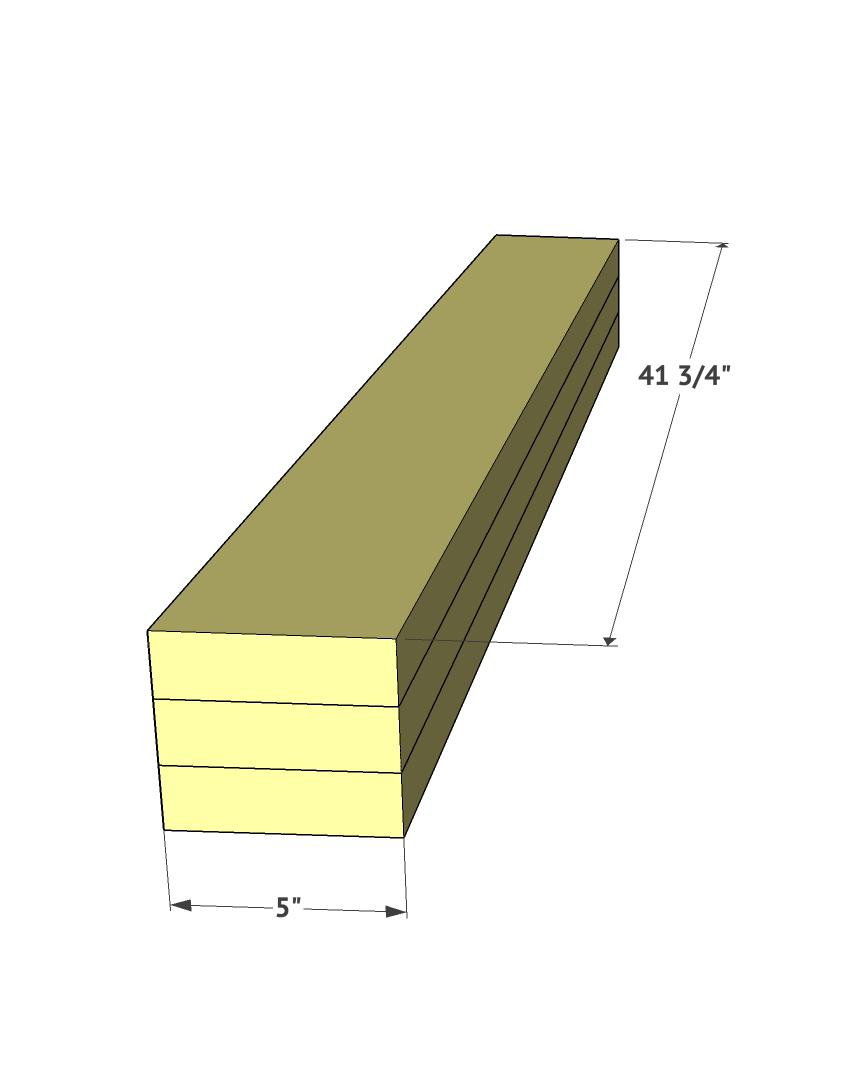
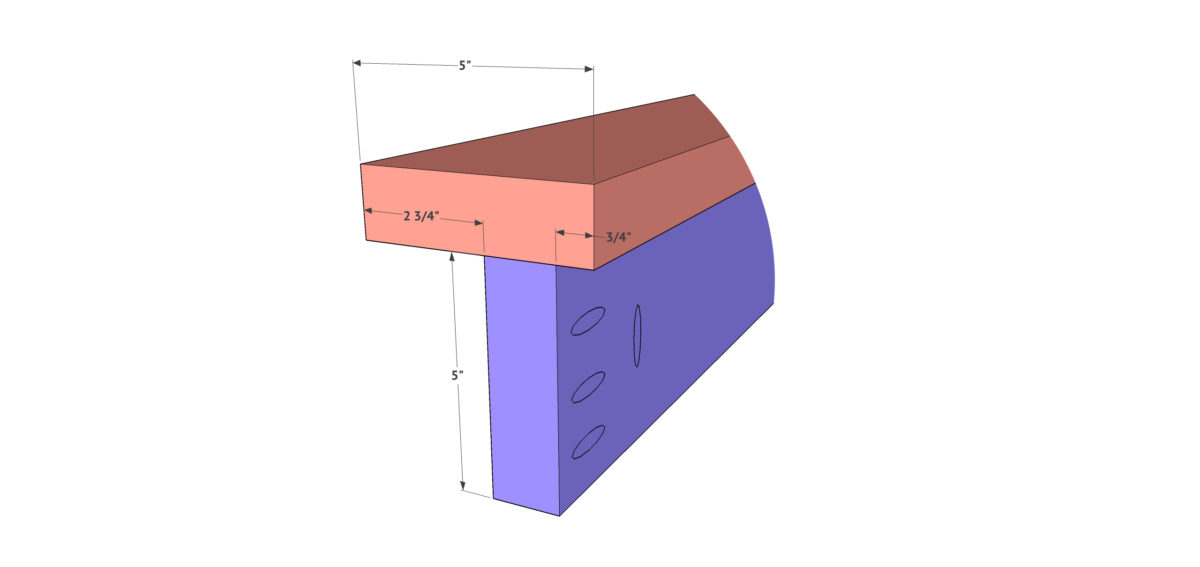
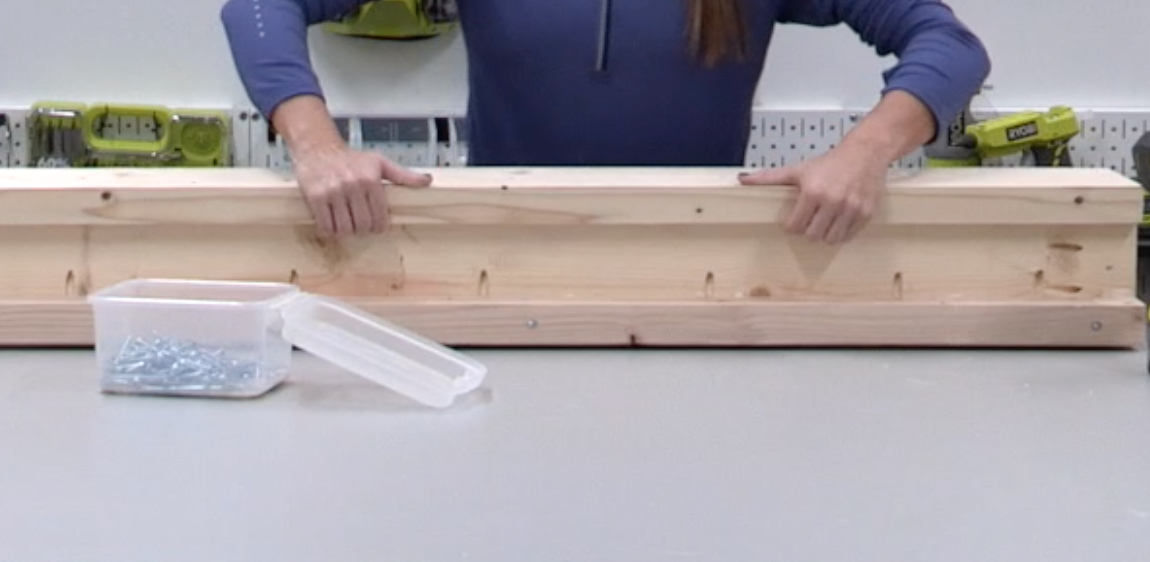
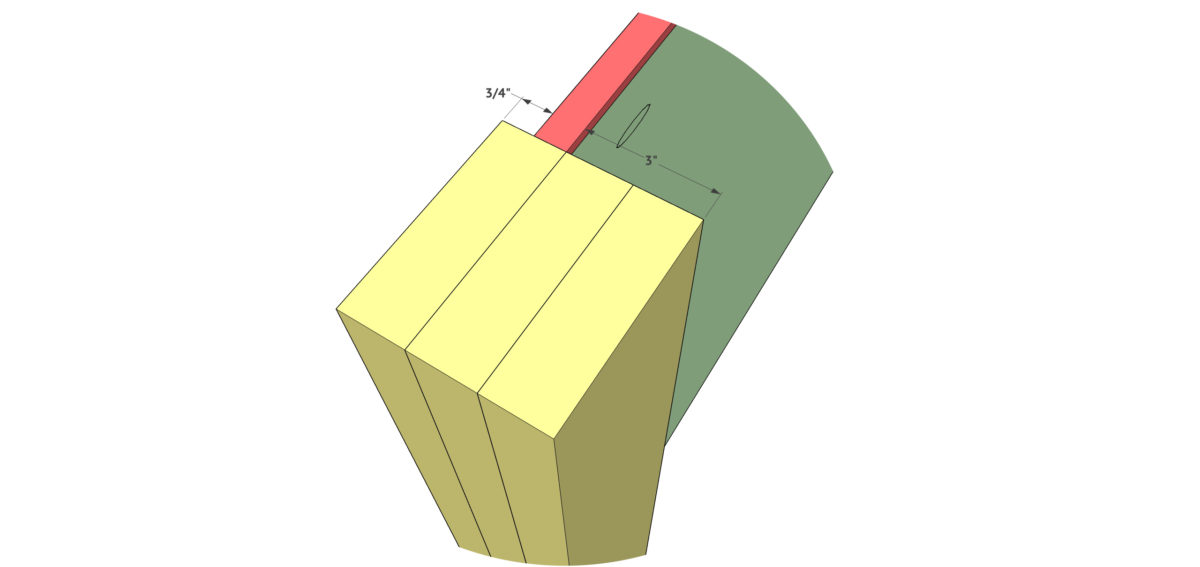
The first step is building your legs. You will build two taller legs that will be a part of your headboard, and two shorter legs that will be a part of the footboard. These are 2×6 boards that we ripped to 5” with the table saw. If you choose to not rip your boards, you need to refigure your measurements as it will change the rest of this plan. We attached each board together using wood glue and clamped them together until the glue dried. Then, sand any rough or uneven edges.
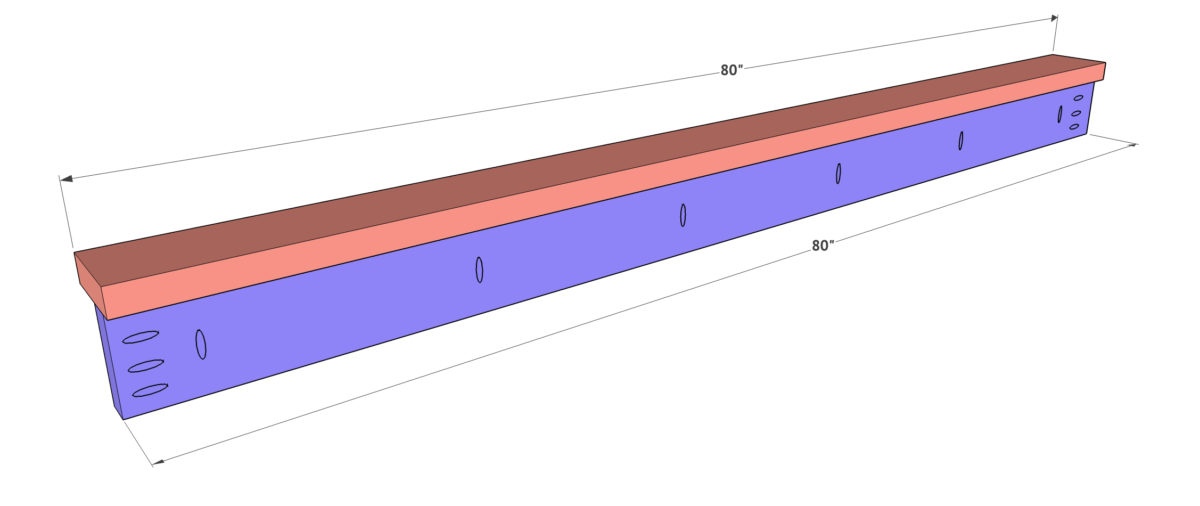
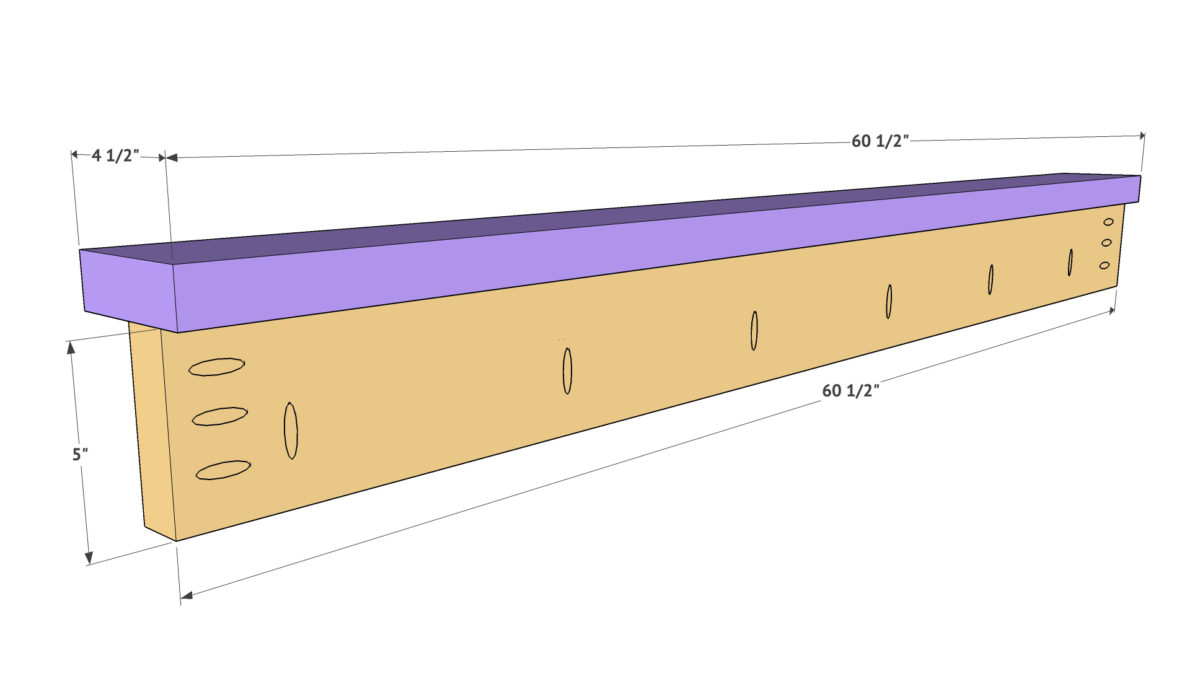
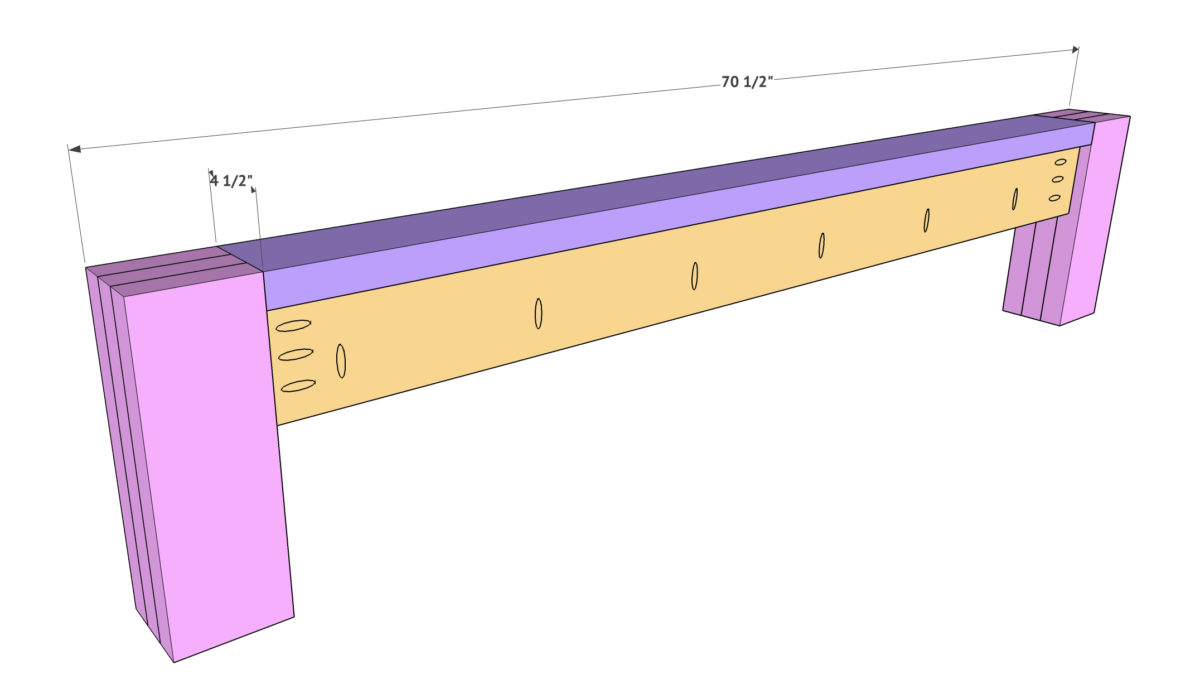
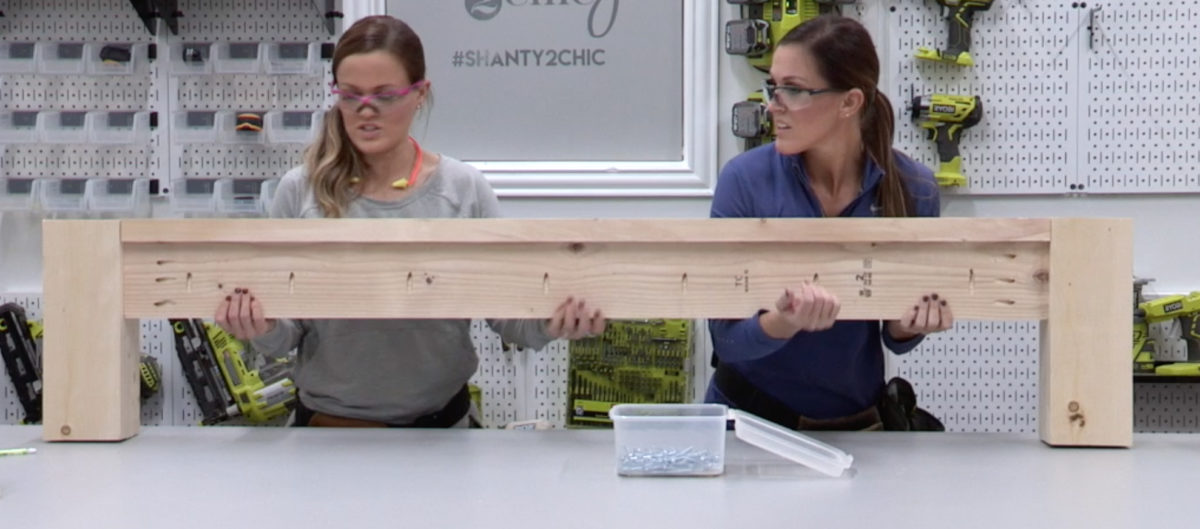
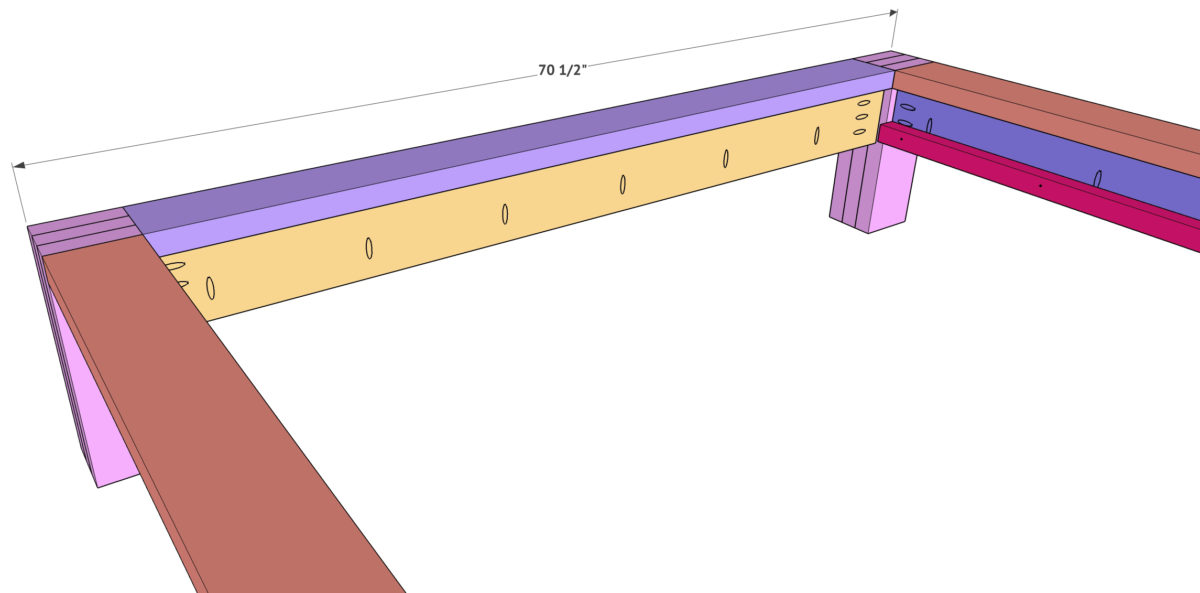
While the legs are drying, you can start building the rest. The side rails are also 2×6 boards that we ripped to 5”. Add 1.5” pocket holes to one side of the vertical board and 1.5” pocket holes on one side of the horizontal board that sits on top of it. Attach these boards together using wood glue and 2.5” pocket hole screws. Notice the alignment of the boards in the picture.

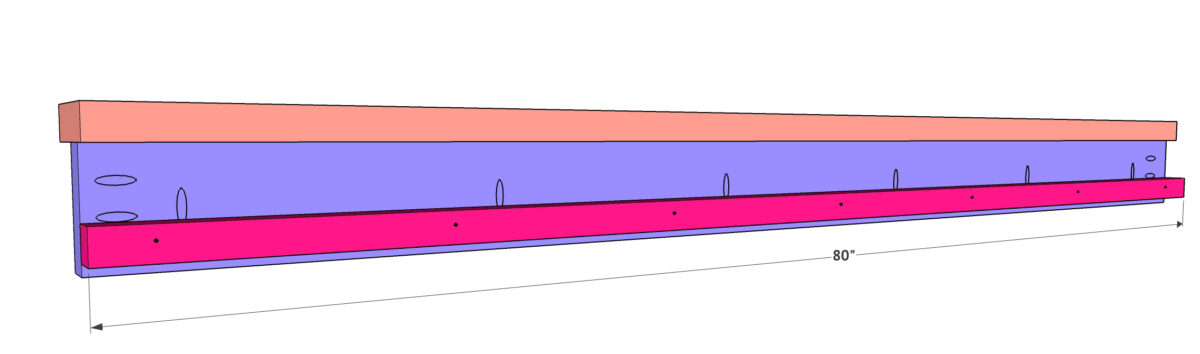
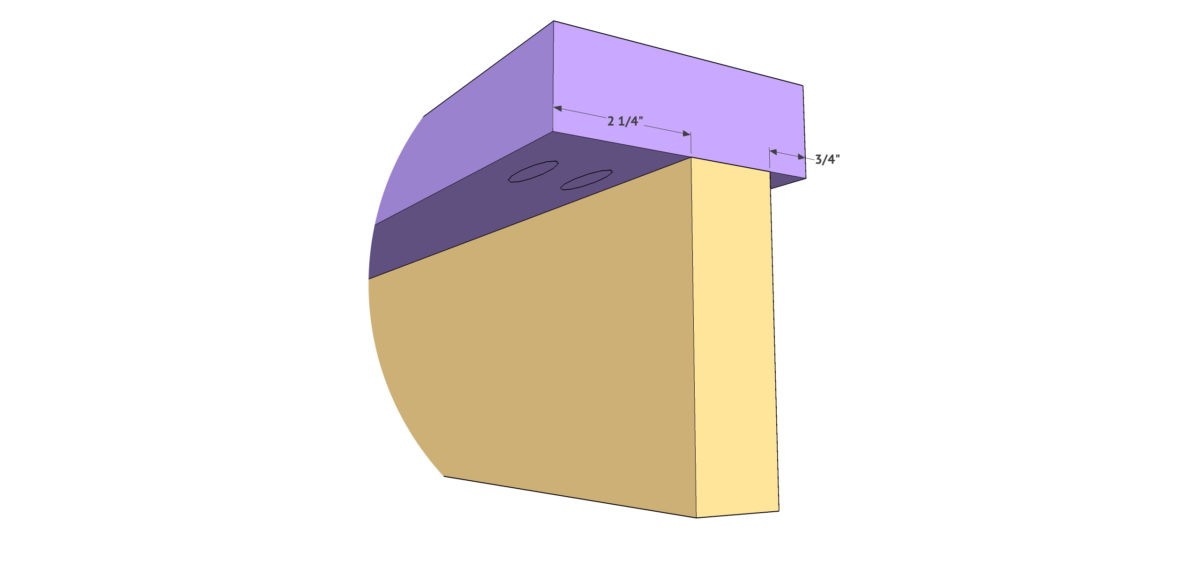
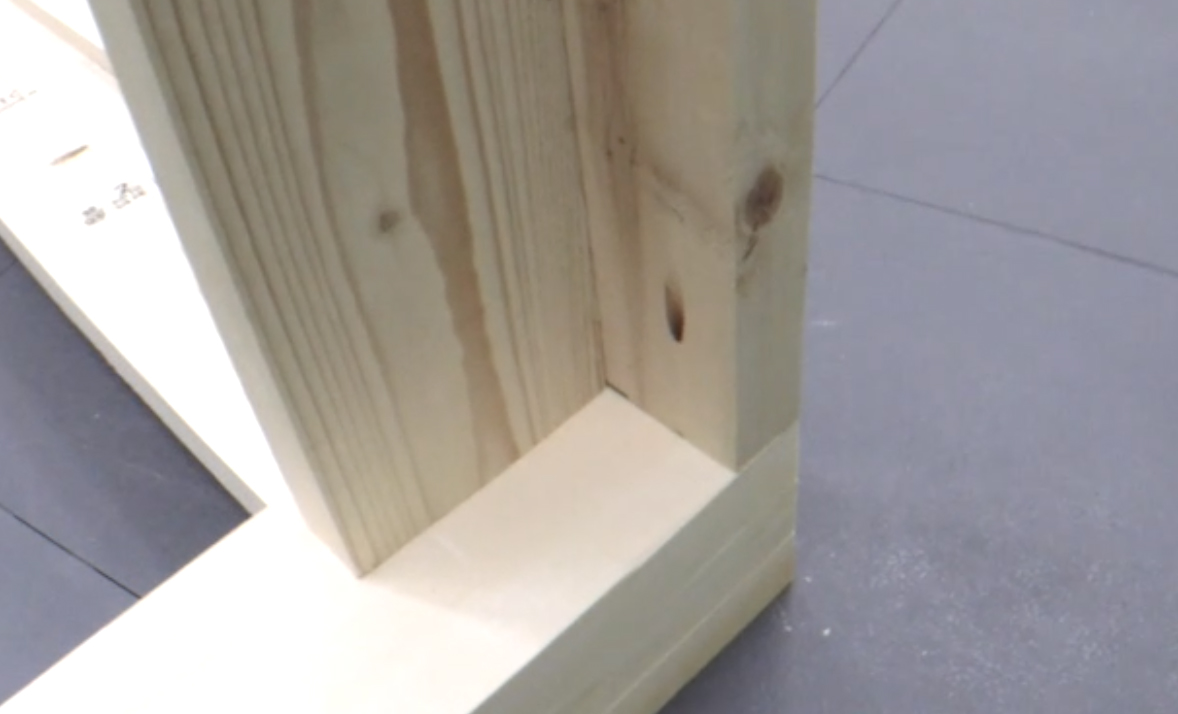
Now add the cleats to both sides. These are 2×2 boards that we attached to each side using wood glue and 3” Spax or wood screws. Notice the alignment in the bottom picture.

Now build the footboard. The top of this assembly is also a 2×6 board, but we ripped this one to 4.5” so it would line up flush with the legs. Add 1.5” pocket holes to both boards, and attach them using wood glue and 2.5” pocket hole screws.
Now attach these boards to the footboard legs we built in the first step. Attach them using 2.5” pocket hole screws through the pocket holes you made and into each leg. You want the top of the slat to sit flush with the top of the feet.
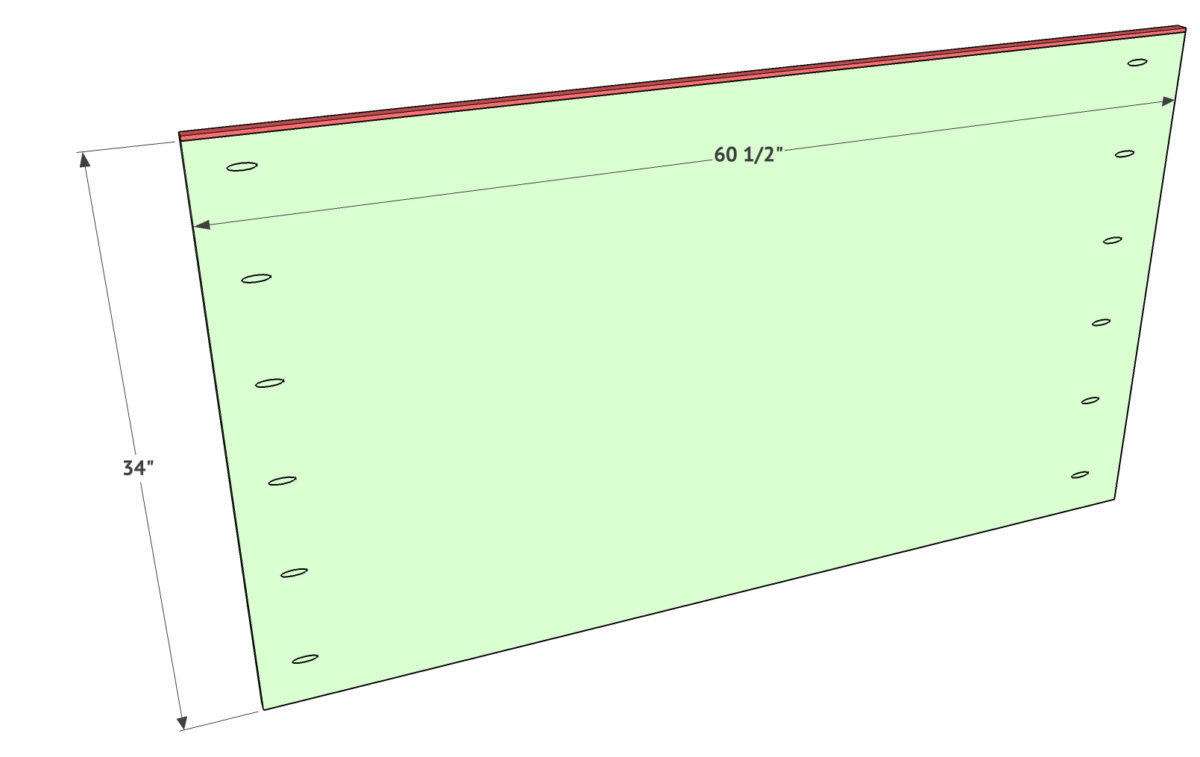
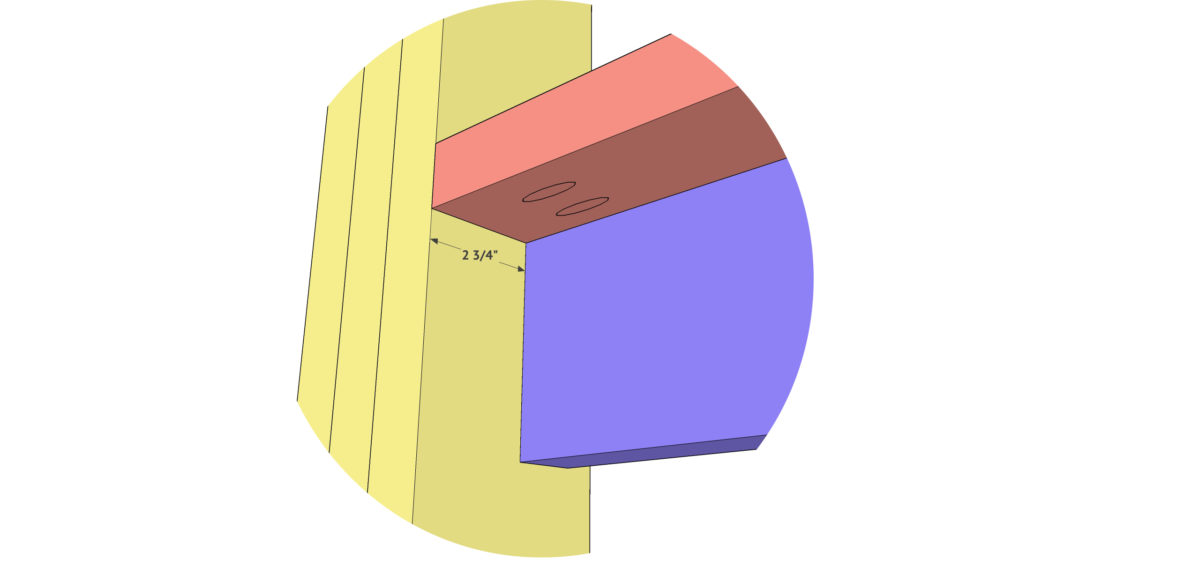
Attach the small trim piece to the top of the headboard panel first. The panel is 3/4” hardwood plywood with 3/4” pocket holes on the sides of the back of the panel. The trim piece is 1/4” thick x 3/4” wide and attach it using wood glue and brad nails.
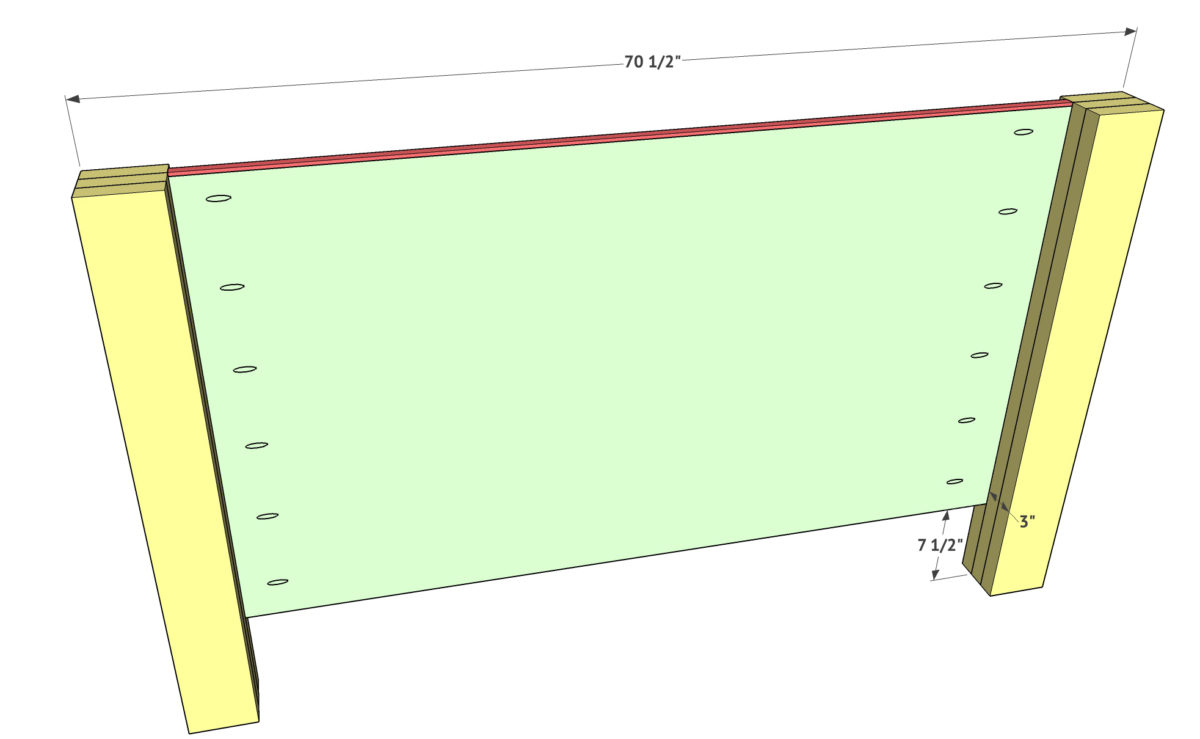
Now attach the headboard panel to the legs using wood glue and 2” pocket hole screws. You want the headboard panel to line up 3/4” from the front of the legs. The top of the trim piece will be flush with the top of the legs.
Now attach the rails to the headboard using 2.5” pocket hole screws through the pocket holes on the rails and into each leg.


Attach the footboard to both legs using 2.5” pocket hole screws. Make sure the tops and sides are all flush.
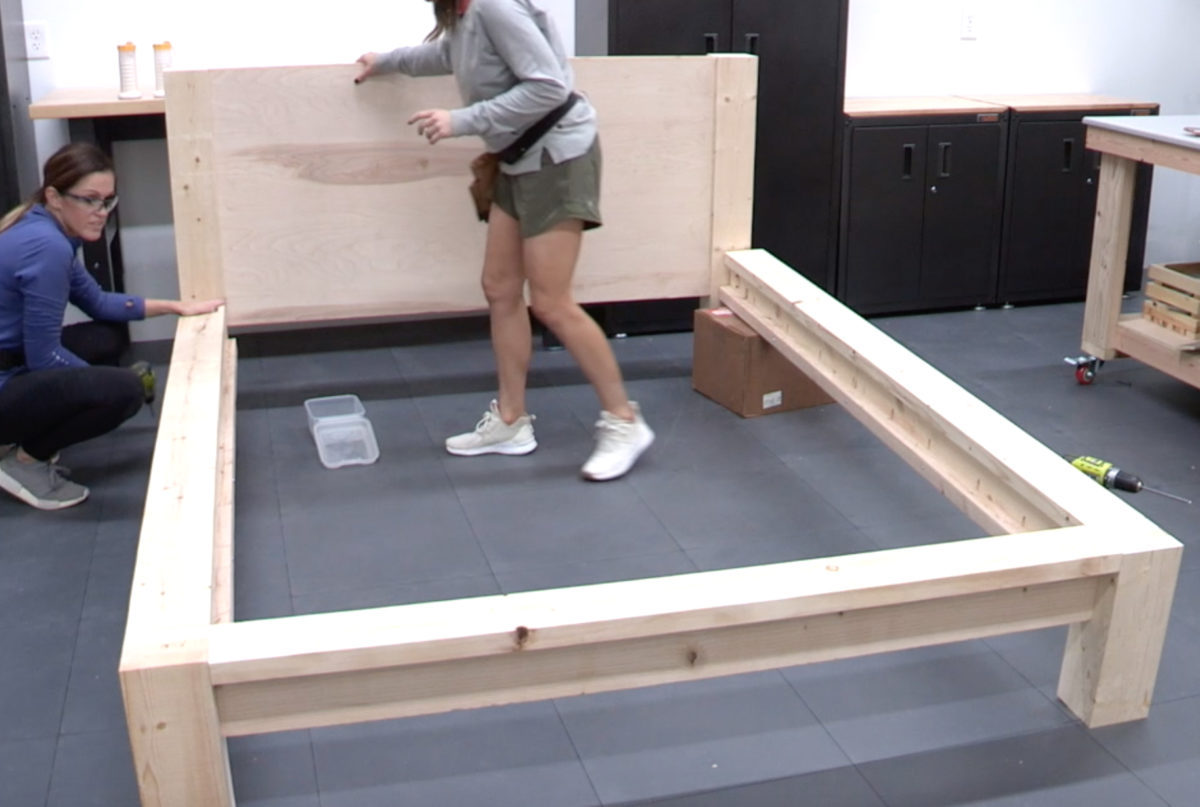
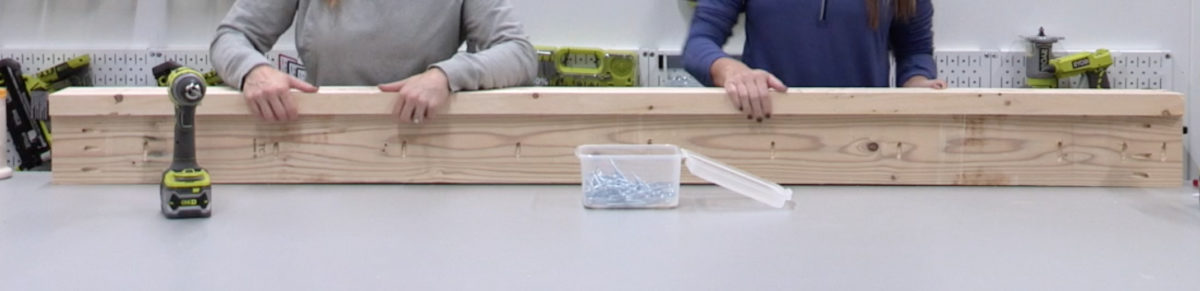
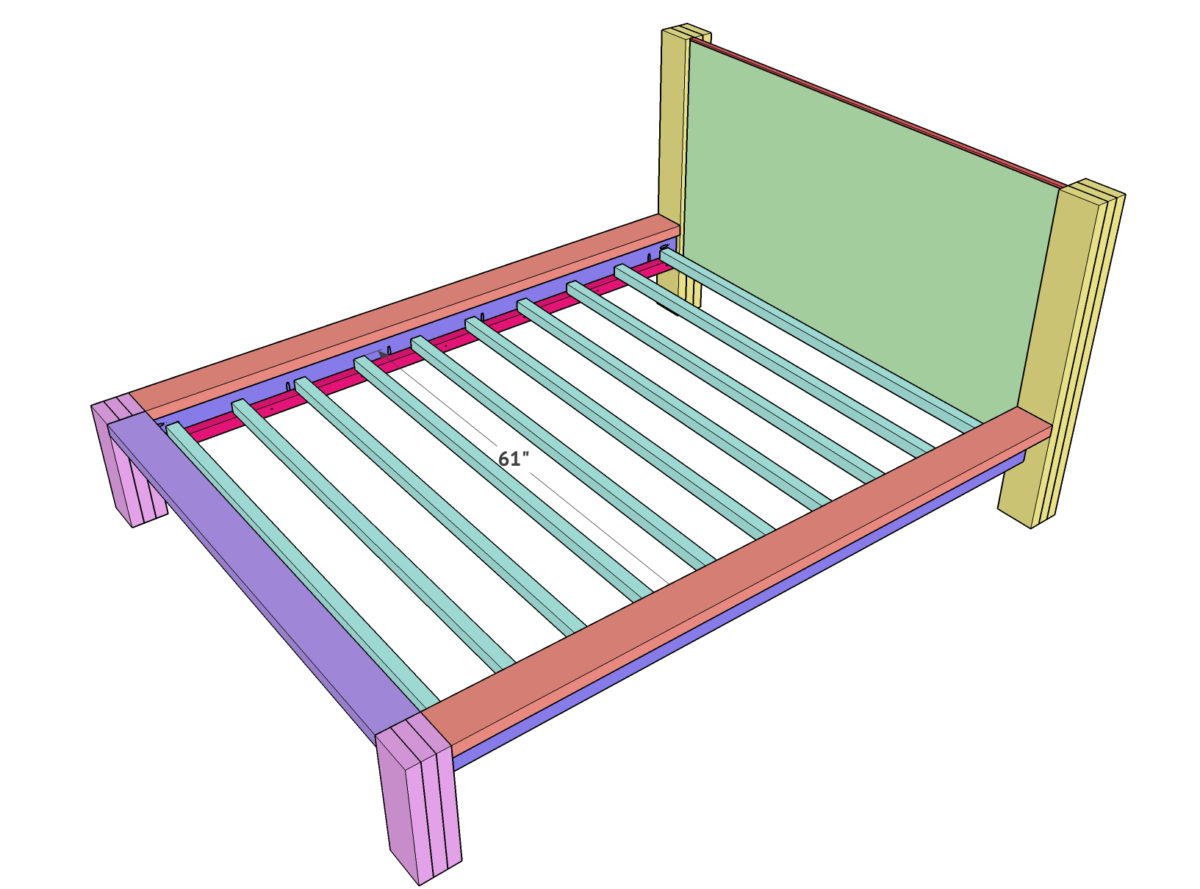
Time for slats! We used 2×2 boards for this part and attached them using wood glue and 3” Spax or wood screws. We suggest not using glue to attach the slats and the runners to both the footboard and headboard so you are able to move your bed around from room to room and disassemble it easily.

Here it is all finished up! I just love this bed so much!


This rustic modern queen bed design looks fantastic. The blend of clean structural lines with natural wood textures creates a balanced look that feels both contemporary and warm. It’s impressive how the design manages to keep the construction sturdy while still maintaining a refined aesthetic suitable for different bedroom styles.
From an interior industry perspective, rustic-modern furniture pieces like this continue to be popular because they combine durable materials with timeless design elements. Solid wood bed frames often become the focal point of a bedroom, highlighting the importance of craftsmanship and material quality in furniture design. We’ve also been following similar furniture and material trends across the interior industry here: https://plywoodbazar.com/
What color and brand of stain was used on the queen bed buiLt for your daughter?
Great Article!
Great design but is it just me? I don’t the measures add up. they are attaching the rail and the footboard which are 5 inches wide to the legs which are 5×6 inches.. Plus the width of the bed is 60 1/2 inches and we are losing 3/4 inch on each side.
I wish I would’ve read these Q&A’s before starting as a few people mentioned this a year or more ago. I printed these instructions in September of ‘22 and ripped the footboard to 4” as the materials list said when it actually needed to be 4.5”. It would be wonderful if you could correct the materials list as I’m making this bed out of Alder which is kind of expensive. Especially these days! Thanks for your attention on this as it may save others from having to buy another board. Love the pattern and can’t wait to finish this for my granddaughter’s birthday! Thanks!