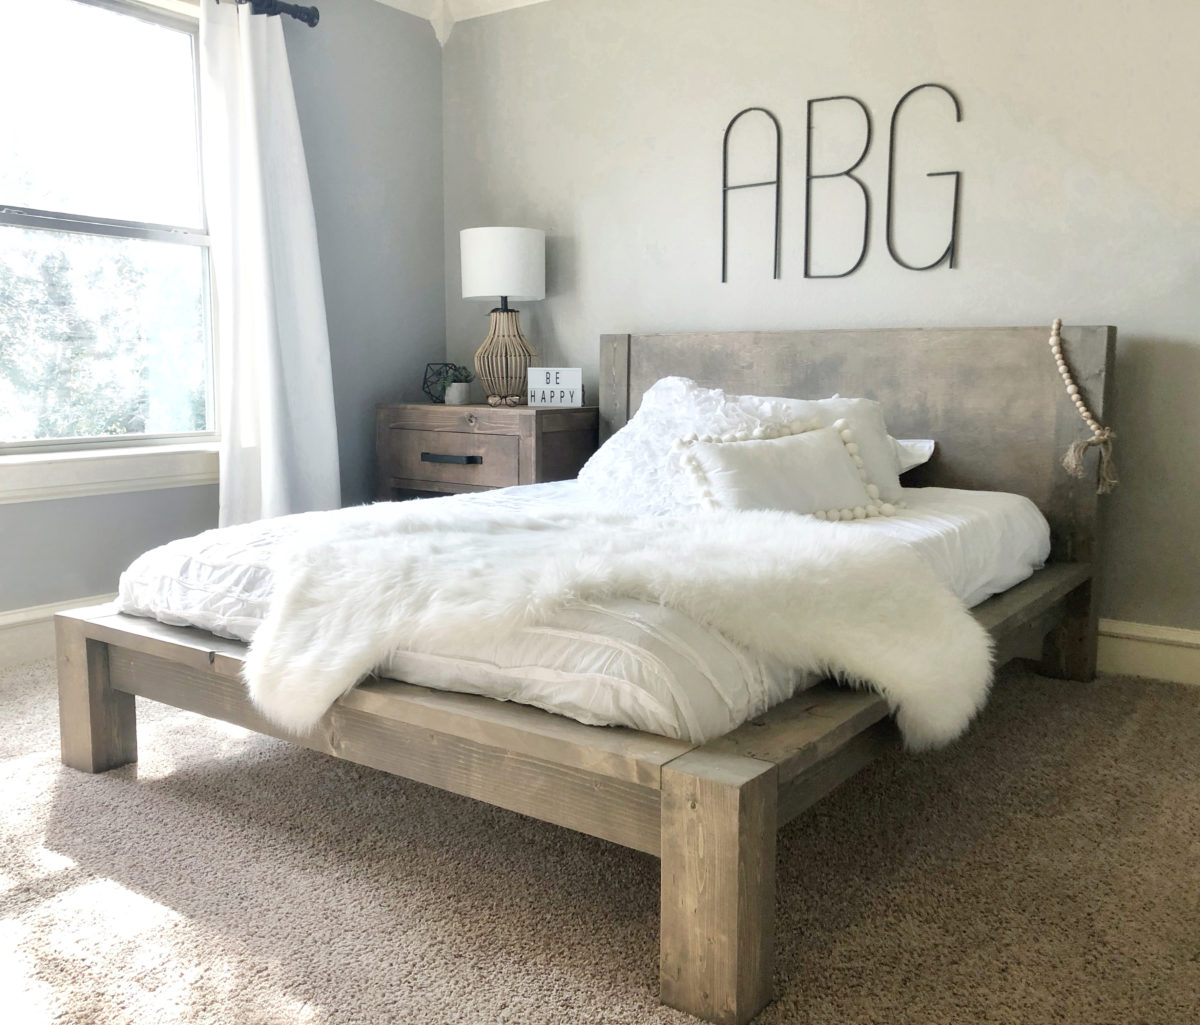
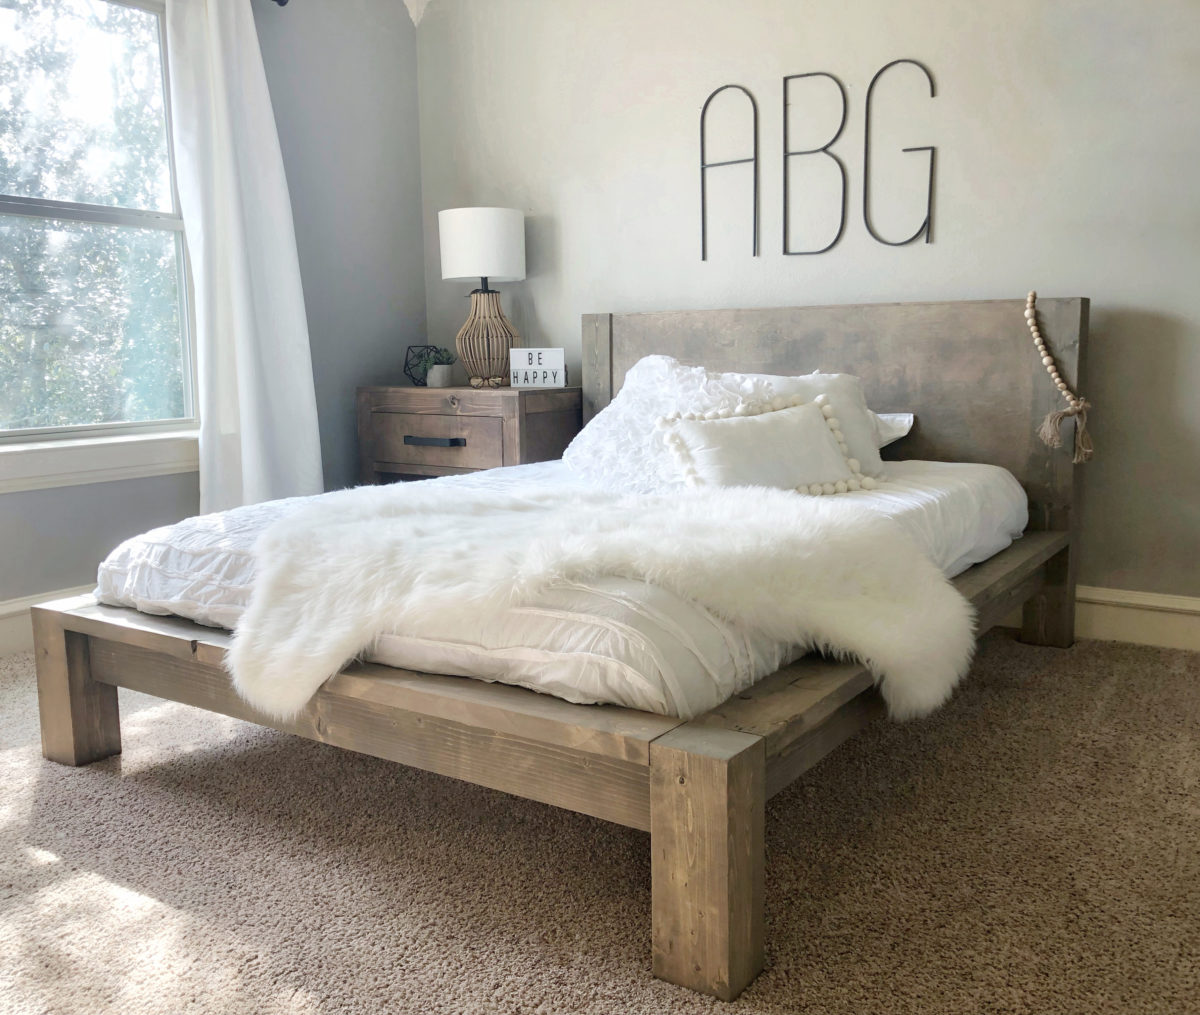
My oldest princess turned 16 this month and decided she needed a queen bed. So, I got to designing and came up with the cutest bed that I was able to build for under $100 of lumber! This bed is so darn cute and perfect for kids or adults. I love the clean lines and modern yet super rustic look. Check out how we built this bed by watching the video below!
How cute did this thing turn out??
Before we get started, be sure to download and print the FREE PLANS by clicking HERE!
DIY Rustic Modern Queen Bed
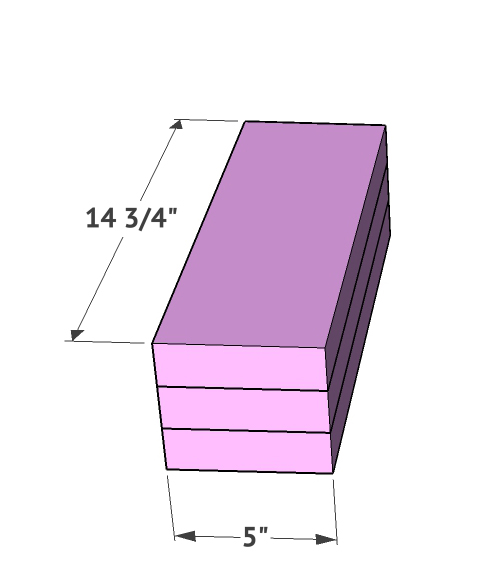
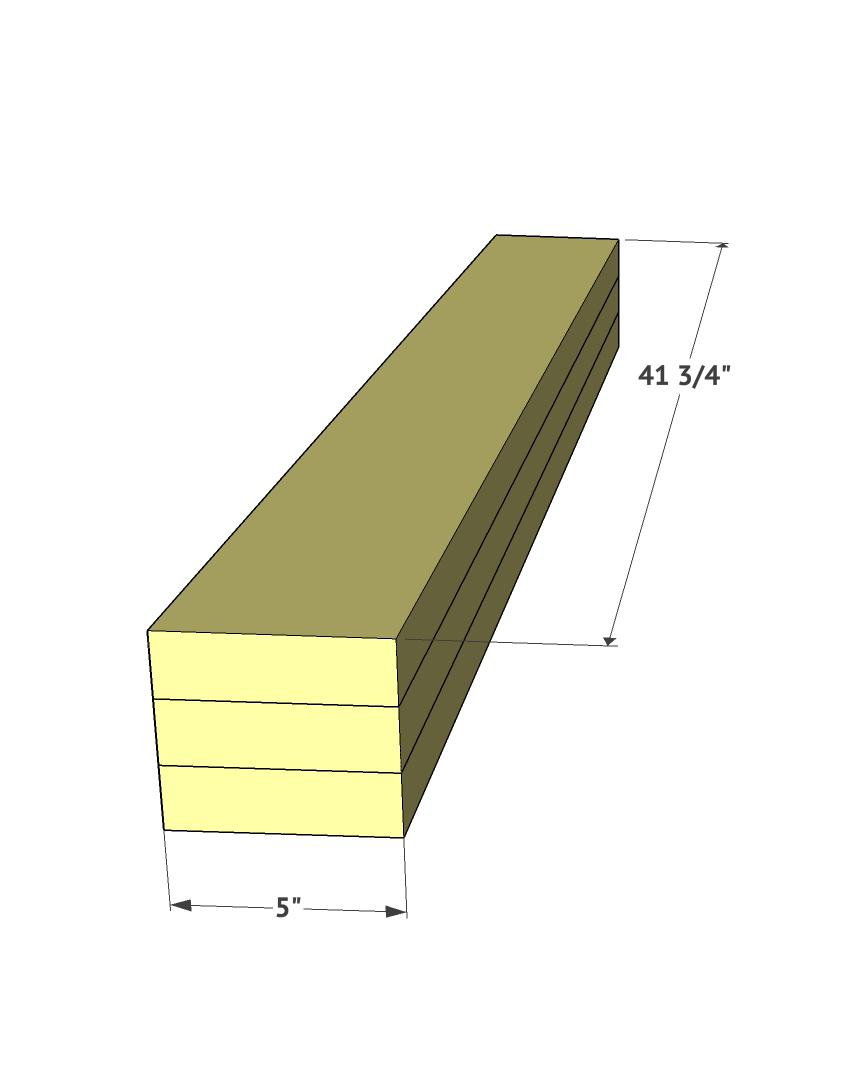
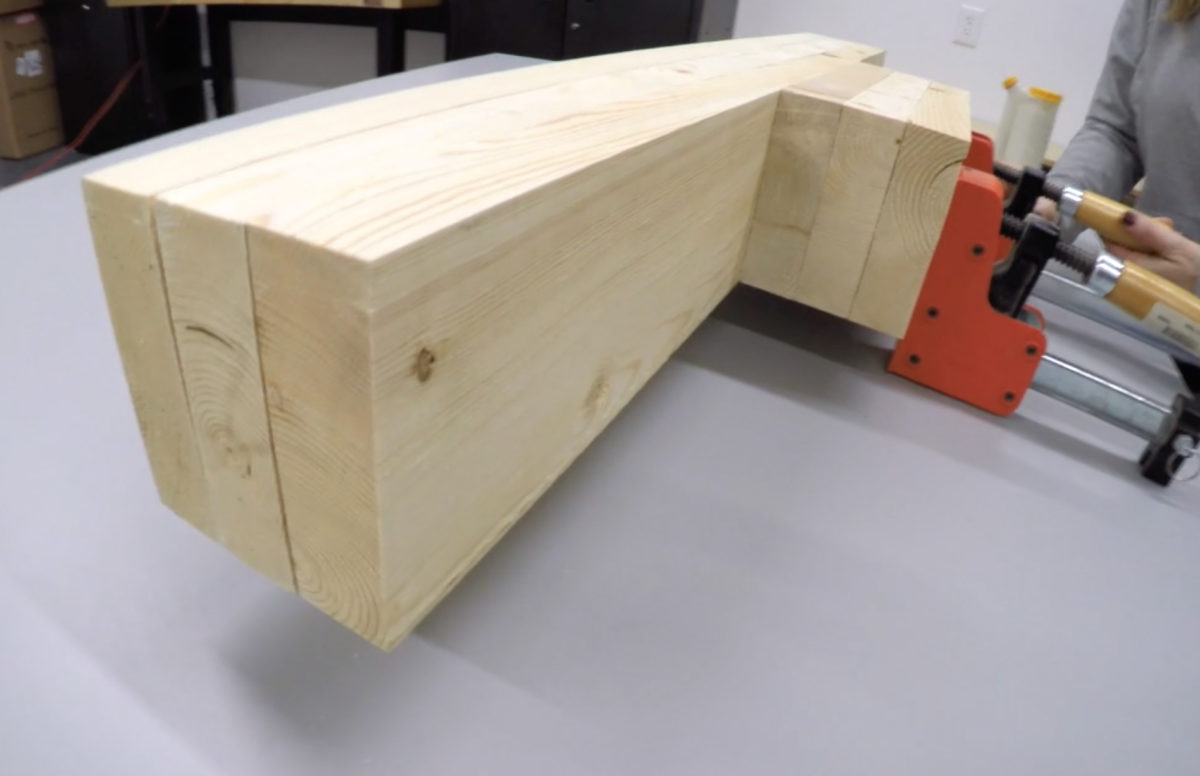
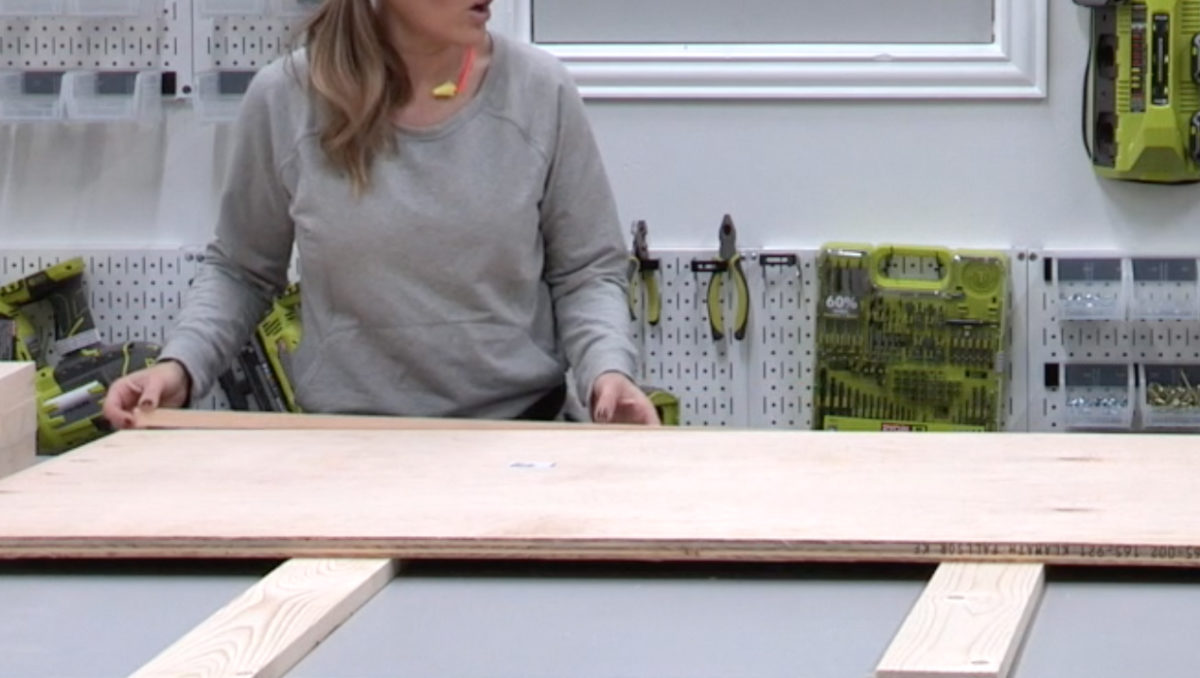
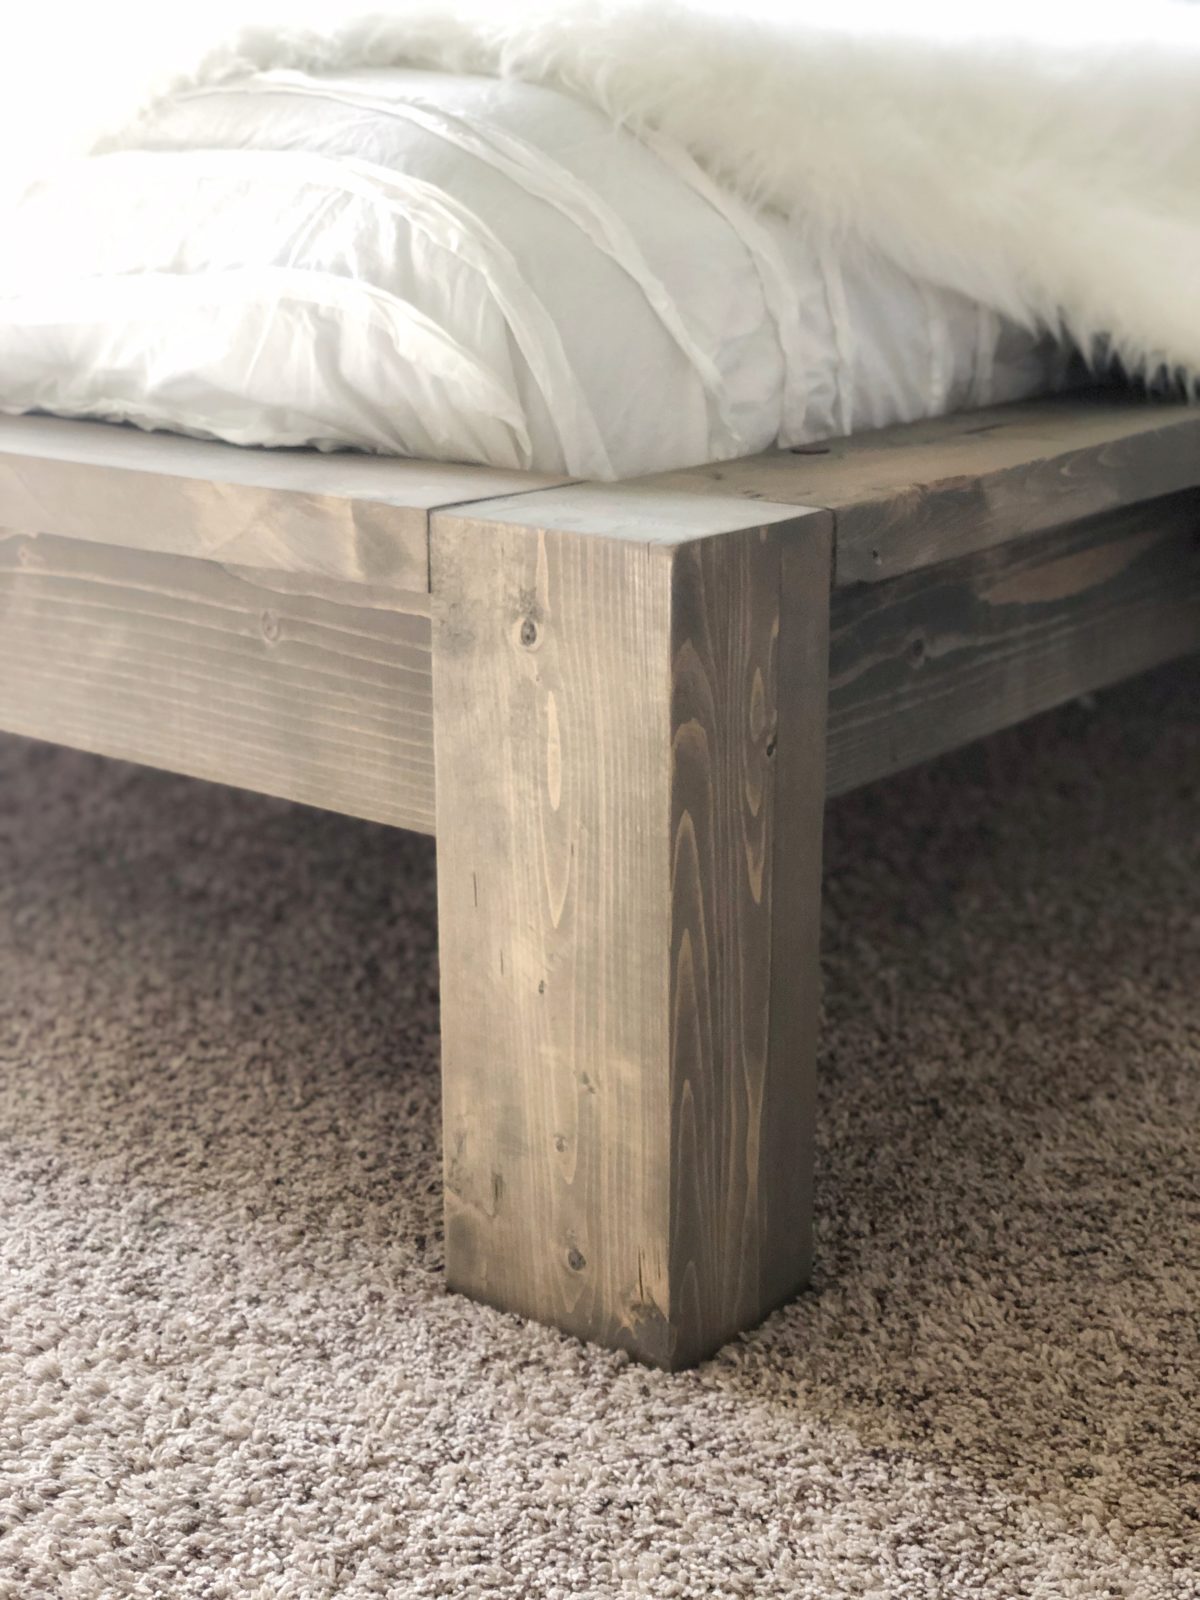
The first step is building your legs. You will build two taller legs that will be a part of your headboard, and two shorter legs that will be a part of the footboard. These are 2×6 boards that we ripped to 5” with the table saw. If you choose to not rip your boards, you need to refigure your measurements as it will change the rest of this plan. We attached each board together using wood glue and clamped them together until the glue dried. Then, sand any rough or uneven edges.
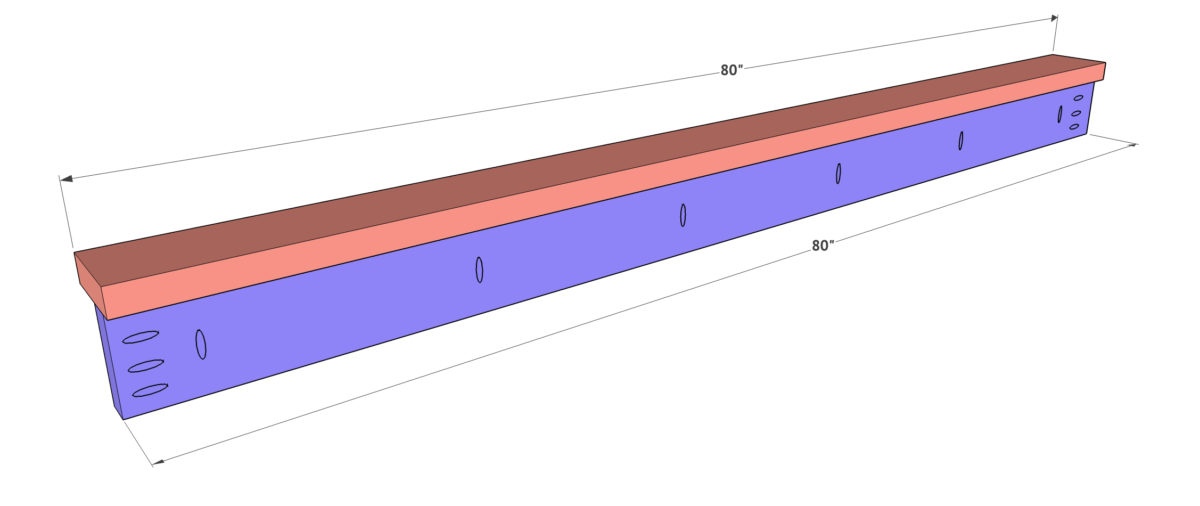
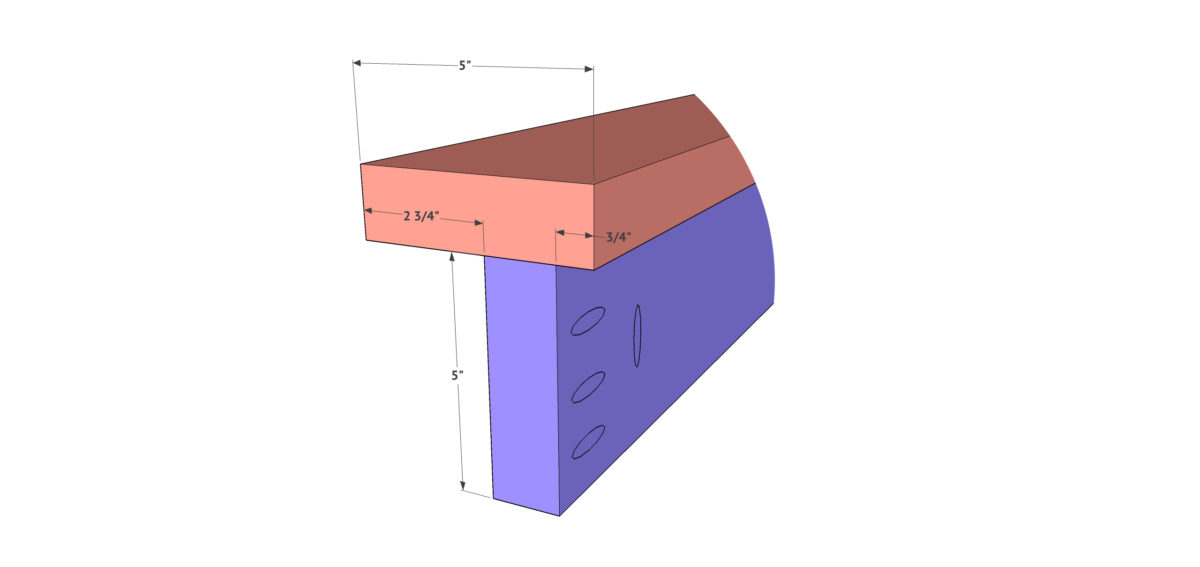
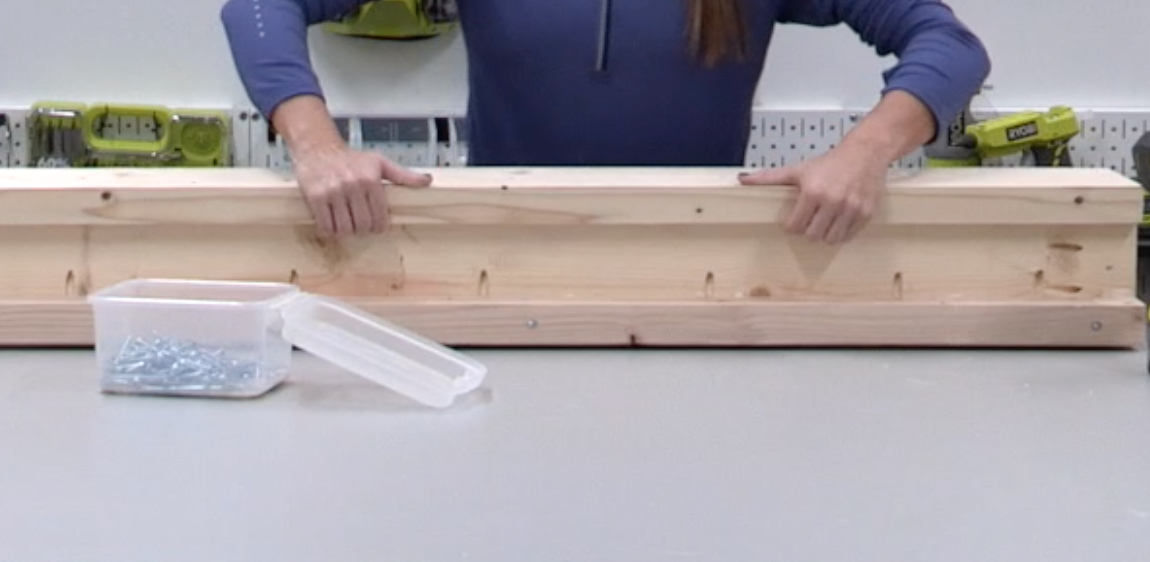
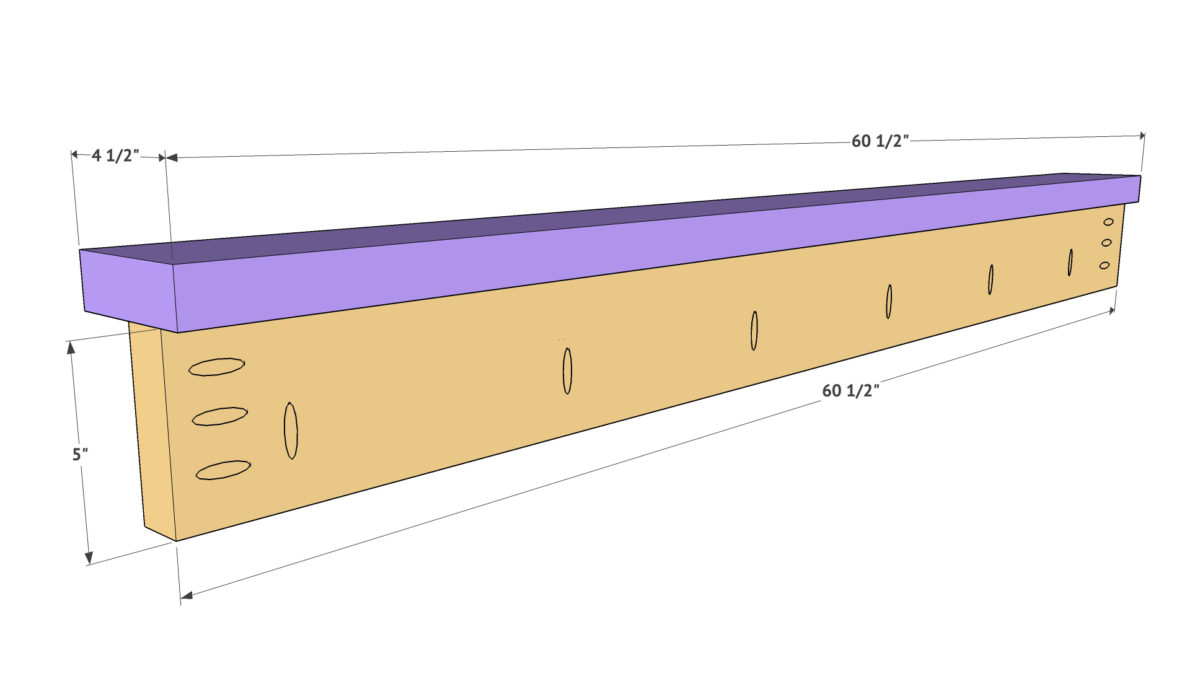
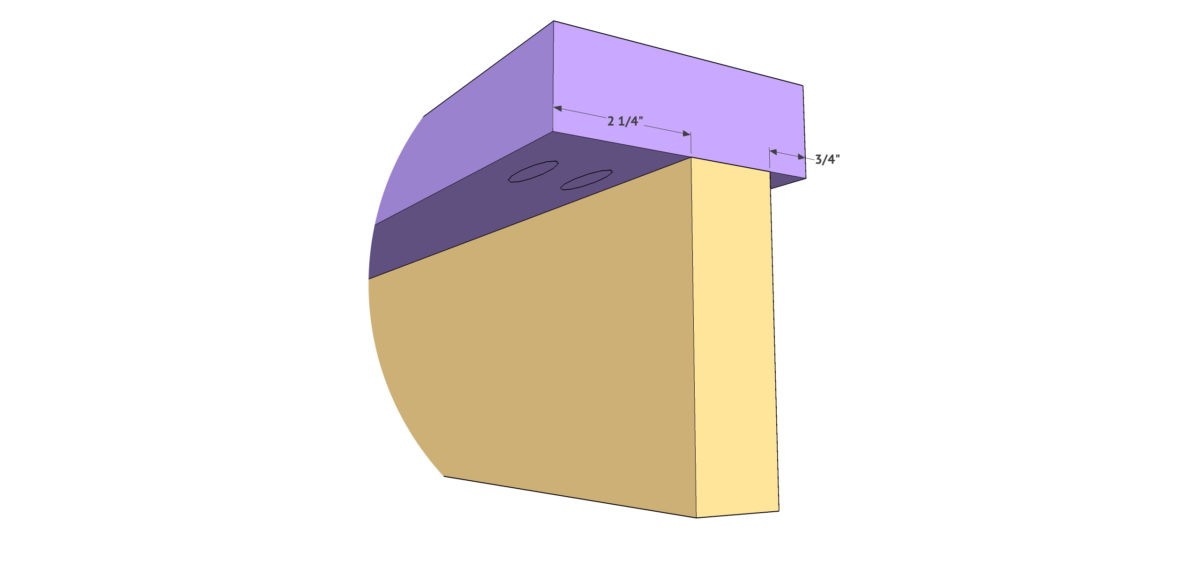
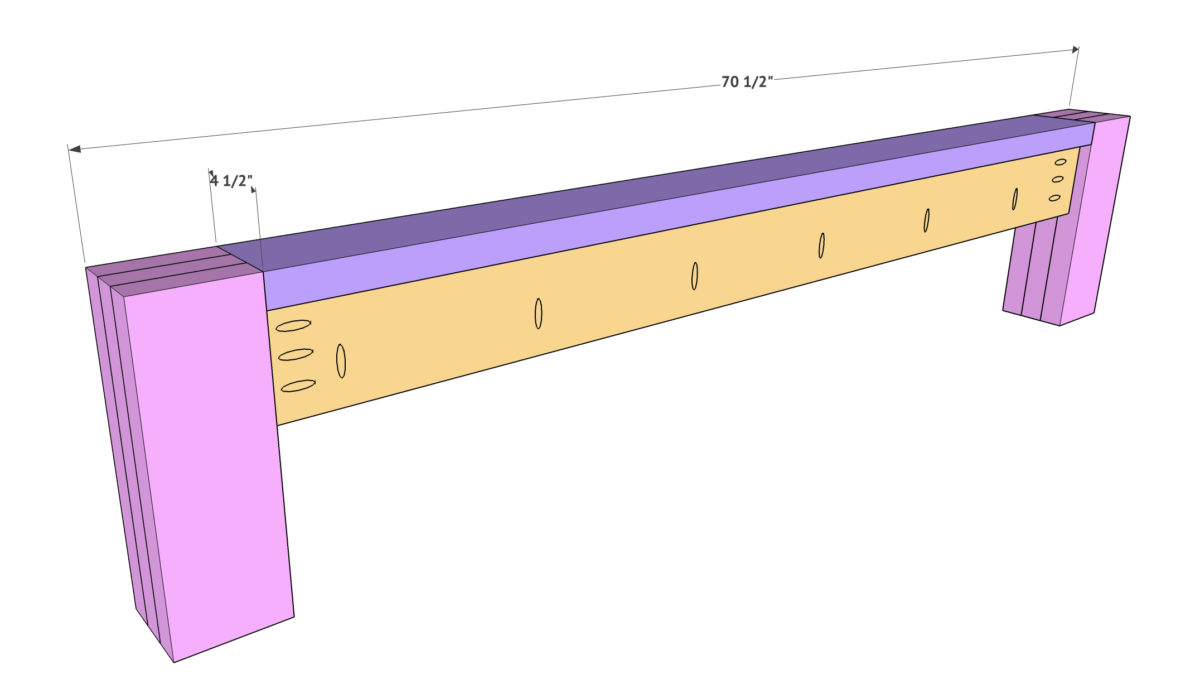
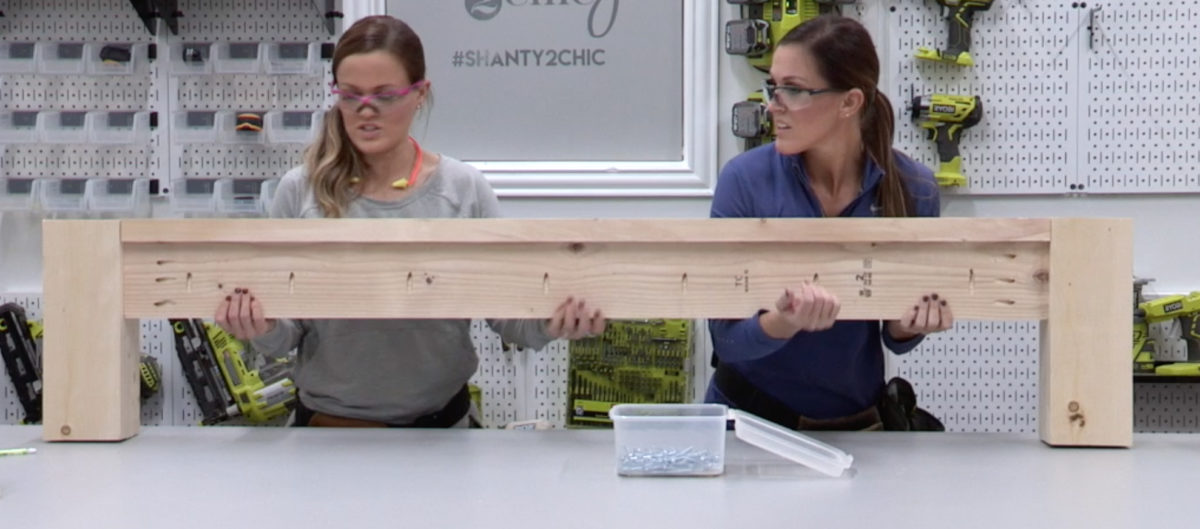
While the legs are drying, you can start building the rest. The side rails are also 2×6 boards that we ripped to 5”. Add 1.5” pocket holes to one side of the vertical board and 1.5” pocket holes on one side of the horizontal board that sits on top of it. Attach these boards together using wood glue and 2.5” pocket hole screws. Notice the alignment of the boards in the picture.

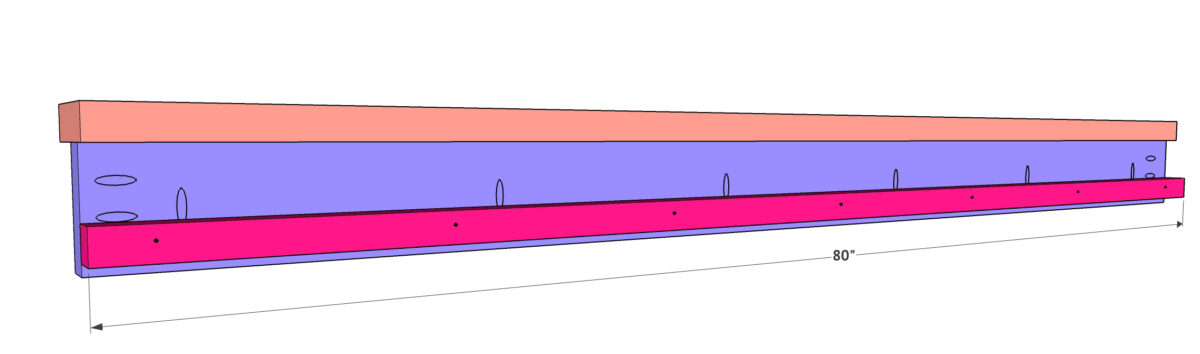
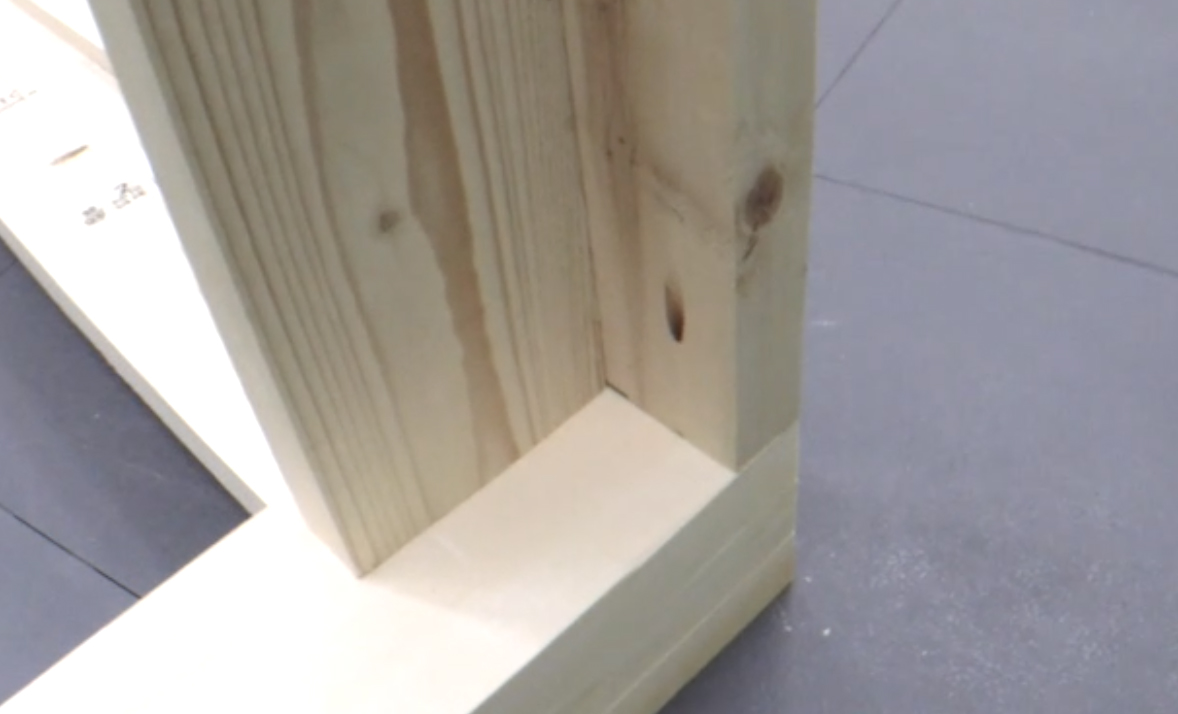
Now add the cleats to both sides. These are 2×2 boards that we attached to each side using wood glue and 3” Spax or wood screws. Notice the alignment in the bottom picture.

Now build the footboard. The top of this assembly is also a 2×6 board, but we ripped this one to 4.5” so it would line up flush with the legs. Add 1.5” pocket holes to both boards, and attach them using wood glue and 2.5” pocket hole screws.
Now attach these boards to the footboard legs we built in the first step. Attach them using 2.5” pocket hole screws through the pocket holes you made and into each leg. You want the top of the slat to sit flush with the top of the feet.
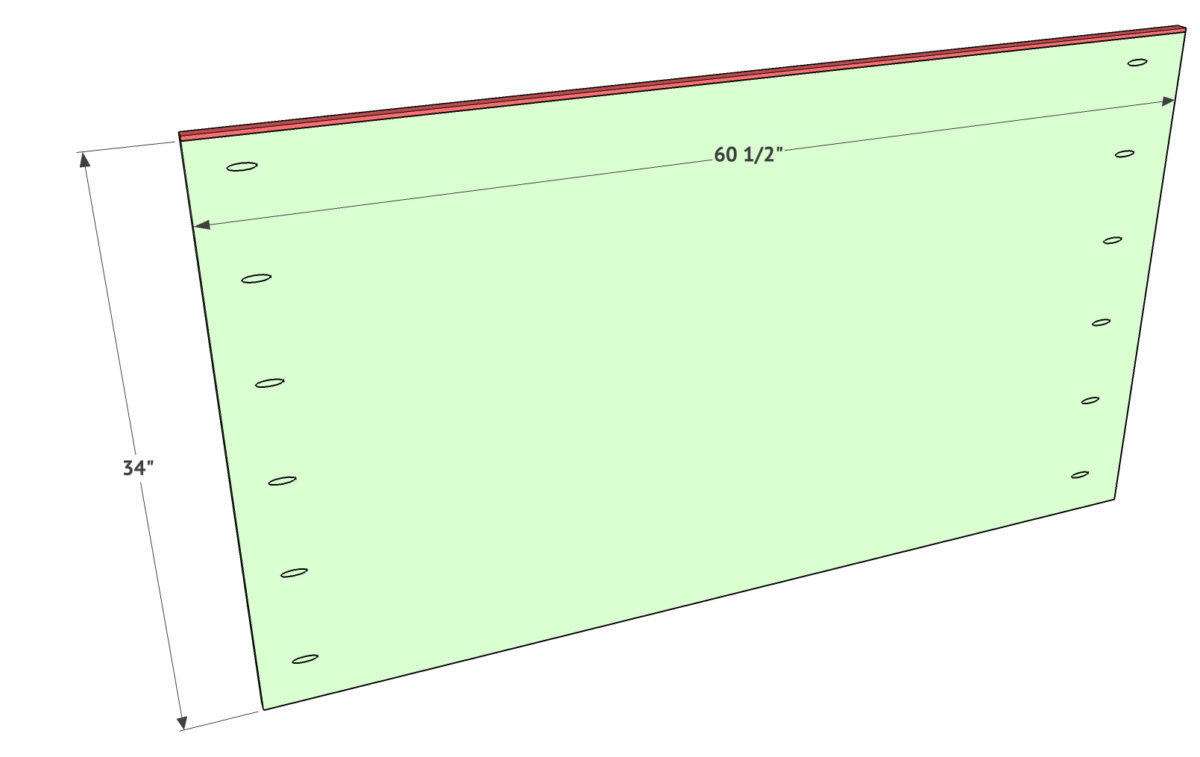
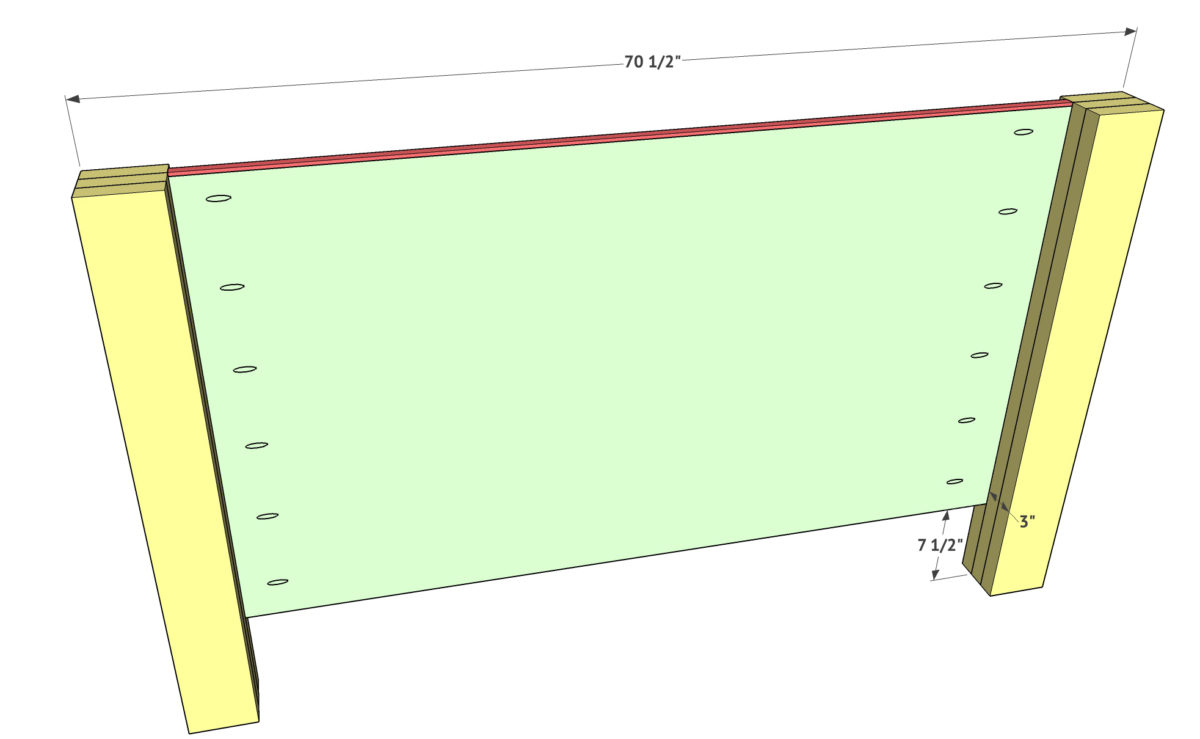
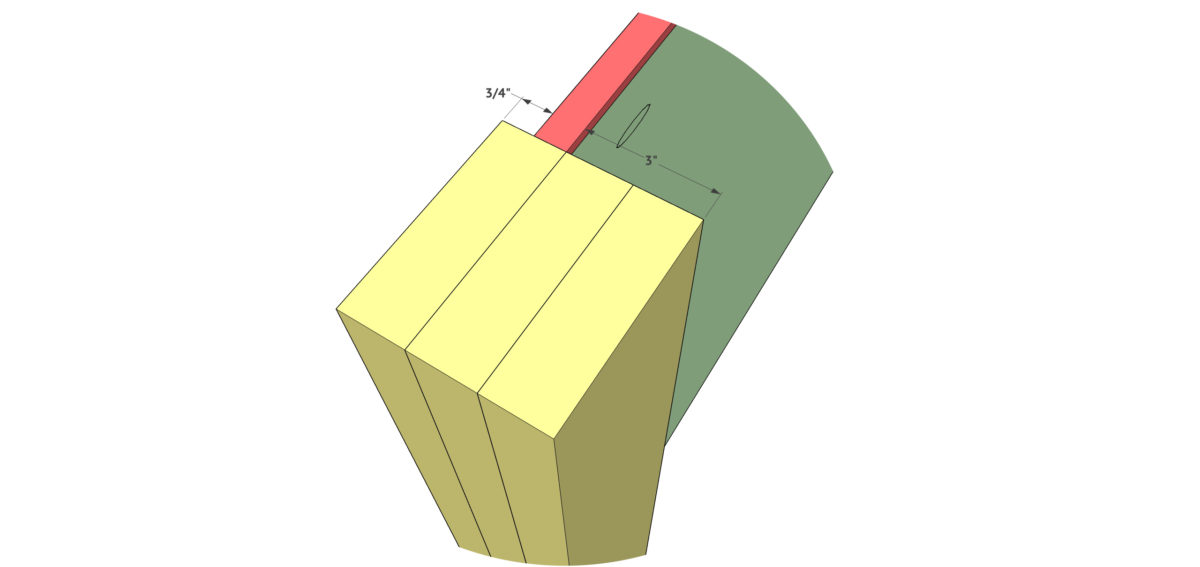
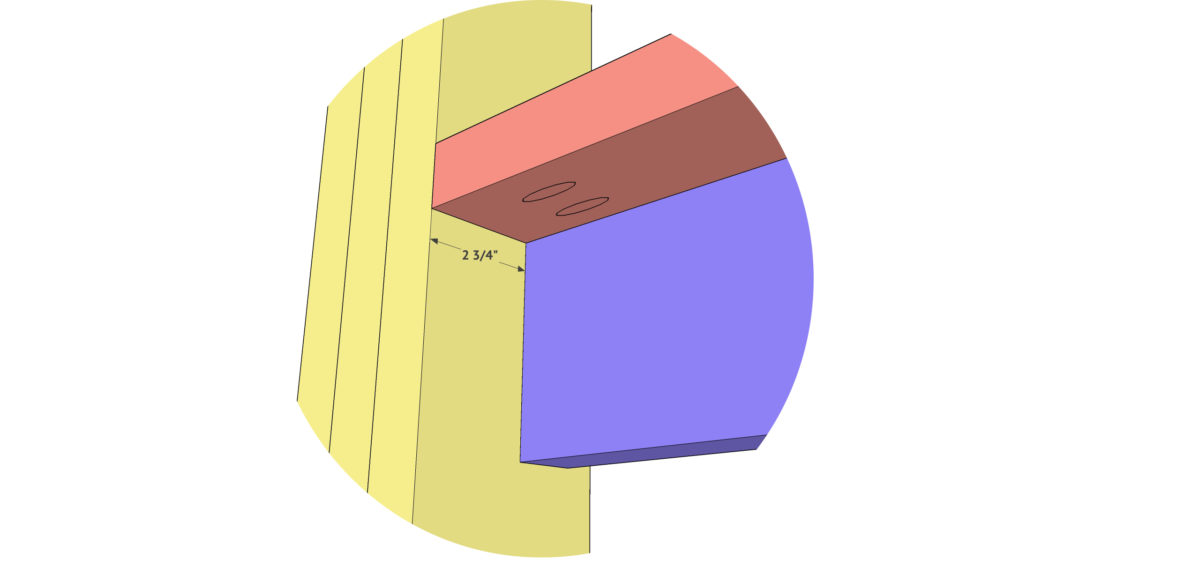
Attach the small trim piece to the top of the headboard panel first. The panel is 3/4” hardwood plywood with 3/4” pocket holes on the sides of the back of the panel. The trim piece is 1/4” thick x 3/4” wide and attach it using wood glue and brad nails.
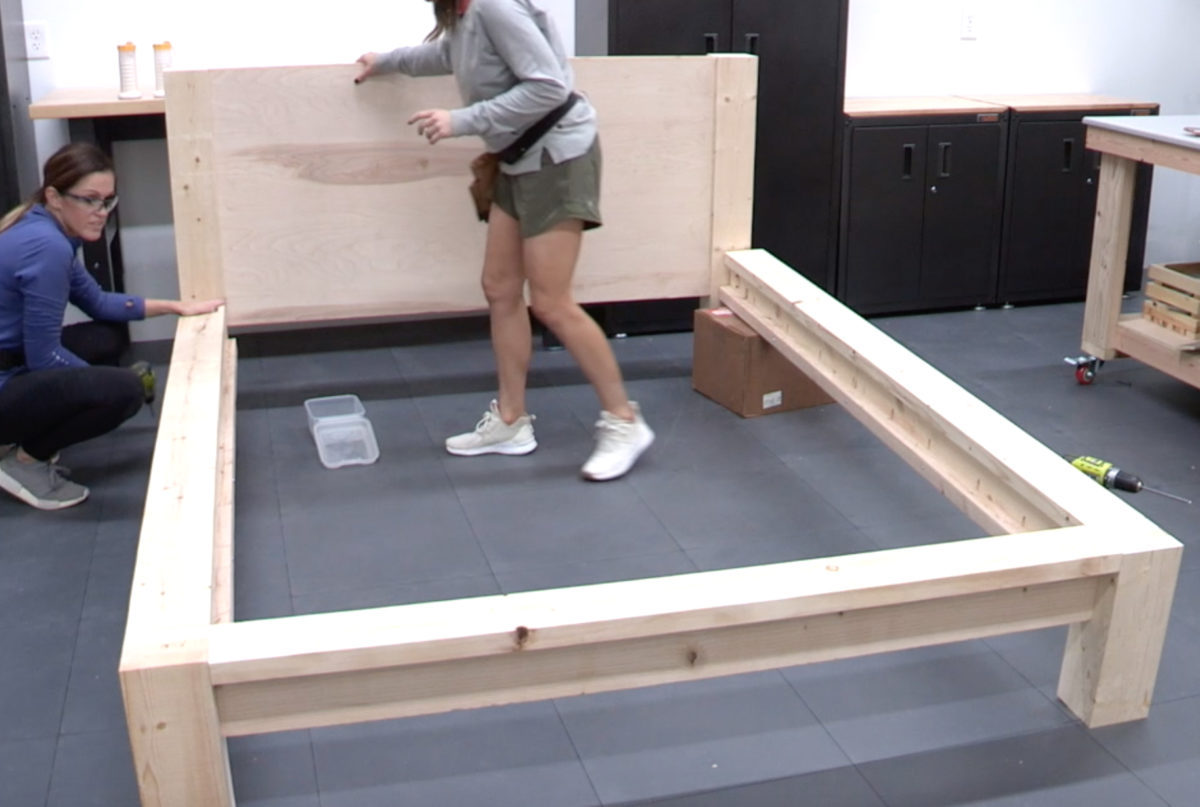
Now attach the headboard panel to the legs using wood glue and 2” pocket hole screws. You want the headboard panel to line up 3/4” from the front of the legs. The top of the trim piece will be flush with the top of the legs.
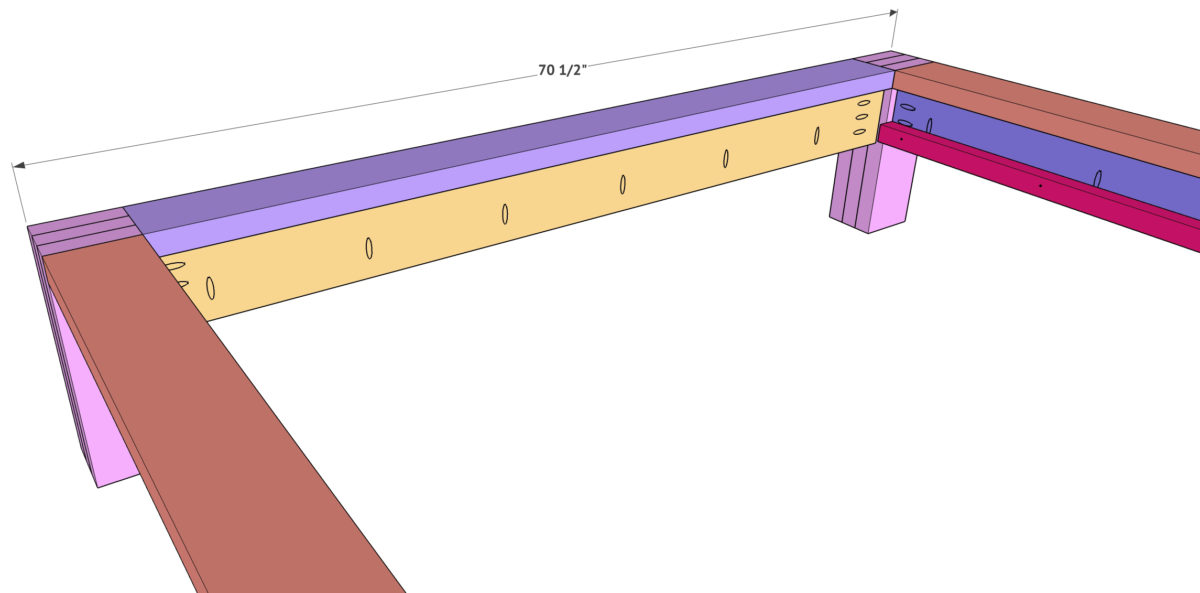
Now attach the rails to the headboard using 2.5” pocket hole screws through the pocket holes on the rails and into each leg.


Attach the footboard to both legs using 2.5” pocket hole screws. Make sure the tops and sides are all flush.
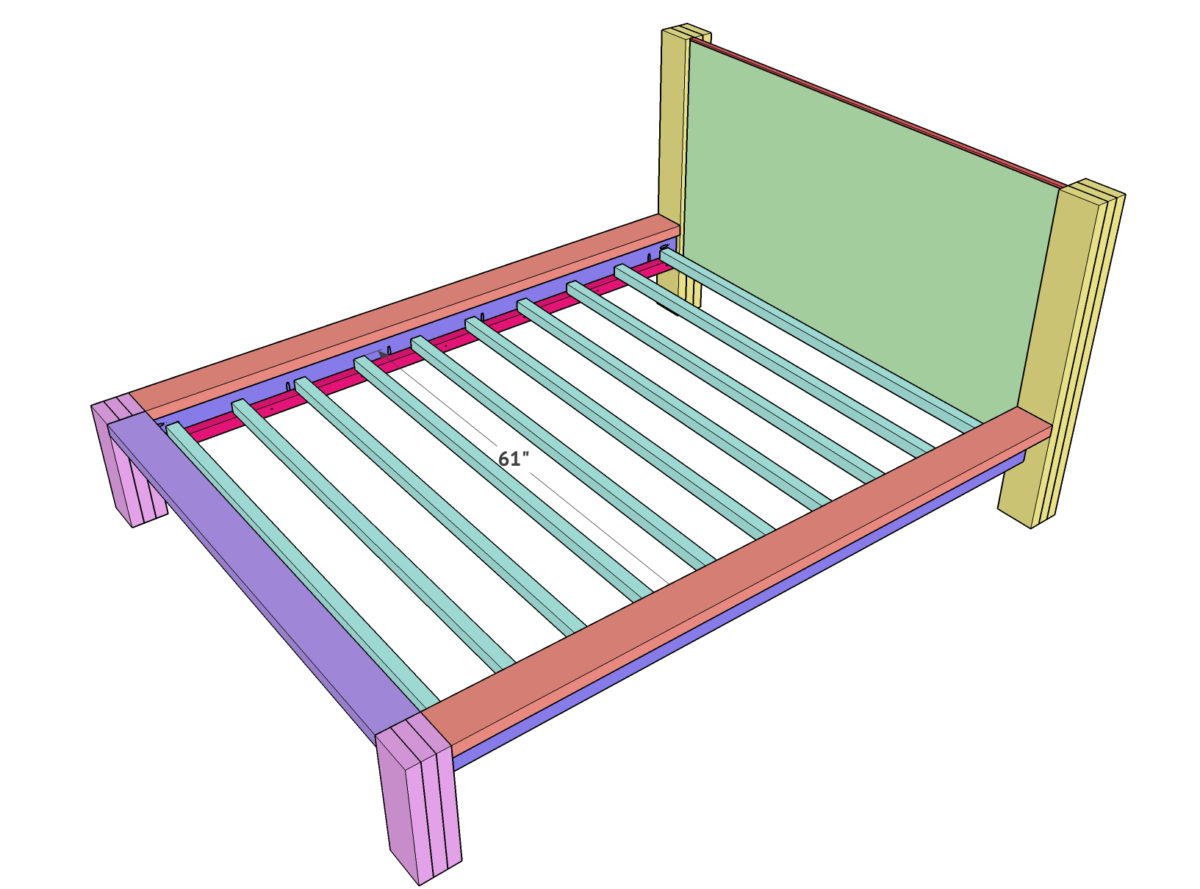
Time for slats! We used 2×2 boards for this part and attached them using wood glue and 3” Spax or wood screws. We suggest not using glue to attach the slats and the runners to both the footboard and headboard so you are able to move your bed around from room to room and disassemble it easily.

Here it is all finished up! I just love this bed so much!


i love this beautiful and simple bed make
amazing article and very well written
I would like to know where to find those letters that are hung on the wall above the bed. I have searched and searched the internet for them. Any guidance and help is appreciated!!!
This is a beautiful bed. I like minimalism in my room and this goes great with that.
These rustic styles are always popular and this is a fantastic example of someone who does their DIY properly – well done!
do you have plans for a King size bed in this style
Just completed this project for our maser bedroom. We just purchased a king size mattress. We ended up using knotty pine to build ours.
I changed a few things to the designing of our bed frame which is 76”x80”.
1. Used 6×6 for posts cut them down to 5×5. Also the back legs were 46” length and 20” for front legs.
2. Used 2×8 for side rails and ripped the 2×6 top plate to fit the posts.
3. Used laminated 1×6 knotty pine for headboard instead of plywood and placed it flush with the posts instead of recessing 3/4”.
4. Used a 2×6 for rail for the headboard post.
5. Used 1×4 spruce for the slats spaced at 2” spaces. I also used 2- 2×4 for supports and in the middle also uses a 6×6 post for centre support.
Overall I spent around $575 on materials and it took me about 25 hours to build. We didn’t stain it yet as unsure of colour so left it natural wood.
Awesome instructions. I’m just a little confused how this is advertised as less than $100 though. The 2×6 boards alone are $70-$80 according to the amounts on the list. I’m just building a cart in Lowes website for an idea, I’m not even to the trim pieces, screws, and wood glue yet and it’s at nearly $160. I guess I would like to know where you guys got your lumber to claim <$100.
How do I find the measurements for the pilot hole locations? Any help is appreciated! Thanks for the awesome plans. Easy to follow and build.
Please What color is the stain
Hi, would you be able to provide the measurements if I do not rip the boards? I’m new to building and don’t have a table saw-yet. I have made one of your coffee table projects and it turned out great! Thanks.
Great build but I do have one question do you have the plans in metric ?
Thankyou
What type of wood did you use. Is this all pine?
I cannot find the plans for the matching night stands.