Hey guys! Happy Wednesday! To keep up with all of our DIY projects, be sure to follow us on Instagram and Pinterest!
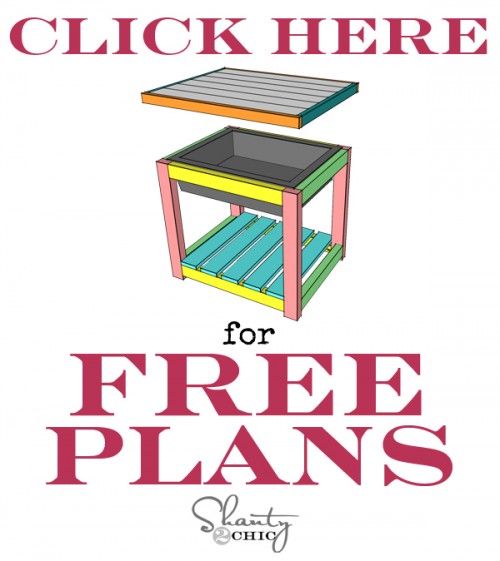
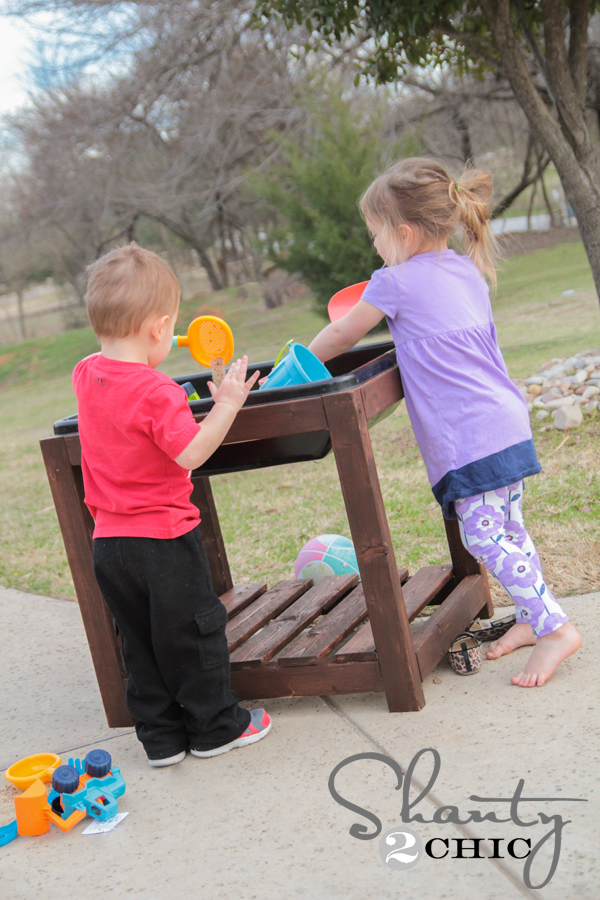
I am so happy with how this latest project turned out! The wanted to build the kids a sandbox of some sort, but I knew I wanted it to have a lid. I also knew I didn’t want it to be huge. So… I did a little designing, and this is what I came up with…
How fun is that? Literally! 😉 The best part? I built the whole thing for under $30. Yep… That’s a cheap babysitter friends!
Just click the photo below to access the free plans for this sand table! All of our free plans include your supply list and cut list… Woohoo!
Let’s get started!
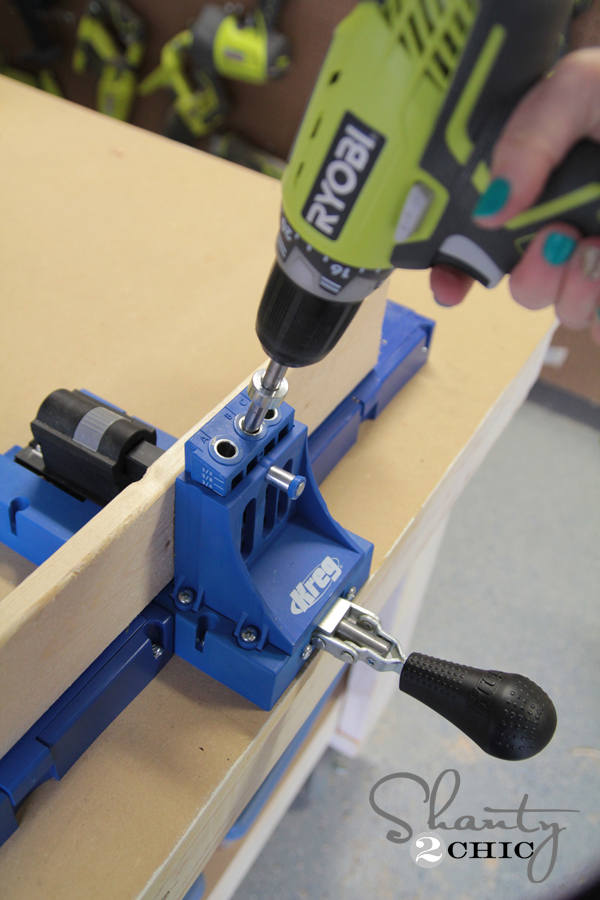
I assembled two sides first. I used my completely awesome Kreg Jig![]()
for this part. I use the K5 model now, which is my very favorite yet. It has so many cool features that make it even more user friendly. This is how the 2×3 pieces will look in the Kreg Jig. I used 1.5″ pocket holes for this whole piece.
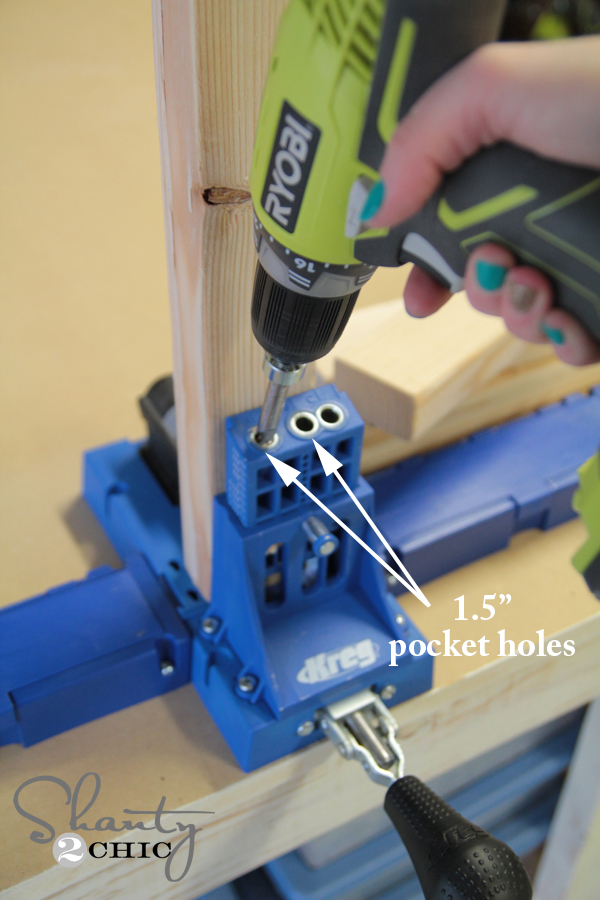
All of my 2×3 pieces looked like this before moving forward…

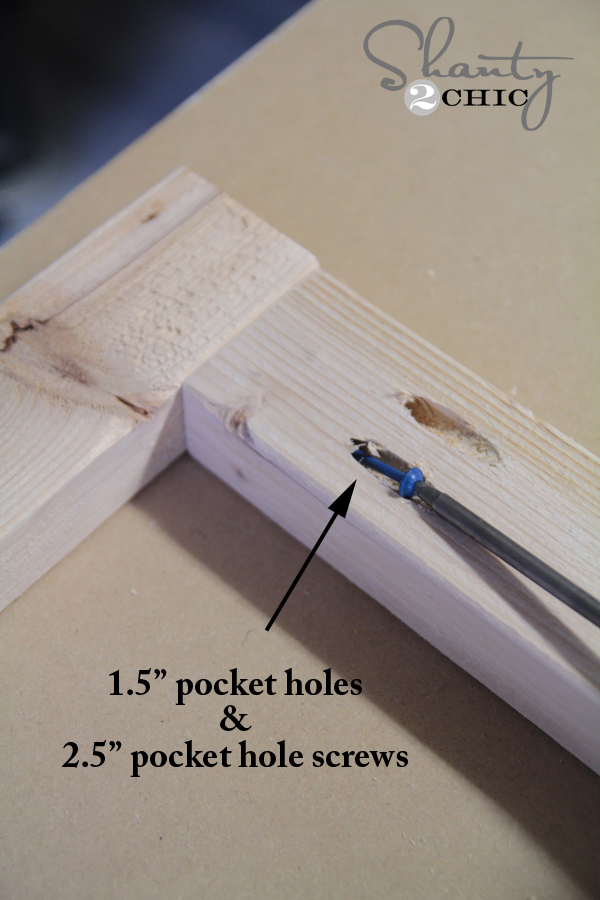
To assemble the sides, I used 2.5″ pocket hole screws. You may notice that mine are blue. Kreg makes Blue-Kote screws for outdoor projects. I love these, and actually use them for some of my indoor stuff as well. I knew this table would be holding a lot of weight with the sand, so I used a good amount of wood glue in all my seams before attaching them.

I used my Ryobi 18V drill with the Kreg driver to attach the screws.
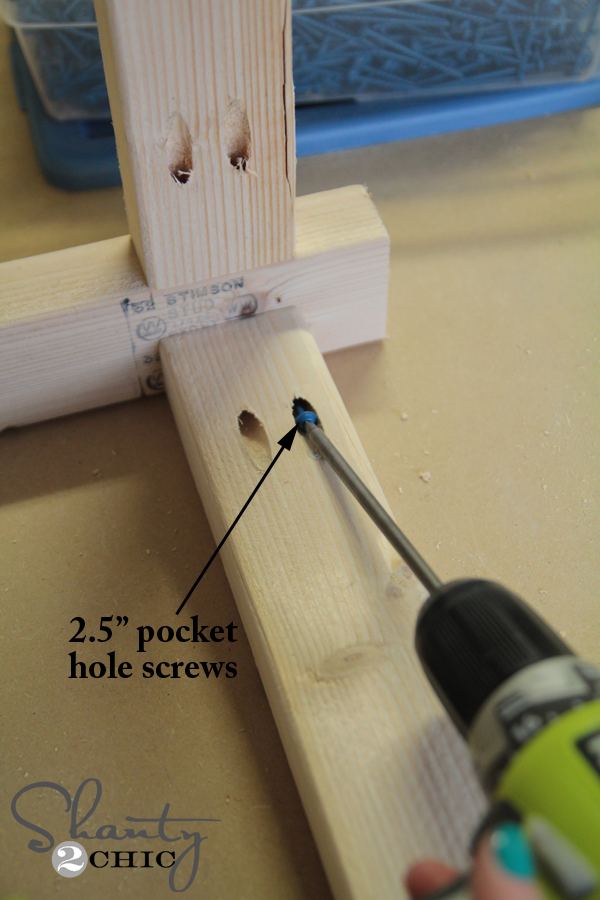
Here is what both of my first sides looked like at this point…

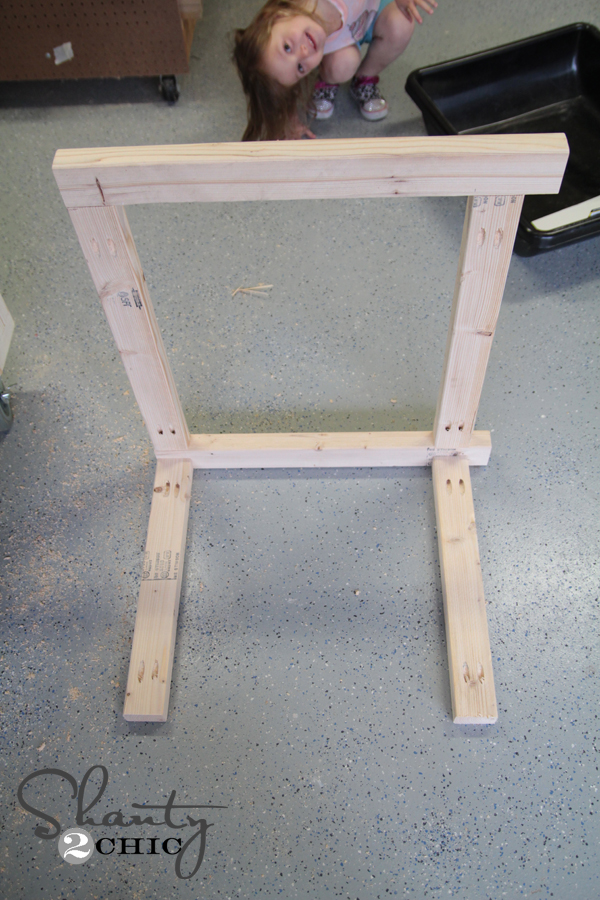
Next, I attached both sides together with my 18.5″ pieces. I used the same method to attach these.

Here are my first two sides attached. I was photobombed by my 3-year old on this one 😉 She ‘managed’ the whole build actually.
And now attach the other 2 side pieces like this…
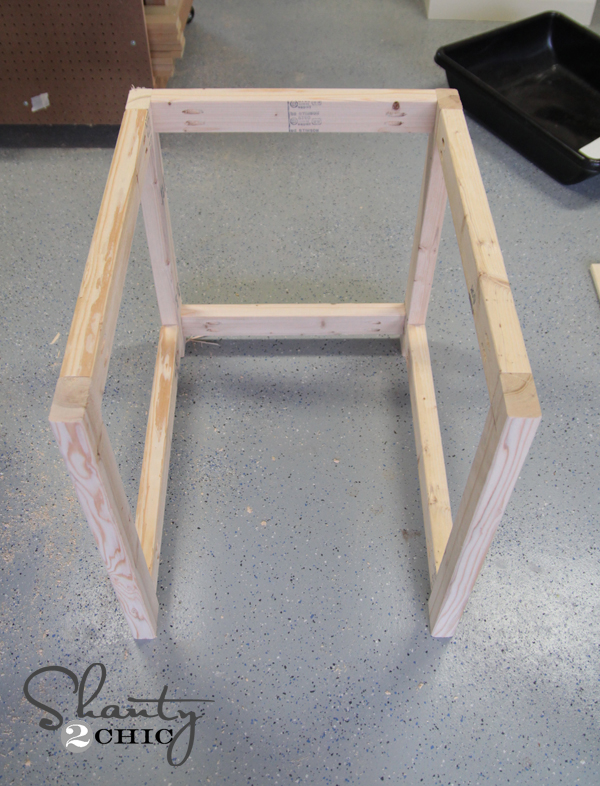
I added the opposite side pieces the same way and I was ready for my planks on the bottom!
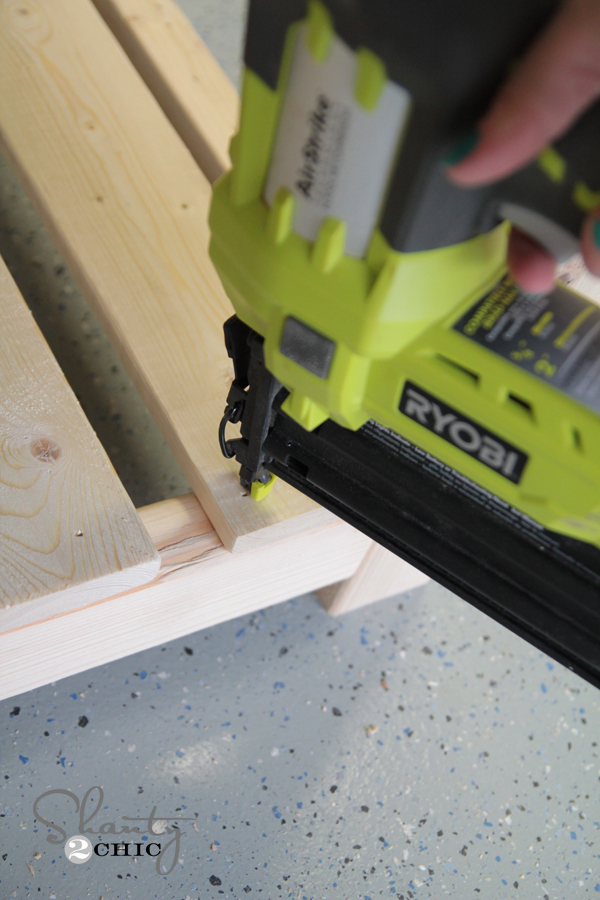
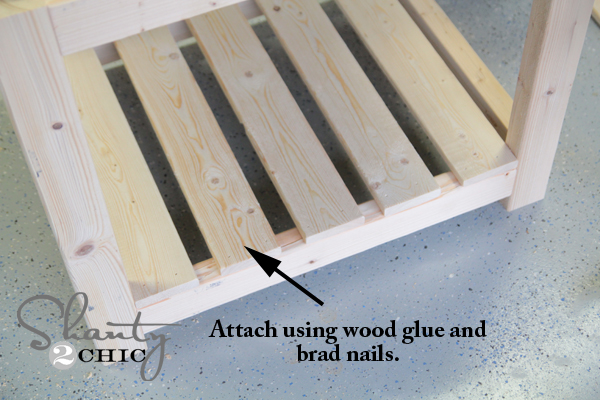
For this part, I used my Ryobi AirStrike cordless nail gun. You all NEED one. This is one of the coolest tools in my garage. I just added some wood glue under each plank, and attached them into the 2×3 using 1 1/4″ brad nails.
And, to keep this bad boy from turning into a neighborhood litter box, I designed a lid for the top! I used the Kreg Jig to plank the pieces together. For this part I used 3/4″ pocket holes and 1.25″ pocket hole screws. This is what the boards look like in the Kreg Jig.
After attaching the planks, I trimmed the outside with my 1×2! I used the nail gun and glue on this part as well.
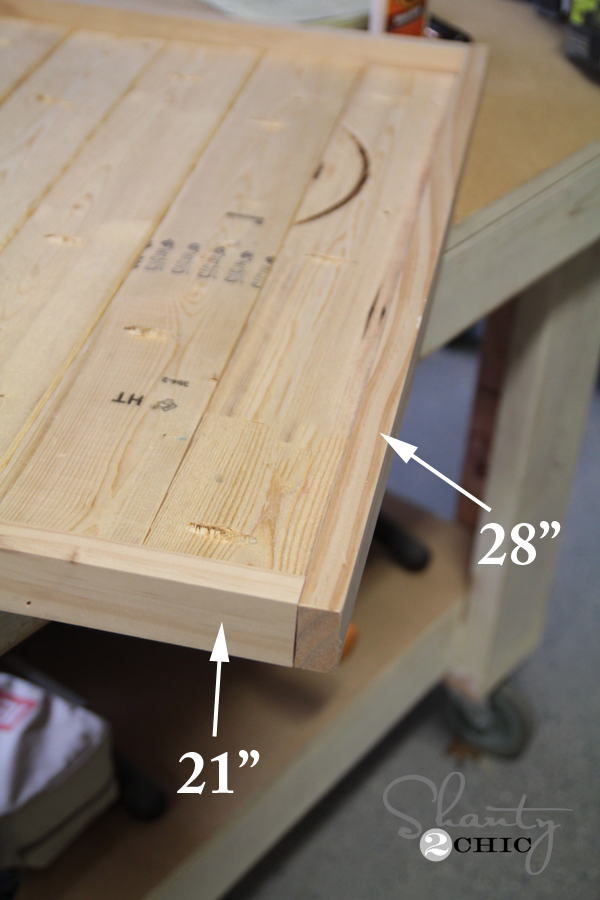
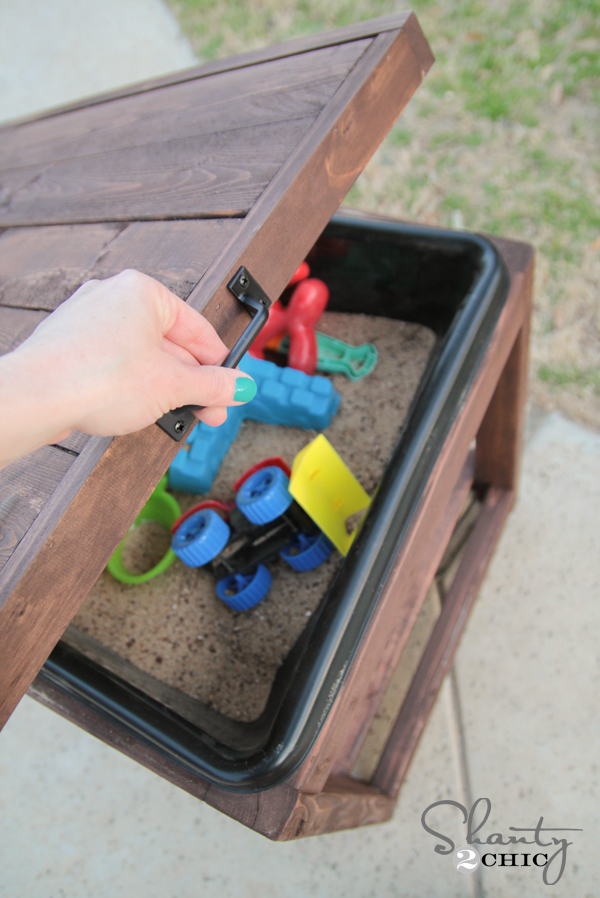
The tub I used is an all purpose mixing tub I found at Lowe’s in the concrete aisle. Home Depot carries them as well, but you may need to change the dimensions a bit if it is not the exact same as the one I used. These run about $6 a piece, and the size of my tub is 26″ x 20″.
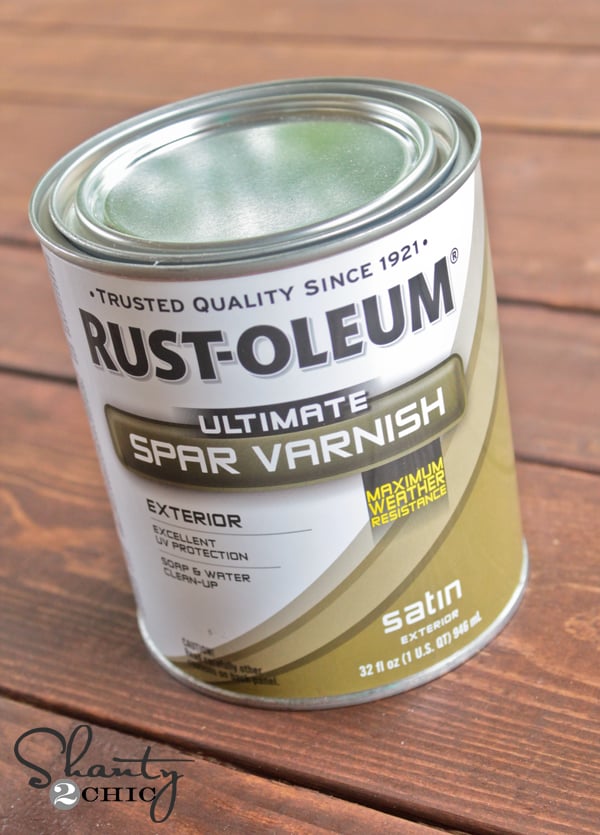
My final step was finishing it off. Some parents may choose to be really cool and paint theirs a fun color… I chose to make it pretty for outside instead 😉 I used Rust-Oleum Ultimate Wood Stain in Carrington.

Because this piece will be sitting outside, I also finished the stain off with two coats of Spar Varnish.
And here it is all finished!!
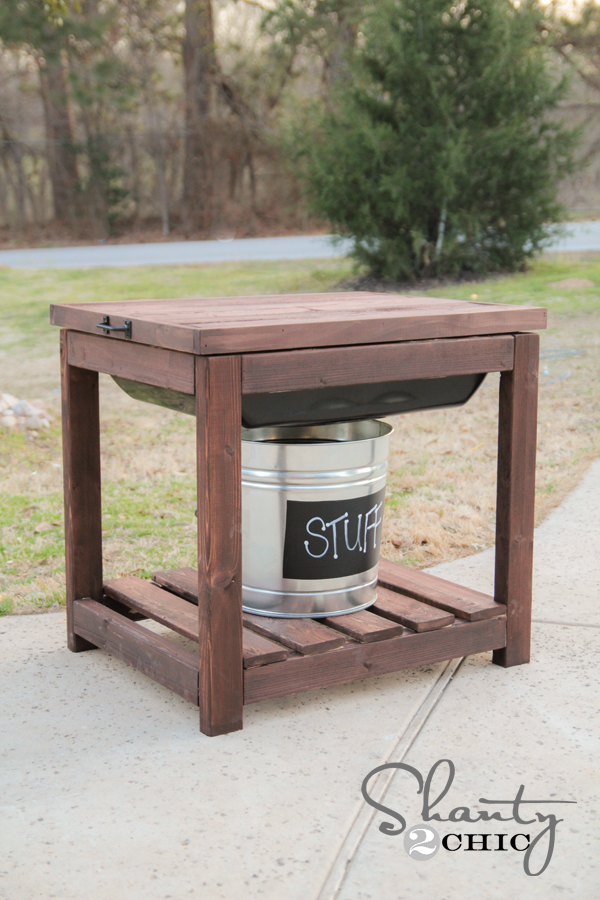

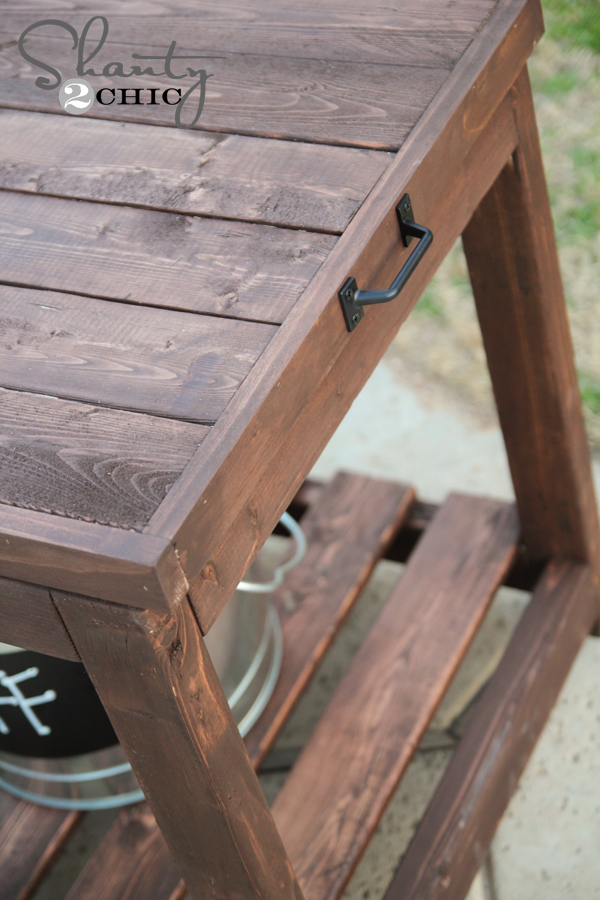
I added some black sash pulls to each side of the lid…
I have some very satisfied customers if you can’t tell 😉
Remember guys! You can download, save or print the FREE plans for this bad by by clicking HERE!
I would LOVE for you to share this table and pin it with all your friends! Let me know if you have any questions at all.
~Whitney


What size is the sand bin? This was never mentioned and is an important factor in building the sand table. Thank you
i’m new at building things but i thought this would be a great first project. One issue is I was not able to get the same size tubs, Lowes has replaced them with a different size. The one I bought says 27.9 in x 20.3…..any help on changing the measurements for the table would be greatly appreciated!!
Just an FYI, Lowes no longer carries this size (found out a little too late). We ended up having to order one online that was more money, but less quality. Maybe it’s just our local one, but online it said that size and that it was available at our local store, but it’s actually longer.
what bin did you use
The tubs at Lowe’s also work splendidly. 🙂
Hello ladies!! I love your website and all the easy and fun projects!! I have already built half a dozen of them and I am starting on this one. I am having trouble finding the sand bin do you have a link or anything else that can help me get going. Thanx again for the great things you are doing.
Here it is. Our son loves it!!
Thank you so much for this!! We modified it just a tad to make it longer, but it is SO BEAUTIFUL and so much better than anything that we could have bought. You are the best!!
The sand box looks wonderful.
Our 5yr. old granddaughter would love having something like this.
Thank you for the plans
I can’t wait to try this out! My little guy will LOVE it!
Yeah!! Happy to hear it 🙂
I love this! Do you think the lid will keep out water?
Love it! I was just thinking could you potentially use this as a planter as well or is the sandbox not deep enough? I might have to make some and try because I’m renting and can’t really dig up my yard but these seem small enough to be portable and would look cute with 3 or 4 lined up with flowers or edibles in my yard 🙂
I think it’s a perfect idea… I have seen people use them as raised garden planter boxes, so I think it would work great!
what a cute idea!
Thank you Kellee!!
You guys did an excellent job on the plans. Love it! 🙂
Thank you Laura!! We are so pumped about our new plans… So happy to hear you like them!!
Great sand box! My little one is turning 21 next month…. So if i may, ill use your awesome design yet intergrate a cooler or galvanized tub for cold drinks out on the deck tbis summer!!! Maybe put some casters to help scoot it around… Thank you for all of your great posts… I follow on instagram and the others as well…
Love that idea Christopher!! Thanks so much for your nice message… We would love to see pics when you get it all finished! 🙂