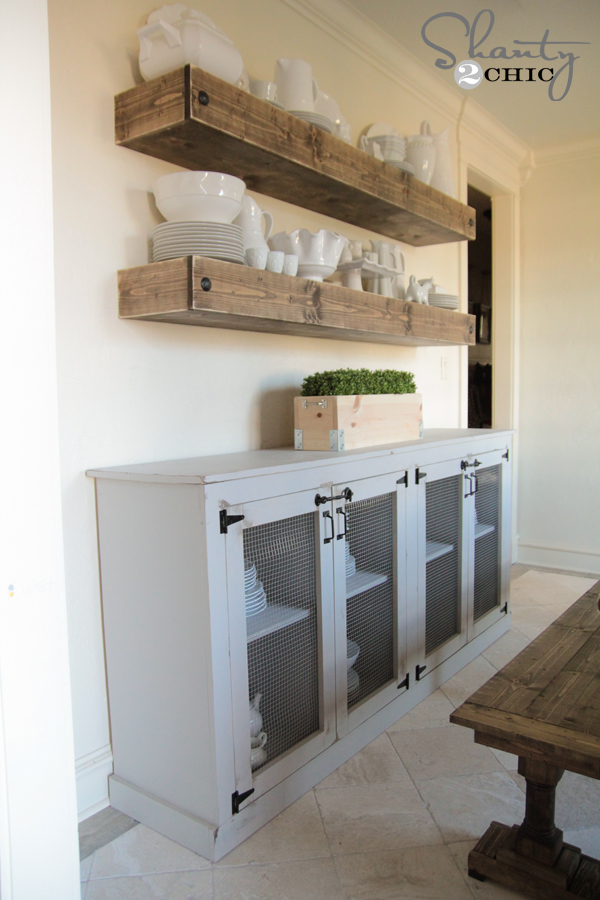
I am so, so excited to share my latest project with you guys. As many of you know, I have been in the process of redoing my dining room. I am thrilled with how my DIY Sideboard turned out! Check it out!
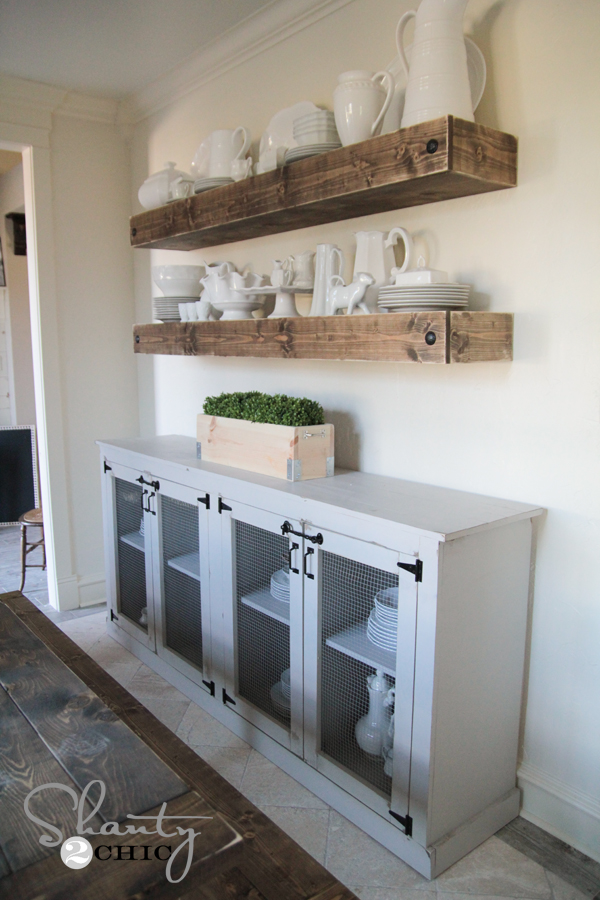
Ahhh… I do love it. I love how big and beautiful it is, but simple at the same time. As always, I will walk you through the entire build here, and you can also download the FREE PLANS by clicking HERE or the button below.

Let’s get started!
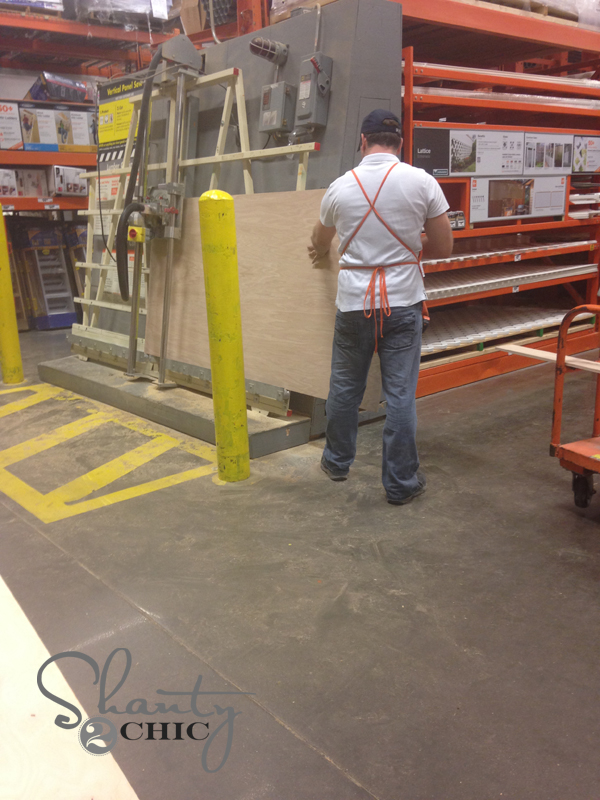
The majority of this pieces uses hardwood plywood. What the heck is that? Good question! Hardwood plywood is plywood that comes in 4′ x 8′ sheets and s0me smaller sizes. Our very favorite brand to use is Purebond Plywood. You can find it at Home Depot. The outside layer of the plywood is a hardwood veneer like oak or birch. So, you get the look of a hardwood at the cost of plywood. Can’t beat that people! Plus, it’s super straight making it easy to work with which makes me happy!
The plywood sheets are big, and often impossible to fit into your car… Especially when you have 5 kids in the back 😉 We like to have Home Depot make the rip cuts for us in order to get it in the car at home.
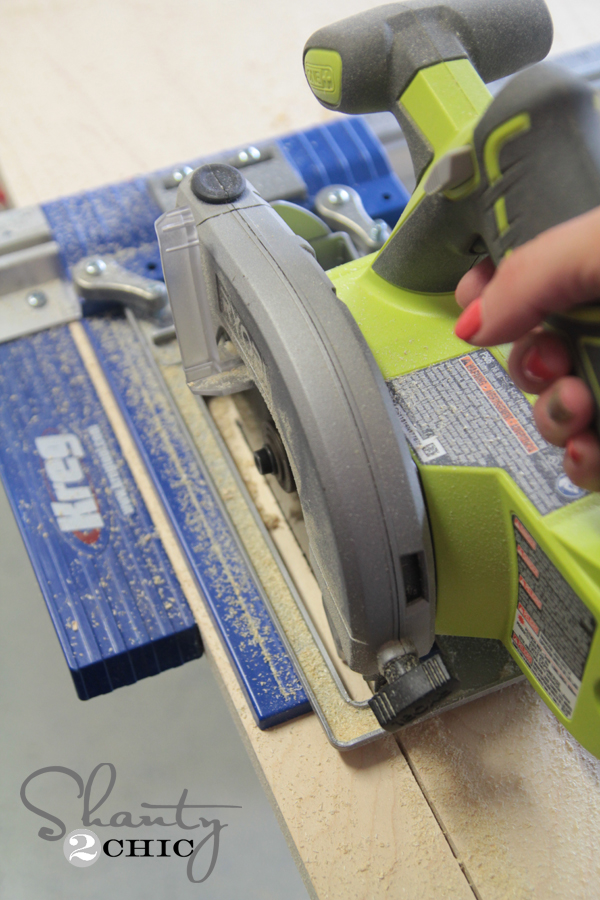
Once I had it home, I made most of my other cuts using Kreg’s RipCut. This is a really cool attachment that fits onto your circular saw. You can adjust it to make straight cuts at certain measurements. It’s very accurate and easy to use.
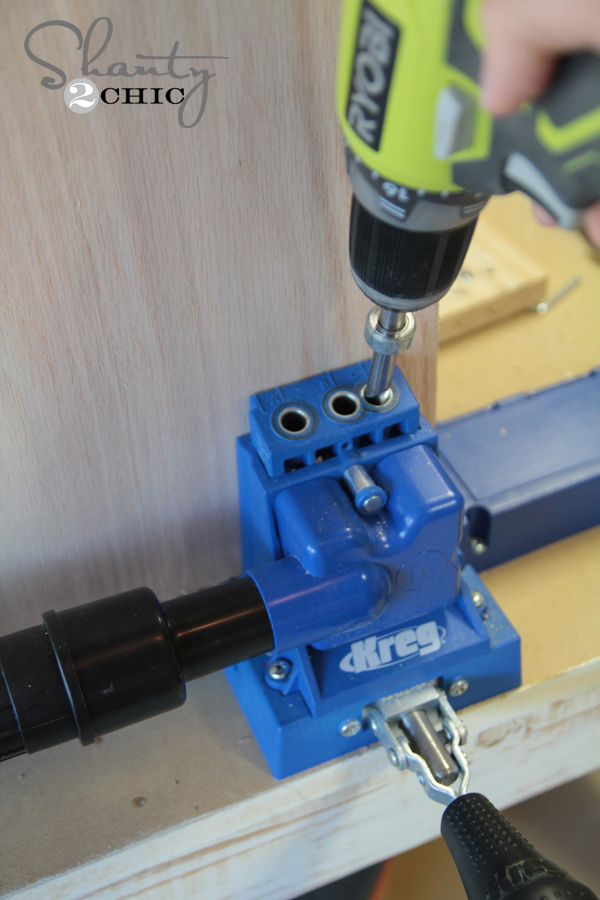
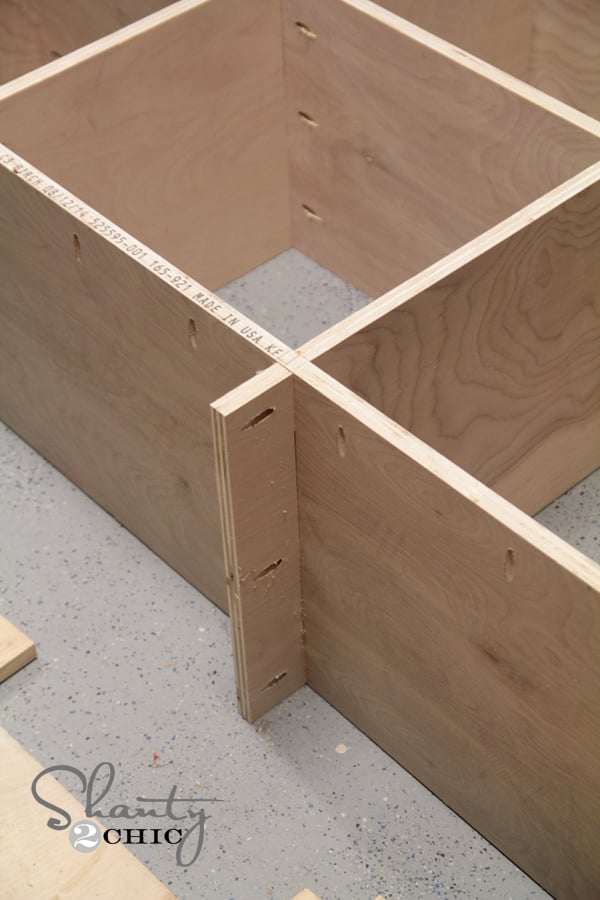
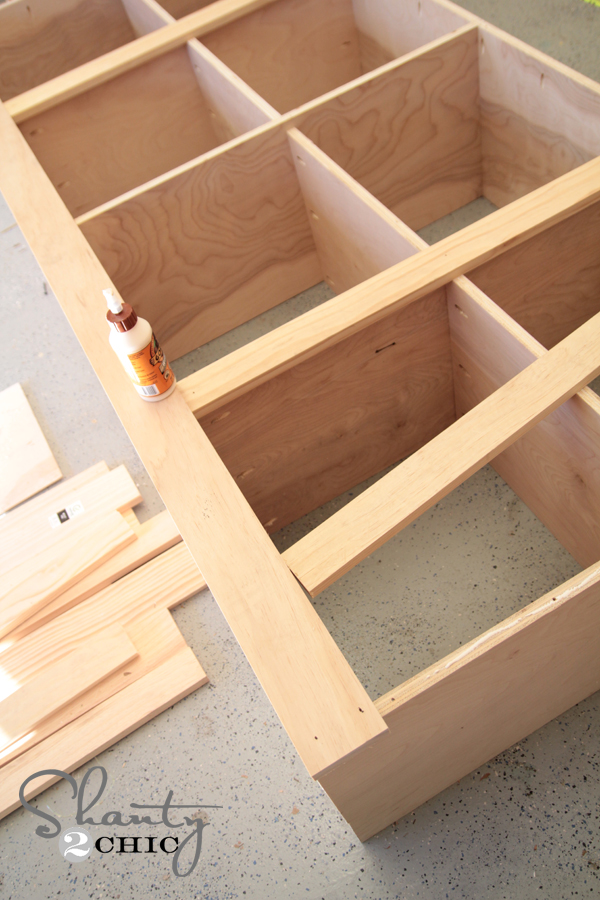
Really this build is very simple. It’s big… But, simple. You build the box of the sideboard first, and then add the trim and the doors. For the box, I used my Kreg Jig.
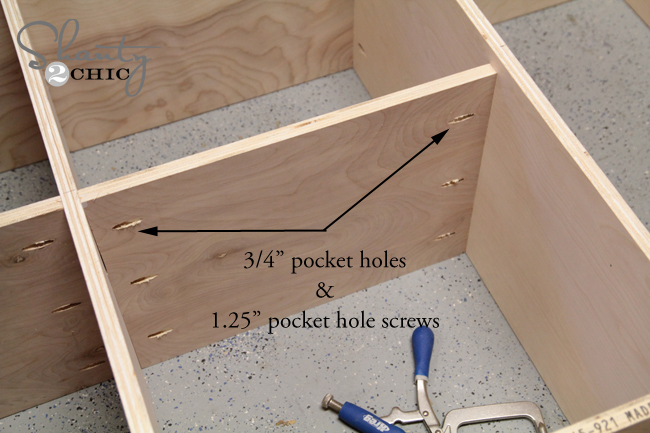
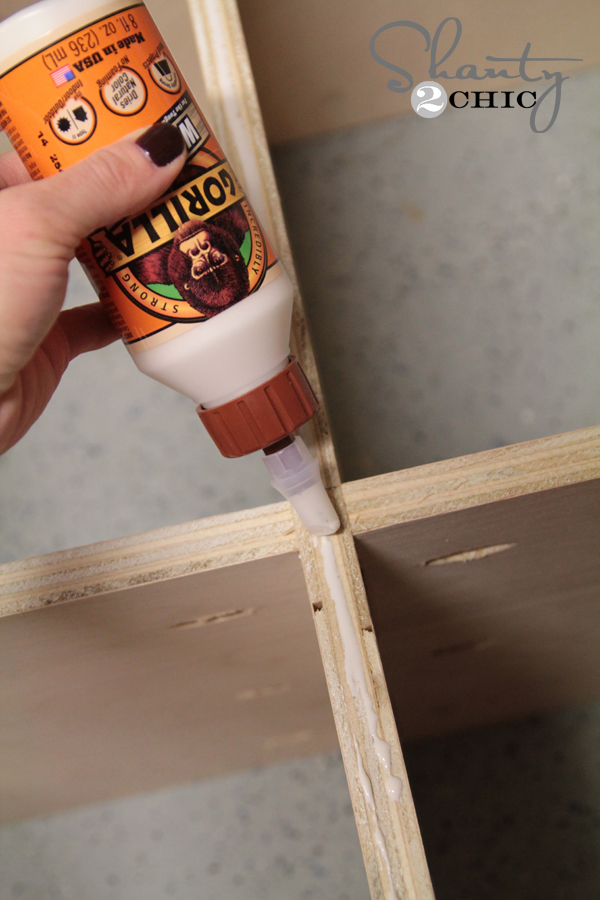
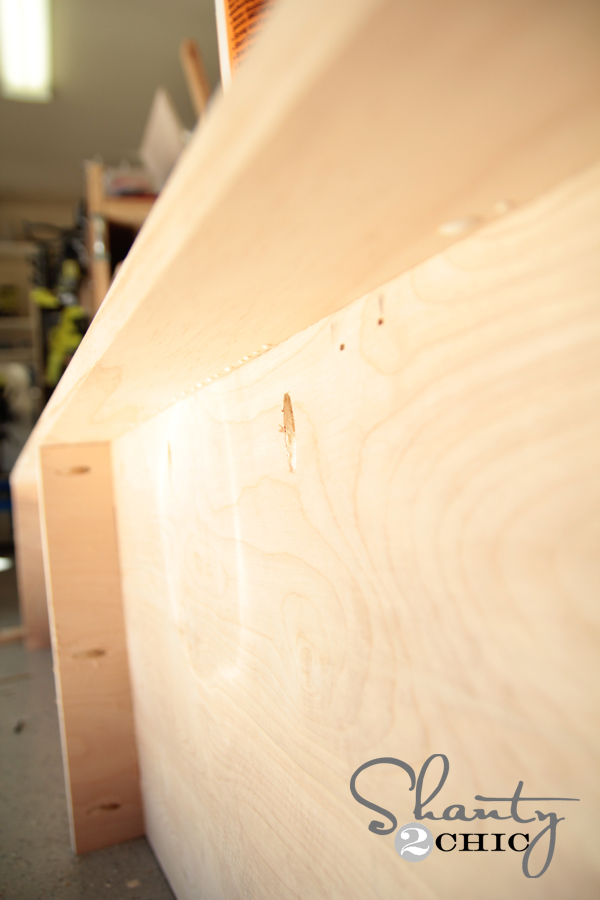
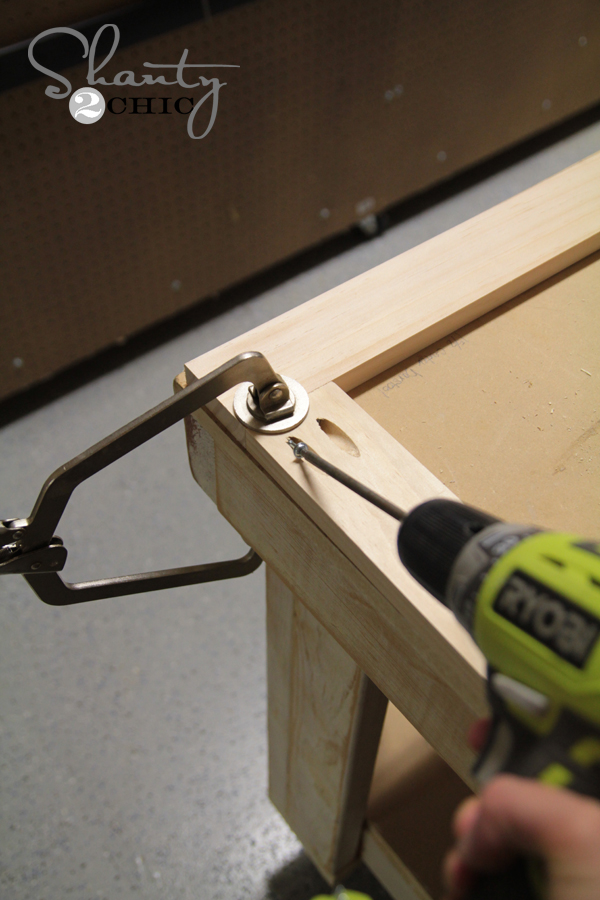
I used 3/4″ pocket holes and 1.25″ pocket hole screws for all of my joints. I also used a line of Gorilla Wood Glue on each joint. You can see below my placement of the pocket holes.
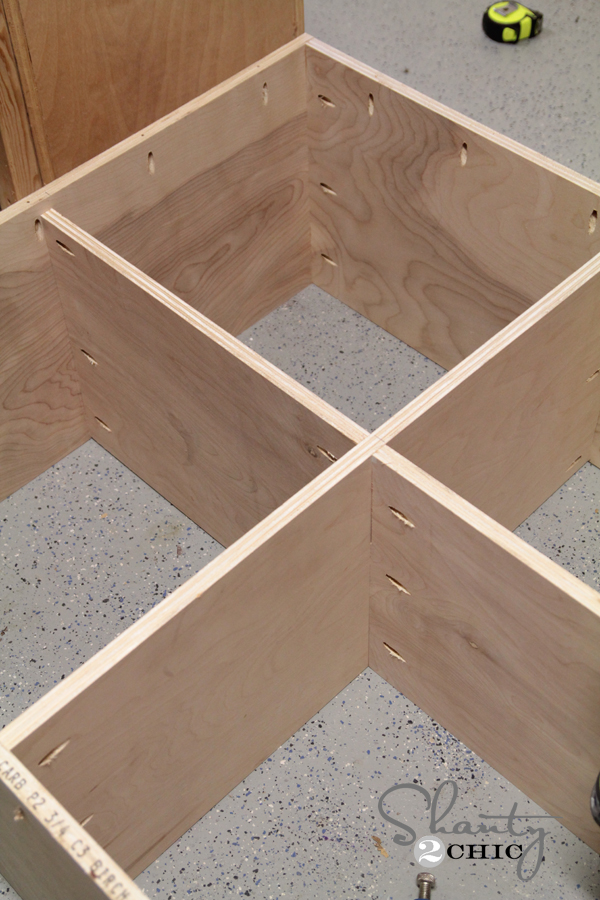
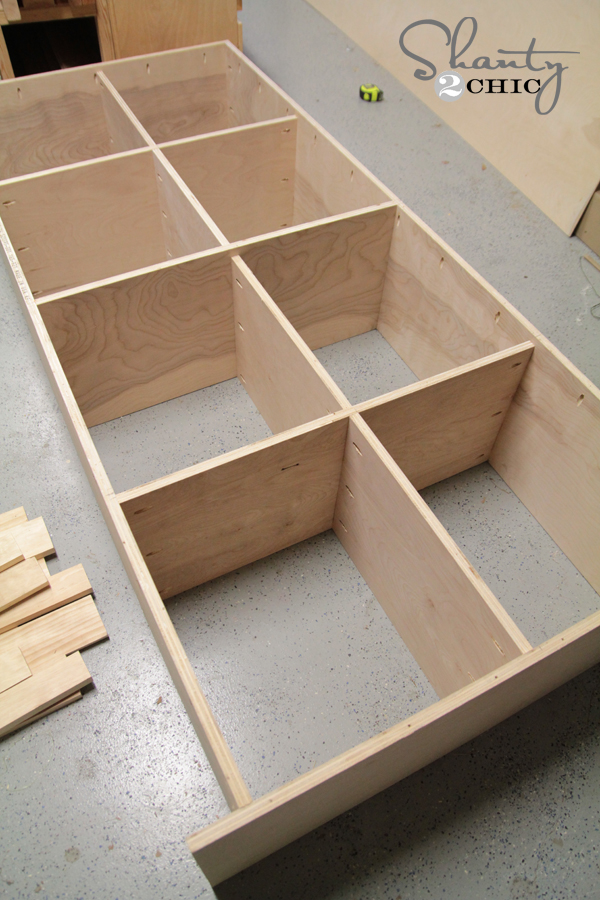
I also decided to add a small piece in the middle to serve as a brace for the weight to keep it from sagging. I plan to fill this baby up with dishes! I did this by cutting a small piece of the plywood and attaching it with wood glue and pocket hole screws.
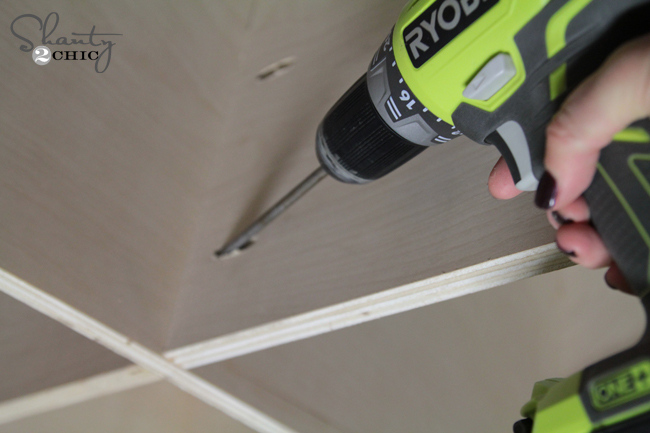
You will use a drill with the Kreg bit to attach all of these screws. The bit is included with the Kreg Jig. I used my Ryobi 18V One+ drill for mine. WE LOVE THIS DRILL. It’s the perfect size and has a ton of power. I actually have 2 to keep me from switching bits… #lazygirlprobs 😉
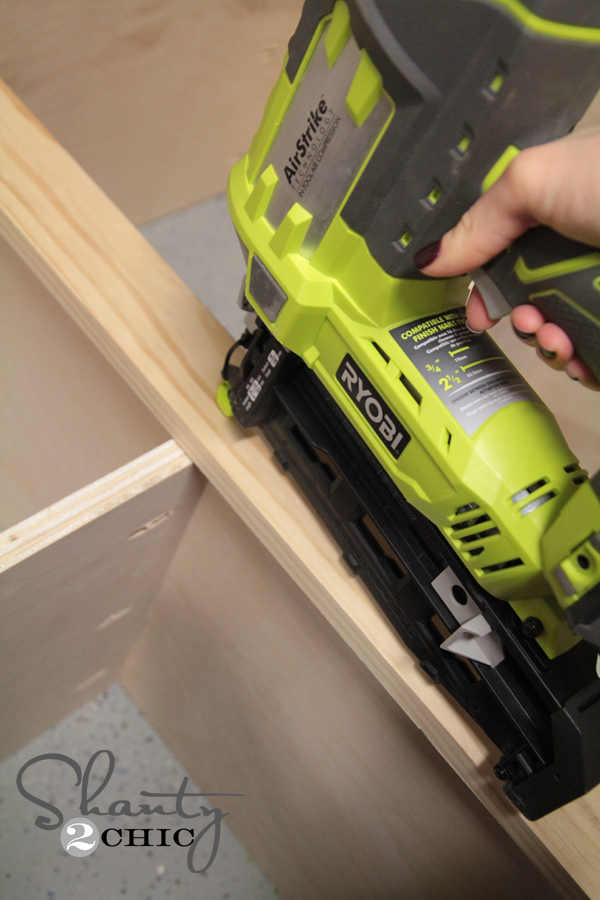
Once you have the entire box assembled you will add your trim pieces. I used my Ryobi 16V Finish Nailer for this part. Yes… A battery finish nailer. It’s amazing. You need it too.
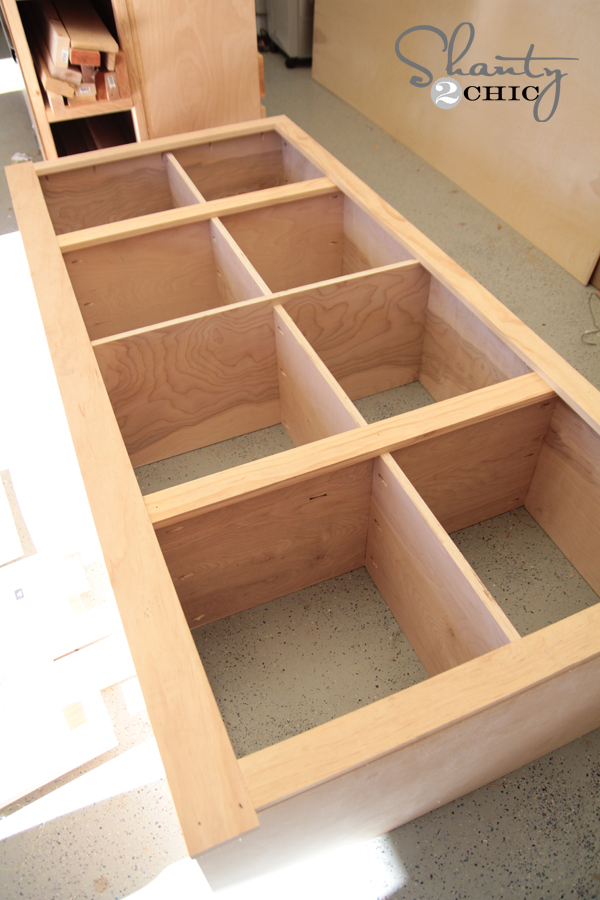
The base of my sideboard looked like this….
And it’s framed!
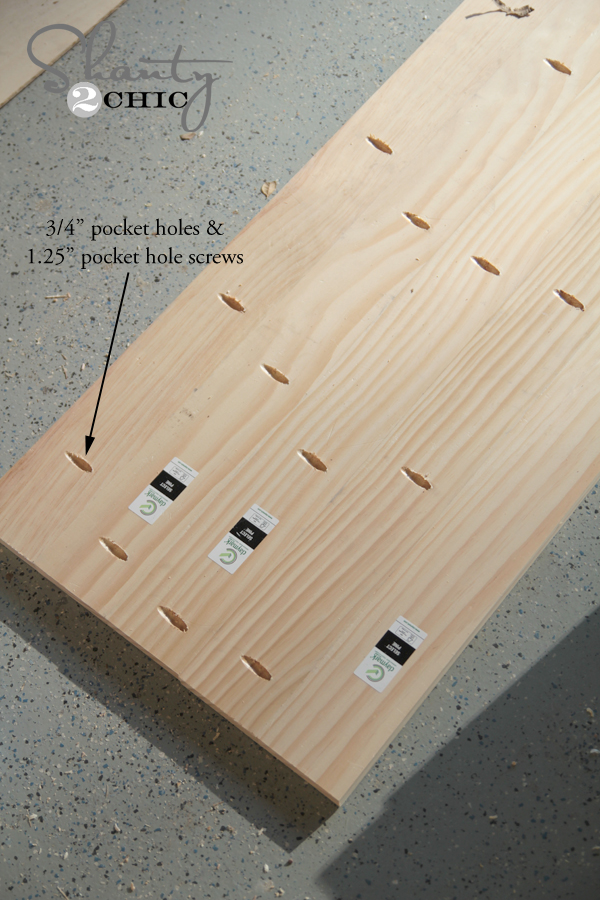
Next, I built and attached the planked top. I created the plank top by using 3/4″ pocket holes down 4 of my 5 boards. Then, I used 1.25″ pocket hole screws through those to attach it all.
Before attaching it to the top I added a bunch of Gorilla Wood Glue to the top of my sideboard. I had a little fun with this part…

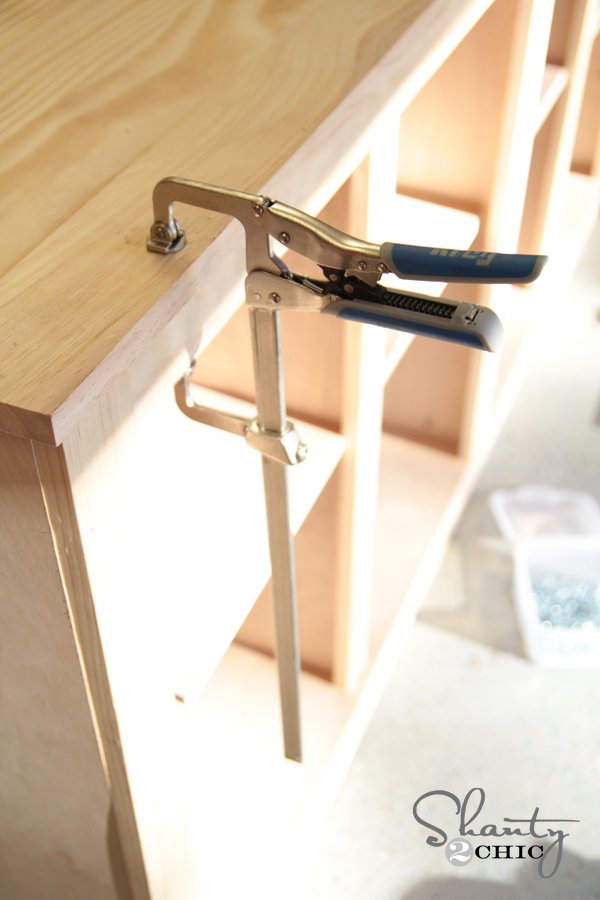
To attach the top, I used my new (and wonderful) Kreg bar clamps. I love easy bar clamps. These are so awesome… They are self adjusting and easy to use. I used mine to hold the top in place while I used the finish nailer to attach the top with 1.25″ finish nails.
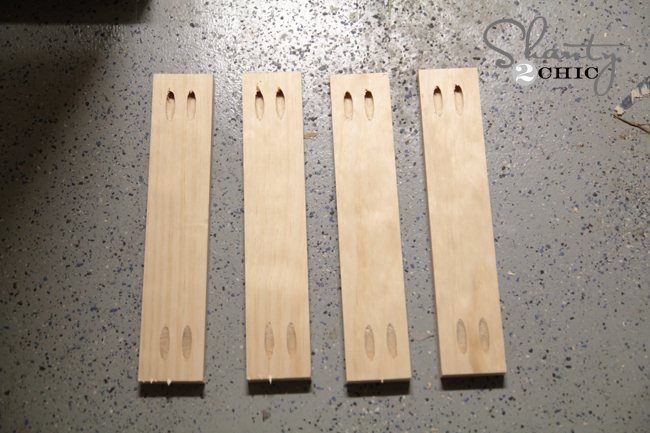
To create the doors, I used my Kreg Jig as well. I made the pocket holes on my shorter pieces and attached them to the longer ones using 1.25″ pocket hole screws.
Although we give you guys the cuts for these doors, I always like to measure the opening before making the cuts to be sure on the size. I like to make the doors 1/8″ smaller all around, which would be 1/4″ smaller than the width and height of each opening. For the doors, you will have 4 longer pieces without pocket holes like this.

You will also have 4 smaller pieces each with pocket holes on both ends like this.
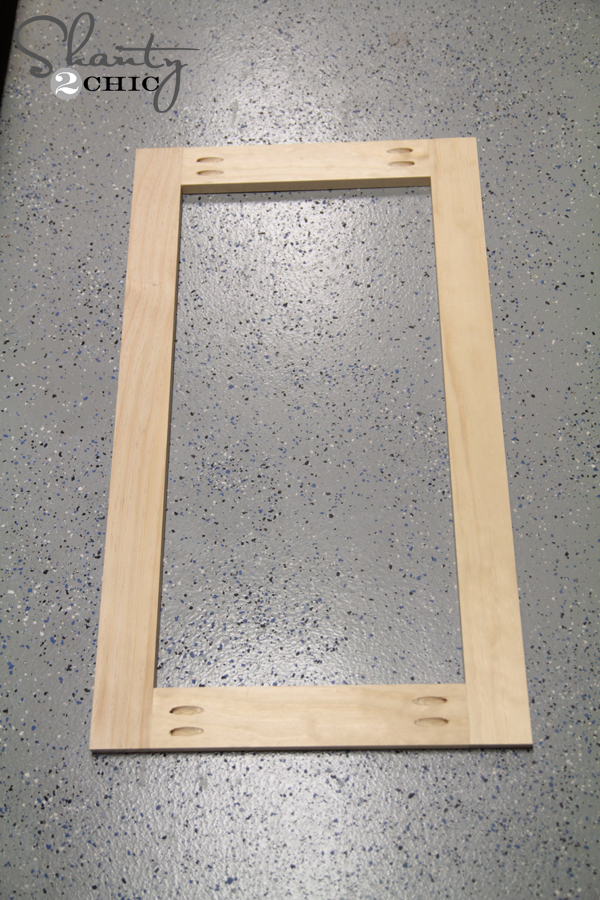
I attached these pieces using wood glue and 1.25″ pocket holes screws to create rectangles.
Each door looks like this!
At this point I painted everything. I chose to use a color called Amazing Grey by Sherwin Williams. I wanted to go a bit darker, but I had a whole gallon of this stuff, so that’s the way she went! I do love the outcome though.
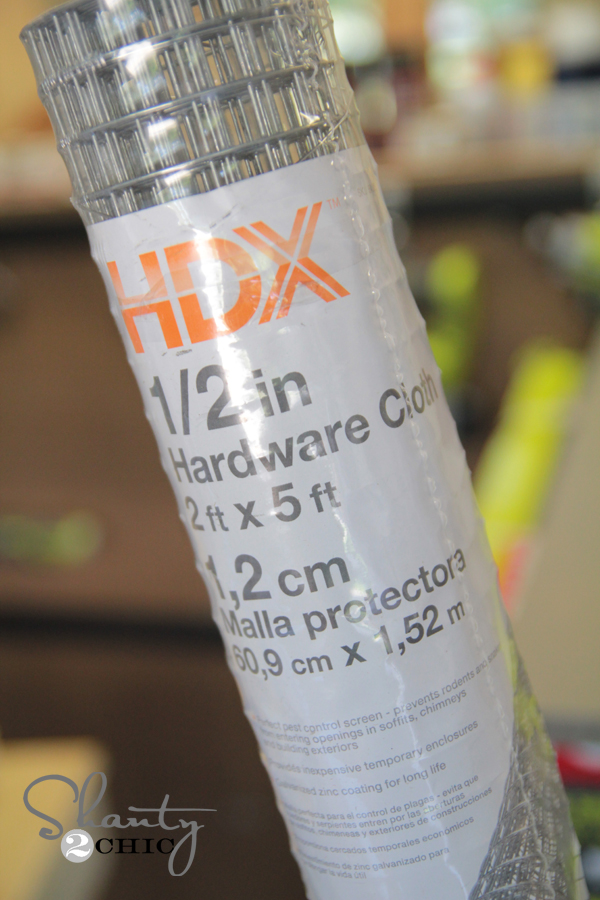
After that dried, I attached the hardware mesh for the doors.
I used this hardware cloth on the inside cloth of the doors.
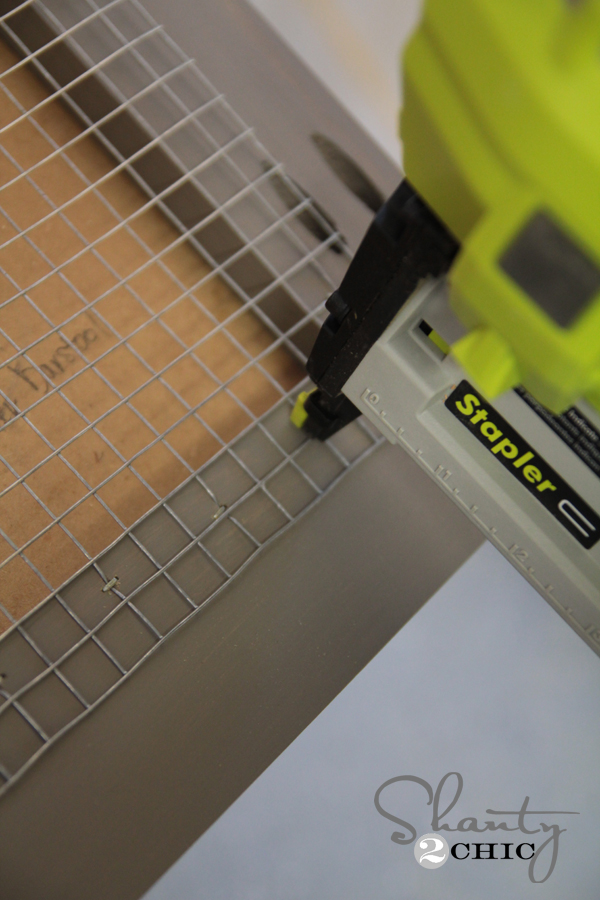
I used a small pair of pliers to cut it to size, and attached it using my Ryobi Airstrike Staple Gun.
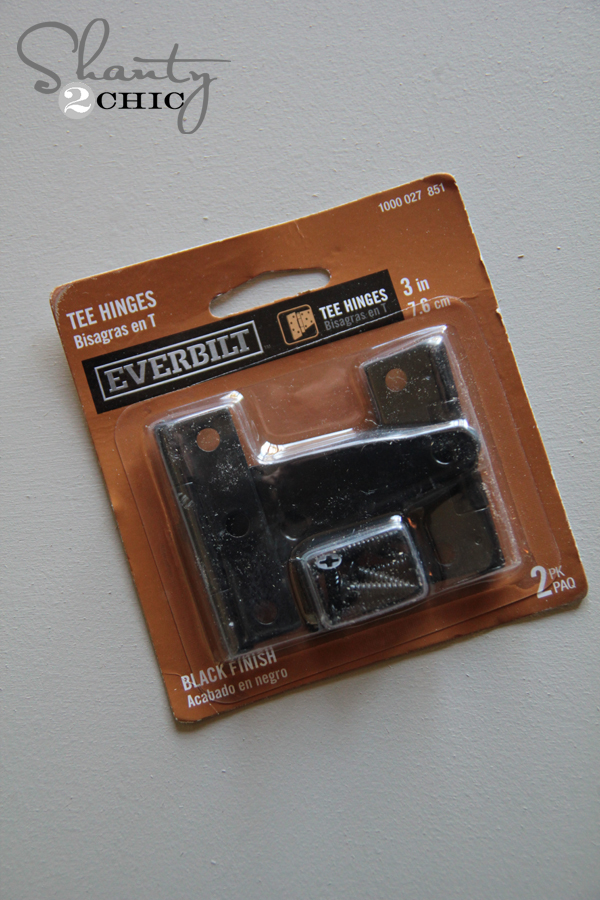
Now let’s talk hardware!
I used these for my hinges… Found them at the Home Depot.
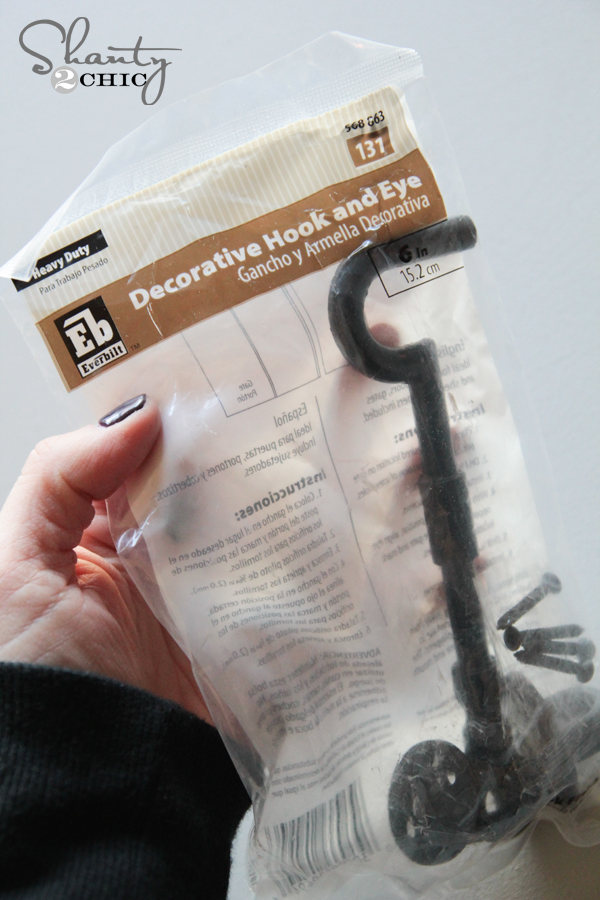
I found these at Home Depot as well for the door latches. LOVE them!
The handles are called sash pulls or gate pulls and are also from Home Depot!
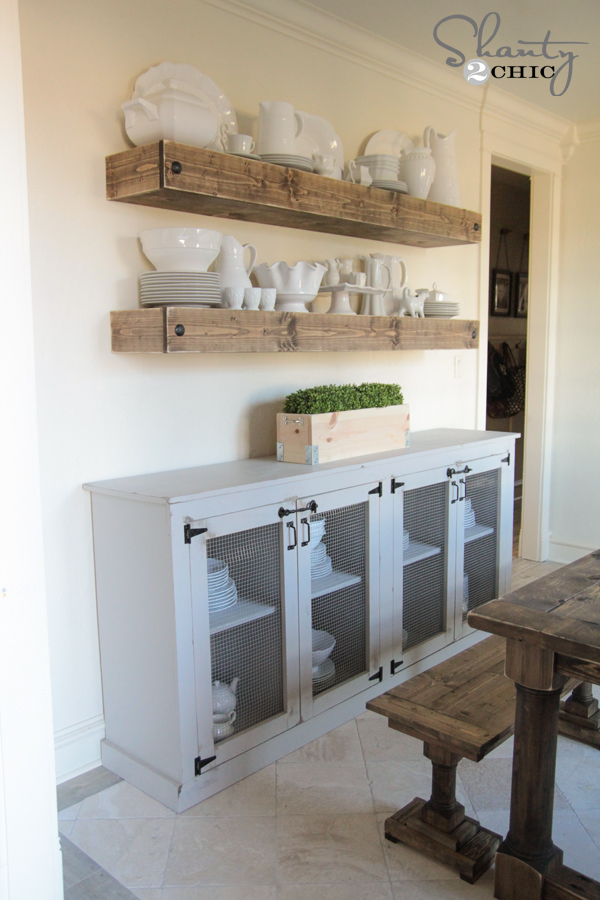
Here she is again all finished!
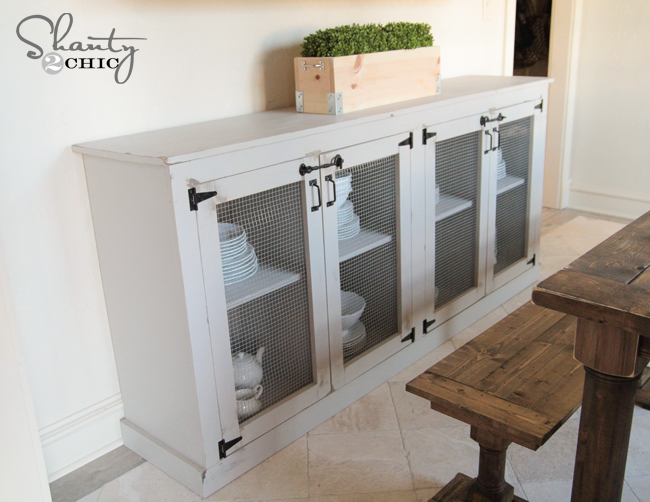
Hope you love it as much as I do!
I would LOVE for you to PIN and share this baby with all your friends!
Thanks so much for stopping by and let me know if you have any questions at all.
~Whitney


What are the overall dimensions? I can’t seem to find that info anywhere. Thanks!!!
What size do you get the plywoycut at home depot?
Can you add glass instead of cloth wire?
Any thoughts on how you would use a stain and ivory white color combo? I am using cabinet faces instead of the chicken wire too.
What is the spacing for the pocket holes?
Can you give me plans to build this with 3 doors instead? TIA!
I cannot believe this site!!!! I can’t sleep for how excited I am to build this sideboard!!! And you give us PLANS!!!
So much joy!!!! Thank you!!!
Great sidebar plans. My dining room loves it. Thanks.
Thanks for the plans! I turned it into a entertainment center.