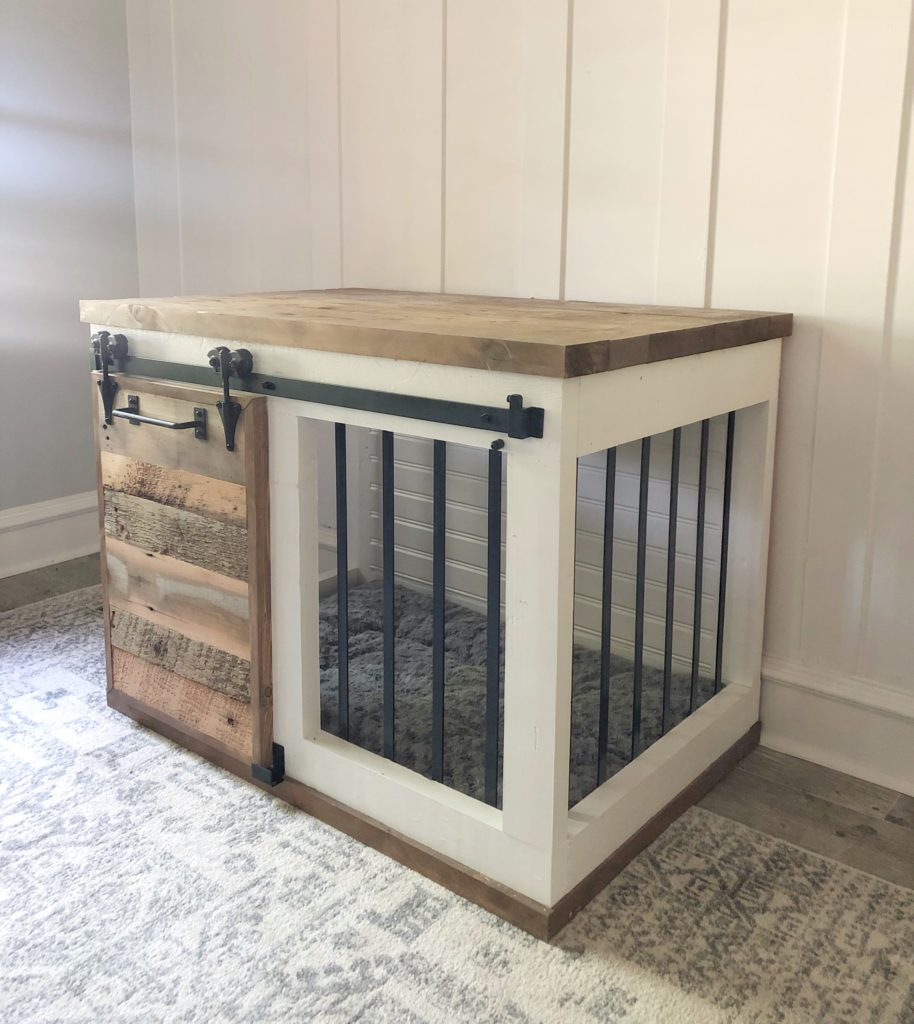
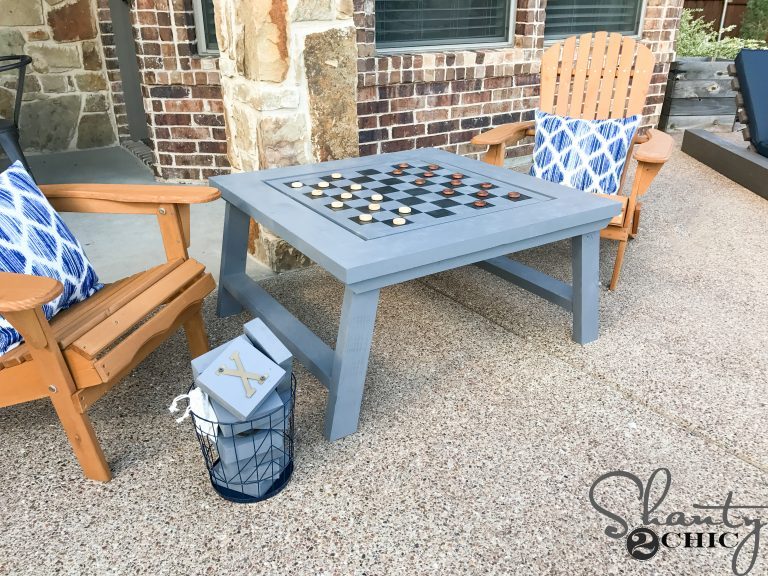
I can’t even wait for my new fur baby coming at the end of this month! Our whole family is so excited! I wanted to build him a crate built for a king, and I think this farmhouse barn door dog crate one fit the bill :-).
I added a link to the FREE printable plans at the bottom of this post! I also linked to the cushion on Amazon and all the hardware!
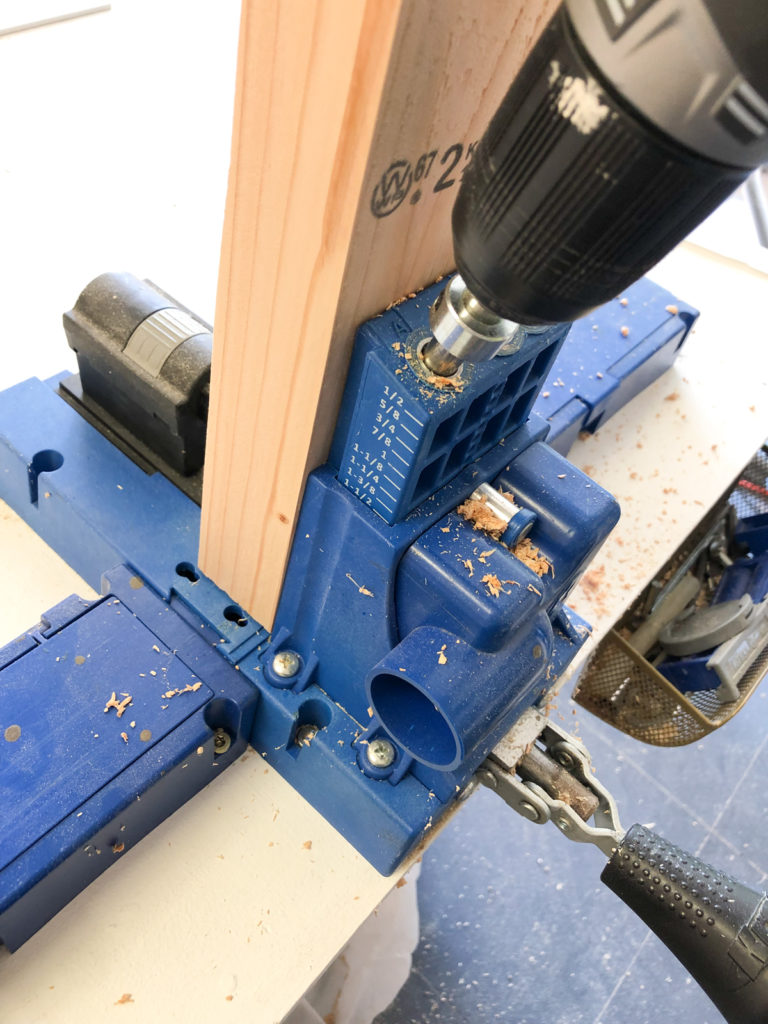
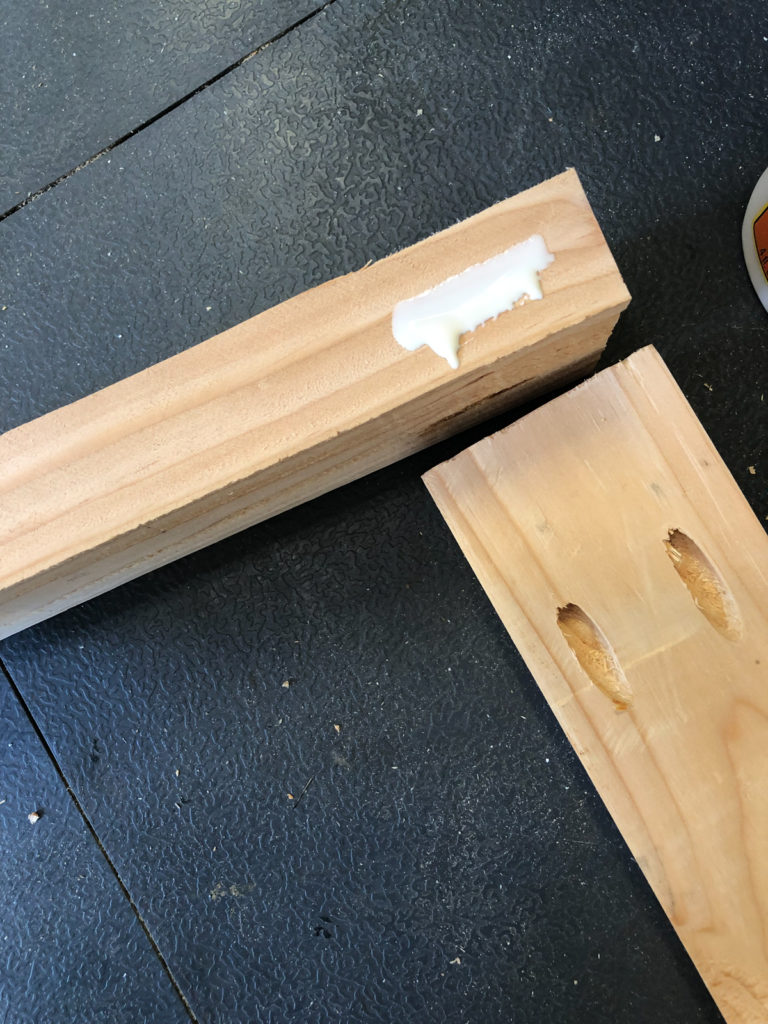
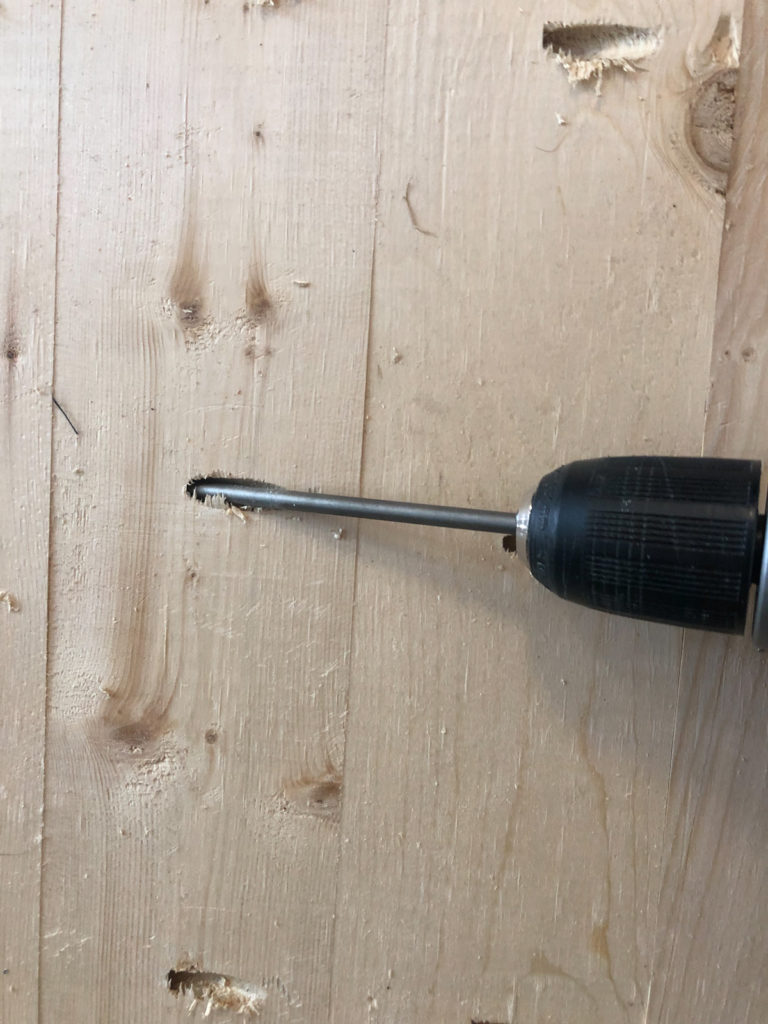
The first step is to create the base of the crate. The outside pieces are 2×4 that we ripped to 3″ wide each. Cut each of these to size with the ends being cut at 45˚ angles. Add two 1.5″ pocket holes to the end of the two shorter pieces.
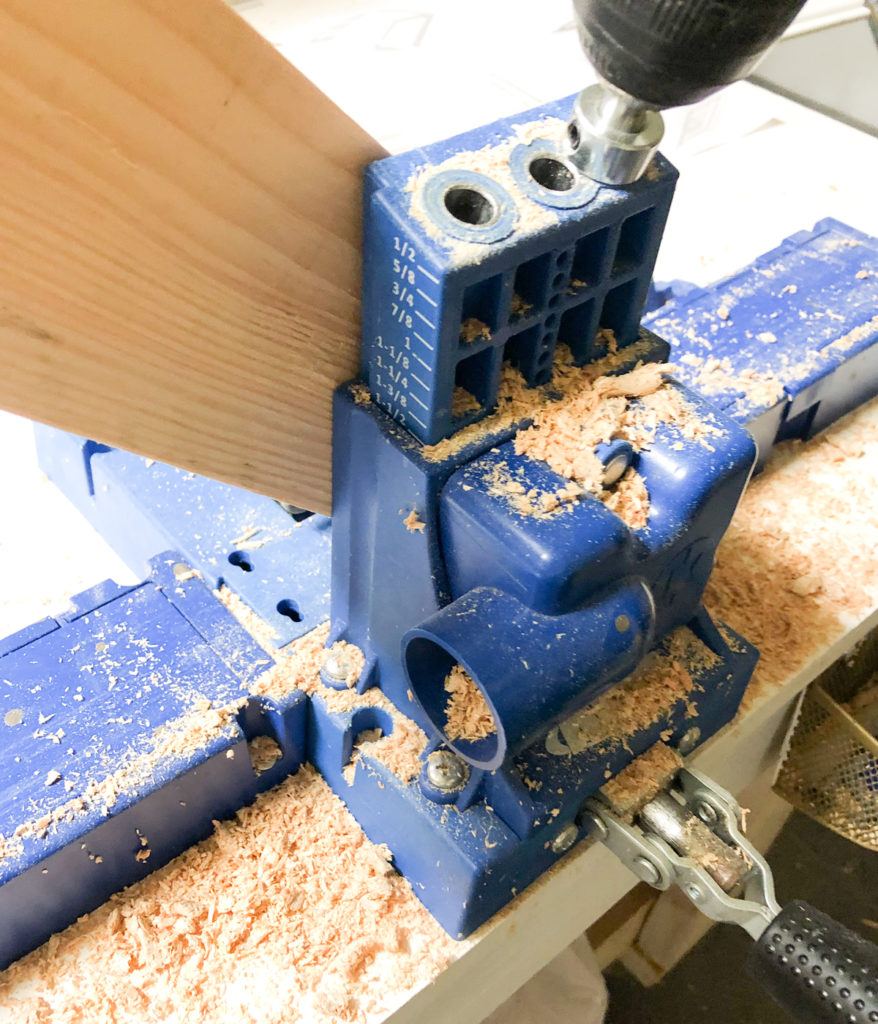
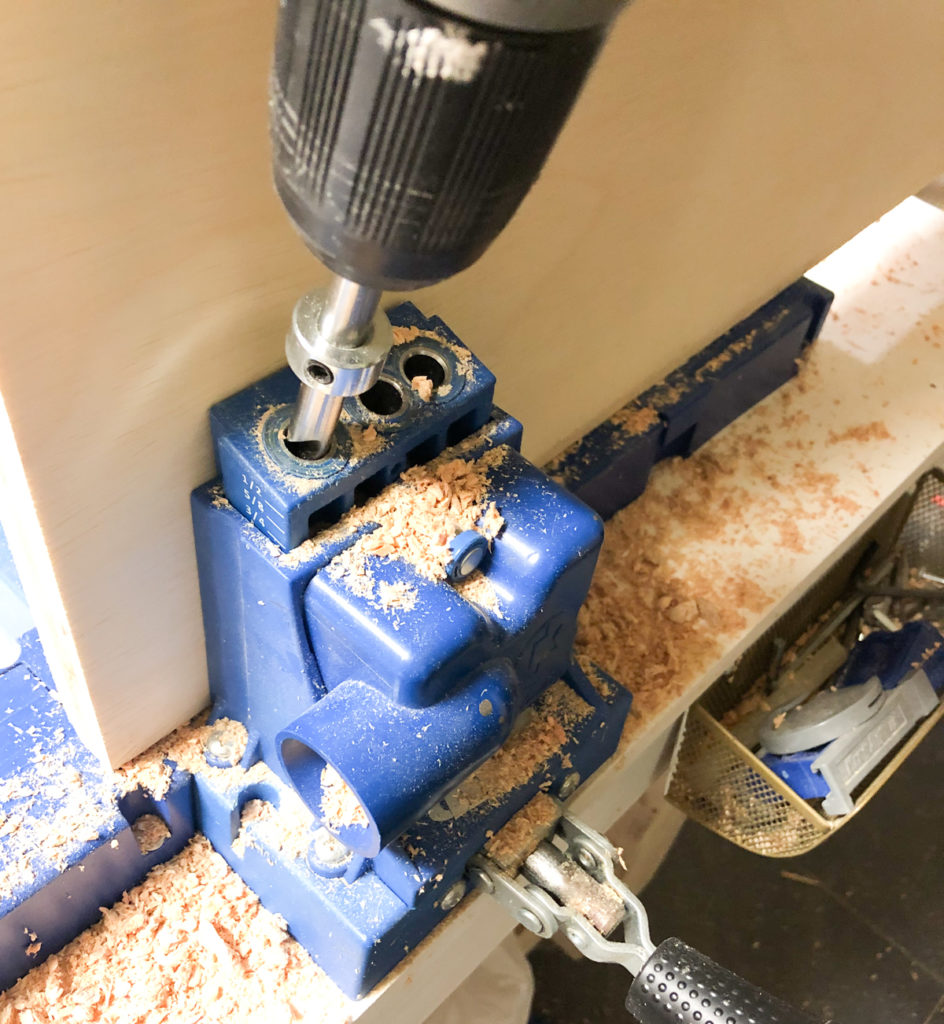
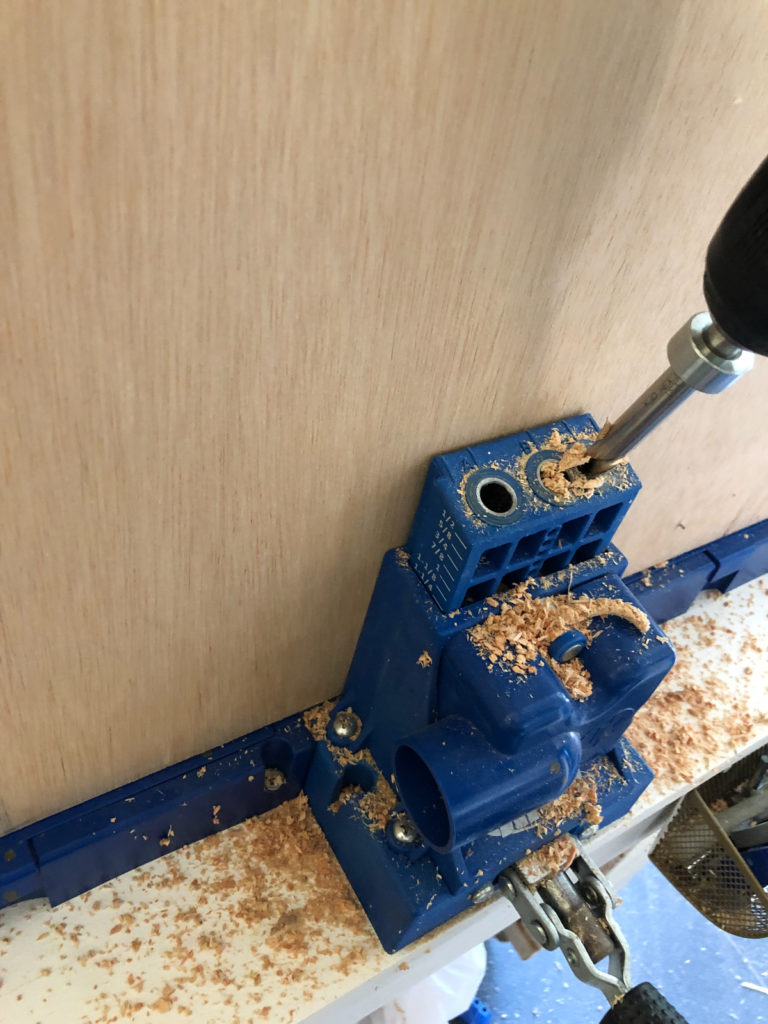
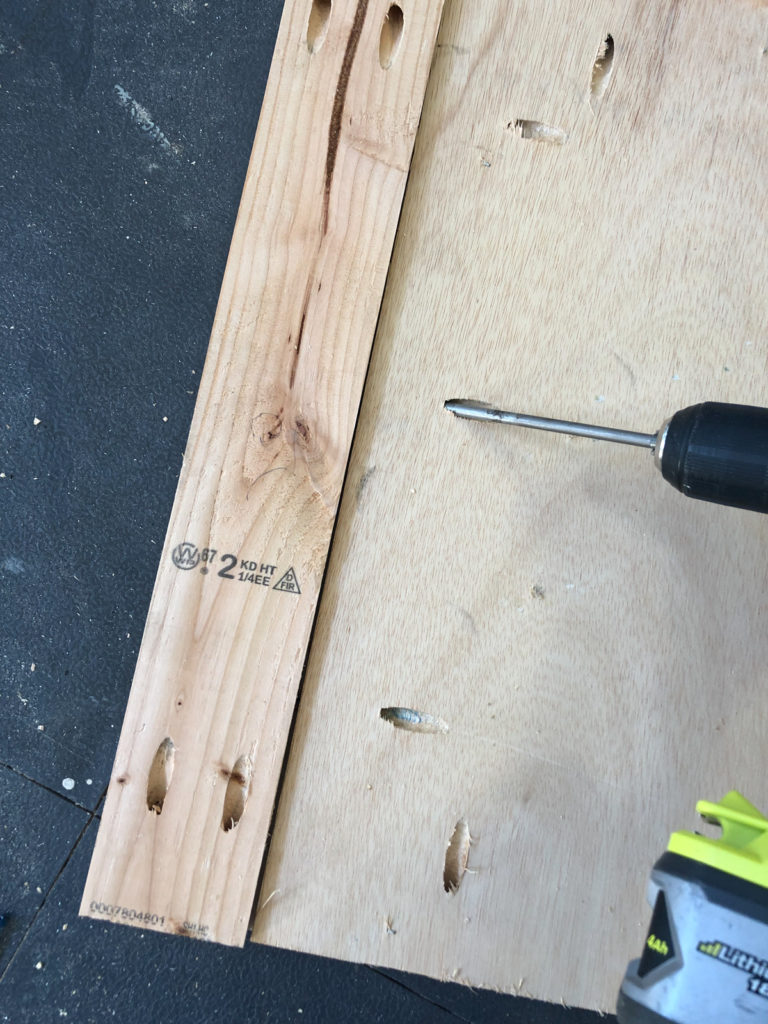
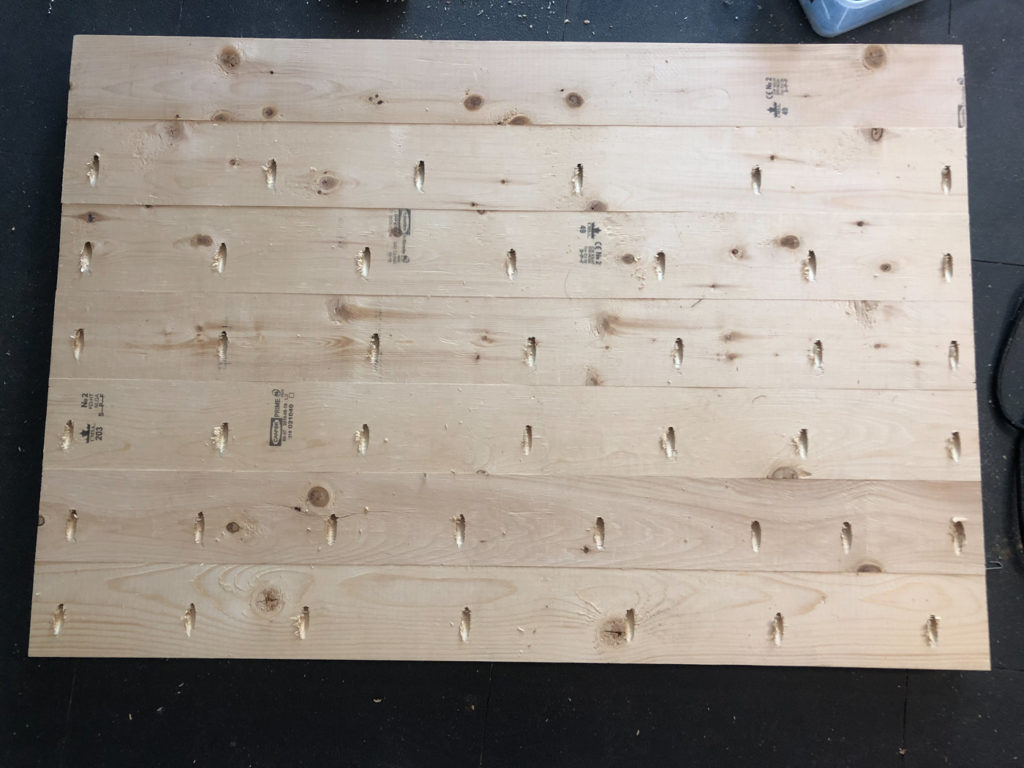
Next, cut the base plywood piece to size and add 3/4″ pocket holes around all sides.
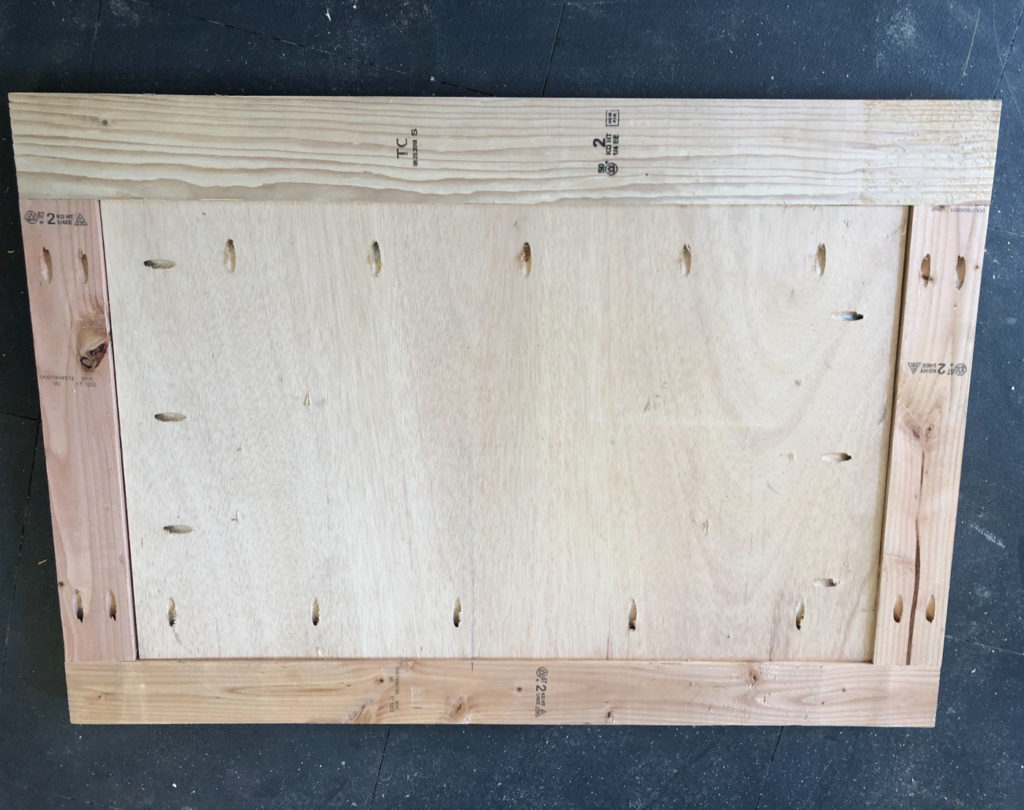
Attach the shorter sides to the plywood piece first. Add a line of wood glue and attach the sides through the pocket holes and into the frame using 1.25″ pocket hole screws. Next, attach the longer sides also using wood glue and 1.25″ pocket hole screws to create the frame around the plywood. You want the top of the plywood to be flush with the top of your frame.
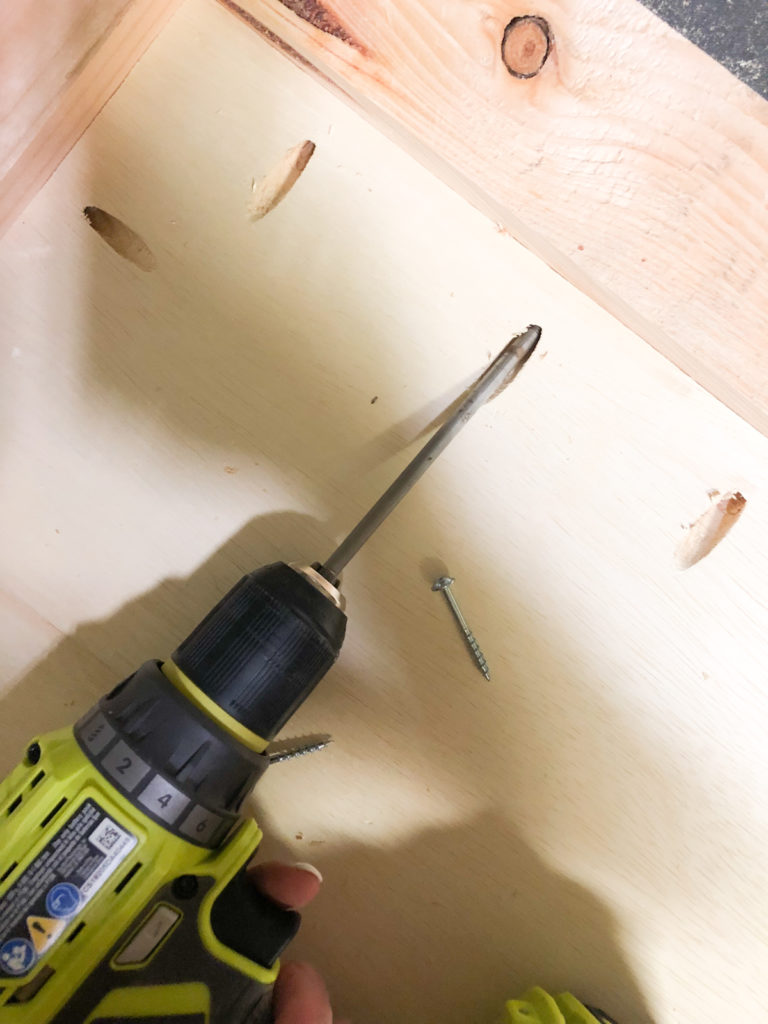
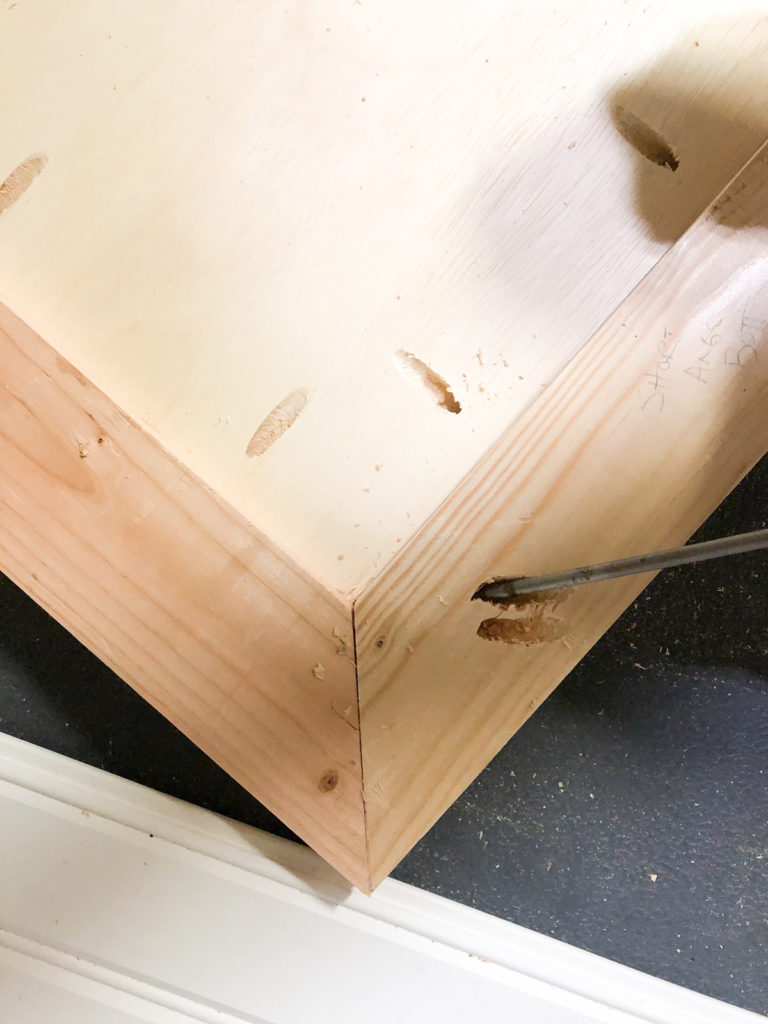
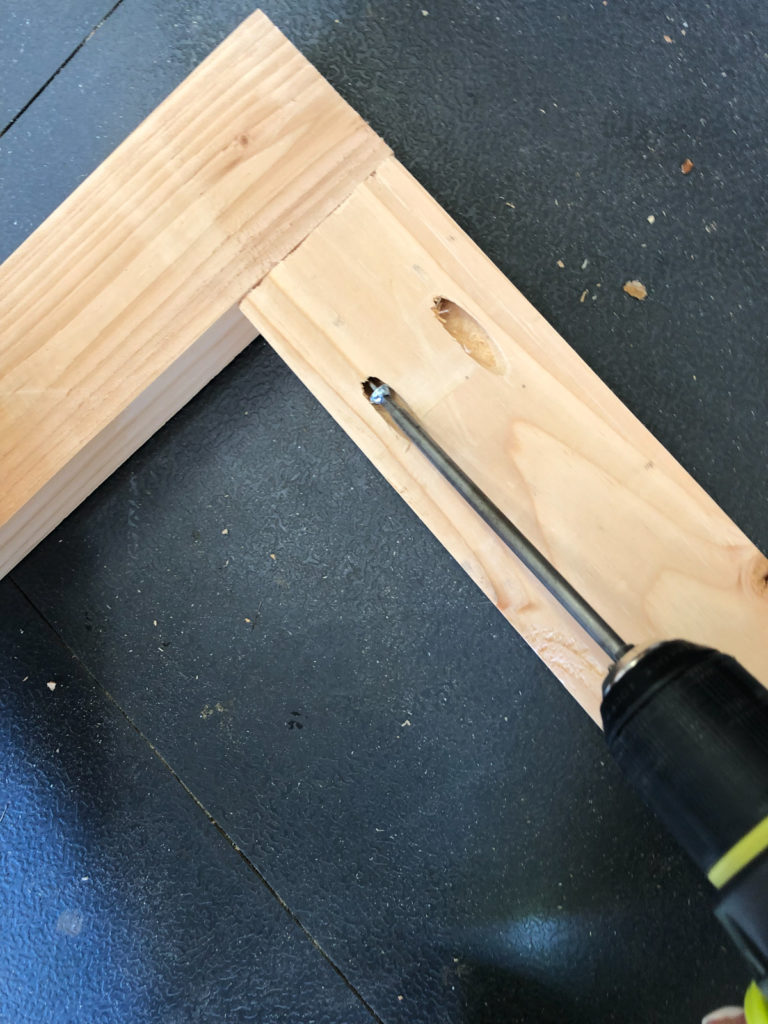
Attach the corners together now. Use 2″ pocket hole screws through the angled pocket holes and into the adjoining corners.
Set the base to the side and begin building the frames of the crate next. Build the back frame first. The base and side pieces of this frame are 2×4″ that we ripped to 3″. The top board of the frame is a 2×6 board that we ripped to 4″. Cut these to size and add 1.5″ pocket holes to each end of both of your vertical pieces.
Cut the back plywood piece to size, and add 3/4″ pocket holes around every edge.
Attach the smaller vertical frame boards to the plywood first. Add a line of wood glue to the end of your plywood and attach these boards through the pocket holes in the plywood and into each board using 1.25″ pocket hole screws.
Next attach the top and bottom pieces the same way using a line of wood glue in between the plywood and frame pieces and 1.25″ pocket hole screws. Once those are attached, add 2.5″ pocket hole screws through the vertical frame pieces and into the top and bottom frame pieces.
Now build the front frame. The bottom and vertical boards of this frame are also 2×4 boards ripped to 3″, and the top board is a 2×6 ripped to 4″ Add 1.5″ pocket holes to each end of all 3 vertical boards. Add glue to each end.
Attach the vertical boards to the bottom frame board using 2.5″ pocket hole screws. These boards should line up flush with the ends of each horizontal board. The middle board will line up in the center of both sides.
Cut the side pieces to 23″. You will have 4 of these pieces, but they won’t attach to anything until a later step. Add 1.5″ pocket holes to the very top of the 4″ wide boards and add 1.5″ pocket hole screws to the very bottom of the 3″ boards.
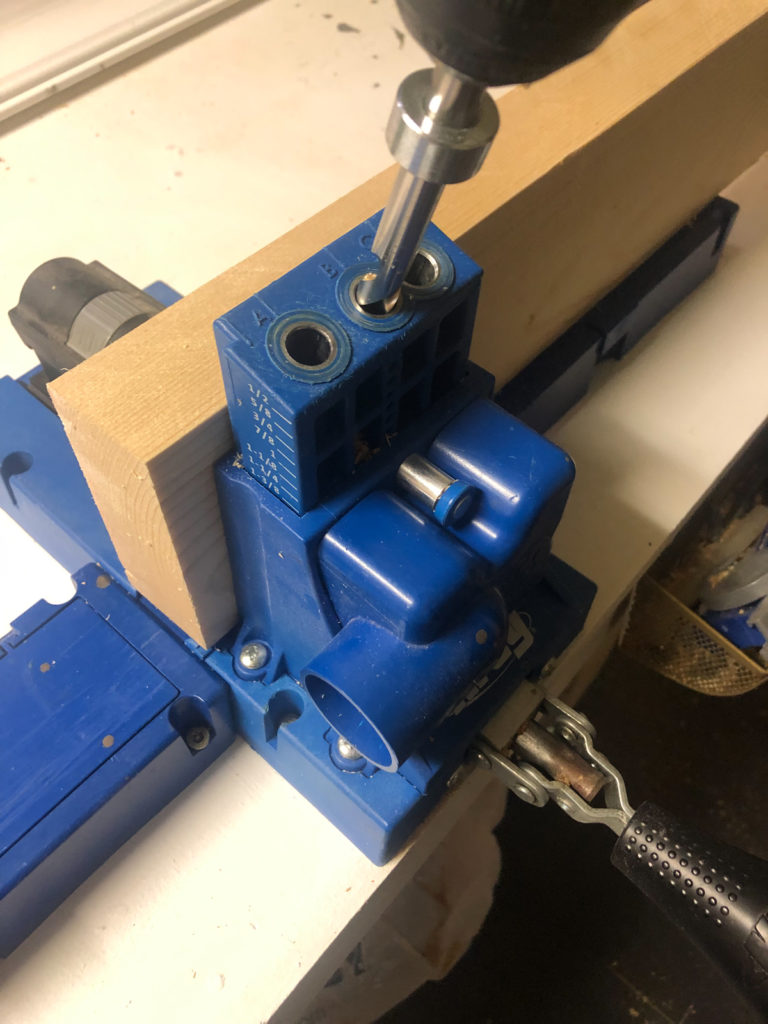
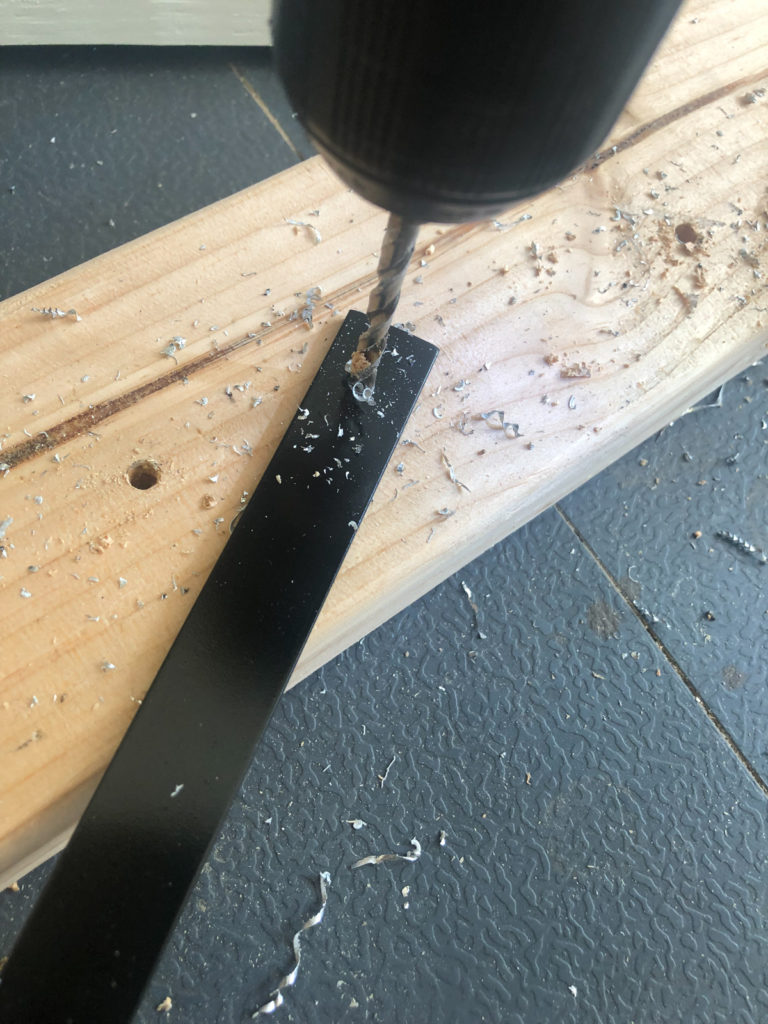
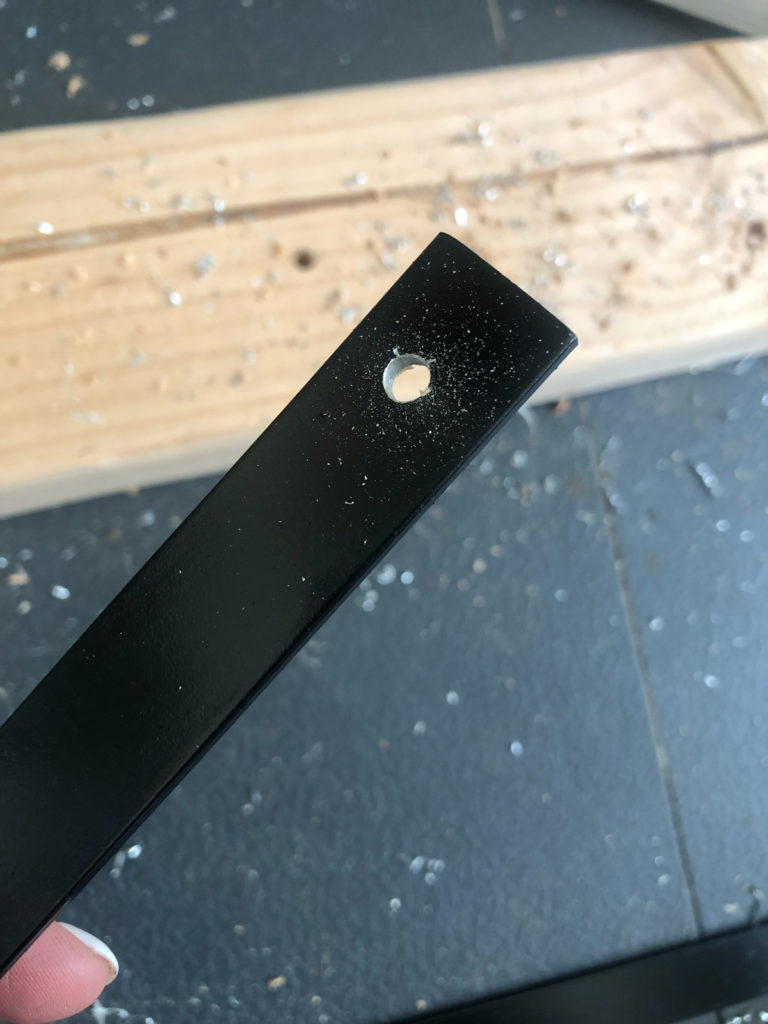
At this point, you need to paint or stain your wood assemblies. This will also include the 23″ cuts you will use to create the sides of the crate. While that is drying, you can begin working on the metal bars that you will attach next. I used aluminum flat bar on this part. These came in 3/4″ x 48″ pieces. I used my jig saw with a metal blade to cut 14 bars at 23″ long each. This bar cuts smoothly and quickly. I sprayed these bars with black satin spray paint before adding the holes in both ends of each bar. Use a cobalt drill bit to make these holes the fastest.
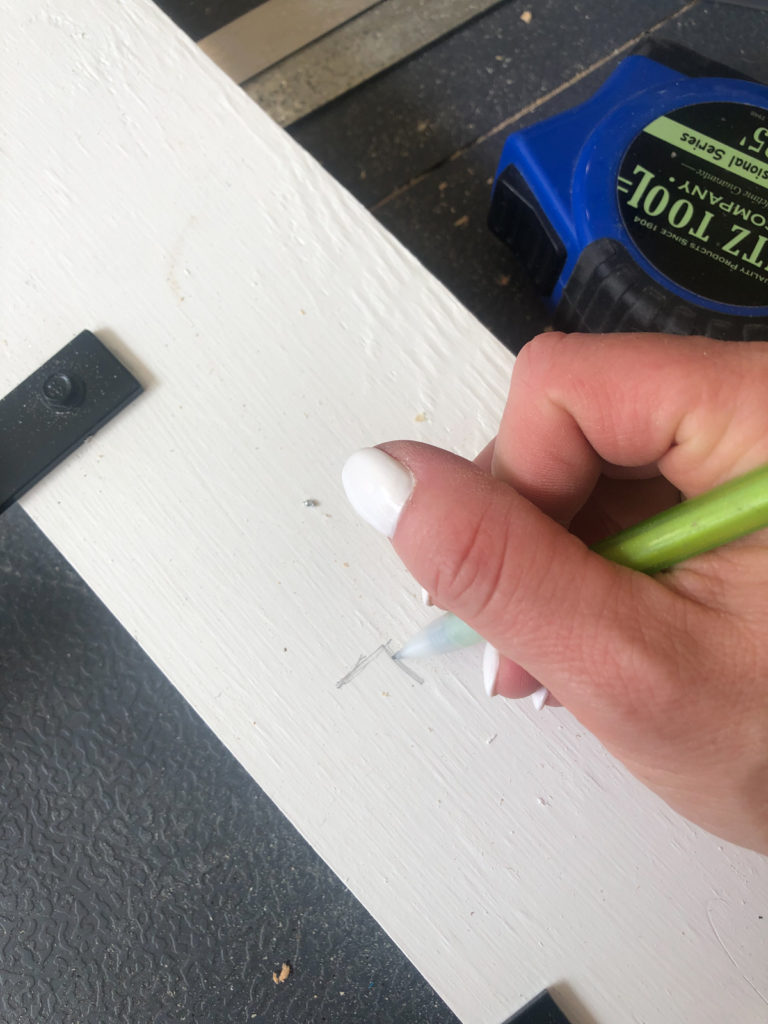
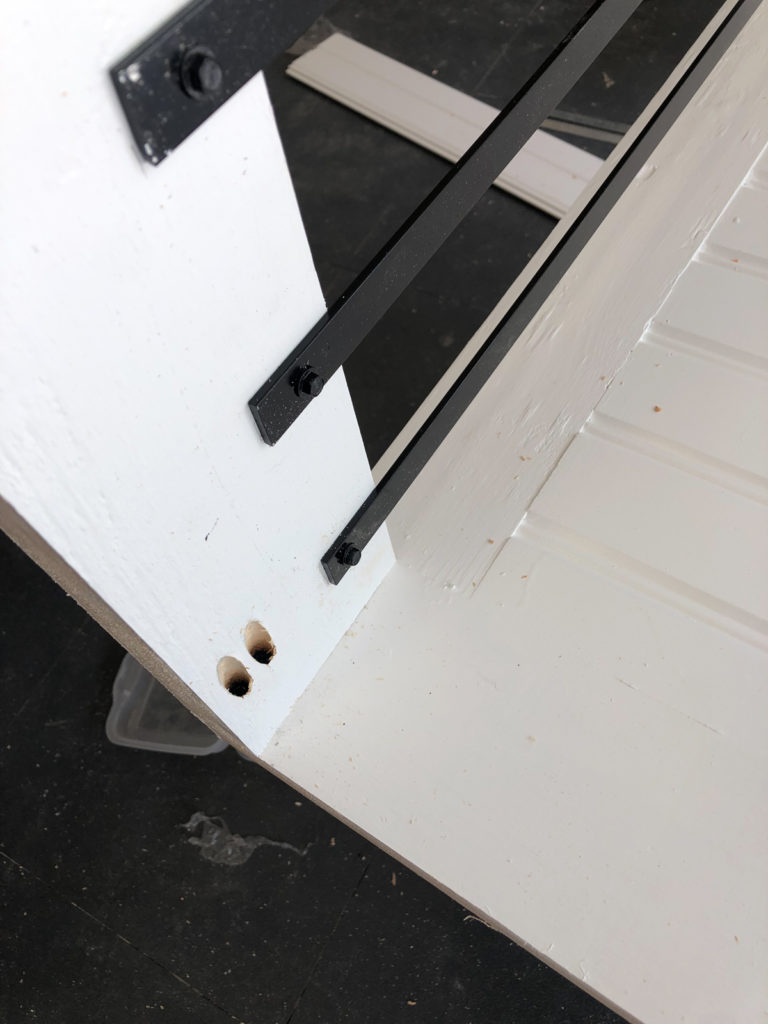
Once all of your wood pieces are dry, create the side pieces. I attached my bars to the wood pieces using 1″ self tapping black screws.

I spaced the metal bars for the sides of the crate each 3″ apart, starting 1.75″ from the ends of each board. If you have a smaller dog, you can adjust the bar spacing to fit your needs!
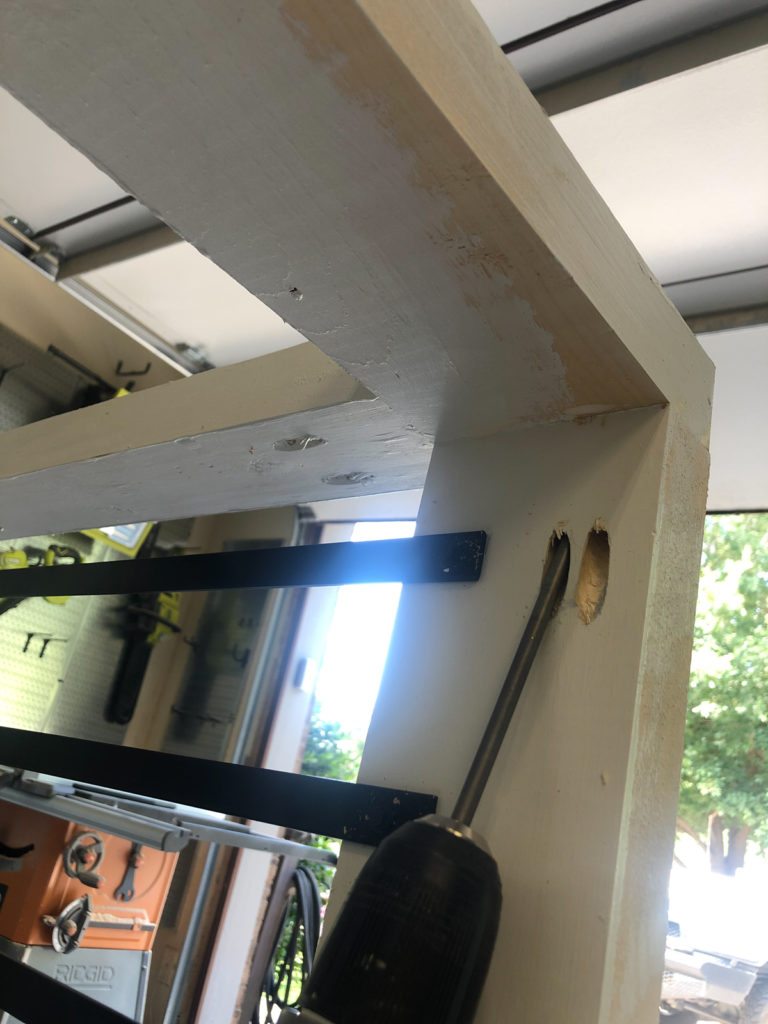
Once both side assemblies are built, attach them to the back of the crate using wood glue and 2.5″ pocket hole screws. Everything should line up flush both on the sides and tops and bottoms.
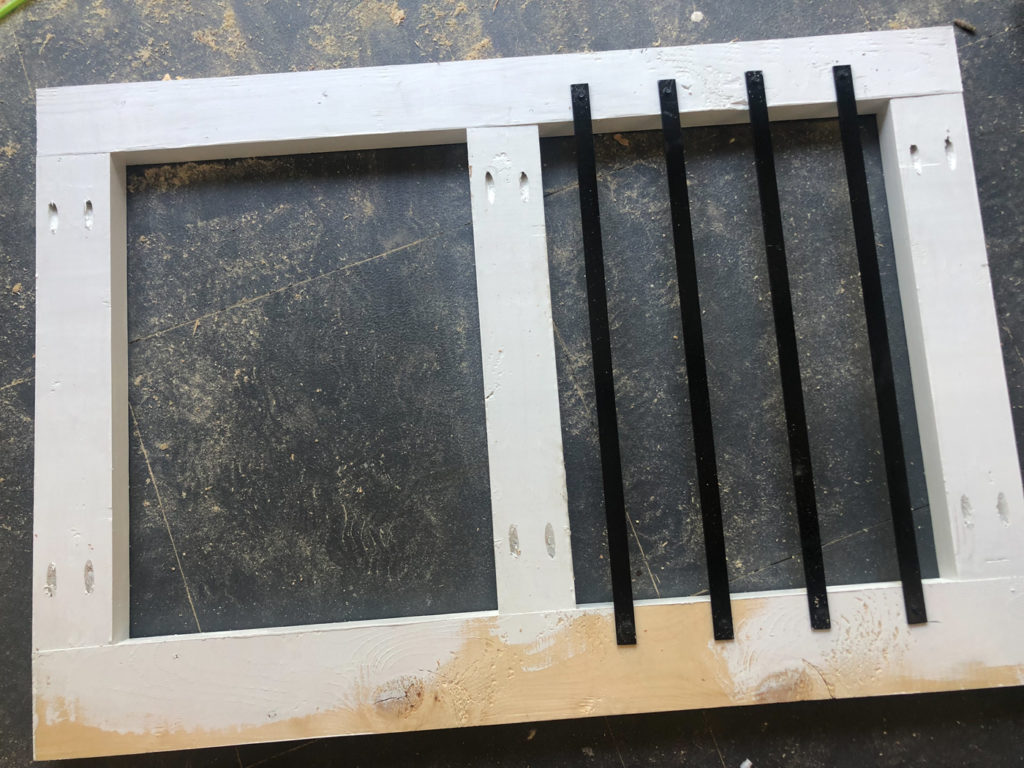
Add the flat bars to front crate assembly next. These will attach to only one half of the front. I spaced these 3″ apart and placed the outside bars 1.5″ from the edges of the inside of the wood frame.
Attach the front assembly to the rest of the crate using wood glue and 2.5″ pocket hole screws through the pocket holes in the side assemblies and into the front.
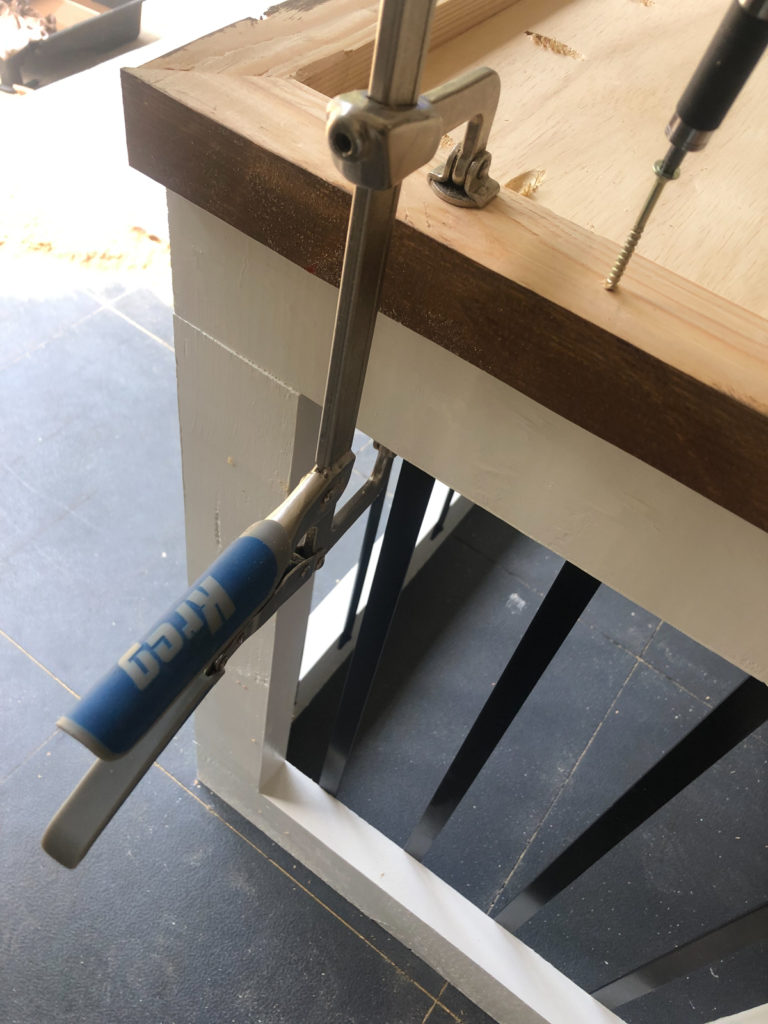
Now it’s time for the base! flip the crate assembly upside-down. Run a line of wood glue around the crate assembly and place the base upside-down on top of it. Attach them by using 2.5″ wood screws through the base and into the crate assembly all around.
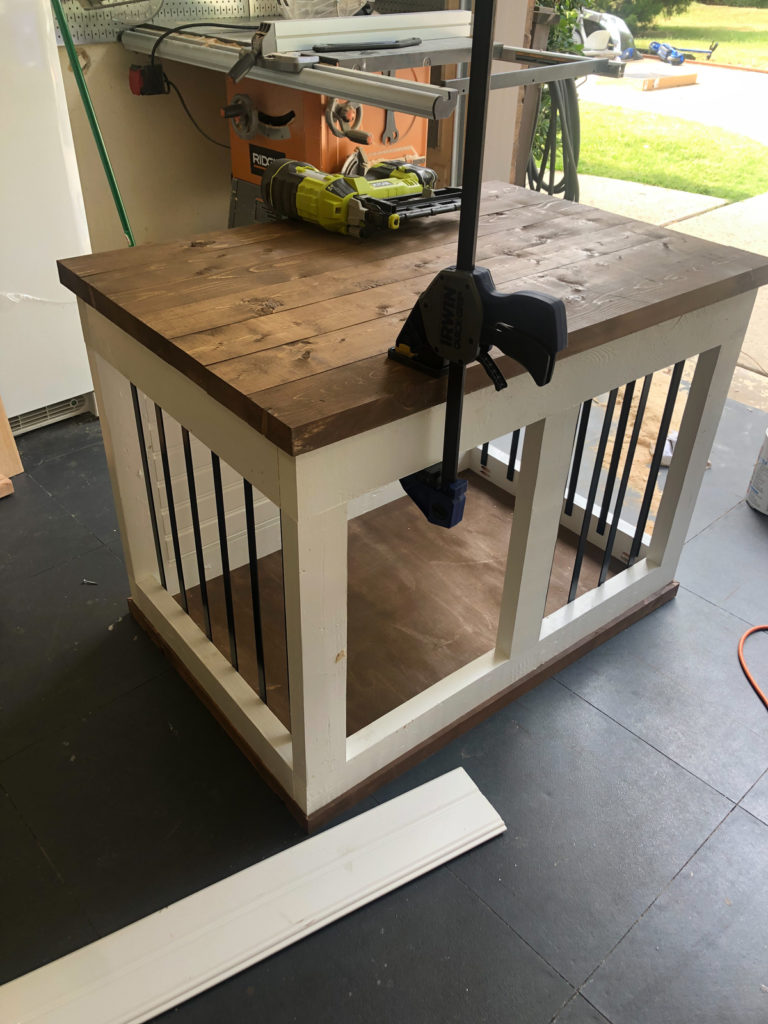
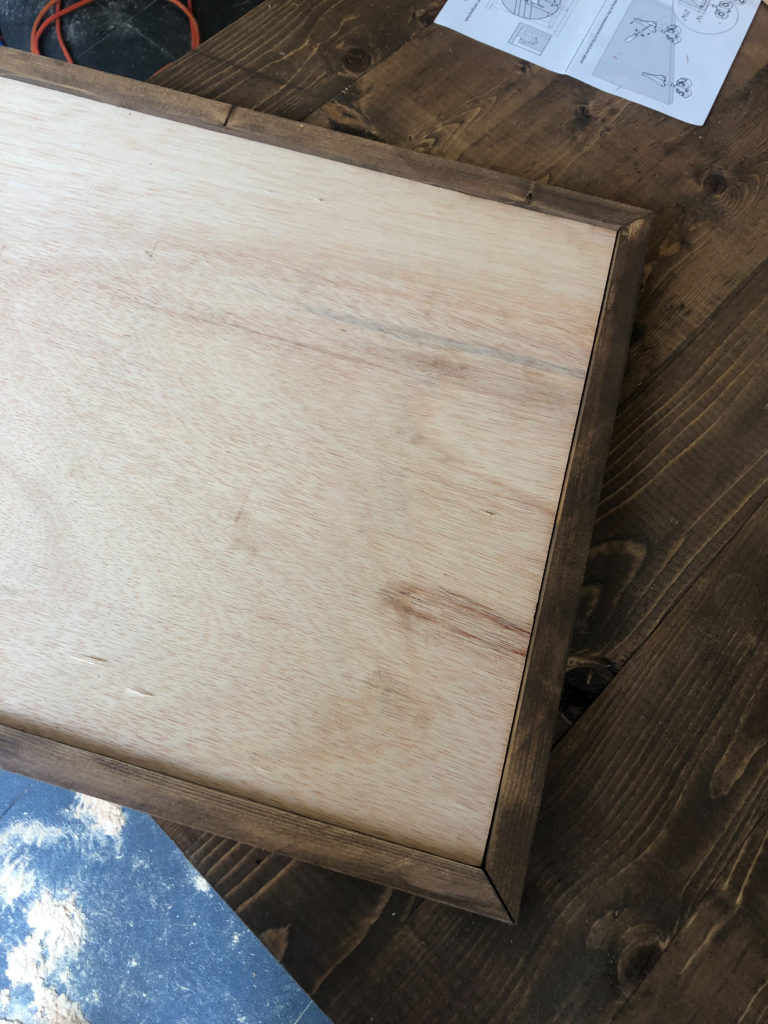
The planks for the top of the crate are 2×6 boards we ripped to 3 7/8″ wide. Cut these to size and add 1.5″ pocket holes down one side of 6 of the 7 boards. Place them side to side and attach using 2.5″ pocket hole screws. Once they are all attached, this is a good time to stain or paint the top before attaching it to the crate.
To attach the top, add glue to the top of the crate assembly and place the top on top of it. Make sure its equal all-around and nail it in place using 2″ finish nails.
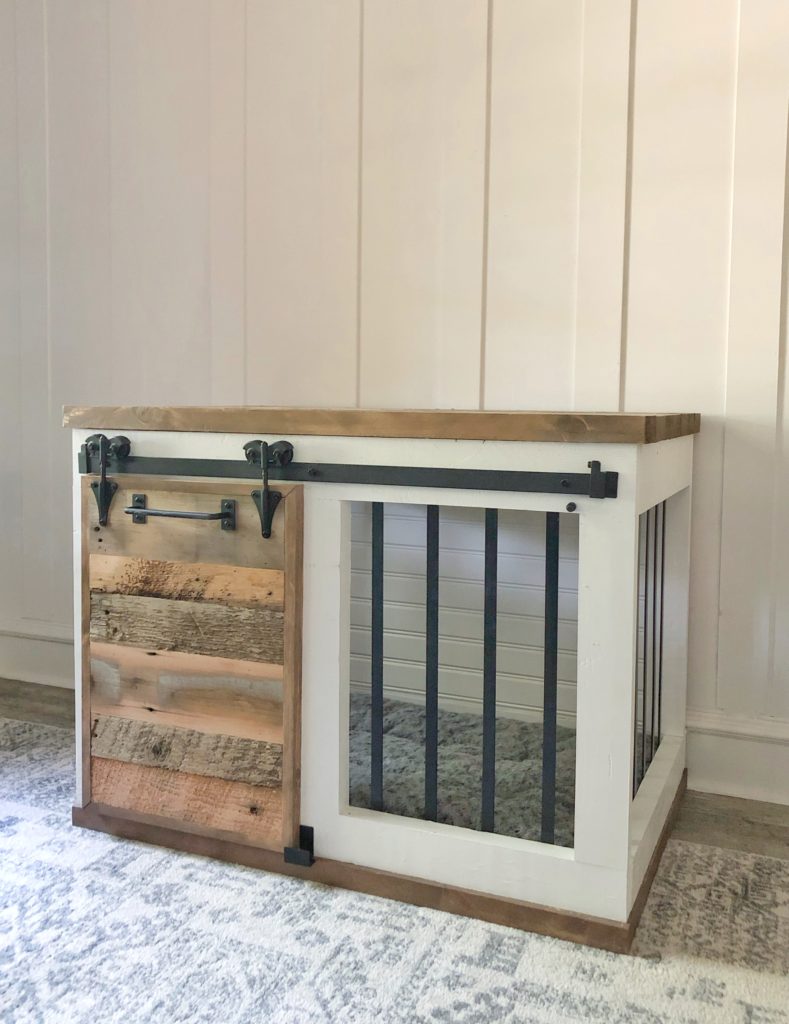
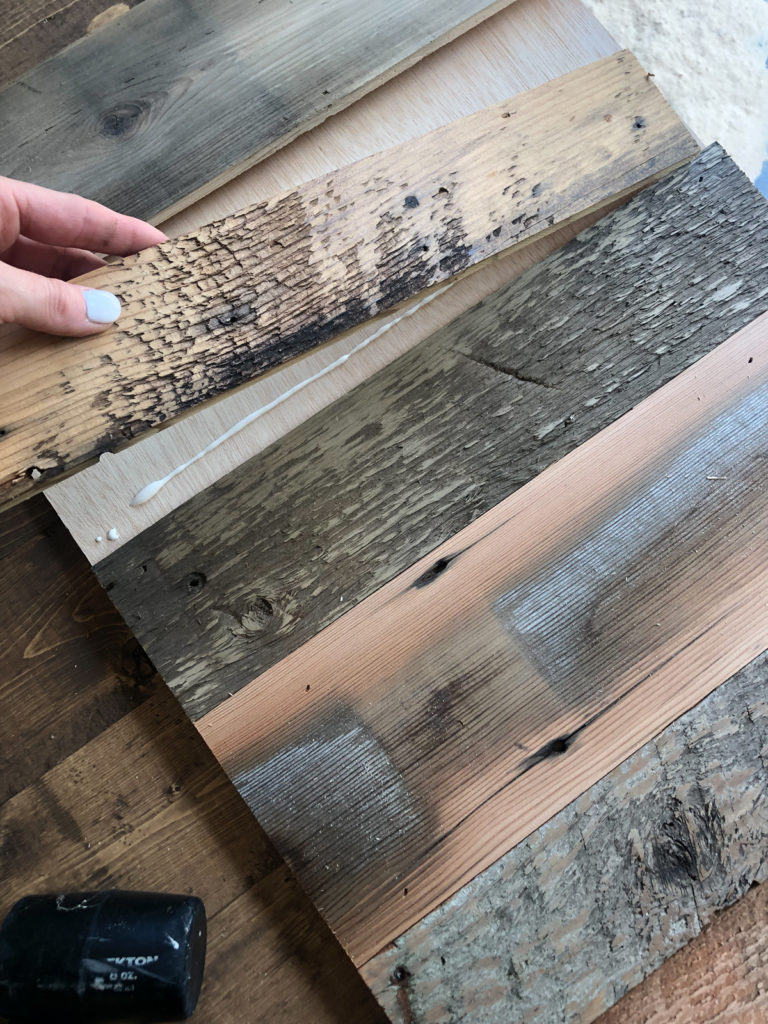
The final step is creating and attaching the door. I used a piece of 1/2″ plywood cut to 15″ x 22″. You can have fun with this part! I used some barn wood left over from an old project I did and glued and nailed the planks to cover the plywood. You can also add decorative trim or whatever style you like… Just make sure you keep the door flush on front to accommodate the hardware.
I ripped 1×2 boards to 1″ thick each. This barn door hardware will work with doors up to 1 1/8″. I mitered the edges to 45˚ and attached them with wood glue and 1.25″ brad nails. Make sure the front of the planked door is flush with the front of the 1×2 boards.
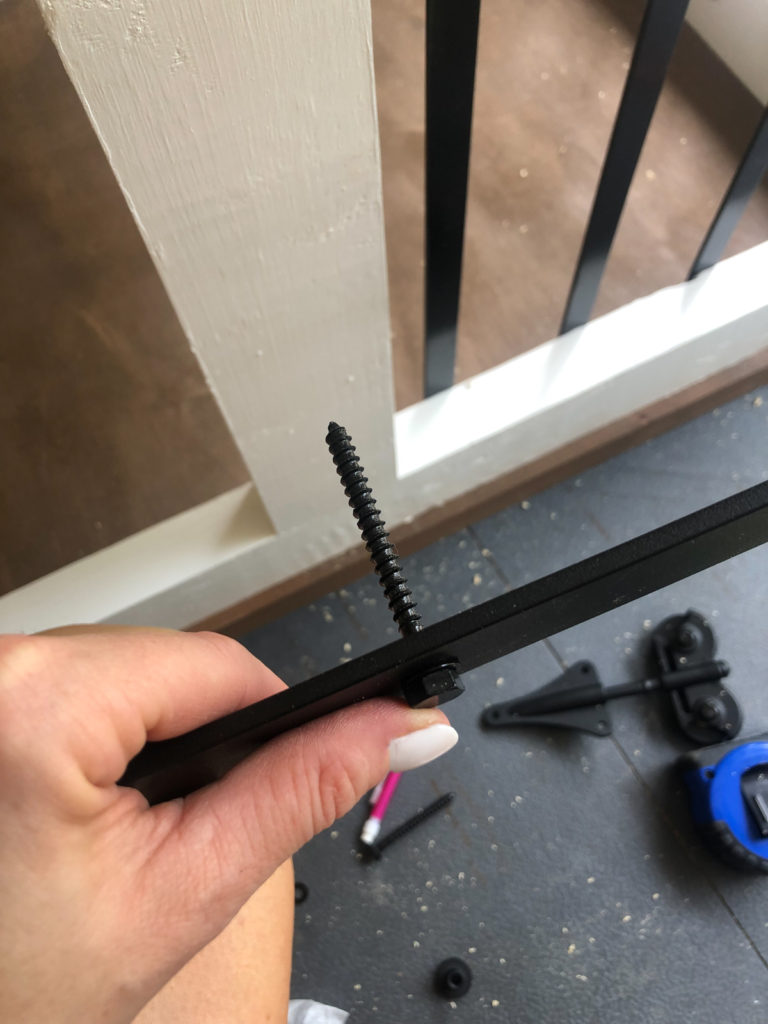
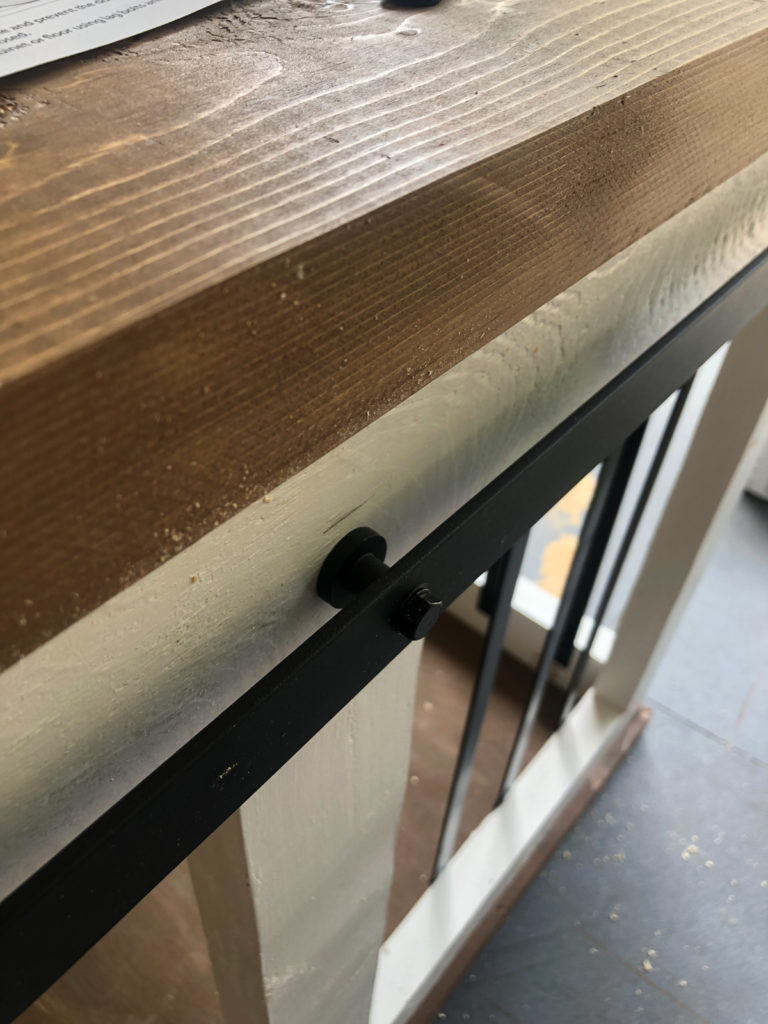
The hardware is super easy to attach! You just run the long screw through the bar and then place the spacer after that. I attached mine to allow about 1/2″ space between the base of the door and the top of the trim piece.
CLICK HERE for the barn door hardware!
CLICK HERE for the universal cushion!
CLICK HERE for the metal door guide!
CLICK HERE for the barn door pull!
CLICK HERE for the free printable plans to build the dog crate!

Hi Johnette,
Thank you for sharing. I am very interested in buying one for my new fur baby. How can I go about ordering one?
Just wanted to check in and see if you are still interested in this item.
Where do you live.
Look me up on facebook.
Johnette Hristov. We can take it from there.
Yes, still interested. I live in Concord, CA. Will look you up on Facebook. Sounds good, thank you!
Hi Johnette, I was scrolling through the comments and I saw that you had said that your husband could make this item for customers, and I was wondering if he can make one for me and if so would you please ask what the price will be?
Hi Elsy:
I will talk with my husband and see what the cost of materials and labor would be and other questions he may have. Where are you located? Would you want it the exact size and on the prints?
Hi Johnette,
Thank you so much for the reply, I’m live in Camarillo CA , Ventura County.
Let me know what the price will be .
Thank you
The price for the dog crate would be $250.00
Hi sweetie,
Great ! How do we go by ordering and how long would it take to make it ?
Can you email me or contact me directly? Also, where are you guys located ?
Thanks
Are you still interested in this item?
Hi, Yes, I’m , I replied to you on the 19th and asked you how would we go about placing the order? Can you contact me directly ? Also, where do you guys live? I will like to order it as soon as possible. Thanks.
How do you lock it?
Is it possible to have this made to purchase
Hi Sharon:
My husband is in the business of building and could actually make this for you if you are interested.
Hi Johnette, I was scrolling through the comments and I saw that you had said that your husband could make this item for customers, and I was wondering if he can make one for me and if so would you please ask what the price will be?
He can make it. Where do you live? I can get you a price but that will not included shipping.
The price for the dog crate will be $250.00
Yes
Hello, I’m trying to build this currently but wondering where to get the bars? Thank you!
Bryan, you can by the flat metal bars at Home Depot. They are pretty expensive. To make this crate it is close to $100 just for the metal flat bars. I made the crate and used rebar that we cut to same length and just drilled 3/8″ holes in the 2×4’s and 2×6’s. It was way less expensive.
The 1/2” plywood for the back…. yours looks like beadboard, but I can only find that in 1/4” thickness. Is that cut and glued to surface of 1/2” after back wall is assembled? (From pictures it looks like back is flush with frame.) Building for a friend, and your design is what they picked, so trying to copy exactly—except for size.
We really appreciate you taking the time to share this! My brother has cerebral palsy and we are looking for a crate he can easily close the door on by himself. We are not the handiest, but would like to try and build this for him and his mini Dachshund :Fuzzy”. A Video would be most helpful. Do you think you might make one?
What are the dimensions of the crate?
What did you use on the floor for when they have accidents in the beginning?
Love the plans, but it would be wonderful if you included a cut list. It also doesn’t state which plywood is used for the base.
Where can I find the metal bar online?
Does the barn door have a locking mechanism?
We just got a new puppy and he loves to chew on wood! What are your thoughts about that?
The one I made was similar, but not exactly like this and I had the same issue, with my dog scratching and chewing, but my bars were wooden as well, so I love the idea of the metal bars. I’ll be modifying my design to include that. The other modification I was going to make was to add sheet metal to line the inside. (@ least where the problem areas are)
What are the final dimensions and where did you buy the flat aluminum?
Home Depot $6 each 48” piece. Buy 7 of them and cut them in half at 23” to come out with 14 bars
What is the overall measurements of the crate?
Beautiful design! I can’t wait to try it for our furbaby. Thank you so much for sharing!
Gorgeous!!