My goal was to update my 15 year old staircase on a budget and by myself. Come check out my DIY Staircase Remodel with a full tutorial and lots of pictures!
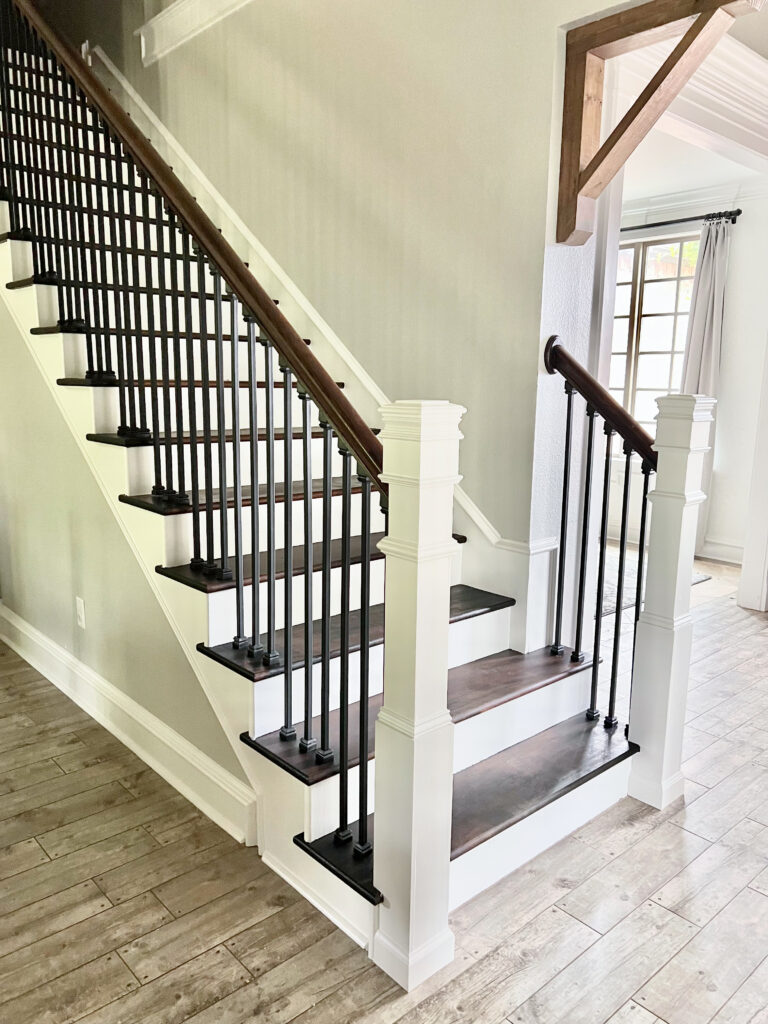
Table of Contents
Updating my old staircase
We have been in our current home for around 15 years. Raising six kids in this house leads to lots of wear and tear as you can imagine! This whole project started with two loose balusters on my old staircase. My goal was just to fix them for safety reasons, which lead me to the stair parts aisle at the hardware store. From there, I got an itch to renovate the whole thing.
Removing the old balusters
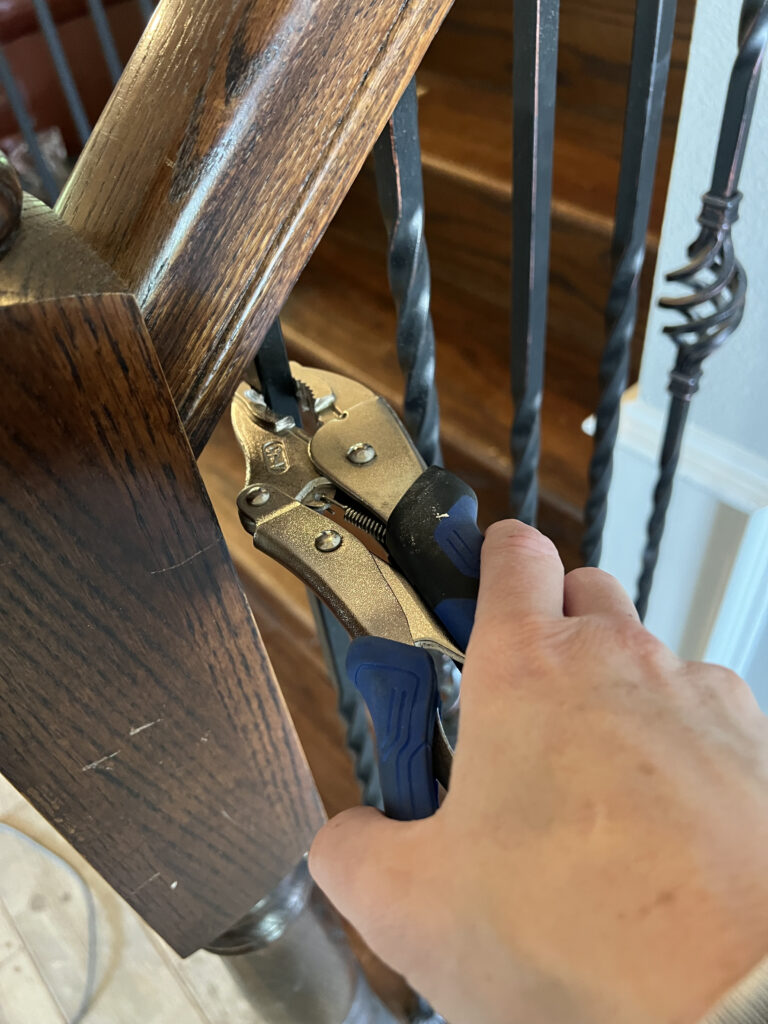
The first thing I knew I wanted to do was to replace my existing metal balusters with black straight balusters. A few of mine had come loose, and rather than just fixing those, I decided why not change them all out. I used a pair of vise grips like these to remove the old balusters. I just clamped the vice grip to the top of each baluster, and slowly twisted with my hand to loosen the epoxy in the top hole. If it didn’t just come out at that point, I used a mallet on top of the vice grip to lightly tap the baluster out of the handrail. This was so easy! Now, I know many of you have existing wooden balusters. All of the products I used in this renovation can also be used if your existing staircase has wooden balusters. The removal of the balusters will be different, but the installation using these products is the same.
New Metal Balusters
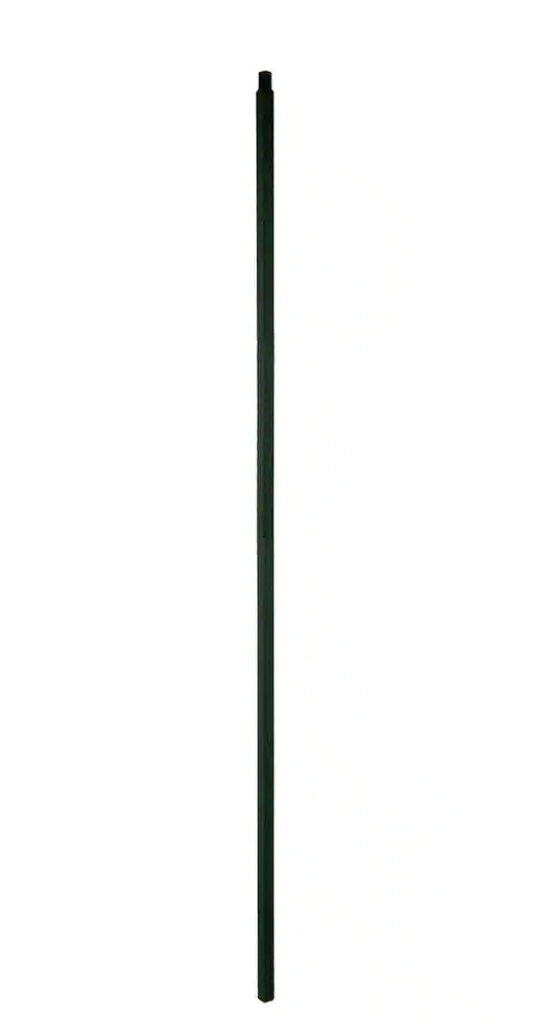
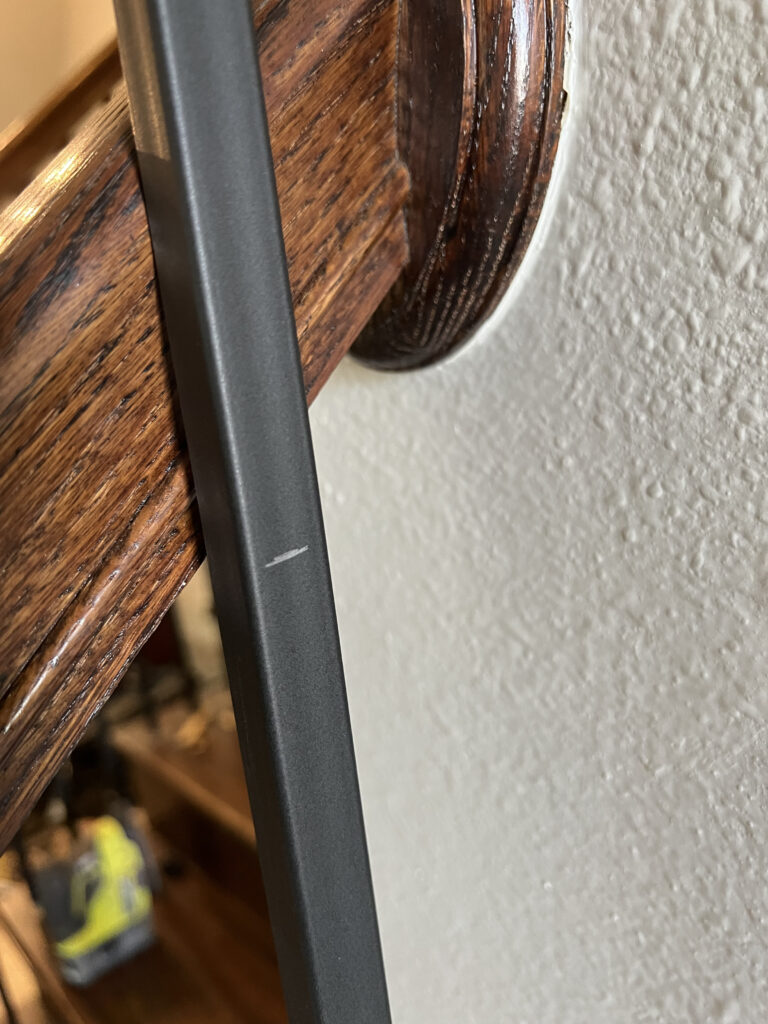
I found the new black balusters at Home Depot. My existing balusters were 1/2” in diameter, but I decided to go with 5/8” for the new baluster size because that is what they carried in stock and was easy for me to get. These are the balusters I purchased for my stairs.
Additional Stair Parts
For each baluster piece I purchased, I also purchased a black flat shoe and a black angled shoe. Depending on your existing staircase, you may need only angled shoes. I needed flat shoes for the base of each baluster and an angled shoe for the top where the baluster meets the handrail.
These are the flat shoes I purchased.
And, these are the angled shoes I purchased.
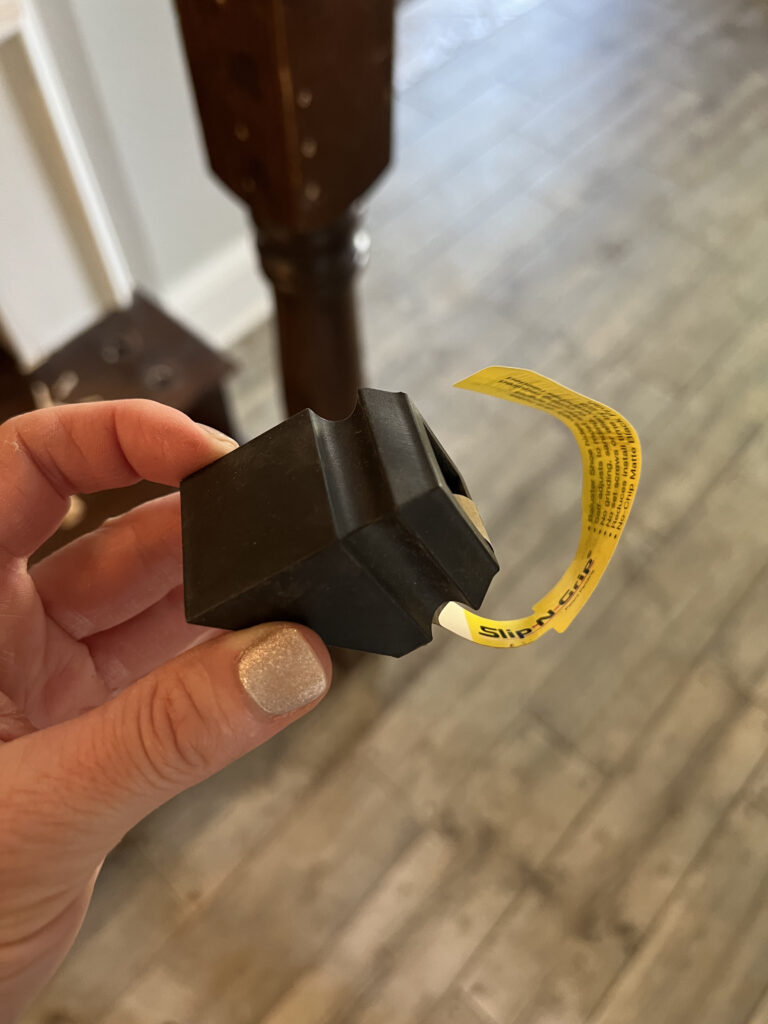
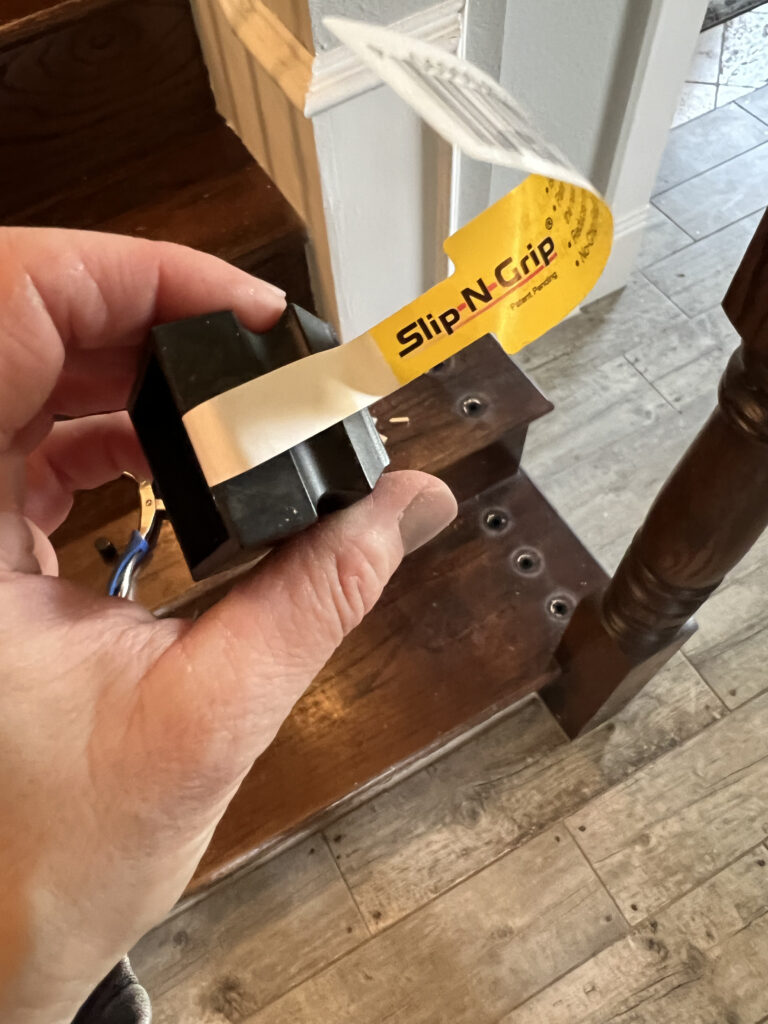
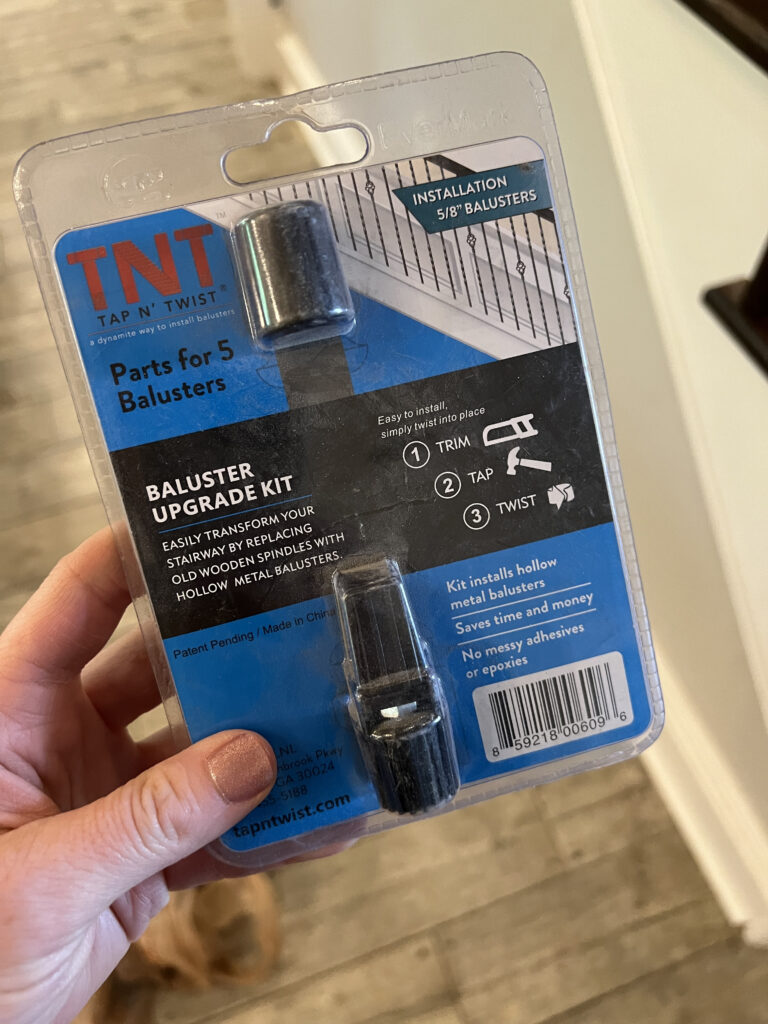
The next parts I purchased were connectors for each baluster. Initially, I had decided I would just use epoxy and shims to attach each baluster. I did that on the first two, and I wasn’t having the best luck. I’m certain this is because I’m not a professional😄. I remember seeing this kit at Home Depot so I went back and looked further into it and decided to give it a try. This made the project so much easier! It’s called Tap N’ Twist. One pack will do five baluster installations. So, you just want to make sure you purchase enough packs to cover each baluster on your staircase. It did add a little bit of money to the project, but I do not regret buying them.
Attaching the new balusters
For each baluster, I worked in the following order.
Clean out existing holes in handrail and tread
Once I removed the old baluster, I used a drill bit, the same size of the existing holes to clean out any epoxy that was left in the top of the hole. This made pushing the new balusters up into the handrail easier and required a lot less force.
Cut Metal Baluster to size
I started by holding the new baluster in place and marking where to cut using a pencil. Then, I used my jigsaw with a metal cutting blade to quickly cut through the baluster. Make sure to use a blade for cutting metal and it cuts very smoothly and quickly.
Attach the shoes
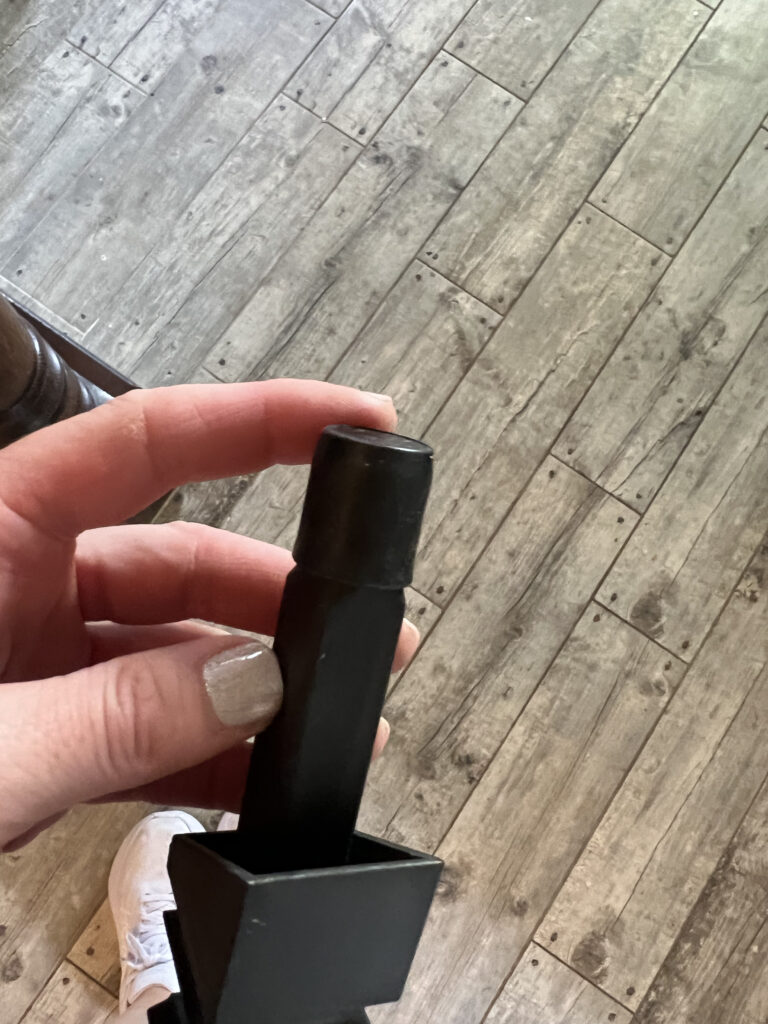
Next, attach your top and bottom shoes onto the baluster. For mine, the flat shoe would be at the bottom and the angled shoe was on the top facing upside down. The skinnier round part of the baluster is the top of the baluster.

Attach the Tap N’ Twist pieces
Next, attach the rubber cap on the top of the baluster and place the square insert with the screw into the opposite or bottom end of the baluster and tap it lightly in place with a mallet.
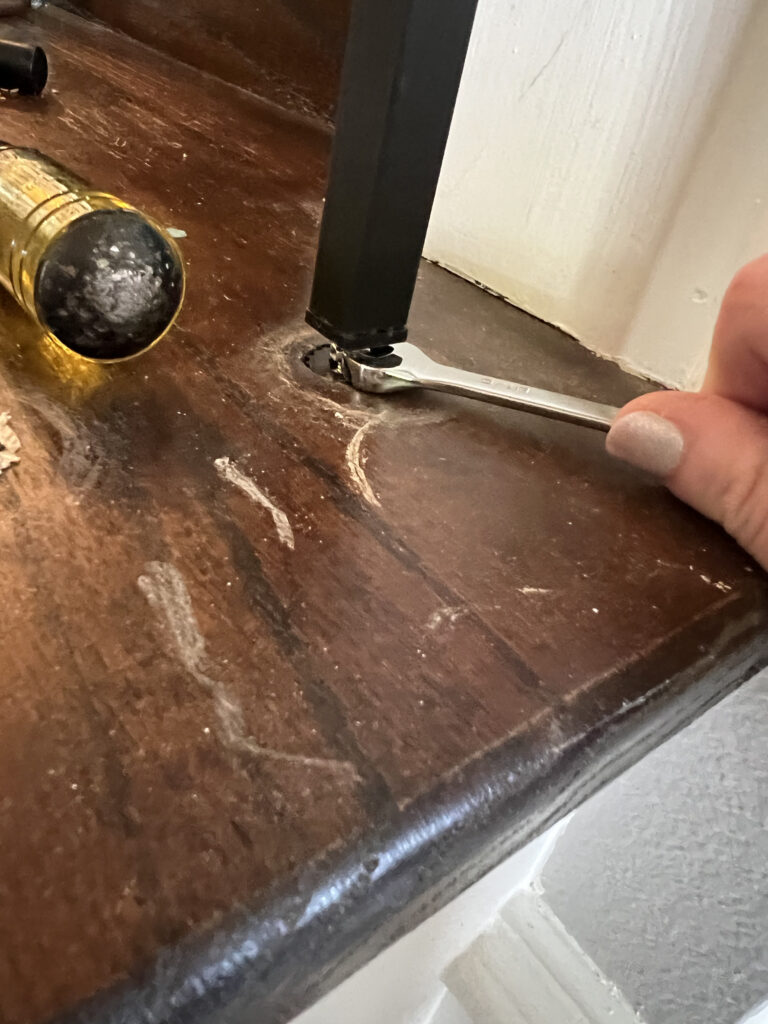
Tap in bottom insert into stair tread
Next, you will tap the round insert into the hole on the stair tread. For some of you, this hole might already be the perfect size and you just tap it into place until the insert is flush with the top of your tread. In my case, the existing hole was slightly larger than the insert so I used small wooden shims around the edge of the insert, and tapped it all into place, so that it would sit tightly.
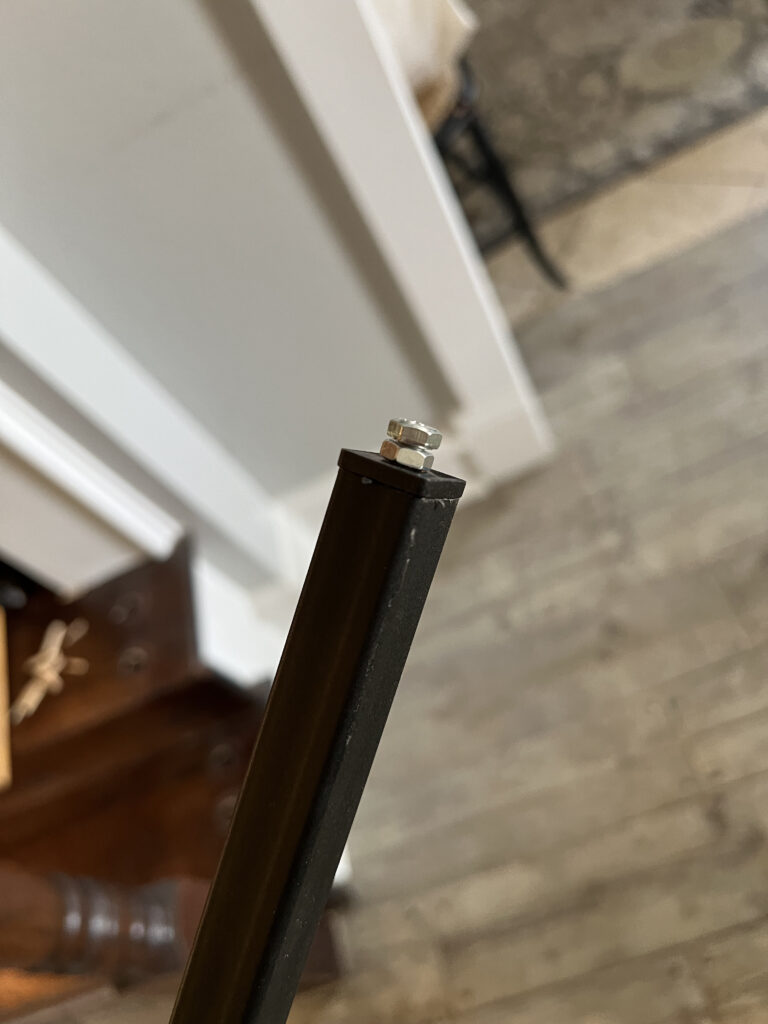
Attach new baluster
Now push the top of the metal baluster up into the hole in the handrail and straighten it on top of the insert on the stair tread. The screw on the bottom of the baluster will fit into the insert on the stair tread. Then, turn the baluster counterclockwise until it is tight. The directions mention not to over-tighten the balusters, so I just tightened mine until it required, a little bit of force. Then, use a small wrench to turn the nut on the screw clockwise until it tightens in place. This will keep the baluster in place and keep it from turning. I didn’t move my shoes at this point because I still needed to stain the stair treads and the handrail so I pushed those to the center of each baluster as I worked to get all of the balusters attached.
Building new newel posts around existing ones
The next part of this project was probably my favorite! My staircase had two existing newel posts.
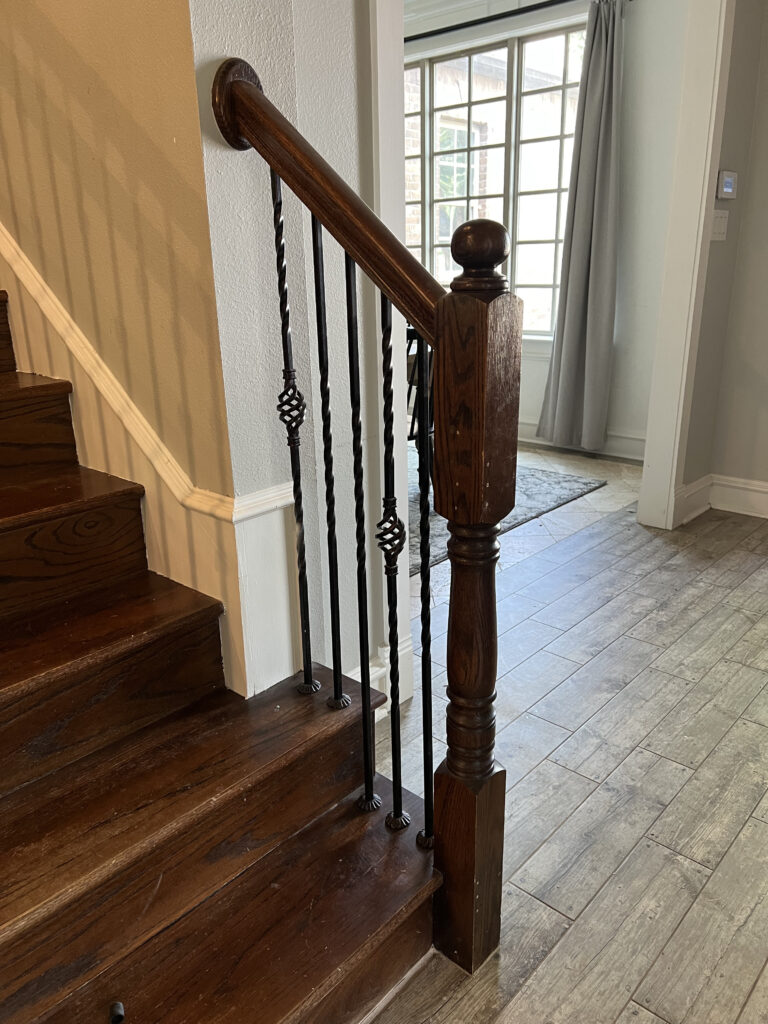
I really wanted to beef these up and give them a whole new look. I decided to wrap each one and trim them out to add dimension and change the look of the staircase.
I started by purchasing 24″ x 48″ MDF sheets from Home Depot in both 1/4″ and 1/2″ thickness. I ripped the 1/4″ board first and wrapped the base of each newel post.
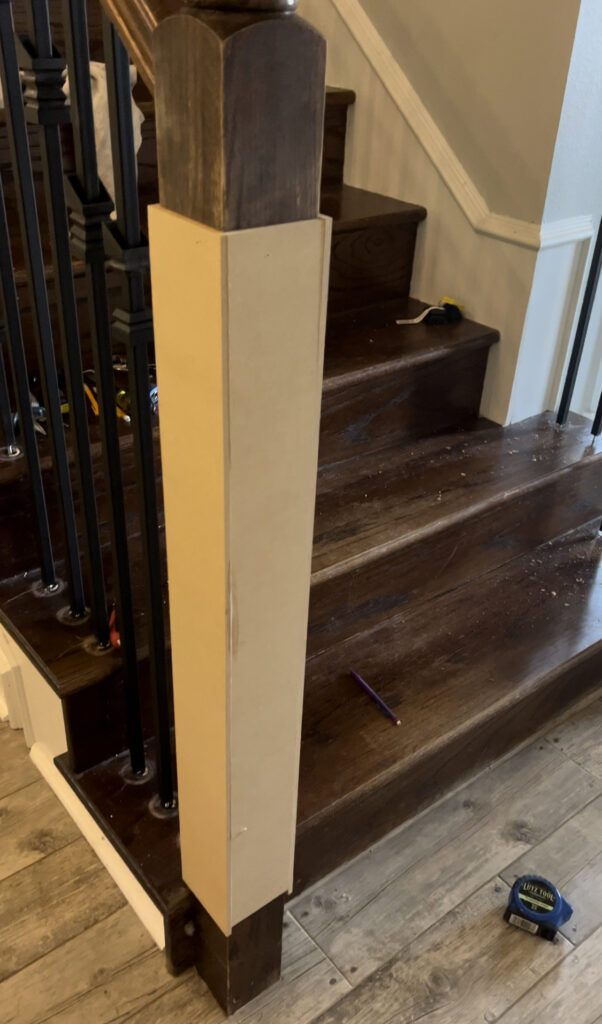
Then, I ripped the 1/2″ MDF down and started wrapping the base of each post going about 24″ tall on each.
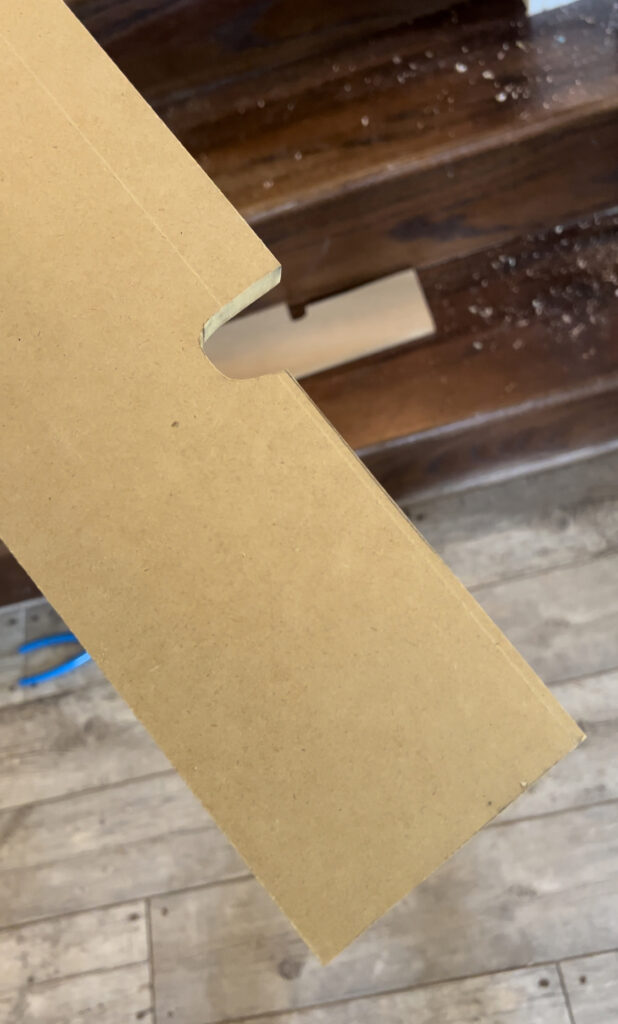
I used my jig saw to cut around the bottom tread and trim to make it fit on each side.
I added 1/2″ to the top to cover the round top posts as well. Then, I started adding different casing and trim until I was pleased with the overall look! I found these post caps at Lowe’s and I used those to top off each of my newel posts. I know HD also carried a couple of options for those, but these were my favorite of all of them.
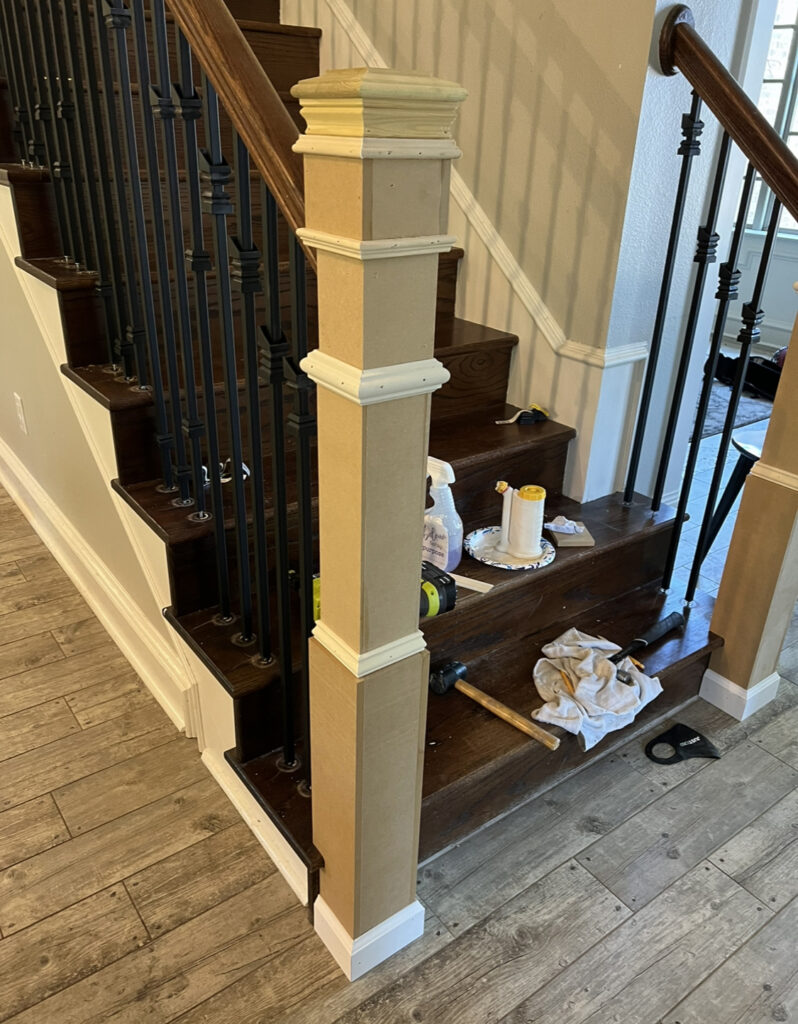
After I attached all the trim, I added wood putty to all of the holes and LOTS OF CAULK for the seams to cover my DIY craftsmanship 😏
Staining the stair treads
I chose to stain my steps every other step since my kids were still going to be going up and down the stairs while I finished this project. While it was a pain in the rear for the week it did work!😄
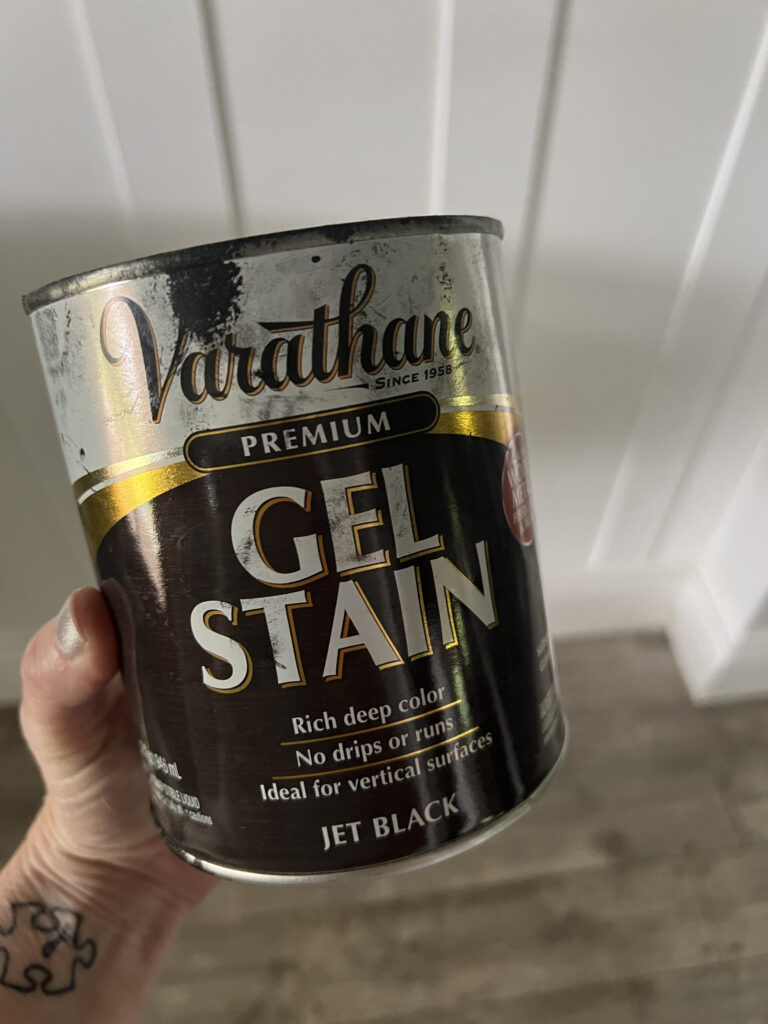
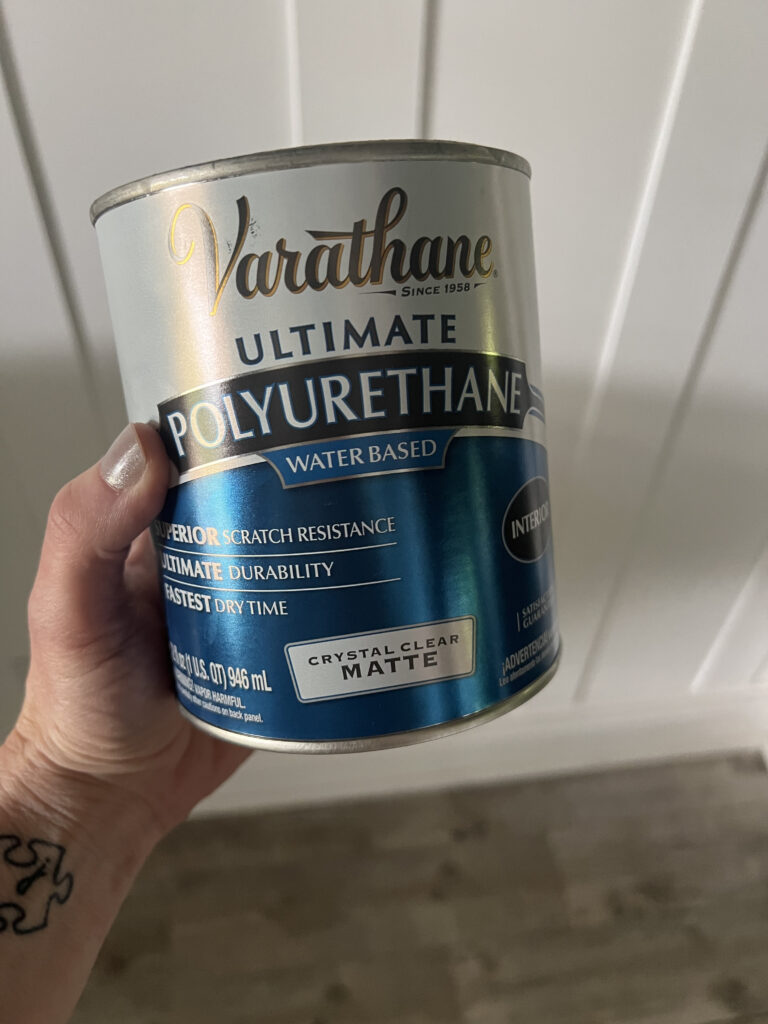
I considered a few different options for finishing out my stairs. I knew I wanted to brighten things up so I decided I would be painting my risers as well as the trim and the new newel posts I would be creating. I did want to keep my treads stained, but I didn’t have any desire to strip the original ones, so I decided to go darker. I chose to use a Varathane gel stain. I went with Jet Black so that I would remove as much of the red tone in my existing treads as possible.
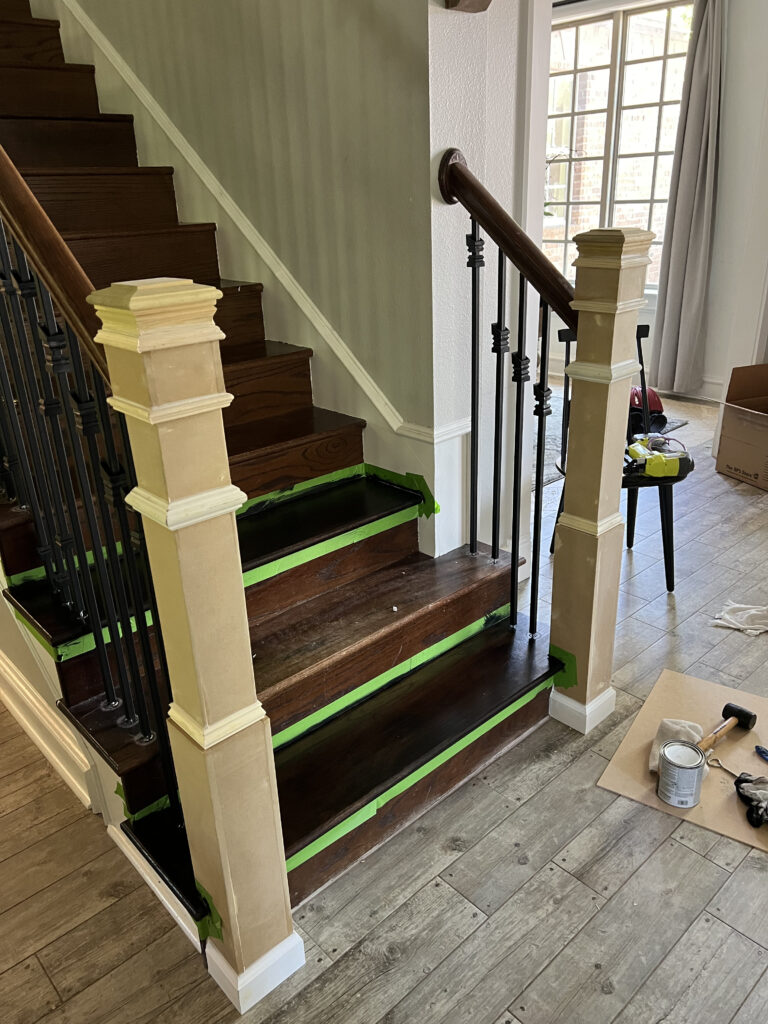
I cleaned off each tread and taped them off individually using Frog Tape. I tried to get gel stain only on the treads and keep it from getting anywhere else to save time moving forward. The taping off did add a lot of time to this project, but I do feel like it was the best decision. I used a wiping cloth to apply the gel stain to each tread. As the directions said, I let the gel stain sit for about three minutes and then used a separate rag to remove the excess stain. The removing of the excess stain was a really important part on the dry time. I found that on my first tread, I left too much of the existing stain behind and it took much longer to dry. When I was sure to remove all excess stain, each tread was dry and just a couple of hours.
Add a finish
I used an interior matte finish poly also by Varathane on top of the stain. I love this poly and it’s finish. I’ve used it on several other projects and I knew it would be great for the steps. I applied two coats to each step, allowing the first one to dry before I added the second.
Painting the risers and newel posts
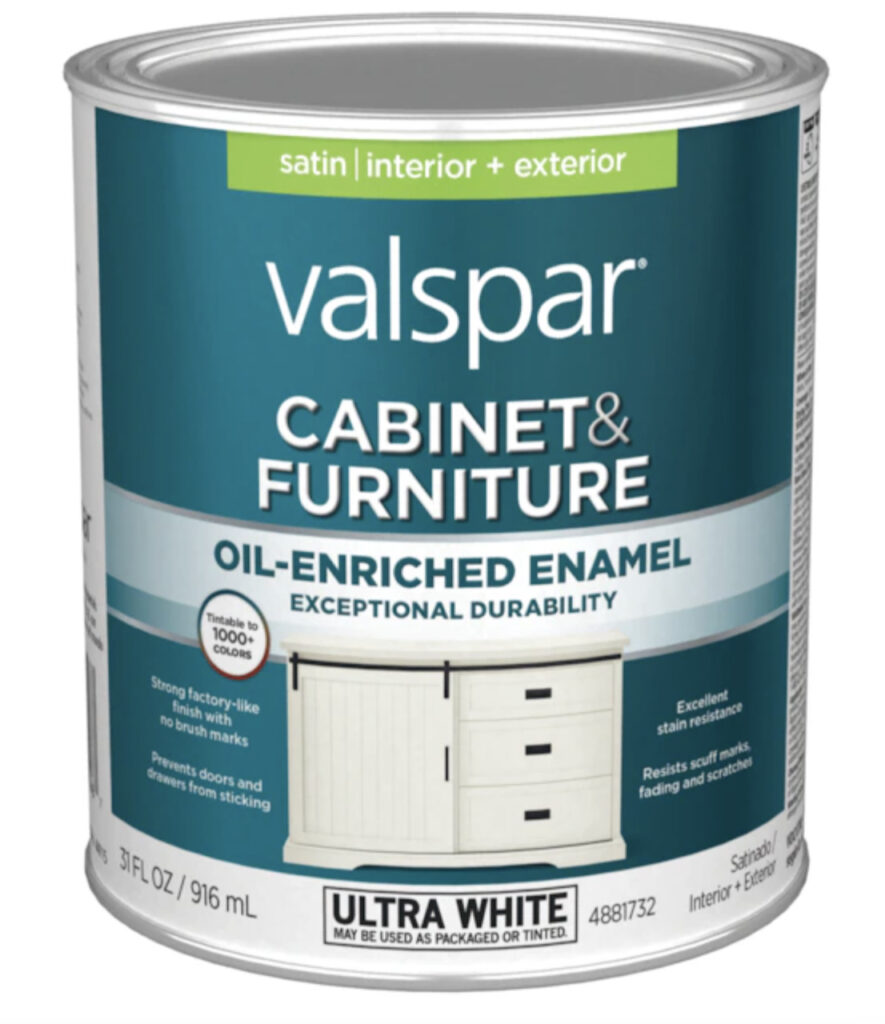
I chose to use my VERY FAVORITE paint for the risers, trim and new post. I found this paint a few years ago at Lowe’s from a nice man at the paint counter and I fell in love with it. I have it tinted to Sherwin-Williams Pure White color (SW 7005). It it oil-infused but water based. This means no priming (heck yes) and also it is able to go over existing oil-based or latex paints. It holds up well to wear and tear I have learned from using it on other projects, and it dries quickly.
Before I painted, I taped off each stained tread with paper and Frog Tape to protect the stain, and then I applied the paint. The risers took 3 coats, but I was going from very dark to white. It does dry quickly though! I had all the painting done in about 4 hours!

The Finish
Once all the paint was dry, I peeled off all of the tape and paper. I pushed the shoes to the top and bottom of each newel post and I was done! I LOVE how it turned out!


I love how u immediately got right into the project and not BS for 15+ minutes. BTW, nice work!!!
The fact that the paint is oil-infused but water-based is a great advantage. This means that you don’t need to prime the surfaces before applying it, which can save time and effort. Additionally, the paint’s ability to go over existing oil-based or latex paints provides flexibility and convenience in your painting process.
How is the left side wall done? Is it just drywall and paint then the trim piece going up or is that a wood piece on the wall? We are having trouble figuring out how to do ours. Thank you
Love how this turned out! How did you cover the newel post where the handrail is attached?
Hello Christina,
Did you ever get a reply your question? I want to replace my post, but I’m not sure how to cover the section where the handrail is as well.
No, I am still waiting for an answer.
She stopped the mdf under that section and started it back above that section. See picture before she put the top cap on
I see the photo that you’re referring to – one where she wraps the top round cap of the original newel post – in that photo, the portion of the existing newel post where the railing attaches has not been covered with mdf. HOWEVER, if you scroll down to through the remaining photos, that portion is covered. At some point, she wrapped it with mdf – but did not include instructions re: how she handled the back side of the existing newel post where the railing attaches.
I have seen another tutorial of wrapping an existing newel post with mdf + adding trim and a new cap – in that tutorial, the person did not wrap the piece of the post where the railing attached to the existing newel post. I believe that the other tutorial is older – and that it may have been an inspiration for this one.