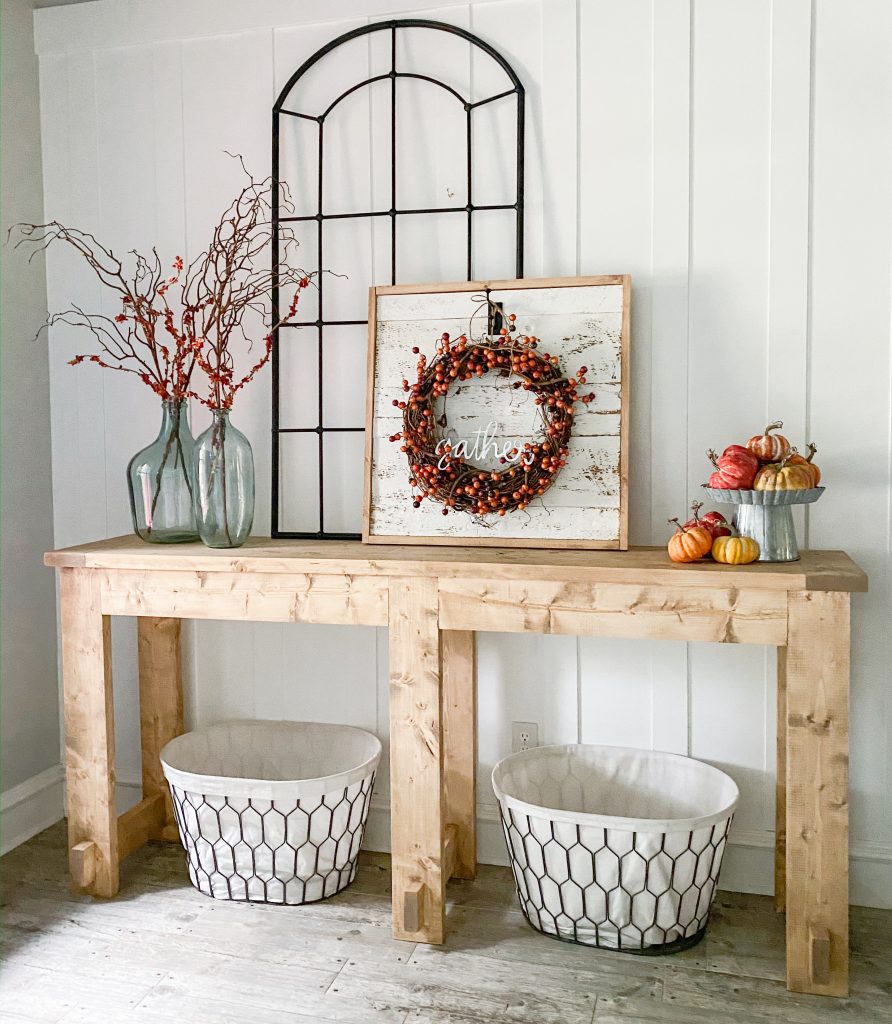
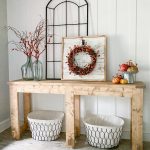
Hey friends! I LOVE FALL. Nothing puts me more in the mood to decorate, and I have been itching to build a new table for my entryway. I have had a bench there for sometime and loved it, but I really wanted something I could decorate a bit more. I designed the cutest 8 board console table! This uses eight 2×6 boards which will save money and time! Look how cute it turned out!
You can check out the video of this build below!
You can get the free printable plans for this table at this bottom of this post!
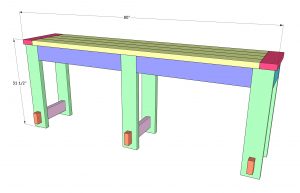
Rip all boards to size first. I like to make my cross cuts first, and then
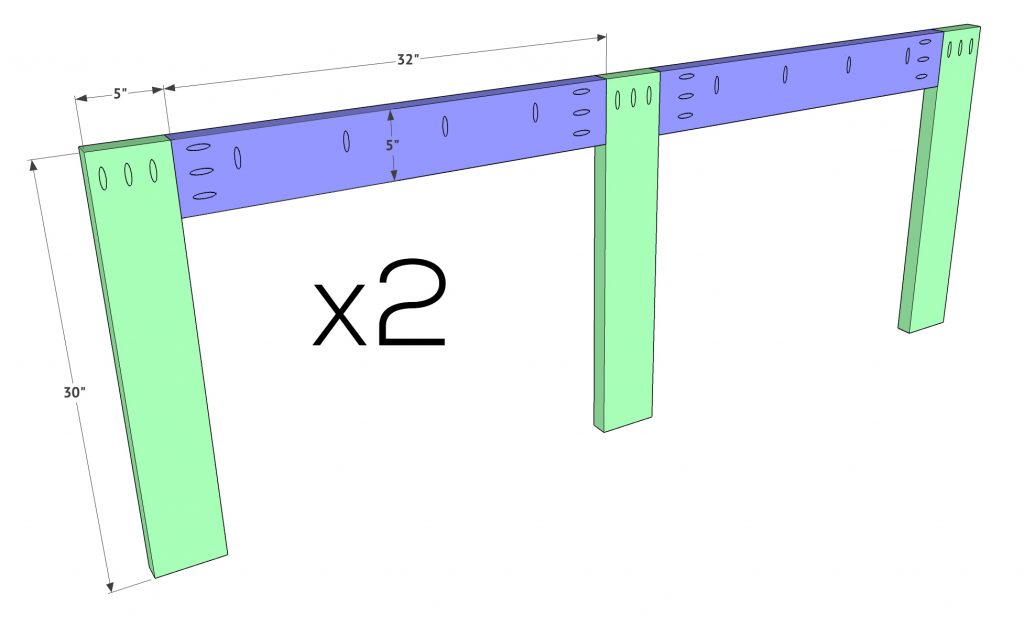
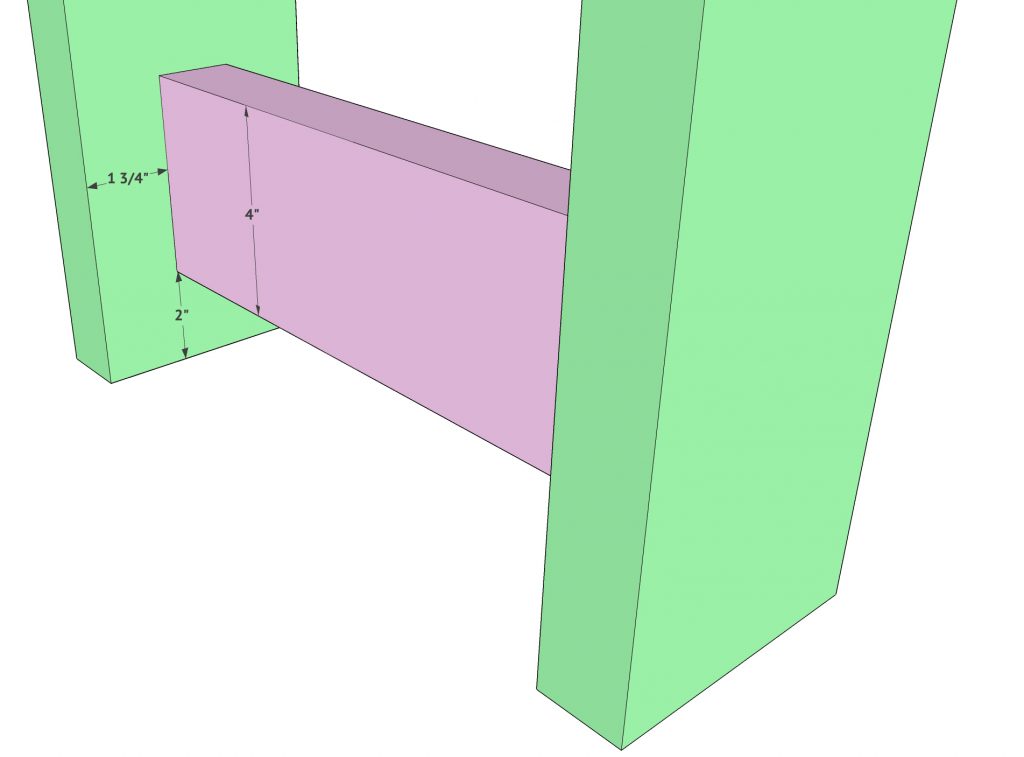
rip each board to either 4” or 5” to make it easier to push through the table saw. Each side will be an “E” shape. Build 2 of these that are identical. The boards on this part are ripped to 5” wide each. Add 1.5” pocket holes to each board and attach the aprons to each leg using wood glue and 2.5” pocket hole screws. The top of the legs will be flush with the top of the aprons.
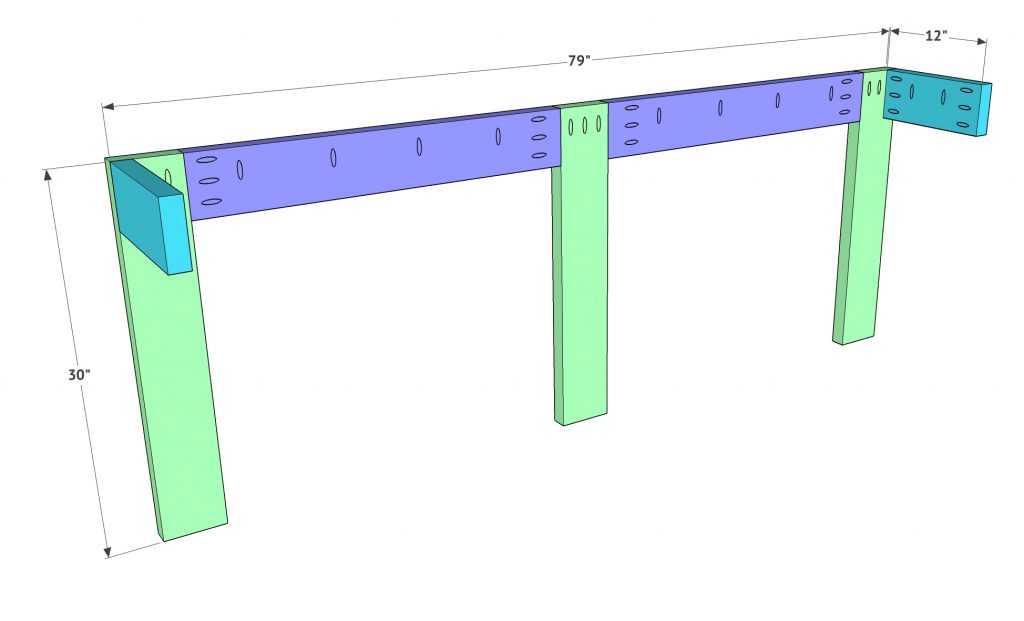
Attach the smaller aprons to one of your “E” shapes. These aprons will be flush with the top and side of the outside legs. Attach the apron using wood glue and 2.5” pocket hole screws.
Attach the second “E” shape next. You can either attach this with 2.5” pocket hole screws and wood glue, or wood screws. The width here is narrow, so I found it easier to use wood screws through the back legs and into the small aprons. I knew they would be on the back of the table and nobody would see them. I also placed the small leg supports in place to help hold things up on this part.
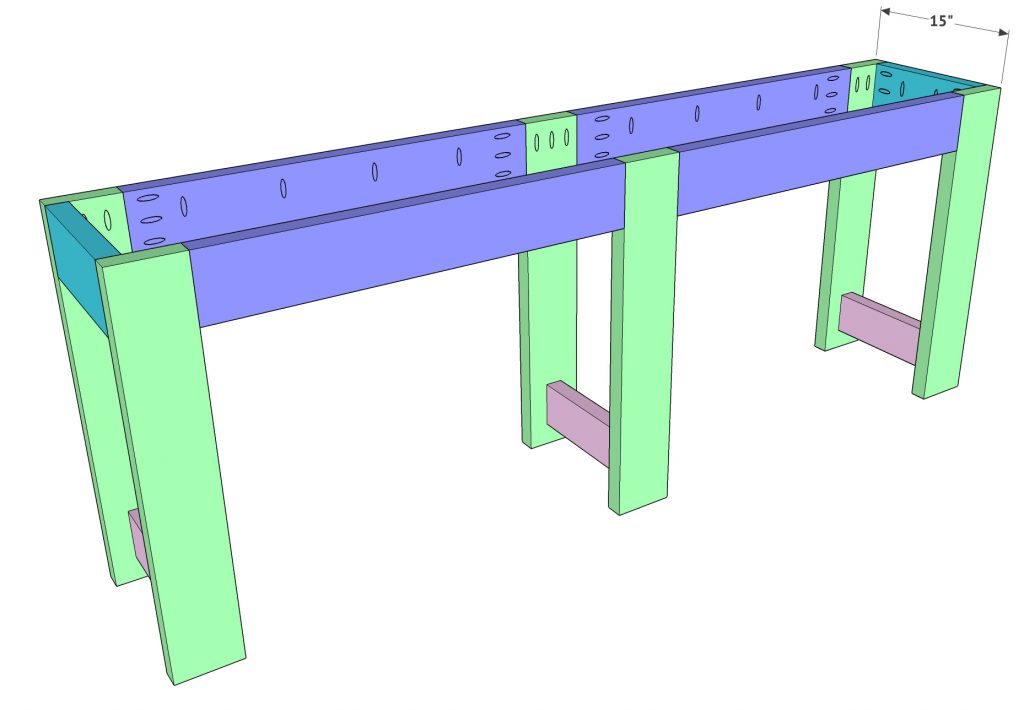
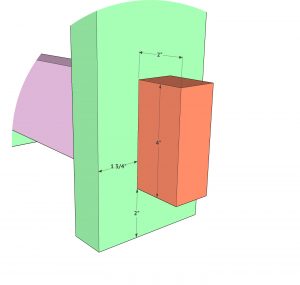
The leg supports are ripped at 4” wide each and they are 12” long. I lined them up in place and marked where I wanted them with a pencil. Attach them using wood glue and 2.5” wood screws through the legs and into the support boards. Don’t worry about the screws showing on this part because they will be covered in a later step.
Now attach the small decorative pieces. These are so cute and will also cover up those screws we used on the last step. Attach these pieces using wood glue and 2” brad or finish nails. There will be 6 total, one on the bottom of each leg.

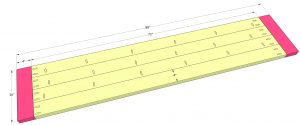
The top planks are ripped to 4” each. Add 1.5” pocket holes where shown. Attach everything using 2.5” pocket hole screws.

Attach the table top to the base using wood glue and 2.5” pocket hole screws through the base and into the top. You will have a 1/2” overhang on both the front and back and sides on each corner.


I stained mine using a combination of two stains. Just mix them together, equal parts of both and apply normally! I love mixing stains! It’s a fun way to create a custom look.

I love it all set up and ready for Thanksgiving! I will be sharing the wreath display I built soon so stay tuned! Here she is all finished up!
Farmhouse Console Table
Instructions
- Rip all boards to size first. I like to make my cross cuts first, and thenrip each board to either 4” or 5” to make it easier to push through the table saw. Each side will be an “E” shape. Build 2 of these that are identical. The boards on this part are ripped to 5” wide each. Add 1.5” pocket holes to each board and attach the aprons to each leg using wood glue and 2.5” pocket hole screws. The top of the legs will be flush with the top of the aprons.

- Attach the smaller aprons to one of your “E” shapes. These aprons will be flush with the top and side of the outside legs. Attach the apron using wood glue and 2.5” pocket hole screws.

- Attach the second “E” shape next. You can either attach this with 2.5” pocket hole screws and wood glue, or wood screws. The width here is narrow, so I found it easier to use wood screws through the back legs and into the small aprons. I knew they would be on the back of the table and nobody would see them. I also placed the small leg supports in place to help hold things up on this part.

- The leg supports are ripped at 4” wide each and they are 12” long. I lined them up in place and marked where I wanted them with a pencil. Attach them using wood glue and 2.5” wood screws through the legs and into the support boards. Don’t worry about the screws showing on this part because they will be covered in a later step.

- Now attach the small decorative pieces. These are so cute and will also cover up those screws we used on the last step. Attach these pieces using wood glue and 2” brad or finish nails. There will be 6 total, one on the bottom of each leg.

- The top planks are ripped to 4” each. Add 1.5” pocket holes where shown. Attach everything using 2.5” pocket hole screws.

- Attach the table top to the base using wood glue and 2.5” pocket hole screws through the base and into the top. You will have a 1/2” overhang on both the front and back and sides on each corner.

- This is the spacing of the table top.


This is a beautifully crafted DIY project that showcases the timeless appeal of farmhouse-style furniture. The console table has a clean, versatile design that can complement a variety of home interiors, and the detailed tutorial makes it approachable for both beginners and experienced woodworking enthusiasts.
Building furniture that lasts starts with thoughtful design and high-quality materials. For anyone planning similar DIY furniture projects, https://www.plywoodbazar.com is a useful resource to explore a wide range of plywood, boards, laminates, and other interior materials for achieving durable and professional-looking results.
Thank you for sharing such a well-explained and inspiring tutorial. It’s a great resource for anyone passionate about woodworking and handcrafted furniture.