Hey there!! I am so excited to share this project with you all today! I was inspired when I found something similar in the Pottery Barn magazine last week so I got busy and created my own version!
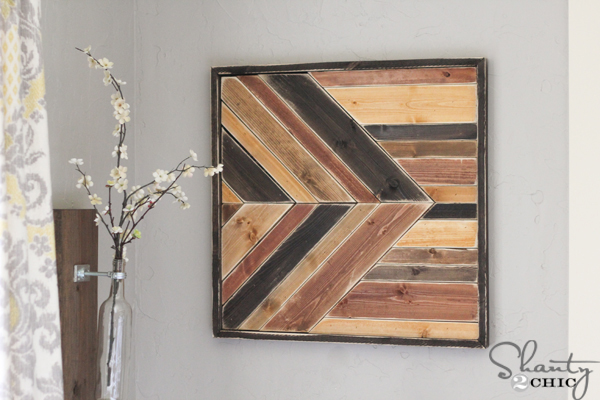 It only cost me about $15 and an afternoon of work! Here’s how!
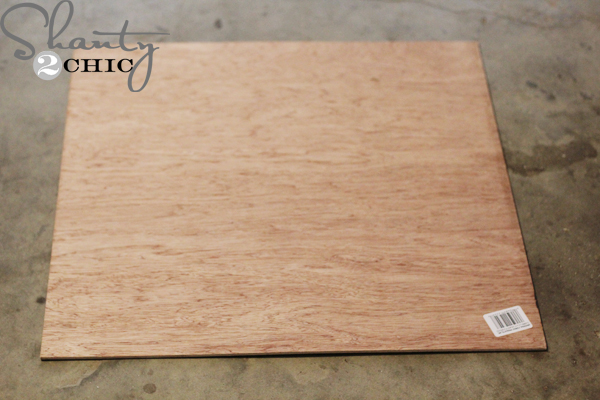 I purchased a 2’x2′ sheet of 1/4″ plywood from Lowe’s for about $4! If you have scrap plywood this is a great way to use it!
I also purchased:
3 – 1×2’s @ 8ft.
1 – 1×3 @ 6ft.
1 – 1×4 @ 6 ft.
I used pine but you could save even more money using furring strips. Just make sure they are very straight or this project could make your head hurt 😉 ***Please measure as you go and make adjustments to cuts if needed.
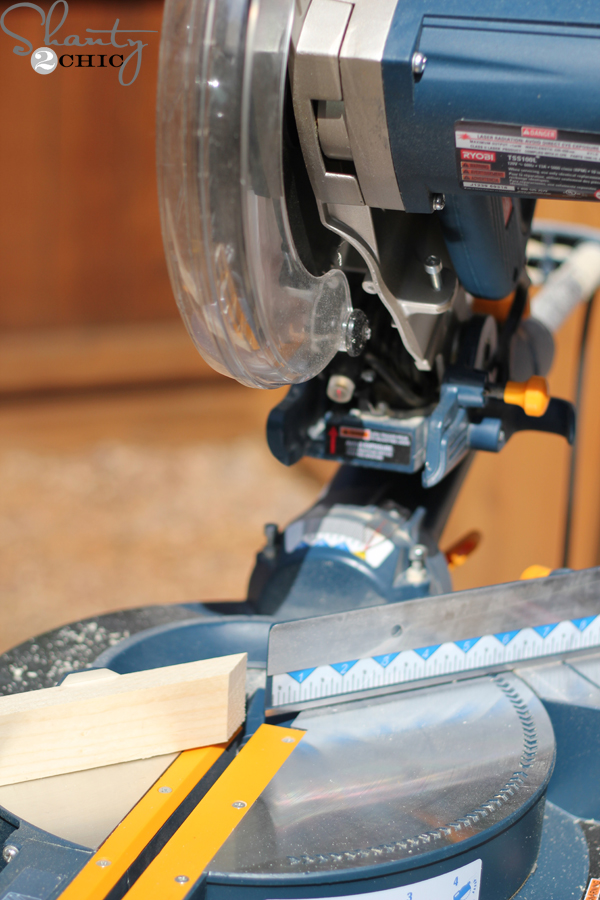
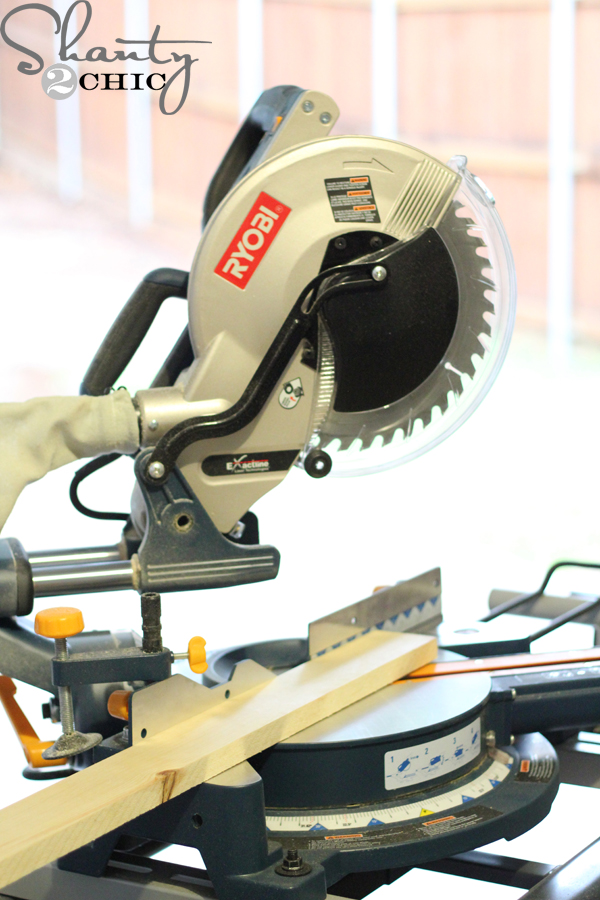 Now for the cutting! I used my Miter Saw to make all of my cuts but if you aren’t ready to make the purchase, the hand saw and miter box, below, will get the job done!
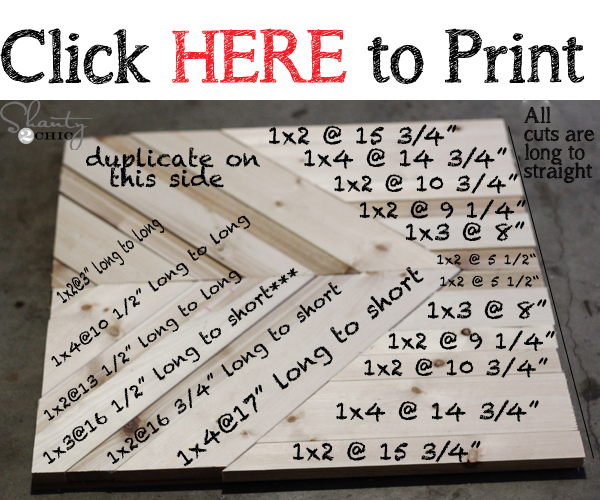 Here are the cuts I made! (You will see long to long, long to short, long to straight. This is just the way to measure. Long to long means longest point on one end to longest on the other end. Long to short means longest point at one end to shortest point on the other end.)
Cut list:
Triangle shape:
2 – 1×4 @ 17″ long to short
2 – 1×2 @ 16 3/4″ long to short
2 – 1×3 @ 16 1/2″ long to short ***after the first cut, you will make a 45 degree angle cut in the opposite direction about 1.5″ down the board. This will make the corners of the square.
2 – 1×2 @ 13 1/2″ long to long
2 – 1×4 @ 10 1/2″ long to long
2 – 1×2 @ 3″ long to long
Horizontal shape:
2 – 1×2 @ 5 1/2″ long to straight
2 – 1×3 @ 8″ long to straight
2 – 1×2 @ 9 1/4″ long to straight
2 – 1×2 @ 10 3/4″ long to straight
2 – 1×4 @ 14 3/4″ long to straight
2 – 1×2 @ 15 3/4″ long to straight
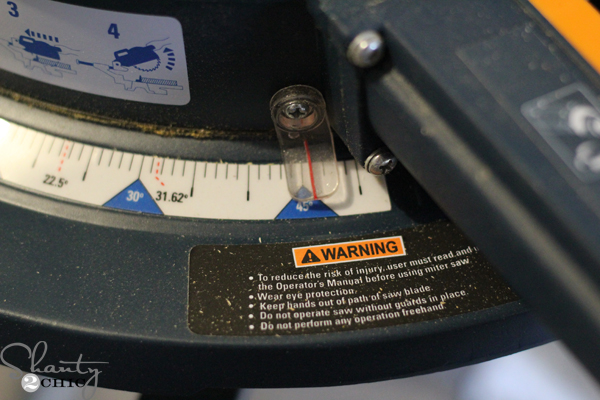
When you make these miter cuts, it’s a simple 45 degree cut. Just set the miter saw to 45 and cut!
 For the straight cuts, just swing it back to 0 degrees. For this saw, you just twist the handle at the end of the arm to loosen then slide the arm to the degree cut you want. Just twist the other way to lock it in place.
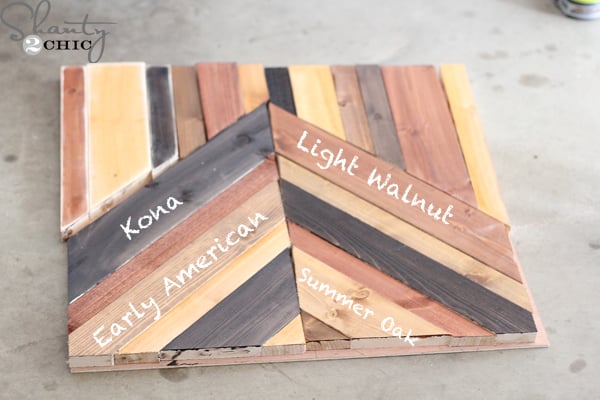 I chose 4 of my favorite stains to stain the boards. There was no rhyme to my reason 😉 I did stain one board at a time and put it back in its spot to dry so that I wouldn’t have to put the puzzle back together. The stains that I used are Kona, Early American, Light Walnut and Summer Oak.
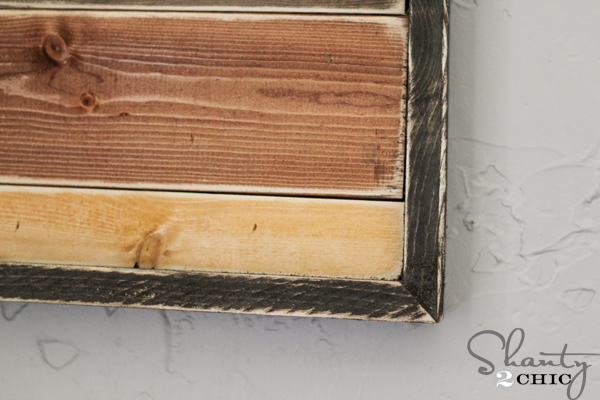
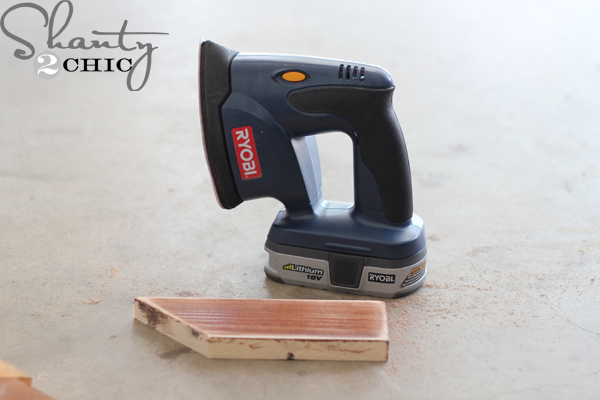 Once the stain dried, I used my Corner Cat to distress each piece. Again, I just did one at a time and put it back in it’s spot.
 Half-way done with the distressing 🙂 I LOVE this added touch. It really makes the wood look old and worn!
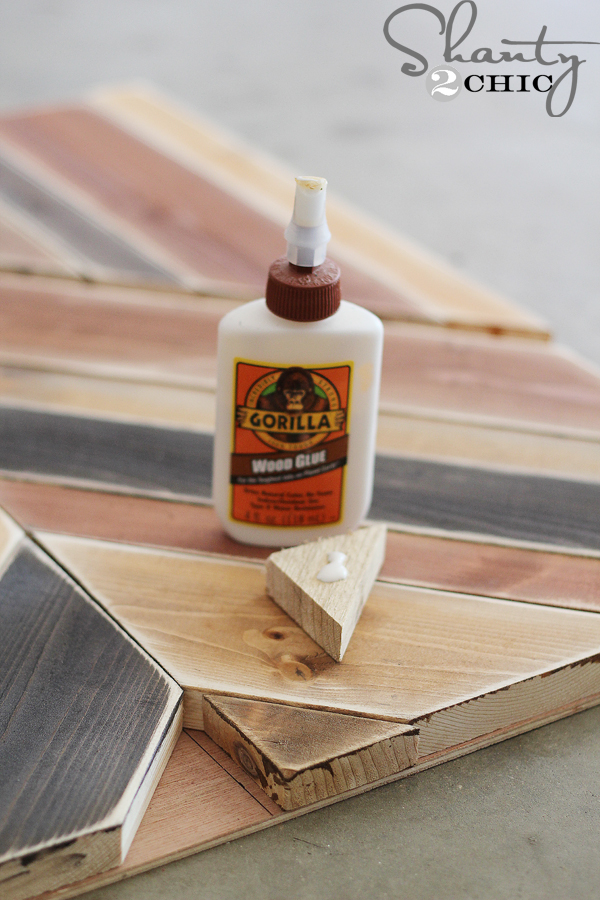 Next, I used my Gorilla Glue Wood Glue to attach the pieces to the 2×2 plywood
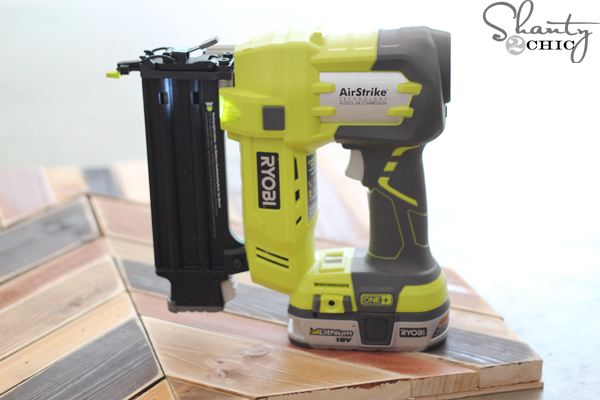
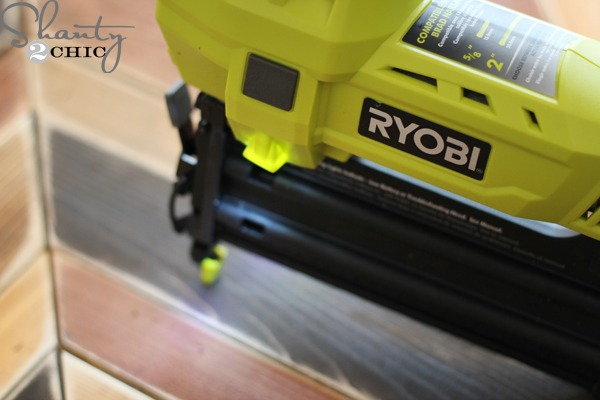 and I followed up with my brad nailer. I used 5/8″ brad nails for this.
 Once you are done nailing and glueing the pieces down, wait for the glue to dry and then you can start the trim!
 For the trim, I cut 4 – 1×2 @ 25 3/4″ long point to long point. Turn the board up with the widest part against the fence of the saw. Just make a 45 degree cut on each end. *Measure your own piece to determine the length of trim.
 I stained the trim pieces with Kona and glued them to the pallet with Gorilla Glue Super Glue Gel and followed with my brad nailer with 1 1/4″ brad nails. I used Super Glue Gel because I stained the trim pieces all over. Wood glue won’t hold once the wood is treated so Super Glue Gel was the perfect solution!
 And again, I ran my Corner Cat all over the frame to give it that distressed look!
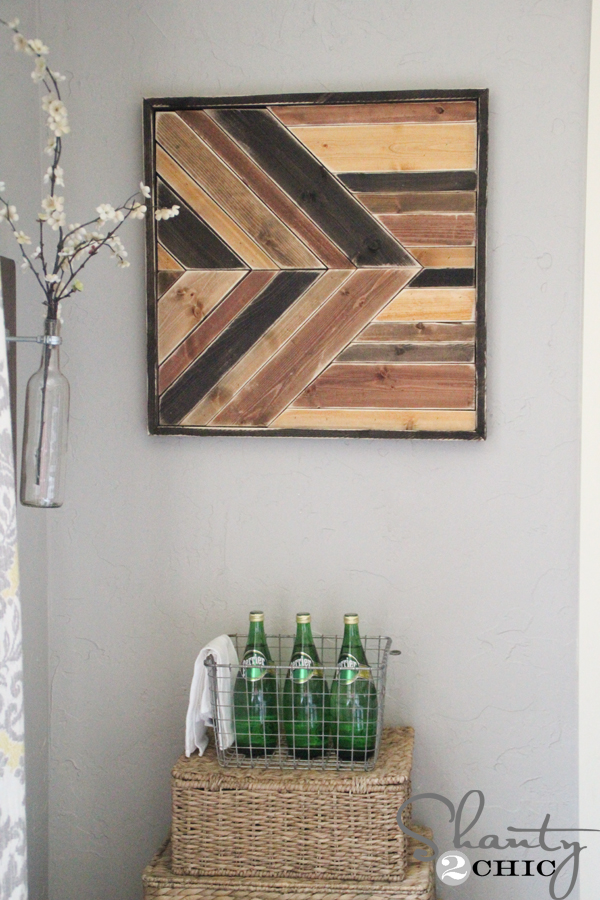


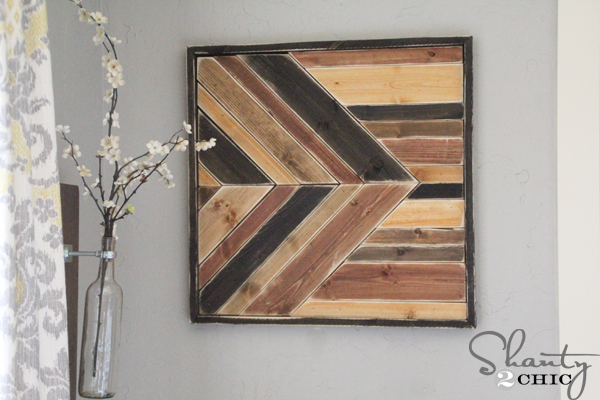 I’m kind of in LOVE with this cutie!
If you love this Pallet Art, I’d love your pins!
Thanks so much for stopping by!
~Ashley


It seems to me that in order for such a cool pallet wall to look good, you need a lot of lighting. The room should have something like Open Ceilings or very large windows, in general there should be a lot of light
can you explain how you cam to the pattern and how you knew what size cuts to make so we can go from your tutorial and create new and exciting shapes
It appears that she knew she wanted a dividing line straight across the center, so she marked a center line and then just took differing thicknesses and lengths to make her pattern, changing direction once per side. There really are not any hard rules to go by, just make the cuts that create a visually appealing design to you.
and who said you cannot make art out of palletts ?
I love the warmth of your wall art! My husband started saving pallets for me and I can’t wait to make something out of them…I just need to figure out the best/easiest way to disassemble the pallets first 🙂
Mary K
Wow that is a fantastic art piece.
Lisa
Creative Raisins
Thanks for sharing! Will make this one for Christmas gifts! Here is one I did for my bathroom to hold make up – cheap frame on sale, piece of tin already cut from Home Depot and Magnetic holders hot glued to back of products – hang and use! I am thinking now your wood frame would be a great upgrade with some fabric attached to pretty it up! Thanks for your shares. (sorry it’s sideways – )
Great job and idea! My teenager needs one of these!!!!
way to go girl. look awesome. I love multi tone on tone
This is so beautiful!! I really need that miter saw for my corner cuts!
Thank you Jamie:)
Love love this piece! I don’t think I’ll have a hard time convincing my husband that we need a Ryobi saw either. Win win! -Abbey
Love it Abbey;). Thank you!!!
I love this!
Thank you Debi!!
How did you hang it on the wall?
Great idea I love how to do the different colors to blend it in! I will have to share this with my followers as I know some of them will just fall in love with this for their home or office.
Thank you Melissa! I love the idea of it for an office and I have thought about recreating it in a larger size for one of my boys headboards!
Oh ya a headboard! Can’t wait to see that photo of when you get it done. I was thinking of doing one and using it as a display for my products. I have been working that idea out for part of the day and work my colors into it.