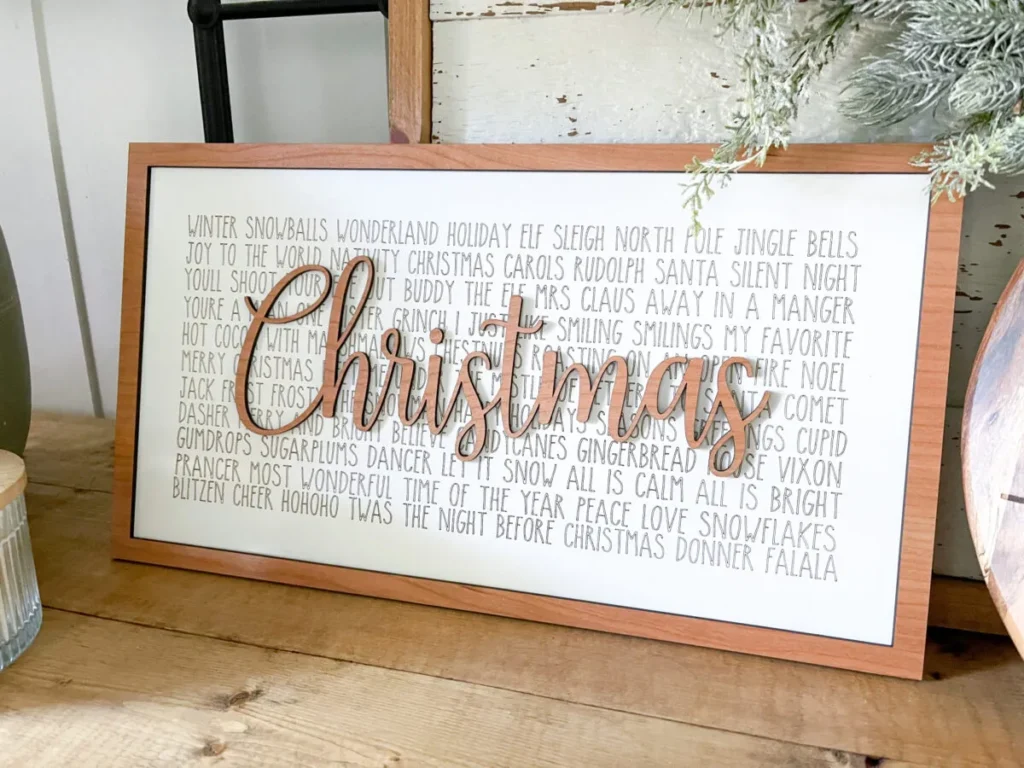
Hey friends! Ashley and I LOVE our Glowforge Machines! These 3D laser printers are AMAZING! We are still learning the endless capabilities of our 3D printers, but I wanted to show you guys a recent project I created with mine! With Fall here, I love getting ready for the holidays! I created a super cute DIY wood sign for my entryway in under an hour using my Glowforge Pro! Check out this super cute sign I made with my Glowforge 3D Laser Printer below and then check out THIS LINK to get up to $500 off your own Glowforge printer!
Table of Contents
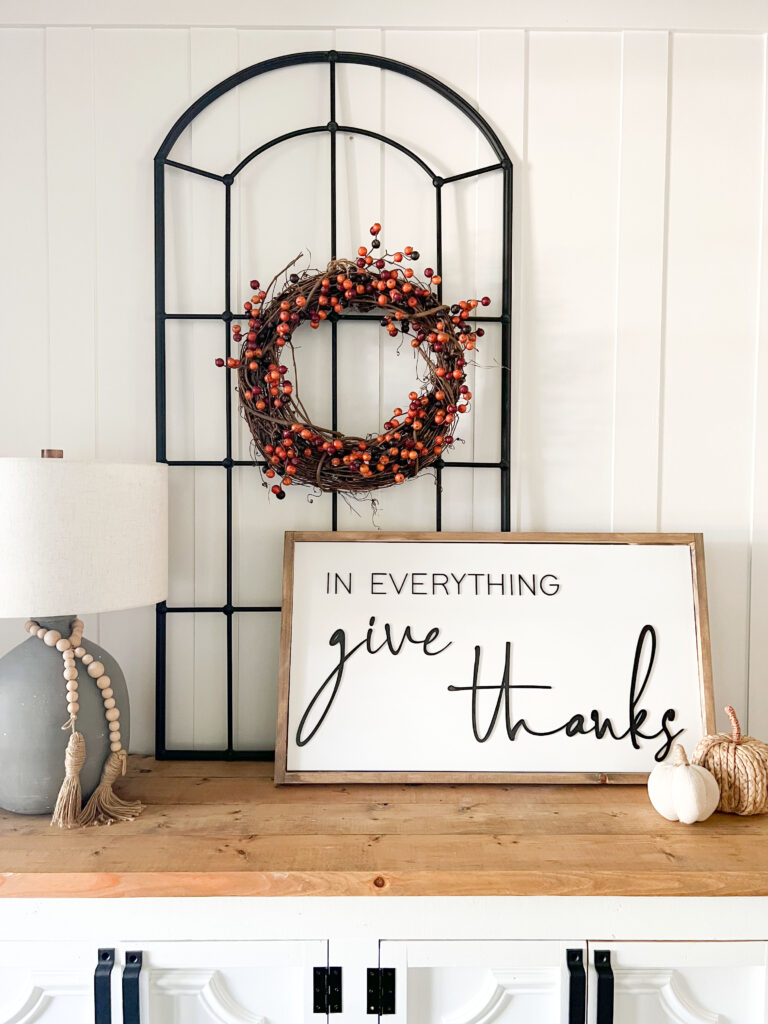
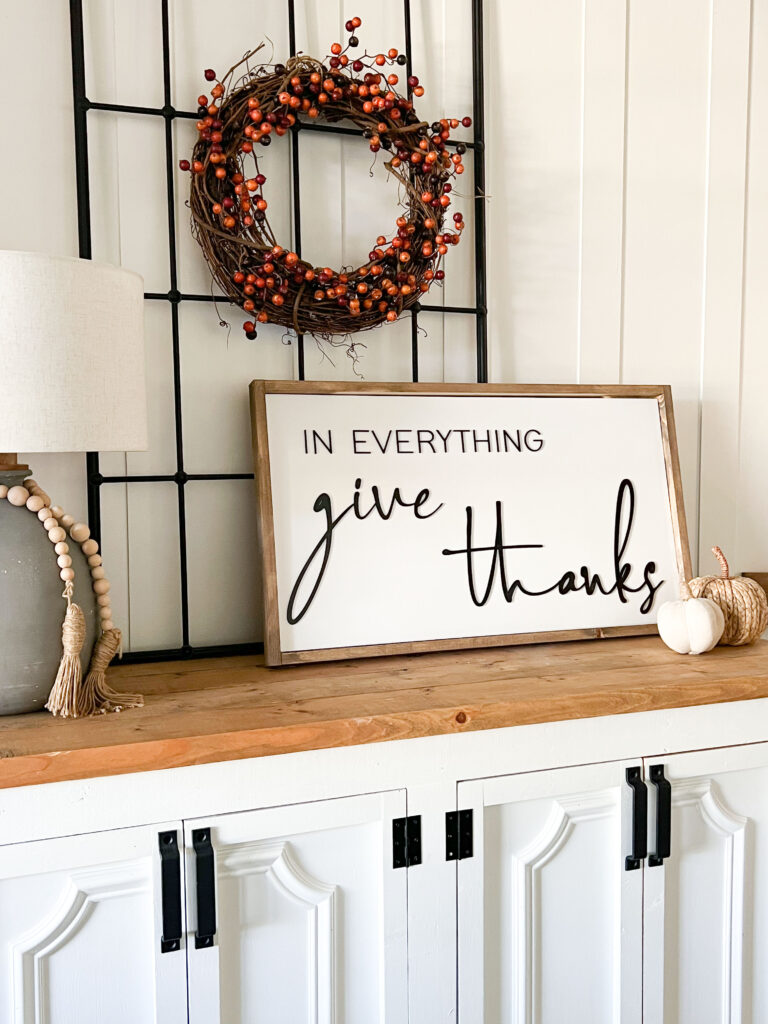
DIY Thanksgiving Sign
2022 has been a very challenging and difficult year for my family. We have children with health issues, and we have also come across new hurdles with my son Jed who has autism. Through it all though, I have learned to give thanks in all circumstances. I wanted to create a sign that had meaning to our family and this last year. I LOVE how it turned out! You can also check out my reel of how I created this sign below!
What Glowforge model do you own?
We get this question A LOT. Both Ashley and I own the Glowforge Pro model. While it is the most expensive model, we believe it’s added features add up! The Passthrough option is by far our favorite feature. This allows us to cut materials at an endless length… this is great for larger projects and furniture additions as well!
I have owned my Glowforge Machine for a little over a year now, and I have to say I love it even more now than when I first got it. The more I use it the more I learn about its capabilities and project options. While it is a big financial investment, I have seen so many people start small businesses with their Glowforge machines, and others take their existing small businesses to the next level. But, let me get to the fun stuff! Let me show you how I made this sign!
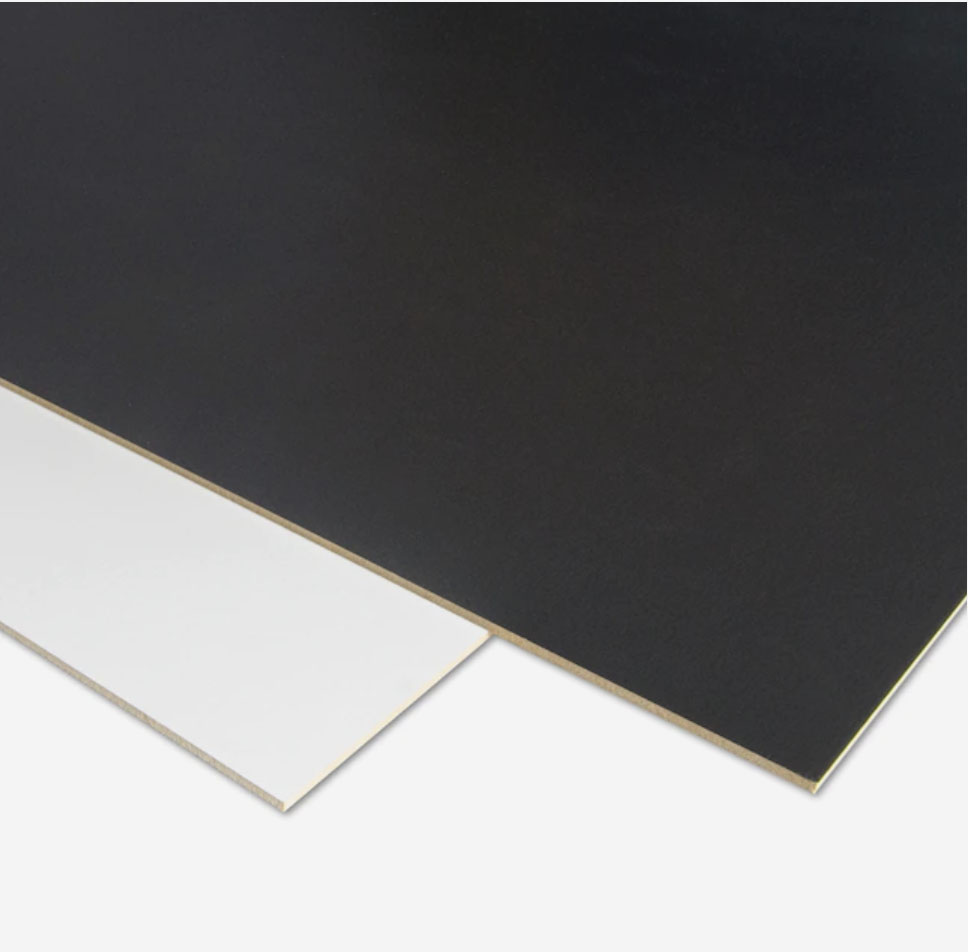
Wood for the Sign Backing
One of our favorite materials to cut and engrave with our Glowforge machines is whiteboard/blackboard. These are from Lowe’s, and are super inexpensive. The whiteboard creates a perfect sign backing and the blackboard side creates great material for lettering on signs and of course other designs as well. It can be painted, but I love using it for projects like this where the finish is already done for me! The whiteboard side looks like white paint… Easy! My first step was deciding how big I wanted my whiteboard blackboard to be and I used my tablesaw to cut it to size. You can also have the hardware store cut yours for you.
How to make the designs for the Glowforge?
Another feature we love about our Glowforge printers are the files. Glowforge printers use a digital file called an SVG file, and with a simple search you can find thousands of files to help you create your vision. Many of these are free, and Etsy is an awesome source for Glowforge tested files that are very inexpensive. You can also create your own SVG files using certain software like Inkscape, Adobe Illustrator and Adobe Photoshop. Ash and I both have experience with Photoshop Elements, so that is where we create our files. We then use a free file transfer website to switch them to SVG laser files. The Glowforge community is a great source of info and tips on that if you choose to do so. I created my files using 2 different free fonts. I used Alpha Danthe font for “give thanks” and I used Modern Sans Light for “IN EVERYTHING.”
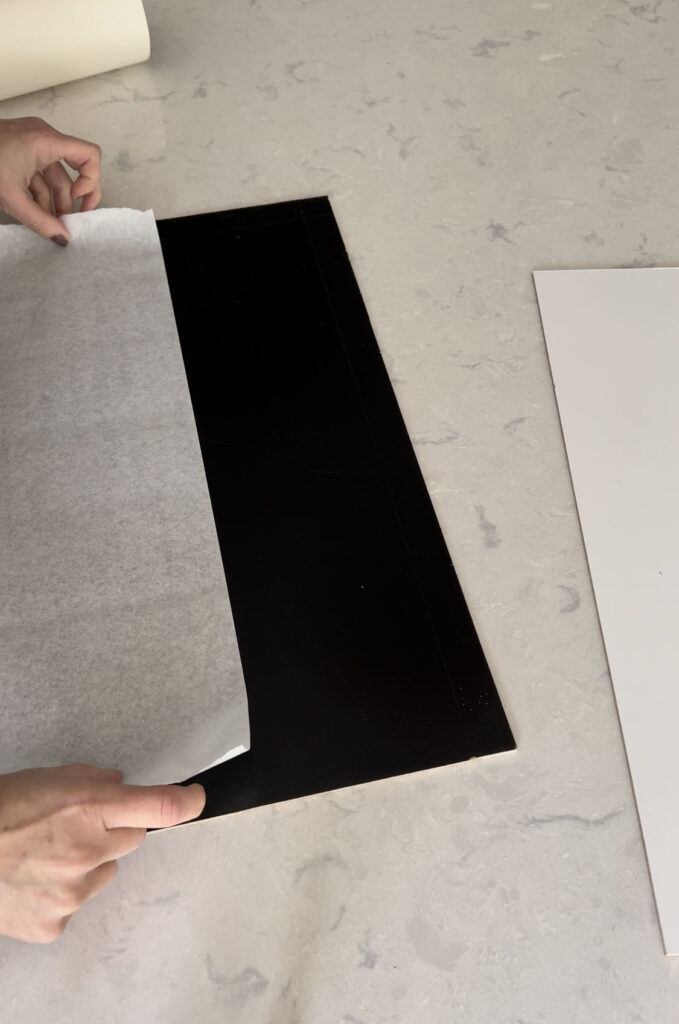
Masking the Material
Some materials you cut on the glow forge will require masking. This can be done with rolled masking like I used for this project, but you can also use masking tape or painters tape as well. You can see the rolled masking I use HERE! This just protects the surface of the material that’s not being cut to keep it free of burn marks and stains. I always mask my whiteboard and blackboard when cutting because the whiteboard does show marks if it is not masked. I also like to score whiteboard and for that I don’t mask because it doesn’t leave any stains and tends to score just a bit deeper.
Settings I used for the whiteboard/blackboard
When you use different materials on the Glowforge, you will need to enter some information about them. This helps make the cuts accurate. Fortunately, many have gone before us and have tried different materials out and share their wisdom to give you a good starting point! There are some great Glowforge owner Facebook groups for that! To cut the whiteboard/blackboard I use 135/FULL power and I set the thickness of the board at .13. I make sure to set focus just before each cut and this stuff cuts like butter!
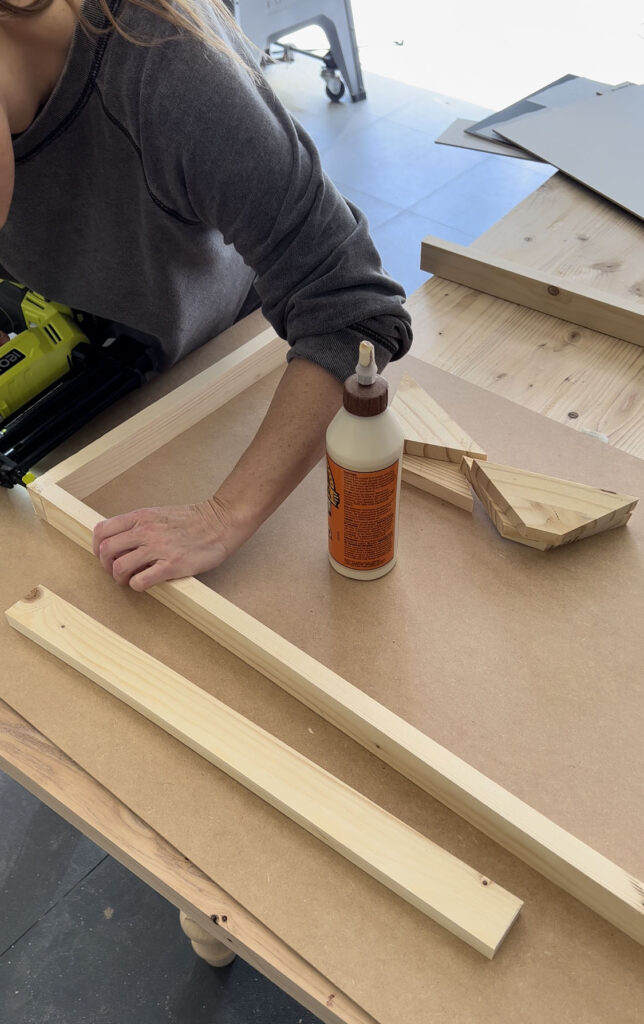
Building the wood frame
While my letters were cutting on the Glowforge, I started creating the frame for this sign. Because I was going with a larger size that didn’t fit standard frames, I decided to build my own using 1 x 2 boards. I just cut them to size and attached the corners using wood glue and 1 1/4″ brad nails. Then, on the back I added four triangular pieces at each corner to help support the sign once I drop it in to the frame. There are several ways to make a frame, this is just one way I tend to use because it is fast and easy and I typically have scraps laying around. Another great tip I like to do is buy open frames from different craft stores. They typically have them on sale fairly inexpensive and often have a clearance section with frames at a huge discount. I will buy those frames and cut my whiteboard down to size which saves time on making the frame. This is just another option!
How to attach the letters
There are several ways to attach the letters to the whiteboard. I like to attach my letters first before placing the whiteboard into the sign. My favorite glue to use for this is Gorilla Glue Brush On super glue. It is inexpensive and it’s easy to apply to the back of the letters. I will usually use the outline of what my Glowforge cut out to mark where my letters will be with a pencil. Then, I brush on glue to the back of each letter and put them in place over the pencil markings. Again, there are several different ways to do this. I know a lot of people use 3M double-sided adhesive on the wood pieces to save time, but it’s pricey so I usually just go with the glue!
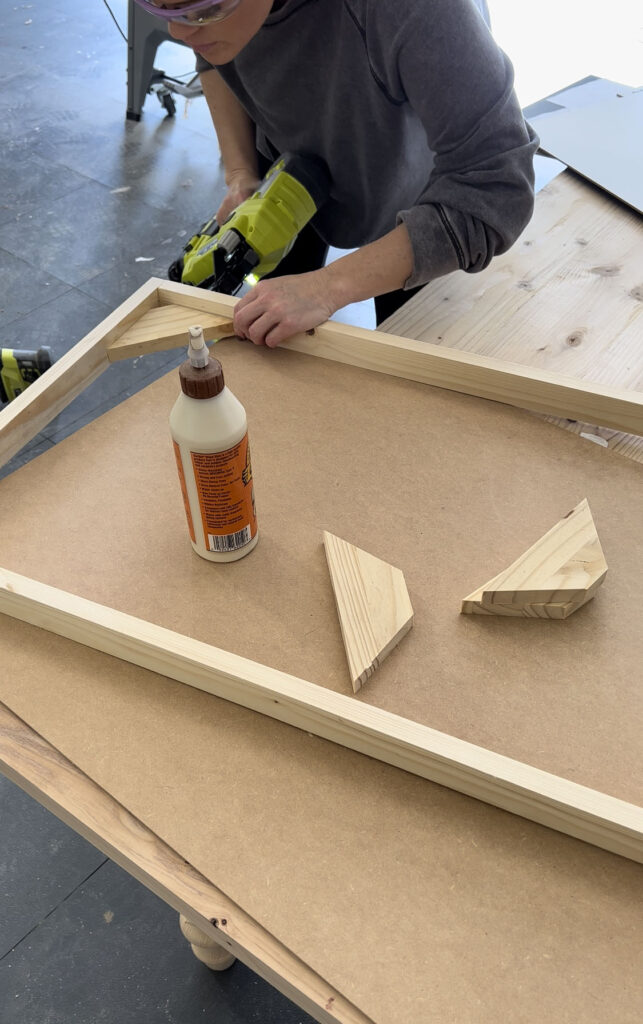
Attach whiteboard to frame
Once all of my letters were dry, I added glue to the top of each triangular corner piece on the frame. Then, I placed the white board down inside the frame and allowed the glue to dry on all four corners before picking it up. Super easy!
What is a Glowforge?
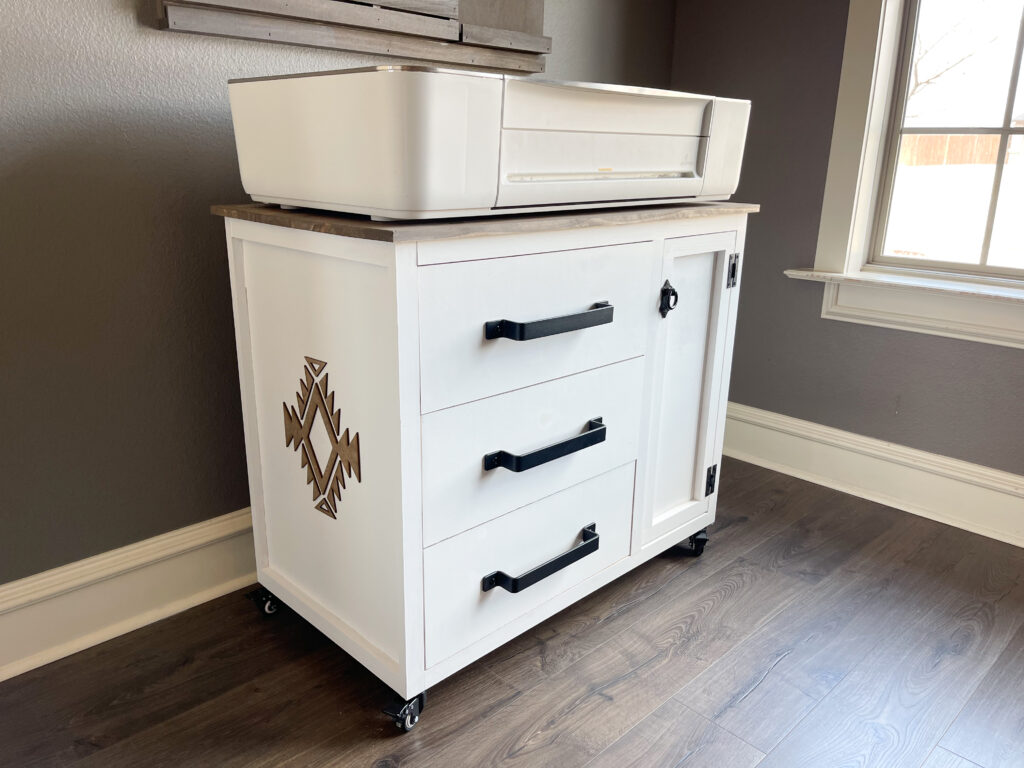
The Glowforge is a 3D laser cutter that makes magical things with a push of a button, and a focused beam of light. One of our favorite features was the simple setup. We had ours up and printing in under 30 minutes. The startup is SO easy! It cuts a wide variety of materials from plywood, leather, fabric, aluminum, acrylic and wood. It also has amazing features like autofocus and 3D engraving. It’s compatible with Mac, PC or mobil and Glowforge uses free web-based software. Another favorite feature of ours is the live preview camera. It literally shows you exactly what is in the cutting area in real time. You just place your material on the tray and the Glowforge goes to work. We love our Glowforge machines so much, we each built piece of furniture for them haha! You can grab the free plans for Ashley’s cute cabinet HERE!
Proofgrade Material
Another product option that Glowforge provides is Proofgrade! Proofgrade Glowforge materials are the first materials that are sourced, prepared, encoded with a qr code, and lab-tested for perfect printing, every time. Proofgrade materials are specially formulated for the Glowforge 3D laser printer and work well with other cutter/engravers using CO2 laser technology. It knows the perfect settings for each piece, and takes all the guess work out. You are also able to cut a variety of other laser-compatible materials. The Proofgrade materials just make it even easier!

GLOWFORGE COMMUNITY
I know we mentioned the Glowforge Community many times in the video. I didn’t understand the value of this group until I started printing on my own printer. The Glowforge Community is group of fellow Glowforge makers who love to help you brainstorm, troubleshoot, and experiment. They provide lots of helpful information! Most posts have answers in just a few hours. You’ll always find someone who tried it first or wants to learn it alongside you! When you are working with a new material and aren’t sure on settings, there are so many others out there who have tried it and share their tips and tricks with you. It’s also a great place to share your own creations.
WHICH GLOWFORGE IS FOR YOU?
There are 3 different models of Glowforge laser cutters. Ashley and I both own a Glowforge Pro model printers. That is their most popular model with enhanced speed, power and it includes the exclusive pro Passthrough Slot which allows you to work with long materials create a piece with an unlimited length. They are pretty amazing. There are also the Glowforge Plus and Glowforge Basic models. You can read the differences in each of these machines HERE on the Glowforge website. All models come with a great warranty, cut different materials and have so many features! The Glowforge cost is high, but they offer Affirm which is awesome!
GLOWFORGE FILTER
One of the things you will need to consider is how you plan to filter your Glowforge. Currently, Ashley uses the Glowforge air filter, but I now filter mine out of a window. I have learned so much on the Glowforge Community about how other makers are setting their laser cutters up, and that led me to purchase the exhaust fan on Amazon and vent outdoors… LOTS quieter too!
GLOWFORGE APP
The Glowforge App is where you will do all of your prep before making your cuts. It is super user friendly. It’s a web based software that controls the machine.
GLOWFORGE PROMO CODE
I hope I was able to show y’all just a glimpse of what a Glowforge 3d Laser Printer can do for you! It’s an amazing investment that can literally pay for itself as you create with it. Glowforge does not do a Black Friday deal. Instead, they have given our readers THIS LINK to purchase your own Glowforge with the best deal they offer on the machines!
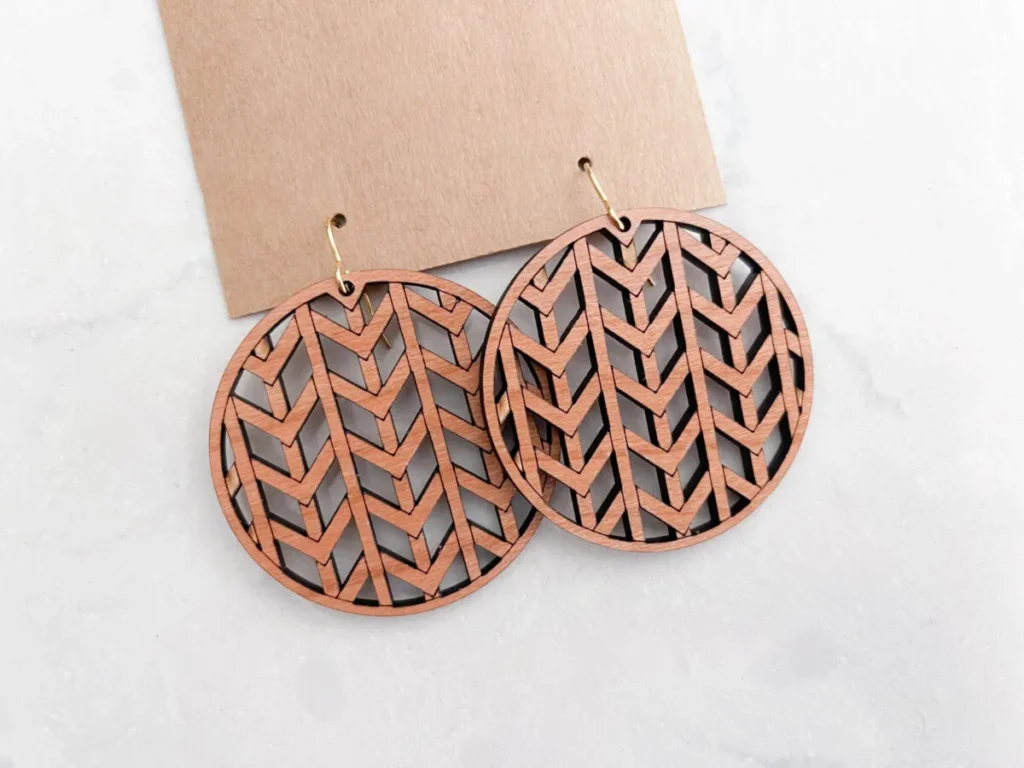
Other Glowforge Projects!
Check out some of these other cuties we have created with our Glowforge Machines!
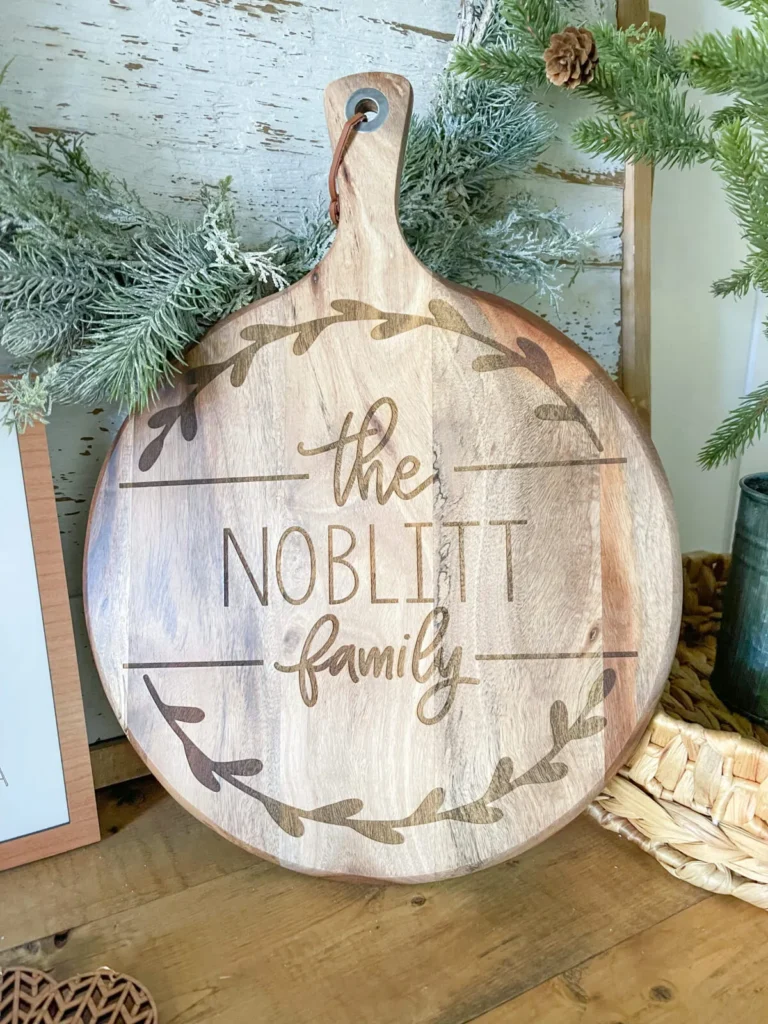


This DIY wood sign is a great example of how simple woodworking can create personalized décor with a lot of visual character. The combination of wood texture and clean lettering gives the piece a handcrafted look that works well in many interior styles, especially farmhouse and rustic-inspired spaces.
From an interior industry perspective, custom wooden signage and wall décor are becoming increasingly popular in both residential and commercial interiors such as cafés, retail spaces, and offices. Projects like this show how natural materials can be used creatively to add warmth and identity to a space. We’ve also been following similar interior material and décor trends across the industry here: https://plywoodbazar.com/
Fantastic. I love this design
Great! Do you have a 3D design?