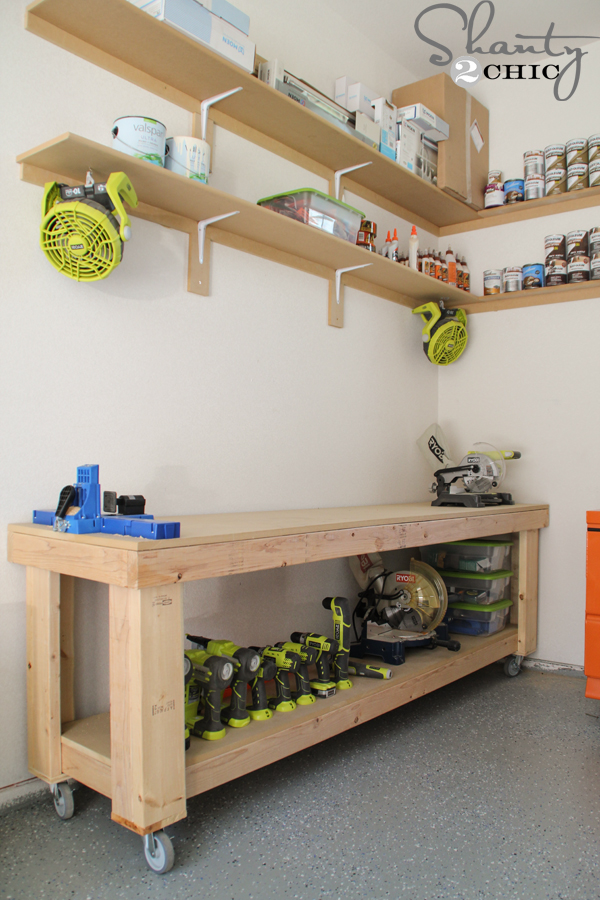
Hey guys! I am so excited about the workbench I built for the shop in my new house! My shop is still a work-in-progress but this was a huge improvement and much needed addition!
 I modified the workbench that Whitney built because I wanted more free space in my shop! You can see her workbench HERE! This is the perfect bench for small work spaces and I only spent about $100 including the casters.
This is a really quick and easy workbench and of course, we’ve got the Free Printable plans too! You can click HERE or the image below to print them!
DIY Workbench

And as always, I’m sharing my step-by-step instructions to help!
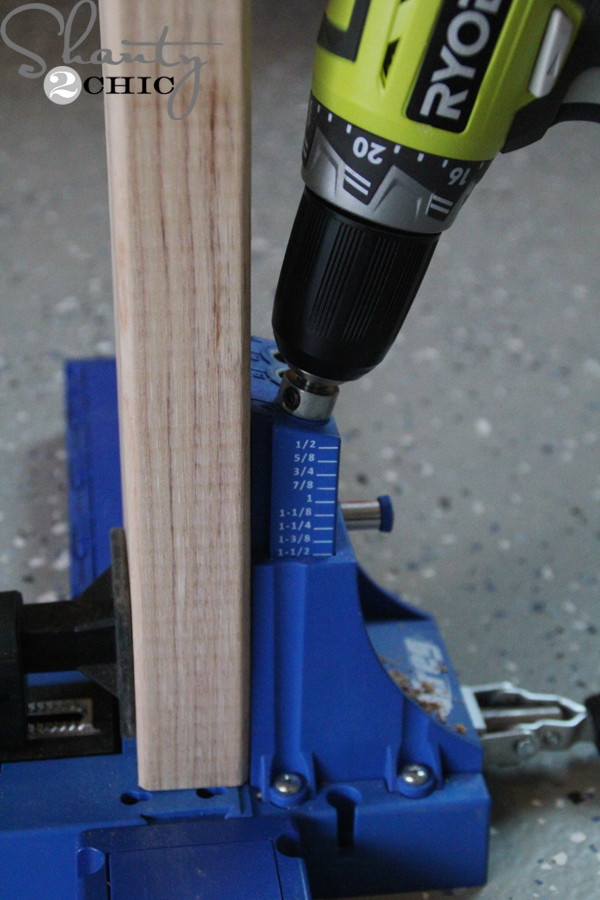 I had my MDF boards ripped down at Home Depot and I started by making my cuts and drilling pocket holes, with my Kreg Jig, in the legs.
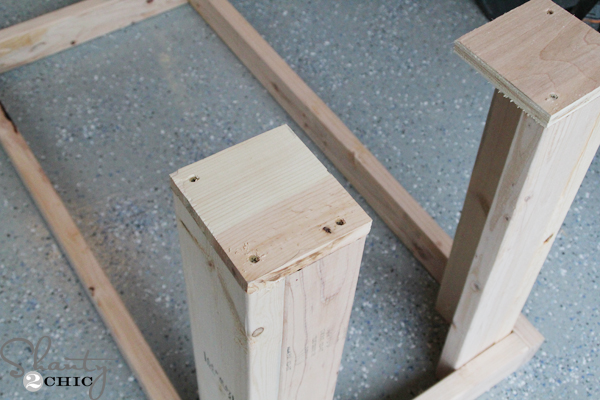
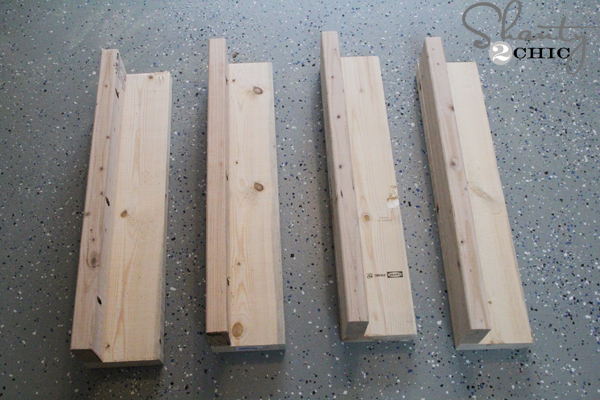 Here is a pic of the assembled legs.
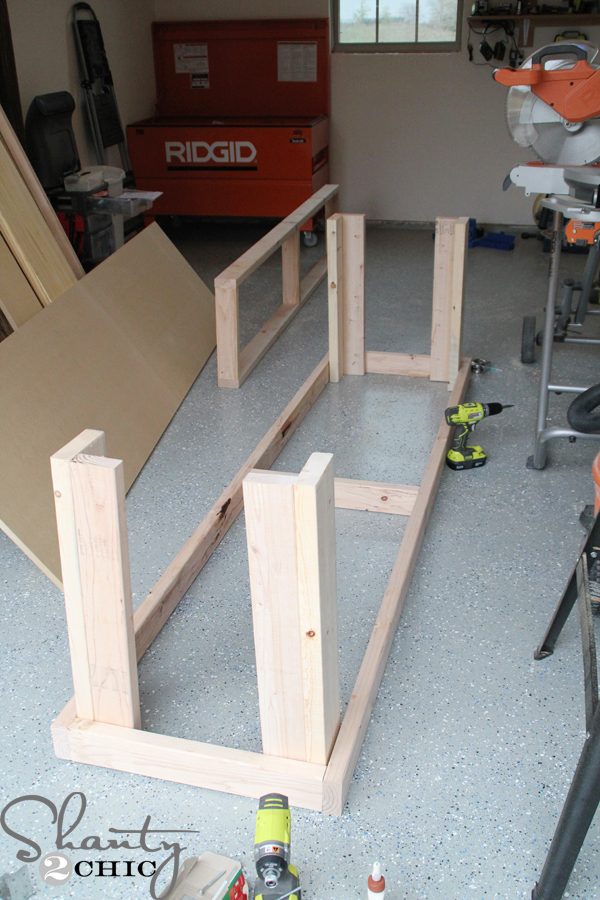
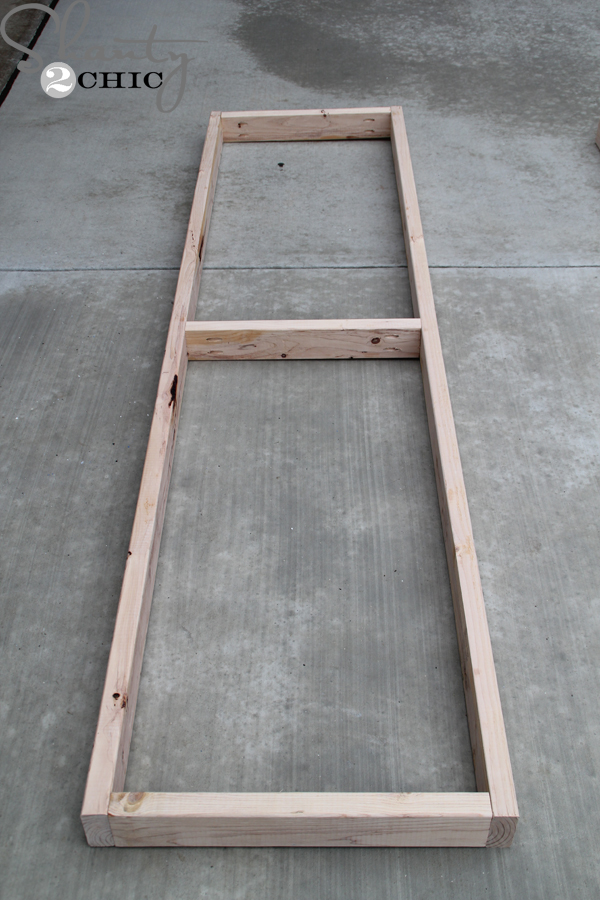 Next the frames! They will both look like this but they are different sizes.
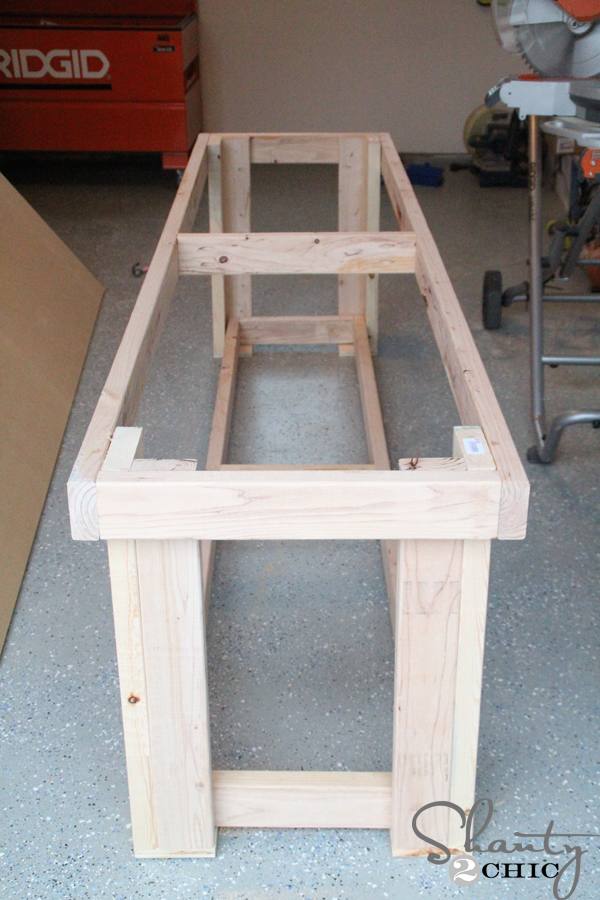
 Next, I attached the legs to the frame
 Then I added the foot pads.
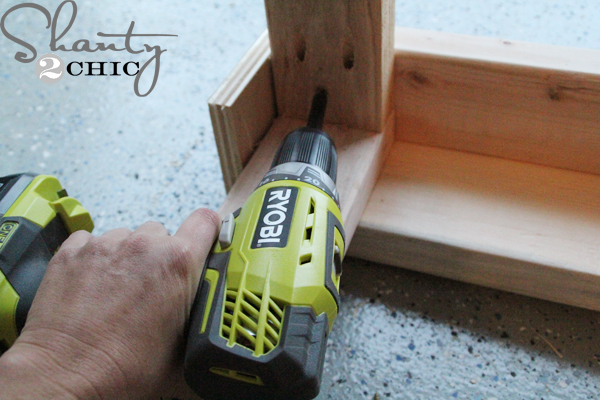 To attach the bottom frame, I used 2 1/2″ wood screws from the inside of the frame into the legs.
 Almost done! Add your casters here before it gets too heavy! (make sure to purchase locking casters)
 I used my brad nailer and wood glue to attach the bottom shelf
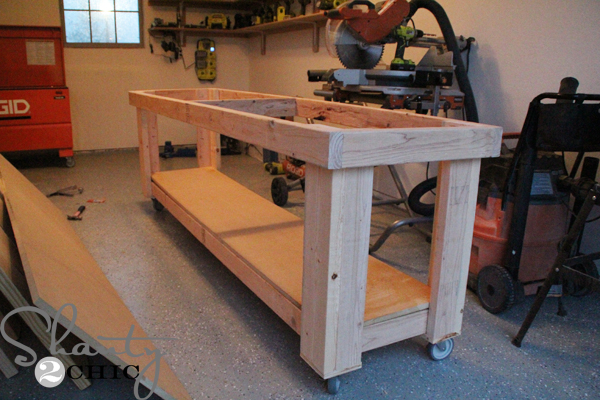 Then I attached the top the same way!
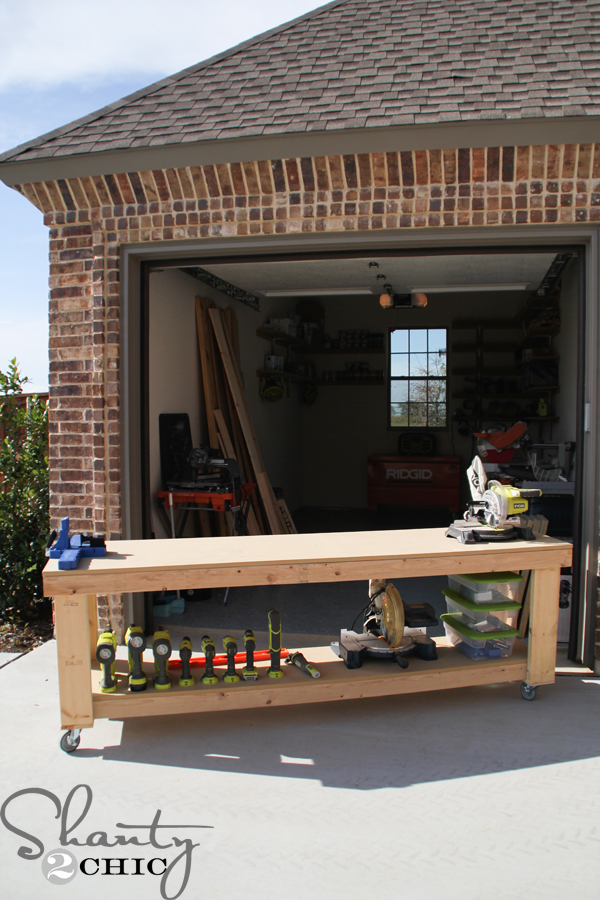 How easy was that?! I love rolling it out of my shop on pretty days (and to watch the kiddos play while I work) As you can see, I have outfitted it with all of our favorite Ryobi power tools and mounted my K5 Kreg Jig to the top 🙂
 My shop is the size of a standard one-car garage and you can see that it still gives me plenty of space to work in my shop!
I love it!! Now I need to get back to building more furniture for the house 🙂
Thanks so much for stopping by!
~Ashley

My plan is to put this in my garage, but the floor has a slight slant to it. Can I purchase casters that are adjustable to account for the slope? If not, would you recommend lengthening two of the legs instead? Thanks!
I’m just asking: Follow me- 26.1/4″ legs+3/4″pad for casters+3/4″for MDF top+4″ casters=31.3/4″ total height. Is it just me or shouldn’t it be a little bit taller-like maybe 33″ or 34″ tall?
You could make it taller with the leg length. I’m only 5’3″ and this is the perfect height for me (especially when I put tools on top to use) It’s an easy modification though!
That’s what I thought. Thank You.
I was thinking the same thing (I know this thread is super old) I increased the length of the legs to 30 inches and it gave me the perfect working height, I am 6 feet tall.
Finished
Hello Ashley(and Whitney), I was wondering: I have been blessed with approx. 20 2x6x9’s that I was able to pick up for $1.00 each(yes, that is $20.00 only!) Do you think I could build this workbench with all 2×6’s to save me some money since I already have them? Other then being beefier and heavier what other changes do you think I would need to do? Thank You
Lucky you! You absolutely can… I actually think it will look better! Beefy is good :-). Send pics when you get it done!
Actually just found out the wood is some very nice, old, dense Southern Yellow Pine. This workbench is going to be VERY heavy!
I built this today as a surprise for my husband. He LOVES it! He kept
Going on and on about how impressed he was I did it solo. I REALLY appreciate the diagram on exactly where to put the pocket holes because I always seem to spend a good amount of time trying to figure that part out. Thanks!
Question, in your free work plan, it shows that your bottom foot-pads are 2×6, but in the pictures on your site, the foot-pads are actually 1×6 of what appears to be laminated board. This will make a minor difference in height, any reason why the plans are slightly different in this regard? I only ask because I’d prefer the 1×6 to the 2×6 myself, so I was curious where you picked up the extra wood in your build.
Hi! Use 1×6 if you have it. 2×6 is a suggestion for those without the scraps. I just used white wood pine scraps 🙂
Thanks! That’s what I figured and I will do the same, just wanted to make sure I wasn’t missing something 🙂 Great site and plans btw!
Awesome table. I’m going to make one this weekend and put the miter saw setup on top. A question for you: As you are gluing the legs together, do you clamp them or do the pocket screws hold it tight enough? Also, are you using the Gorilla Wood Glue that I see throughout your site?
seems like an awesome plan. I am in the process of building this, but i have a question. when i am building something (not that i have built much, but i am enjoying it) i typically need to clamp something or else to the work surface. the current table i use has an overhang of about two inches which helps in clamping. since the top surface is flush to the base, i don’t see how i can clamp anything and i am not sure a two inch MDF could be used for clamping, feels like it would disintegrate. should i just get 3/4 plywood top with 2 inch wider top surface?
I used 2×4’s for the top and with a little pre planning you could end up with an inch and a half overhang. I use my bench more for mechanical and I like the slight grooves between the 2×4’s as it catches those small screws before they fall off and roll to wherever it is they roll to.
Good to know! Thank you for sharing that tip 🙂
Question, do you sand or plane your lumber before assembling it? Everything looks so clean and straight. Thanks
Thanks Chris! We don’t but the Kreg Jig and clamps help a ton and we also spend time selecting good lumber!
I use the Kreg Jig clamp that came with the kit for most
of my projects. With the top frame of this work table being around 4 inches and the ¾ inch top not hanging over the frame are you able to use the standard size Kreg Jig clamp on this workbench? Is the standard size Kreg Jig clamp big enough to bypass the frame and clamp to just the top? I hope this question makes sense. :)… Thanks Olivia
Makes sense! The clamp won’t work with the table as-is. You could make the too wider and longer so that you have an over hang to use the clamps! When I clamp to a table, I use a different style clamp. Hope this helps!
Here is the photo of it complete! Thanks again!!
Ashley, you’re a lifesaver!! I was going to use Whitney’s plan but when I saw yours I was sold. Perfect size!! Bought the material this weekend and just wrapped up my build. I absolutely love it and can’t thank you ladies enough. Best plans and instructions on the internet. Keep up the good work. You have a loyal follower in me. Thanks again!!
We built two of these over the 4th of July weekend. Very easy! My husband was very impressed with the instructions. I use mine to paint projects in my shop, and I love them! Thank you!
Just made this and it turned out perfect you ladies make it seriously so easy to follow your directions!! Love love love it!!!
Looks awesome might even make a little back splash for it with my extra piece of wood!
YES!! My husband and I “fight” all the time about the space in the garage and his work bench – this will work and fit perfect in the space I made over on “my” side! I just need to run to home depot for wheels and MDF! Woot! Woot!! Thank you for these plans!
Awesome bench! I know you were looking for more space in the garage, but is a 24″ top deep enough? I’m debating between this one and the one you guys posted in January which has a 36″ top. You do save money on MDF with your version. Any reason you used plywood and 4″ casters instead of the 2×6 and 5″ like the previous post?
Thank you! I feel like 24″ is plenty to work on. Obviously the bigger the better if you have the room but I like having space to work on the floor too and this size was a good fit. I picked 4″ wheels because they didn’t have enough 5″ in stock 😉