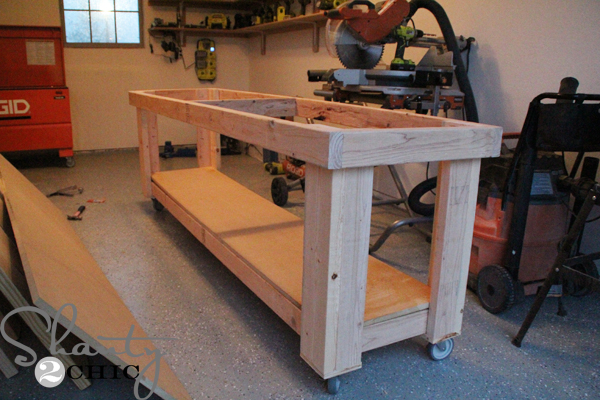
Hey guys! I am so excited about the workbench I built for the shop in my new house! My shop is still a work-in-progress but this was a huge improvement and much needed addition!
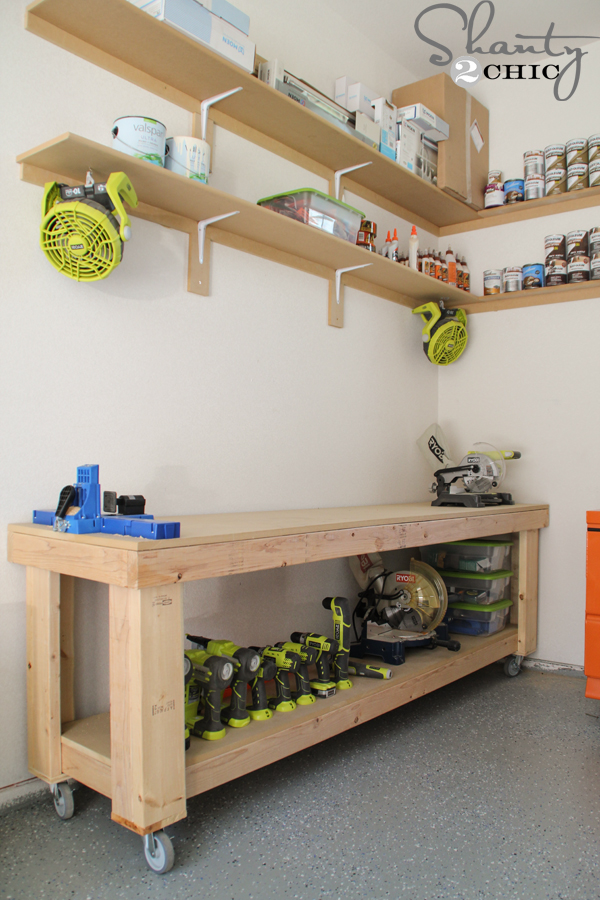 I modified the workbench that Whitney built because I wanted more free space in my shop! You can see her workbench HERE! This is the perfect bench for small work spaces and I only spent about $100 including the casters.
This is a really quick and easy workbench and of course, we’ve got the Free Printable plans too! You can click HERE or the image below to print them!
DIY Workbench

And as always, I’m sharing my step-by-step instructions to help!
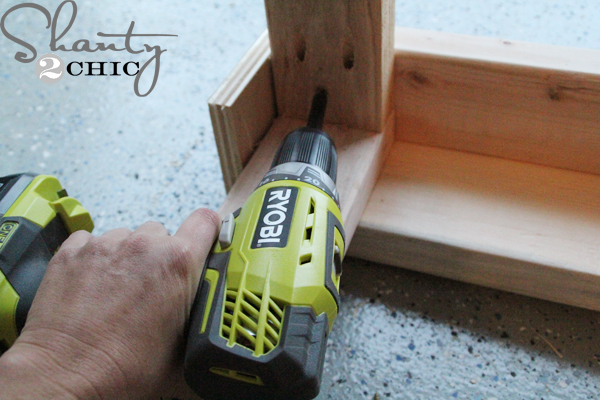
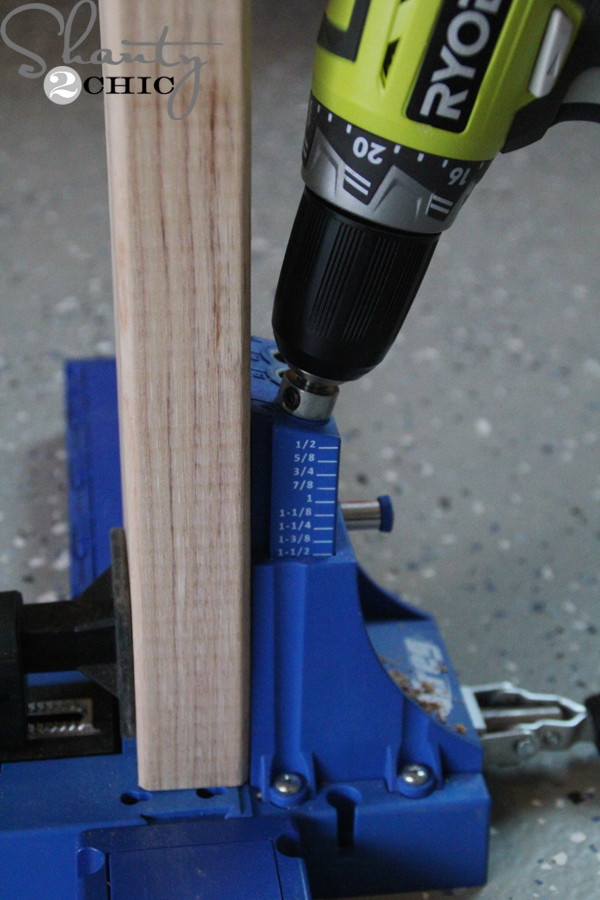 I had my MDF boards ripped down at Home Depot and I started by making my cuts and drilling pocket holes, with my Kreg Jig, in the legs.
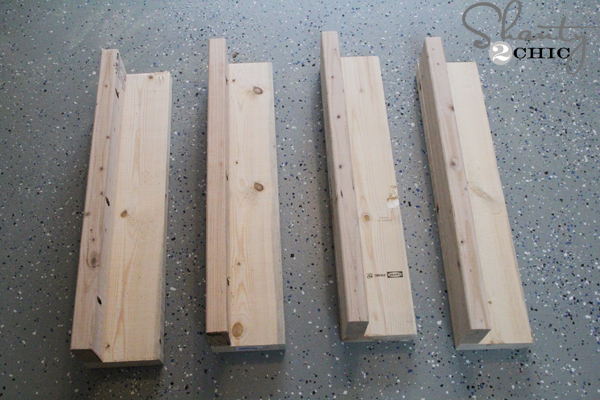 Here is a pic of the assembled legs.
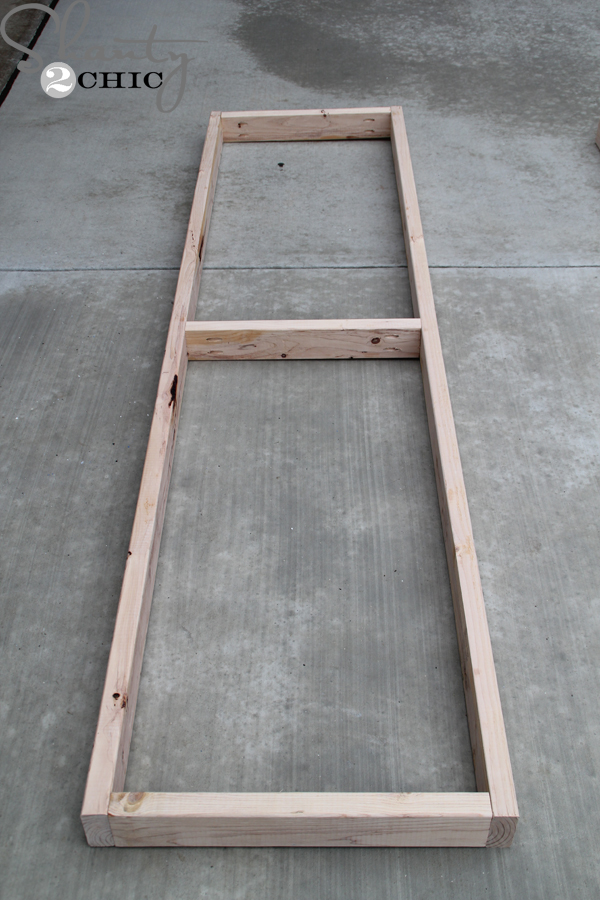 Next the frames! They will both look like this but they are different sizes.
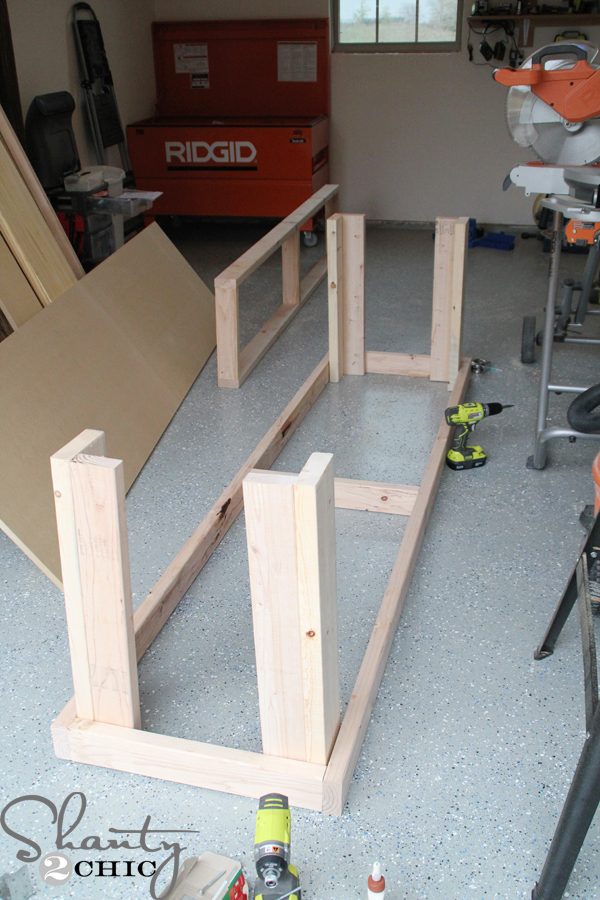 Next, I attached the legs to the frame
 Then I added the foot pads.
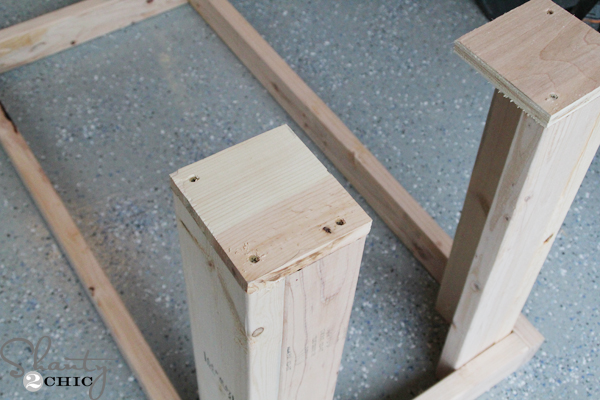
 To attach the bottom frame, I used 2 1/2″ wood screws from the inside of the frame into the legs.
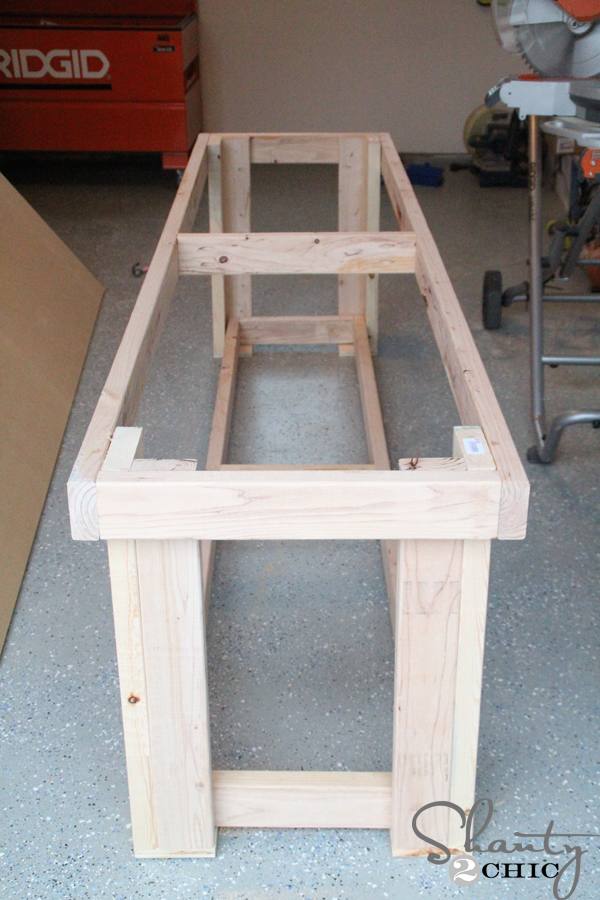 Almost done! Add your casters here before it gets too heavy! (make sure to purchase locking casters)
 I used my brad nailer and wood glue to attach the bottom shelf
 Then I attached the top the same way!
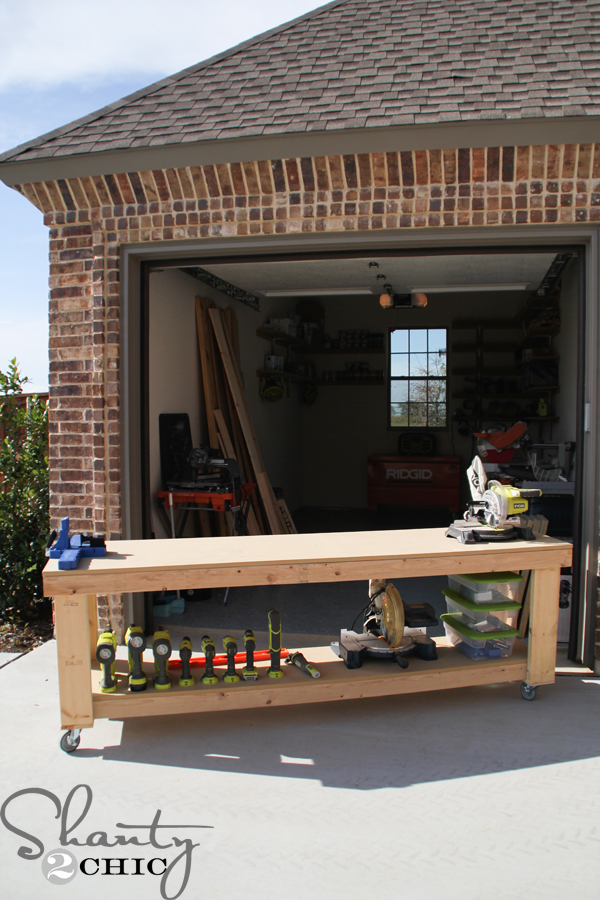 How easy was that?! I love rolling it out of my shop on pretty days (and to watch the kiddos play while I work) As you can see, I have outfitted it with all of our favorite Ryobi power tools and mounted my K5 Kreg Jig to the top 🙂
 My shop is the size of a standard one-car garage and you can see that it still gives me plenty of space to work in my shop!
I love it!! Now I need to get back to building more furniture for the house 🙂
Thanks so much for stopping by!
~Ashley

Hey ladies! great project. One problem I see. For this project i think it’s fine but for later know that When using pocket holes as a way to conjoin wood. the hole SHOULD be on the outside, although most ppl use these to HIDe the hole.
Example. You have two 2x4s in a “L” shape. put the holes on the outside. Putting them inside the “L” give it it weaker hold.
Elkefbjw fodboldtrøjer børn AmberegN MalindaG maglie calcio bambino HamishHe DorothyK fotballdrakter SylviaBr PoppyDeN fotbollströjor GeniaSap
Two wide and shallow drawers would be a nice addition, since there is only one brace in the center of the top. I made a very similar bench with two drawers. It’s great when you need a calculator, pencil or notepad to just pull out a drawer also for nails and screws in small plastic organizers.
Where did you get those Fans?
FYI screws are not structural the are fasteners. You need to support top with wood all the way to ground. Take the 2×4 legs and laminate then to a 4×4 cut a rabbit at to of 4×4 to support 2×4 you then wrap the 2×4 around the left over 2×2.
I know this post is pretty old, but my husband and I just finished making ourselves one of these tonight, and we love it! It was our very first build, and now we have the bug!
I do have one question though… I heard MDF is super absorbent, so should we seal it to add extra protection from moisture? We don’t plan to use liquids on it or anything, but it’s pretty humid here in SC many days of the year. Thoughts?
Yes it needs painted to seal, polyurethane is a good waterproof choice.
Thank you! Thank you! I’m finally getting ready to roll with my projects and this workbench is exactly what I needed. We gathered everything we needed & my husband built this for me in no time. The plans were very easy to follow. I enjoy reading your posts. I find them inspiring and I’m hoping to be able to increase my skills and build more along my way.
I know this is a bit of a zombie thread, but I decided this was an awesome idea, and since I have the room, I made some modifications.
I added a foldable 24×48 leaf to the bench, this give me TONs of work space when I need it.
I also added a couple of the 5″ plates to the tops of the legs, this gives me a total of 36 1/2″ of height, lines up with cut deck on the table saw, so I can use it as a run out table.
Thanks for the kick start!!
Had the best time making this! Only took a couple hours from start to finish. This was my first ‘official’ project for my home. Only the jumping off point for tons of other projects!
I cannot find the mradutememts anywhere
Easy plans to follow! The plans that you have available for download really helped. Took about 3 hours while drinking some bud lights and listening to music. Looks great. Thanks!
Thanks a ton for the wonderful plan and steering me towards the Kreg Jig. Made a project weekend of this and am pretty happy with the results.
Looks awesome!!! Thanks for sharing 🙂 so happy you like the Kreg too!
Made a 6 ft. version. Just wanted to say thanks for the instruction! My first big project. Got into woodworking to stay away from my TV and refrigerator and lose some weight. 🙂 Thanks again!
This looks amazing in my garage. This is one of my favorite sites!
Great plans, and the Kreg Jig is amazing.
What size nails did you use to attach the top with the Ryobi Airstrike? How do you know what size to use for size of wood? New to airstrike