I should say easy and CHEAP! I got to start on the nursery this week….which used to be my hubby’s office. I love the look of the paneling in this room over at Serena and Lily so I drew up my plans and went to Home Depot!

Whitney, being the wonderful sister she is, volunteered to come help me in this project! I chose to do one accent wall, after much convincing from Whitney, and I’m so glad I did! This wall measures 175.5″. Here is my purchase list:
6 Whitewood 1×4’s @ 8ft.
2 Whitewood 1×6’s @ 8ft.
1 box 1 1/4 finishing nails
1 Nail Finishing Kit
Blue Tape
1 tube of Liquid Nails for Paneling
1 tube of white all-purpose caulk
1 gallon of paint – I had Home Depot match to a sample of my trim color
I chose to use Whitewood boards because they are smooth and do not have imperfections. They are more expensive but much easier to work with!


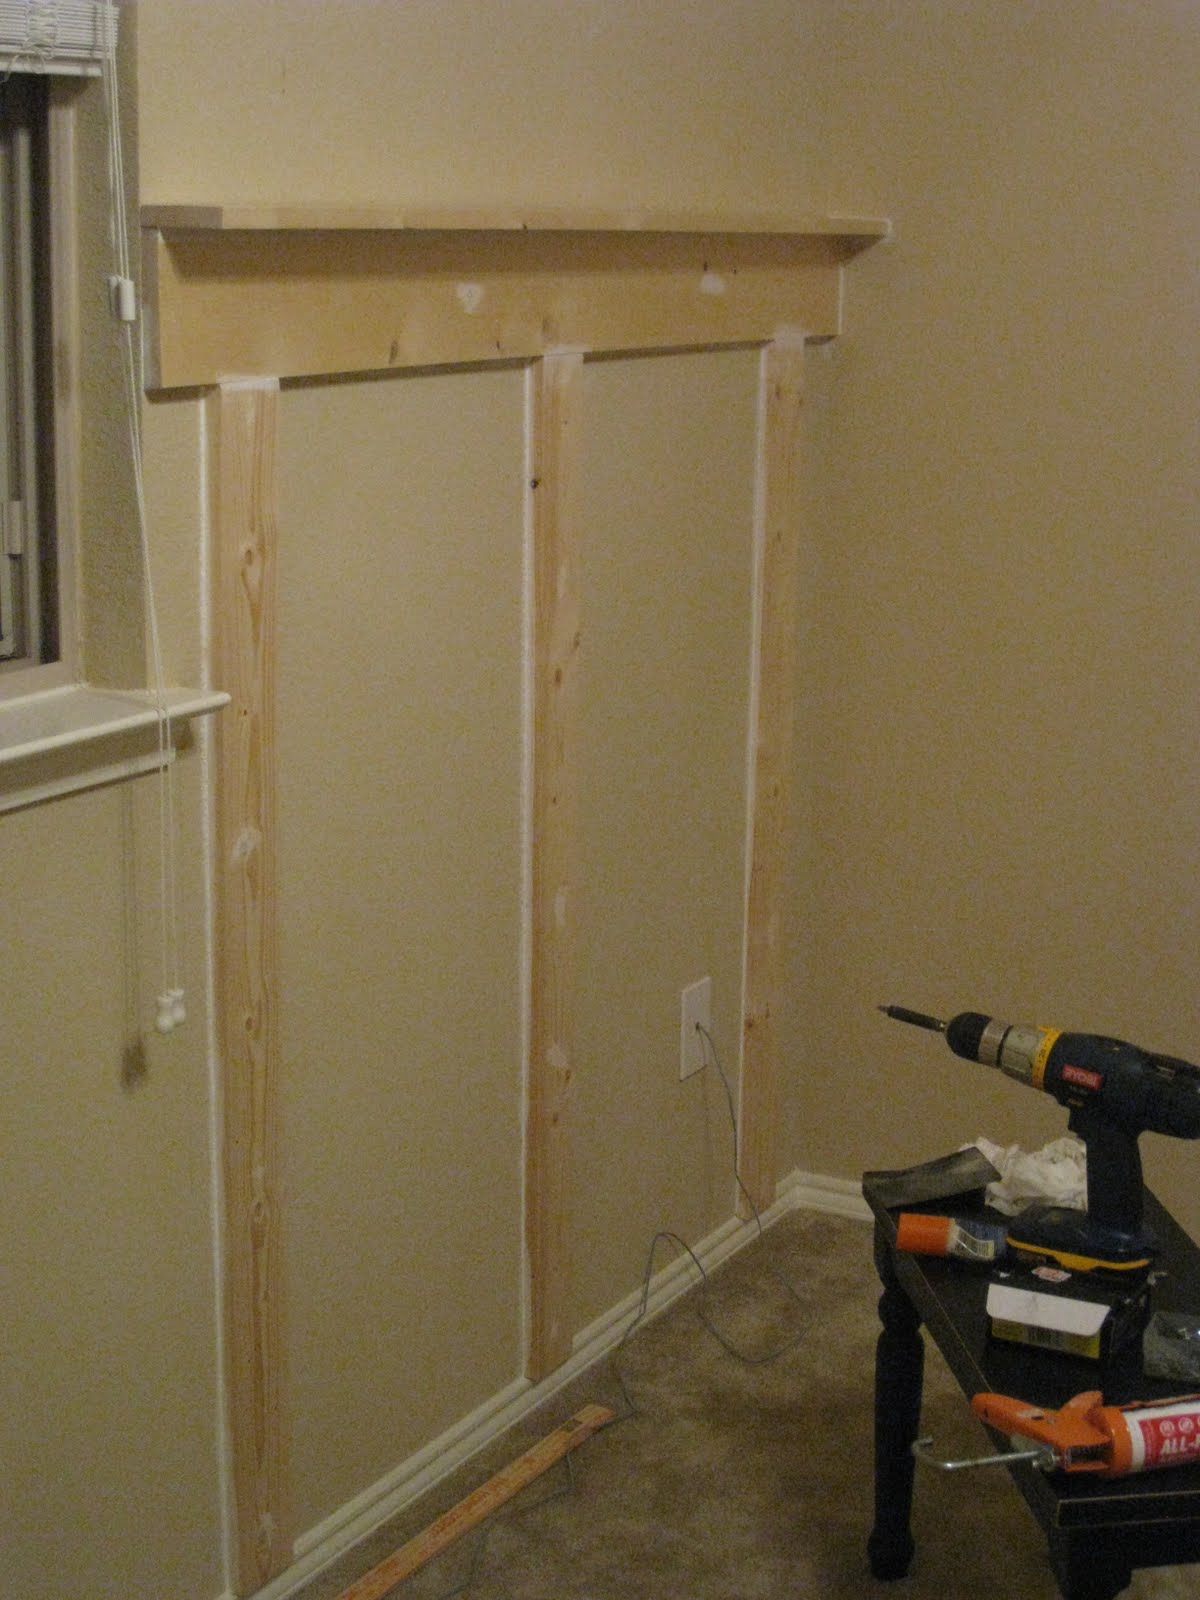
I started by marking off where I wanted the 1×4’s. I chose 20″ apart because I like the look of having them spaced out and it worked well with the window and sockets.
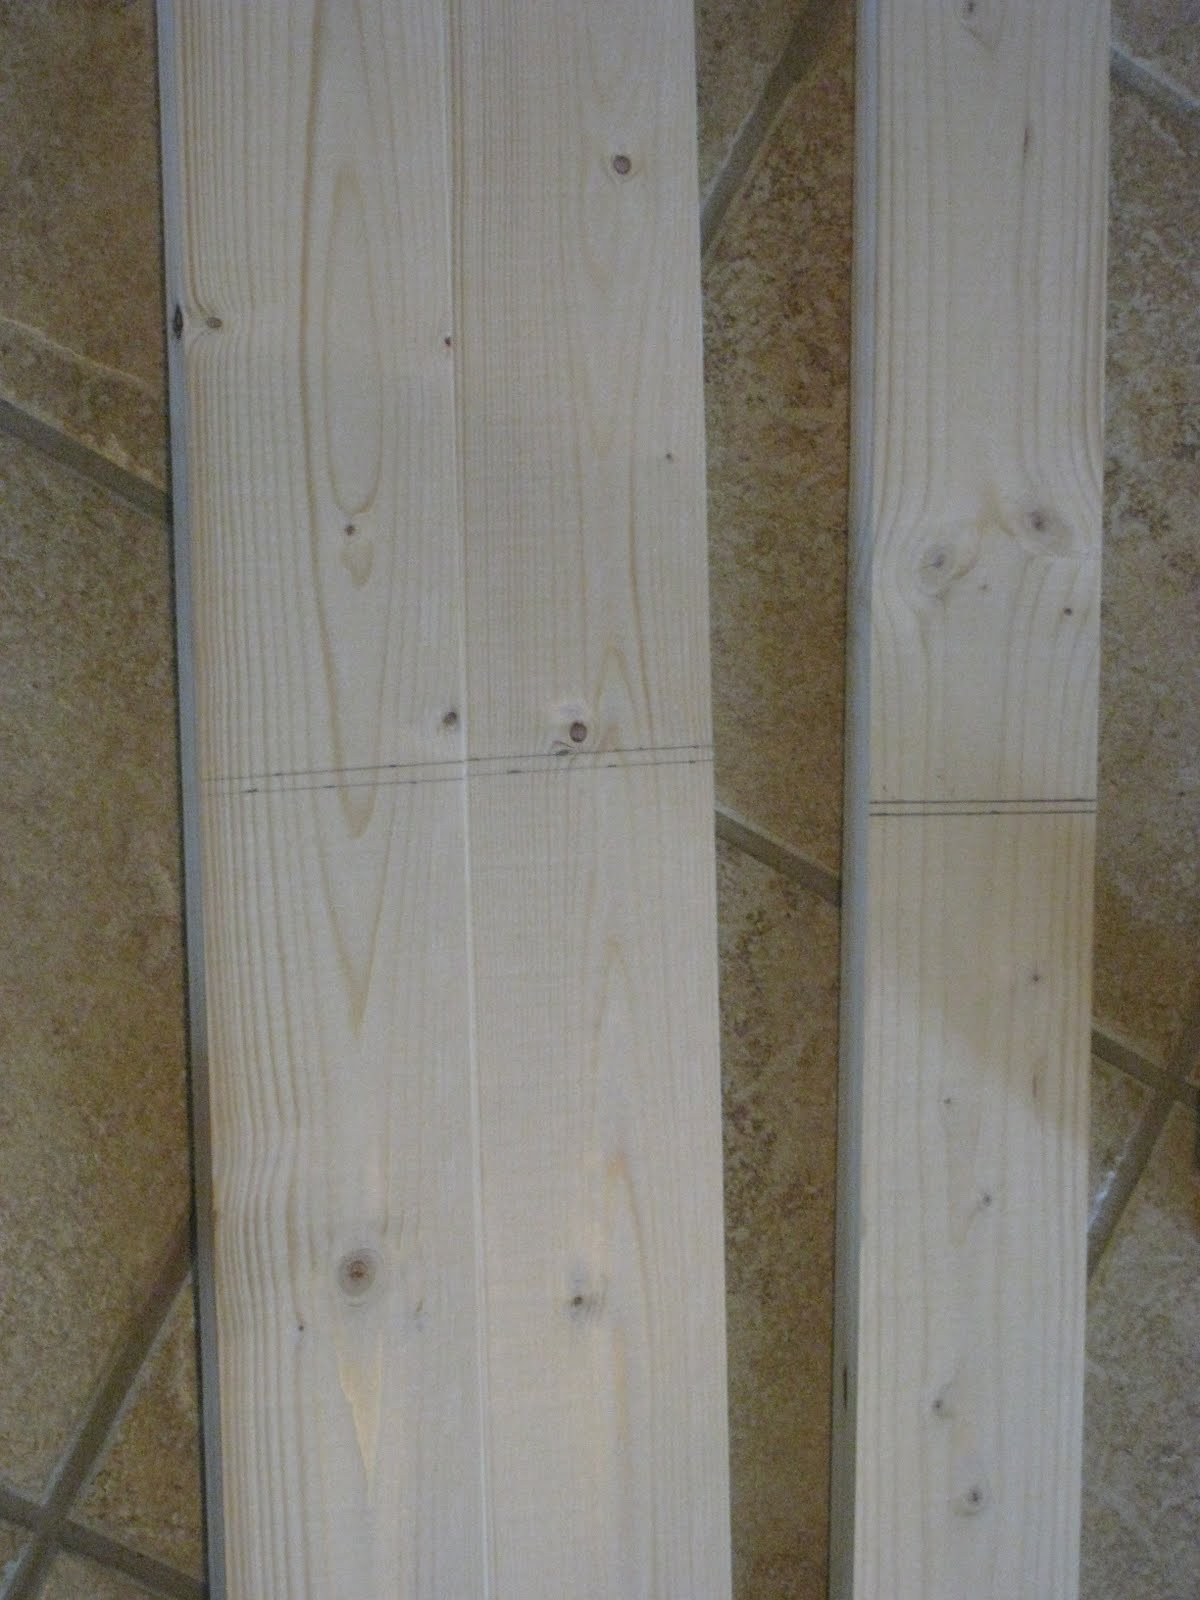
We used a Ryobi Miter to cut the 1×4’s to 4ft. (making the boards under the window shorter). You can use any saw for this because they are straight cuts.
We put a generous line of Liquid Nails on each board and placed them on the wall. Our step dad, Tim a.k.a. Bapa, is a builder and he suggests pulling the board away from the wall and back on for a good set with the Liquid Nails. So, we did:) We followed up with 3 to 4 finishing nails in each board. Looking good!

I used this nifty tool to hammer the nails all the way into the wood so you won’t see them. Very easy and you can get 3 for $1.99.
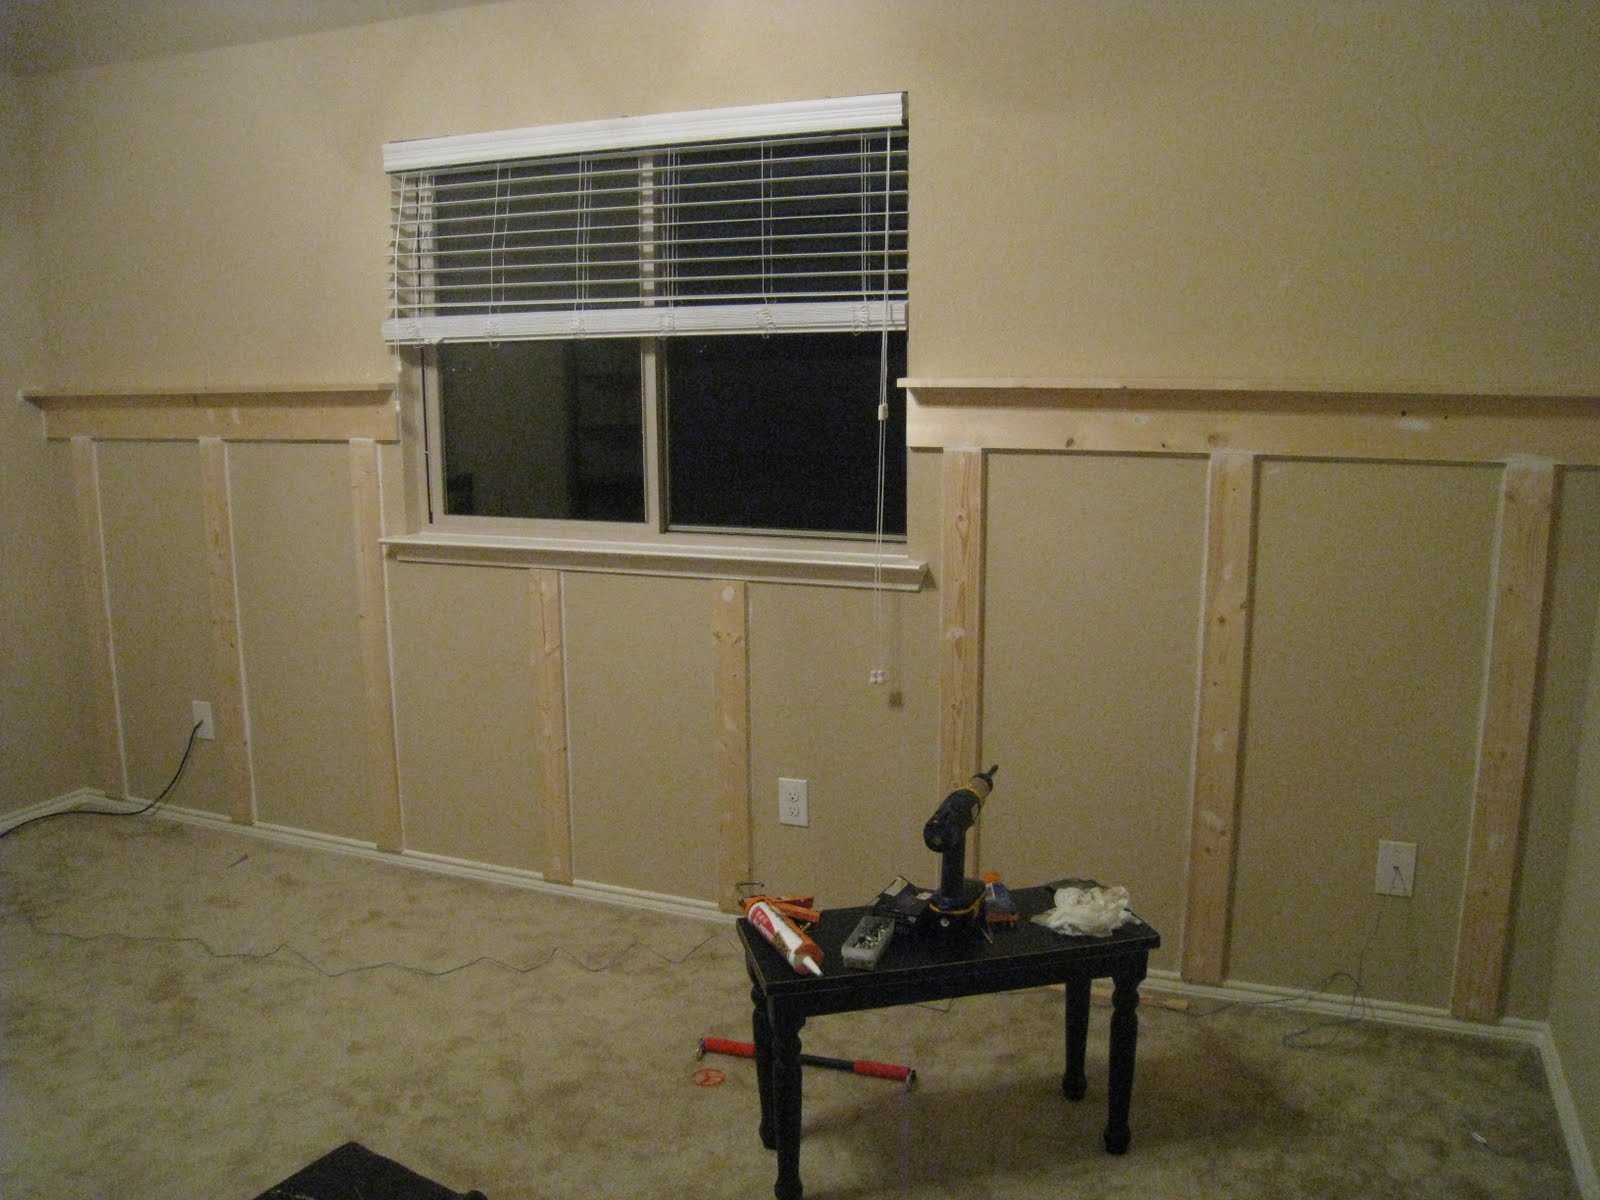
We attached the 1×6’s to the top using the same technique and then turned a 1×4 flat on the top to form a shelf. We made sure to sink wood screws down it through the 1×6 for good support.
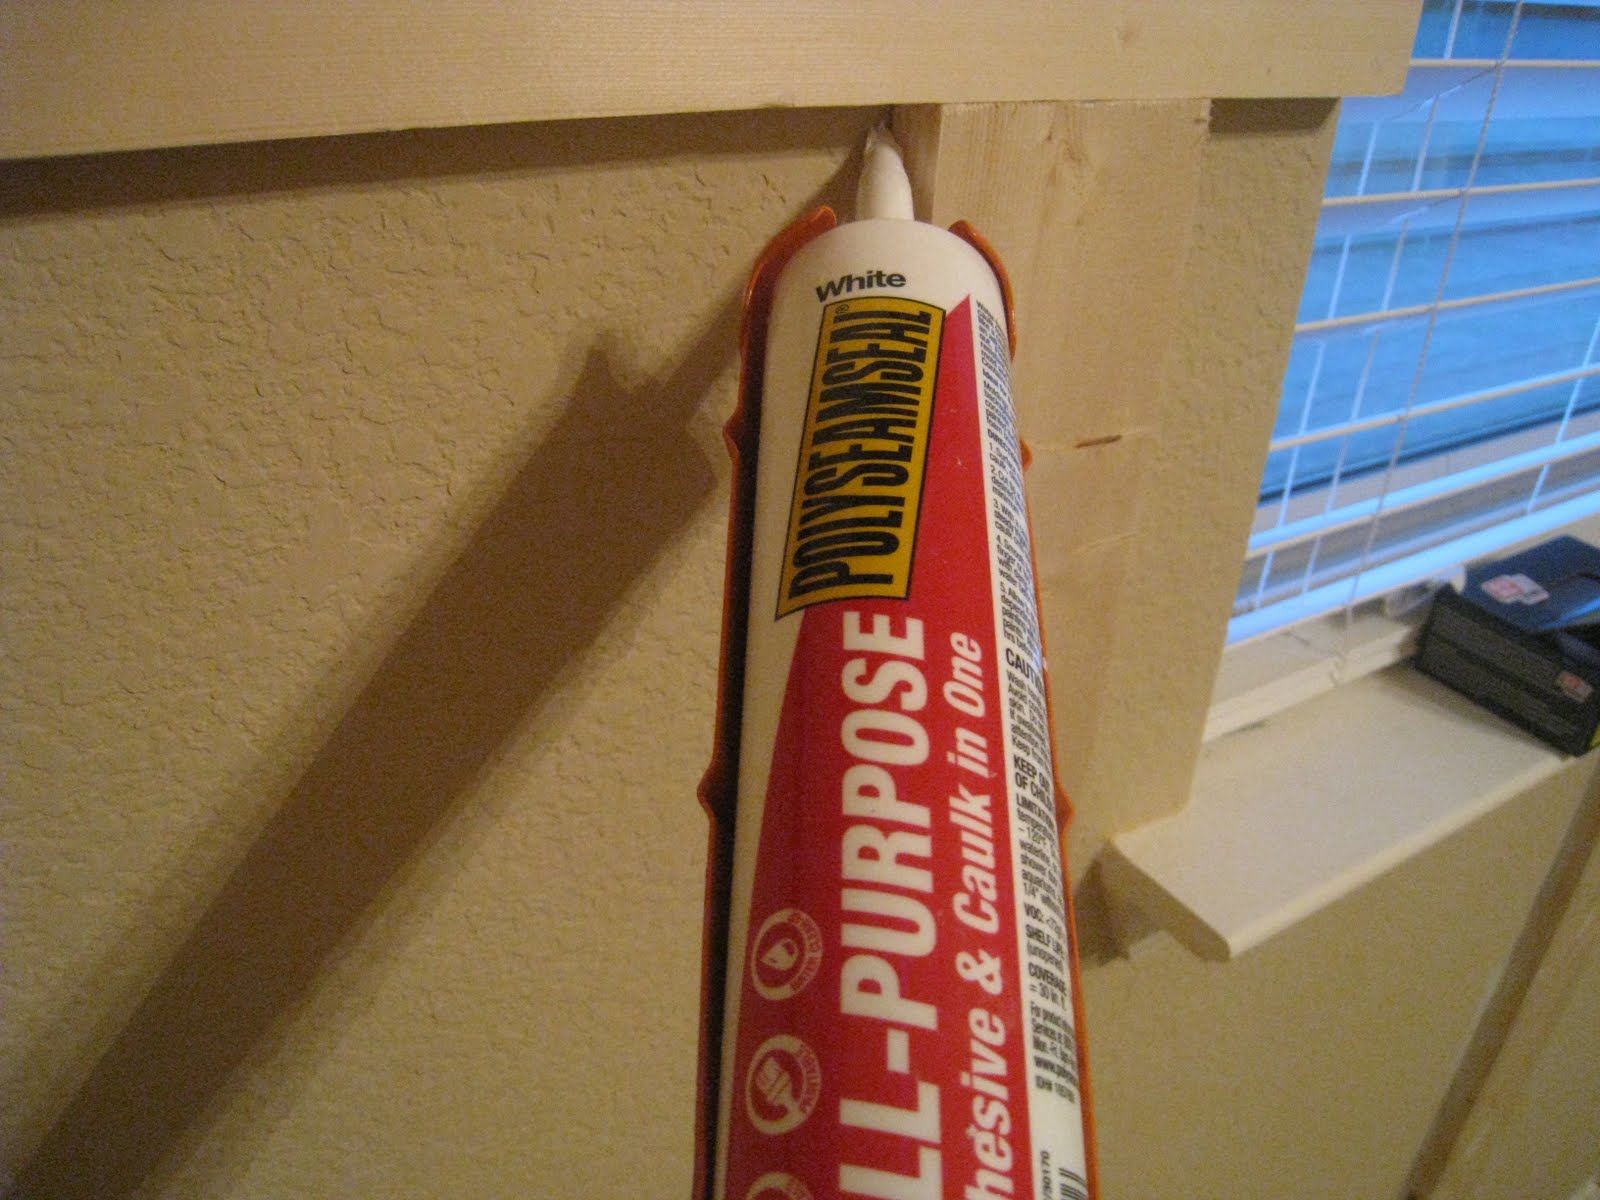
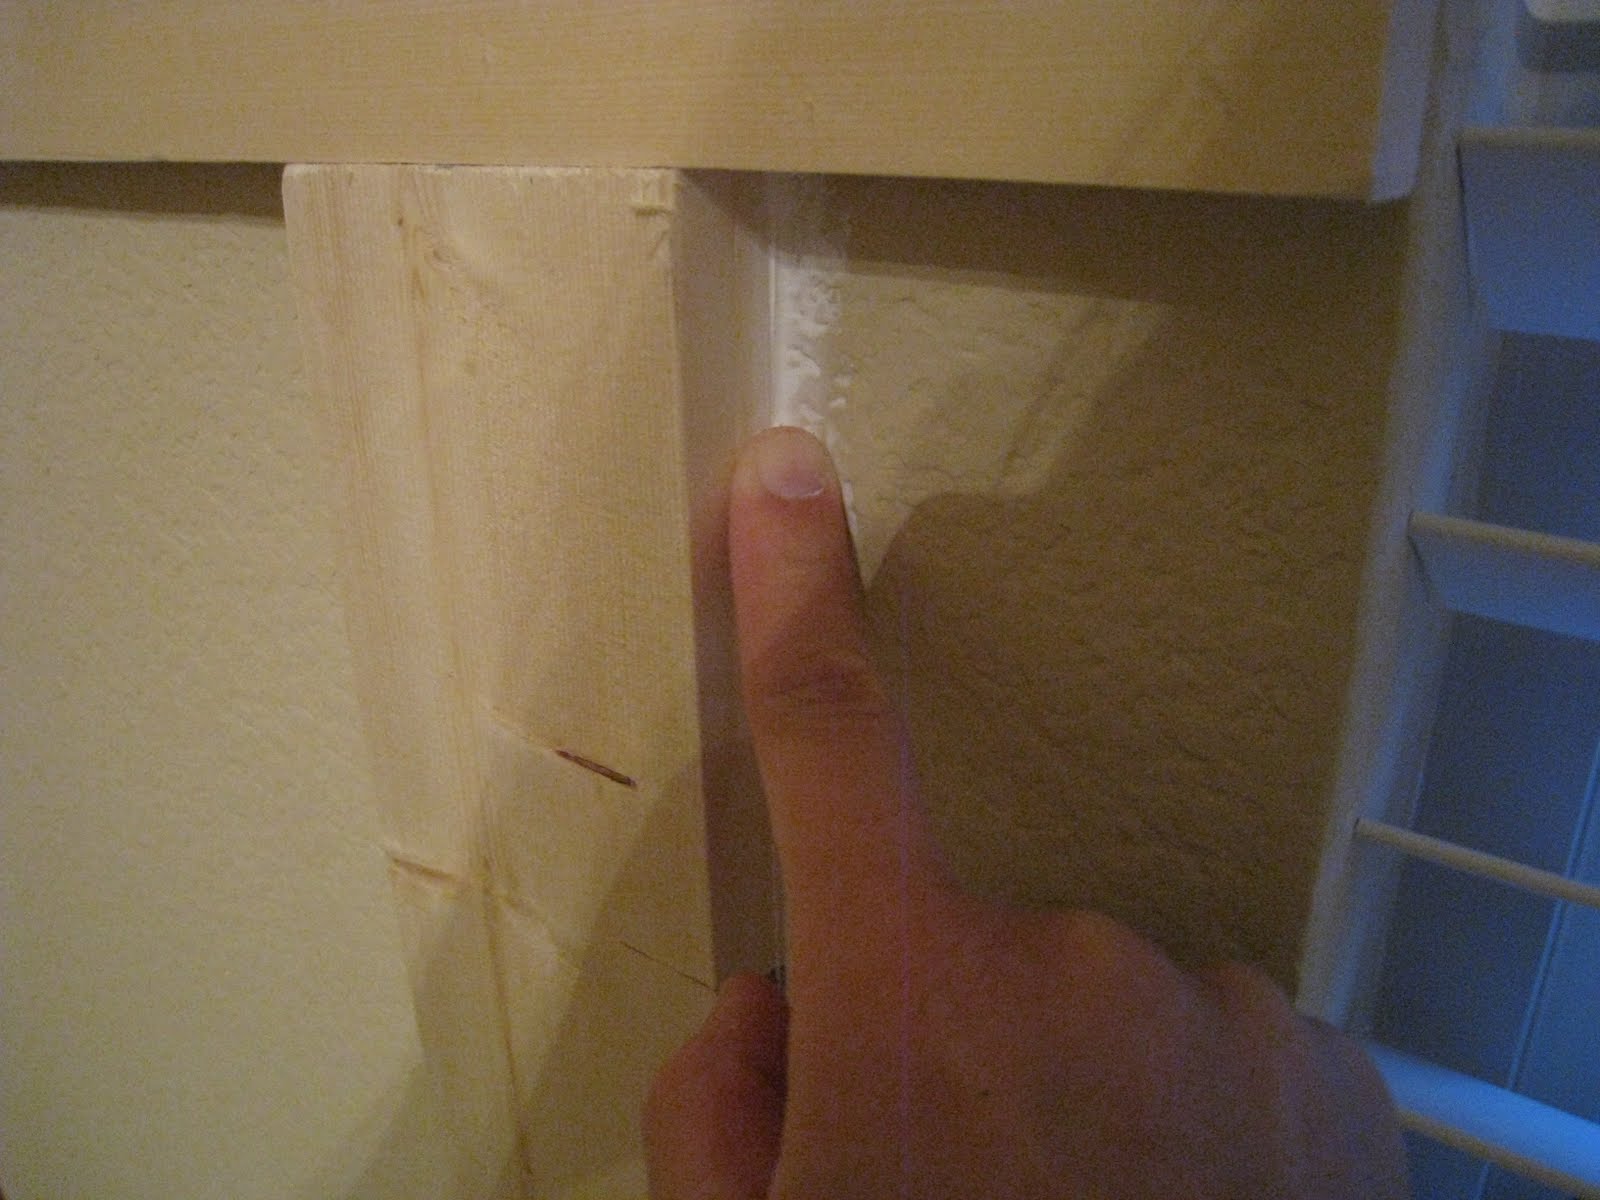
I followed up by caulking EVERY corner, edge and hole left from the finishing nails.

Finally I taped off the walls to prep for the painting! We used a paint roller for the walls and a paint brush for the wood, edges and corners.
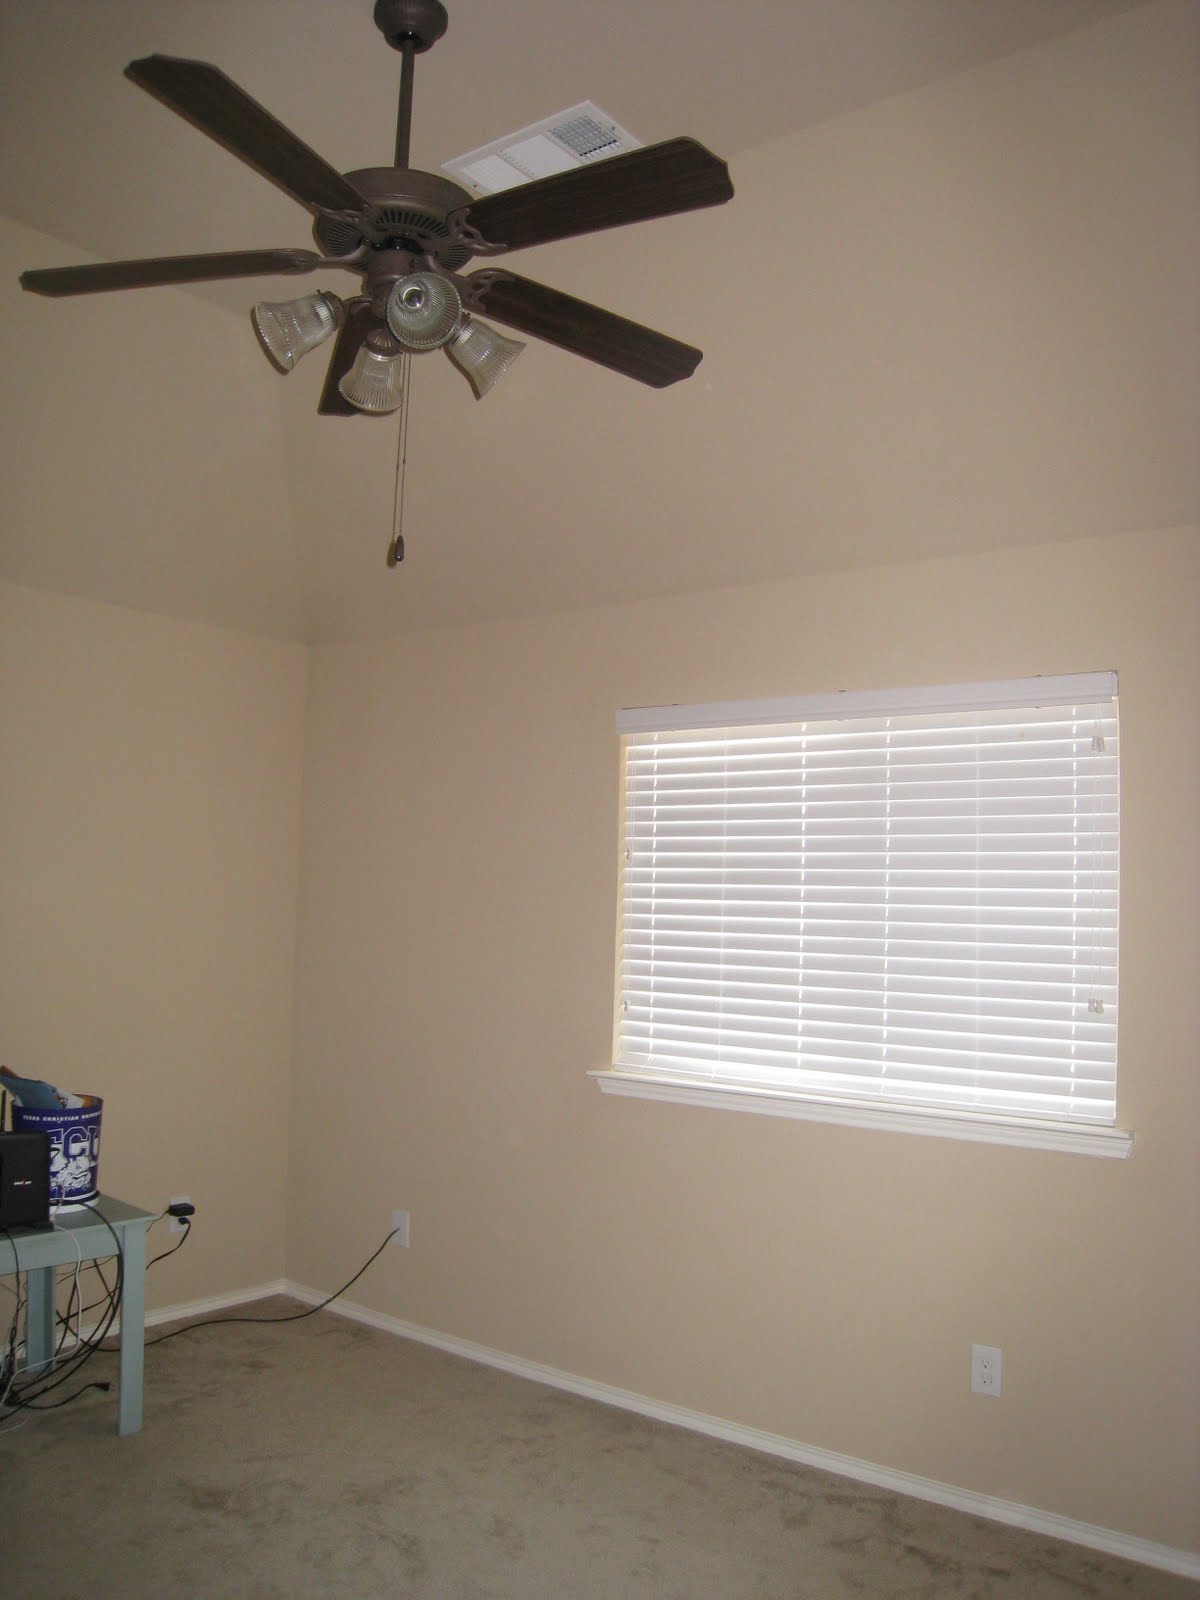
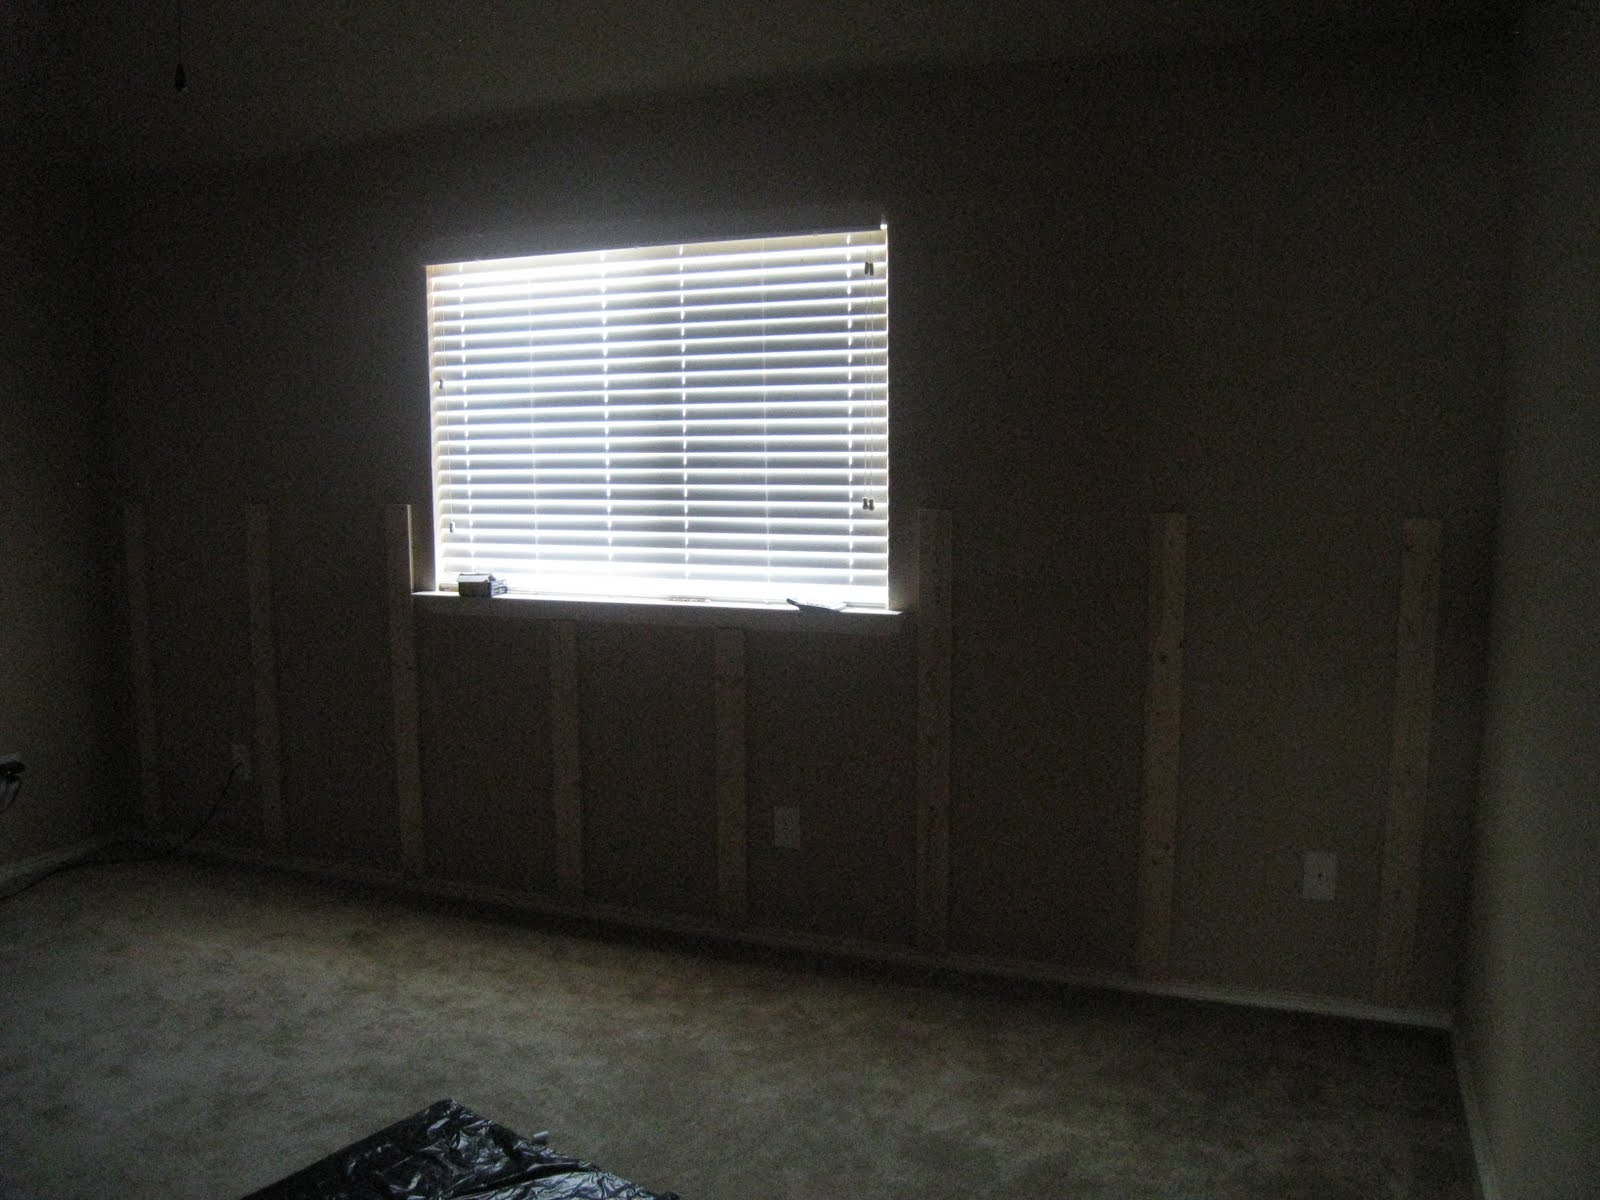
Here’s the before…
and the after!

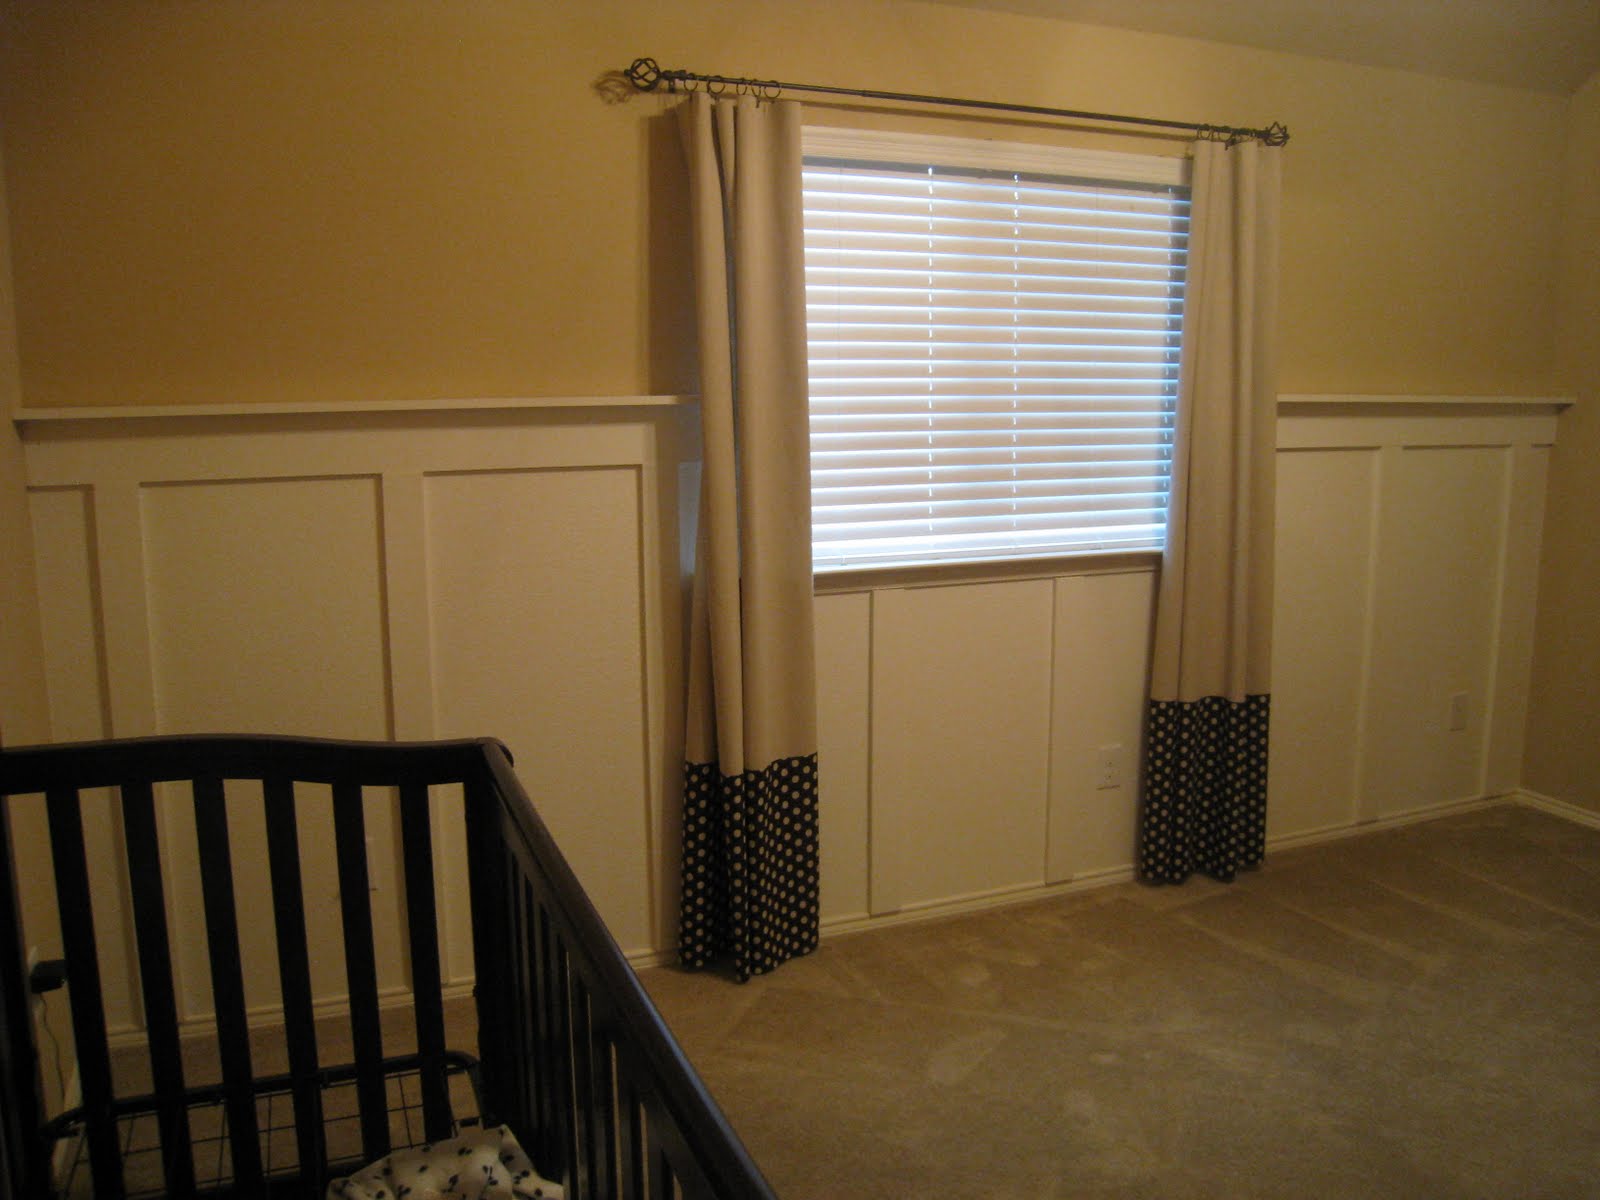
After:)
I am so happy with the way this turned out and with Whitney’s help it only took about 3 -4 hours! I spent about $30 on the wood and about $30 on the paint! Small price for the custom look it gives the room! I still have a ton left to do in the room but this is a huge start!!!
This post brought to you by Garage Sales Tracker!
Stop by to find lists of all the garage sales and consignment stores in your area! Check out their new App for your Iphone too:)
Also: It’s not to late to enter the “I Made it Without my Hubby” party! Scroll down to enter!


加油-不論如何都支持你............................................................
Looks great! Can you explain how the 2×4 meets up with your floor moulding? I have been wanting to do this but can figure out if I'll need to replace the floor moulding as well.
fan-tab-ulous! we have a very similar wall in our master bedroom at the cottage and adore it!
That looks great! Such a big impact for little money. I am wanting to do some paneling in my younger boys' room. Just don't have the time right now. 🙂
Hope you sweet girls are doing well.
Traci
I love this! It looks so good!
lOVE it! great job. i'm wanting to do the same idea in our new house!
It looks beautiful!! We have the same thing in our family room/dinning room in our little beach house. It is so classic and charming.
Heidi
Nice job on this! I am looking into doing this too! Thanks for the tutorial!
Looks fantastic!!! I have a question…you just nail the boards into sheetrock, right? Obviously if you're choosing your width, it may or not hit stud, so I'm assuming that's OK? I've been doing some research on this process and I'd love any insight. Thanks!
I love this idea and have been wanting to do it in my new baby's room – After seeing this – I really want too!!
Looks great! We have this paneling up in our daughter's room too and I love it! It totally changes the look of the room, doesn't it? Great job!
What would we do without our sisters????
Love it !
Hugs ~ Kammy
You two CONSTANTLY AMAZE me!!!! That looks wonderful. Do you hire out? I could trade some babysitting for word work around here. I was just showing this to your uncle and he can't believe it either. I love it!!!
Great tutorial! We are in the process and moving to a home that needs a lot of TLC. This will be perfect in the halls and our bedroom! Thanks!!
Loved looking at your before and after pictures. It looks fabulous!
Wendy