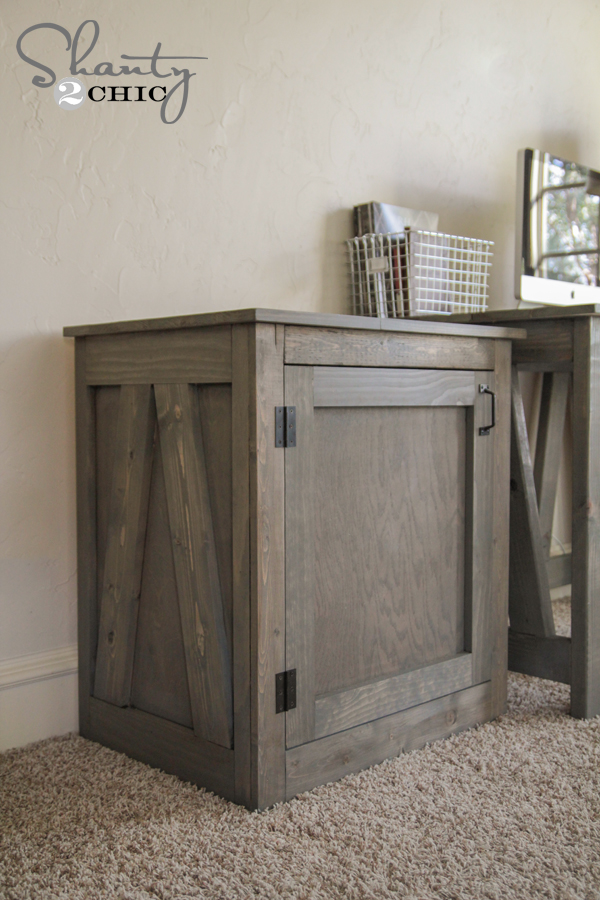
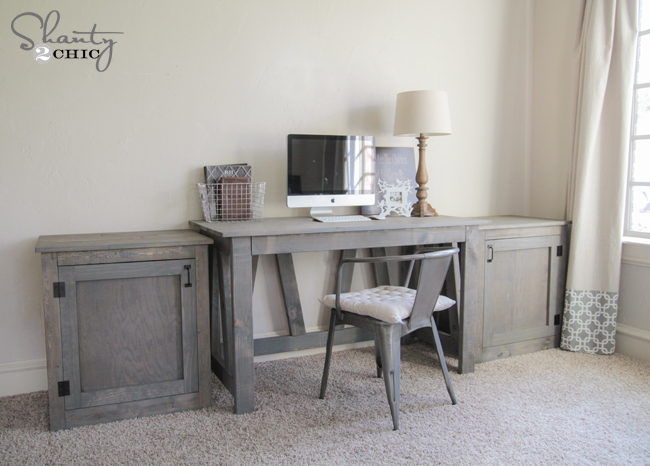
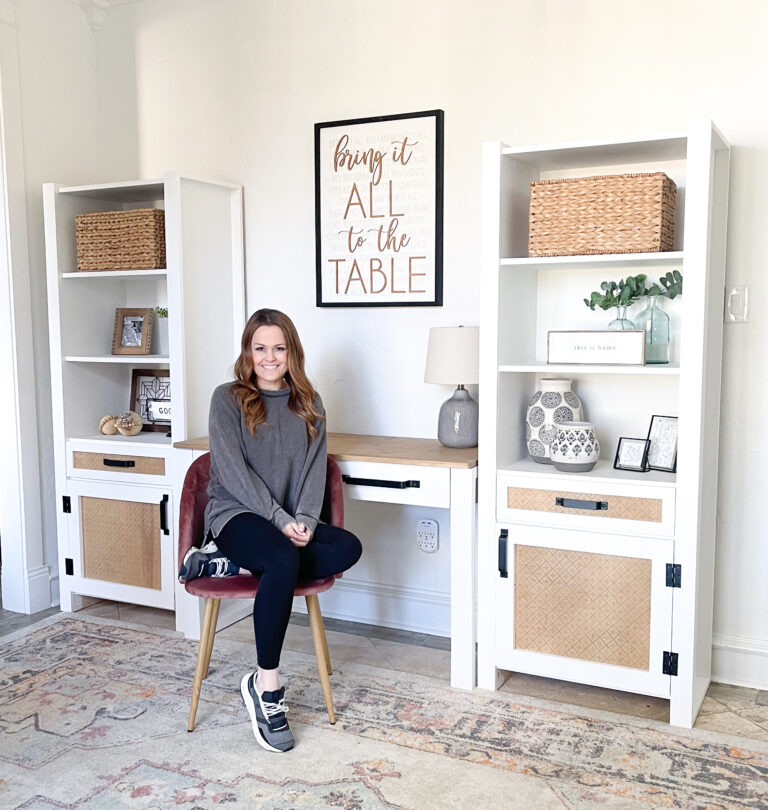
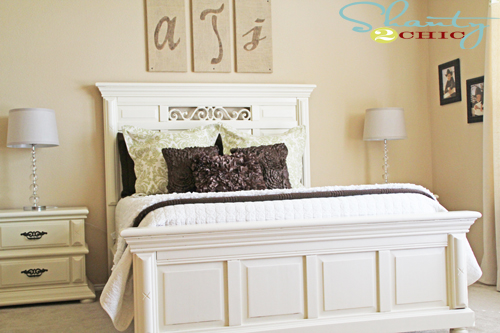
Today I am sharing the free woodworking plans for the side tables of the desk. I designed this part of the desk to be very multi-functional! I am using it as part of my desk system, but these babies also double as nightstands. Nightstands with hidden storage… Can I get an Amen?? Here it is with my desk!
Free Woodworking Plans
I shared the first part of this desk with you guys a few weeks ago, and you can see that HERE. It has been really exciting for me to “need” a desk space. When we started this little blog 6 years ago I never thought I would need a large desk to store a bunch of stuff, but here we are. Makes me thankful.
So… Let’s get to it! As always, you can download the FREE set of plans for this project HERE or the button below! We have an awesome friend named Jay of Jay’s Custom Creations. He puts all of our original ideas and plans into printable plans for you guys! Go check him out and give him some Shanty love!

As always, I would call this a very simple and easy build! I have broken it down for you, but let me know if you have any questions at all!
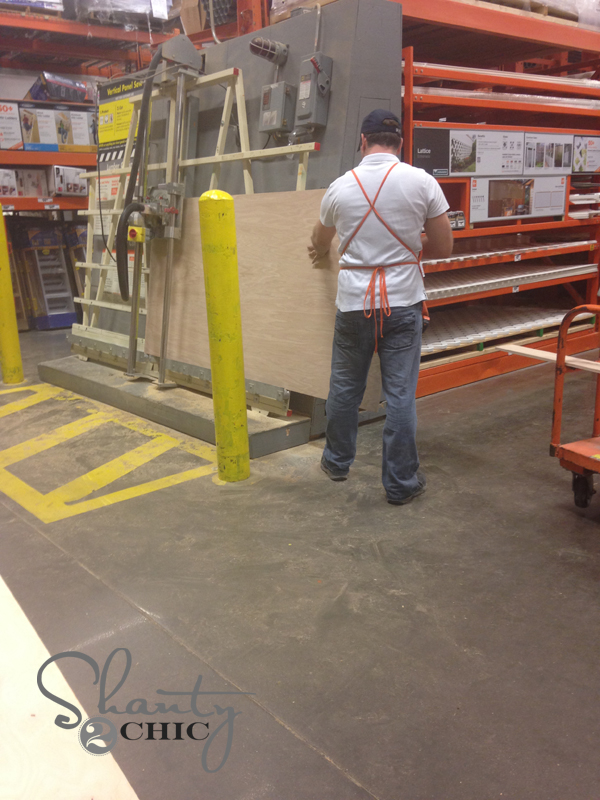
The box of this little table uses hardwood plywood. I chose to use Purebond Plywood for mine! Purebond is our favorite product to use when plywood is part of a build. It looks like expensive hardwood at a fraction of the cost. It’s made here in the USA and it’s formaldehyde-free making it safe to work with! You can find it at the Home Depot. We always have the guys there cut it down for us to make it easier to get into the car.
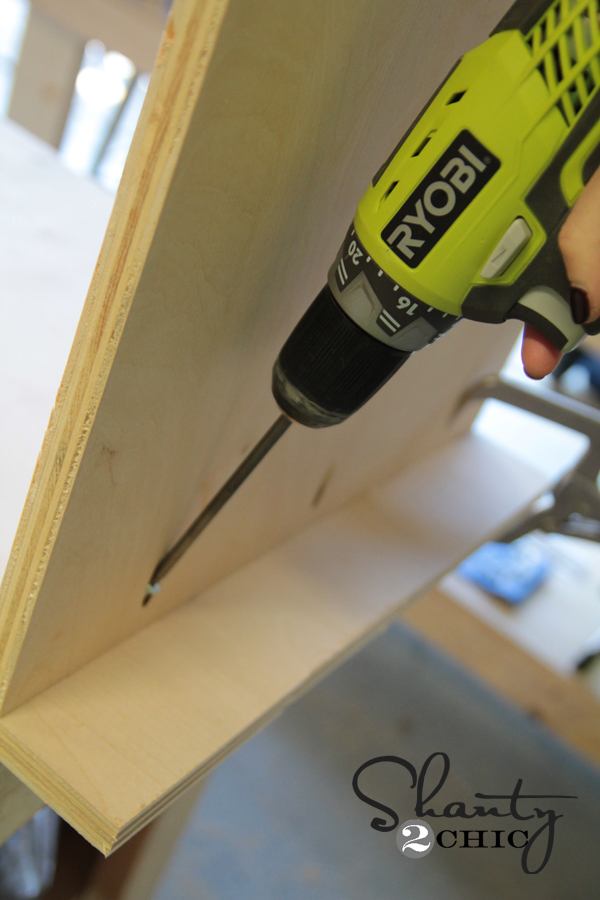
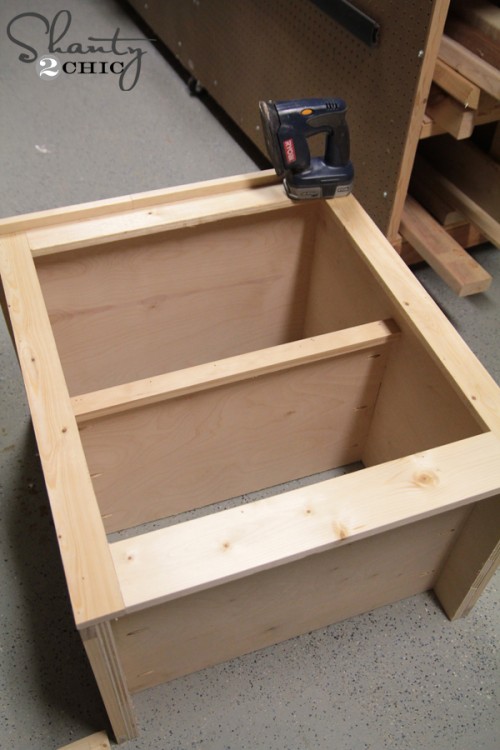
The first step on these tables is to build the box. I used my Kreg Jig for this part. I made 3/4″ pocket holes on my top and bottom pieces.
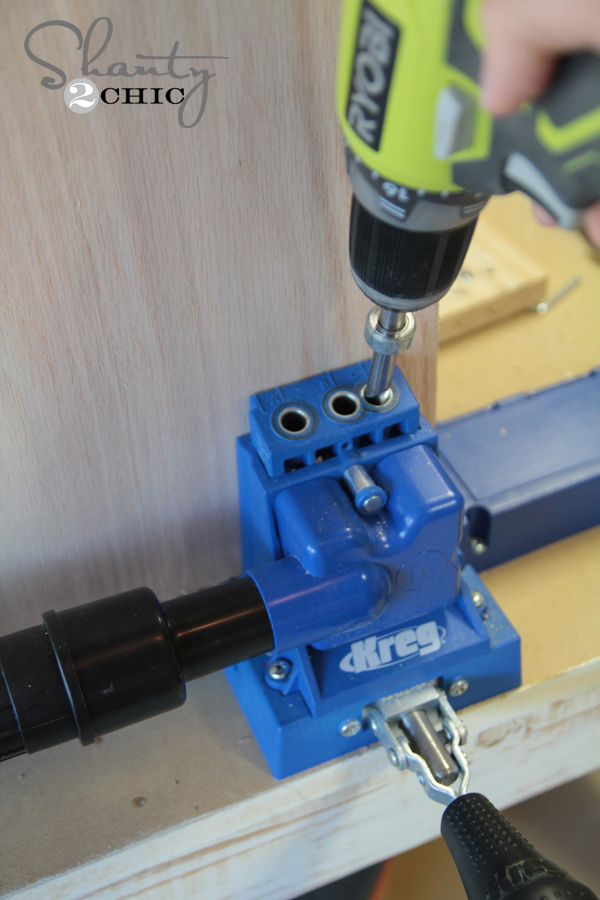
I used a pencil to mark where the bottom board would line up on a side piece and added a line of Gorilla Wood Glue before attaching the bottom piece.

I used my Kreg Right Angle Clamp to hold the bottom board in place while attaching with 1.25″ pocket hole screws. I love this clamp! It’s like having an extra arm around!
I attached my top board the same way. Make sure it’s flush with the edge of the side pieces.
And you have a box!
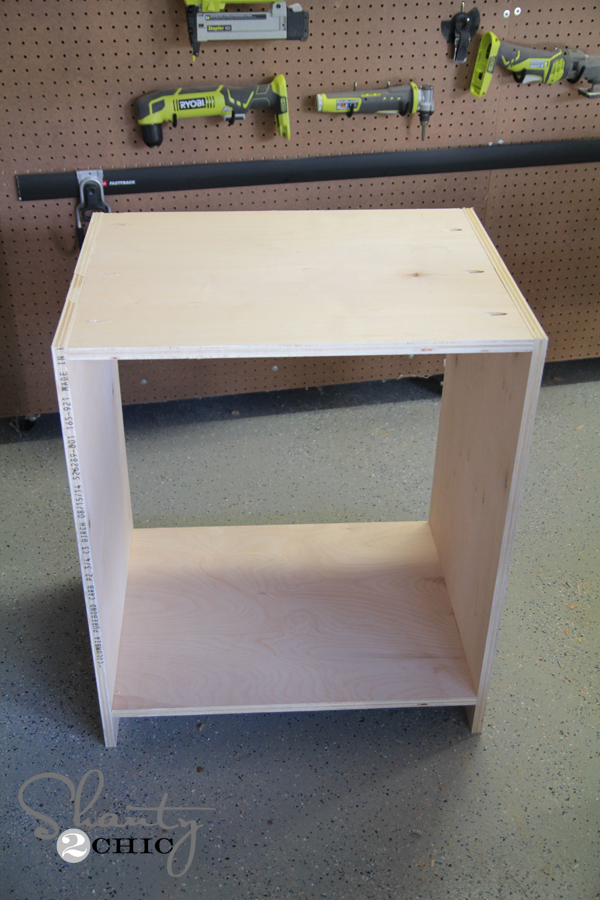
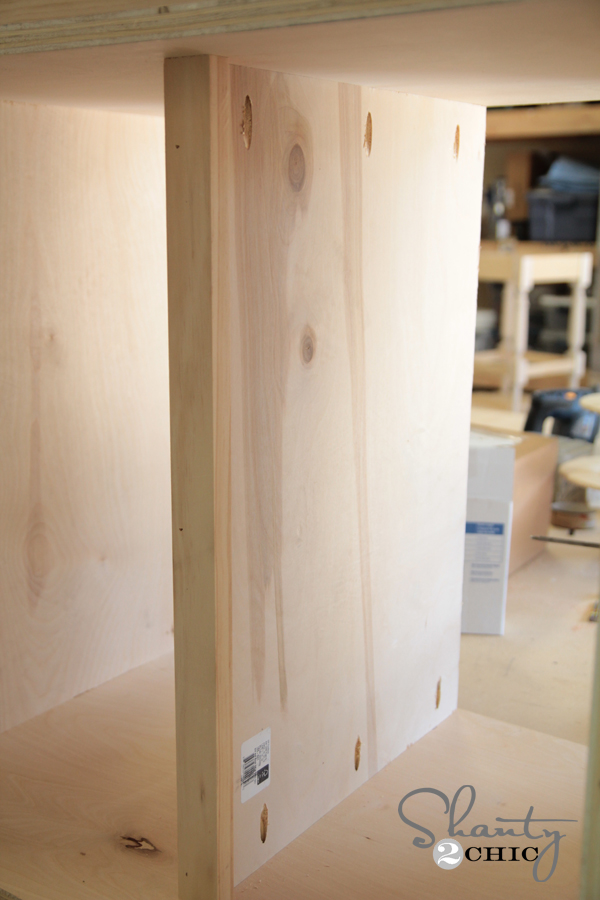
I added the shelf piece next. This part is optional and you can line it up inside the table wherever you want to fit your own storage needs. I used 3/4″ pocket holes and 1.25″ pocket hole screws for this part as well.
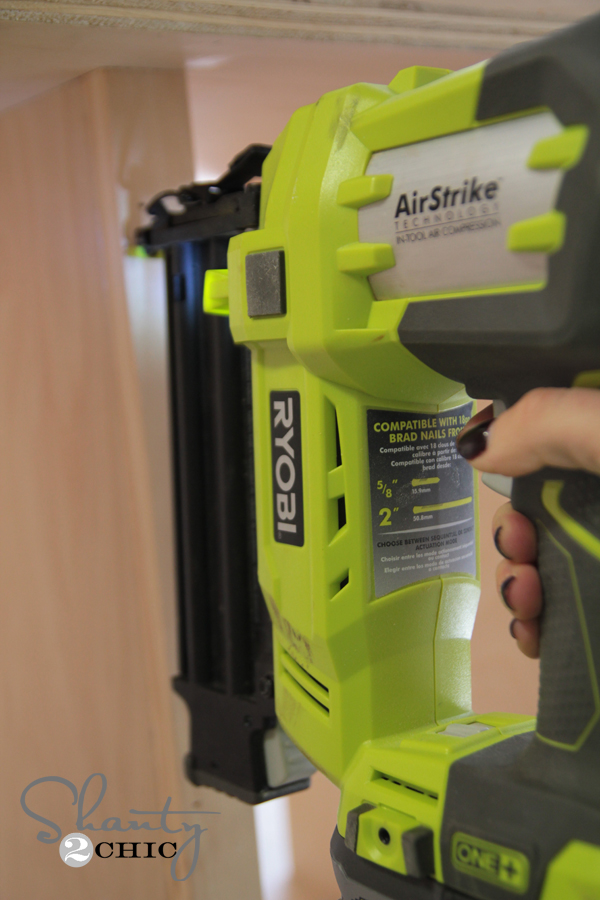
I attached a piece of 1×2 on the front of the shelf using my Ryobi AirStrike brad nailer and wood glue. This covers the rough edge of the plywood.
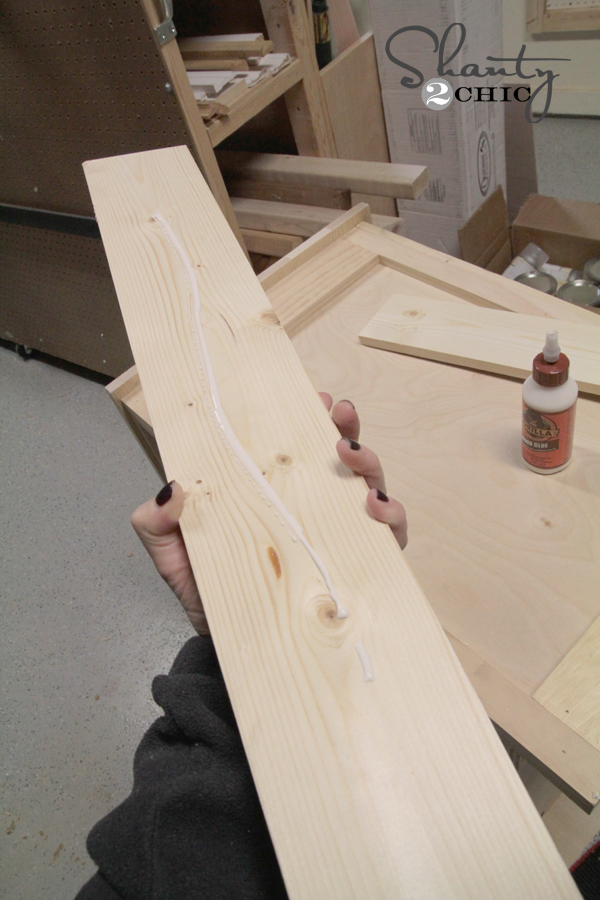
Now to trim this bad boy! Simple. I used whitewood for all of my trim pieces. We have noted the cuts in the plans, but I really like to measure this part as I go. Sometimes you may be of a very tiny bit, and that will be most evident when adding trim. I used a line of wood glue under each board.
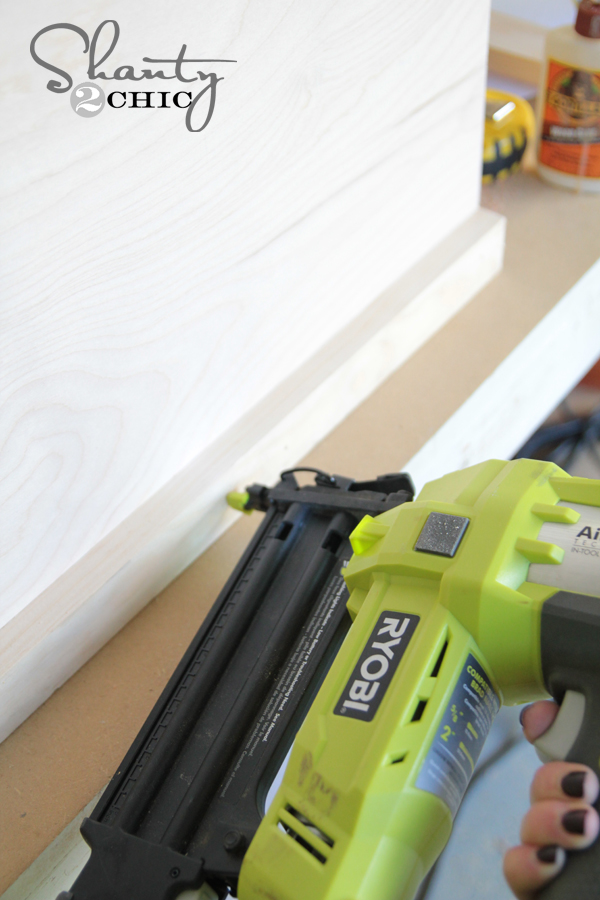
Then, I attached them using my brad nailer with 1.25″ brad nails.
I didn’t worry about the nail holes on this part. I am going with a weathered wood look, and I actually love the look of the exposed nail holes. You can fill yours if you wish… Just be sure to use stainable filler if you plan to stain.
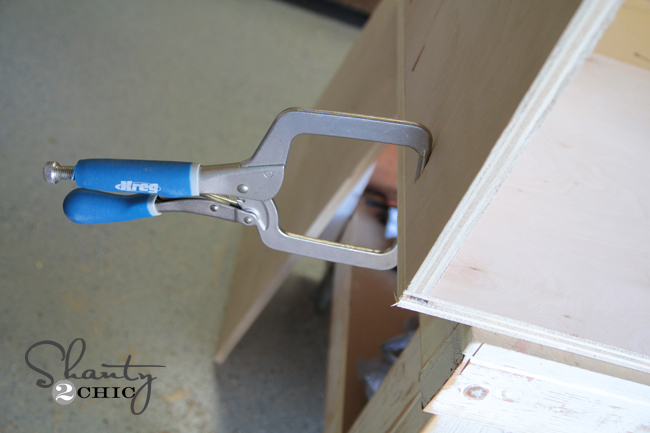
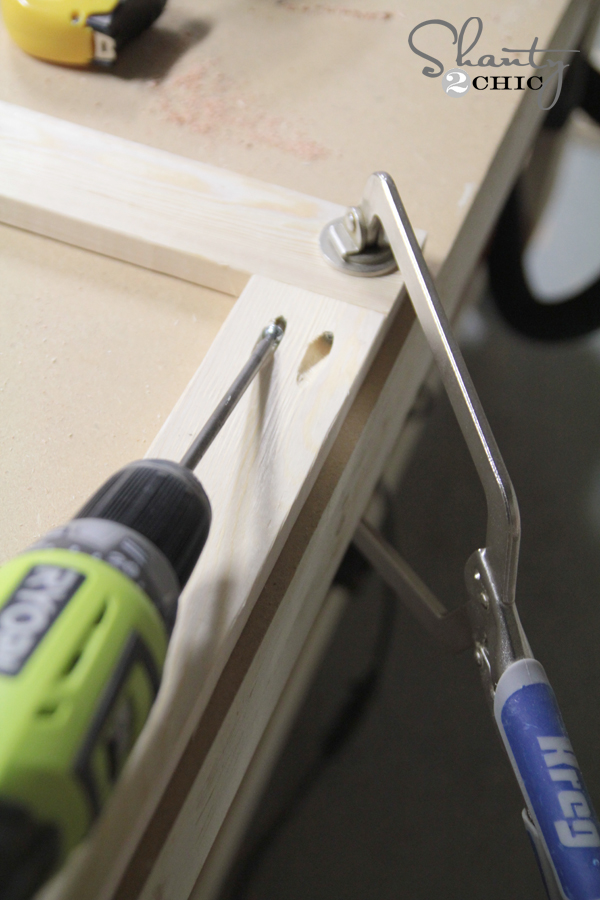
I used my Kreg Jig again to put together the face frame of the table. This part uses 3/4″ pocket holes and 1.25″ pocket hole screws as well. You can see my Kreg face clamp hard at work here….
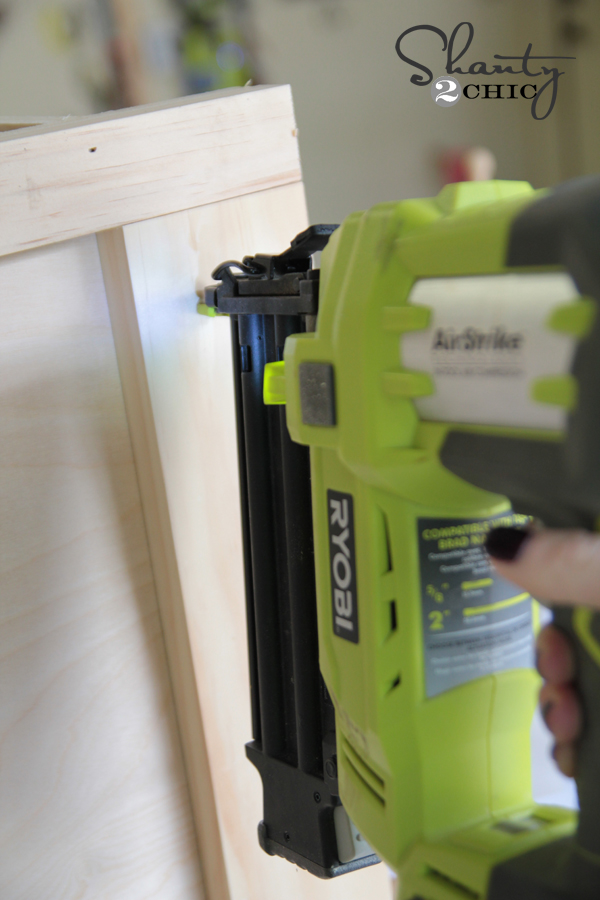
Once I had the entire face frame assembled, I attached it to my ‘box’ using wood glue and my brad nailer.
Time for the doors… AKA Mom’s best friend…
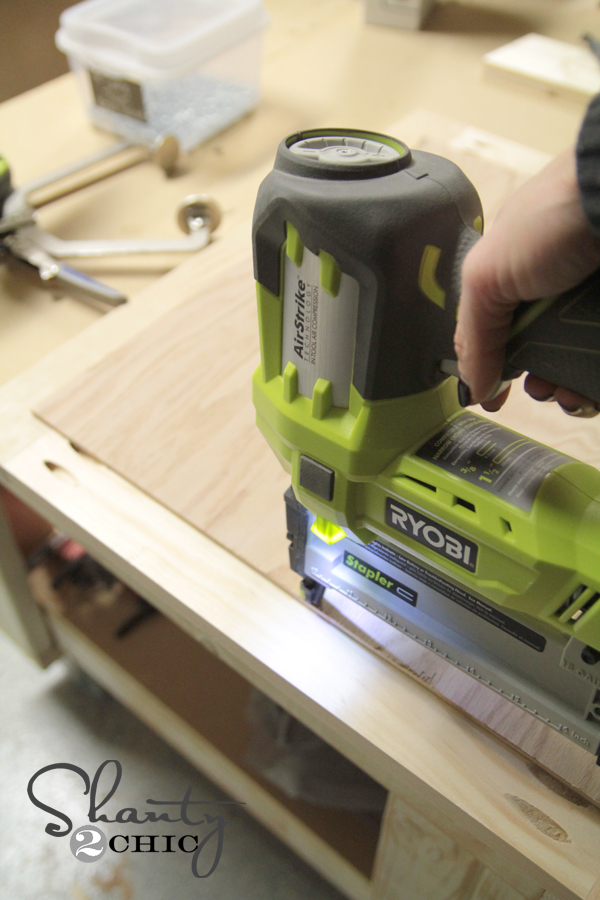
You build the doors the same as the face frame using the Kreg Jig. Once those frames are built, attach a piece of 1/4″ Purebond plywood to the back of the frame. I used wood glue and 3/4″ staples with my AirStrike Stapler for this part. Staples are a good option when using thin plywood like this.
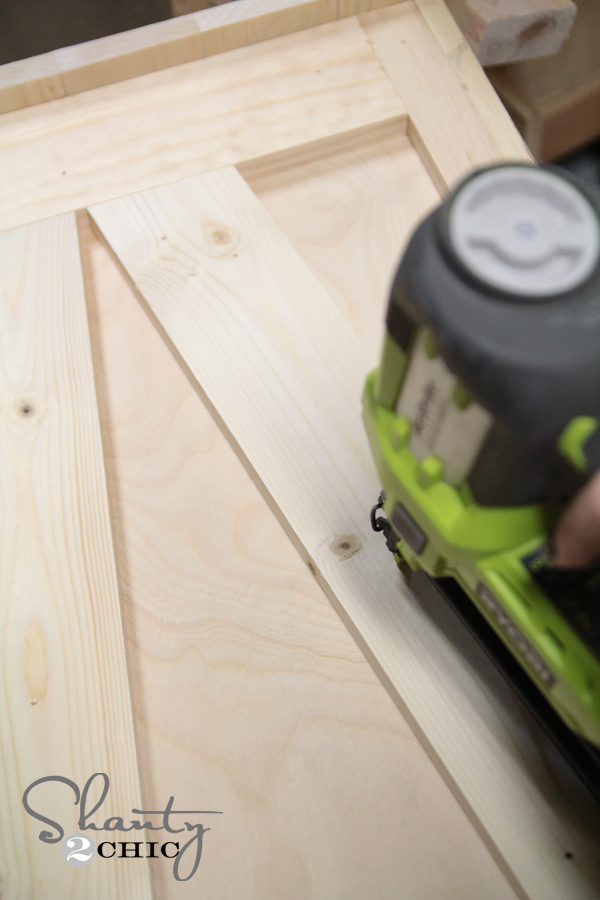
I kept the doors off for now, so I could stain them. My final step was adding the side pieces of trim. These are 1×4 cut with a 10 degree angle. This is a very easy cut to make with a miter saw. Just set the saw to cut a 10 degree miter cut and cut them according to the plan. I added a line of wood glue on each piece….
I attached them using my brad nailer and 1.25″ brad nails.
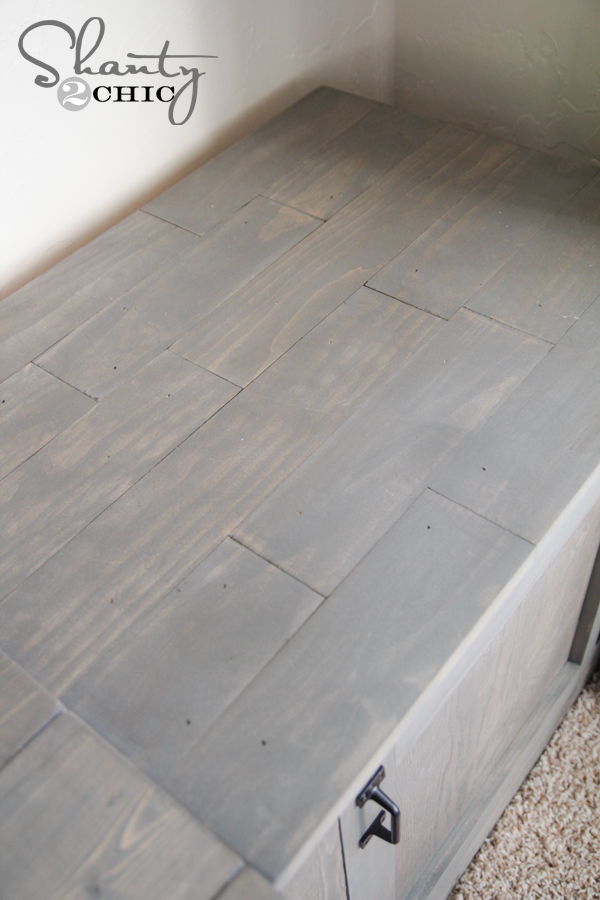
My final steps were adding the plywood to the back of the tables and planking the top. I used Purebond for the back and attached it using my stapler and no glue. I decided to plank the top of the table with the same measurements that the plan calls for. I just broke those up into more cuts to give it a ‘planked’ look. I LOVE IT. You can see it here…
Let’s talk about the stain!
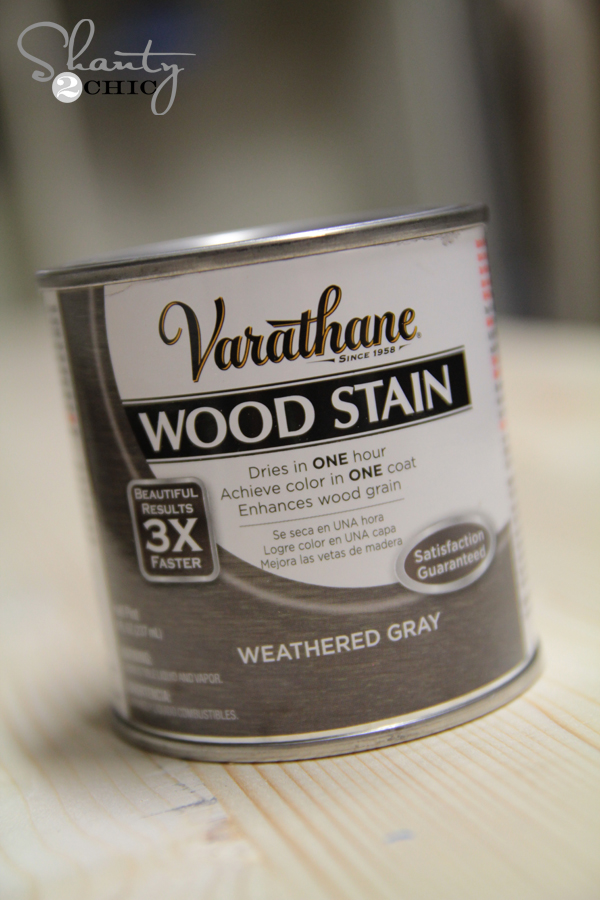
I used one of my new fav stain combos for the finish! I started by staining the whole thing with Varathane wood stain in Weathered Grey. You can find this at Home Depot! It only requires one coat and dries in an hour… Yes please!
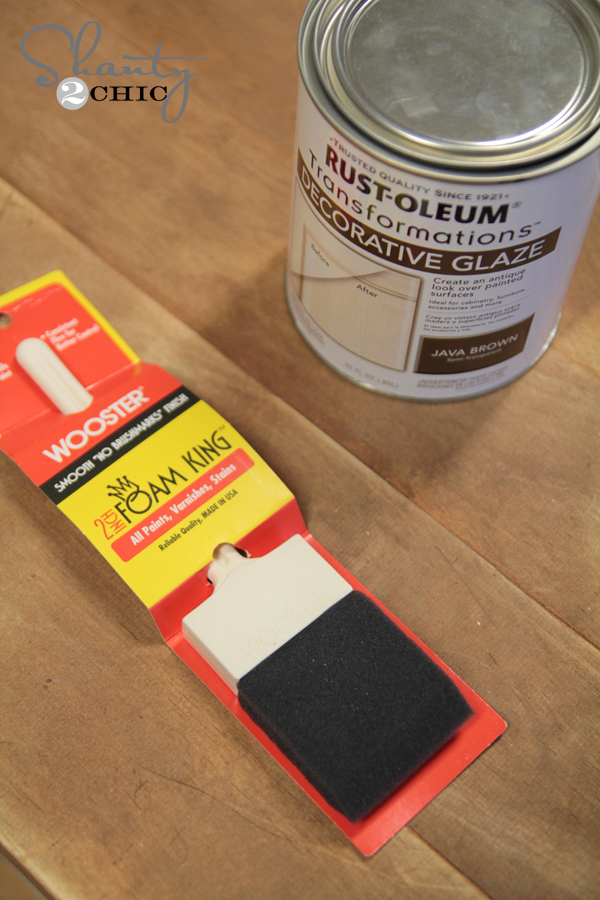
I wanted mine to look a bit more distressed, so I used Rust-Oleum decorative glaze on top of the stain once it dried. You just brush this stuff on and then wipe the excess off. Work on one side at a time as it does dry pretty quickly. You can also find this at Home Depot.
I found my hardware at Home Depot as well. These are the pulls and hinges I used for my tables. Just use your drill to attach both… Easy peasy. I also added a small magnet closure on the bottom of the inside of the table to catch the door as it closes.

Here are a few more shots of the progress!
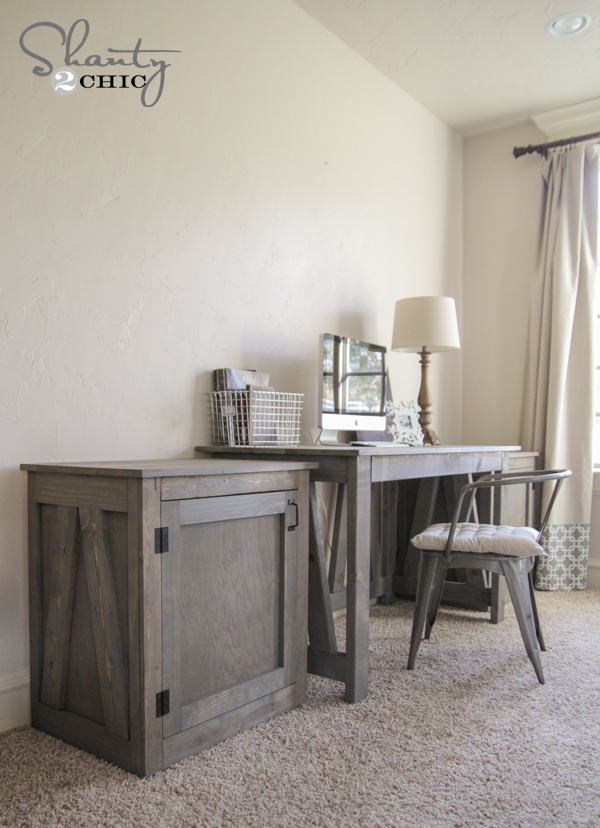
I can’t wait to share part 3 with you guys soon! This is such a fun system that can be easily modified to fit your own space!
I would LOVE for you to PIN and share this plan with all your friends! You guys are great and we appreciate you so much!
~Whitney


I’m not positive the place you are getting your information, however good topic.
I must spend some time finding out more or understanding more.
Thanks for great info I used to be on the lookout for this information for my mission.
Having read this I thought it was rather informative. I appreciate you spending some
time and effort to put this article together. I once again find myself personally spending
a significant amount of time both reading and commenting.
But so what, it was still worthwhile!
Your link to the desk isn’t working ?
For newest news you have to pay a quick visit internet and on world-wide-web I found
this site as a best web page for newest updates.
I blog frequently and I really appreciate your content.
This article has really peaked my interest. I’m going to take a note of your blog and keep checking for new details about once a
week. I opted in for your Feed as well.
You could definitely see your enthusiasm in the work you write.
The arena hopes for more passionate writers such as you who aren’t afraid to say how they believe.
Always go after your heart.
There’s certainly a great deal to learn about this subject.
I really like all the points you made.
Good post! We will be linking to this great article on our site.
Keep up the good writing.
Admiring the commitment you put into your website and in depth
information you present. It’s good to come across a blog every once in a while that isn’t the same unwanted rehashed
material. Great read! I’ve bookmarked your site and I’m adding your RSS feeds to my
Google account.
In Dubai, 5-star hotels dominate the skyline.
Padma, There is enough time for a fuck usually.
Đây là điểm tận hưởng hấp dẫn cho du khách.
So what is the final verdict do I need 1/4″ or 1/2″ plywood ?
Sounds like 1/4″.
23 1/4″ are what my 10 degree mitered pieces needed to be. Plans say 24 3/8″, but these are a bit too long. Had to cut them down a bit to get them to properly fit.
Sorry about your frustration. On page 2 of the plans (cut list) we suggest that you measure and cut as you go, for the most precise fits.
No worries. Just putting my finding out there since I didn’t catch that the first time. Love all your plans! They couldn’t be easier to follow and they look gorgeous!
Is anyone else having trouble with the 10 degree miter cut? Or are my tools in the shed the sharpest things in there? Lol.