Hey guys!
I hope you all had an awesome weekend! I took one of my girls to Lowe’s on Saturday and just walked the aisles. It is amazing what you can come up with. I left the store with materials for 5 new projects… Woohoo! I finished 2 this weekend, and I want to share my new Key Holder with you today!
I love my old mason jar key hook that I shared over a year ago, but with only 3 spots for keys we have outgrown it! It was time to upgrade.
Here is how it turned out…
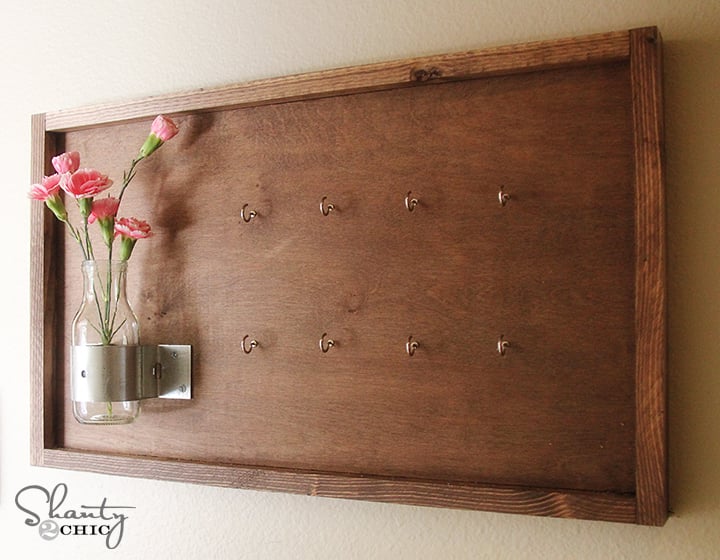
How fun! This is super easy to make… Definitely a great beginners project into woodworking for those of you out there itching to get started!
Here we go!
I started this project with a piece of PureBond Plywood! Many of you know how much Ash and I love PureBond.

After learning more about it’s health benefits and how pretty it makes our projects turn out, it is our go-to when we need any kind of plywood or hardwood plywood. You can see us talking about it’s benefits in this video HERE.
We encourage you to follow PureBond of Facebook! They are always sharing great how-to projects using their product from other bloggers, as well as sharing great giveaways!
The other great thing about using PureBond is the scraps baby! I have a TON just like this one I used today just waiting to be turned into something fabulous! You can also buy hardwood plywood in 2’x2′ pieces. Here is my piece…
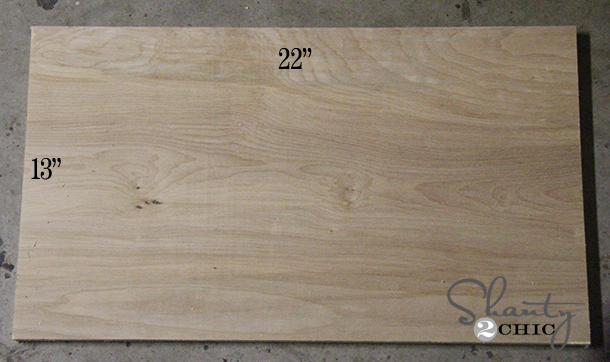
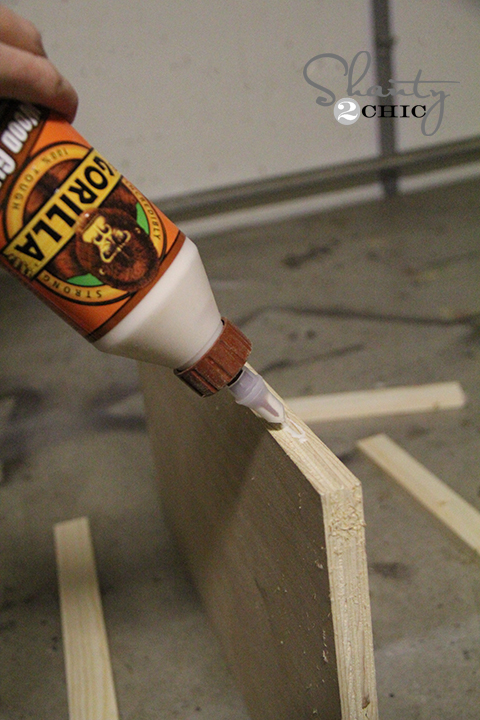
For the frame of my board I chose to use a 1x2x8′ pine board. You will only need 1. My first 2 cuts were the length of my longer sides… 22″.
I used Gorilla Wood Glue and my Ryobi Finish Nailer to attach both pieces.
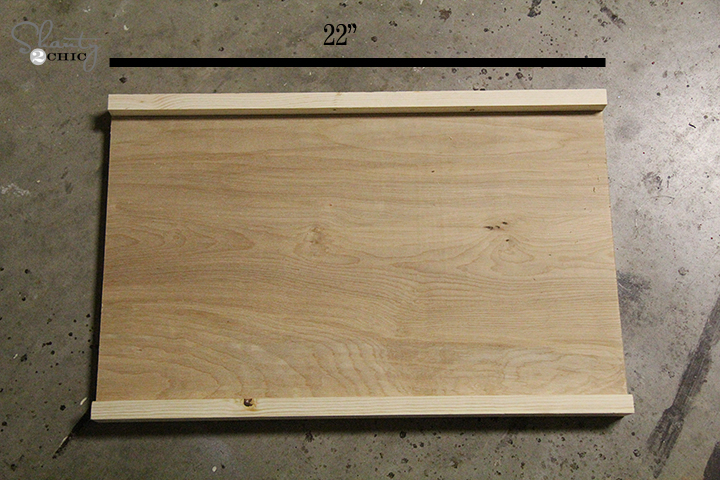
Now your final two pieces will be this length below…
I would encourage you to measure your own before cutting. Some wood is slightly off on measurement, and this just makes sure you are cutting the length that fits yours best!
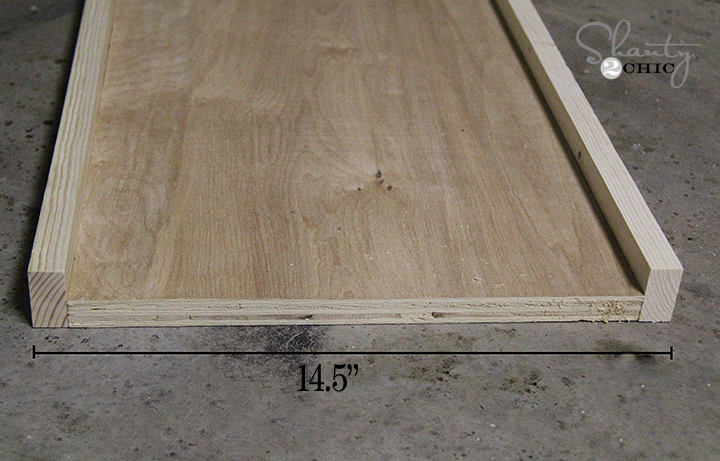
That’s it for the wood! Super easy!!
Now for the finish… I chose to use one of my very favorites for this project…
Rust-Oleum Wood Stain in Dark Walnut
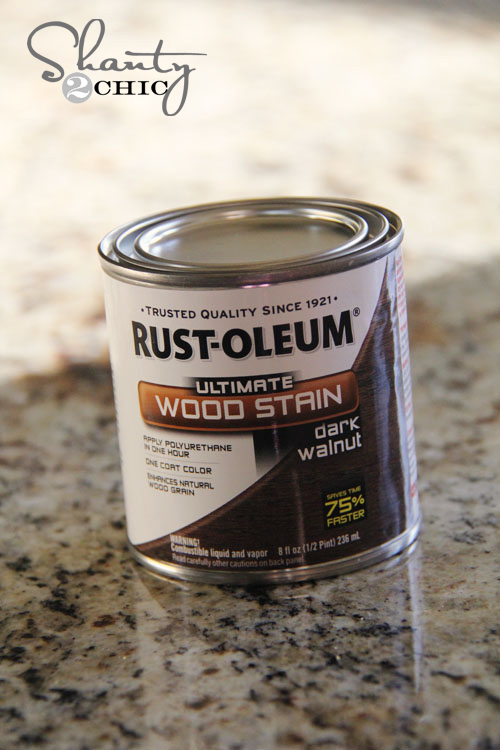
After waiting just an hour for this stuff to dry (LOVE that!) I got started attaching my hardware!
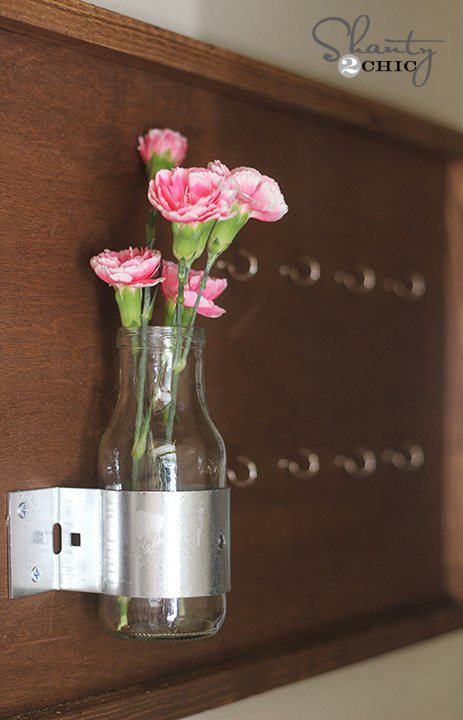
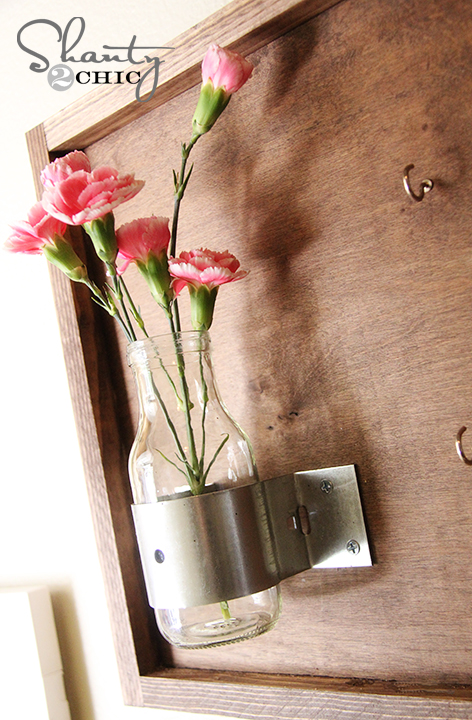
I found these great little silver things at Lowe’s called Pipe Rail Ties. They are $1.38 a piece at my store… Fits my shanty budget perfectly! Here is a pic of the price tag at Lowe’s…

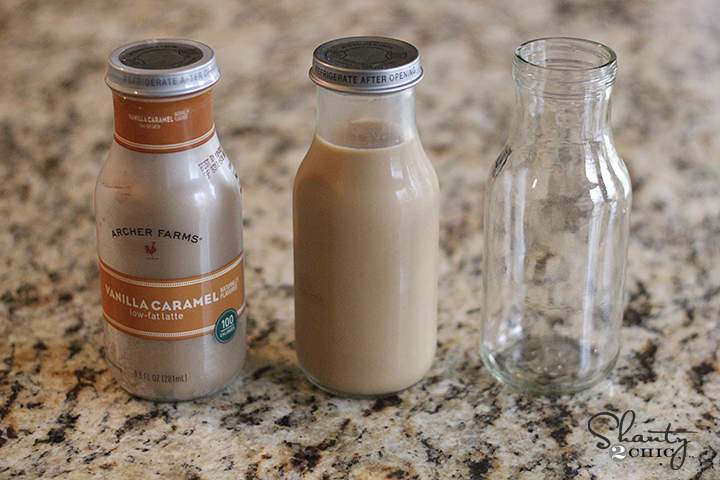
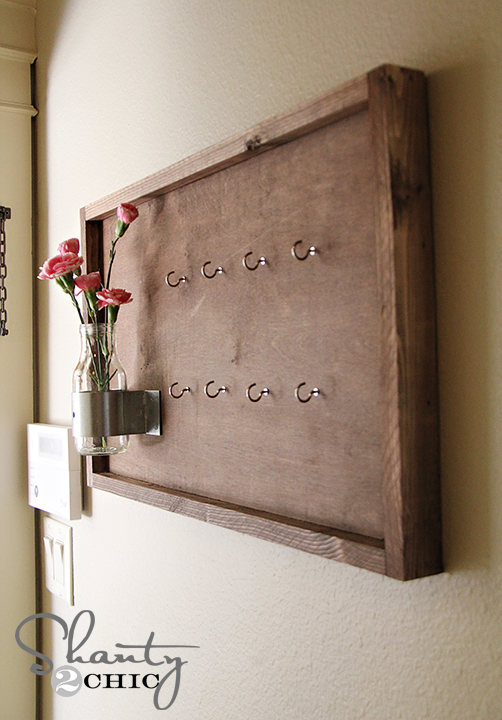
For my bottle, I used a Archer Farms (from Target) coffee drink bottle. These come in packs of 4. They are just like the Starbuck’s ones, but the bottle is more round. Plus they were on sale, so I paid under $1 a bottle…Woohoo! I peeled off the plastic wrapper and washed the bottle out before attaching it to my metal piece.
The bottle fits well inside of the metal piece. Once you use screws to hold it in place, the bottle is very snug and won’t go anywhere!
I used wood screws to attach mine. You want to make sure the head of your screws are big enough not to go through the holes of the metal piece, and the screws need to be short enough to not go through the board.
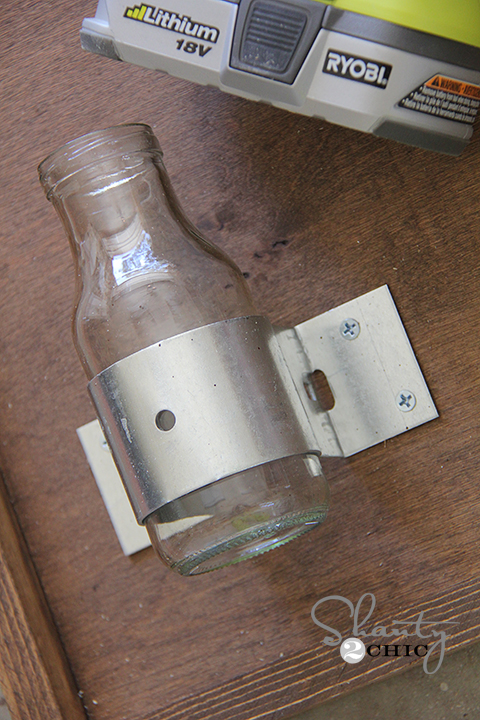
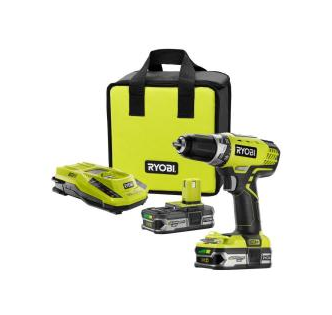
I used my very favorite Ryobi Lithium Drill to do this part. LOVE this bad boy! All of you need to put one on your list! You will thank us!
Here is a link to our drill at Home Depot!
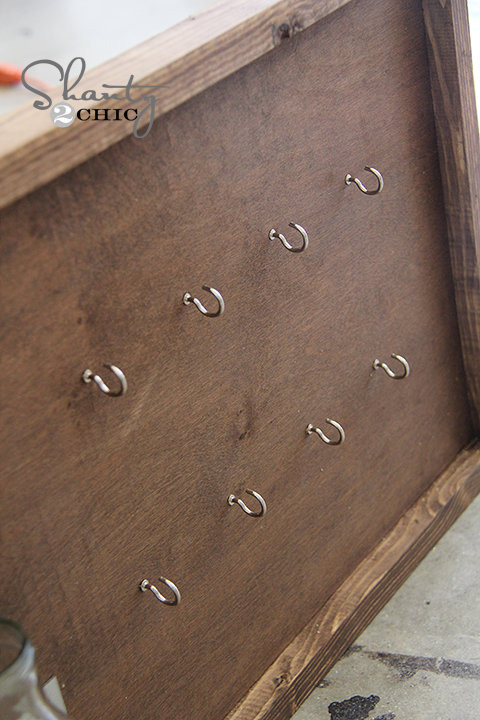
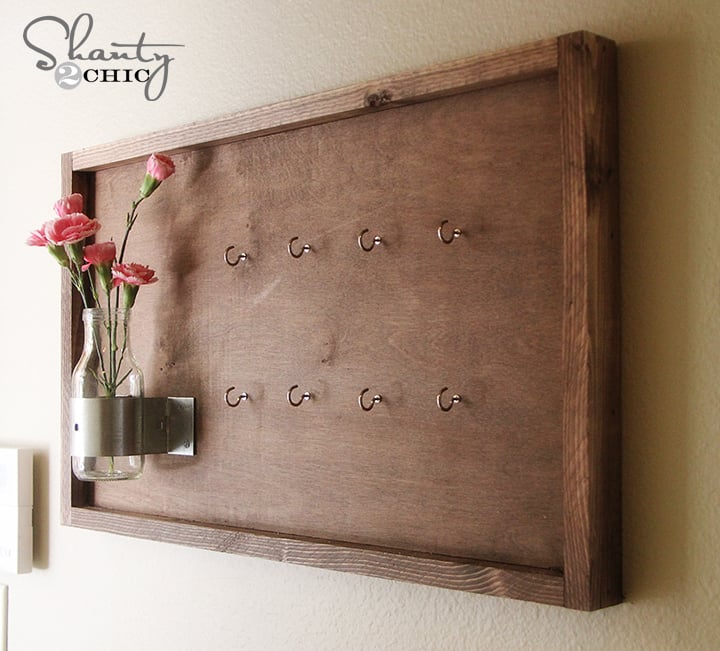
My final step was adding my cup hooks. I found these silver ones at Target!

I spaced mine 3″ apart and about 4″ from the top and bottom of the board. I like to use my drill to make a small starter hole, and then just use your hand to turn the cup hooks into place! Easy peasy!
My final step… Hanging it up! I just used a sawtooth hanger on the back and hung it from a screw on the wall.
Here are a few more pictures of it all done!
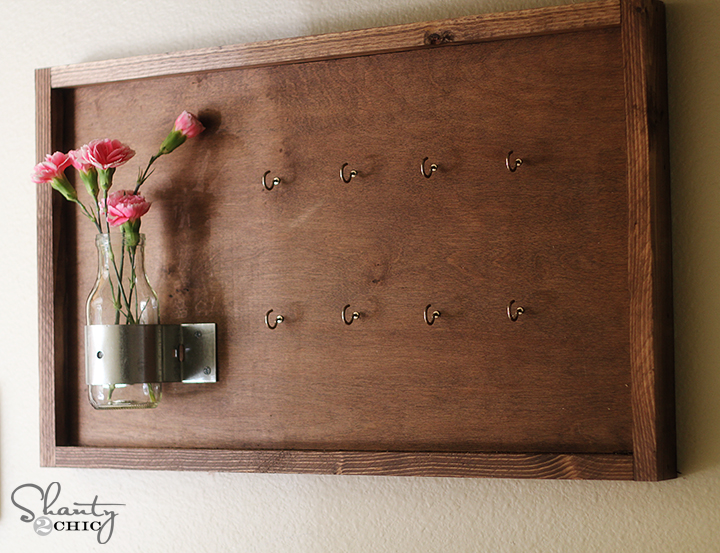
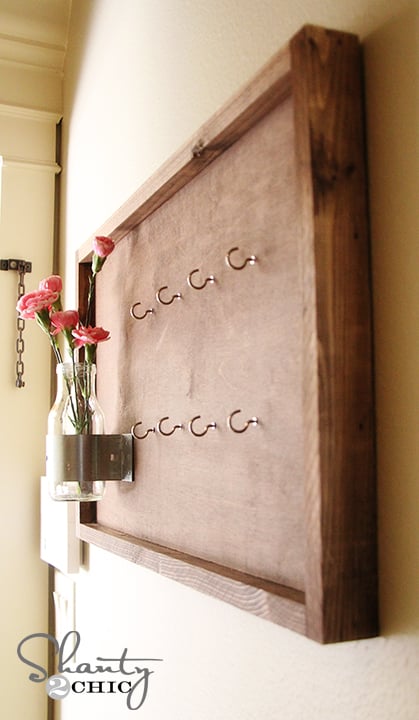
What do you think?? So cheap, so easy and SO chic! I hope you love it!
I would LOVE for you guys to share this with your friends and PIN the heck out of it below 😉 Thanks so much for stopping by!!
Also, if you aren’t receiving our post updates in your email you can sign up HERE!!
~Whitney

Good guide, I want to try it.
?????????
?I built my own using the plans at www. WoodworkPlans.info – highly recommended you check those out too. They are detailed and super easy to read and understand unlike several others I found online. The amount of plans there is mind-boggling… there’s like 16,000 plans or something like that for tons of different projects. Definitely enough to keep me busy with projects for many more years to come haha
?Head on over to www. WoodworkPlans.info if you want to learn more – click the pink link above for some more plans! Best of luck on your building adventures! ?
✌?????
This is so pretty!
How cute! Definitely an upgrade to the “toss ’em on the counter” approach to key storage around here. 😉
So cute, I agree with Stephanie, you come up with the best projects! I love your blog!
I absolutely love this! You girls come up with the best projects!!
I love that there are these glasses for some fresh flowers on both boards, the old and the new! That makes them really cute…
Love, Midsommarflicka
This would be perfect to hang in our walk-in closets to hold all my chunky or super long fashion necklaces that won’t fit in my jewelry box, just stagger the hooks. Guess I know what I’m doing this weekend!!
I love this! I’m still waiting to see your tutorial for that super cute mirror sitting on your floating ledge 😉