So I must introduce you to my new partner in crime…
This is Erin! She is a crazy talented girl who I have been getting into trouble with lately. You have to go check out her BLOG!!

She is a former graphic artist turned mommy who now spends her time painting and decorating just about everything… Much like myself 🙂 When she mentioned a fab idea she had to paint her parsons chairs, I couldn’t pass it up!
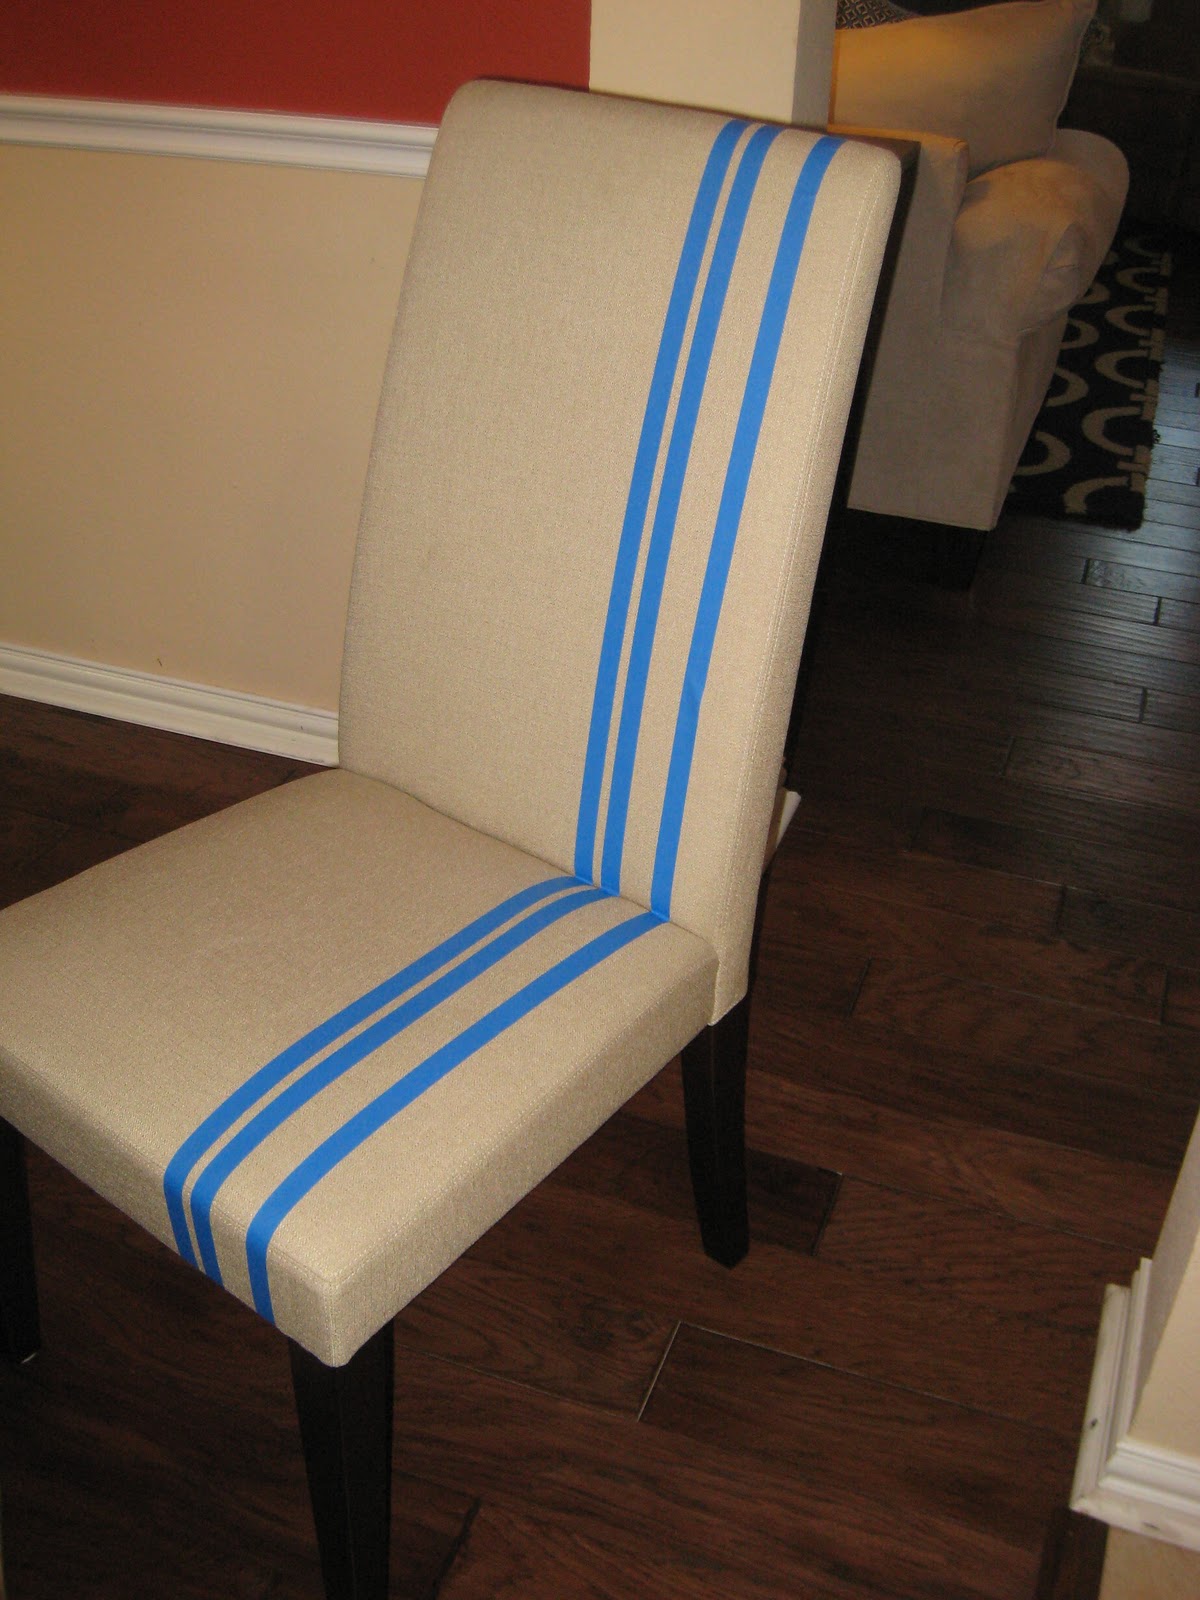
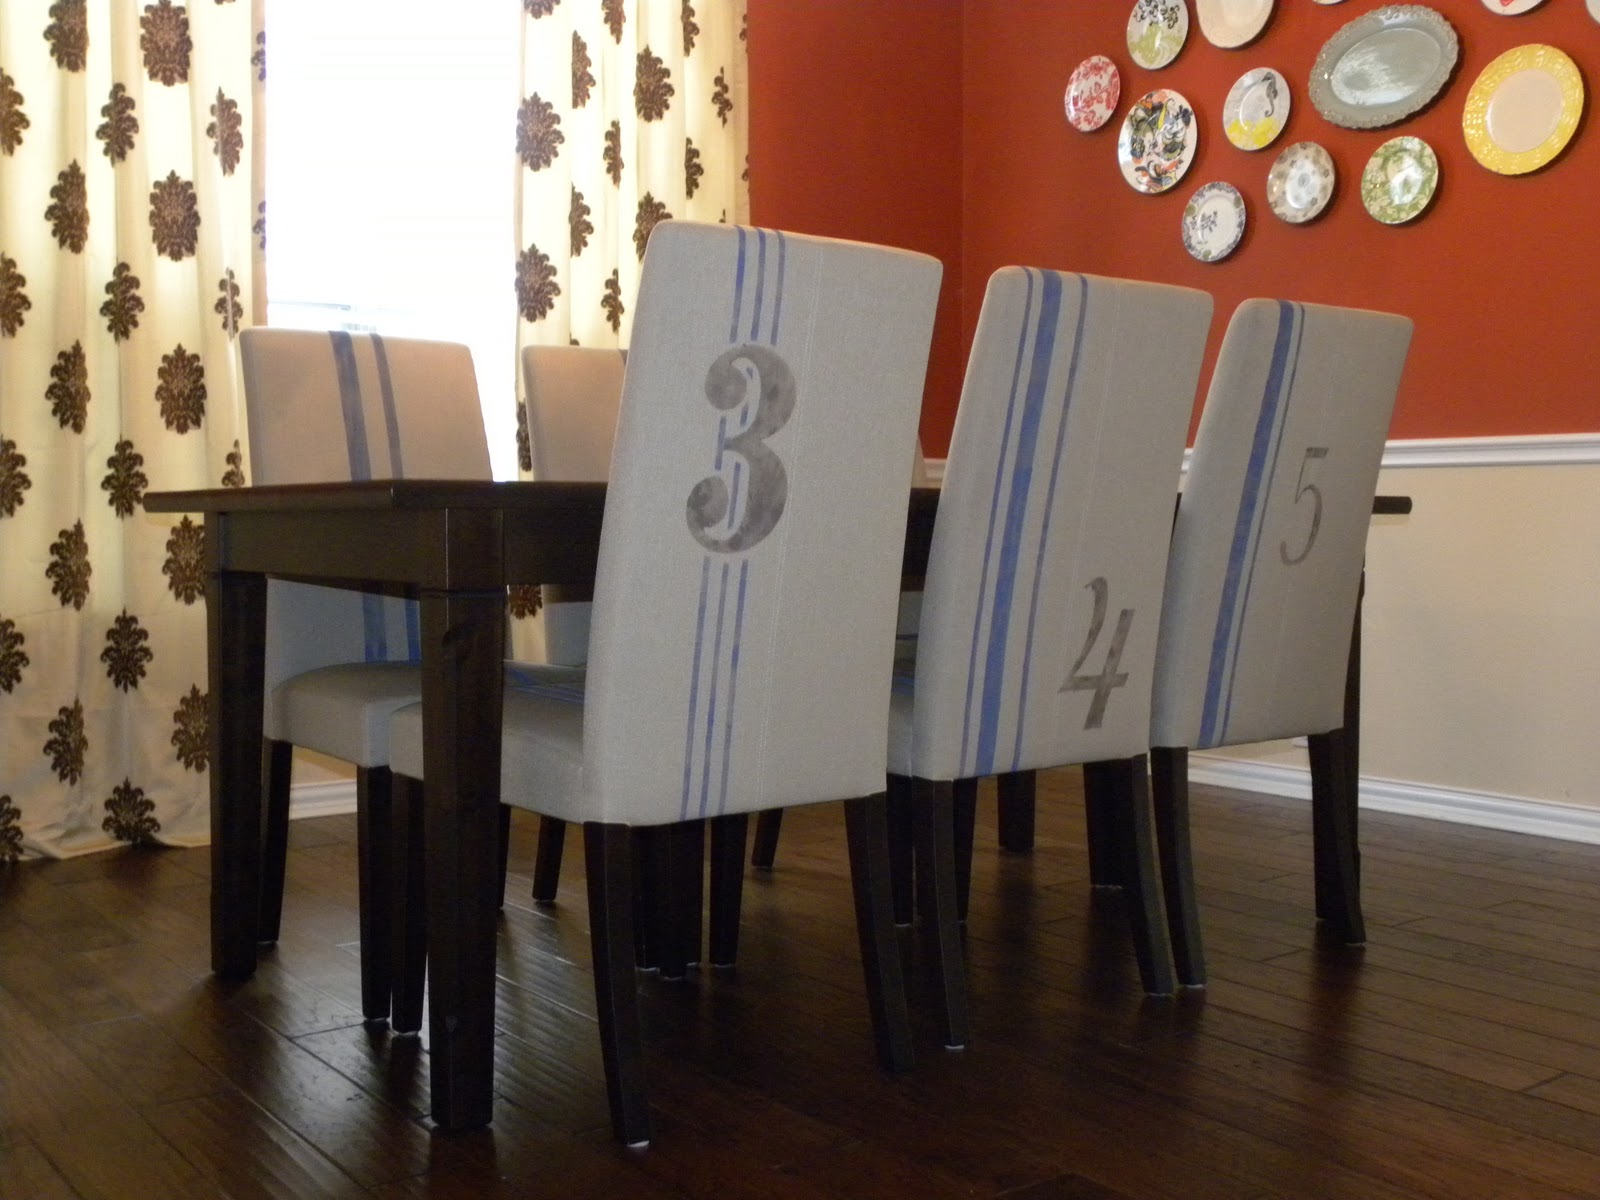
These are her dining chairs…

They are very simple linen parsons chairs she purchased a few years back. Very cute but in need of a little revamp…
She wanted to get the look of a grain sack without reupholstering which led to this project!
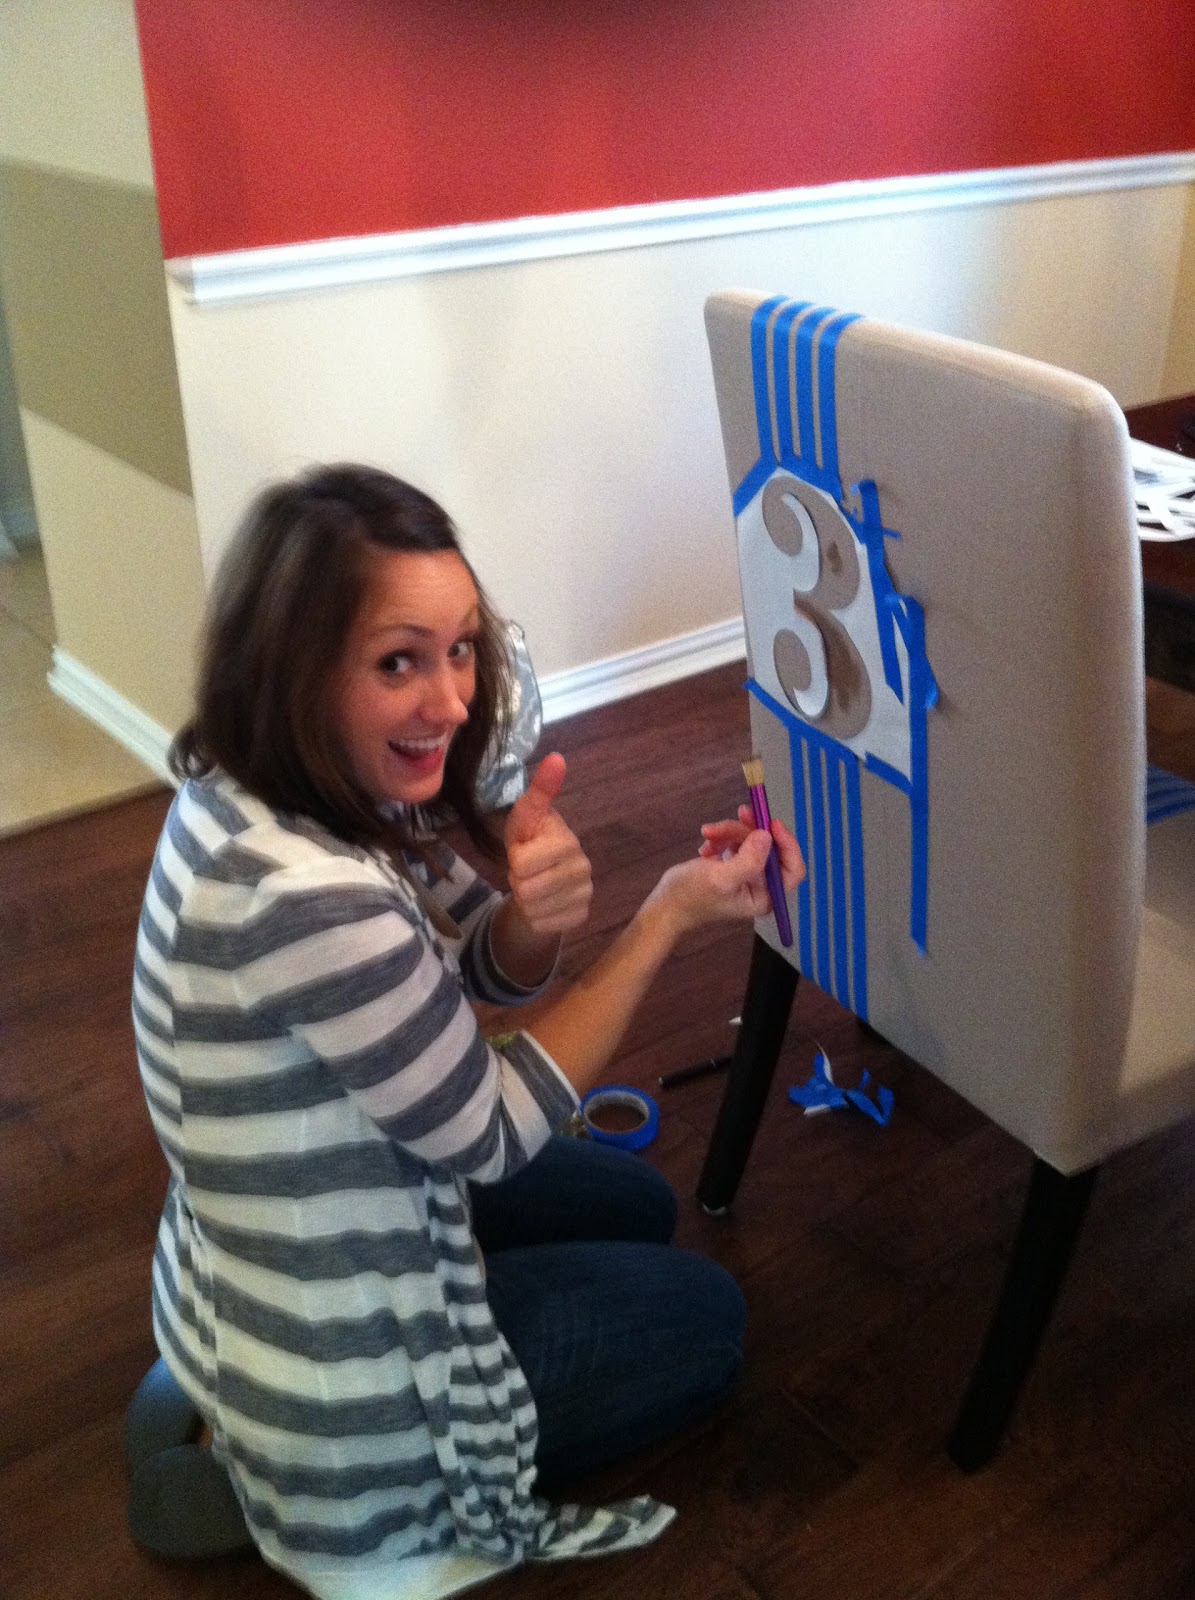
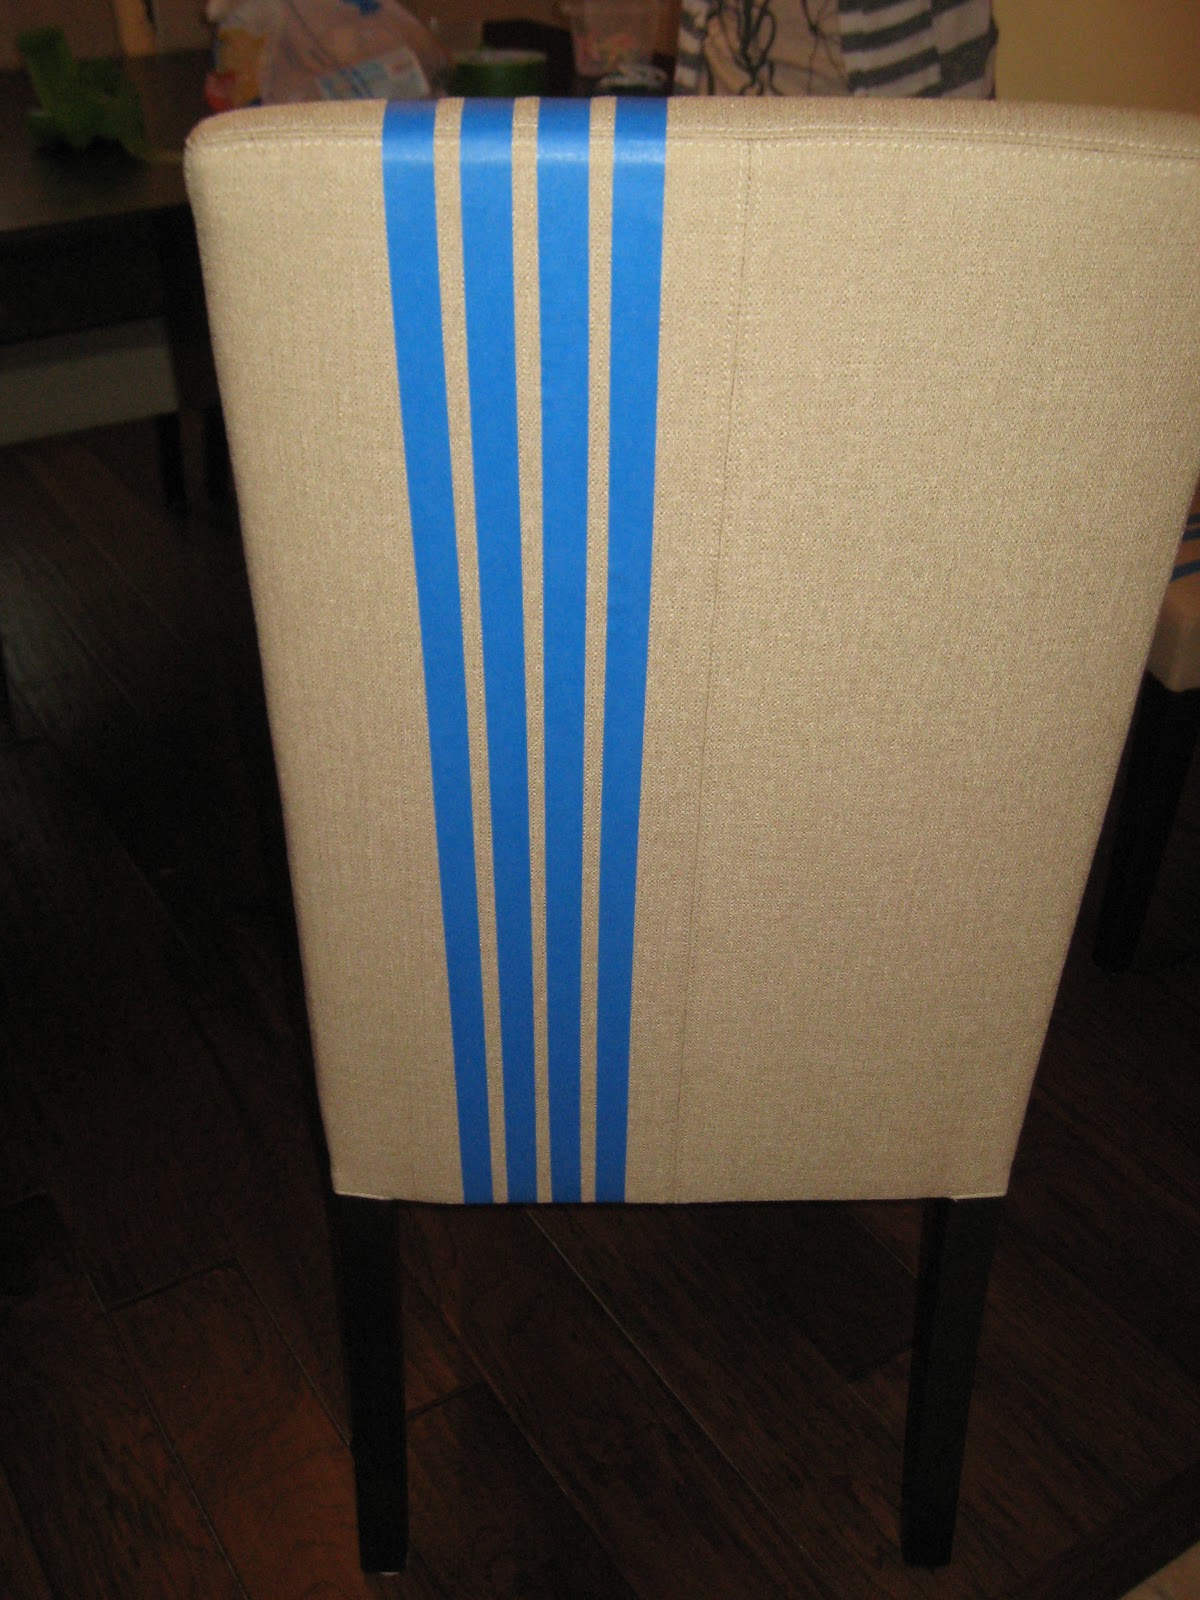
We started by randomly taping lines of painter’s tape in different widths on each chair. We did this by professionally “eyeballing” them… No tape measure needed 🙂


After doing this we started on the numbers. I used my very favorite new tool to cut some stencils for us…

I used my Silhouette to cut numbers 1 through 6 in different fonts. I loved that I could use any font that was on my computer rather than being limited to just a few cartridges. I even went and downloaded a few free fonts just for this project. I used white vinyl to cut out each number. The plan was to peel and stick on the chair. Word of advice… Vinyl is great, just won’t stick on fabric! I will cut these out of contact paper when working with fabric.
After taping off our lines we attached each of our numbers. This is where we realized we were doing things a bit backwards. We should have painted the numbers first but oh shwell! Instead of re-taping we just used a craft knife to cut out the tape from the inside of the numbers.
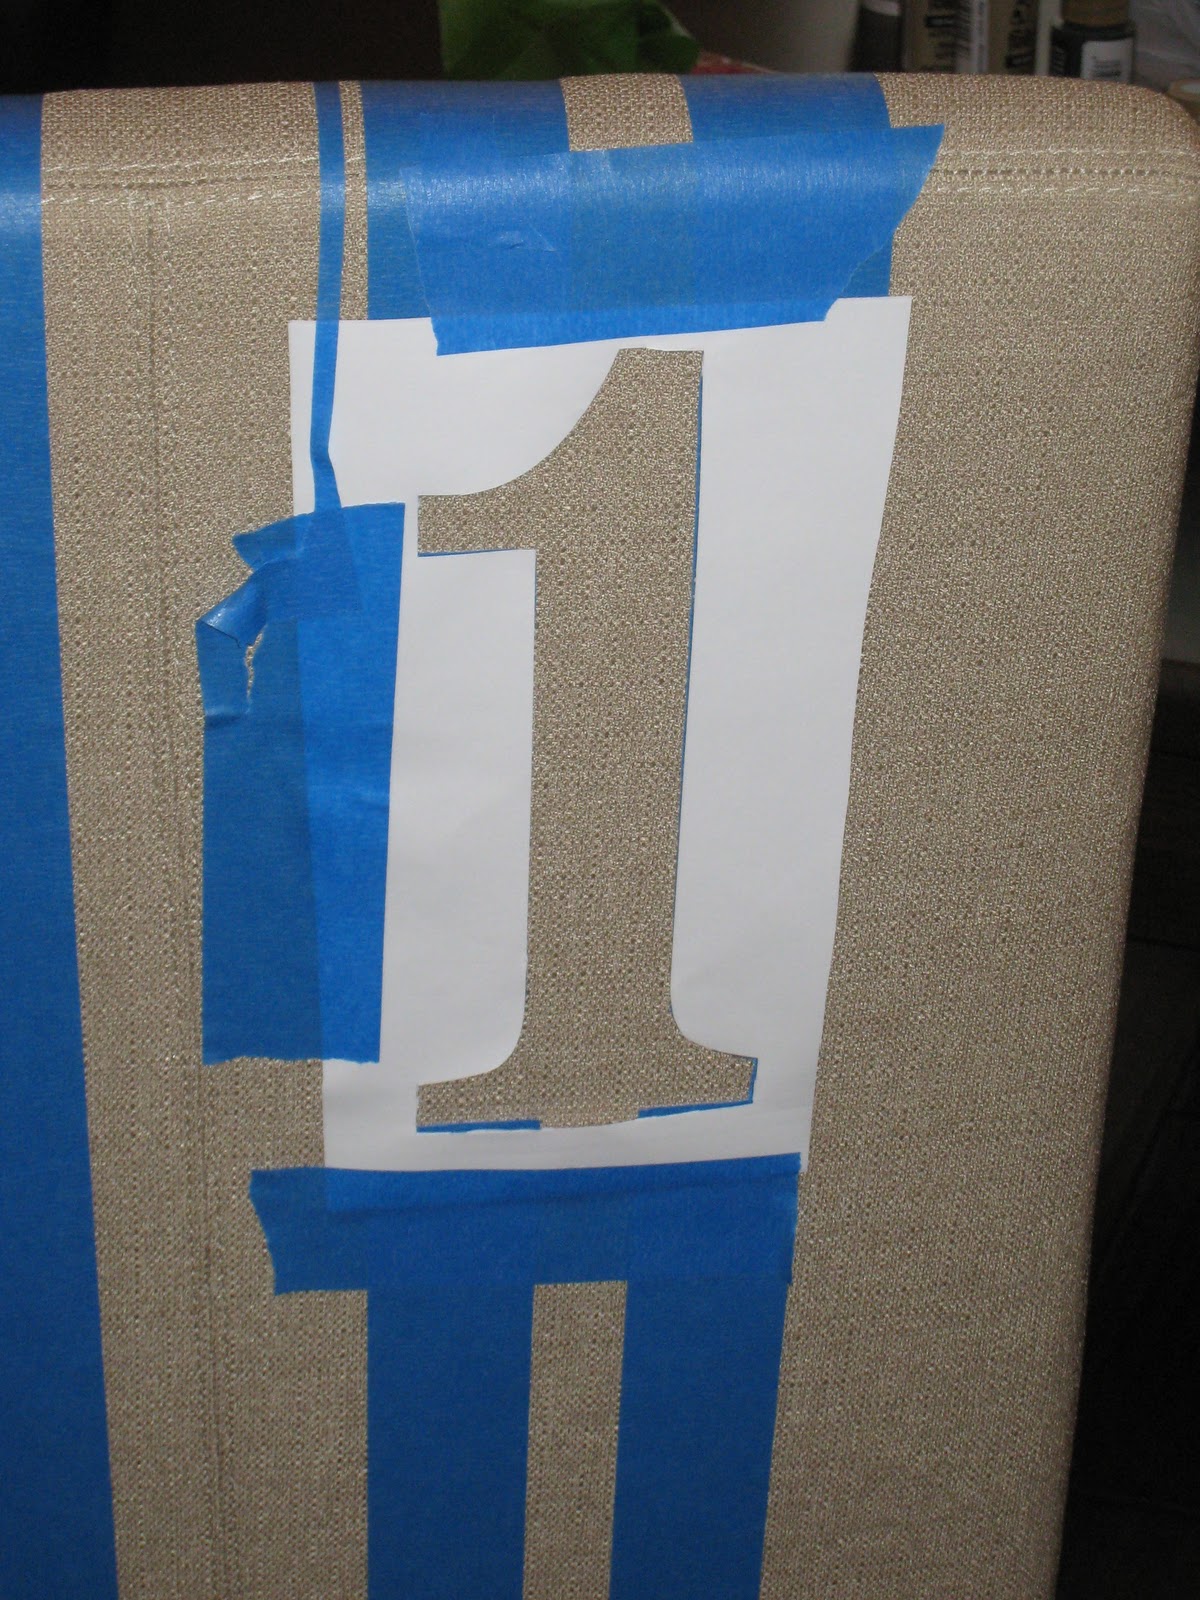
We placed each number in random spots on the backs of the chairs.
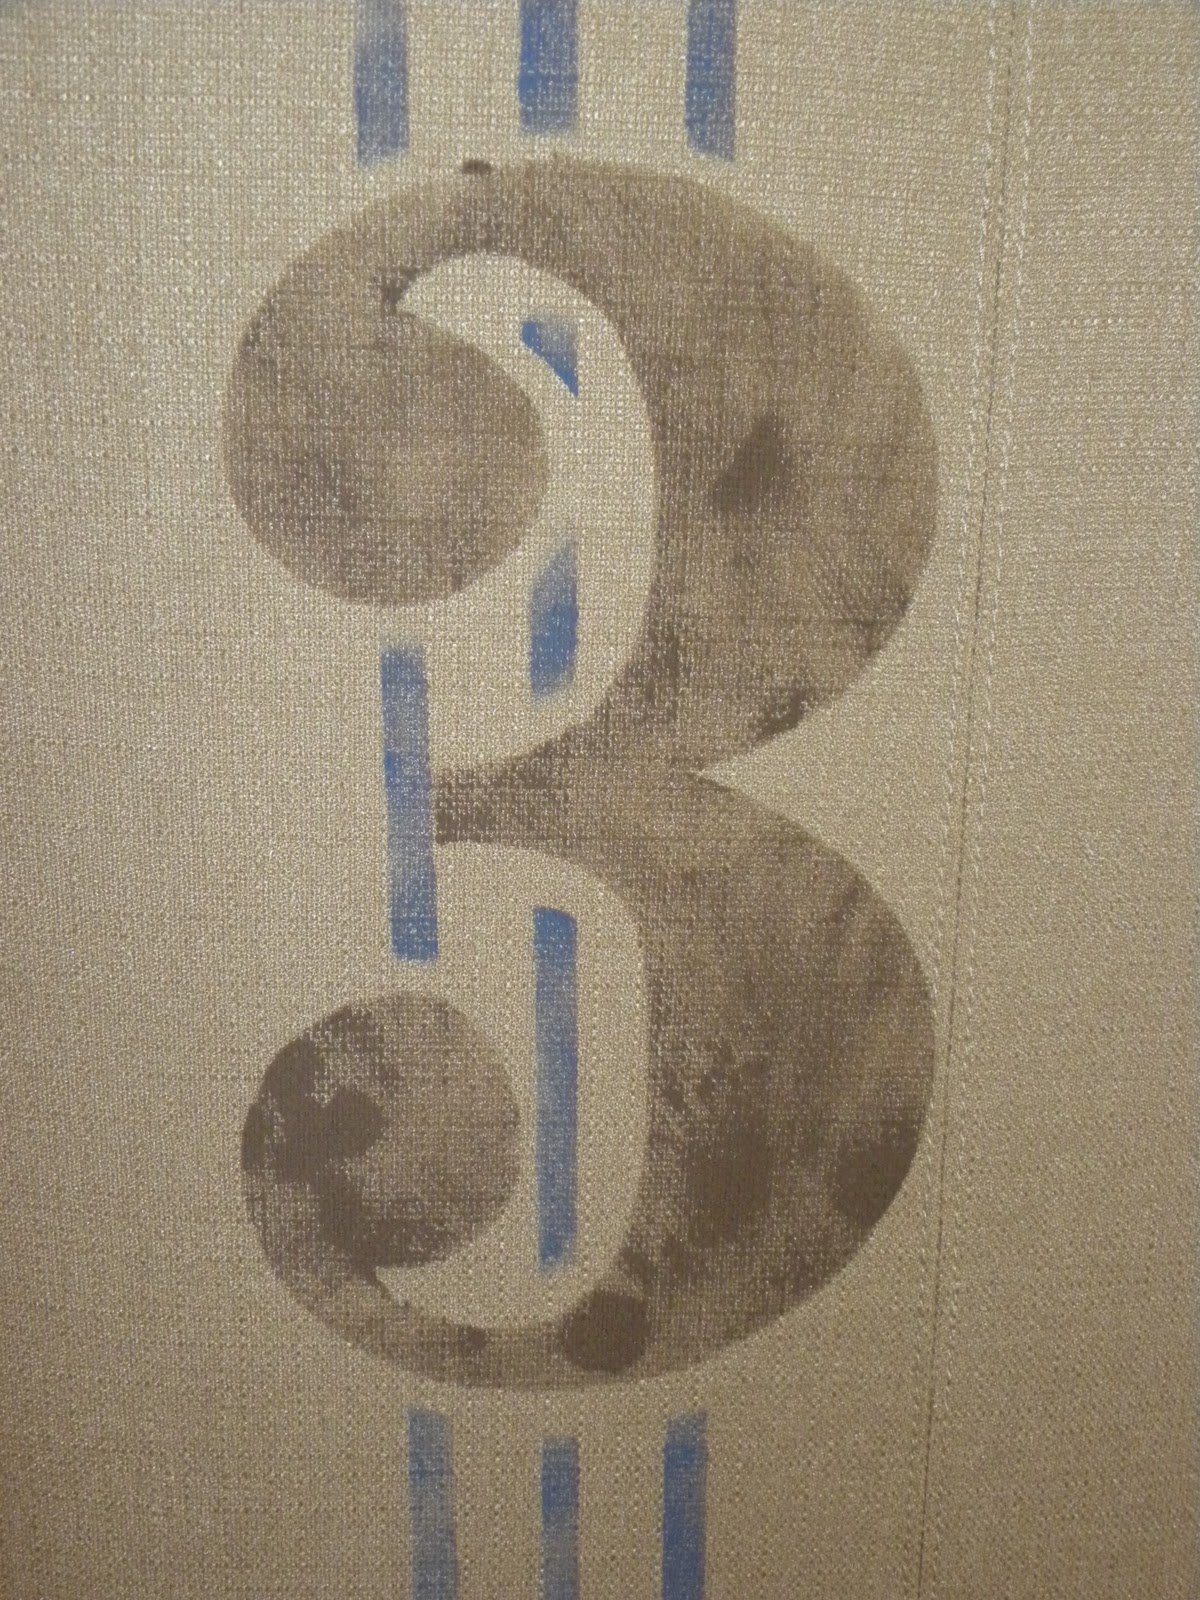
Erin stenciled in the numbers while I got started on the lines. She chose a dark taupe color for the numbers and a blue for the lines.
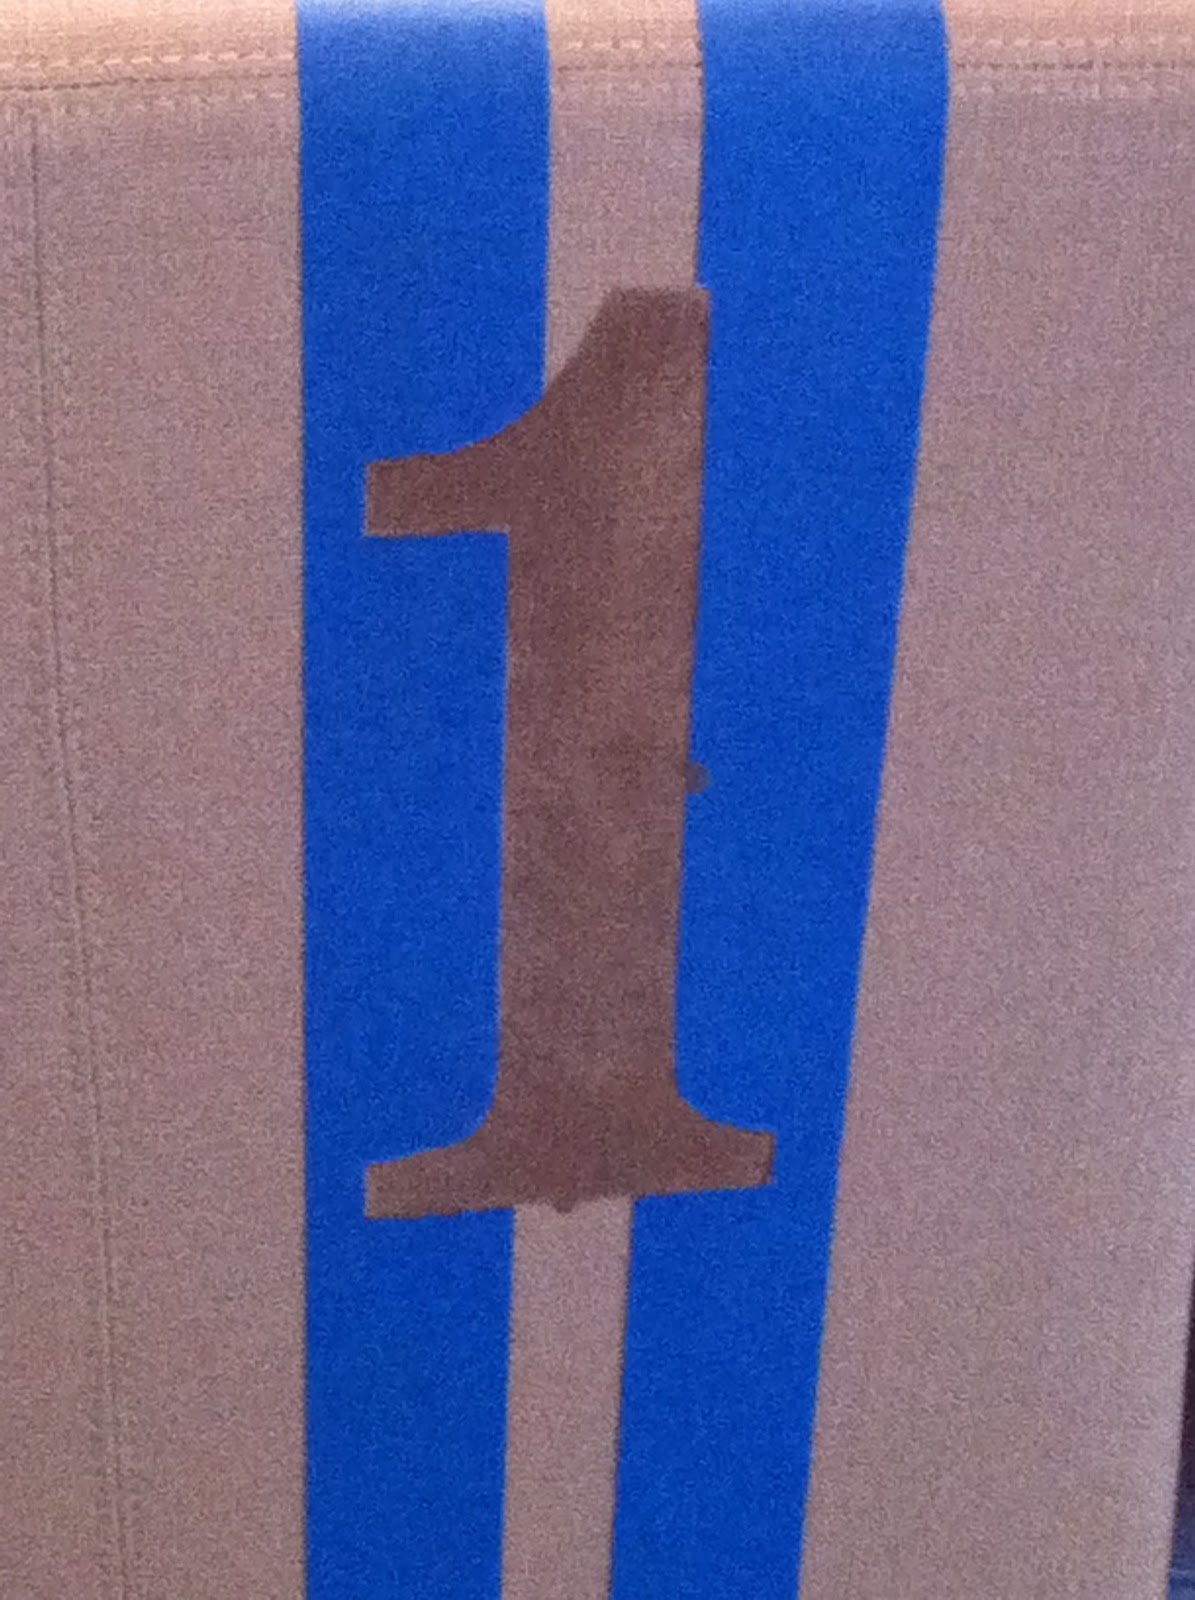

We stenciled using a stencil brush and kept it pretty dry to keep the lines from looking too perfect.
Here is number 5…
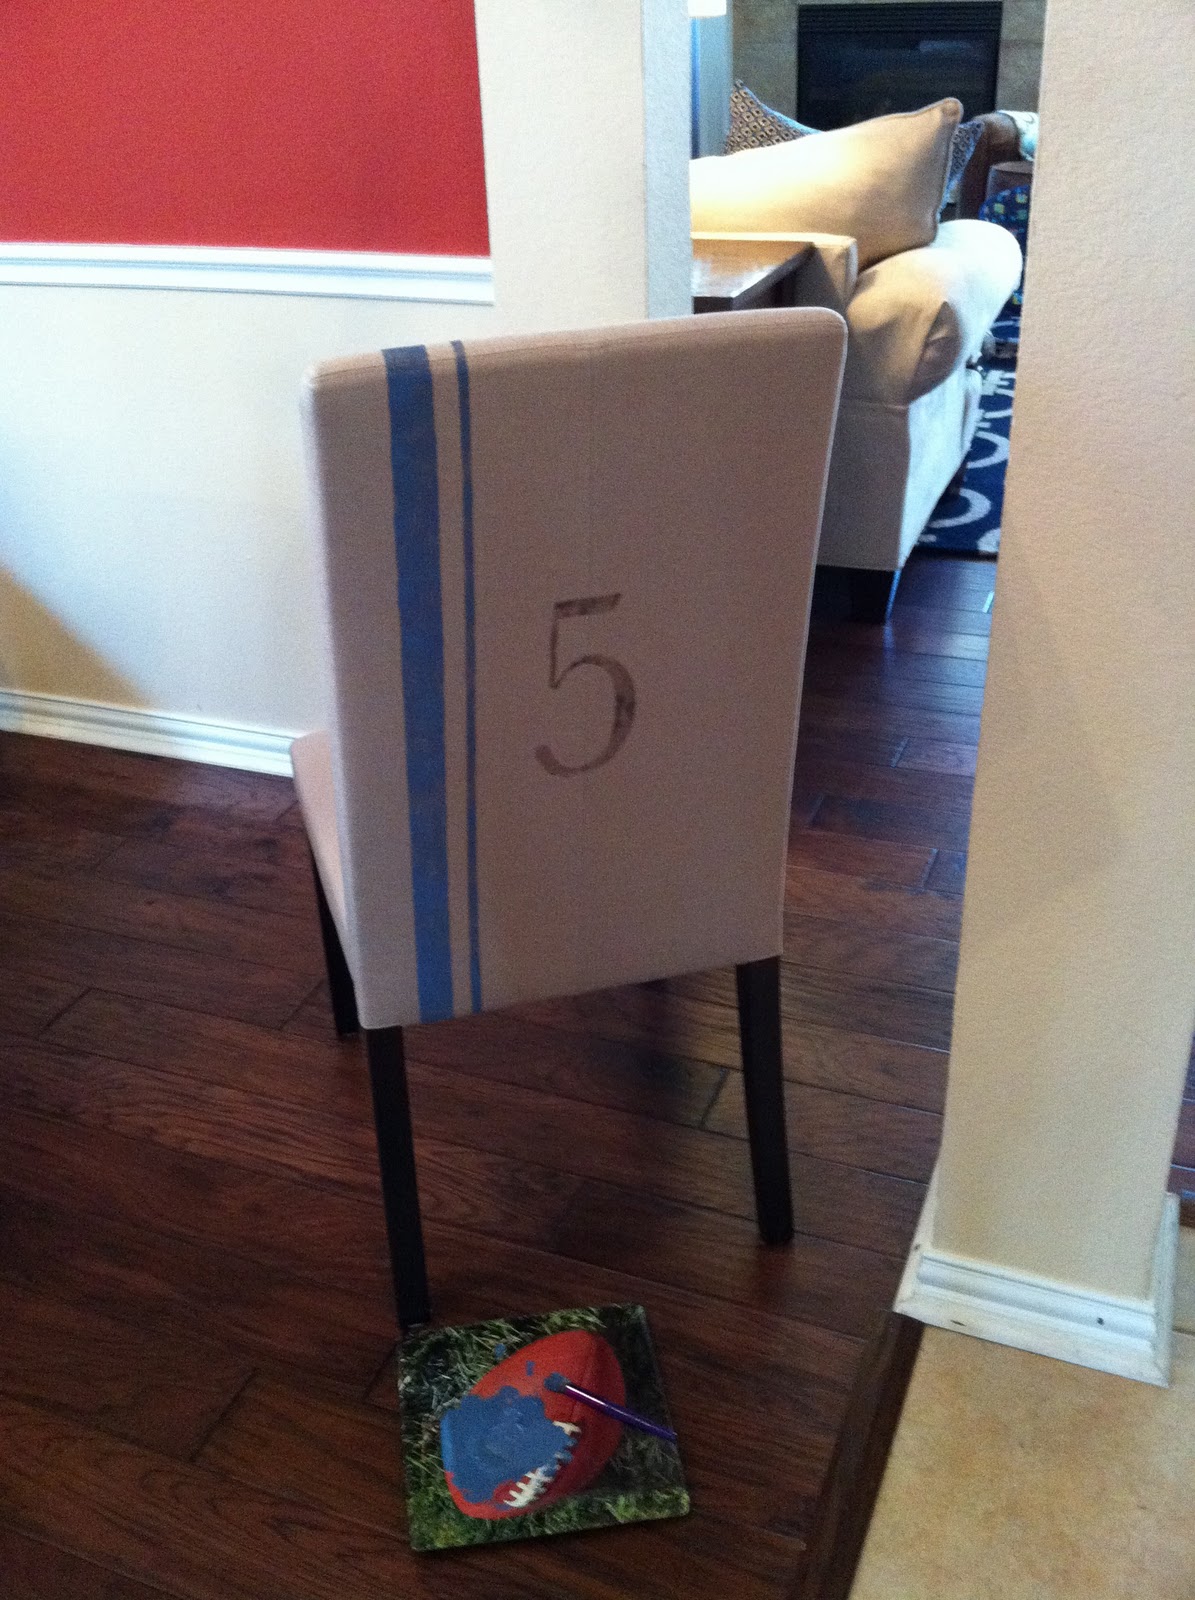
Do you like our professional paint trays there on the floor? 😉
Number 4…

The best part was pulling off all the tape when we were finished…


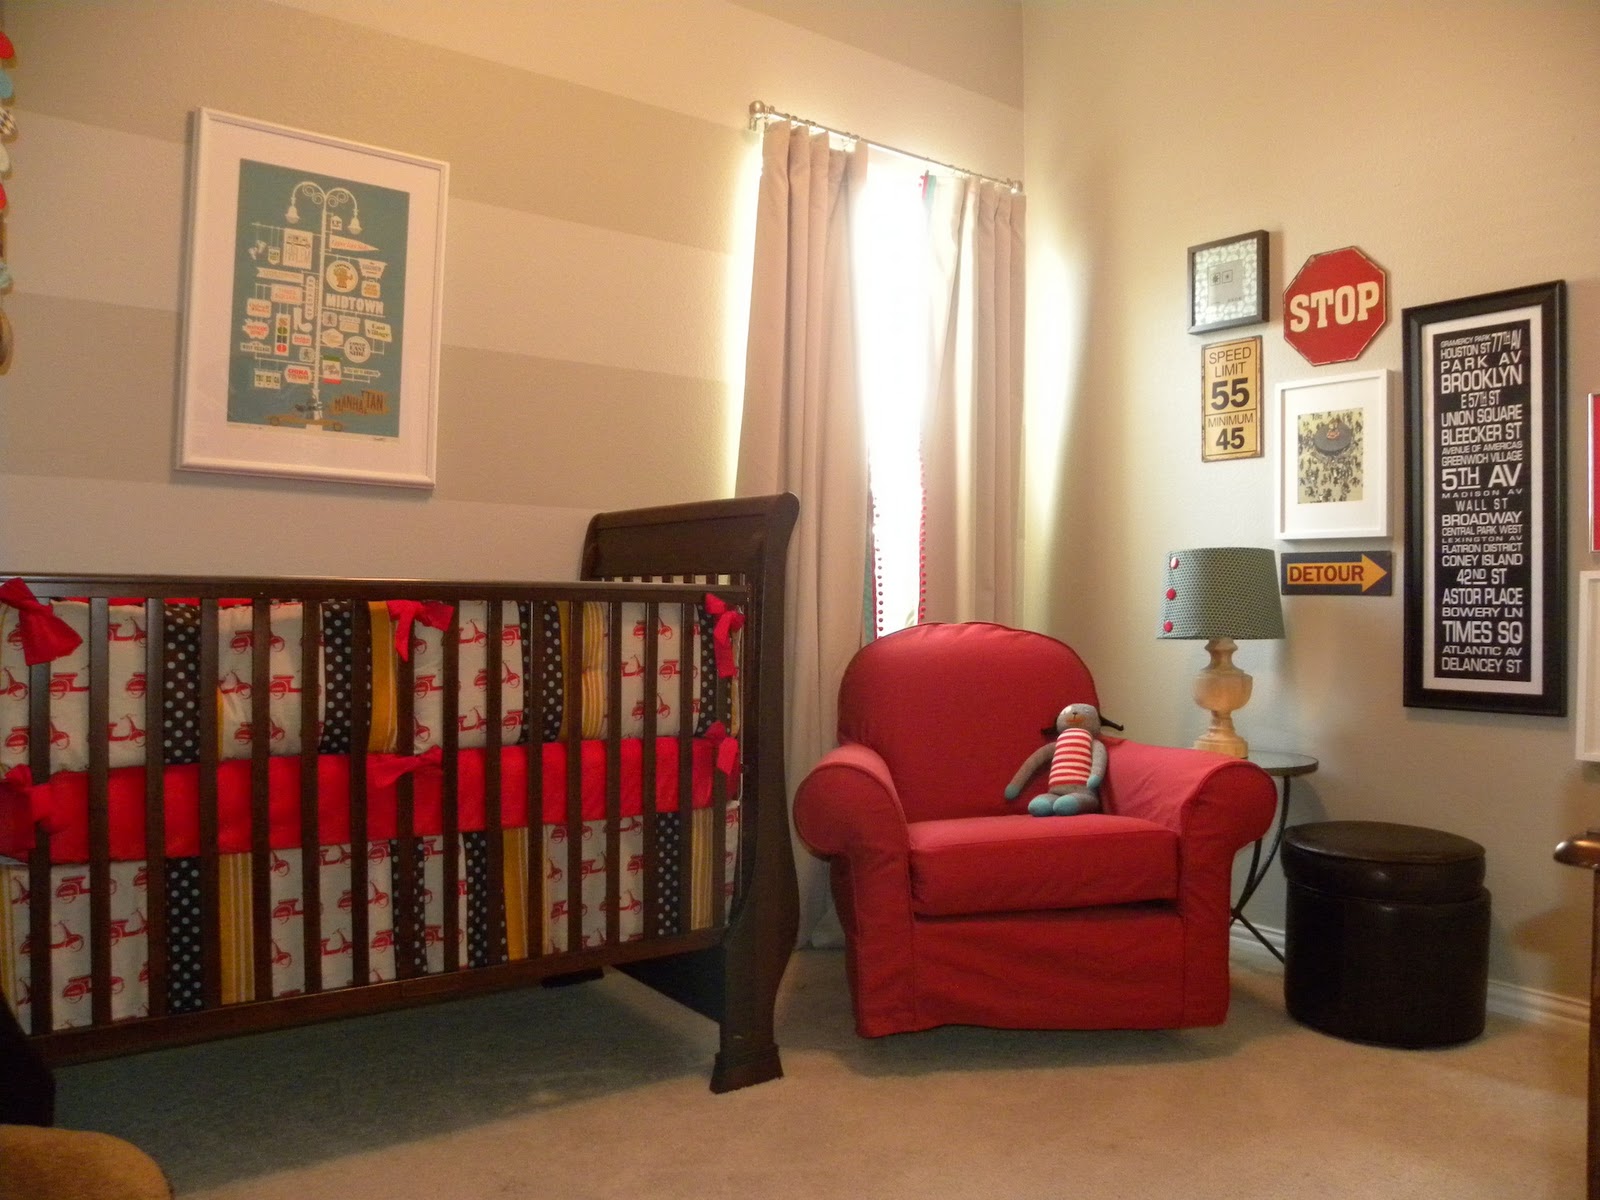
I love! What a fun project!! Her house is super cute. I was in awe of Baby E’s nursery! Her son is just a few days younger than my new baby and he is one lucky boy! Not only does he have a great family but please check out this nursery!!
Go check her out guys!! Her style is so fun and she is a good read too!
Thanks so much for stopping by!! Go see Miss Erin, leave her a sweet message and tell her we sent you. It will make her day 🙂 And it’s great eye candy too!
After that go check out Silhouette! This is for real one of the coolest tools I am proud to own. You gals need to add it to your Christmas list!!
Have a great weekend!!
~Whitney


The chairs are really cute and I like your writing style.
What a fun project! Her chairs came out so cute!
I would like to ask your opinion about your new gadget, the Silhouette. Not ever having used one, I've been wanting a Cricut for projects like you just did and cutting thick chip-board type paper for glittering, etc. Other than the font options (which is totally awesome!) why did you choose that over the Cricut? From all your for real DIY posts and skills, I really value your opinion.
Thank you!
Missy
The chairs turned out awesome! Always nice to have a partner in crime with great style!
The chairs are fantastic! What a great way to transform them without reupholstery. Love them!
I have been wanting a Silhouette since I first saw them advertised! It sounds like a fabulous machine.
xo, Sherry
I left a message on her blog, but just wanted to thank you for sharing the project too. I love it!
Awesome! I love how those chairs turned out. What a great idea. I am going over to check out that blog now!
These are FANTASTIC! I love how each one is a little different from the rest. Well done!
wow! you two make a great team. love the chairs!
Cool way to dress up those chairs. Love it!!!
WOW, the chairs turned out fabulous!! How creative! Great job and I wish I had some parson chairs!! Thanks for sharing, great job!
Cheers!
Cyndy