Hey friends! I am SO excited to share my latest build! This next one has been a long time coming. This has been where my son’s tv has been resting for the last few months…

I know… Pretty shanty, right?? 😉
I have been avoiding tackling a dresser for sometime, because I thought it might be too hard. Well I am happy to report that it did not kill me, and it really wasn’t too difficult at all! The best part?? His tv and clothes now have a new home! Here it is! Ana gave me a great set of easy plans to follow and you can see them HERE!

I will say that the Kreg Jig® is a MUST for this build. If you need another excuse to finally go and buy one, just check our last 10-15 furniture projects. You need one… I promise!
I will show you a few tips here, and you can get the full set of plans for my Pottery Barn Inspired Dresser HERE on Ana White’s site!
I used my Kreg Jig® on lots of parts!
The sides…


The base…

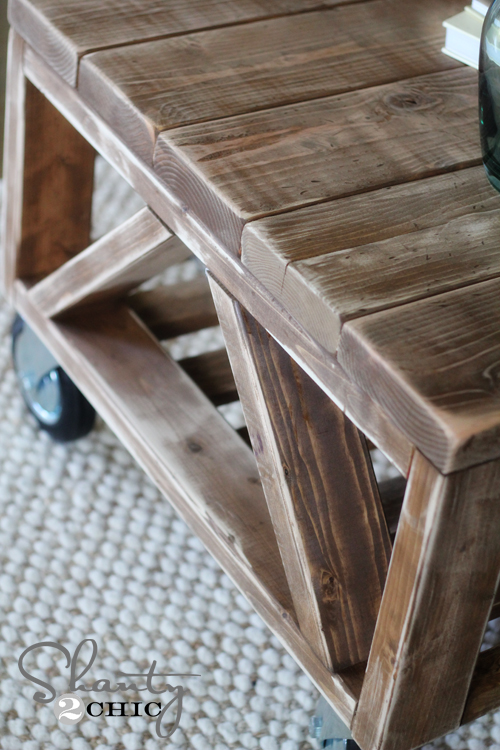
The base looks like this after it is attached…

This is a picture of the top before I attached it to the dresser.

I used Gorilla Wood Glue on ALL of my joints! LOVE! It never fails, and it is our very favorite glue!

For this piece I was finally able to try out some PureBond Hardwood Plywood. I have heard lots about it, and it certainly lived up to it’s hype for me! I used 3/4″ birch from Home Depot and had the nice man at Home Depot cut it into 15 3/4″ strips as Ana calls for in the plans. This saved me lots of time, and made it much easier to carry home!
I will be sharing later a more specific tutorial on working with metal drawer slides, but Ash gives a few tips HERE on her Pottery Barn inspired coffee table!
Here it is all finished up and ready for a good coat of stain!

I used the same stain on this piece that I used on the other pieces I made for his room. This stain is the BOMB. It dries in less than an hour, and only requires 1 coat. As a mommy with lots to do, this makes me super happy!

Rust-Oleum Ultimate Wood Stain in Dark Walnut
For my hardware I matched what I used previously. These sash pulls can be found at Lowe’s for cheapo!


My hubby helped me move it into his room and I took a few more pictures for you guys!


Hope you LOVE it! I do! Sure beats the old clothes basket… just sayin!
I would love for you to share this and Pin it below!
You can also check out the other pieces I have made for his room!

DIY Restoration Hardware Nightstand


Thanks so much for stopping by guys! Make sure to check Ana’s site for the full set of plans on this great DIY dresser!
~Whitney


I really need a new dresser for my bedroom and can’t find anything anywhere that I love AND can afford. I’m a beginner builder and have only tackled some small projects BUT just got a miter saw for my anniversary, yay!! So excited.
My question would be: instead of the open bottom, could I add two more dressers? If yes, would I still need the bottom?
Silly questions, I know. I’m really kinda scared of attempting to make a dresser, I’ve had some issues building square….oops, not good when dealing with drawers.
So, if you guys have any tips of keeping things square..that would be greatly appreciated as well.
Love your blog, you guys are incredibly inspiring.
Eva
Make sure you make all of your cuts precise especially the ones that are the same size. Use a square when putting together corners to check for square. You can also pull a tape diagonally across to check for square by making sure that the number you get on both is the same. Being square is about taking the time and making the cuts right. When the back goes on it too will help square up the dresser as long at that too is square.
Starting this dresser and have a few ?’s about purchasing the wood. What type of wood did you use for the 1×2, 1×6, 1×8, 2×2 strips? We found the birch plywood, but can’t get birch in these sizes? Did you use a different species or am I missing something?
I used pine for all the boards… It stains the same as the plywood and it’s the cheapest. I also like that you can see the wood grain. Hope this helps!
working on building the dresser and the plans call to mark out all PH’s and drill 3/4H’s… what is a PH and the H???? sorry I don’t know but this will be the first thing I ever attempt to build!
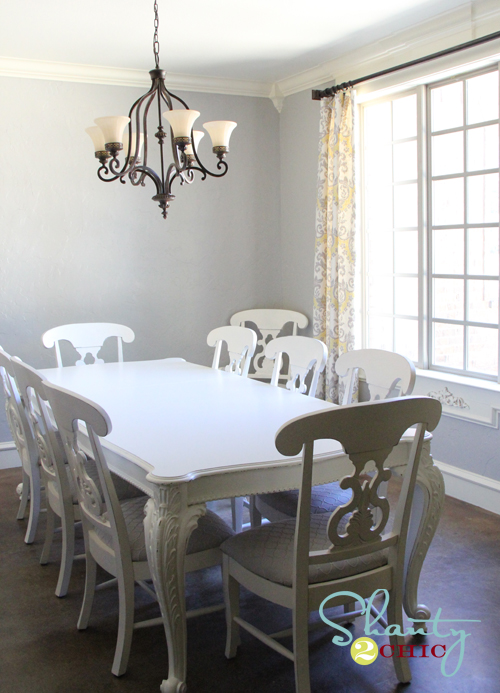
Hey! I love the blue in your room, can you tell me what paint color it is?
The blue is a Valspar color called Blue Twilight. Hope this helps!!
I just love all of your work!!! My husband and I are planning on building this entire set! LOVE IT!!!
That is so awesome!! I can’t wait to see pics!
Love, love, love all your projects! Just trying to get the plans for the dresser and the website is down. Does this happen often or will it be back up again shortly? I can’t wait to make something:)
It does happen sometimes, but usually only for a few hours! Print them next time you are on there in case it happens again! Good luck!
You are amazing! All the furniture is beautiful.
Thank you so much Emma!
Seriously impressed here. I love the build, but love the finish even more! Great job! I’m putting this on my to-do list and will come back and share once I get ‘er done!
We would love to see it!! Thank you Jen :-)!!
Quick question… for your Kentwood nightstand and bookcase: did you use pine? And for this wide dresser project, you used birch?
I did use pine for those. I just recently learned about PureBond plywood and it’s benefits. The birch stains almost exactly the same as pine boards do, which is why I went that direction with the dresser. You can get the PureBond at HD. Let me know if you have any other ?’s! 🙂
Thanks for the replies! I’m excited to get started, I’m so inspired. And next, methinks a how-to post about your finishing techniques is in high demand, judging from all the questions!
Good call Jen… I’m on it! Send some pics of the pieces you build when you get them finished 🙂
My son and I are very excited (well, I’m excited but he’s willing) to tackle some of these projects over the summer! He doesn’t know that my goal is to give him a college student worthy room. I have been researching the Kreg Jig and, while it’s spendy, I know that it will go a long way. Which model/setup do you most recommend?
Hi Mary!
Ash and I both use the K4 model which runs right at $100. It will be the best money you will ever spend! Here is a link…
http://www.kregtool.com/Kreg-Jigreg-Prodview.html
You are freaking amazing! This looks like something I would buy in a store… new follower – found you on Pinterest 🙂
Thank you Anne!! That totally made me smile 🙂
~Whitney
Absolutely love! Once again you amaze me! Thanks to you, I bought the Kreg jig, you guys should get commissions!!!
You are sweet Janet! Thank you so much! I will see if I can hit Kreg up for that 😉
Great job, it looks amazing!
Thanks so much!! I appreciate it!
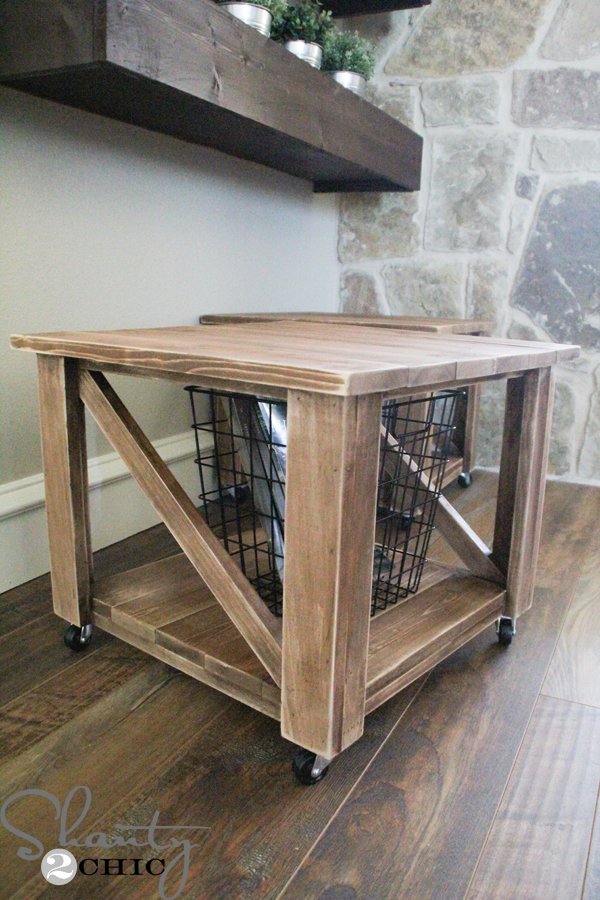
Love this! where did you get the baskets that fit under? the pottery barn ones are not cheap and I was looking for an alternative for my camp style dresser that we got (before I knew how to DIY!) Also love the basket of baseballs-such a chic little room!
I found these at Michael’s, but have also found many at Hobby Lobby. Hope this helps!
Thanks!
Hi. I was also wondering about the floor. I like it very much.
I was also wondering about the finish on the pieces you made. The stain is a rich, gorgeous color, but do you finish it at all with poly or wax or anything?
As always,very nicely done.
Hey Linda! It is stained concrete… I do love that I can scrape just about anything off of it! We had ours stained when we built the home.
I did use Rust-Oleum’s polyurethane on the top of the piece to protect it from water rings and from my 5 kiddos :-). Thank you!!!
Speechless! I LOVE all the pieces you have done for his room! What a talent you have!
Thanks so much Nif!! 😉