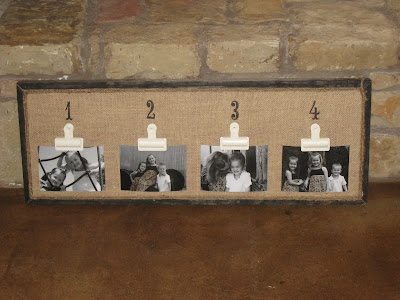
 This is a solid wood piece but you can also use a large frame or just a large piece of unfinished wood from your hardware store. Your first step will be to attach your burlap. I used hot glue to attach mine starting at a corner and then pulling tight all the way around. If you are using unfinished wood or the mat from a frame, just wrap the burlap to the back and hot glue it down.
 Next, I used jute twine to cover my rough edges. Just take your hot glue and run a small line down an edge to attach the twine. Once I made it around twice, I tied a small knot at the top corner.

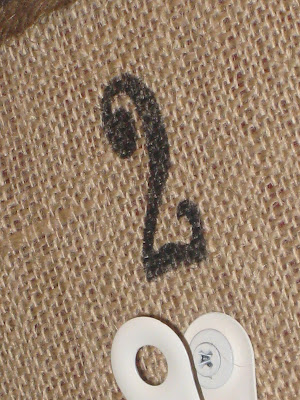
My next step was to stencil my numbers. I measured out where I would be putting my clips and drew a small dot to mark it. I then used my Cricut machine to cut my stencils… You can use premade number stencils too. Using a stenciling brush I lined up each number and used Americana Ebony acrylic paint to stencil my number on. Go up and down with your brush… not side to side.

After letting that dry, I used my drill to attach the clips to the wood. For those of you ladies that don’t have your own drill… It is time to go get one or ask the hubby for one for Christmas! This tool is obviously a must.
 My last step was to add some black and whites I had developed of the kiddos. I used Walmart to develop my 5×7’s and they were under $1 a piece. Just clip them to your clips and you are finished. This is an inexpensive and fun way to display pictures, art, notes or really anything. I guess this is also your formal introduction to my three kids…. Thanks so much for coming by!





This is a fabulous project!!! Looks awesome! Quick question….when you use your cricut to cut out the stencils, what kind of paper do you use? Thanks!
Polly
P.S. I am soooooo adding you girls to my blog list!!! You are so very creative and talented!
LOVE IT! Can't wait to finish our family so I can make one too!!! Thanks!
I always love finding creative ways to display photos, and I LOVE this idea!! I am feeling inspired! Thanks for sharing this!
And by the way…I have been reading your blog for just a little while now, and I enjoy it so much! I have a link to your page on my blog. 🙂
I am loving the burlap craze right now! Seriosly, how cute, even with the numbers! Love it, thanks for the idea!
lookin good! Can't wait to see what else you picked up!!! I love all your stuff!
I absolutely adore this project. I think I will make it for my sister since I don't have any cute kids to put in it.
Girl! this is so awesome! i'm totally going to copy cat YOU! love this idea!
Super cute! Love it!
Roeshel
You rock! This is great too!
love this! i will be copying this! i just became a follower! i cant wait to look back at all your awesome posts and start creating! thanks!