Hey Guys!! Fun project for you!!
I decided to use the space below my serving bar in my kitchen to make my magnet board. I also decided to make it a piece that I can take off the wall in case I decide to move it around. Here’s what I did:)
I was lucky enough to find a 2′ x 4′ piece of raw pressed tin in Canton a couple of weeks ago. I bought it for $20. You can buy this stuff online though.
I started by painting the tin with Rust-Oleum Painter’s Touch Heirloom White spray paint. I used about two coats to get a good even finish…
I purchased two 8′ pieces of 3″ pine from Lowe’s.
I cut my boards using my hand saw. I cut my top and bottom pieces 4″ longer than the tin and my 3 middle pieces 2″ shorter than the tin… two boards were 52″ and three were 22″. You do not need a power saw to cut this stuff. It took me less than 5 minutes, the saw only costs $12 and it was a bit of an arm workout:)
Now to attach everything… I used my trusty Gorilla wood glue to attach the edges together.
And then used L-brackets to secure all my corners…
After you finished this part it will look like this…
I just used glue without the L brackets for my middle piece and let everything dry good. I wasn’t too concerned about how pretty everything looked because I knew I would be distressing and adding glaze.
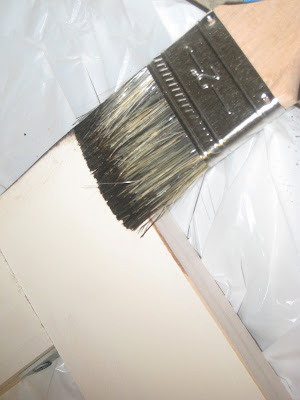
My next step was to paint the wood with the same paint and let it dry.
I then used my 3M block sander with 80 grit paper to distress my edges.
When I was finished it looked like this…
Then I took some Minwax Dark Walnut stain to all the raw edges just to make them stand out…
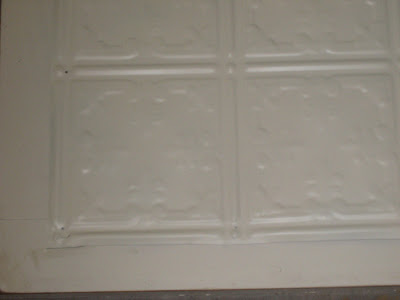
My next step was to attach the tin to the wood. I used small finishing nails and my pink hammer to put a nail every 6″ where the pattern repeated…
When I was finished it looked like this…
Can you guess my next step;)
Ralph Lauren Smoke Glaze…. Just paint it on and wipe it off…
It looked like this when I got it all rubbed in…
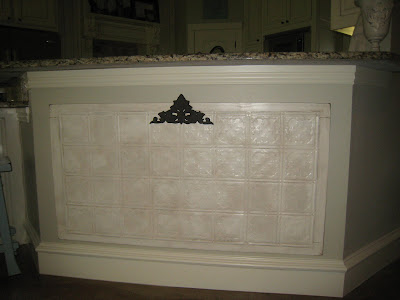
Here’s a picture of the whole thing…
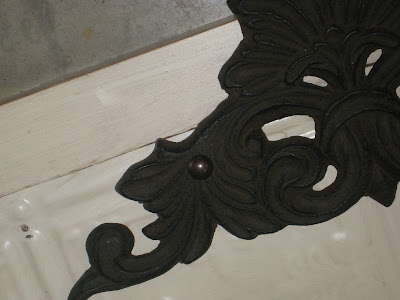
I knew I wanted to add a little something so I found this iron scrolly at Hobby Lobby for $3.
I attached it to the top using wood screws.
To cover up my ugly silver screws I cut the nails of two furniture nail heads and super glued them on top of the screws…
I was all finished at this point… I just added a D-ring to each side of the back. I measured for the wholes in my wall and hung it up. I LOVE it:)!!
I will be making some fun magnets for it and will share that in one of my next posts. What do you think??
As you can see… I finished my magnets!! To see a tutorial on these cuties just click HERE!


That look SO stinkin cute! Aren't you just too clever. I don't know how you guys find the time for all these projects LOL!
FABULOUS!!! (What more can I say?)
Karen
My Desert Cottage
Absolutely LOVE this!
Wow! what a great idea, and beautiful too. thanks for the tip.
Oh,, i love it. So cute. Gotta get me some of that glaze. Thanks
Love it! I think I need some tin in my life.. AND I finally went by Home Depot during lunch today and got some RL Smoke Glaze!! I totally looked at the hand saws and walked out without one, but I'll be back! 🙂
Aja
this is absolutely gorgeous! and such a great idea! I collect magnets from all the places we travel and this would be perfect to dosplay them! all i need is a bigger house 🙁 but i will bookmark this is do it when my dream comes true 🙂 thanks for the great inspiration!
Love it! It really works well in that spot.
Nancy
awesome attention to detail! I absolutely love it!
Hey Emily!
For this project I used my manual hand saw… It is a Stanley hand saw with really sharp teeth. It is $12 at Lowe's. It's great for small projects like this but if you are wanting a power saw I would go with a Dewalt… LOVE that brand:) Hope this helps!
~Whitney
Love your blog. I'm totally inspired. Wondering what kind of saw you're using. I think I saw in one other post that it's a battery operated power saw. What brand do you use and do you like it? I want to add one to my Christmas wish list!
Terrific idea! I might have to make one for myself!
It is beautiful! It looks like a piece of art!
Lou Cinda 🙂
Supercute and it fits perfectly there! I'll be back for party details tomorrow, thanks!
That's so cute and the perfect spot for it! I bet the kids will love it!