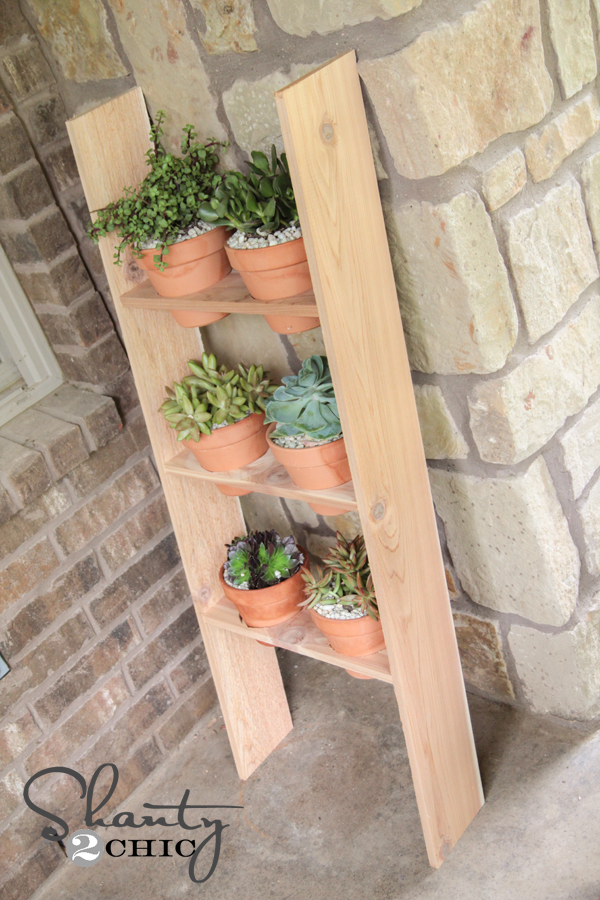
I’ve been wanting a fun planter for a space on my back patio for a long time. I LOVE how this baby turned out!
Check out my $10 DIY Ladder Planter!
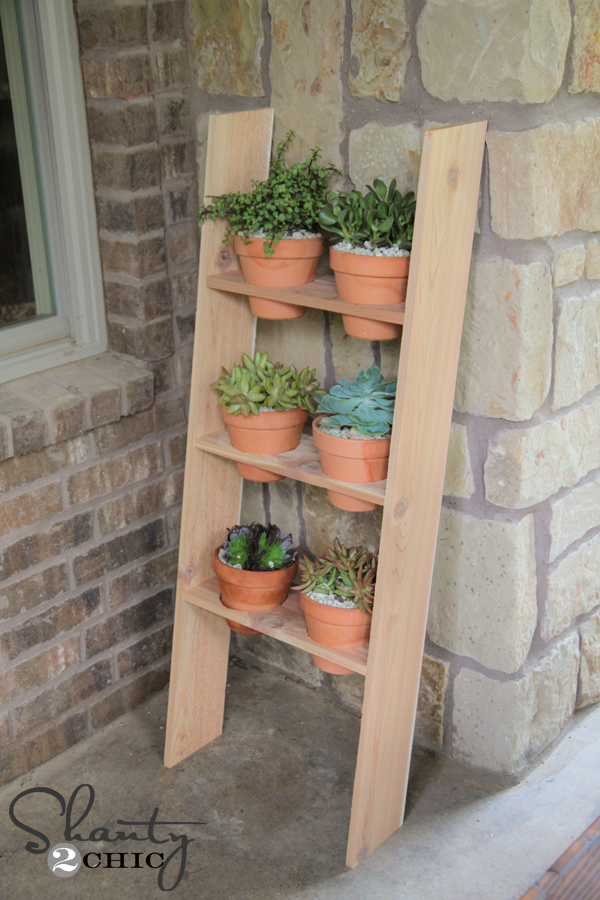
How fun is that? This is such a fun and simple build!
As always, we have FREE plans for this project! You can download the free plans HERE or by clicking the button below! We are so happy to team up with Jay of Jay’s Custom Creations. He puts all of Shanty 2 Chic’s original ideas into printable plans for our readers. You should check his site out! He has some great plans himself! I will also share some tips and tricks below…

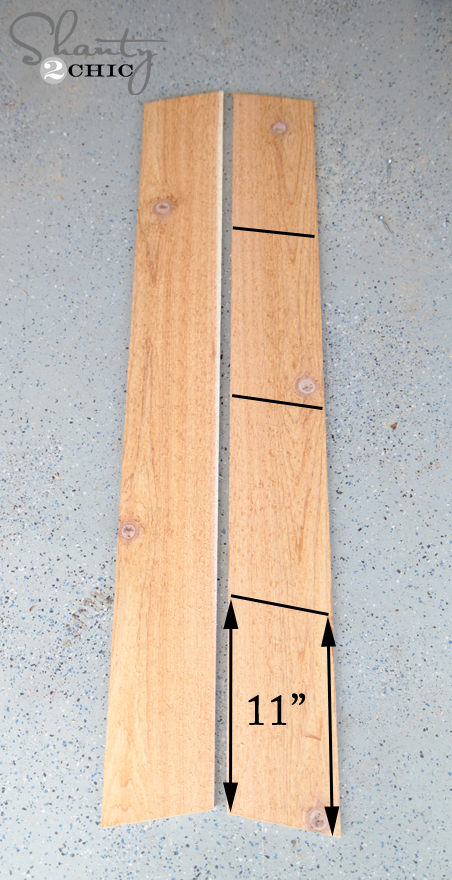
You will need three 6ft cedar pickets for this project. I used 3/4″ pickets which I would recommend over the 5/8″. I started by cutting my long side pieces. Both of these will be 46″ long and I cut each end at a 10 degree angle to help it stay sturdy when it’s leaning.

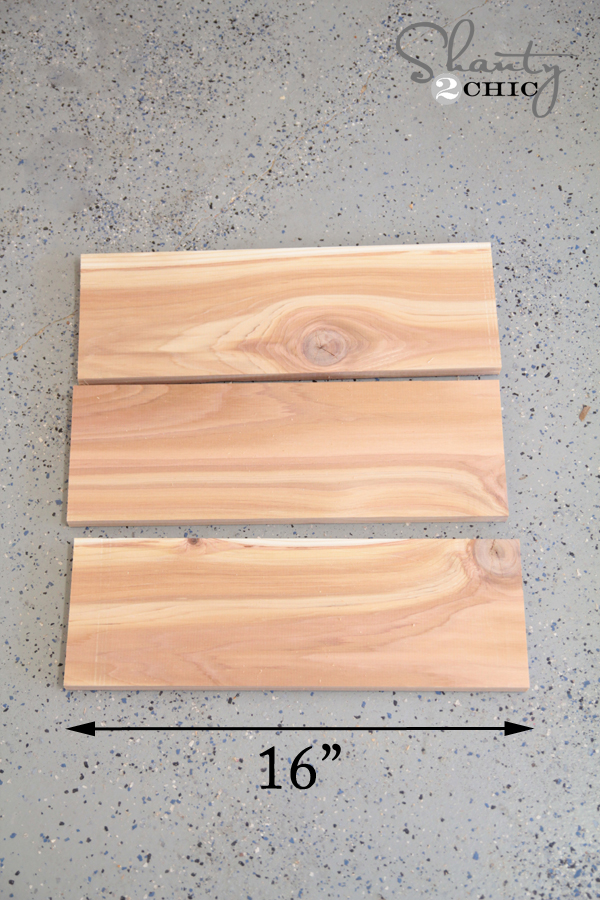
Next, I cut my rungs. Each of these are 16″ long.
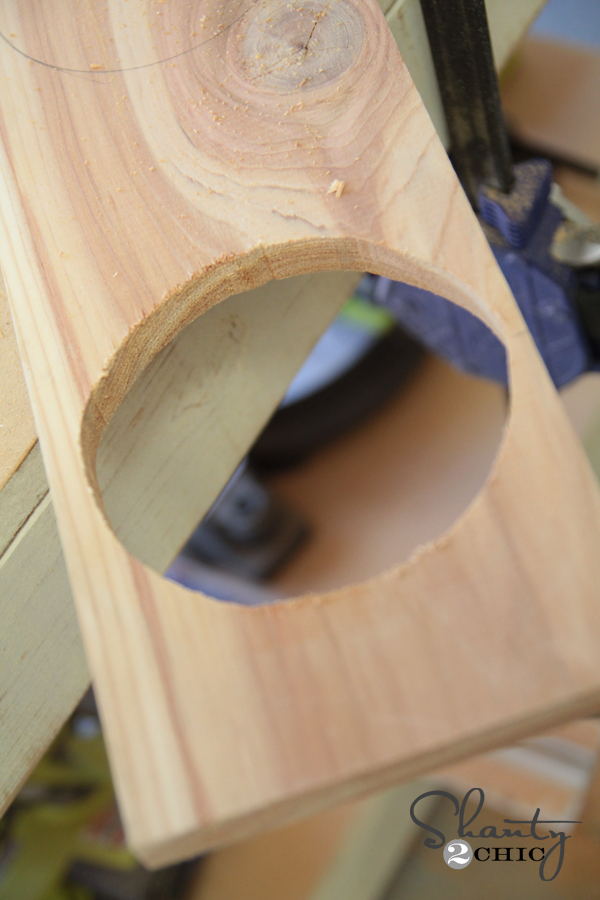
Next, I used one of my new, very favorite tools to cut my holes!
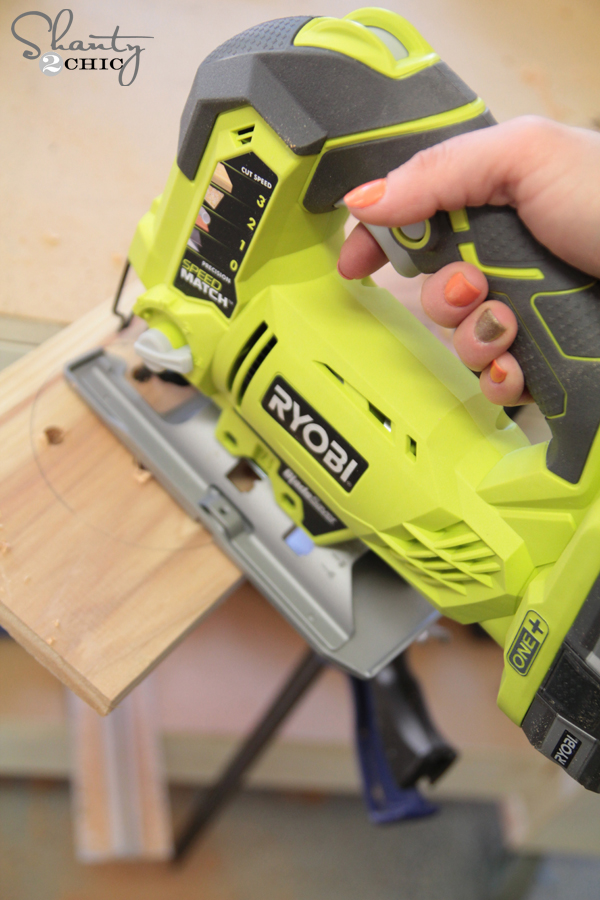
Check out the new Ryobi 18V One+ Jigsaw… LOVE this tool! It cuts like butta.
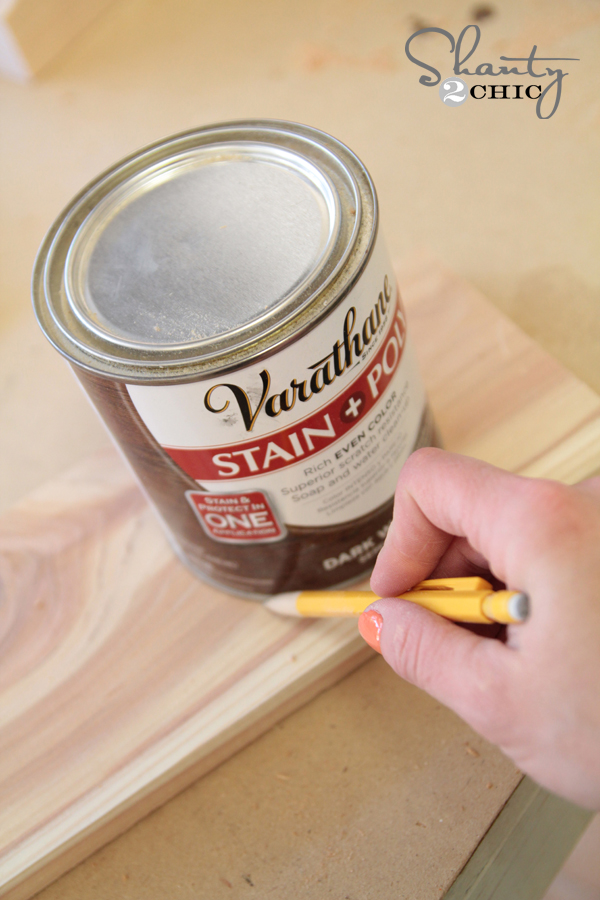
To make my cuts, I started by tracing around a can of stain to mark my circles.

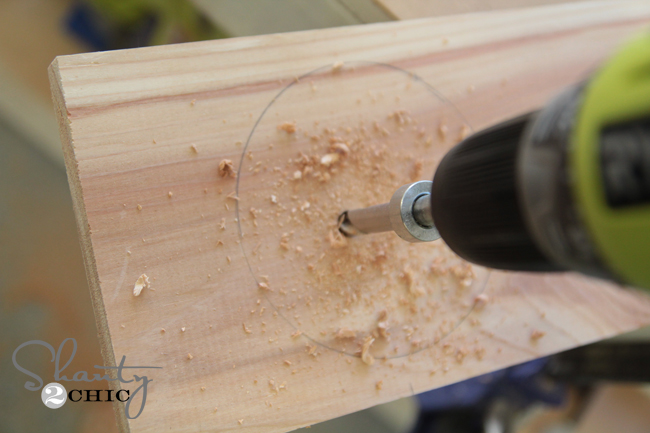
Next, I drilled a few pilot holes with my Kreg bit. You can use any drill bit that is large enough.
Then, I fit the blade of the jigsaw into the pilot hole to allow me to start cutting forward.
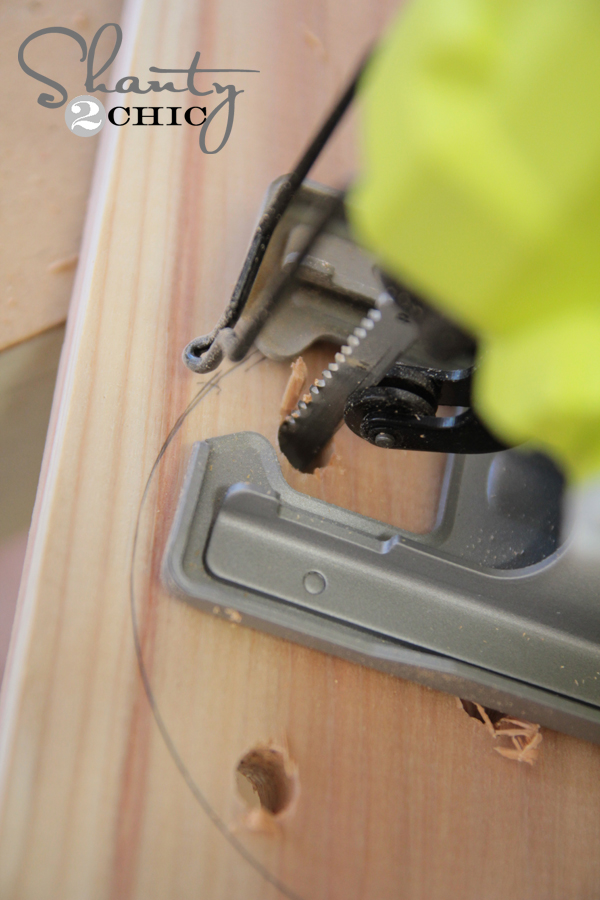
I actually cut about 1/2″ wider than the circle I had drawn. I didn’t have a good circle that size to trace so I just made the circle I was cutting larger.
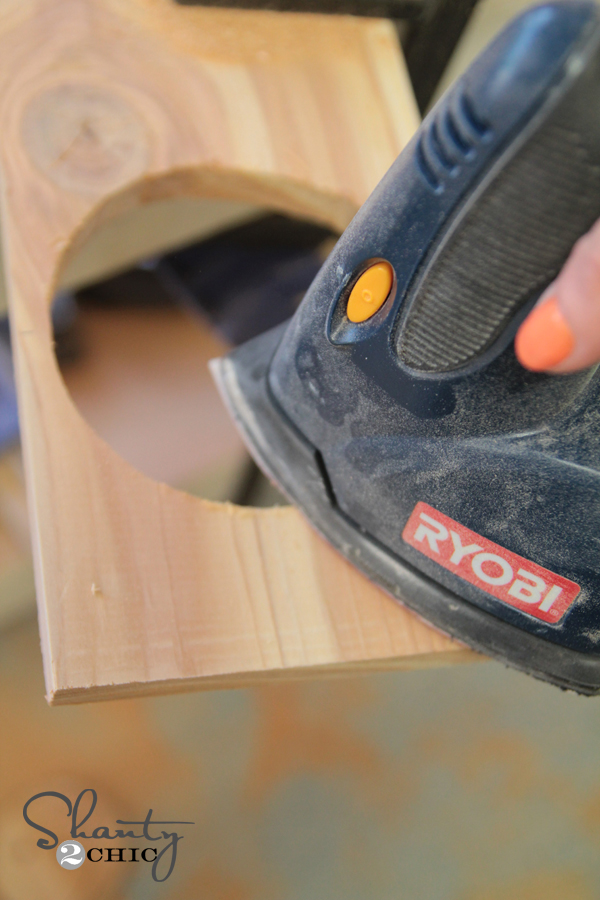
I used my Ryobi Corner Cat sander to remove all the little rough pieces and splinters.
Time for pocket holes! I waited to add the after cutting the circles to make sure I put them wide enough on the board without going into a circle. I lined them up in my Kreg Jig like this…

Here is what they looked like after I added my 3/4″ pocket holes…
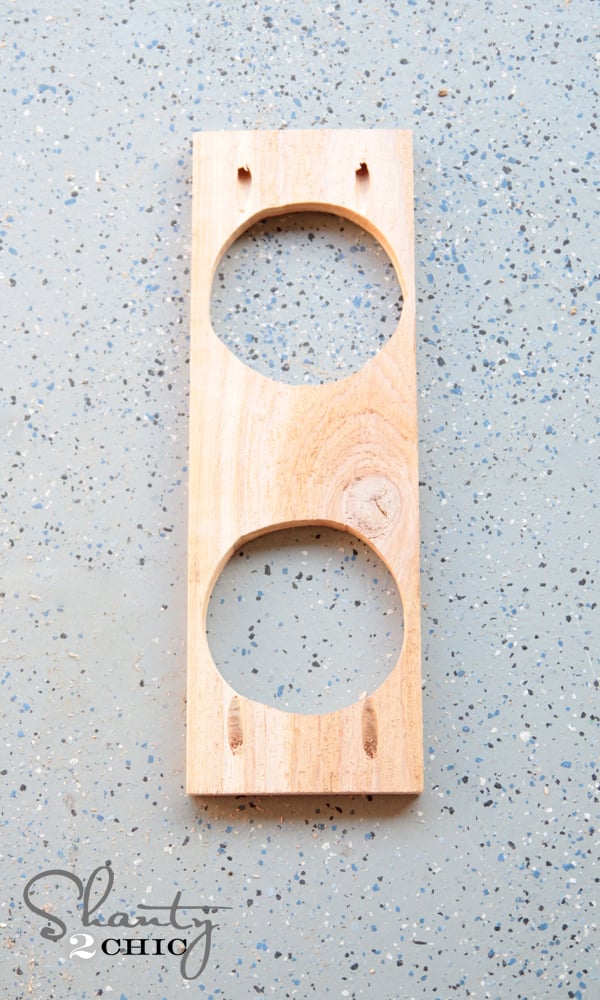
I drew lines on my side pieces to help me line them up. Mine are spaced 11″ apart starting from the bottom.
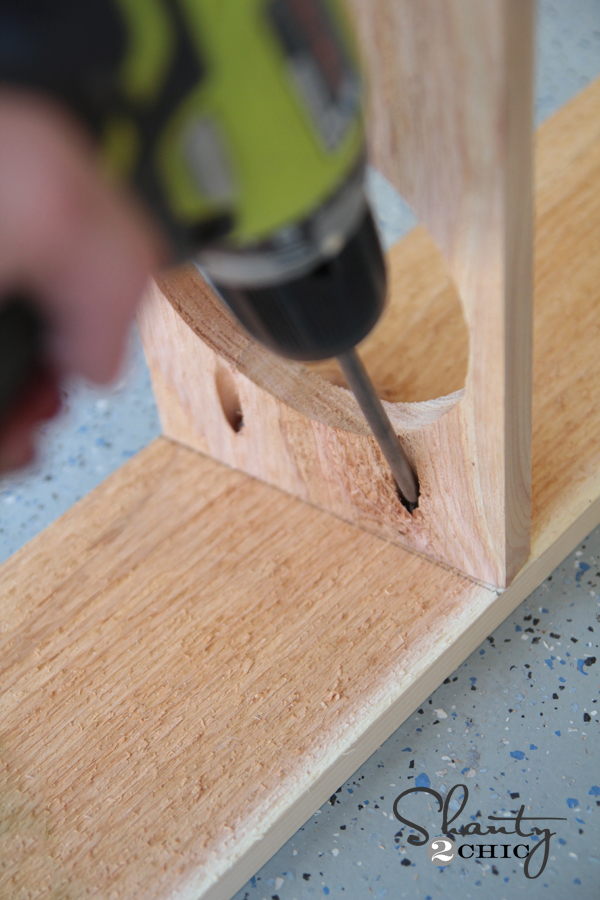
I added a bit of wood glue to each rung before attaching using 1 1/4″ pocket hole screws.

I used my Ryobi drill to attach each piece.
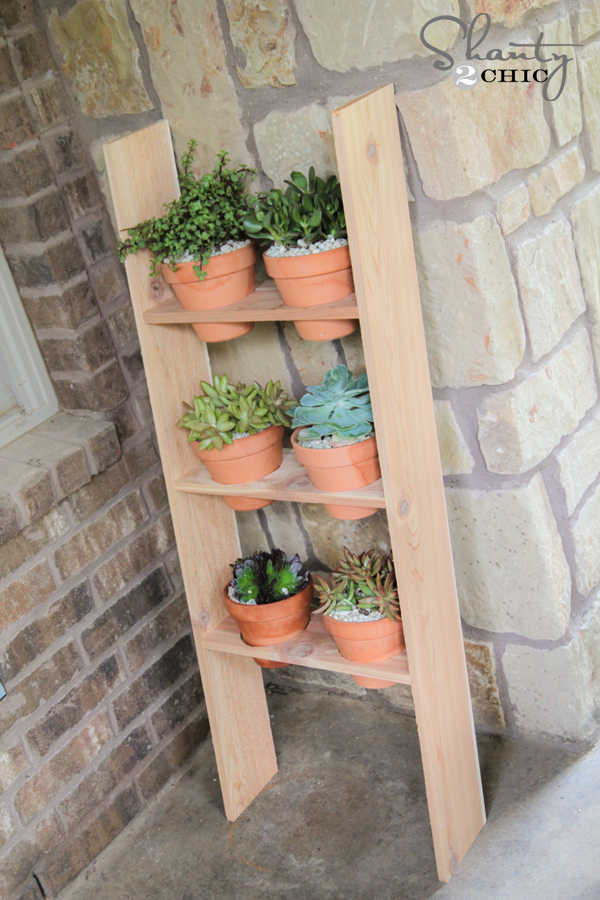
I repeated the same thing on the opposite side and I was done! I decided to keep my wood unfinished for this project. I LOVE the look of raw cedar.
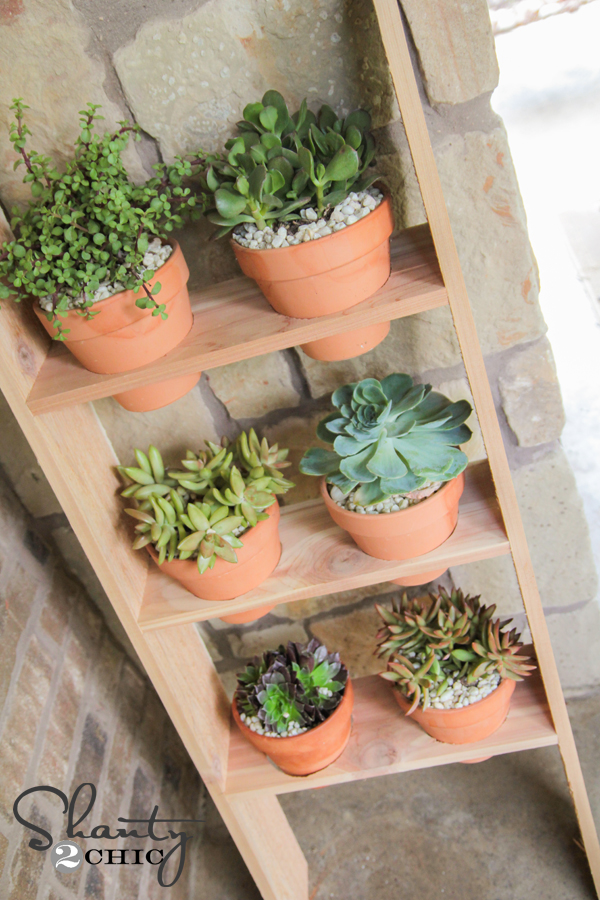
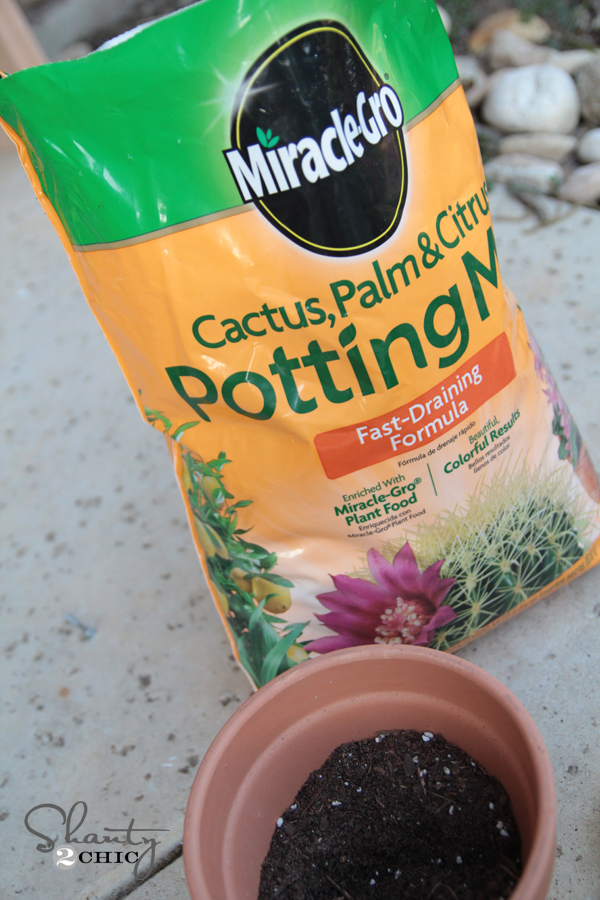
I found all of my succulent plants at the Home Depot. They have the best selection! I also bought 6″ pots for each plant.
I used a potting mix that is fast draining and good for succulents.
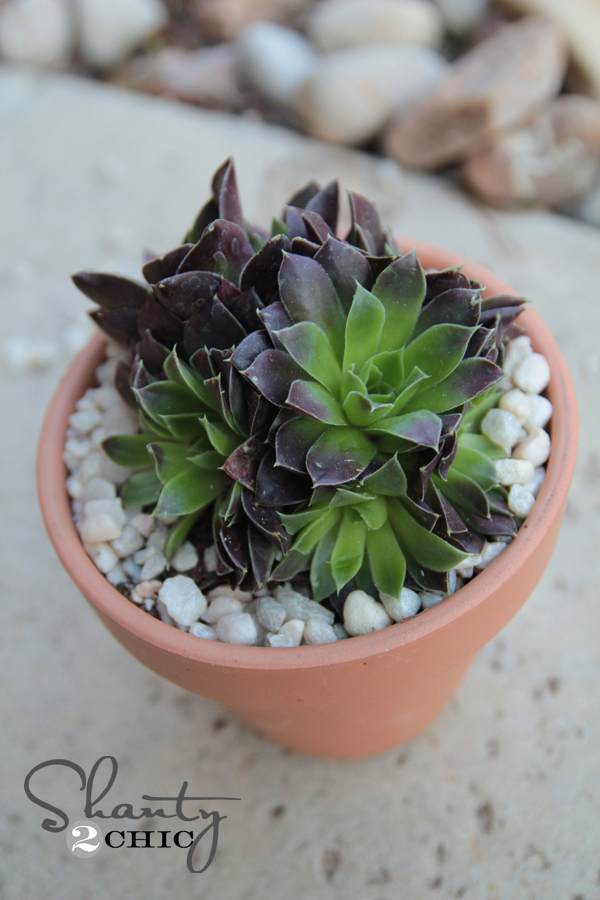
I put one plant into each pot and covered the top with a few white rocks. I love the clean look of the rocks on top!
Here are a few more shots of it all finished up!
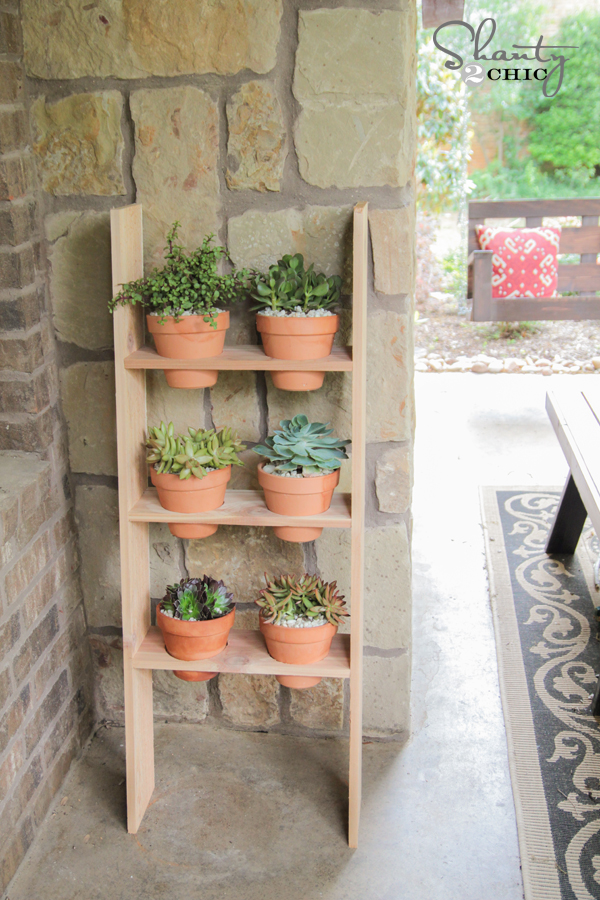
What do you think?? Not bad for $10, huh?!
Remember, you can check out the full set of FREE plans HERE!
I would LOVE for you to share and PIN this project with all your friends! Let me know if you have any questions at all!
~Whitney
Also, be sure to check out some of our other outdoor projects!

hi i love this DIY but i would like to know what if i don’t cut the circles for pots? will it work? or do Home depot guys cut circles for us?