Whitney’s DIY Apothecary Jars… Too Darn Cute!

Oh hey there! I am so excited to share my next project with you guys because it was so fun to make and I am sure you will all be making one of your own! Ashley and I went to Michael’s over the weekend to look for shantys. While I was checking out, she was glancing at a magazine and ran across a lady that made apothecary jars from mason jars…. That started my wheels spinning. I would love to give her a shout out but I didn’t even see the title of the magazine. Hers were different but she for sure inspired me! Here are the supplies you will need to make these cuties… I found all of mine at Hobby Lobby for under $8. You will also need a small piece of burlap.
First you will need to glue your candlestick to your wood circle… I used Gorilla Glue and put a book on top of it for about 30 minutes.

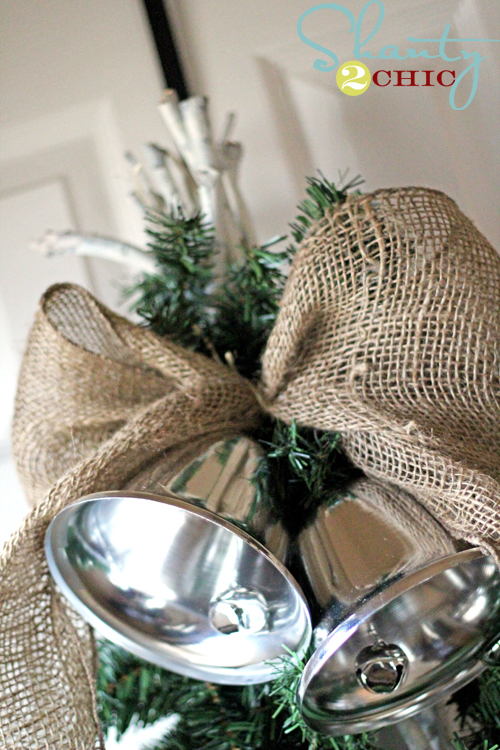
Next, paint your finial and your candlestick. I sprayed mine with Rustoleum American Accents Heirloom White. While those are drying I started working on the top of the jar. Hot glue a small piece of burlap to the top of your lid… Mine was 5” x 5”. Glue down the burlap to the sides of the lid, starting with your corners.

Next, take a piece of twine and wrap it around the sides of the lid a few times. I also added a dab of hot glue here to keep everything in place. You can either tie a knot at this point or add a little something.
I found this little pewter cross at Hobby Lobby for $2 so I tied it to my twine…


Now take your painted pieces and do a little distressing. I also added some Ralph Lauren Smoke Glaze to mine to make it even cuter…

Next, hot glue your the bottom of your jar to the top of your candlestick… we’re almost done!

Hot glue your finial to the top of your lid… SO FUN… Love these!!


Now your final and most fun step will be to fill her up. I used some shells I had that needed a home to fill this one. But I did think about what a great teacher gift this would be… Find out her favorite candy or coffee and fill your jar up with that. She will get to enjoy her treat and her new apothecary jar! There are endless options for these babies…. I would so love to see yours when you make it…


Follow Us Here


Subscribe

Get all of our posts delivered straight to your inbox!


  • Pat & Ron Harris

    Love it!!! Can't wait to make one, or two or three. I can think of so many ways to use these. You did good, girl.

  • Pat & Ron Harris

    Love it!!! Can't wait to make one, or two or three. I can think of so many ways to use these. You did good, girl.

  • Joyce @ Cheap Frills

    Nice job! And, Lord – I LOVE those pears lol! :)

  • Shanty 2 Chic

    Haha! Thanks Joyce… Your comment made me laugh:)
    ~Whitney

  • Nancy

    Love it, love it, love it! I can actually do this one, I think! ;-) Where do you find the RL smoke glaze?

    Turned out great…now I want to do one!

    Nancy

  • Enchantresses Three

    I am on my way yo Hobby Lobby to get the supplies!!!! LOOOOOVE them!
    Hugs,
    Sariah

  • Mimi

    Oh my goodness I love those! I can't wait to make one, gonna run out and get the supplies, RIGHT NOW! I think I'll put candy corn in mine for fall. Thanks for the inspiration.

  • duchess

    Tres cute! Another great project. Slow down girls, I can't keep up.

  • emry@my little creative outlet

    wow. you two are seriously creative geniuses! i am always so inspired by reading about your projects. thanks for sharing.

  • Linnea

    Thanks for posting a pic of the RL glaze. I went to Home Depot the other day and they had no idea what i was talking about when I said smoke glaze. But now I see that they DID have it. Is is just the basic faux technique glaze and do they have to tint it to the smoke color for you?

  • Jacey @ Trash2MyTreasure

    WOW that is SUCH a cute idea! thanks for sharing, i may have to try this :)

  • Room to Inspire

    Are you kidding me? Seriously fabulous. I love the use of inexpensive items to make something so great! I am seriously off to buy some smoke glaze :)

    Chelsea

  • Miss Mustard Seed

    Very interesting and creative. Those glas jars can be so expensive, so this is a great alternative and a fun project. Thanks for sharing!

  • Elizabeth

    That is soo cute!! I think I have a little project to do. :)

  • Lee Laurie

    What a great idea! I might have to make one for me and my sister! I will fill hers up with Haloween candy and give it as a gift. Thanks.

  • Cara

    Love, love, love, love IT!!!! I am on my way to Crafts Direct tonight to make these!!!

    Blessings,
    Cara

  • Terry

    That is so stinkin cute! And easy! And fun! I feel a craft project coming on! You two are great!

  • Kimmy @ my beautifully blessed life

    SOOOOO Cute!! Thanks SO much for sharing!!

  • Red Writing

    How do people come up with this stuff!? It is so stinkin clever!

  • Get Your Martha On

    Cute idea! The lid of the jar screws off as normal, even with the burlap on it, right? I might have to try this project …!

    And by the way, this blog totally makes me wish I had a sister!

  • Shanty 2 Chic

    Hey girls! Thanks for all the sweet comments! If you glue your burlap to both the top and the sides of the lid it will unscrew like normal.

    ~Whitney

  • Sarah @ Thrifty Decor Chick

    So cute! Love the distressing. :)

  • Your cool friend Cheryl

    Love how you distressed the paint! Thanks for sharing!

  • Dresser Girl

    WOW!!! I so wanna learn how to distress (it is stressing me out that I can't distress!!).

  • Aimee

    What a wonderfully creative and beautiful idea. It turned out great!
    If you get a chance stop by my Blog and say hi! I just put up a new post…
    Have a great day,
    Aimee

  • Laurel @ Ducks in a Row

    Super duper creative.

  • Creations from my heart

    thanks for visiting my DIY lampshade re-fo. I just love the jars! Blessings…Sherry

  • Hillary @ The Other Mama

    You have got to be kidding!! SO Amazing! I'm going to steal this egg-zact project and LOVE it!!! Thanks!!

  • ~ RM

    New to your blog- You guys have so many great and creative ideas! I am in awe everytime I visit your site!! Great Job!

  • Jen

    Wow. I think I say that everytime I see your creations.

  • Wendy

    That turned out cute! What a neat idea!

  • Joy Beadworks

    You make it look so easy! Love it. Gotta get some of that Ralph Lauren Smoky glaze.

  • Candace

    Oh so cute! You girls are so clever.

  • DeeDee

    very cool….I love these so much check out mine here…

    http://deedeescraftspot.blogspot.com/2009/08/glue-bottle-holder.html

    Love your blog and awesome ideas…

  • christi

    what a fun idea! thanks for stopping by my blog, too!

  • Launa

    What a FABULOUS idea! I love it!! And I just happen to have a cabinet full of mason jars…and to be honest this project looks a lot more fun than canning….in fact I'm seeing the new baby's nursery….cotton balls…pacifiers! LOVE IT!!

  • Maryann @ Domestically-Speaking

    Very creative ~ you can never have too many apothacary jars.

  • Gail

    Love it! This is definitely tagged as a must do.

    Gail

  • Morning T

    What a fun idea and love it for teacher's gifts!

  • Annette

    This is so charming. It looks like it belongs in an expensive home decor boutique. Great Job!

  • Karen Valentine

    This is perhaps the coolest idea I've seen in a long time! I am totally making one for myself! Thanks so much for sharing!

    Karen
    My Desert Cottage

  • Ruth

    Thank you for stopping by my blog and for your kind words.

    I love these jars. I can't wait to get to the craft store and pick up the supplies. Thanks for the tutorial.

    Ruth

  • Sandy and Joe/rhubarb reign

    What a great idea! You could do so many different variations. Thanks for sharing. xo

  • Jody

    hi girls, love what you did with the apothacary jars! love your blog, i'm now a follower. :)

    Jody

  • Mary Ellen (megardengal)

    I'm bookmarking this idea!! I love it and so very thrifty!! thanks for sharing such a great idea!

    blessings
    mary

  • Melissa

    What a great idea! I can't wait to go to Hobby Lobby after work!

  • Christi

    How stinkin' cute! I'll definitely be making some of these!

  • Chany

    Que bonito, se parece tanto a una creación mia muy parecida a estaque que publique el 17 de septiembre, estaremos en la misma sintonía? Hasta pronto, un abrazo, Chany.-

  • Paula

    That is such a creative idea! You could change your paint colors and make all sorts of sets for each holiday. I love it!

  • Love the Decor!

    Those are darling!! love the pears in your pix also!!
    Just found you and look forward to you projects. Stop by for a visit when you have time

  • Marsha’s Mpressions

    CUTE CUTE CUTE!

  • ~ ~ Ahrisha ~ ~

    You are so clever, this is great!
    ~ ~Ahrisha~ ~

  • Julie

    Hey Girls … This is so cute…Y'all did a wonderful job on thie project…
    xoxo
    Julie

  • Glenda/MidSouth

    What a great idea! Thanks for sharing.

  • Jennifer

    OK, I have to admit . . . I was skeptical. But when I saw your finished product – gorgeous!! Now, off to Hobby Lobby . . .

  • Kathy @ Creative Home Expressions

    This is a great idea! I just saw some of the finial pieces at Michaels and wished I had a project I could use them for ~ and here you are!

  • Jenny

    Great idea! It is so cute too!

  • Tammy518

    This is so cool! Great job!

  • Kammy

    Love this idea – you gals ROCK !
    Kammy

  • laurmela

    Love these! But alas I can't find all the pieces parts where I am. Wish we had a Hobby Lobby here. I will keep looking.

    laura

  • adrienne

    Love these! I just went to Hobby Lobby this morning to buy the materials and made one. Love it!! Thanks for the great idea and LOVE your blog and great decorating ideas. You have been blessed with a serious dose of creativity!!

  • Stephanie @ and noah makes five

    These are fantastic! We always have Mason jars at the local thrift stores. I like these better the ones you can buy at HL or HG! Great job.

  • B.E.A

    I'm over from Just A Girl. I LOVE this idea!! Great job!

  • Fanchy

    This is too cute!! I had to try one myself. I credited in my blog back to you for the inspiration and tutorial. Thanks for enlightening my creative spirit! Jen @ Noting Grace.

    http://notinggrace.blogspot.com/2010/02/my-attempt-at-diy-clocheapothecary-jars.html

  • Amanda

    I love this project but do not have alot of space in my apartment to put them so I, MINI-ME them. They turned out soo cute and CHEAP. I went to Michaels with my 40% off coupon in hand and went to shopping. I made 4 mini-me versions and this is what I used, besides your wonderful instrictions:
    * 4 Mini Square Apothecary Jars-$1.00 each
    * 4 Mini Unfinished Wooden Circles-$0.39 each
    * 1 pack of 4 Mini Unfinished Wooden Finials-$1.49 per pack
    * 1 pack of 4 Mini Unfinished Wooden Candlesticks-$3.29 per pack
    * 1 tube of Super Glue-$1.49 each
    * Beads- I had these
    * 2 Sponge Brushes- I had these
    * 1 tube Vanilla paint-$0.59 each
    * 1 tube Light Blue paint-$0.59 each
    **TOTAL= $13.51
    * Take 40% off the candlesticks- $1.31
    **TOTAL after discount= $11.53
    THATS $2.88 EACH MINI APOTHECARY

    Thank you for this wonderful post oh and sorry I dont have a picture right now, I will get one though. Can’t wait to see what’s next! <3 Amanda

    • Shanty2Chic

      Yes! I would love to see pictures!!

  • http://jamiebrock.hubpages.com Jamie B

    Hello, This jar is gorgeous! It looks as if you picked it up in some expensive boutique! I have to try to make one of these sometime. I really love the cross, too. I hope it’s okay, I just couldn’t resist featuring your apothecary jar in my mason jar crafts and home decor round-up. You can see it here:

    http://jamiebrock.hubpages.com/hub/Mason-Jar-Crafts-and-Decor-Ideas?done

    Thank you so much for sharing how you made this!