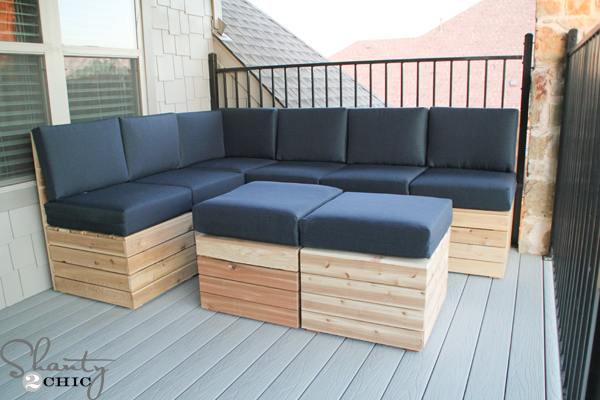
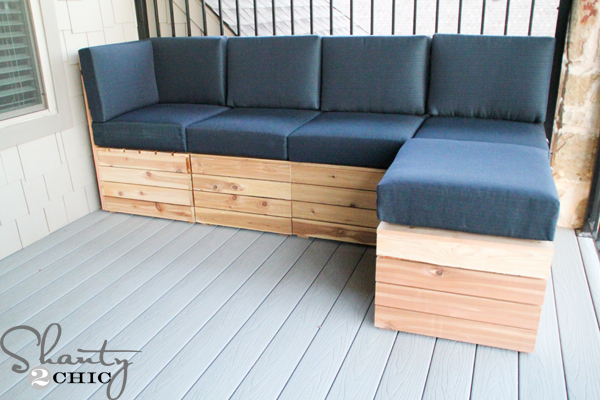
Hey there! Living in Texas, Fall is the BEST time for us to spend outdoors! One of the big reasons we picked the house plans that we did, when we built our house, was the balcony! I dreamed of a giant comfy sectional – the kind I see in expensive magazines – and of course my goal has been to build it! I finished it just in time – the weather has finally cooled off and this space is becoming my FAVORITE place to spend time!
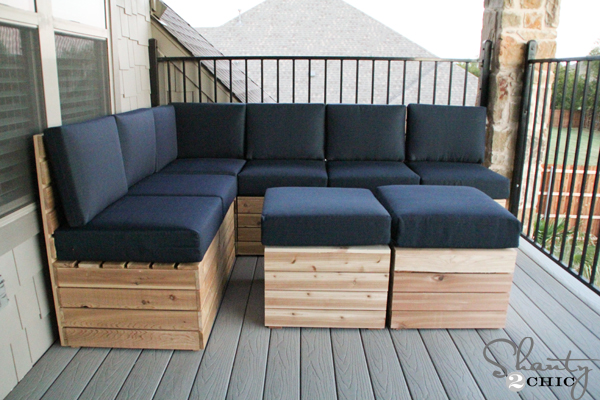
Not every space is built the same so I wanted to come up with a seating solution that could fit all spaces! I came up with this modular sectional that is SO easy to build. Every piece is basically a box and you can add a backrest or leave it off and there is a corner piece to create a sectional!
Today, I’m sharing the basic box seat with the optional backrest and of course, I have the step-by-step tutorial for you to follow as well as FREE Printable Plans! You can click HERE or the image below for the free plans!

*You can find the plans and tutorial for the corner piece HERE!
Now, let’s get to it! I built this for outside so I chose cedar boards.
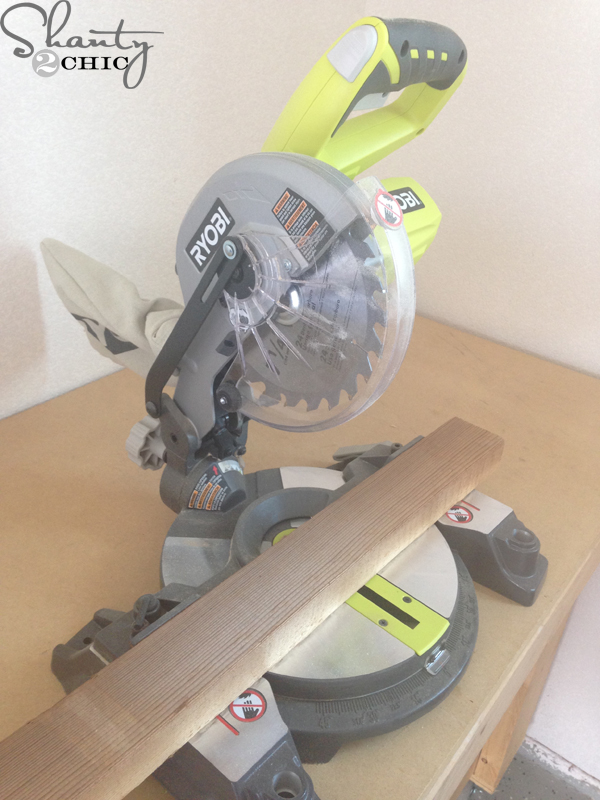
To start, I used my Ryobi 18V miter saw to cut every piece. This is a great saw that runs off of the same batteries as all of our favorite Ryobi 18V tools. It’s small enough to move around with you and doesn’t take up very much space. Whitney and I actually used it on a hotel balcony when we had to cut pieces for a class (shhhhhh 😉 )
I made the 2×3 cuts for all of the boxes that I wanted to build.
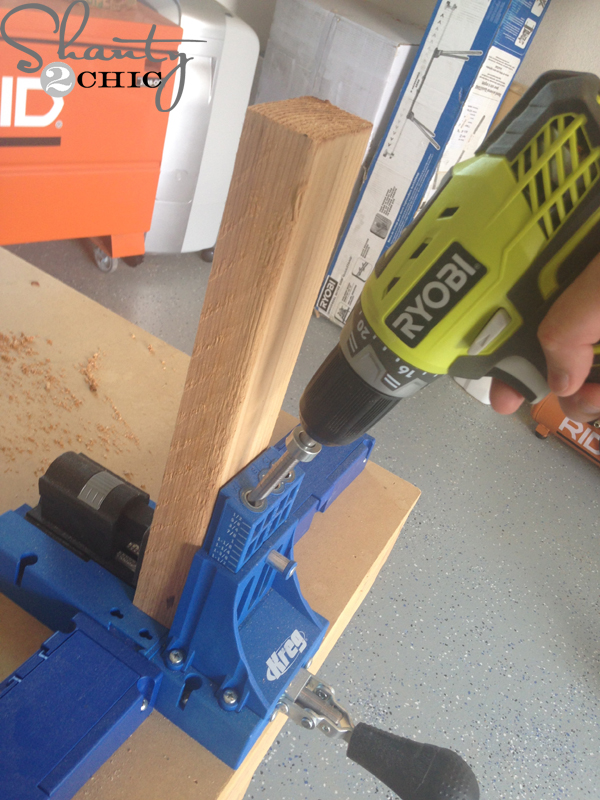
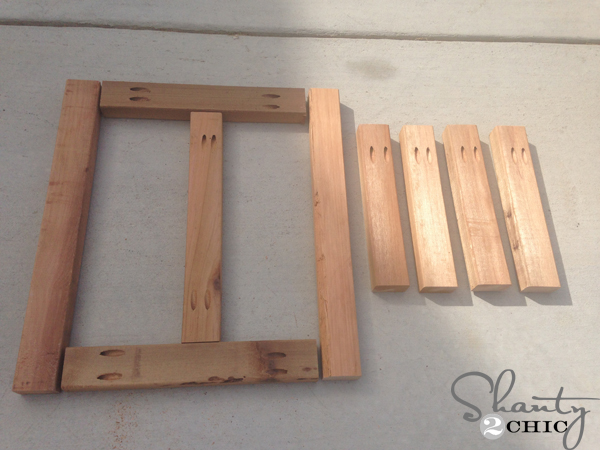
Then, I used my Kreg Jig K5 to drill pocket holes (you can find the Kreg Jig HERE on Amazon). You can refer to the plans for the pocket hole location and you can see them in the cuts picture above.
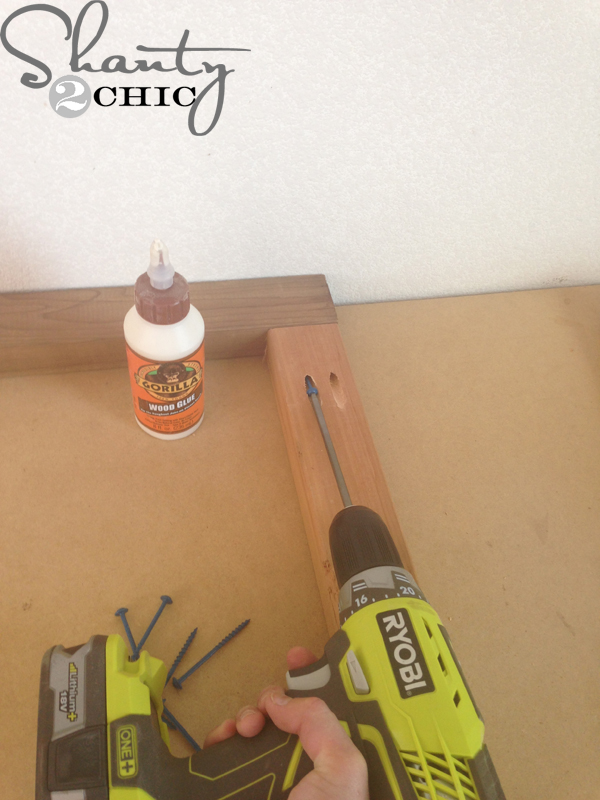
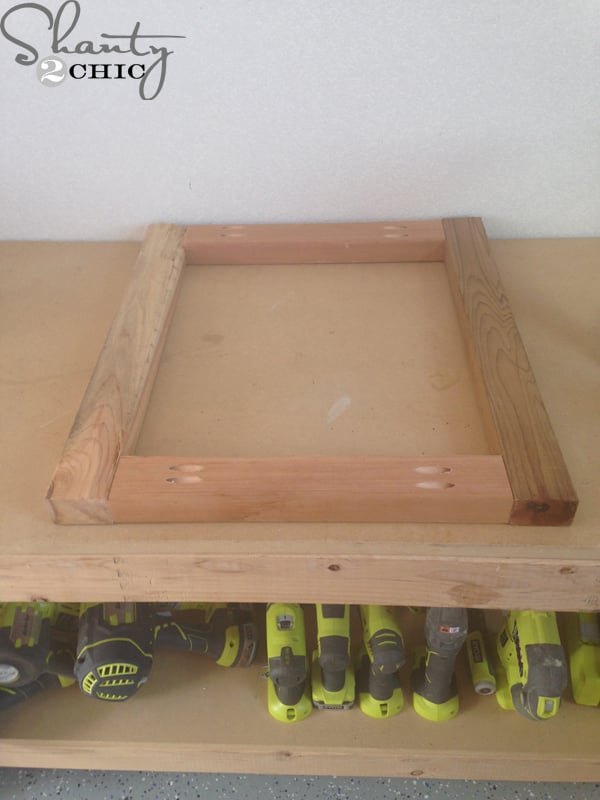
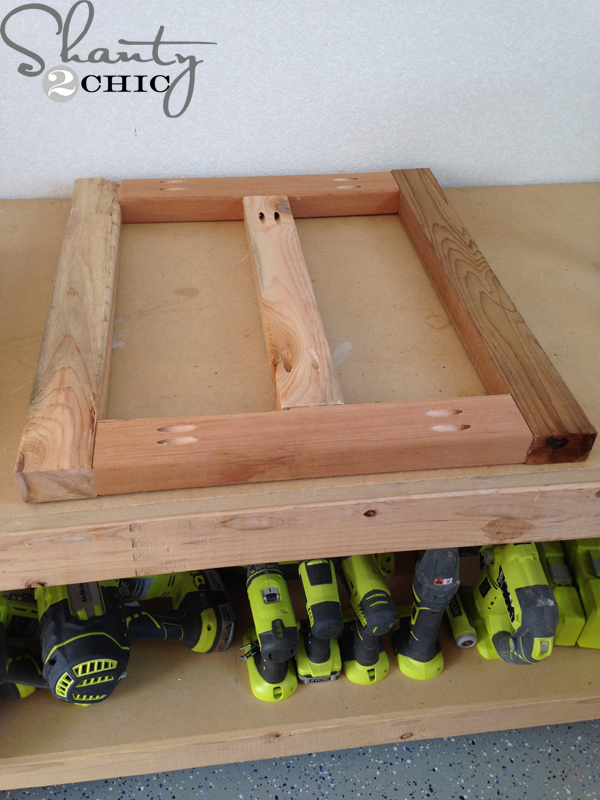
I attached the frame of the seat first,then added the center support piece.
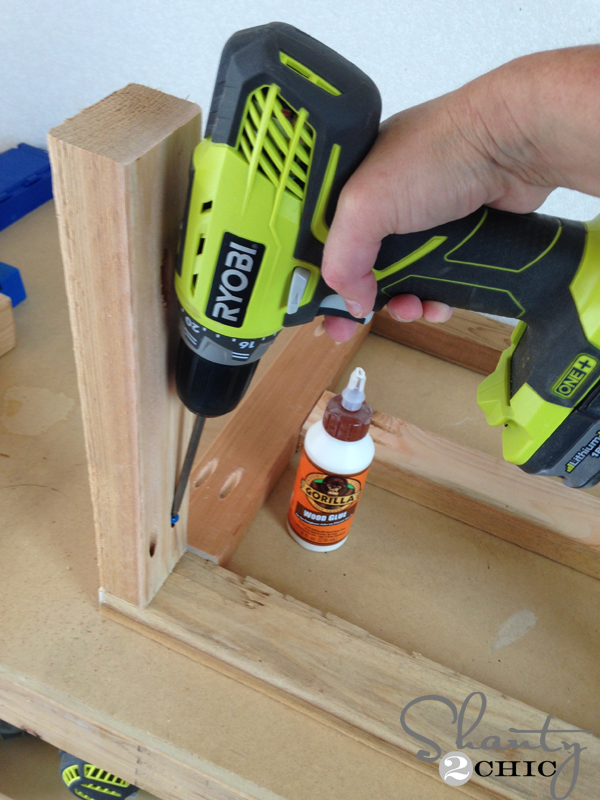
To finish the seat frame, I just attached the legs.
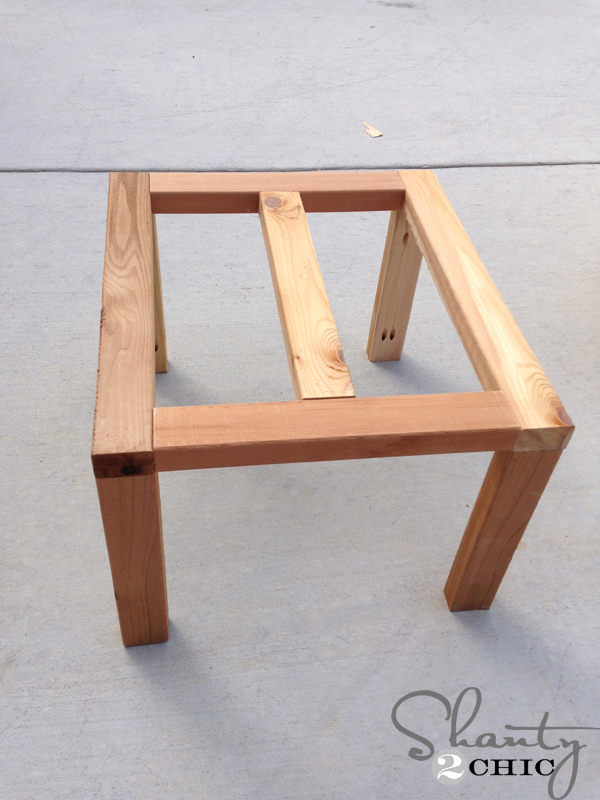
Frame = DONE 🙂 Easy enough!! Now for the slats!
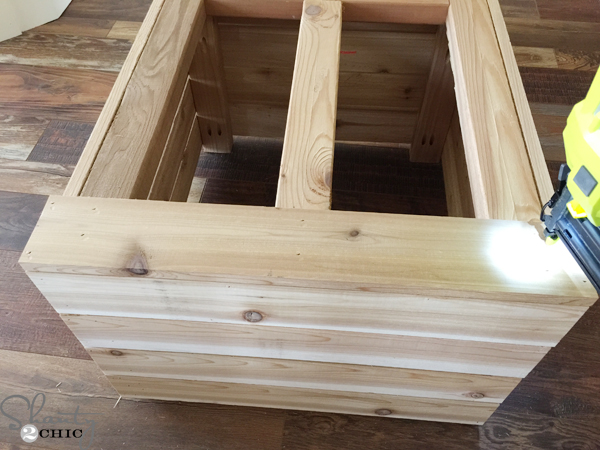
I began attached the side slats first. To make spacing easy, I used scrap 1/4″ pieces as spacers. Start at the top of the seat making the top slat flush with the 2×3 frame. I attached them with Gorilla Wood Glue and my Ryobi 18 gauge Airstrike Nailer (1 1/4″ nails for this).
Work your way to the bottom and you will have about a 1/2″ gap between the last slat and the end ground.

The front and back slats are easy. No spacers needed, just line the slats up with the side slats, glue and nail in to place.
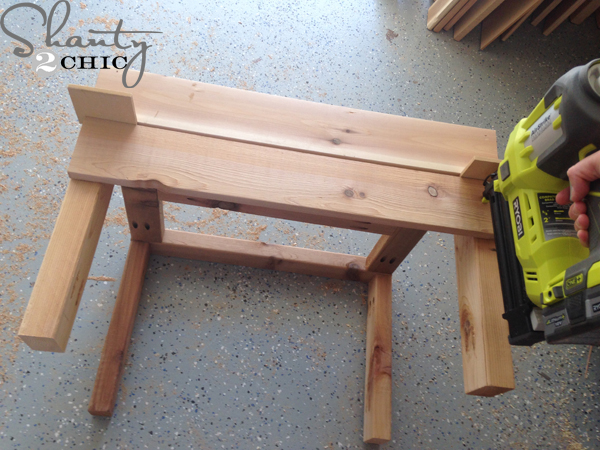
The top slats are last! I attached the front and back slats first, making them flush with the front and back slats (you will cover the slats so that you only see the top slats).
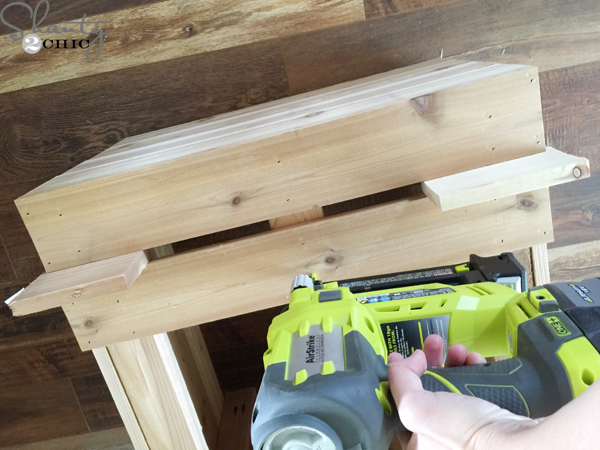
I used my 3/4″ cedar scraps to space the rest of the slats out and attached them with wood glue and my nailer. Nail these into the center support, as well.
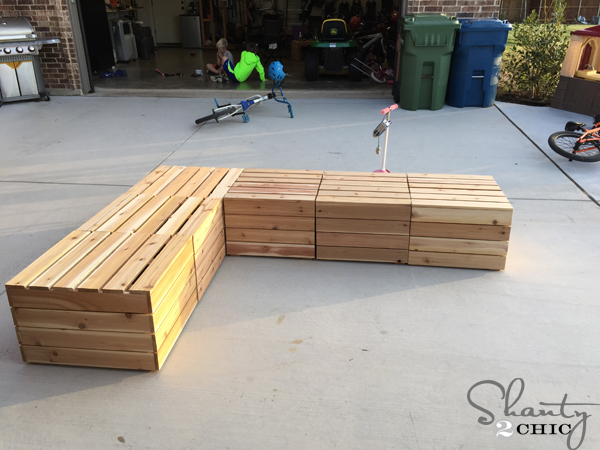
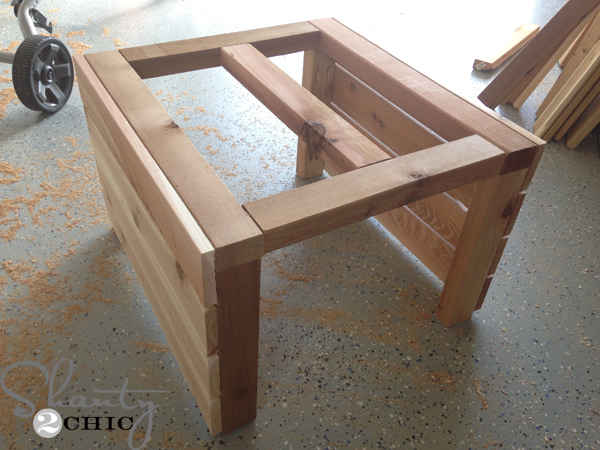
Here are the assembled boxes! (The corner box is a different size that I will share plans to next week). At this point, you can leave it as-is or add backrests!
I opted for backrests 😉
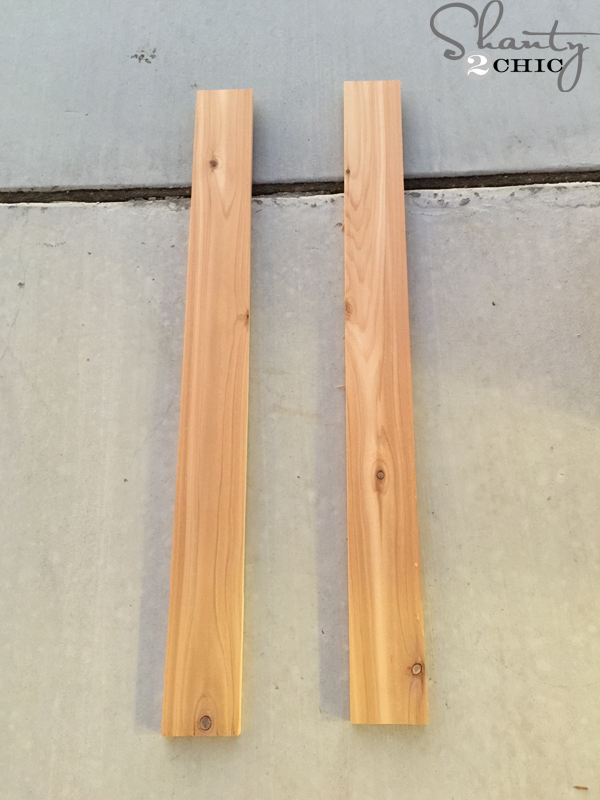
I cut the posts first
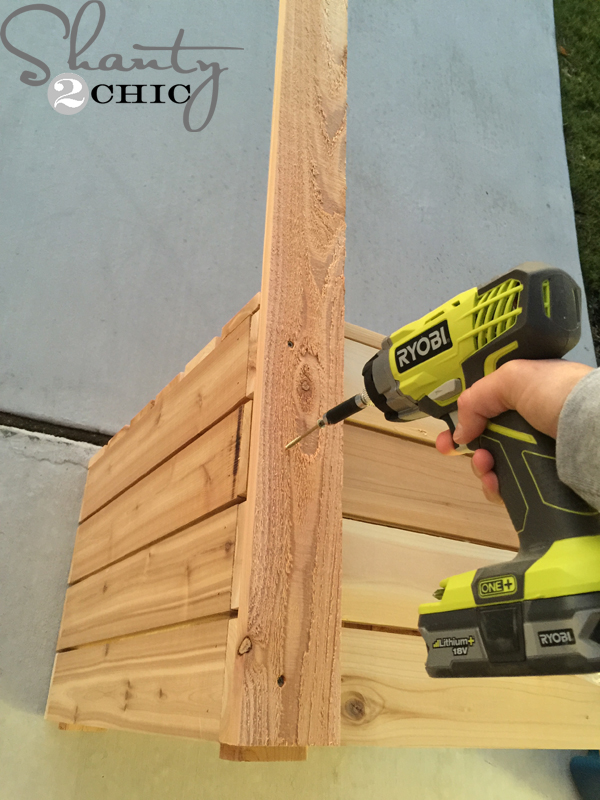
Then attached them to the back of each box with 2 1/2″ spax screws. The screws will go into the 2×3 legs inside the box.

Then, I added my slats. Begin at the top of the backrest and attache with wood glue and 1/4″ nails. I used 3/4″ spacers and attached 5 slats.

That’s it!!!! I wanted to keep the natural cedar look so I just applied 2 coats of Varathane Spar Varnish all over and called it a day 🙂
I found a great deal on deep seat cushions at target.com. I used my Red Card so I saved 5% after the sale price and got free shipping. I did design the seats based on the cushion measurements but they are pretty standard measurements and should fit a variety of cushions. Just make sure to check dimensions if you choose different cushions and modify the plans accordingly. You can see the cushions that I purchased HERE.
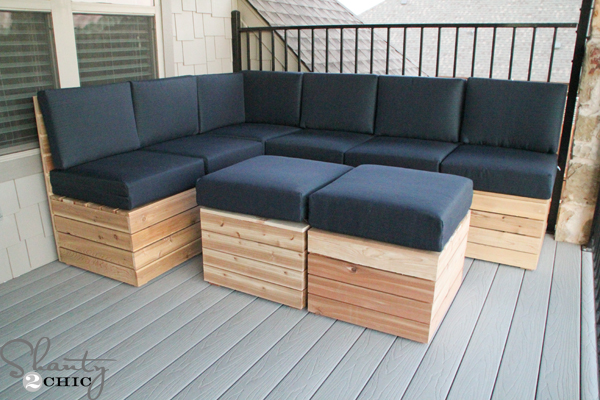
I have mine set up to have two boxes create a coffee table that can double as ottomans
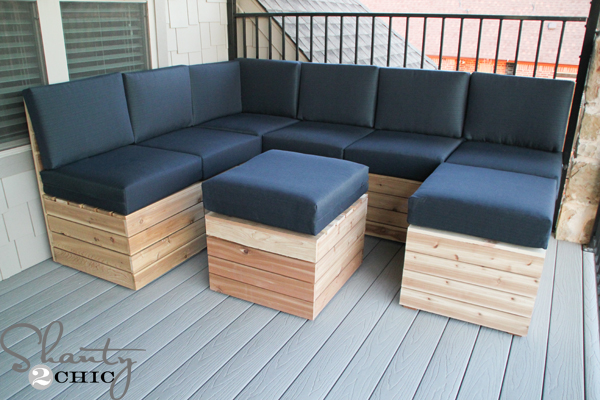
or they can be arranged to create a chaise lounge end
or this set up 🙂
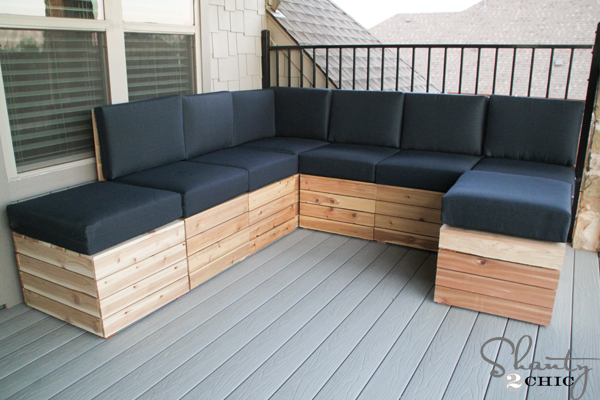
or this!

You could even create an individual chaise lounge, or two, for a small space!
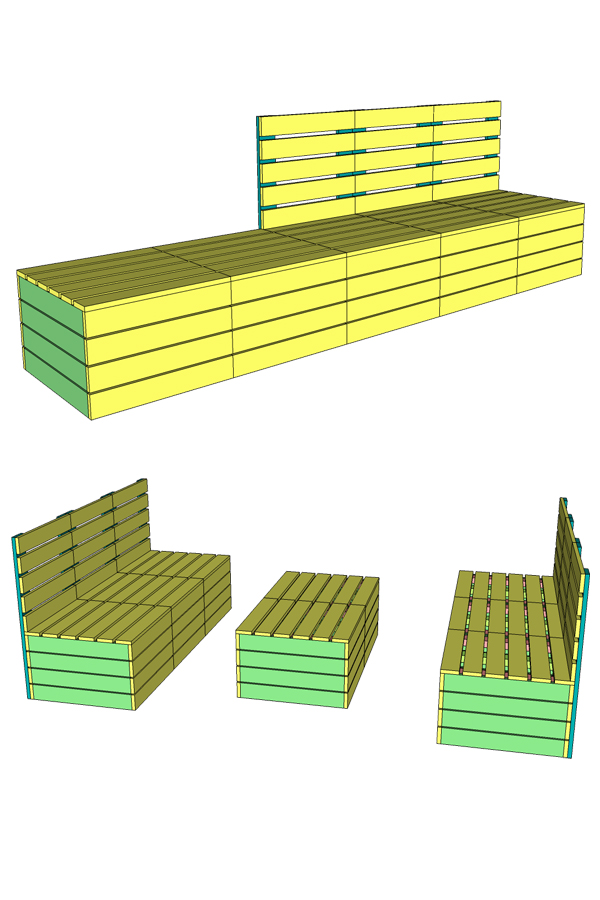
There are so many possibilities, even without the corner piece!
I LOVE, LOVE, LOVE this space now! And, if I get bored with it I can always rearrange things;) This seating works great with our without cushions and another cool thing about this type of seating is that you can build a little to start and add to it as your budget allows! I’ll be back next week to share the corner piece plans!
Happy Building!


I found the correct cushions if anyone is still looking for them. Go to the Target website and type the item # 16343170 I am almost done with the build. I have to finish staining the wood. Went with an Acorn Brown…
Did you build your set with 1 x 4 cedar or 1 x 4 construction lumber? I am trying to figure out if either changes the plan as 1 x 4 cedar is 1 x4 but construction lumber is 3.5. thanks! looks Great!!
I used premium pine from home depot.
Looks like they do not have the size needed on targets website. Any recommendations? Thank you!!
For people wanting slants cut some 6 inch two by fours diagonally and attach them to the back and use those to attach the backs which (if calculations are correct and assuming imperfect cuts) would give a 12.5-13.0 degree slope, nice and comfy
I like this idea except I would add hinged tops to make these into extra storage as well.
Love this idea, just a couple of questions. What wood do you suggest for using inside? And what are the measurements for the cushions, like the other comments, the item is no longer available. Thank you.
Here is a link to the cushions. The dimensions are under the product info. Sorry for the trouble! Also, you could use cedar inside but I would probably use pine. Hope this helps! http://m.target.com/p/threshold-heatherstone-2-piece-outdoor-replacement-sectional-seat-cushion-set-lime/-/A-14751061
I am looking on Target’s website for the cushions. The link is no longer active. Are the cushions you used the cushions that have the seat and back sewn together? Or are they the individual cushions? Thanks!
So sorry about that! Here is a link to a different color (not available) but the dimensions are under the product info tab. Hope this helps!
http://m.target.com/p/threshold-heatherstone-2-piece-outdoor-replacement-sectional-seat-cushion-set-lime/-/A-14751061
what are the dimensions of the cushions, because they are no longer on your site. Looking for both bottom and back cushions. Please help Target has standard size, but they don’t look like they would fit your dimensions. Thanks
It looks like there is an issue on Targets site. It will probably show up soon!
I see they are not available but I did find the dimensions on a different color. Click the link and its under product info! Hope this helps 🙂 http://m.target.com/p/threshold-heatherstone-2-piece-outdoor-replacement-sectional-seat-cushion-set-lime/-/A-14751061
About how much in the end did all the supplies cost you?
I broke down how much each cube and back cost me. I did this so you can piece together what you need to get a better idea of cost.
Hi, I don’t see the cost breakdown, would love to know before I start! ! Thanks
There is a link to the corner piece right below the image for the free plan download. The breakdown is on that post: https://www.shanty-2-chic.com/2014/11/diy-modular-sectional-corner-piece-plans.html hope this helps!
Nice project aside from plugs for ryobi (I like Bosch tools better) and what if you don’t own a K5 from kreg.. Do able?
You could use 3″ screws instead. Hope this helps 🙂
Yes I have the same question. Is this a little uncomfortable without a slanted backrest? It doesn’t look like it slants. I really like the beauty of this. I’ve been searching for a while to find this “look” . Another question, can you hinge the seats so you can use them to store the cushions. If you have some thoughts on how to do this I would love to hear them. Also I was thinking of making the tops of the seat with the slats tight against each other so it would add some protection for the cushions when I store them under the seats.
BTW where did you find those cushions they look really comfy and thick!
Hi,
The backs are not slanted. It doesn’t seem uncomfortable to me because the cushions allow you to lean back a bit but if you are looking for a comfortable that you can sit back in (like a big comfy chair) then you may not be pleased with it. Adding a hinge is a great idea, I would attach boards under the seat slats running the opposite direction. If this is outdoor, you really need to have the 1/2″ gaps between the slats to allow for expansion and to allow water to run through and not sit on top of the seats. Hope this helps! We would love to see your modifications!
Looks great & I’m sure they will last a long time. Just a quick question. Are the backrest cushion slanted to make it more comfy
Thank you! They do not slant. I don’t think the seats are uncomfortable, especially with the thick cushions but it’s not comfortable like a big chair that you can sit back in. I hope this helps!
Thanks for your reply and the building plan. May get round to do it.
I am so building this!! After 2 years I have just finished my 16′ x13′ foot porch and I have been looking at sectionals to fit it. Thanks off the plans I just hope the cushions will hang around until I can get them piece by piece 🙂 I love ya’ll!!
Awesome! So happy to help and please send us the pictures when you finish 🙂
I’ve noticed this for a long time and just haven’t said anything, but why do you guys use so many exclamation points? It’s like you’re yelling at your readers.
I guess we just get really excited about DIY;)
Of course you do. It’s exhausting as a reader to read something in a constant yelling voice.
Thanks for your feedback Jennifer. Have a great day!
Telling people to just not read something is the latest fad in blogs it seems. I would think the owners of the blog would appreciate all feedback from their readers, not just the cheerleading. If they don’t get both sides of the coin, they don’t know when something is wrong and would just lose readers. No, I did not get up on the wrong side of the bed this morning, but thanks for your concern.
When asked why we use so many (!) we responded that we were excited about DIY. You wrote back a rude comment to which we responded “thank you for your feedback”. If it is so exhausting for you to read our tutorials, by all means, don’t read them. You are more than welcome to print out our FREE printable plans without a reading the tutorial.
Maybe you notice this “fad” in blogging because there are a lot of people that feel the need to post rude comments and call them “feedback”. The way you followed up to our response gives the idea that you are looking for a fight.
While we do acknowledge and appreciate your feedback, we do LOVE what we do and have a passion for DIY and if our expression of that through (!) is offensive and exhausting to you then again, please don’t feel that you have to read. We will not change the way we write and express our excitement so this is probably not the site for you to read. Hope you have a better and more relaxing day!
Insinuating my day is bad and not relaxing is quite the assumption. I wasn’t being rude or looking for a fight. I was direct without filling it with positive affirmation first. There’s a big difference. My last follow up wasn’t directed at you , but rather the other 2 commenters who actually were rude. Seems you only want the cheerleaders, so congratulations on losing a reader. It amazes me when a blog owner can’t take criticism, but would rather just want the feel good comments. Which by the way, if you have read any of my other comments on your blog, which you have because you’ve commented back to me, you’d see they were positive. This definitely isn’t the site for me if you can’t take one criticism. Enjoy your cheerleaders. I guess I shouldn’t hold my tongue any longer and go ahead and comment on how it seems desperate how every single post is asking for follows on IG and Pinterest. It used to be at the bottom of the posts, but now it right up top. Every post is overkill. Have a nice day!!!!!!!!!!!!!!!!!!!!!!!!!
Thanks for your feedback Jennifer! Have a great day;)
When asked why we use so many (!) we responded that we were excited about DIY. You wrote back a rude comment to which we responded “thank you for your feedback”. If it is so exhausting for you to read our tutorials, by all means, don’t read them. You are more than welcome to print out our FREE printable plans without a reading the tutorial.
Maybe you notice this “fad” in blogging because there are a lot of people that feel the need to post rude comments and call them “feedback”. The way you followed up to our response gives the idea that you are looking for a fight.
While we do acknowledge and appreciate your feedback, we do LOVE what we do and have a passion for DIY and if our expression of that through (!) is offensive and exhausting to you then again, please don’t feel that you have to read. We will not change the way we write and express our excitement so this is probably not the site for you to read. Hope you have a better and more relaxing day!
Latest “fad?” I am not a blogger. Just because you are a reader doesnt give you the right to be rude. How arrogant of you to think that they need to change because of “you!” You are one reader. I’m sure you didn’t complain when you printed off your plans to build your latest piece of furniture. Constructive feedback would be about the plans/furniture. Not attacking the blogger’s personality. If you cant say something nice, don’t say anything at all.
Then don’t read???? Pretty simple.
You guys are incredible! love this! 🙂 -Abbey
Thank you Abbey 😉
i absolutely love this. great job!
Thank you Melissa 🙂