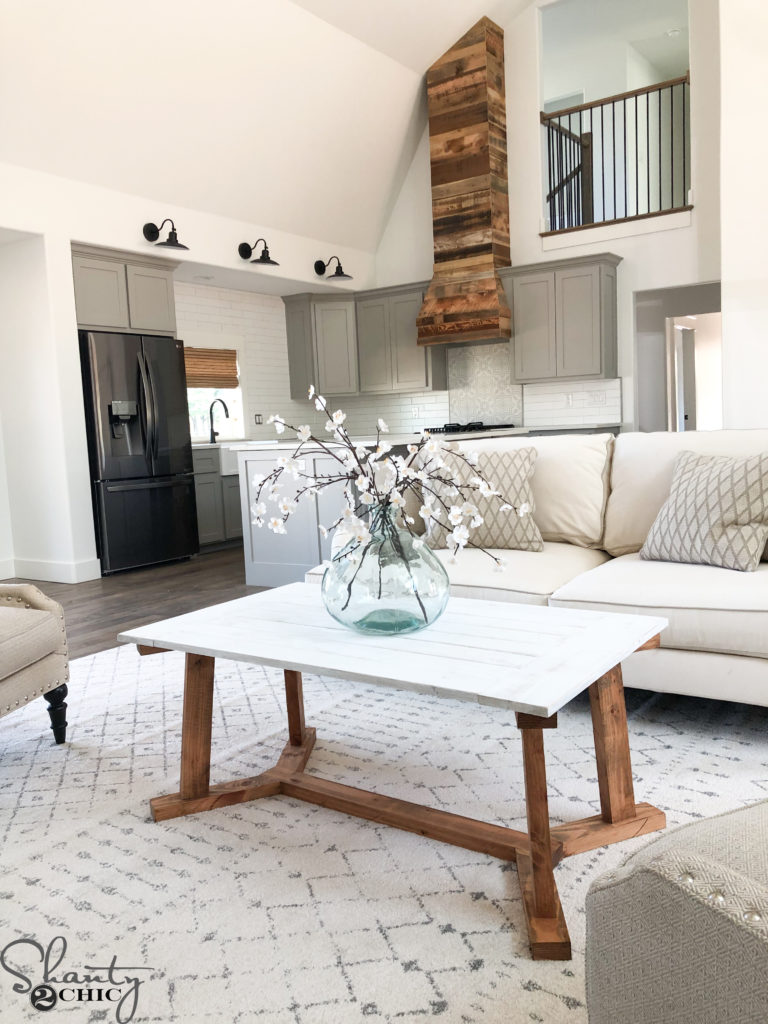
Learn how to build this easy DIY Console Table for about $100 with free plans by Shanty2Chic! This is an easy build and you only need 3 tools!
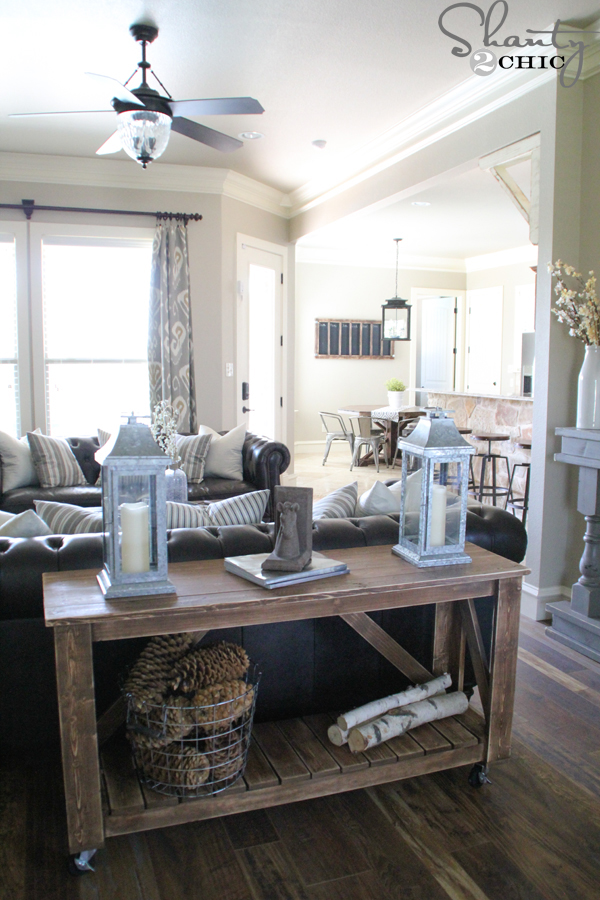
I’m a sucker for a console table and this one is one of my favorites! I’ve been needing something for the back-side of my couch to break up the room a bit. It’s a very open room that opens to the entry way so this table was a great way to separate the spaces!
It is so incredibly easy to build and I assembled the whole thing with my Ryobi Airstrike finish nailer! It’s 4 1/2″ feet long and would work great in so many areas of your home – oh and it only cost me about $100 including the casters 🙂
As always, we’ve got the FREE printable plans for you! You can click HERE or the image below to print them.

I’ve also got the step-by-step tutorial for you! Here we go 🙂
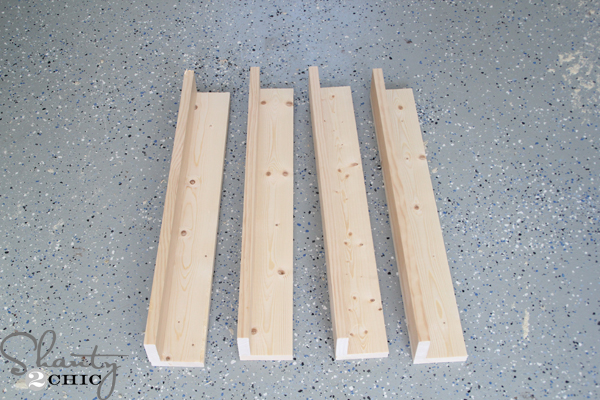
I started by attaching the 1×3 and 1×4 pieces, with Gorilla Wood Glue and my 16 gauge finish nailer.
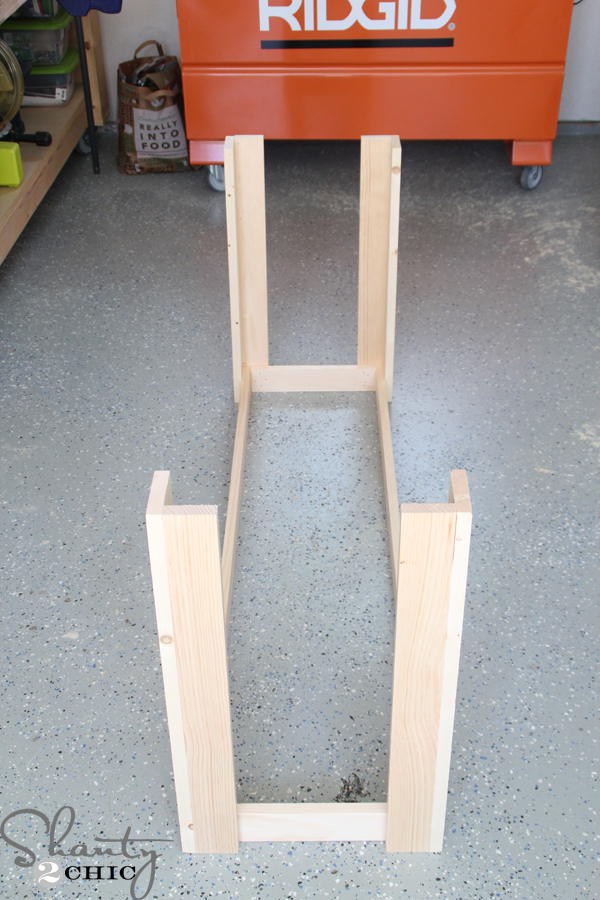
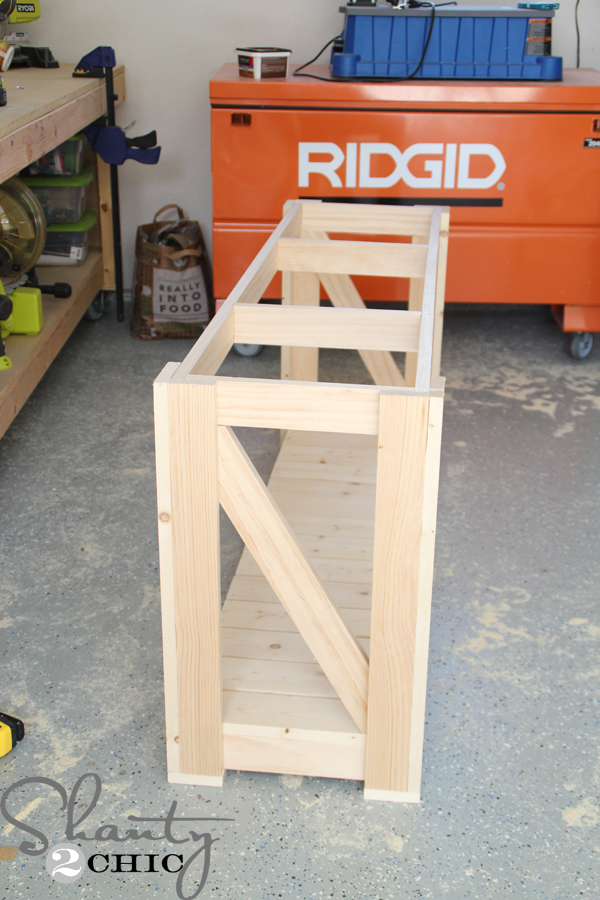
Next, I attached the bottom of the legs to the bottom frame – the bottom of the legs will be flush with the bottom of the frame.
Then, I attached the top frame the same way. I drove my nails from the inside of the frames into the legs to hide the nail holes.
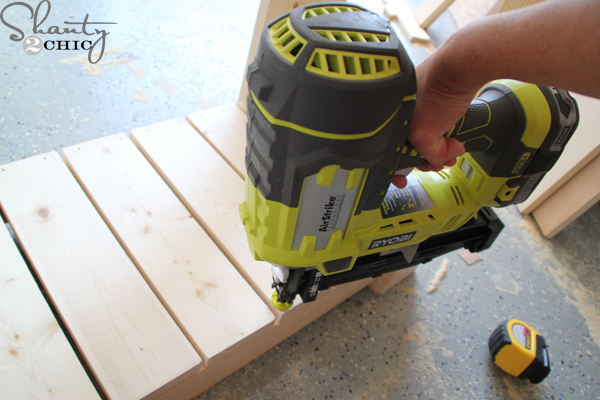
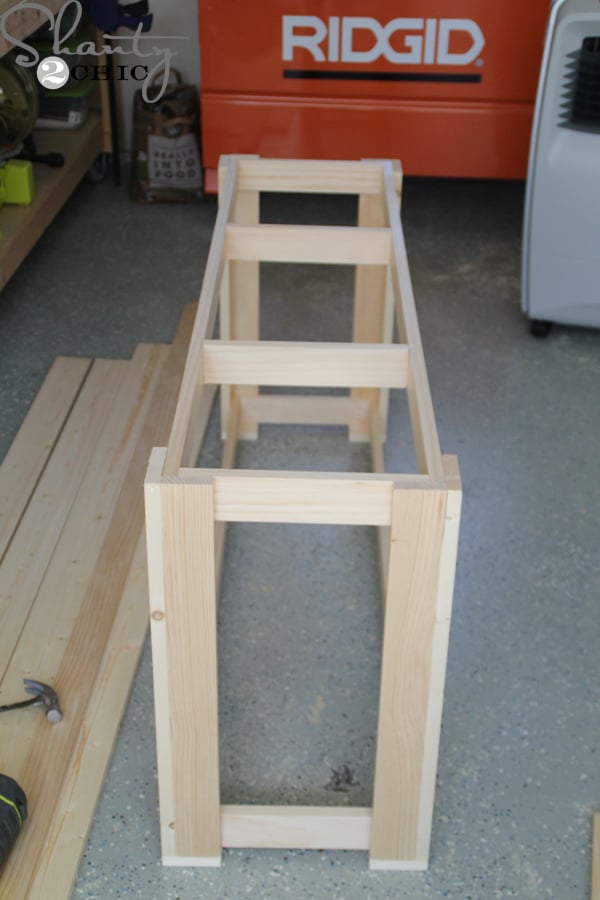
After cutting the bottom slats, I attached them to the bottom frame. The ends of the slats will be flush with the edges of the bottom frame. I used wood glue and 1 1/4″ nails here.

Halfway done 🙂
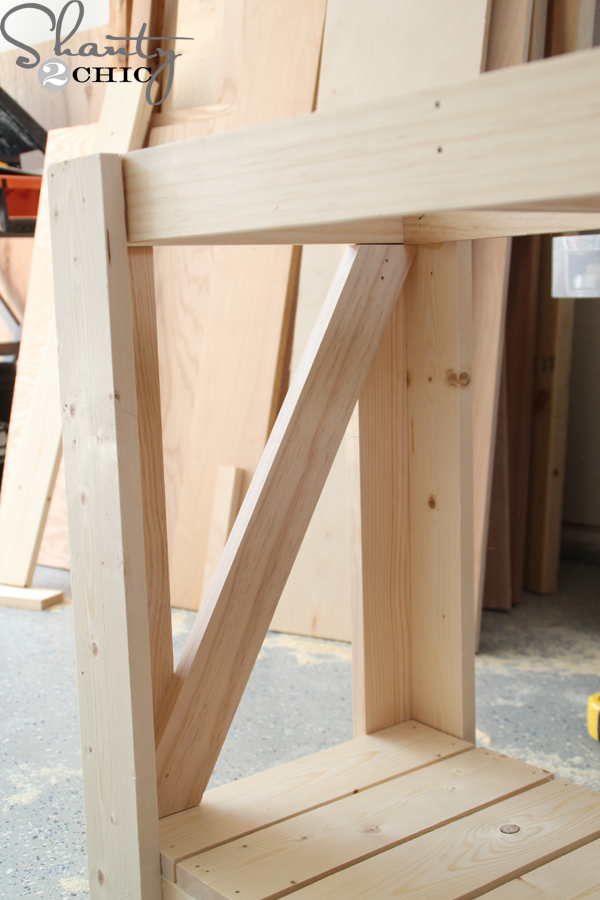
I attached the side angle pieces from the inside of the console table into the legs.
Notice the direction the angles are going. This is important so that the back pieces fit properly.

Next, I attached the back angle pieces the same way. The best way to install the back pieces is to make sure the outside edges are flush with the inside of the table legs. Then, the pieces will split center. I nailed through the bottom of the angle piece into the top frame.
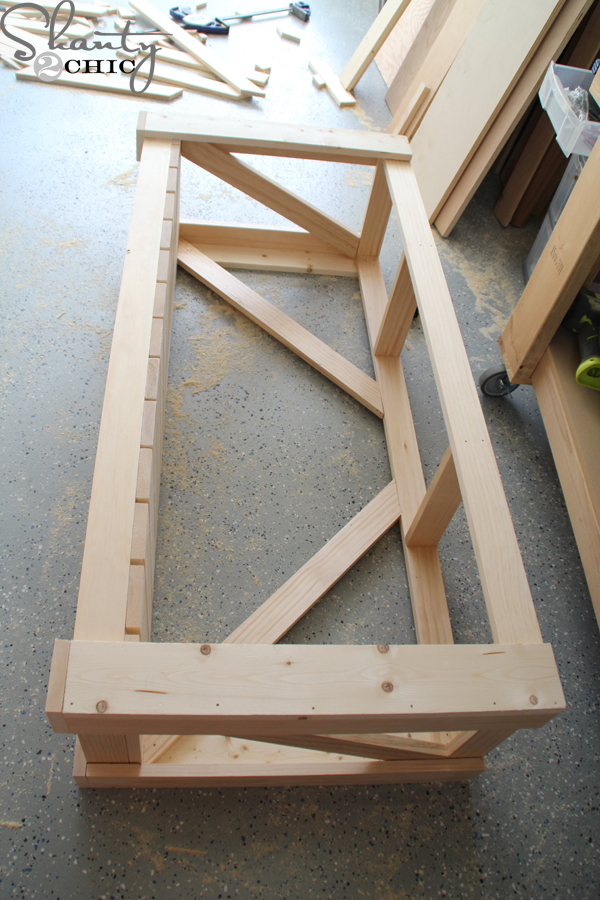
Ready for the top!
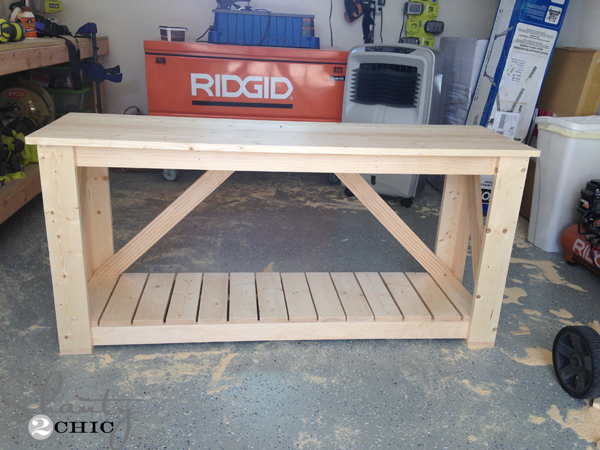
I attached the top slats with wood glue and my finish nailer. I nailed from the top of the table into the top frame, making sure to also attach them to the center supports.

For the finish, I applied one coat of Varathane Early American. I wiped it on with a clean cloth, let it sit for 5 minutes and then blended it with a fresh clean cloth.
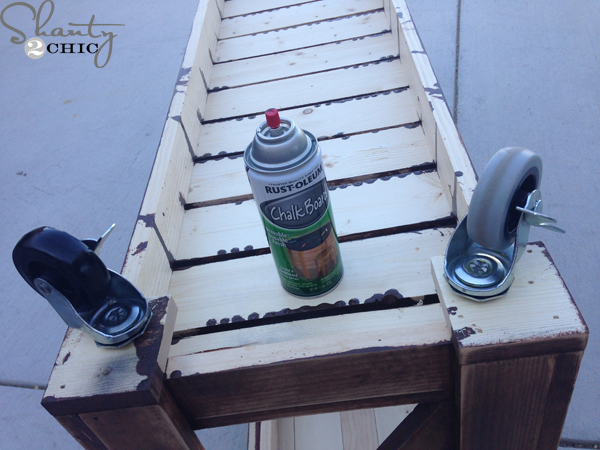
I bought these 3″ locking casters from Home Depot. I wanted black casters (gray works perfectly though) so I spray painted the wheels with Rust-Oleum Chalkboard spray paint. I like to use the Chalkboard paint because it’s a great flat paint. To attach the casters, I predrilled a pilot hole a little bit wider than the bolt on the casters and secured it with a washer and bolt. You will need to purchase the washers and bolts separately from the casters.
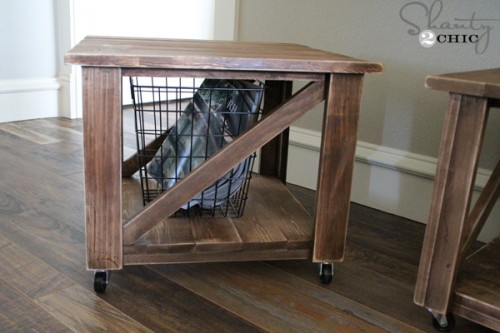
That was it!! I designed this to coordinate with my Rolling Ottomans 🙂
You can get the plans for these HERE!
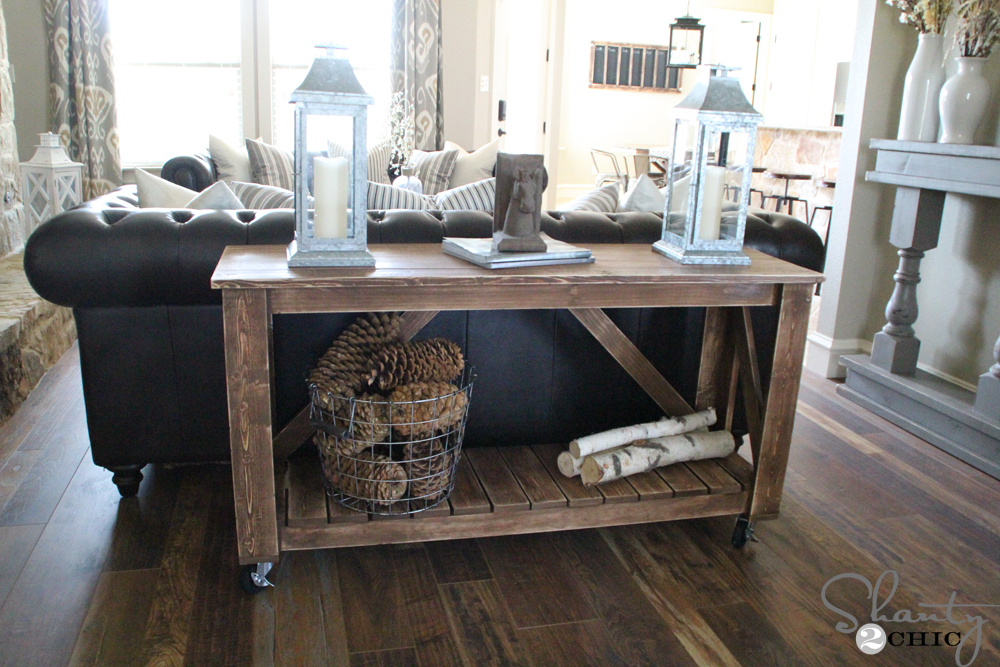
I LOVE it 🙂 It makes the perfect table for the back of my couch!

I want to make this console table but with different measurements. I have no idea how to find the miter angle of the side and back planks if I change the dimensions. Some help would be awesome. I want to make the inside measurement of the base to be 26″x40″ and a finished height of 36″. My goal is to not put the slats on the base and to put a 26″x40″x3″ dog bed in the base so I can have my table and a spot for my dogs bed so things could look more tidy in my living room. Any help would be amazing.
Thank you.
Hey Jon,
Just hold the board where you want it and mark a line where the boards meet. Then match your blade up to the line 🙂 hope this helps!
That was my original plan, but didn’t know if there was a specific way you measured for the proper angle. Thank you for your help.
Sure! That’s the way I always do it. Seems to be the easiest for me and I always get a perfect fit 🙂
I love your ceiling fan… do tell where you bought it 🙂
Made this and I love how it turned out. Thanks for posting free plans!
Where did you get that amazing ceiling fan!??
I really love this plan, and love the room it’s in! Do you happen to know the brand of paint and the color? We are building, and will have similar floors. Love seeing this inspiration!
Are u just staining most of these tables and not adding a sealer?
If they will see a lot of use I am sealing them. It’s best to seal all stain 😉
Is the flooring that’s in these pictures the Laminate or real wood flooring?? I LOVE it!! 🙂
Laminate 🙂 thank you!
Anyone any ideas
Can you tell me the height of your dining table and th in desk that matches please
I love the table and floors. Do you mind sharing the brand name and color of the floors?
One thing you might want to notice is that the majority of the frame is built out of clear pine as well as the braces. The top also looks like it was clear pine, but I couldn’t tell from the photos. The only thing that is not clear pine is the bottom shelf top and the front and back of the legs. My guess for doing this is to make sure the frame is square and straight then you get the look of the of old wood in certain places.
what are the complete dimensions on this?
One of my favorites! (And i’m with you on the flat black/chalkboard paint.)
,Another great project. Thanks ladies. I do have a question about choosing your wood. I have Menards to shop at, and they have Standard, Quality and Select boards, each going up in price and “supposidly” a better cut of wood which has less knots, and gets straighter… but not always the case.) I go into the store with a list to make a few things and spend TONS of time trying to find straight, flat wood and most times, I come out with nothing because i couldn’t find enough to finish a project. What do you girls look for when shopping for your wood and at what point do you say “good enough” and bring it home? I will find a wider board and lay the ones I am trying to find ontop of that to see if it is straight on the edges or lays flat, but even that doesn’t work so good. Any ideas or tips on being happy with the wood I bring home would be really appreciated. I just wanna make some stuff, and as I mentioned, the hardest part is finding wood that won’t look stupid. Picking wood, at least for me….takes WAY longer then I think it should…please help…if you can.
Hi Debora!
What a great question!!! Sometimes, we are left having to go to another store to find enough wood but the majority of the time we leave with complete shopping lists. You will have to say “good enough” to get enough wood. If you know that a board will be cut into several smaller pieces or that you will be securing it in several spots (such as a planned table top) then a slight bow, from one end to the other, in the board is ok. If one side won’t show am then you can get by with a board that is a little “chewed up”) on one side. What you want to stay away from is boards that have a twist to them or that bow from one edge to the other. Really, no boards are perfect but try to pick the best! The Kreg Jig can minimize small imperfection. And, we go with the cheaper boards rather than premium because we like the knots. Hope this helps and good luck 🙂
Thank you for your reply. I am my own worst enemy and need to lighten up a little I guess. Now I need to gather up my list and head to the lumber yard. thank you again!!
Hi there. Awesome job! Did you use 1 1/4 finish nails to build the whole thing?
Yes 🙂