Hey guys! I just finished one of my favorite DIY projects yet! I have been wanting a vintage looking bench for my entry for quite sometime and our awesome friend Ana White came to the rescue, once again!

She sent me a picture of this bench…I fell in LOVE immediately and with Ana’s Vintage DIY Bench plans, I was able to recreate this bench for only $100!
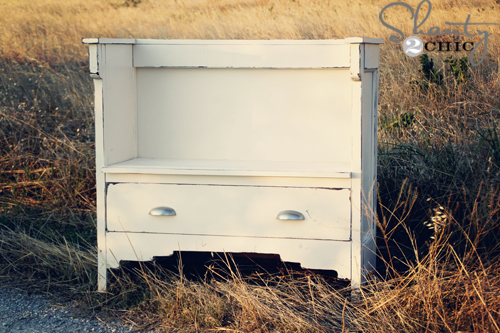
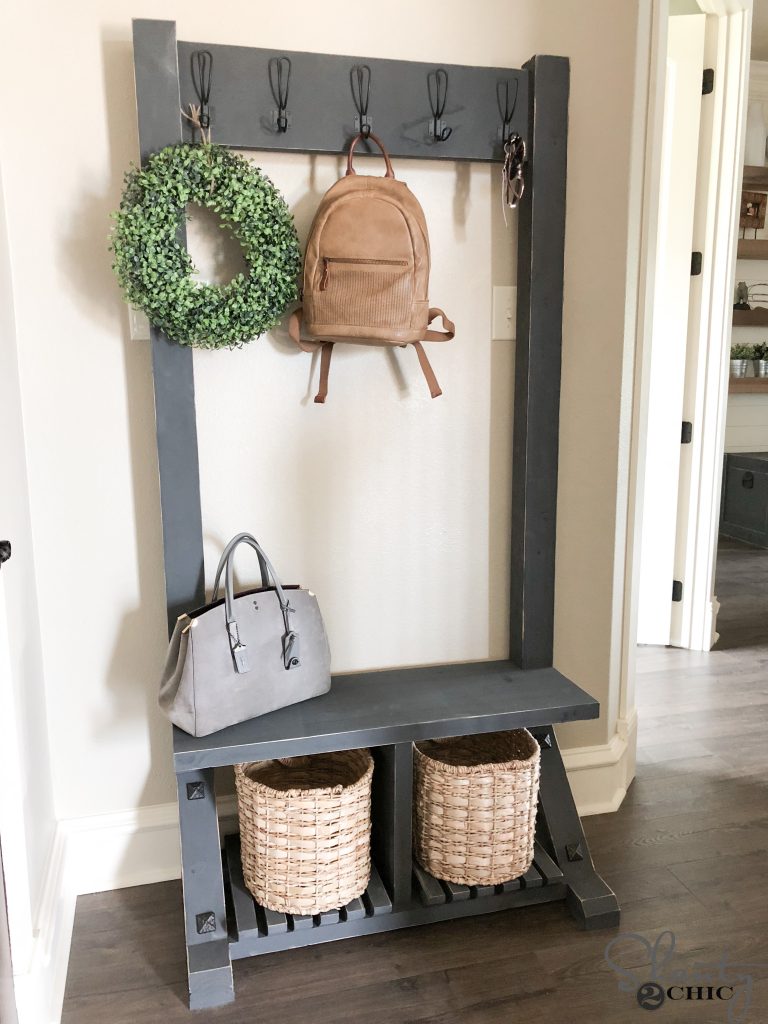
Here she is;) I am slightly in LOVE!
I will be honest and say that I was TERRIFIED to build this. I am not experienced with my router and the idea that I would have to cut the detailing on that bottom board ~ which is what makes this bench so unique and vintage looking ~ was almost enough to turn me off completely! Well, I loved it so much that I decided to give it a go and it was NOT hard at all! I will share a few steps that made it easier for me and a few pictures of my building process as well!
Again, a huge thank you to Ana White for the Vintage DIY Bench plans!


 I told you I would share what I did to make cutting the detail easier for me:) I started on one end of the board and used Ana’s measurements and connected the dots.
 Then I used this super, hi-tech strategy… I traced the detail from the first side on a scrap piece of printer paper, flipped it over on the other end and traced it ~ pressing down on the paper hard enough to leave an indention in the wood. I then just ran my pen over the indention and I had perfectly matching ends! I used my Dremel Trio to cut the detail but any router or jig saw will do. (A sander will be your best friend here…. it cleans up all of the imperfections;)

 I cut my wood as I was building to make sure everything fit perfect! Nothing worse that having to go back and make adjustments!


 Okay, this is my favorite part of the bench;) I just discovered PureBond ~ it is a Formaldehyde-free, decorative hardwood plywood that is not only better for the environment, it is BEAUTIFUL! It paints and stains better than the plywood we have built with in the past and it is very comparable in price! I was completely sold on it after seeing it in person at the Haven conference….so much so, that I returned the huge sheet of plywood I purchased before the conference, and exchanged it for PureBond! I used my Kreg Jig Rip Cut to cut it down and again, this nifty gadget is the bomb! It is inexpensive and is a great alternative to purchasing a table saw!
 Here she is before paint:) Notice how pretty the birch Purebond is on the backing… beautiful even before the finish!
 I used the Vaseline technique to distress this beauty! I started with 1 coat of Rust-Oleum Espresso spray paint (in satin finish).
 I was so impressed at how pretty this paint was! I have never been a fan of painting wood brown (I prefer stain) However, I called Whit as soon as I used this and told her that I want to finish a piece of furniture with it now! It is so rich and the color is gorgeous!
 I’ll save that for another day though because this bench is all about looking OLD!!! I used Vaseline on all of the areas I wanted distressed.
 No science to this….I just went crazy:)
 After the Vaseline, I sprayed 2 coats of Rust-Oleum Heirloom White spray paint, all over:)
 Then sanded the edges to reveal the espresso. It takes very little to sand because the Vaseline keeps the top coat from soaking in.
 I added my favorite decorative pulls ($5 from Home Depot) to the drawer and that was it!


I can’t wait to bring this beauty in and show her off in my entry:) Again, I was so intimidated to build this but I stuck to it and it was not hard at all! I have only been building furniture for 2 years and never thought I would be able to build a piece that had any kind of detail to it! If I can do it so can you! It’s all about having the right tools and if you can follow a recipe you can follow building plans! My first build ever was this Pottery Barn Inspired Storage System and it is still being enjoyed today. Here are a few other pieces of furniture I have built, for our home, in the past 2 years…. Outdoor patio furniture, side tables, storage bed, coffee table, night stands…. this is just a few (it’s addicting;). Start with something small and keep challenging yourself!
If you love my bench, I would so appreciate pins below:)
~Ashley


Wonderful!! Inspiring – thank you:)
Thank you:))
Sent from my iPad
Thanks for this.
Could you do this with an old dresser?? I have one right now and am looking for the right project to upcycle it.
I am sure it would be awesome! Send us pics if you do it:))
When I first saw this picture, I actually thought it was an old dresser made into a bench – which I might attemt to do, by the way. I love the way yours turned out!
That sounds like a great idea! I’d love to see your finished piece if you do attempt it! Thanks:))
Hey Ashley, looks awesome! Can you estimate how many hours you spent on this project? We have a program called the ReWork Project where we provide a work space for homeless men and women to repurpose old things and build new things. Would love to consider adding this piece. (
http://www.reworkproject.org/products/pastproducts/)
Jacob that sounds awesome! I would say about 6 hours from start to finish!!
Omg! I want one! It looks so professional!
Thank you Heather:))
This is pretty friggin fabulous!!!! Love Ana! I’m working with her on plans for a cupola. Great job on the bench!
Thank you Debbie! Can’t wait to see it:)
Awesome job! I love it! 🙂
Thank you Kellie!
Neat vaseline trick!
Thank you Jen!
Love this bench! Anna gives good inspiration! Love the way yours came out!
Thank you Deneen! LOVE Ana;)
Looks so great! I’ve heard of the Vaseline technique, but have never seen directions. Thanks!
Thanks Lisa! It is so much easier to distress and I love the chunky pieces of paint it takes off. Gives it a more aged look!
Love it!
Thank you Sally:)
Oh wow, this is REALLY gorgeous! Nicely done!
Thank you:))
you did such a beautiful job, it turned out perfect!
Thank you so much:)
Love it!! I am pretty new to building and I agree working with a project that involves detail is scary… but you nailed it!! I hope you share how you use it in your entry!!
Thank you so much Sarah! I will soon:)