Oh hey guys! Happy Friday! As many of you may know, Ash and I took a little road trip to our sister’s house near Houston over the Summer and crashed her living room. We built her several new pieces and helped make her house feel more like a home…. It was so much fun. Today I am sharing a console table I built her for under her TV. This has great open shelving for baskets under to hide toys or blankets or whatever you like to throw into a basket… Check out her new Diagonal Base Farmhouse Console Table!
Isn’t she pretty? Don’t be fooled though! This thing is a beast in size! The entire thing is built with 2x framing lumber so Ash and I did a little weightlifting getting it into the house after I finish it.
I will walk you through the entire build below. You can also download and print the FREE PLANS by clicking HERE!
Here is the supply list for this table… 11 boards people! Lumber cost was around $50 people!
Diagonal Base Farmhouse Console Table
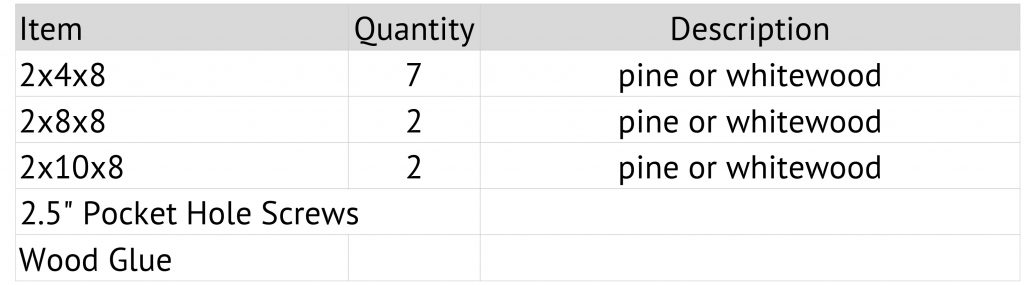
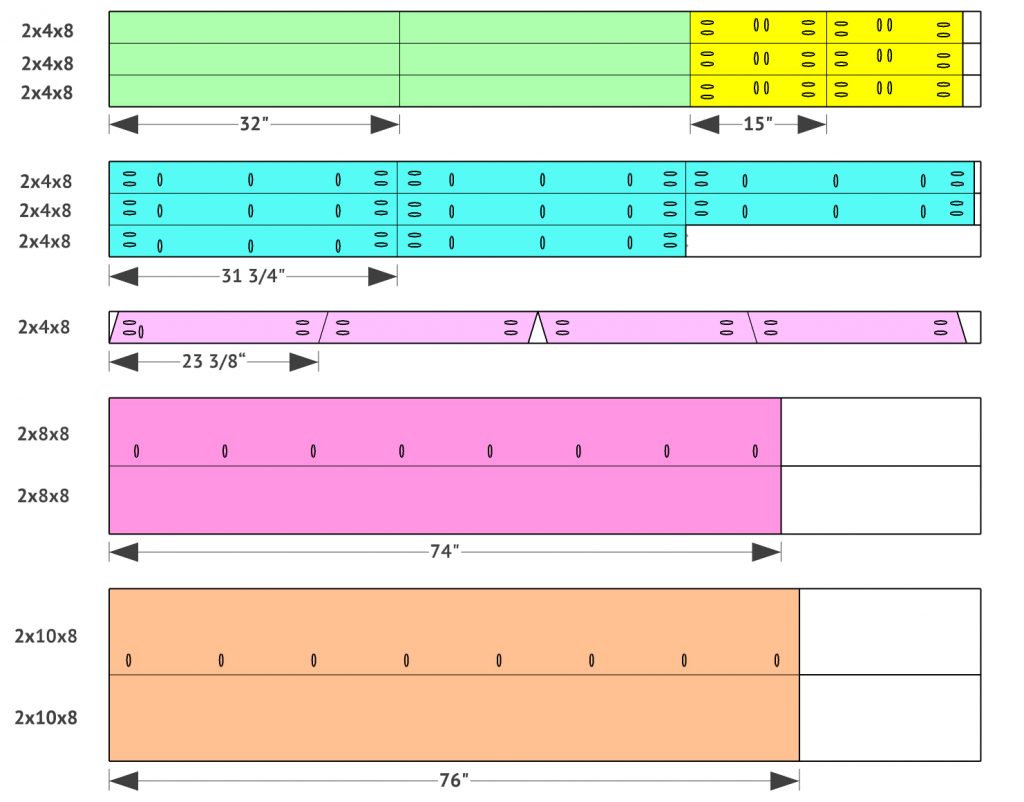
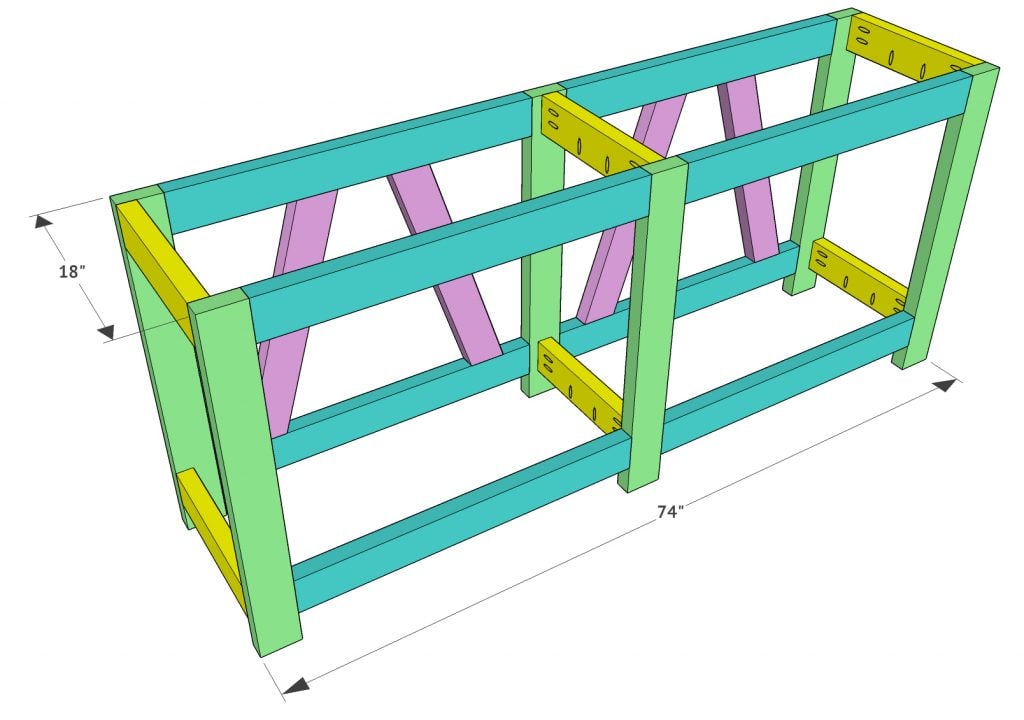
And here is a shot of the cut list… Remember! It’s best on lots of parts to cut as you go to get perfect measurements.
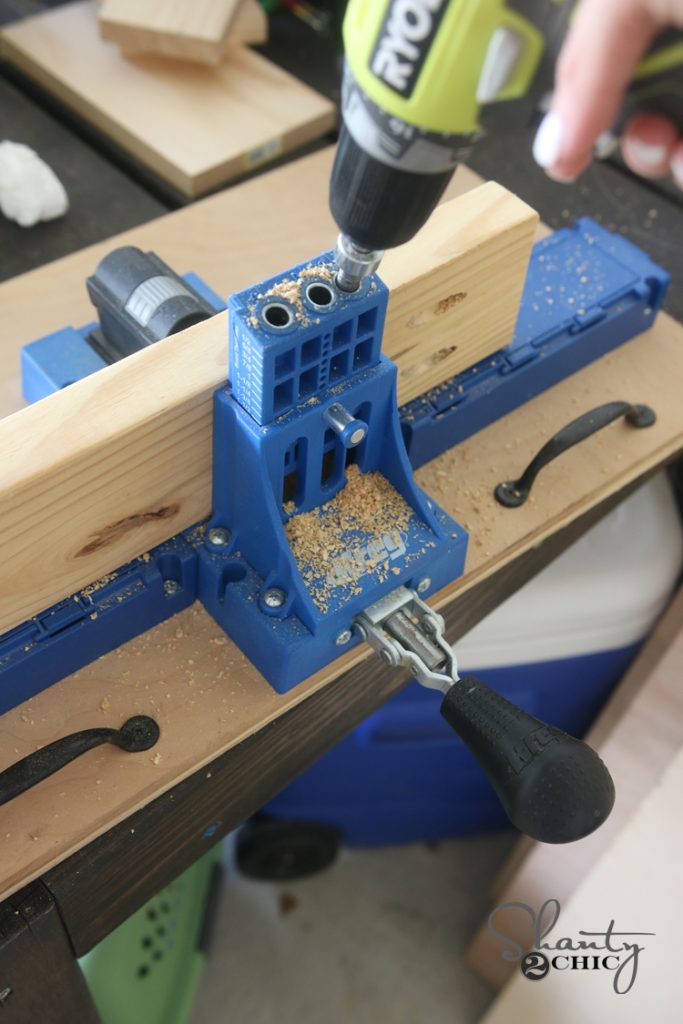
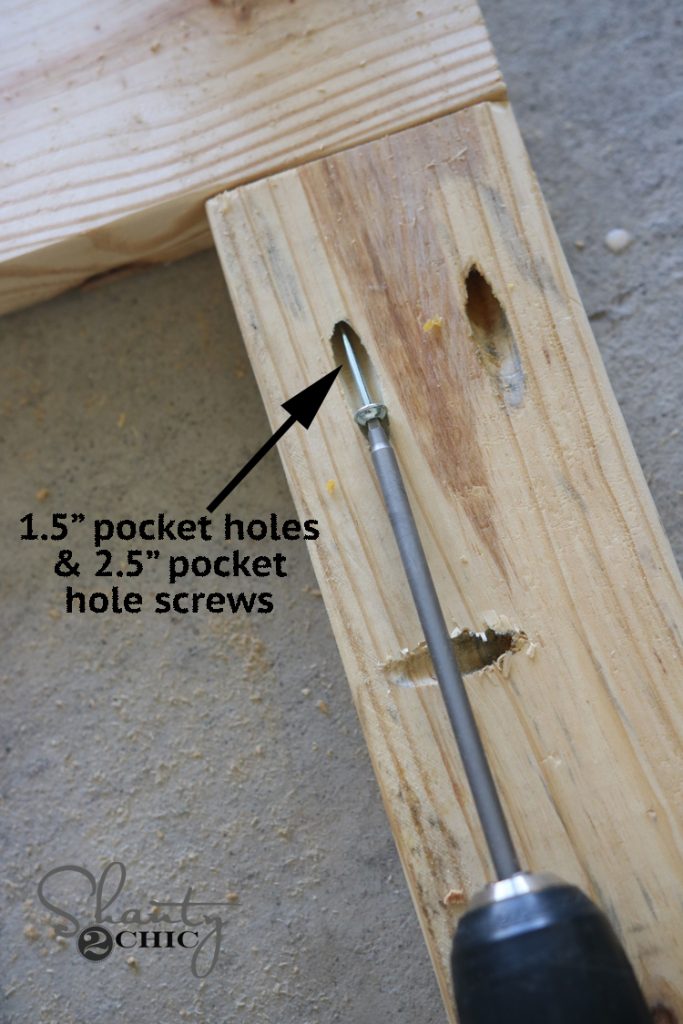
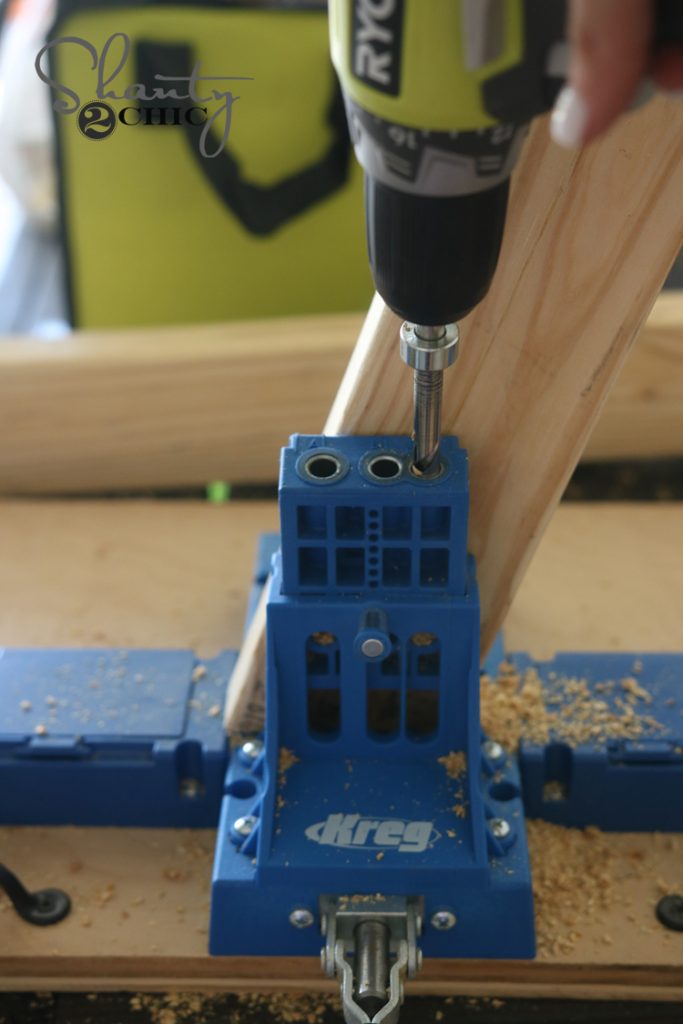
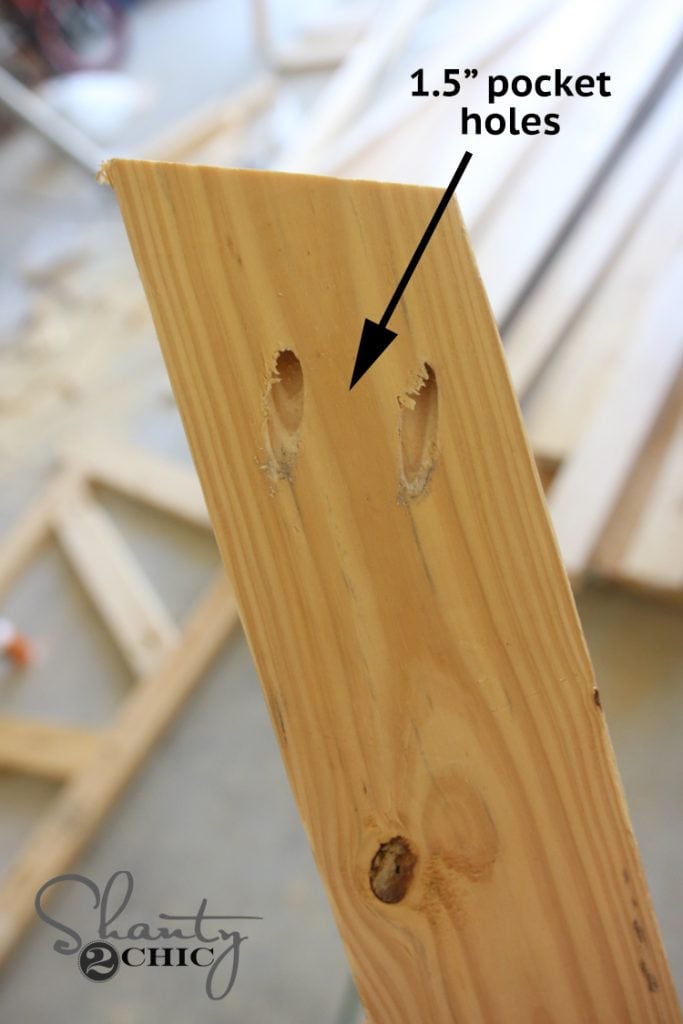
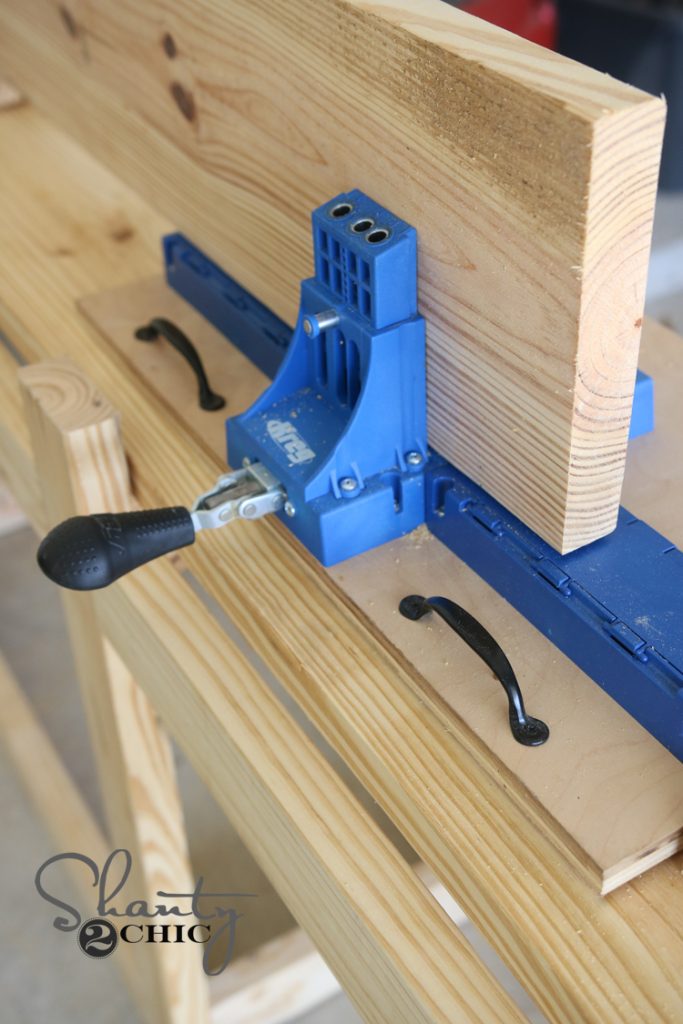
My first step was building the back of the console. This begins with a frame. This entire piece is built using my K5 Kreg Jig which made the road trip with us 😉 You will make 1.5″ pocket holes where I have marked in the cut list. I started by making those pocket holes for the boards that create the frame of the back of the console. You will create two of these frames…. One will be the back with the diagonal accents and the other will remain as is for the front of the table.
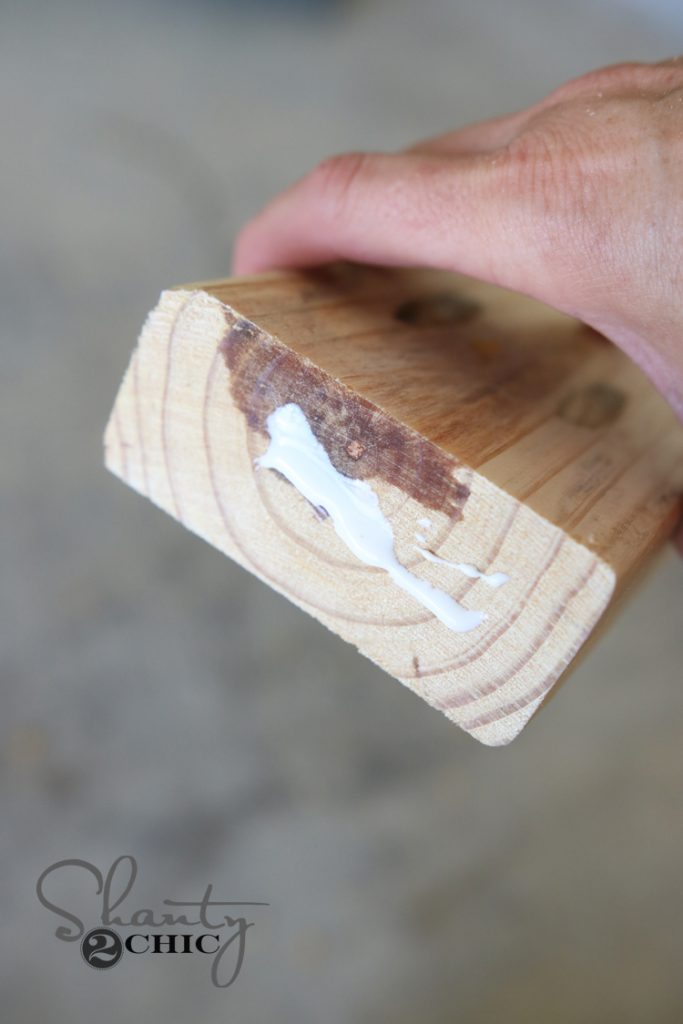
I used wood glue between each joint…
And, I used 2.5″ pocket hole screws through each of my pocket holes.
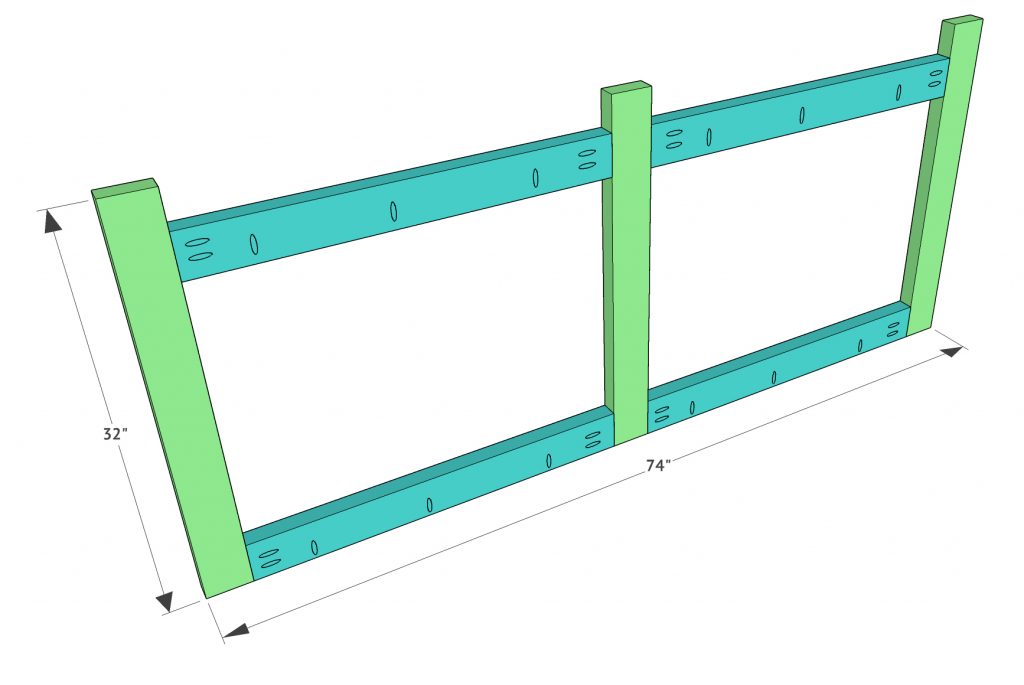
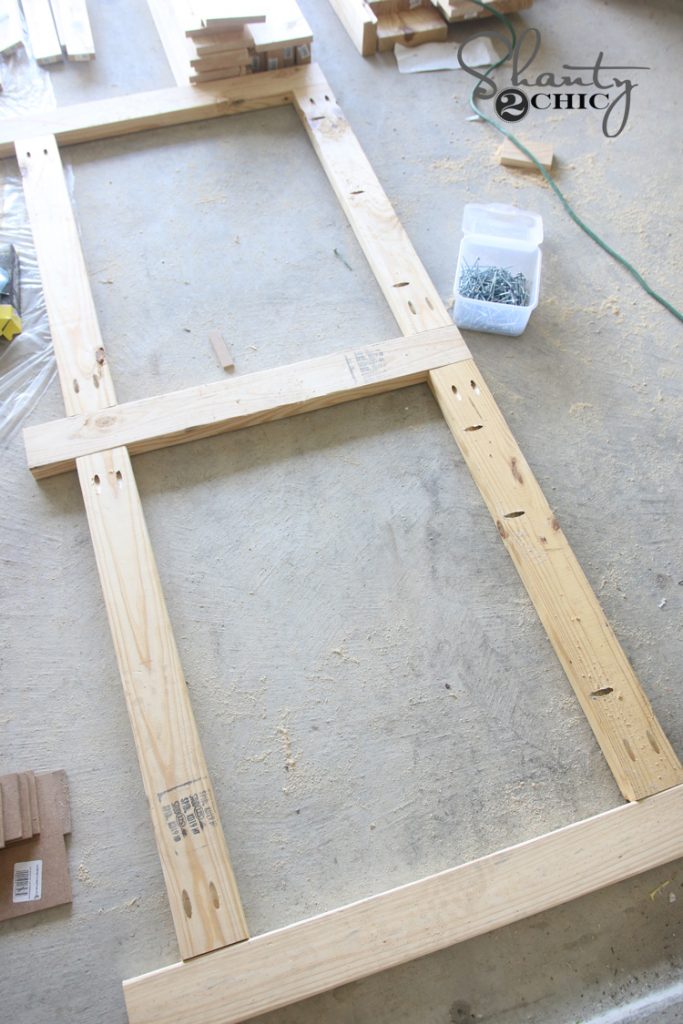
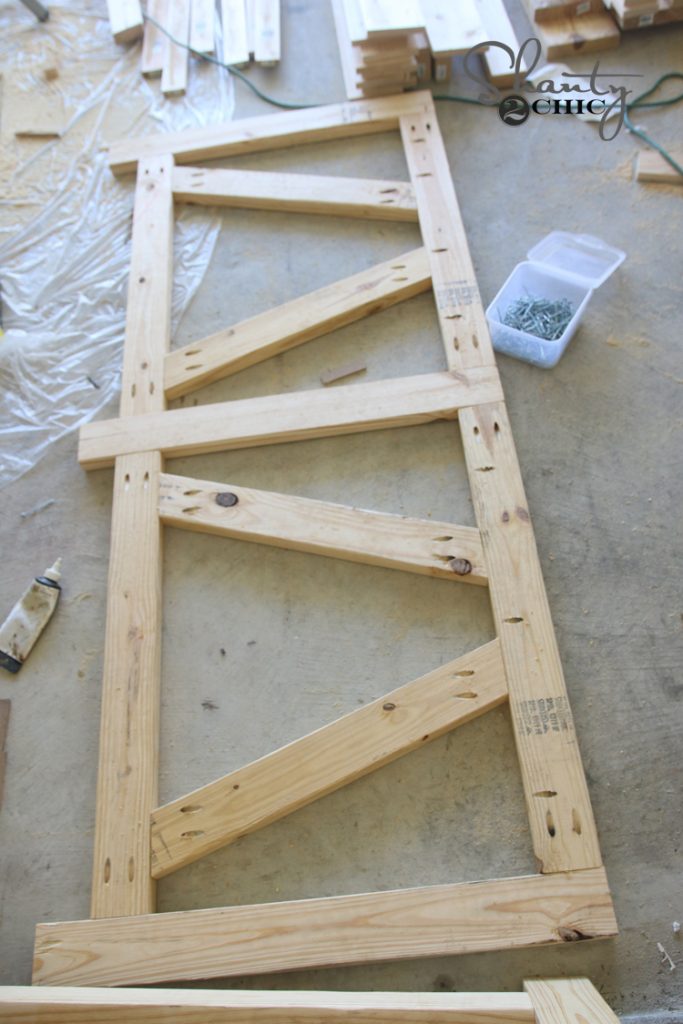
You should at this point have 2 frames that look a bit like this…
Now, I added the diagonal accents to the back frame. You want all your pocket holes facing the same way so that they remain hidden in the back when it’s all assembled.
After making the angled cuts on the diagonal pieces, you will put them in the Kreg Jig like this to make the 1.5″ pocket holes.
They will look like this once the pocket holes are made.
I attached each piece to the back frame using wood glue and 2.5″ pocket hole screws.
Here is a shot of the spacing…

Next, I added my side pieces. These are also attached the same way with glue and PH screws.
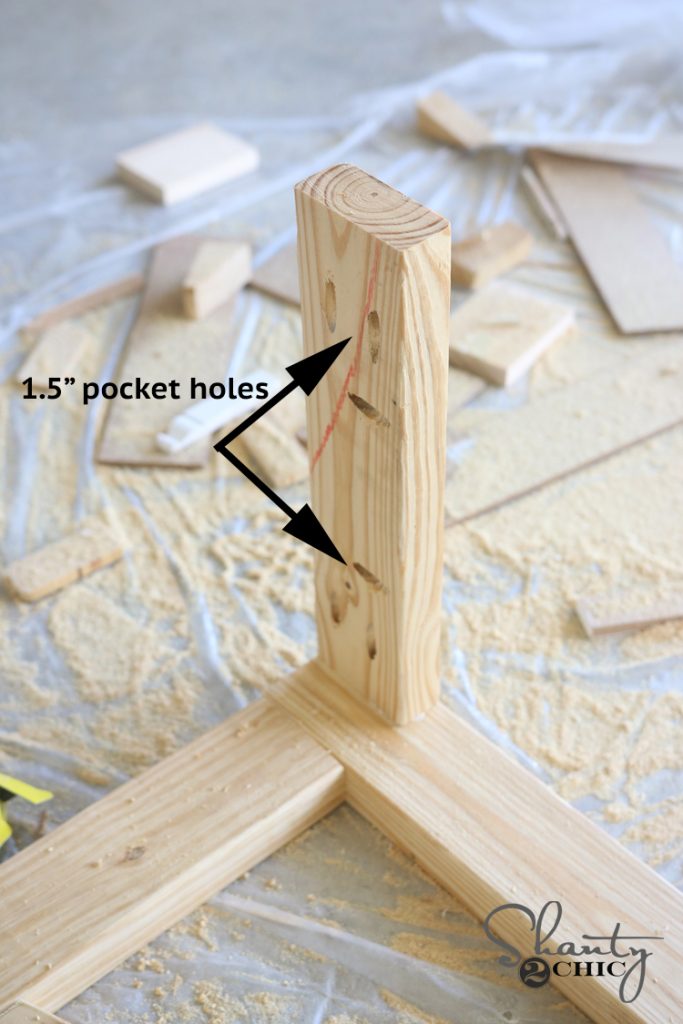
The bottom sides will look the same, and here is a shot of the spacing of these supports.
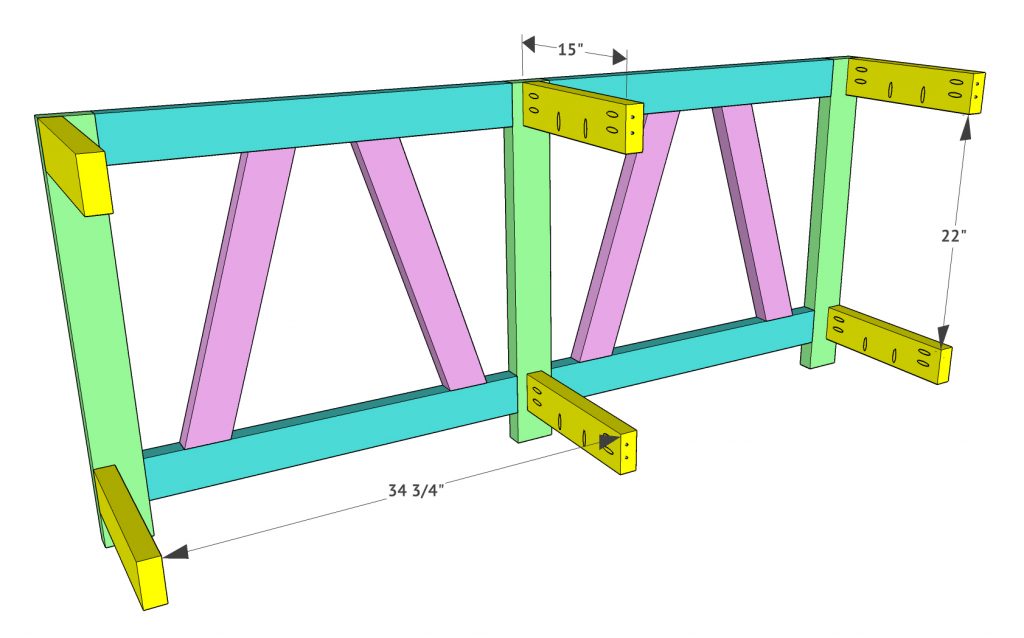
At this point, I attached the front base to the back base using 2.5″ pocket hole screws through the pocket holes in the short supports and into the back of the front frame.
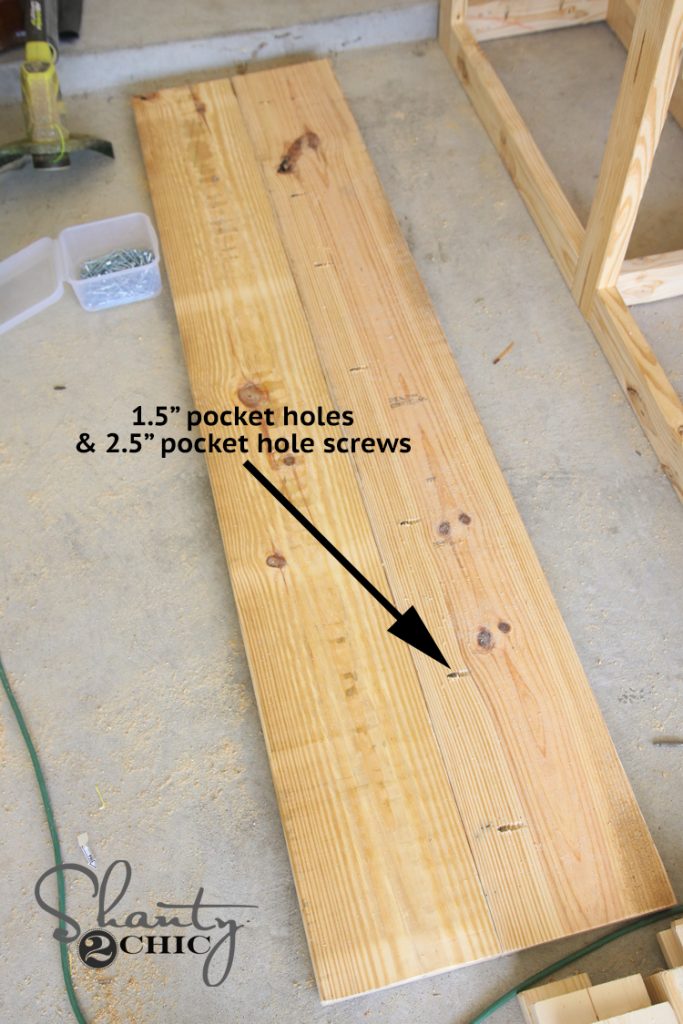
Final step is creating and attaching both shelves. These look the same but the top uses a wider board. I added pocket holes to both piece of each shelf first.
Next, I attached them together using 2.5″ pocket hole screws.
To attach the top shelf, I laid the entire base upside-down on the bottom of the top shelf and attached with 2.5″ pocket hole screws through the pocket holes I added on the aprons.
You can see spacing of this step here…
I attached the bottom shelf the same way, but laid the console on it’s side to do so, making it easier to access the pocket holes on the bottom supports.

Here is a shot of it all finished up and ready for stain!

We originally planned on using Briarsmoke for this table, but I left it in Ft. Worth… Oops! Apparently, it’s difficult to find Varathane stain in Houston! So, we mixed Weathered Grey and Dark Walnut to get this finish… Which is just about the same! Here are a few more shots of her all finished up!
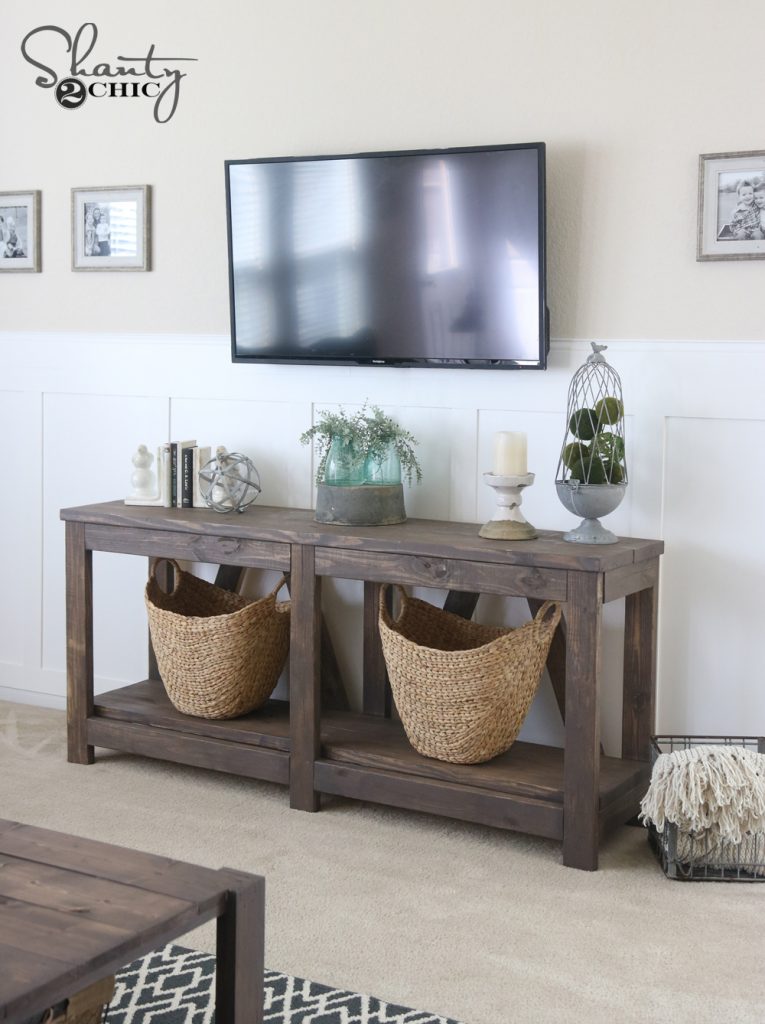
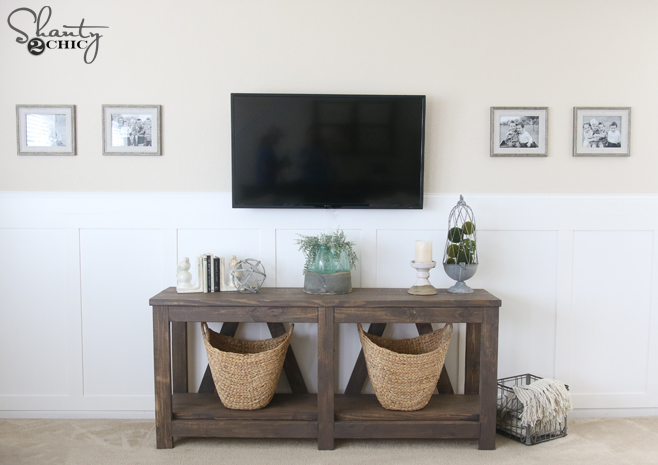
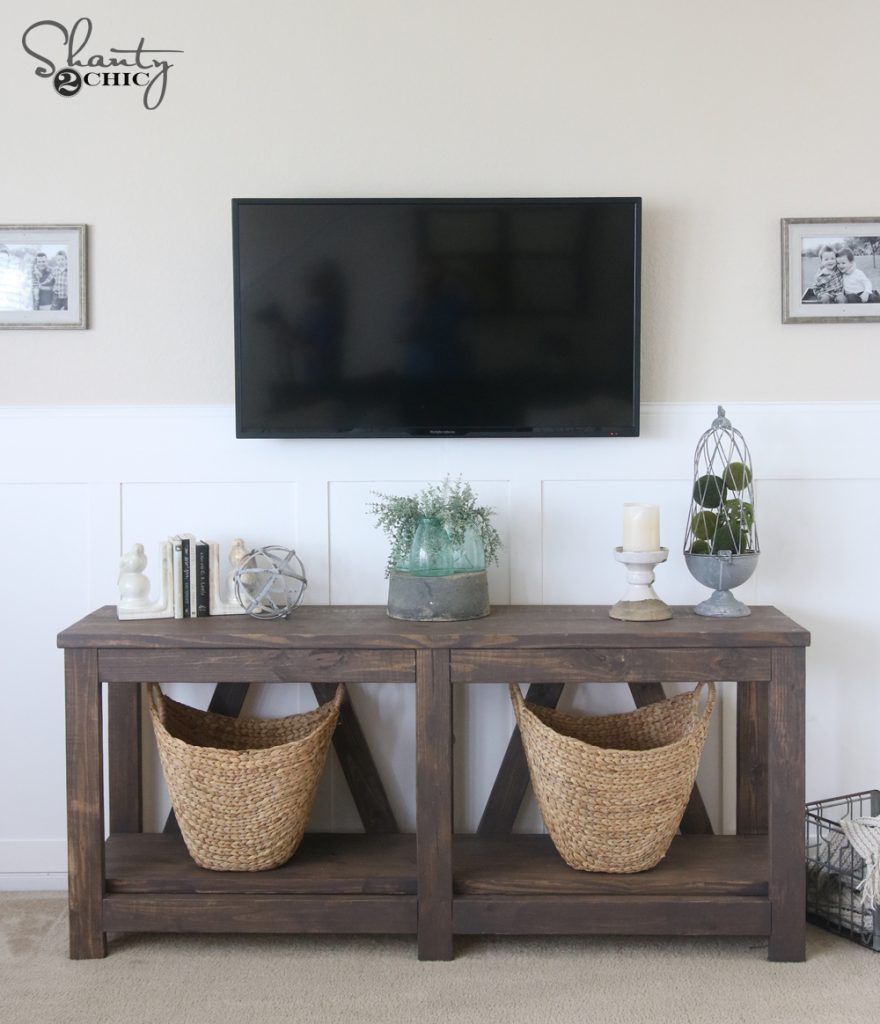
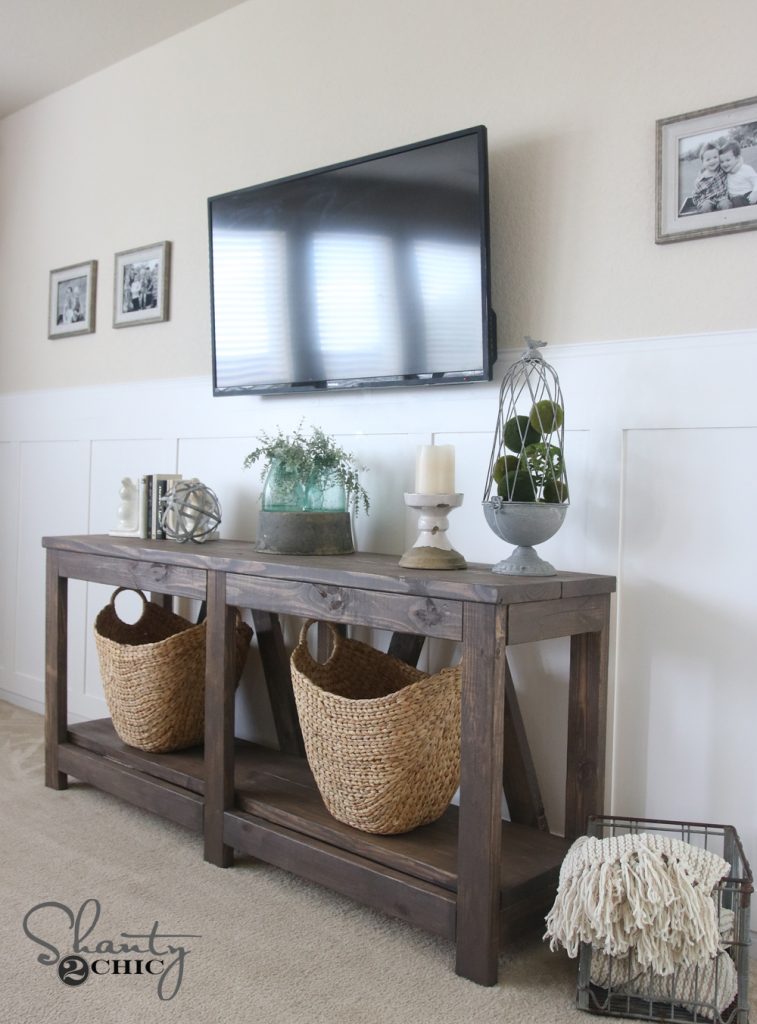
You can find ALL the cute baskets and accessories at At Home!
Make sure to check out the other projects we did in this #shantyhousecrash!


DIY Crate Coffee Table on Wheels
Thanks so much for stopping by guys! Let me know if you have any questions at all!
~Whitney


When you love your console table so much you make it again smaller and add a shelf to use as a kitchen island.
Made this piece for my daughter, following a round coffee table and matching end table. I slimmed this table down by using 2×2 rails and insetting the lower shelf. hid all the pocket holes so the back is clean also. Came out so nice!