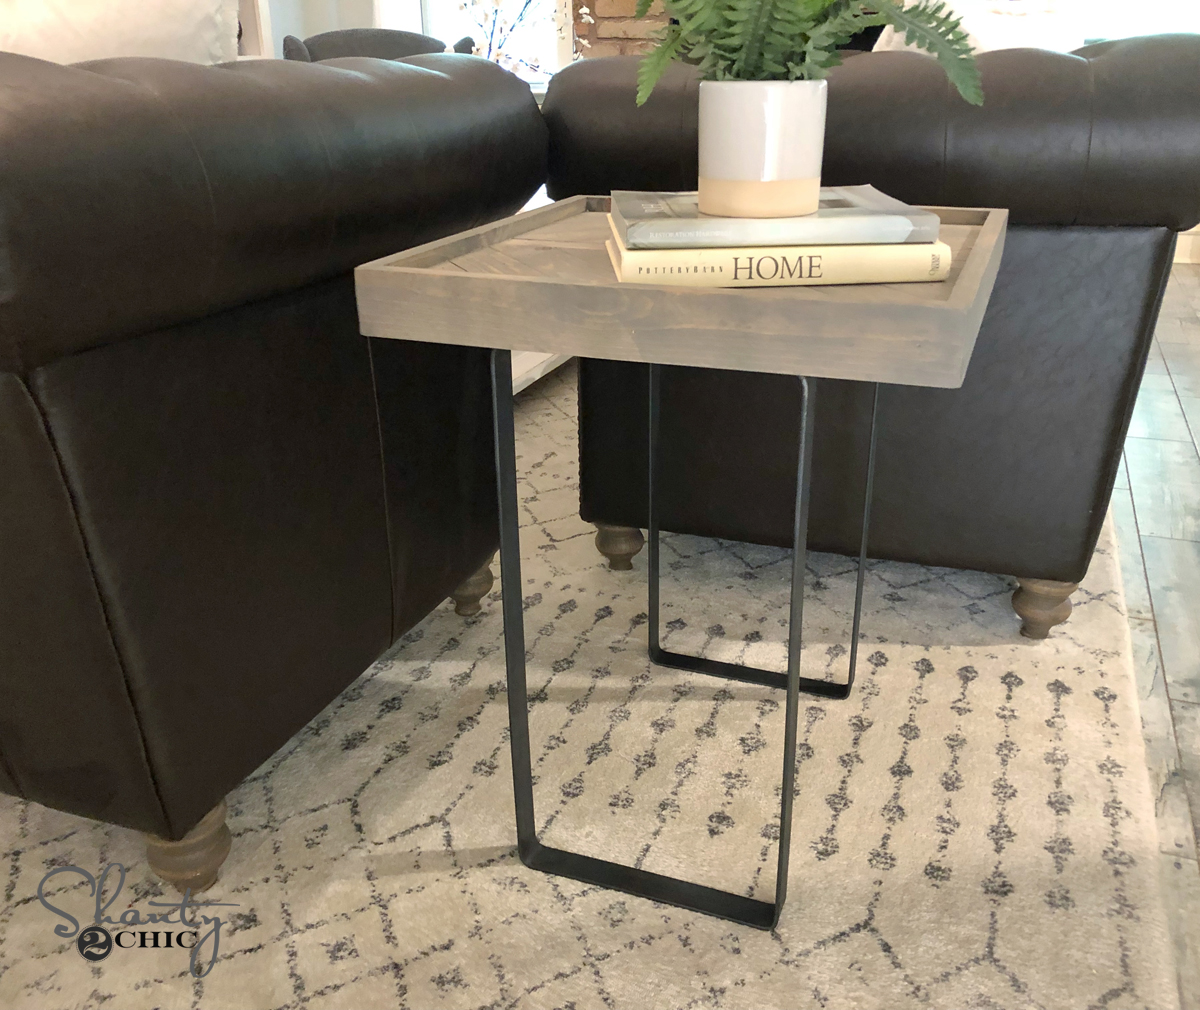
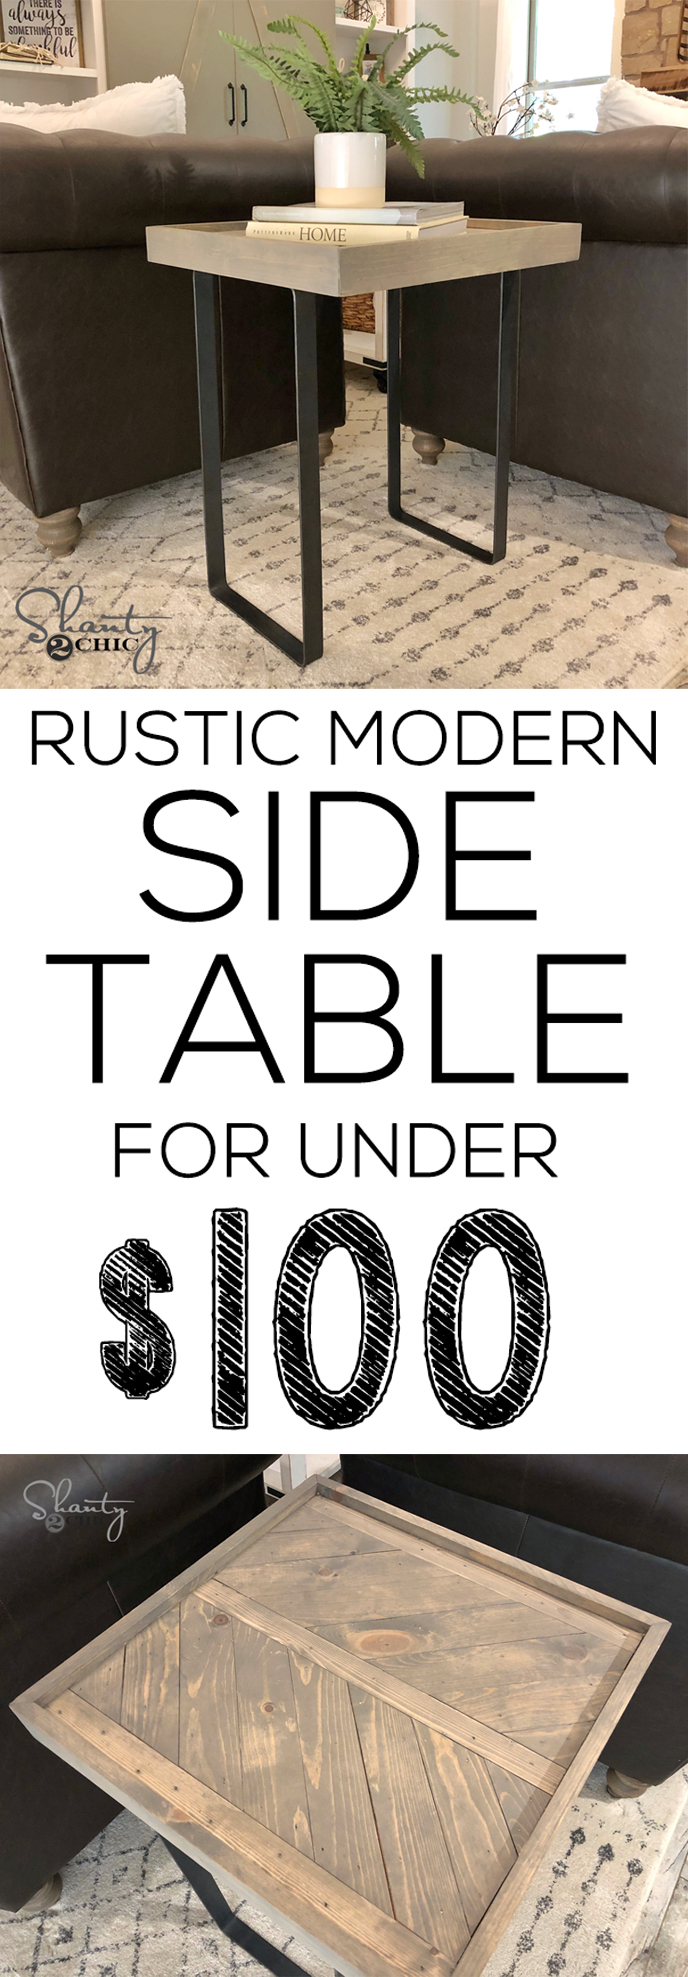
We built the cutest DIY Modern Rustic End Table for around $80 including the legs! Check out the video!
How cute is this table guys?? Before we get started, you need some legs! Here is the link to the legs we purchased for our table. We used 24″ height and 12″ length!
You can also download and print the FREE PLANS by clicking HERE!
Now let’s get started!
DIY Modern Rustic End Table Step by Step
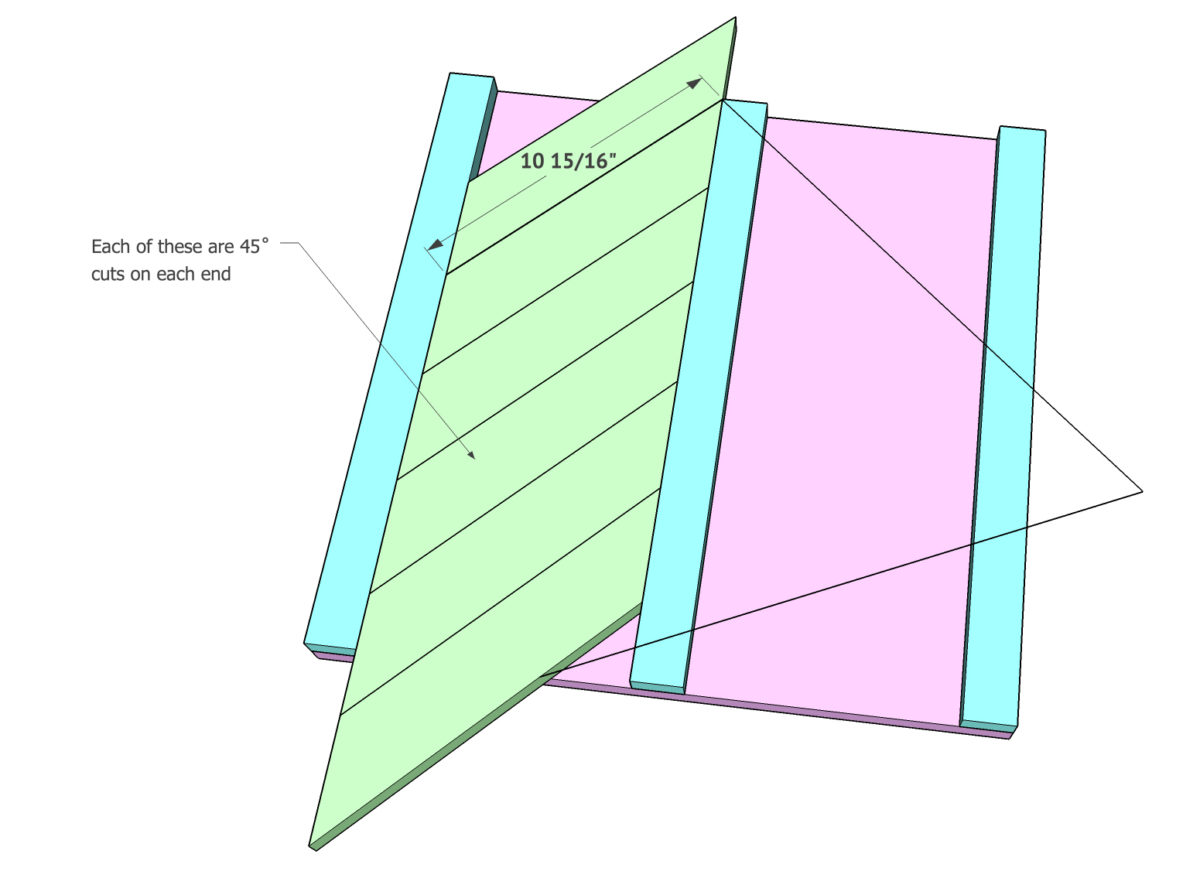
Attach the 1×2 boards to the project panel first using wood glue and 1.25” brad nails. Two of the boards will be flush on each side and the other board will be centered on the panel.

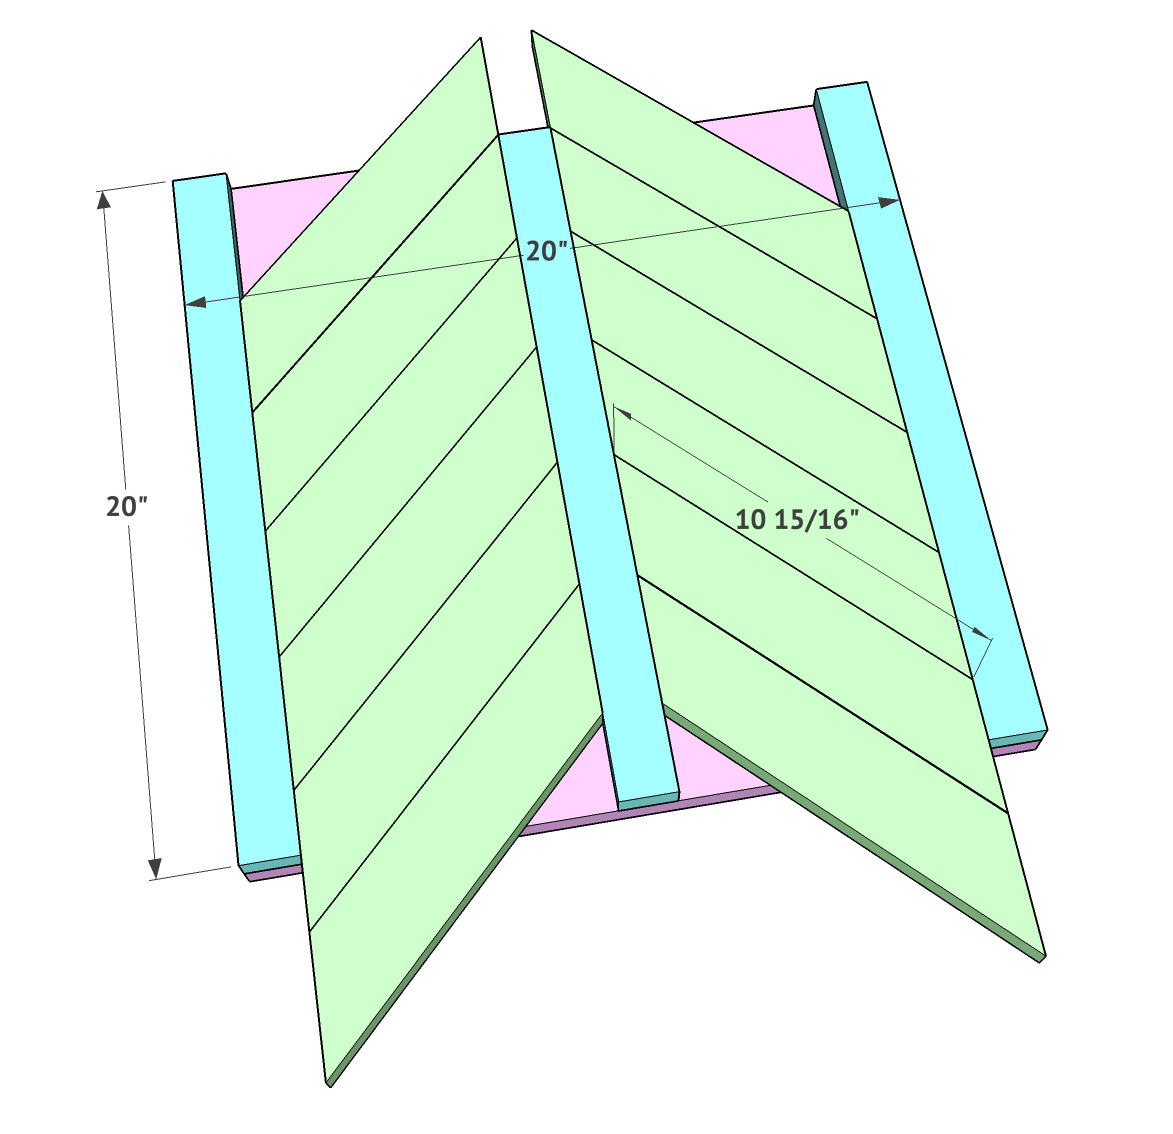
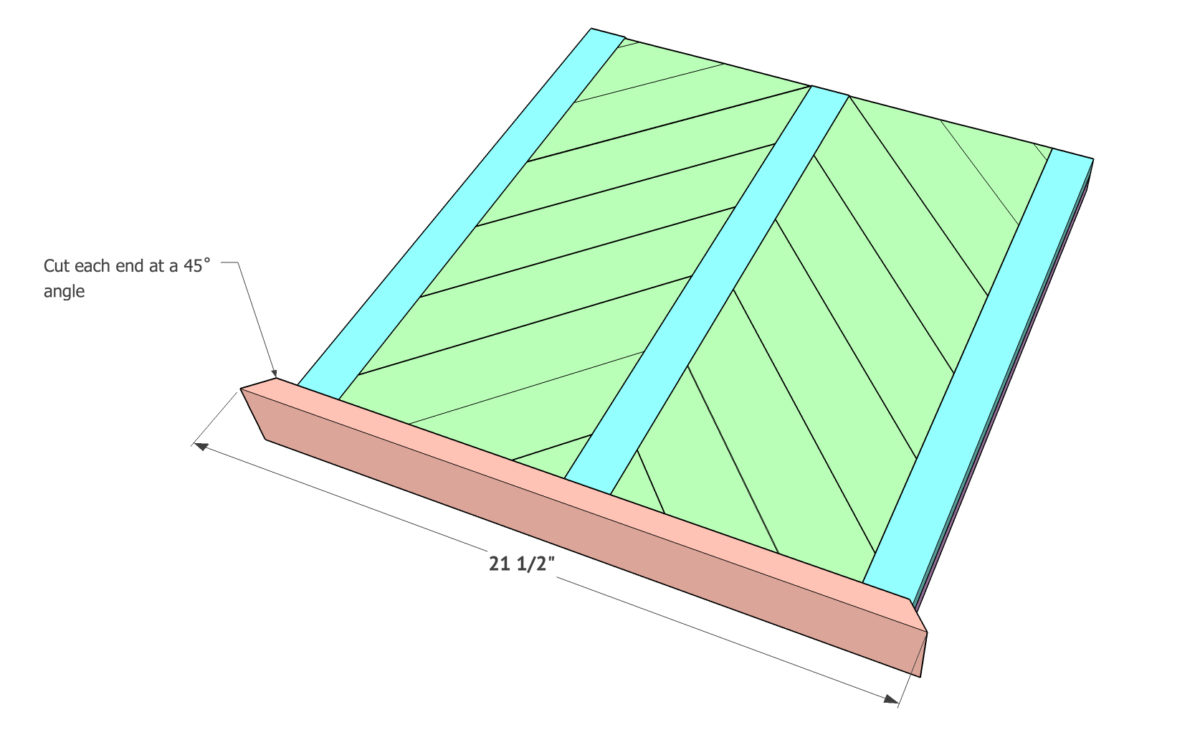
Now on to the chevron pattern. These are simple 45˚ cuts on each end. I did add the exact measurements to the cover sheet, but it’s important to measure and cut as you go on this one! We found it easiest to make several of the full length piece, like below and then mark and cut the smaller pieces from the scrap of those pieces.
Once you finish one side, move on to the next!
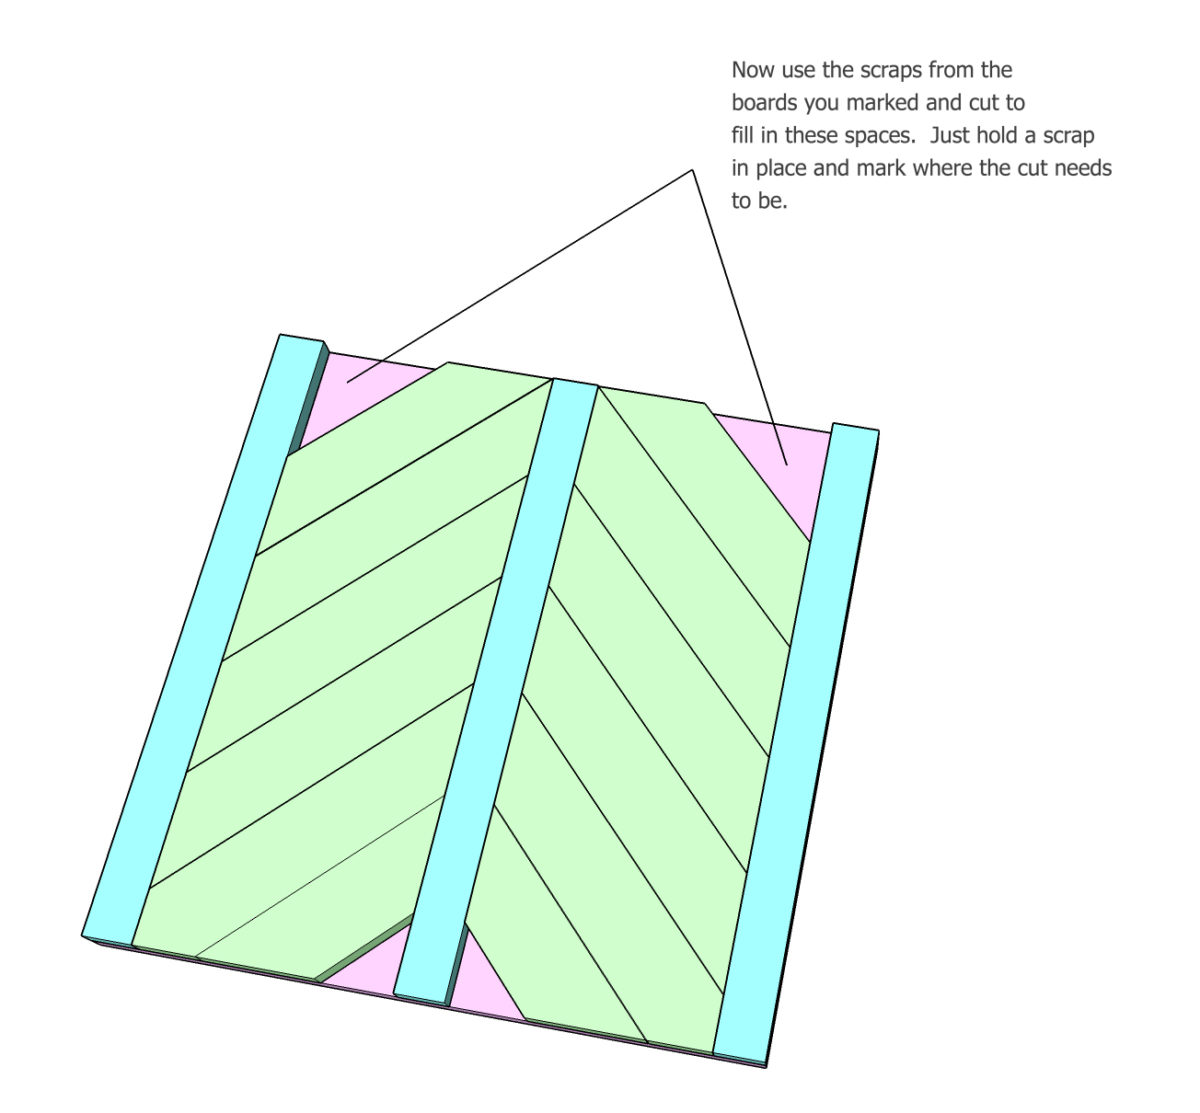
Now fill the smaller spaces with the scrap you cut from the other boards. Rememner these are simple 45˚ cuts!
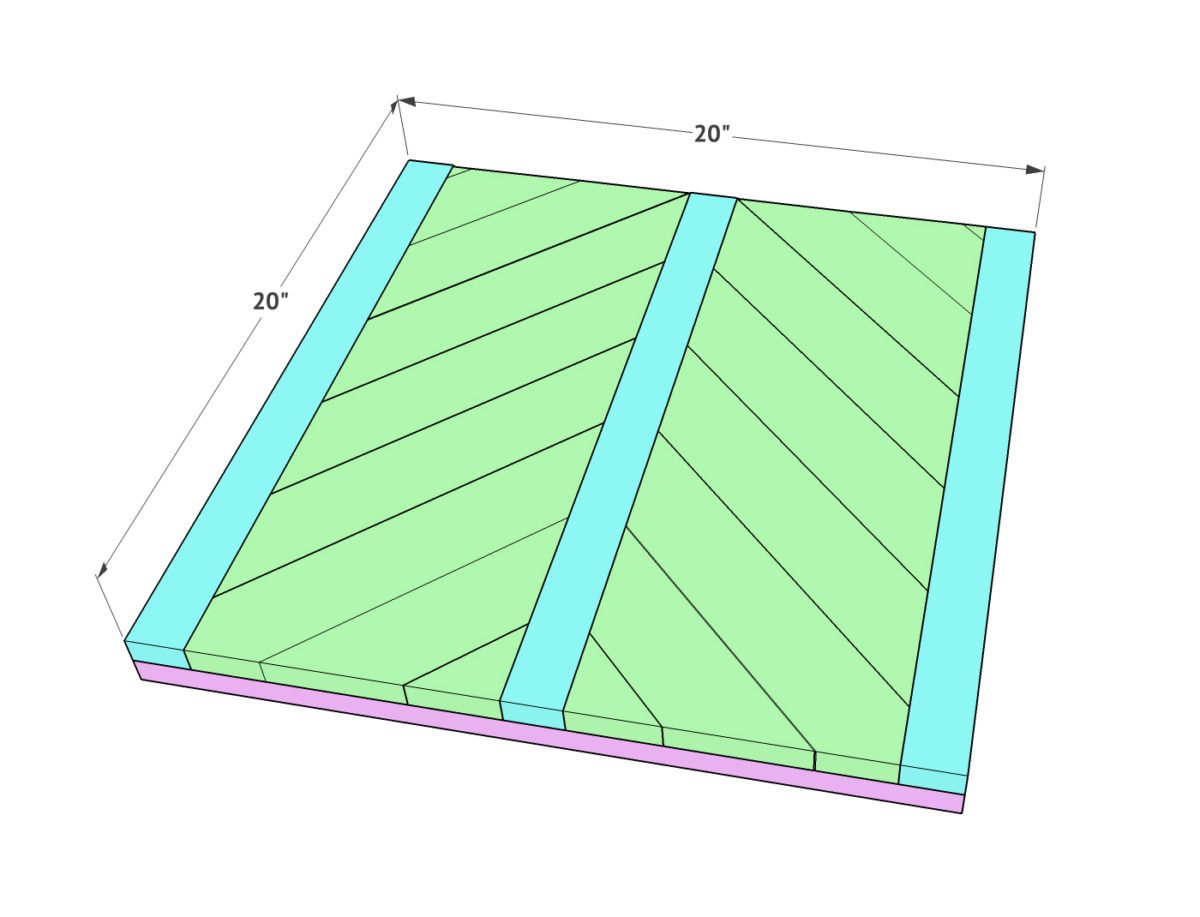
Once you have made all the cuts and dry fit everything, attach all of the patterned boards to the panel using wood glue and 1.25” brad nails.
The trim pieces are also 1×3 baords. We chose to add a 45˚ cut to each corner to give the table a clean finished look. Line the base of each trim board up flush with the bottom of the panel. This will leave the top with an overhang giving it a tray look.
Measure and cut the rest of the trim boards to size and attach them to the outside of the panel using wood glue and brad nails.

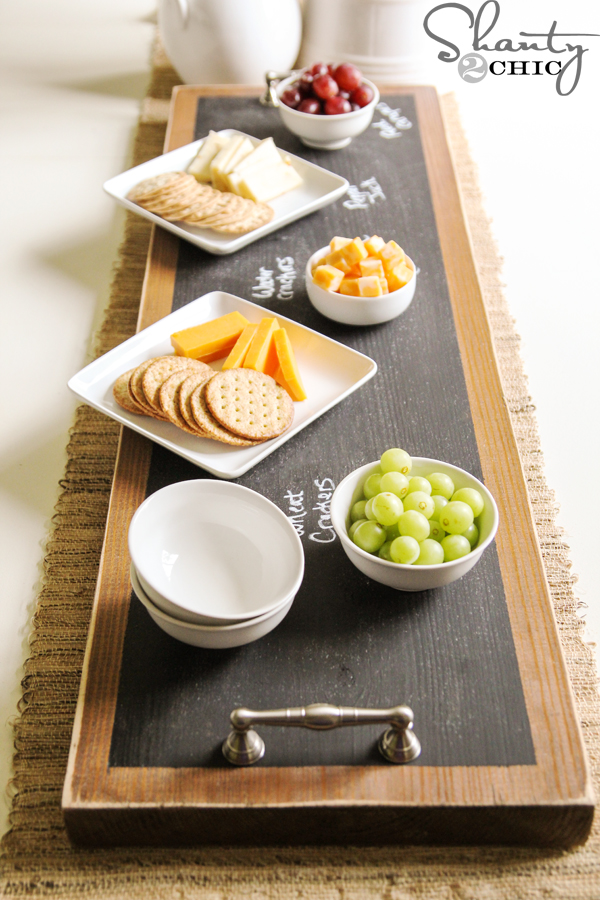
Now you are ready for legs! Be sure to check the website for a link to the legs we used. This would also make the cutest tray! Add a couple pulls to the sides and you are set! Have fun with it! Be sure to tag us and use hashtag #shanty2chic when you share your builds!


I know you answer this question all the time, but what stain did you use on this?
briarsmoke stain by varathane
Where could I find that rug please?