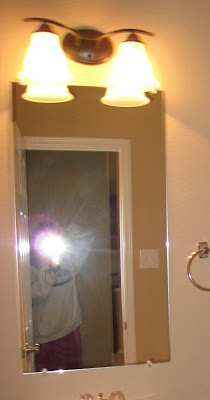
Hi Friends! I HAVE to blog about the thrifty find I made yesterday! I really don’t like the mirrors in our bathrooms but I have been patient in changing them out because I wanted to replace them with framed mirrors (for a more custom look) and that can be costly! Well, I said it CAN be costly but as I found out yesterday my patience paid off BIG! I went to Lowe’s to buy some curtain rods when I stumbled upon a rack full of Mirr-Edge mirror trim in several different colors. I stared at the Cherry Walnut for a while and wasn’t sure how it would look but I couldn’t leave the store without it so I bought just enough for the boys bathroom upstairs.

These came in sets of two so I bought 2 sets ~ one set for the horizontal trim and one for the vertical trim. I then bought 1 set of 4 corner plates. They cover the seams and add a nice aesthetic touch.
Whitney just happened to be coming over that afternoon (how convenient for me) so she assisted me in this venture. The trim is 59.5” long, so roughly 5’. The instructions say to measure each piece on the mirror, score and then crisply snap the trim to get the right fit. This did not work (circular saw is so much more efficient – learned how to use one with this project). Measure the vertical strips first and then the horizontal. After you cut them down to size there are double-sided adhesive pads that come with the trim – just peel and stick (we put 4 to 5 on each strip).
Then press the trim on the mirror and Voila!
 Once you have all of the trim up it’s time for the corner plates. No cutting here – just peel and stick the double sided, adhesive, strips and fit to each corner!
 I just love how custom my boys mirror looks now and it completely transformed their whole bathroom! Total time invested – 30 minutes! I highly recommend this product to anyone that wants a chic look in minutes!
 Okay, so I loved this product so much that I went back to Lowe’s that night to get more trim for my master bathroom.
This line also carries seam plates that cover seams when you need more than 5’ of trim. My master mirror needed about 6 ft. on the horizontal pieces so I bought 1 set of 2 seam plates.
 You want the seams in the center of the mirror for aesthetic purposes so I had to buy 1 set of trim for the top and 1 for the bottom and then 1 set for the vertical sides. I measured the horizontal pieces so that they met in the center and followed up with the same steps we used for the boys bathroom. When I was done I added the seam plates to cover the seams in the center with the double sided, adhesive, pads and that was it. I LOVE MY MASTER BATH SO MUCH MORE NOW! Total time invested – 30 minutes!
I had so much trim left over that I decided to do my half bath also! I will eventually buy a framed mirror for my half bath but for now this is perfect! The only purchase I made for this mirror was the corner plates!

At the end of the day I had customized three bathroom mirrors / which in turn transformed all three bathrooms (in about 1.5 hours) ~ it just doesn’t get any better than that folks! As always ~ Enjoy!
UPDATE:
You can purchase this product in a variety of colors and styles HERE!
You can also purchase at HOME DEPOT online or in store!


Great find! It is a lot cheaper than mirror mate.com!
Great job! :o)
You have just changed my life!!!
Wow, that's awesome! I need to do my bathroom mirrors, I'm going to check this out!
This is EXACTLY what I've been looking for for my plain ole mirrors too. I thought I would have to buy trim and stain it and use a nail gun etc :-/ so I have put off. I will definitely look in Lowes today or Home Depot, both are close to me. Thanks for a great idea, and showing how easy it is. Your mirrors look amazing. 🙂
That really did make such a difference! I think I will have to keep my eyes open for some trim!
-Angela
we're looking to do the same in our two baths – thanks for the great idea! I'll be headed to Home Depot tomorrow morning!
I did this in my master bath with real trim. I stained the wood and had to cut it to fit. We then glued it to the mirror with liquid nails. My husband is a real trooper!
I love this find! This is so much easier! I love the corner pieces. I have a couple of mirrors left, I think I feel a project coming on!
Great job! 🙂
Roeshel
WOW! great look for such a good price! hmm you just gave me some ideas…thanks for the inspiration!
Oh that does make such a difference!! Great find, and great job!
Suzanne
Much better!! Great job!
I love this idea!! I didn't even know there was such a thing. I can't do it in mine but my daughter-in-law and son has a mirror like that. Hmmmmm
Looks great, and pretty easy. They make a big different in your bathrooms definitely. When you showed the first picture of your boys bathroom and said to myself, "I bet she ran out and bought more"…lol. And sure enough, you did.
This looks so good! I want to do mine now!