
Happy New Year friends!
I am SOOO excited to share this latest build with you! I decided to build a little something for myself this go around. I figured it was time to get a lot of my projects off the garage floor and onto a workable space. Check out my simple DIY workbench!
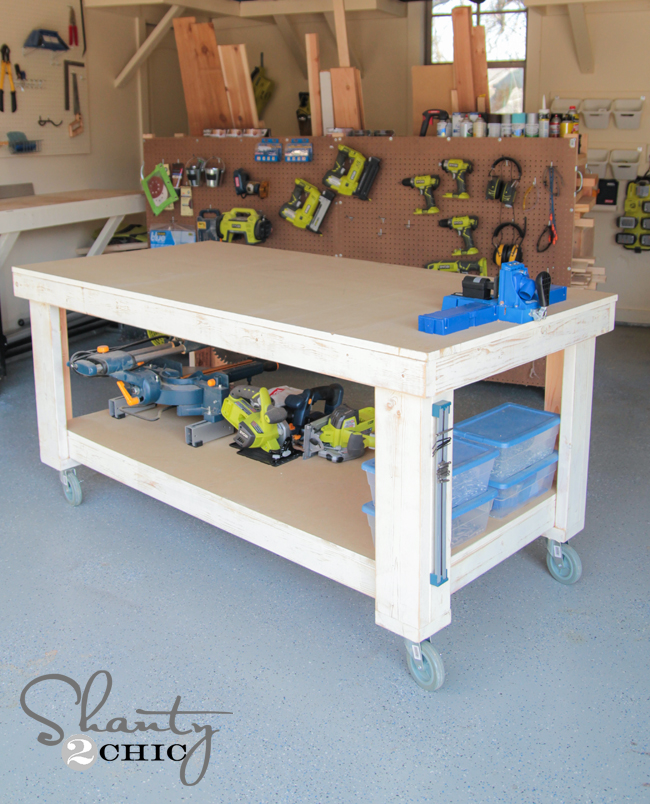

Ahhh… Isn’t it perfect?? I love everything about it! Ashley and I have been working with our friends at Ryobi Power Tools to create fun DIY videos for you guys. They always have the BEST workbenches for our shoots, and I come home feeling super inspired to build one for myself. Well… I finally did. This is a large workbench, but it really is a very simple build! I tried my best to break it down for you, but feel free to ask me anything!
CLICK HERE TO DOWNLOAD THE FREE PRINTABLE PLANS!!!!!
Here we go!
New Workbench Supply List
2 – 2x6x8
7 – 2x4x8
2 4×8 sheets of 3/4″ MDF
4 5″ locking rubber casters
2.5″ wood screws
Kreg Jig
I started by building my frames. This workbench has two frames… A top frame, and a bottom shelf frame. Here are the measurements of both.
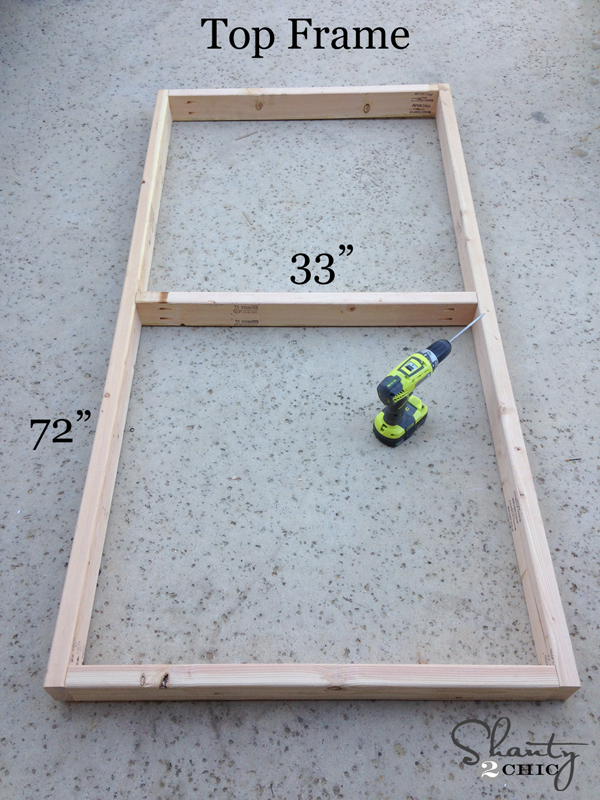
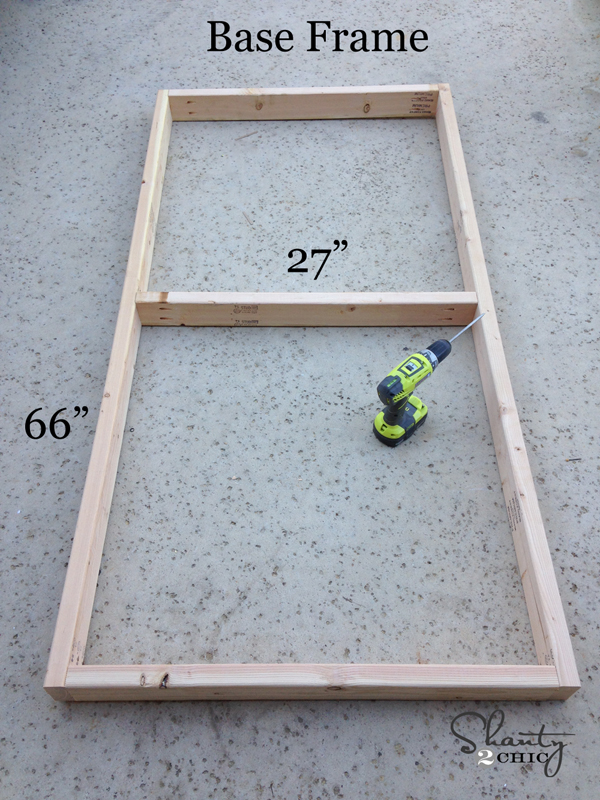
I used 2×4’s for both frames. I also used my crazy awesome Kreg Jig to put the whole thing together. If you don’t have a Kreg Jig, you can also predrill and attach all the pieces with 2.5″ wood screws. But, I totally suggest the Kreg Jig! Makes this part a breeze and you won’t have screws showing on the outside.
I used 1 1/2″ pocket holes and 2 1/2″ pocket hole screws to attach all my pieces. I did this because the width of the wood is 1.5″.
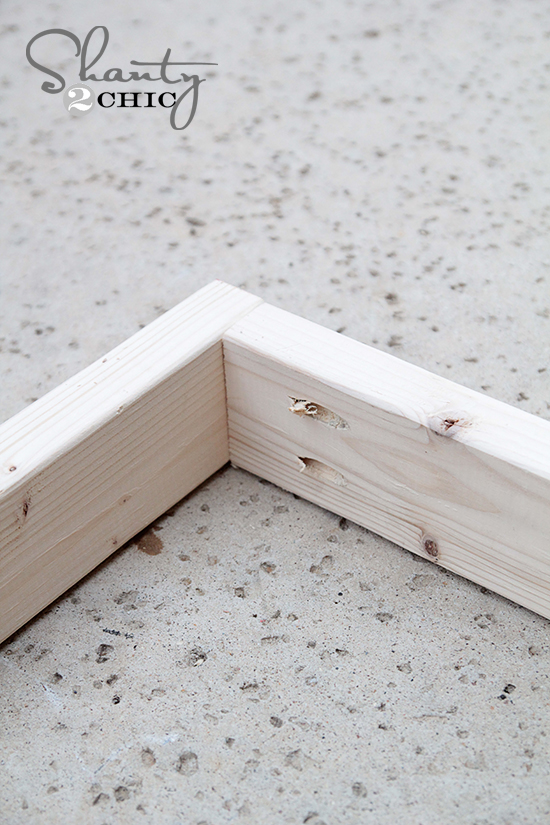
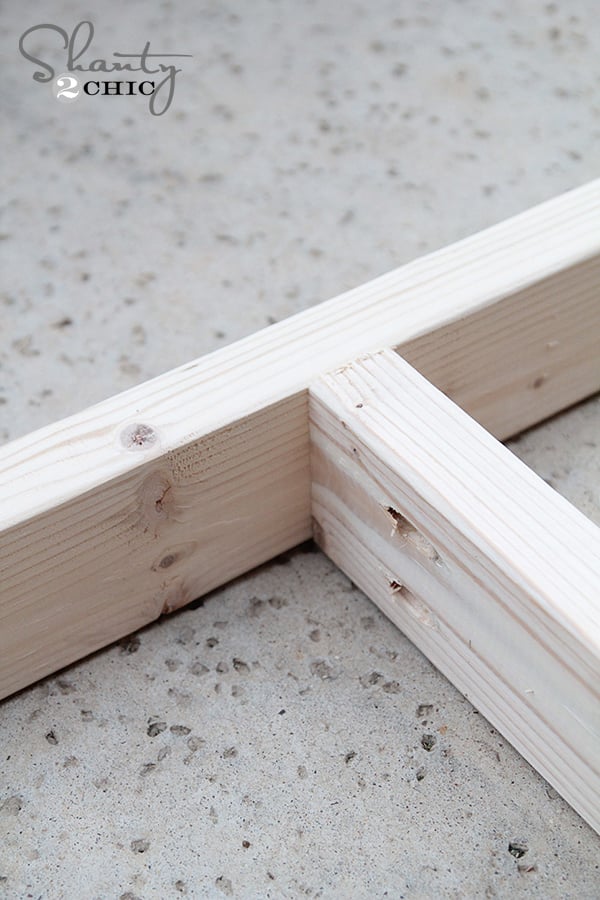
Now for the legs! Each leg is made from one 2×4 and one 2×6 piece. These measure 26.5″ long each. I attached the legs together first using my Kreg Jig. You can see where I put my pocket holes into my 2×4 pieces. I did 3 on each 2×4 piece. Then, I used Gorilla Wood Glue and 2.5″ screws to attach the legs together.
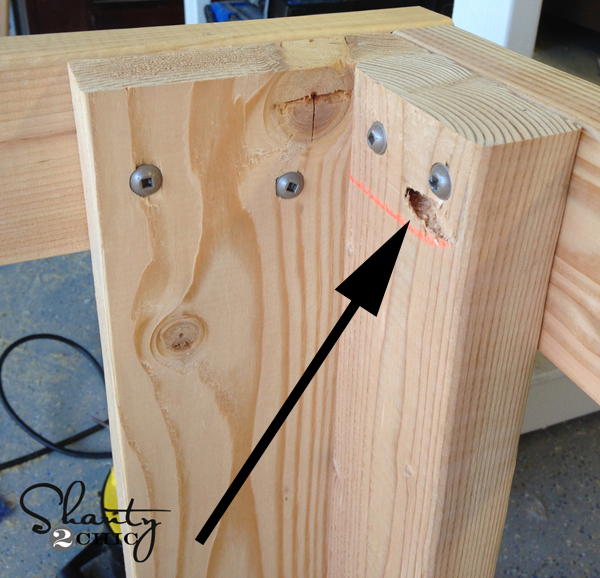
Here is another shot of the legs…
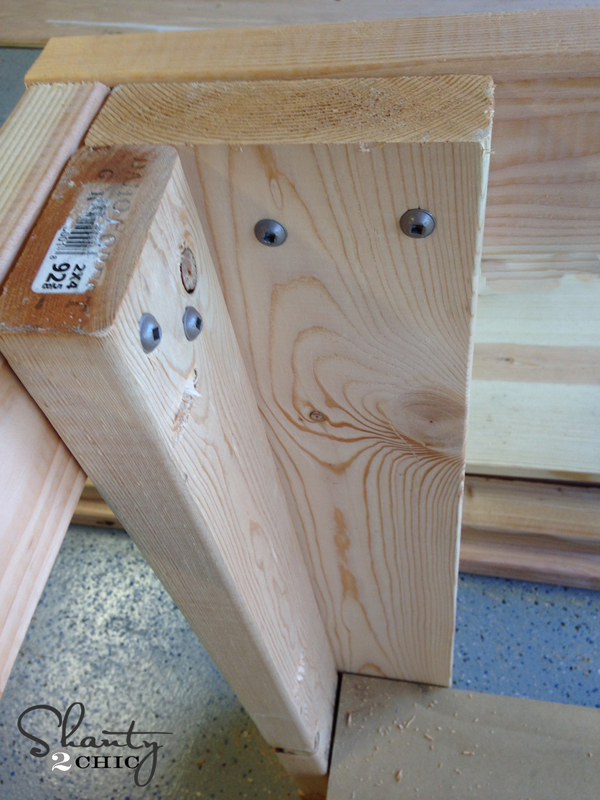
Each leg will also have a 5″ 2×6 piece on the bottom of each leg. These will hold the bottom shelf in place and hold the casters once it is all built. I used wood glue and 2 1/2″ wood screws to attach these to the bottom of each leg. Here it is after I attached the frames to it…
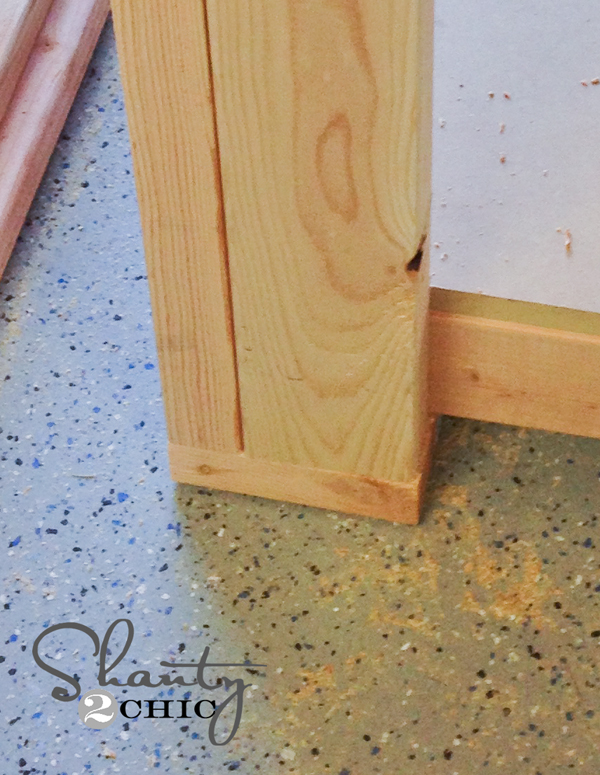
Once I had all the legs built, I attached them to my frames. The legs will line up on the outside of the bottom shelf frame, and on the inside of the top frame. I used heavy duty 2.5″ torx screws on this part. You can see them on the inside of my top frame. I also used my drill to pre drill before attaching.
Now for the shelves! This is the heavy part…So I got my hubby to help me lift them up. I used 3/4″ MDF for each shelf. I had the nice guys at Home Depot cut it down for me.
Here are those measurements…
Bottom Shelf – 30″ x 66″
Top Piece – 36″ x 72″
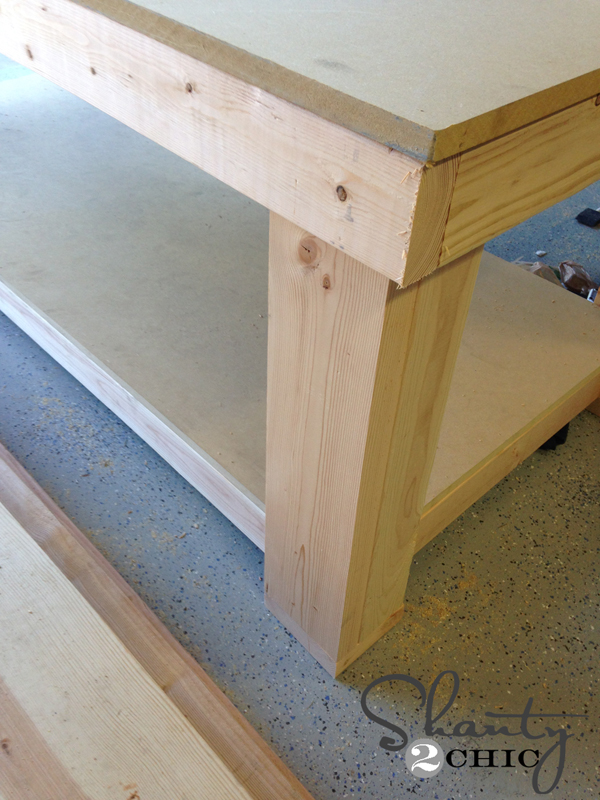
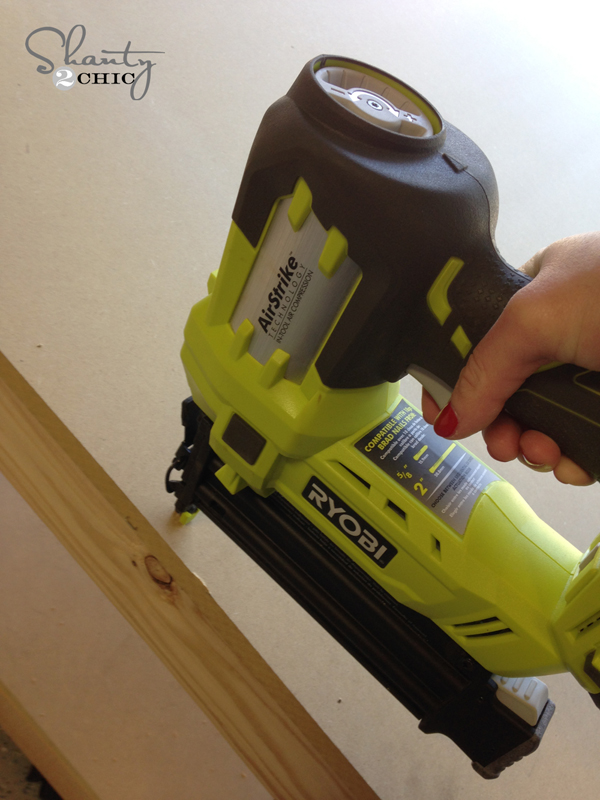
I used my Ryobi Airstrike Nailer to attach both pieces of MDF. I didn’t use glue on this part, because I want to be able to easily change out these pieces when they get too worn.
That’s it! My final step was adding the casters which I found at Northern Tool. These are 5″ rubber locking casters. I also gave the my frames and legs one fast coat of white paint and used my Corner Cat sander to distress them a bit… Every good workbench should be cute too, right??
Here’s the New Workbench all finished up!

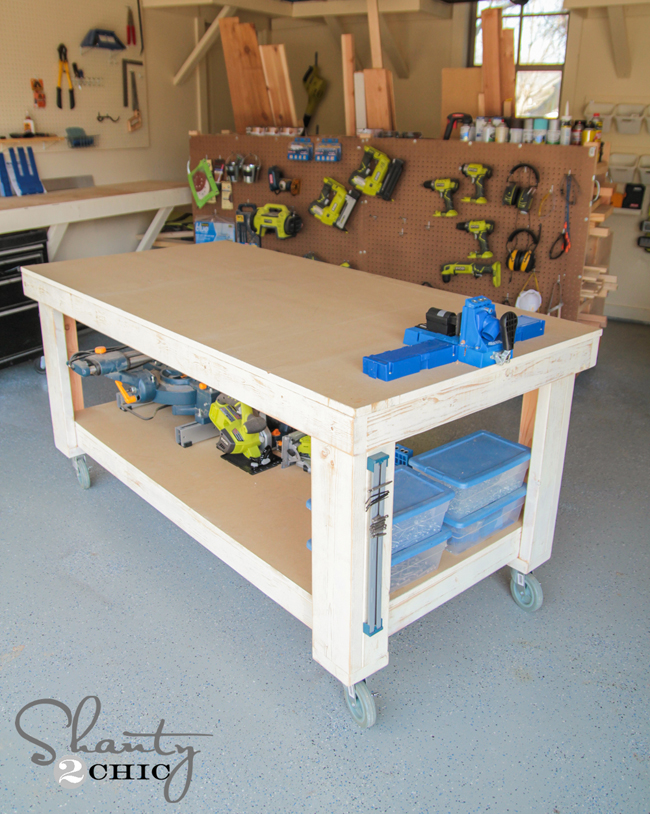
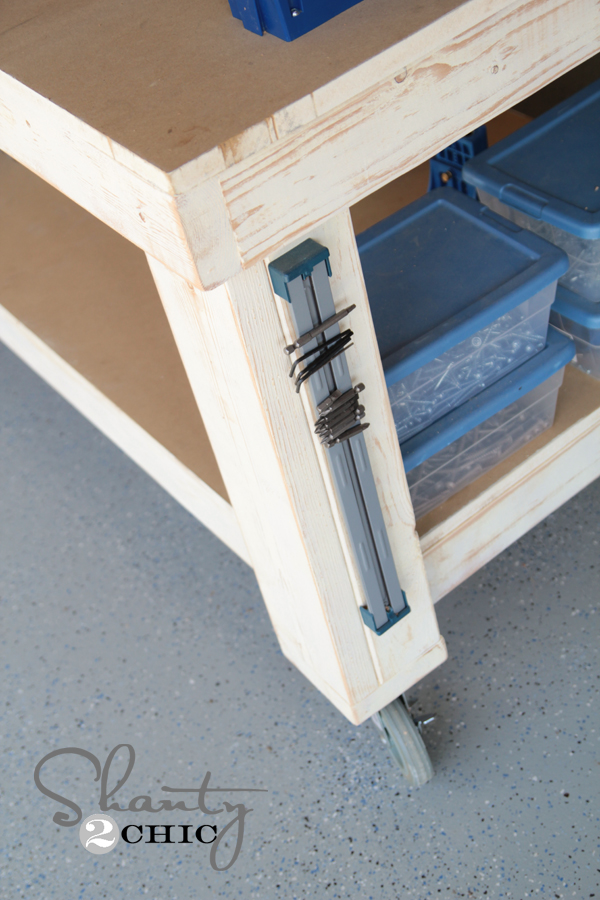
Did I mention I totally love it?? Just checking! I built the whole thing for under $130.
Thanks so much for stopping by! I would LOVE for you to pin and share my new workbench with all your friends! Let me know if you have any questions at all!
~Whitney

Great simple design & tutorial. I wish I had read the comments, or thought about customizing first. At 5″10″ this bench is too short for my standing comfort. Going back to the lumber store so I can build up the bottom & put the wheels back on.
Thanks for the plans. They are great benches!!! I built two. One for my girlfriend and one for me. Hers I made to your specs, Mine I made larger and added home made Bench Dogs and a vise
what did you use to attach to the base in order to attach the casters to the bench. Did you use actual Kreg screws or another brand?
I built your bench and then added drawers on both ends now ihave more work and storage space. thanks for the great plans and jut to let you know the Kreg Jig is the best gift ever.
That is so awesome Paul!! Loved this message! And yes… The Kreg Jig is AMAZING! Enjoy your new table!
Hey Paul… How did you add the drawers? I was thinking of doing the same!
Thanks for sharing! I am in the planning process on a miter saw cart (just got a Ryobi 10″ sliding compound miter saw!) and I’m waffling over the height, which will affect a subsequent workbench build.
What height do you ladies find comfortable (and how tall are you)? Or better yet, what is the tabletop even with on you? wrists? belt? etc.
Gosh, that sounds so personal…
I don’t know if it is different for females, but most recommendations for wood work bench height suggest the top should be about level with your wrist when standing. This certainly works well for me.
Thanks, TBJWebmaster! 32″ seems way too low…nervous about building something all wrong 🙂 Will try to set up a temporary table to work from at that height to test it out.
Thanks again!
Hi Lauren I am just seeing these so sorry! With casters this stands 35″ which is almost the exact height as my miter saw bench. I personally love the height. I’m 5′ 2″. We have had several people that have made this table just as I did and are very pleased with it. And I am totally able to clamp to it… I do it all the time. Hope this helps!
Thanks for the kick in the pants. I’ve needed to make a new bench for a while. Love your site!
Oh that’s awesome Gregory!! Thanks so much for the nice words!!
I love the size of this and totally love that my hubby or I can take it out to the drive way for big jobs or just to work in nice weather! Thank you so much for sharing. SO ready to get this project going.
I love the idea of the magnetic strip! I am always searching for my boxes of bits, and this takes away that issue — just grab what you need from the strip. I’m going to look for a way to add one of these in my garage work space. Thank you for the inspiration!
Once I opened my Kreg Jig just now I answered my own question about the pocket hole screws! Happy they included some because I’m making a couple of your blanket ladders right now! 🙂
Do you think it would work for me to use 2×3’s for this? I just have a ton of them so it would be cheaper for me but I don’t want to if it won’t be durable enough. I just got a Kreg jig so this will be my first project with it! Yay! But one question, are pocket hole screws much different than regular screws because no one at Home Depot had any idea what I was talking about! Thanks!!! 🙂
Hi Tara,
Re: HD and pocket hole screws: I had a similar problem with no one knowing what I’m talking about. Make sure you talk to the tool expert- the Kreg screws are usually with the Kreg tools, and they would know.
You can get Kreg screws on Amazon or at Lowes (if you have one nearby).
They have fine ones for hardwood and coarser ones for softwood. They take a #2 square bit (much better than crosspoint) and the heads are shaped to fit the hole left by the Kreg bit. They are also self tapping.
I find I have to be careful when using them near end grain (screwing into the undrilled section), and often use a size 1/4″ less than they say (or adjust the jig) to avoid the point sticking out.
That said, they are excellent, much better than stock shelf crosspoints.
Hi Tara,
If you don’t want to get the Kreg Screws or your HD doesn’t carry them, you can find pocket hole screws in bags down the screw isle. They will be under the premium wood screws section.
Thank you all so much! Apparently the tool expert on duty at my HD wasn’t such a tool expert after all! I have a Lowe’s and a HD catty-corner from each other so that makes things convenient! 🙂 I’ll check again!
Glad they helped you Tara! I like ordering on amazon too… I can always find what I need there. Hope you got it all worked out!
Just a thought, I use melamine for my workbench tops, cleans up a lot easier and is nice for drawing out full size drawings of projects. I’ve used it commercially for years and it’s tough and durable. Even wood glue that drips onto it comes off easily with a scraper of after a short soak with a wet rag. I’d also second Matt’s suggestion that an overhang be left around the edges for clamping. Great tutorial though!
Awesome! Thank you for sharing how you built this. I am not clear (or I’m dense) on how you attached the bits to the legs to support the bottom shelf. Can you expand on that, please?
A smaller version will be perfect for my single car garage, and can be easily wheeled out to the driveway when working on projects. LOVE IT.
Looks like you permanently attached your Kreg jig, right? And is that a magnetic strip? Also wondering about the clamping question from Matt. Great build though. Might be my first project with my jig!
I feel a new bench coming on for our garage! Thanks for sharing ya’ll – Happy New Year!
Whitney,
This bench is great and thanks for the tutorial. I am just about to be in need of a new one myself and this will be perfect. Thank you for all that you share!
– Matt
I’d certainly want an overhanging edge for clamping. I would reinforce the edge with 2.5″ (or wider) x 3/4″ timber glued underneath (to give total thickness of 1.5″) to prevent damage from the clamps and a little more stability. I would also consider an edging piece around as I don’t like seeing the edge of MDF.
I haven’t had a hard time clamping to the table at all. I use the 2×4 that runs just under the top. And you can certainly finish it however you like… I don’t mind the look of that MDF, but an edge banding would be an easy fix. Thanks!