Happy New Year friends!
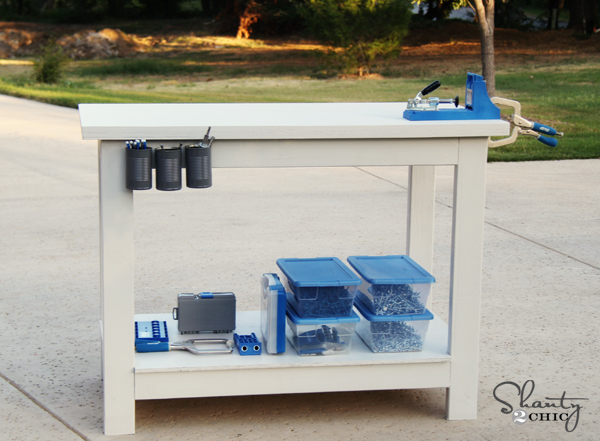
I am SOOO excited to share this latest build with you! I decided to build a little something for myself this go around. I figured it was time to get a lot of my projects off the garage floor and onto a workable space. Check out my simple DIY workbench!
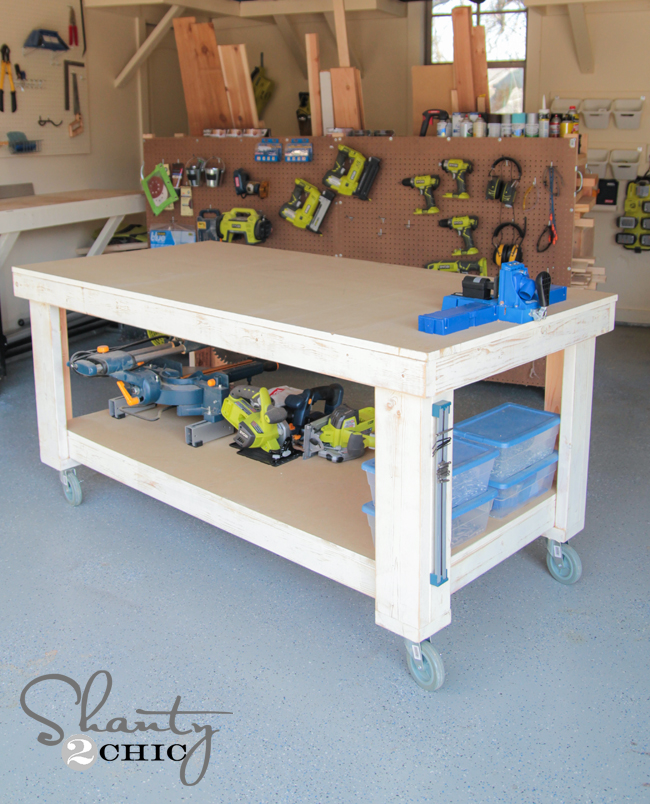

Ahhh… Isn’t it perfect?? I love everything about it! Ashley and I have been working with our friends at Ryobi Power Tools to create fun DIY videos for you guys. They always have the BEST workbenches for our shoots, and I come home feeling super inspired to build one for myself. Well… I finally did. This is a large workbench, but it really is a very simple build! I tried my best to break it down for you, but feel free to ask me anything!
CLICK HERE TO DOWNLOAD THE FREE PRINTABLE PLANS!!!!!
Here we go!
New Workbench Supply List
2 – 2x6x8
7 – 2x4x8
2 4×8 sheets of 3/4″ MDF
4 5″ locking rubber casters
2.5″ wood screws
Kreg Jig
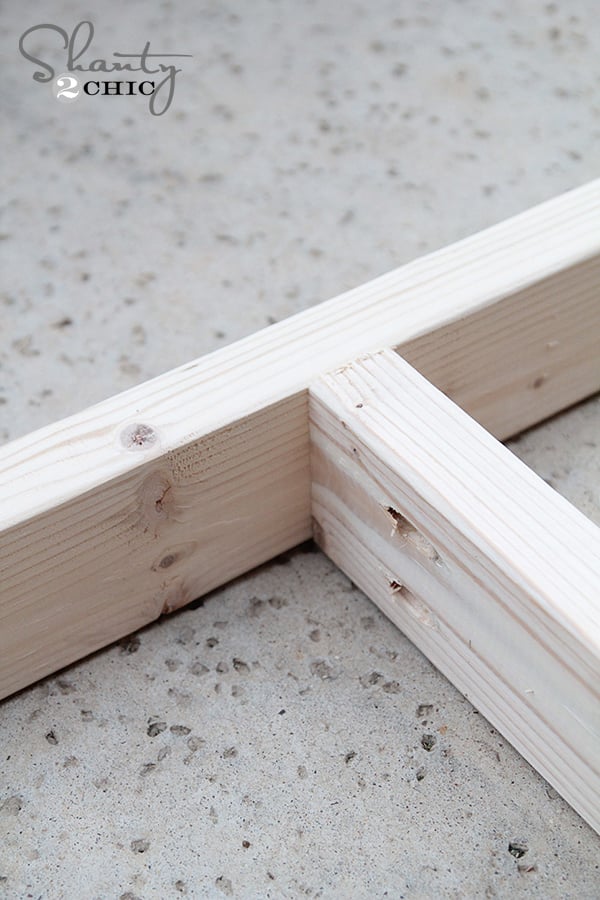
I started by building my frames. This workbench has two frames… A top frame, and a bottom shelf frame. Here are the measurements of both.
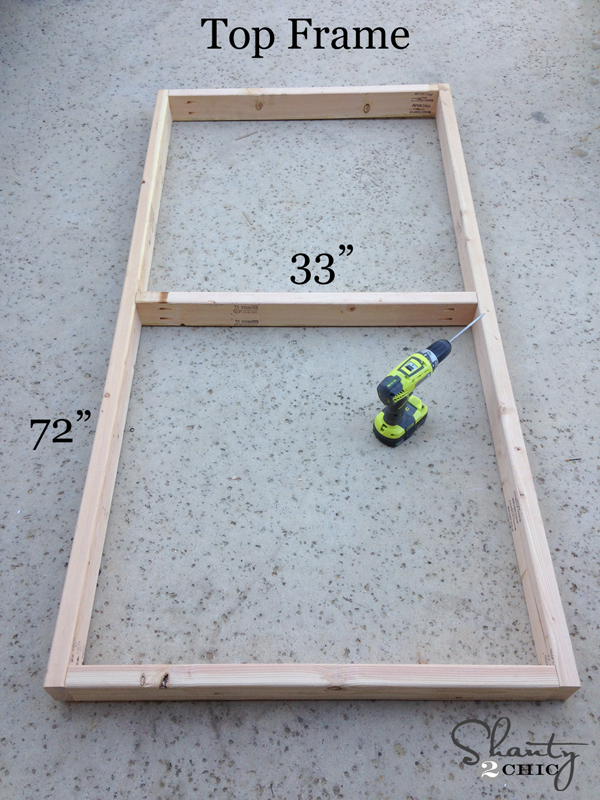
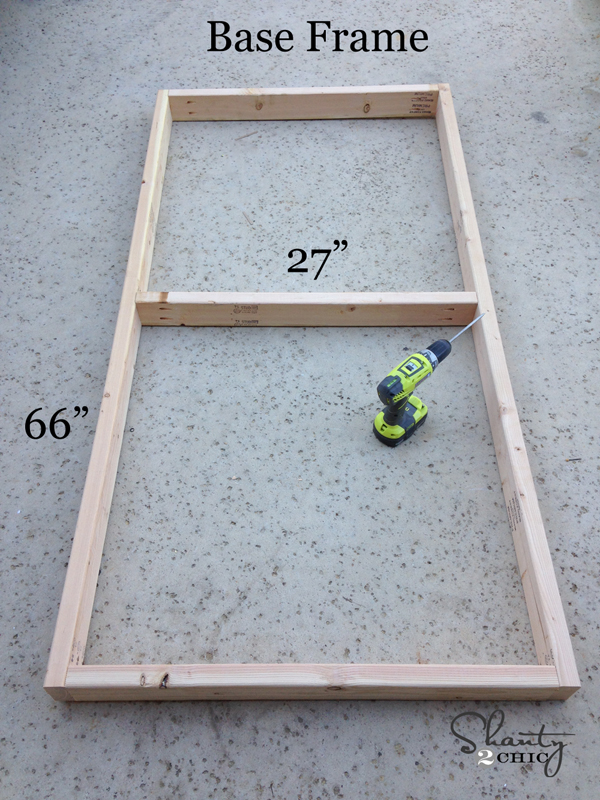
I used 2×4’s for both frames. I also used my crazy awesome Kreg Jig to put the whole thing together. If you don’t have a Kreg Jig, you can also predrill and attach all the pieces with 2.5″ wood screws. But, I totally suggest the Kreg Jig! Makes this part a breeze and you won’t have screws showing on the outside.
I used 1 1/2″ pocket holes and 2 1/2″ pocket hole screws to attach all my pieces. I did this because the width of the wood is 1.5″.
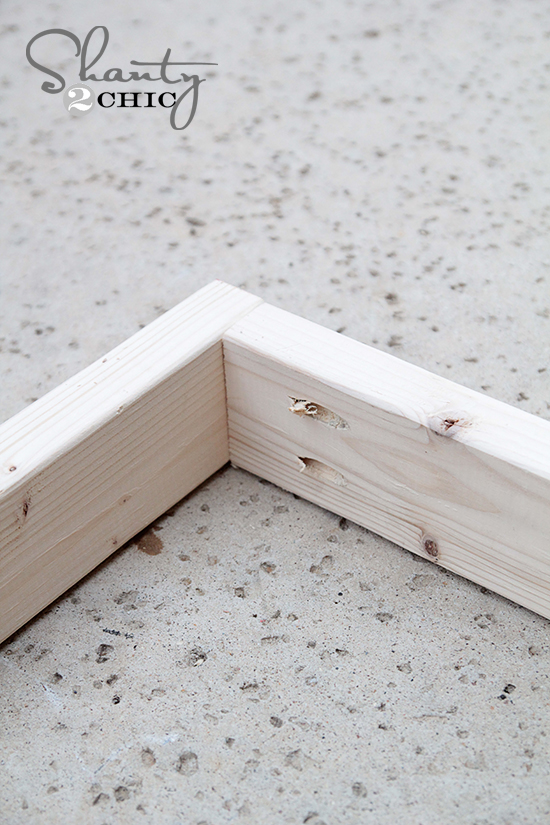
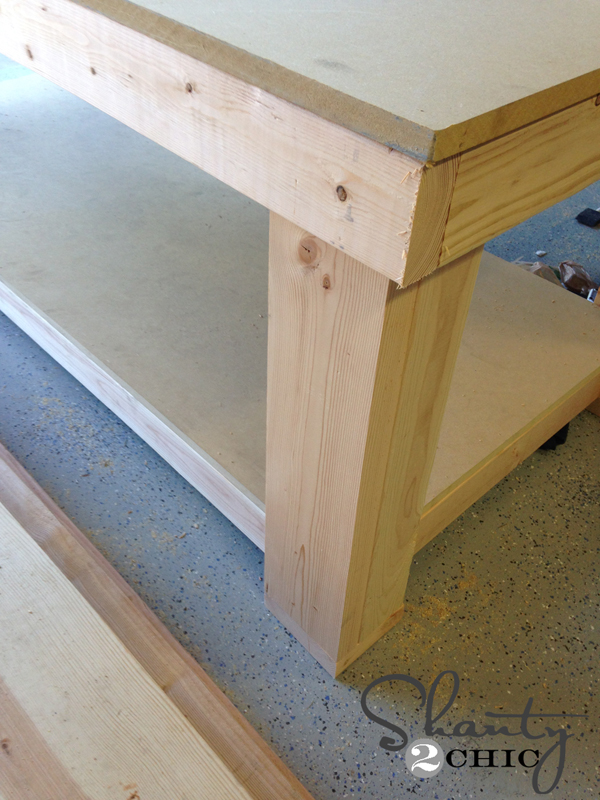
Now for the legs! Each leg is made from one 2×4 and one 2×6 piece. These measure 26.5″ long each. I attached the legs together first using my Kreg Jig. You can see where I put my pocket holes into my 2×4 pieces. I did 3 on each 2×4 piece. Then, I used Gorilla Wood Glue and 2.5″ screws to attach the legs together.
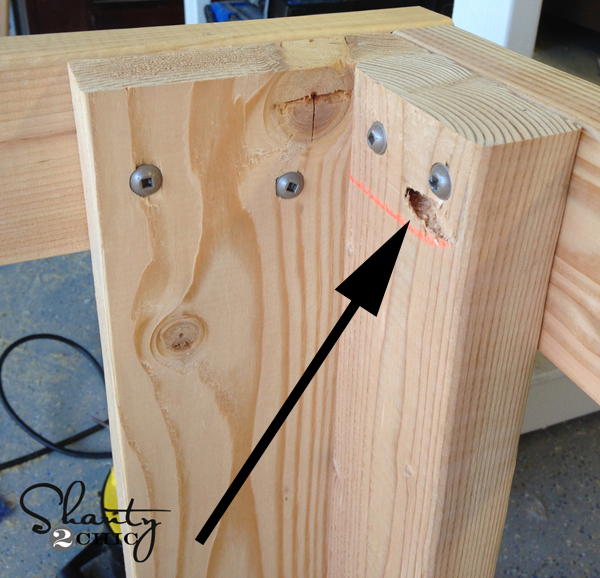
Here is another shot of the legs…
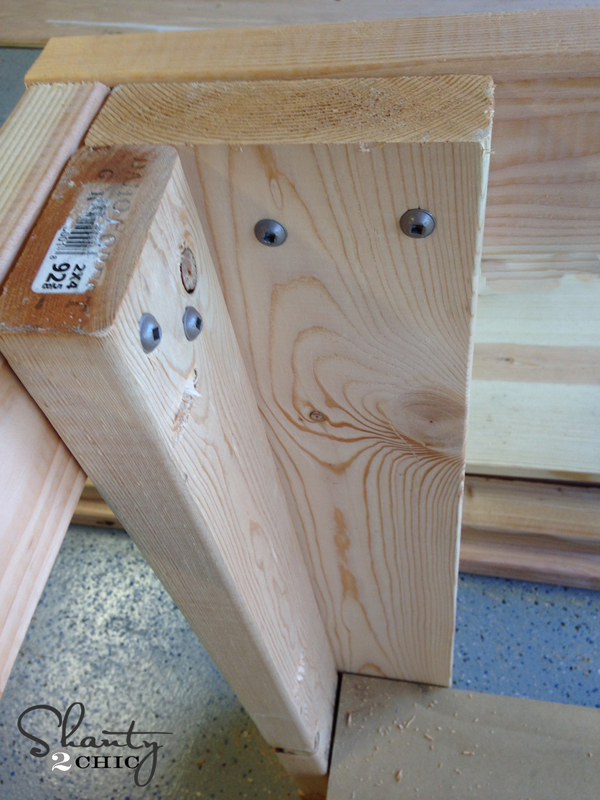
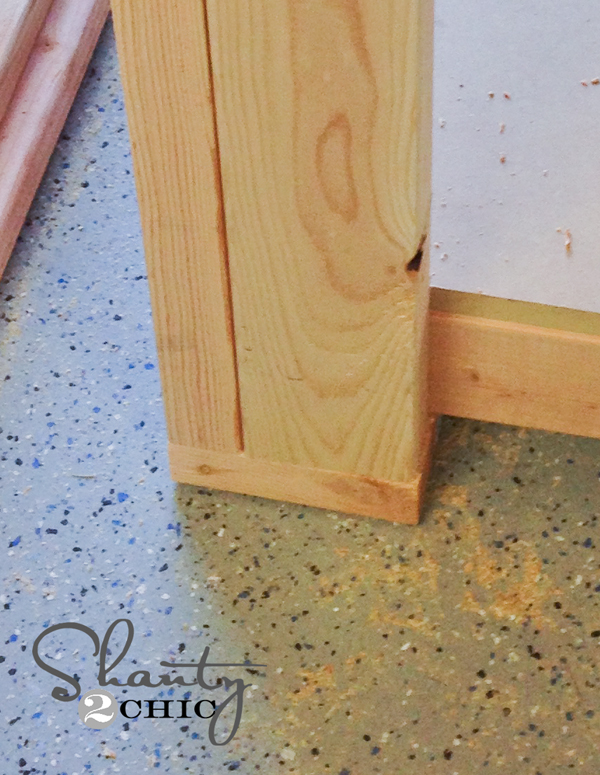
Each leg will also have a 5″ 2×6 piece on the bottom of each leg. These will hold the bottom shelf in place and hold the casters once it is all built. I used wood glue and 2 1/2″ wood screws to attach these to the bottom of each leg. Here it is after I attached the frames to it…
Once I had all the legs built, I attached them to my frames. The legs will line up on the outside of the bottom shelf frame, and on the inside of the top frame. I used heavy duty 2.5″ torx screws on this part. You can see them on the inside of my top frame. I also used my drill to pre drill before attaching.
Now for the shelves! This is the heavy part…So I got my hubby to help me lift them up. I used 3/4″ MDF for each shelf. I had the nice guys at Home Depot cut it down for me.
Here are those measurements…
Bottom Shelf – 30″ x 66″
Top Piece – 36″ x 72″
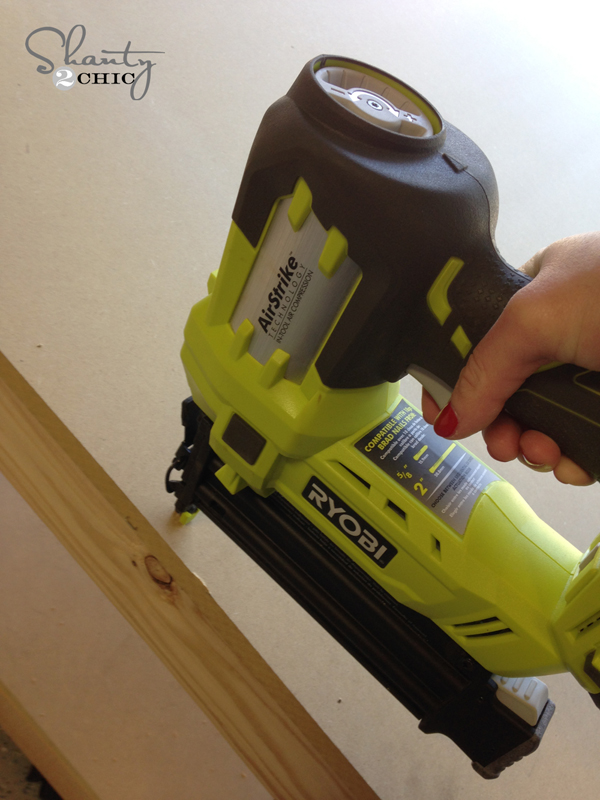
I used my Ryobi Airstrike Nailer to attach both pieces of MDF. I didn’t use glue on this part, because I want to be able to easily change out these pieces when they get too worn.
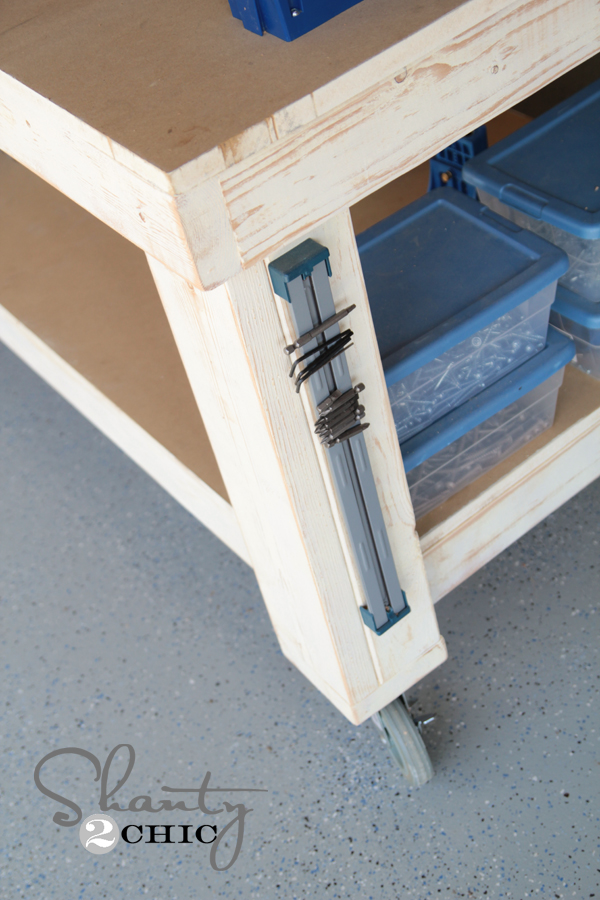
That’s it! My final step was adding the casters which I found at Northern Tool. These are 5″ rubber locking casters. I also gave the my frames and legs one fast coat of white paint and used my Corner Cat sander to distress them a bit… Every good workbench should be cute too, right??
Here’s the New Workbench all finished up!

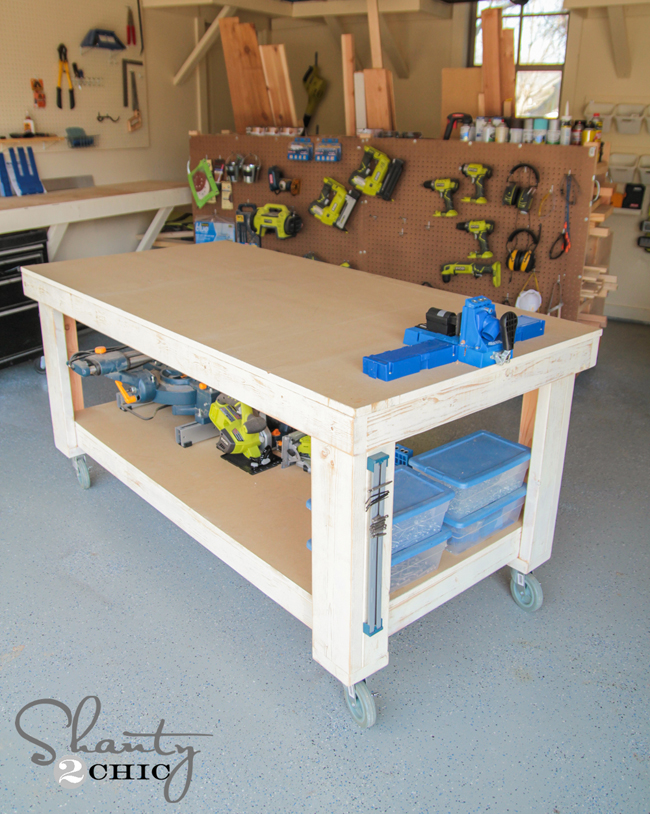
Did I mention I totally love it?? Just checking! I built the whole thing for under $130.
Thanks so much for stopping by! I would LOVE for you to pin and share my new workbench with all your friends! Let me know if you have any questions at all!
~Whitney


Thanks for the plans! I just finished my build today and can’t wait to use it for the long list of other projects I have to get finished. Unfortunately, adding height was an afterthought, but I just doubled up the 5″ 2×6 pieces before attaching the casters.
Found your post on Pinterest.
I just finished my workbench yesterday!
Do we have to worry about the entire board of MDF absorbing water? or just the edges?
I’ve read to seal the board with an oil based primer, but I wanted to double check.
What kind of torx screw did you use to attach the legs to the frame? Do you have a link to Amazon (or other website) maybe?
Thanks for the plans. Here is how my workbench turned out
Looks perfect James!!! Way to go!
hi, what kind of wood you used on this bench?, thanks
Thanks for the great instructions. I followed them but chose to not add casters. I also added a backsplash with outlets.
How much does this bench weigh? How much are the casters ? Everywhere I look they are expensive
Not sure about the weight but the red casters you see in many of the pictures run about $10 a piece.
Finished mine last night! Only change I made was adding 5″ to the legs to accommodate my 6′ 3″ height. Thanks for the inspiration!
Plan to be making this bench by the weekend so I can start the long list of projects my wife has for me. Having the bench on wheels is a great idea when working with little space.
I just built one of these. I made many mistakes and learned quite a bit. Thank you for a great site, I have learned a lot from
it!
Nice workbench!
Hey, I just finished making this. I am about to attach the casters and I was wondering what kind of hardware you used to attach them?
I reduced the size to 24”x48” but used the same plan. It gave me an opportunity to use my Kreg jig that I got as a present. I love it. I would send you a photo but I can’t figure out how to insert it into this comment.
Sat on my garage floor to build this workbench. Thanks! Love it! Now I’m a Kreg-for-Lifer
I am going to make two of these. One for my welding room and wrap the top and sides with metal so the work will be grounded and wood is cheaper (most times) than metal. I can get more working space and I really need to organize my scape metal pieces I use for my “Art Welding” pieces. The other will be used in the garage and used for projects only – no storage nothing but the current working project. I have 3 tables now all the same size you have if not larger and I have crap on all of them – even my metal work table I made in my ALC (Adult Learning Center). The other table was to be used for painting and stains…ha! It has car crap, fishing stuff, 5 gallon pales, 3 battery testing terminals – mostly all liquid stuff and is always in the corner with my motorcycle – mower – 2 tool chests – planer, jointer and table saw and 15 gallon vacuum – car lifts (drive up on racks) etc. I have a 30 X 30 garage and I can’t find a place to work in it. So another promise…to use these as IN PROGRESS working surfaces – no bags, boxes or ….You might think I am talking to my 5 guys crew…nope – I am talking to myself. Many arguments are handled wrestling in the yard – I don’t win most of the time. Thanks Shanty Ladies!!!!
It has finally warmed up here in the Toronto area, and this project was #1 on my spring to do list.
Thanks for the plans, they were perfect.
Terrific workbench. I found it on this site about 10 days ago when I was looking for a workbench plan and built it today. The plans are easy to use: A picture with dimensions and a few words of wisdom. I bought a Ryobi Airstrike as well for the top and some trim work that I am doing for my entertainment room. Very nice tool. I am a Dewalt guy usually. Their equivalent was more than $100 more and not as nice.
I looked at the suggestions and went with Melamine for the top and bottom shelf and added a pair of magnetic strips. The neighbors stopped by as I was finishing it up and were impressed. Thank you for posting the plans. I look forward to doing more of your projects.
Thanks so much Mike for your awesome comment! It totally made my day reading it! Happy you are pleased… We would love to see a picture of yours if you ever want to send one along 🙂
Can I make these but tall like sales counter height?
No, that’s not authorized!
🙂 that made my night ?
Hi. Nice bench. Did you run the frame pieces thru a jointer & planer ?