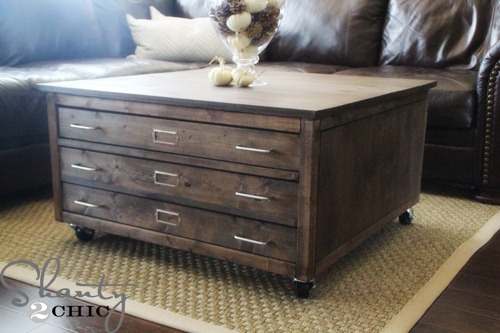
Learn how to build this DIY Farmhouse Coffee Table with only 8 boards with free plans and a how-to video by Shanty-2-Chic.
Hey guys! Happy Wednesday! Happy day before Thanksgiving day! I can’t wait for #allthefood! Today we are sharing a super cute solid wood table you can make for under $40 in lumber and only 8 boards… Heck yes. Sign me up! Before we get started, be sure to check out the video by clicking the play button below!
I have added a link at the bottom of this post to print the free plans for this table!
How to Build an 8 Board Farmhouse Coffee Table
Table of Contents
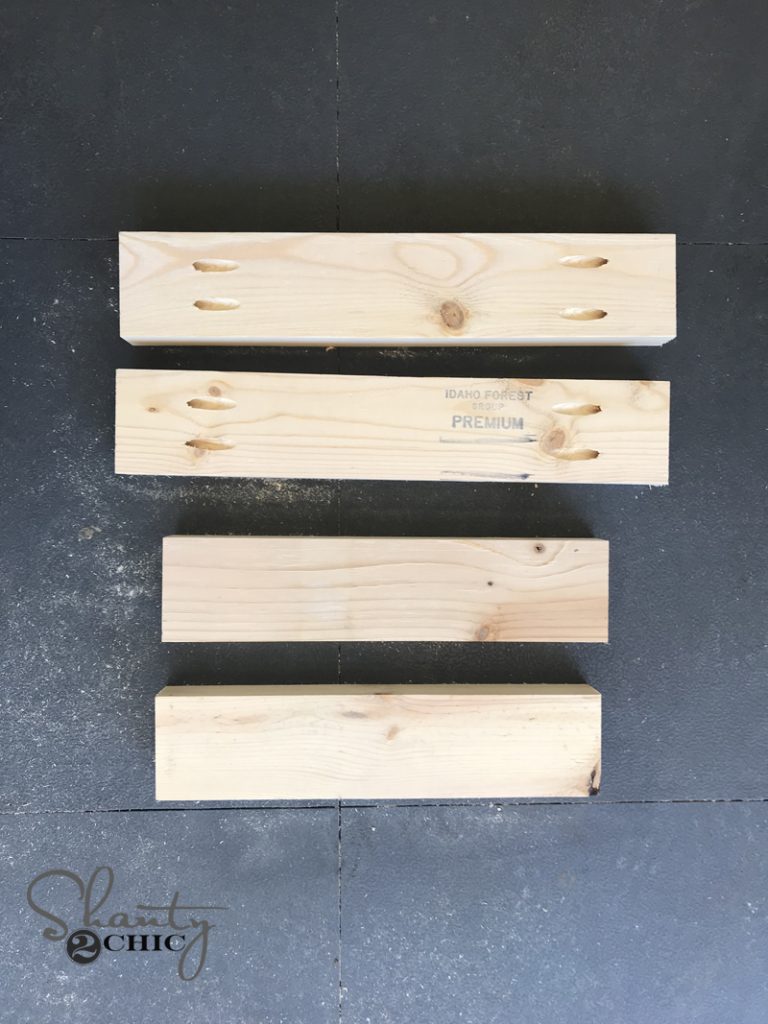
Step 1: Building the Leg Assemblies
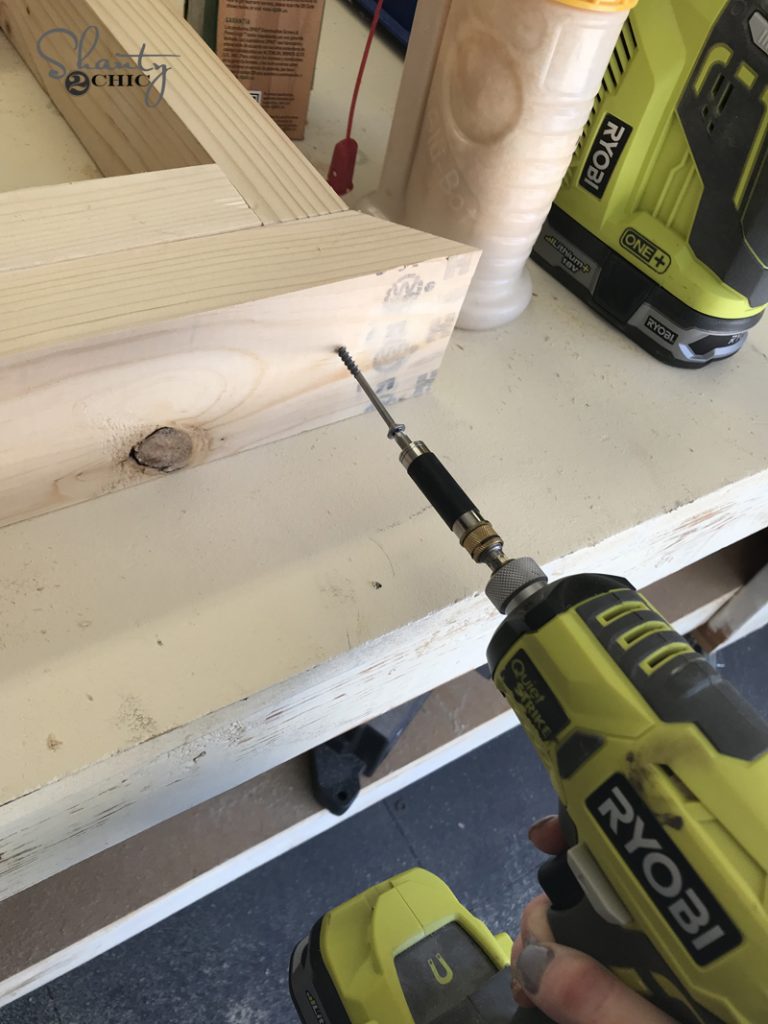
First, build two boxes for each leg assembly. These are attached using wood glue and 2.5” pocket hole screws through the horizontal boards and into the vertical boards. You want your pocket holes facing the outside of the box on this part because we will cover them with another board on the next part. We used our K5 Kreg Jig for this part. We get asked ALL the time which Kreg Jig to start with. We always suggest the K5. We use it on almost every build. You can find it HERE on Amazon!
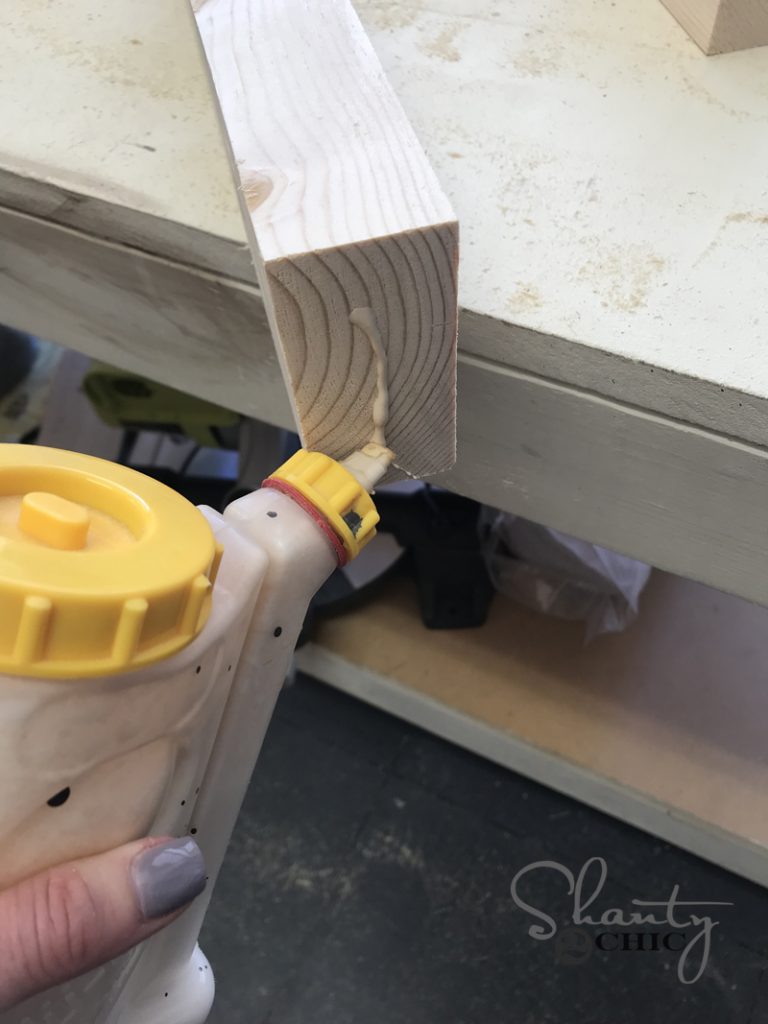
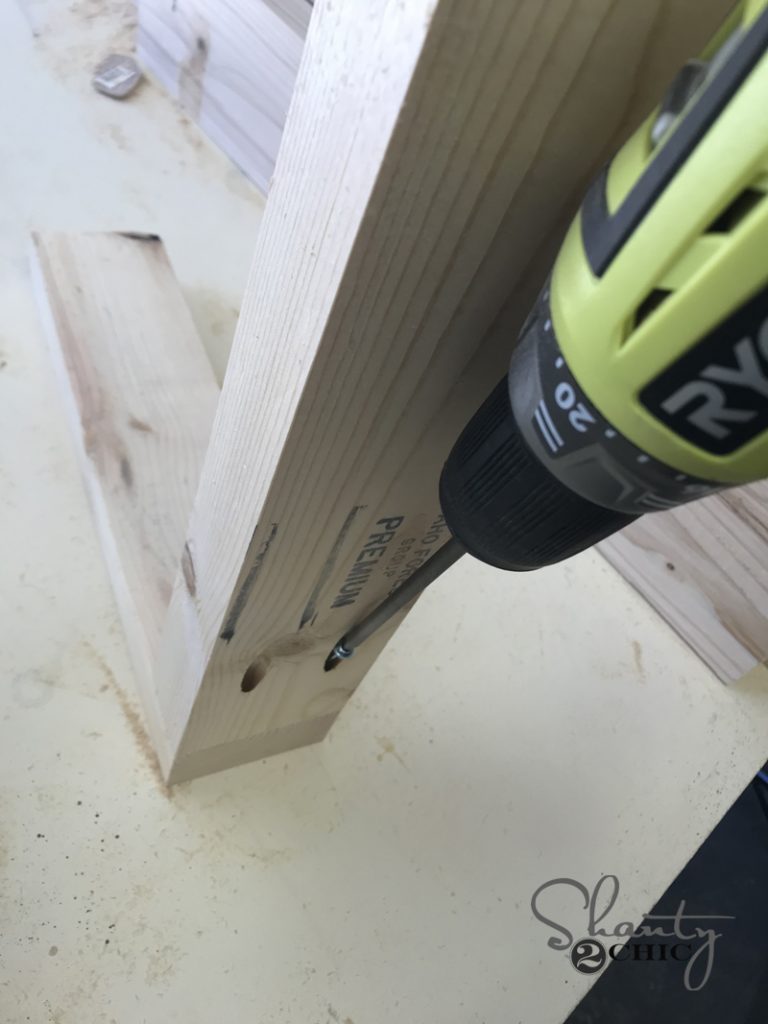
Now add the decorative pieces to the top and bottom. These edges are cut at a 45˚ angle and are attached to each assebly with wood glue and 2.5” wood screws through each decorative piece and into the leg assembly.
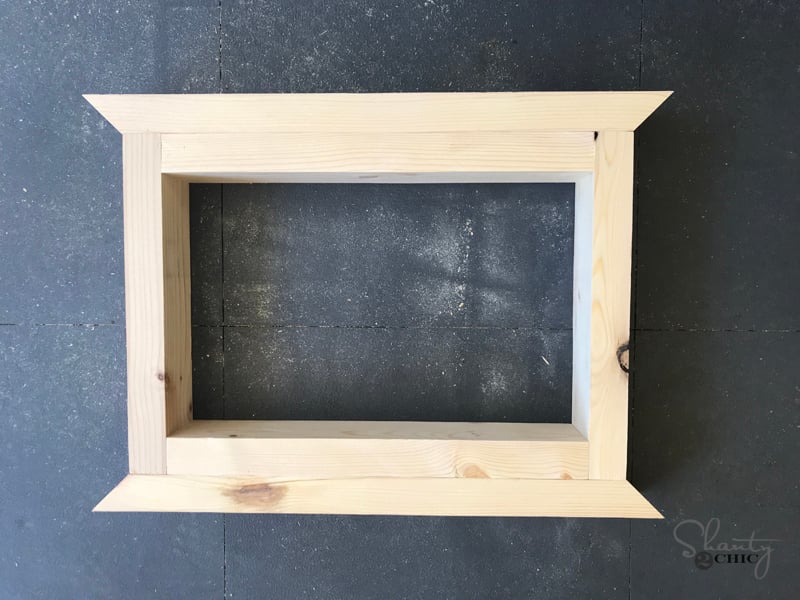
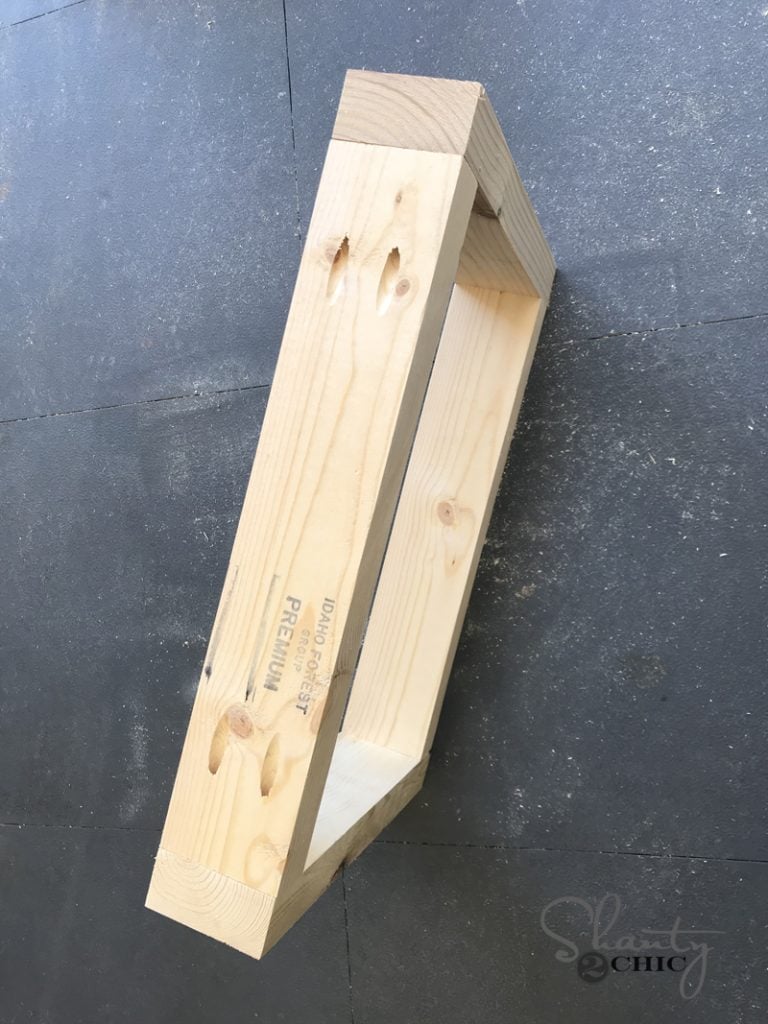
We cut the decorative x boards to fit on this part. Mark each board with your pencil and cut them to fit exact. You can check out the video if you have questions about this part! We walk you through it. Cut the diagonal pieces to fit first, then mark and attach them to each other using wood glue and nails. Then, fit them in the box and attach them with wood glue and nails through the box and into each end of the X piece.

Step 2: Building the Table Top
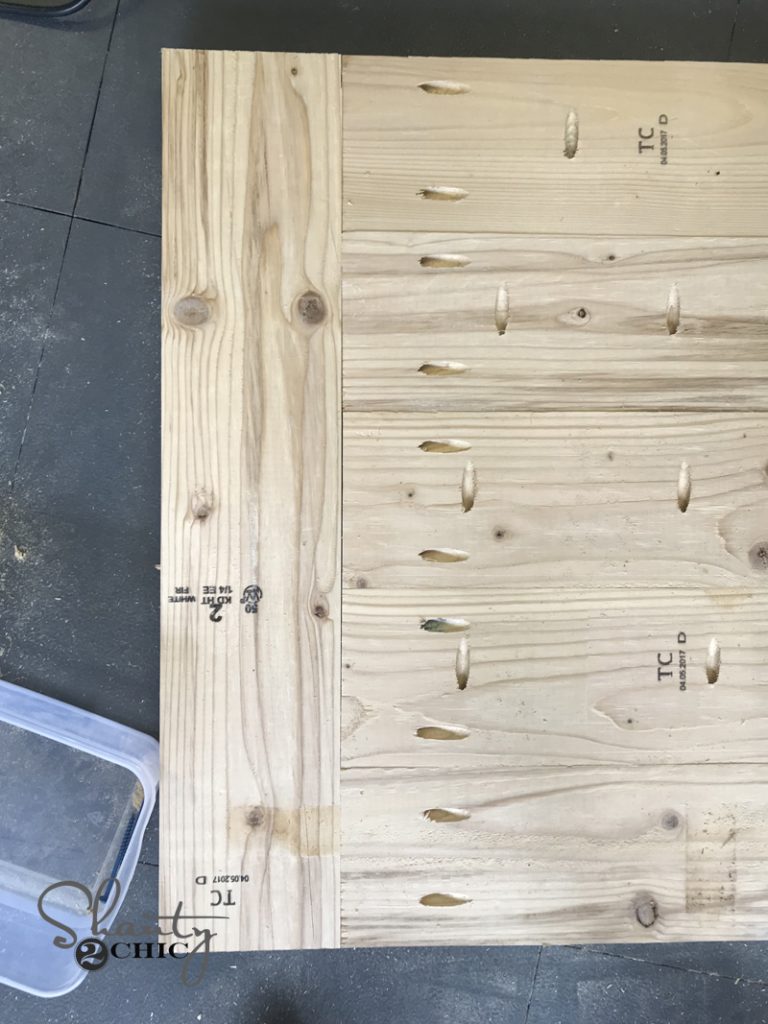
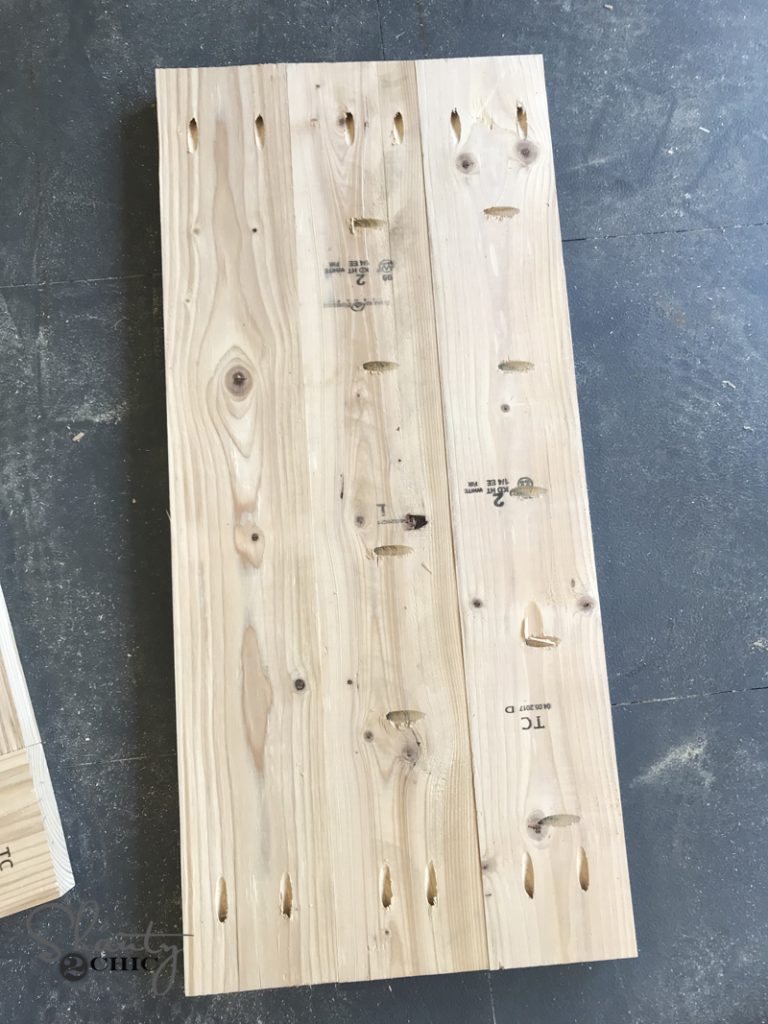
To build the table top, we used our Kreg Jig to create 1.5” pocket holes down one side of 4 of our 5 longer boards, and also at both ends of all 5 boards. Attach the 5 boards to each other first with 2.5“ pocket hole screws, and then attach the breadboards with 2.5” pocket hole screws.
Create the shelf assembly of the table the same way! Attach the three boards to each other using 2.5” pocket hole screws. Don’t forget to add the pocket holes on each end to attach this to the leg assembly later.
Step 3: Attaching the Runner
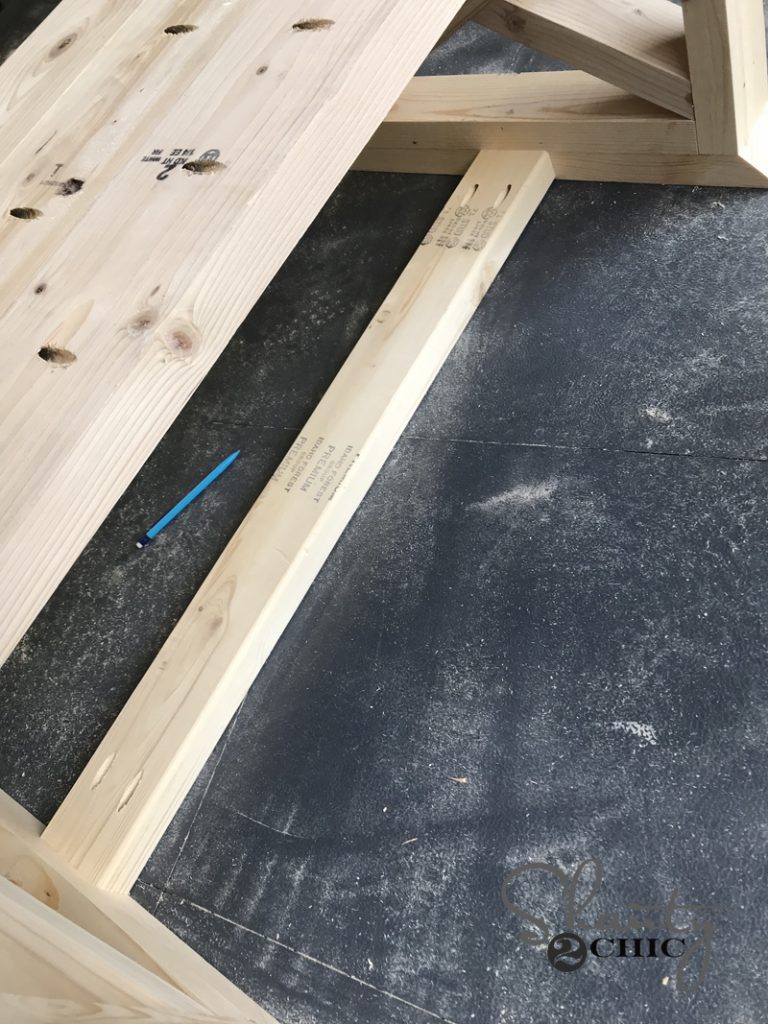
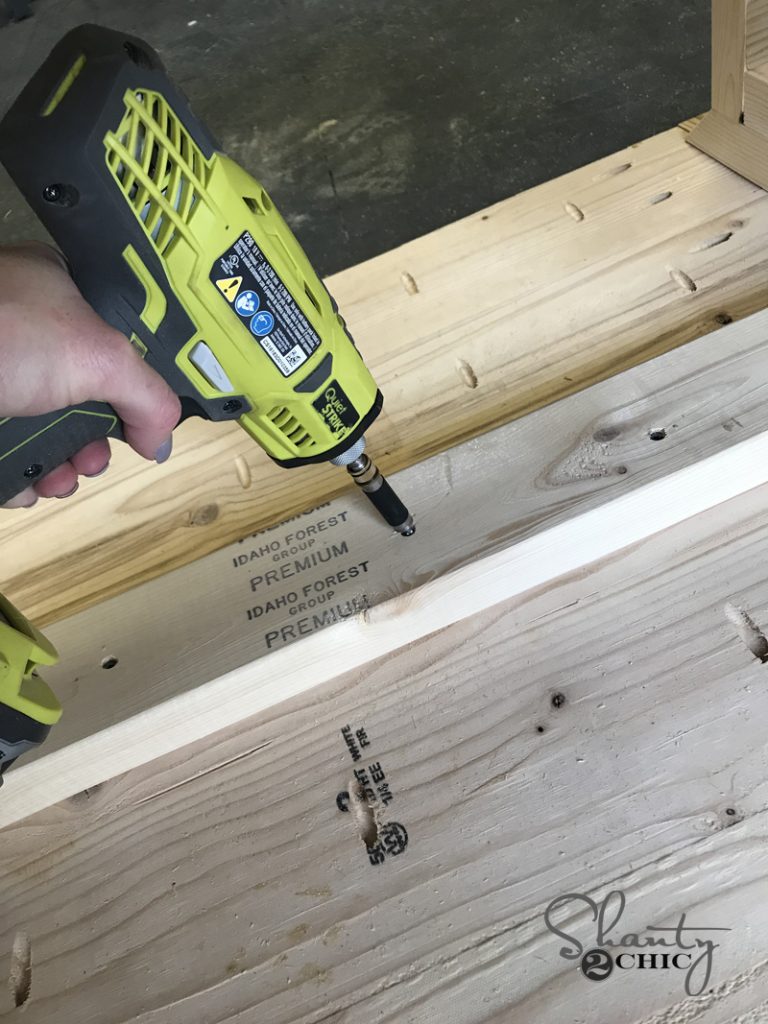
Now attach the horizontal runner that will go between each leg assembly. This is attached using wood glue and 2.5” pocket hole screws into each assembly. You will also attach the bottom shelf to both sides on this part. Make sure your pocket holes are facing down.
Step 4: Attaching the Table Top
Final step is attaching the top to the table sides! Line the top up evenly on the base. Set the top face down on the ground and attach the base through the horizintal runner using wood glue and 2.5” wood screws.. You can also add a few 2” nails through the top and into the bases.

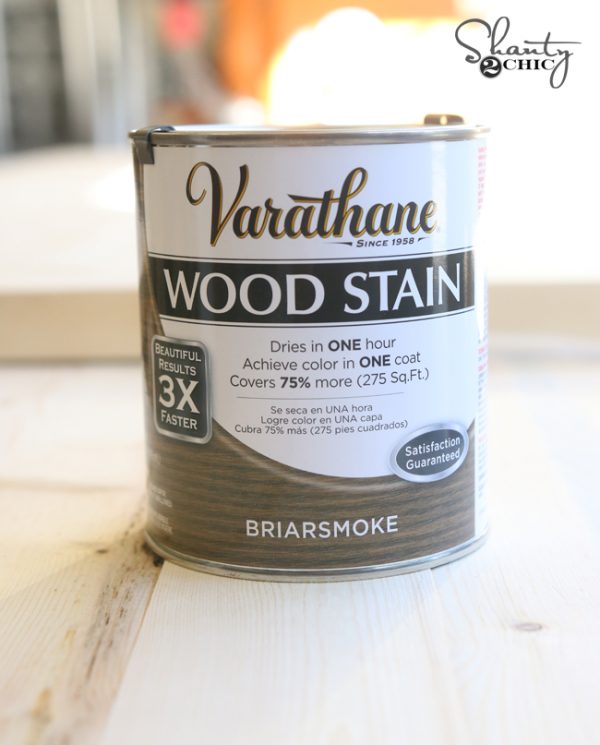
Step 5: Staining the Rustic X Coffee Table
Once I finished the full assembly, I stained the table using Varathane Briarsmoke stain and I mixed it with half natural stain to lighten it up just a bit. I did a 50/50 mix. Just stir it really good. It’s my favorite stain color combination right now. You can find it HERE on Amazon.
I added the decorative hardware last. I found that at Hobby Lobby. This is a link to one of their corner pieces.
And here is my beautiful table all finished!
I found the glass vases HERE!
I found the flower stems HERE!
The tutorial for the sign can be found HERE!
The tutorial for the corner corbel can be found HERE!
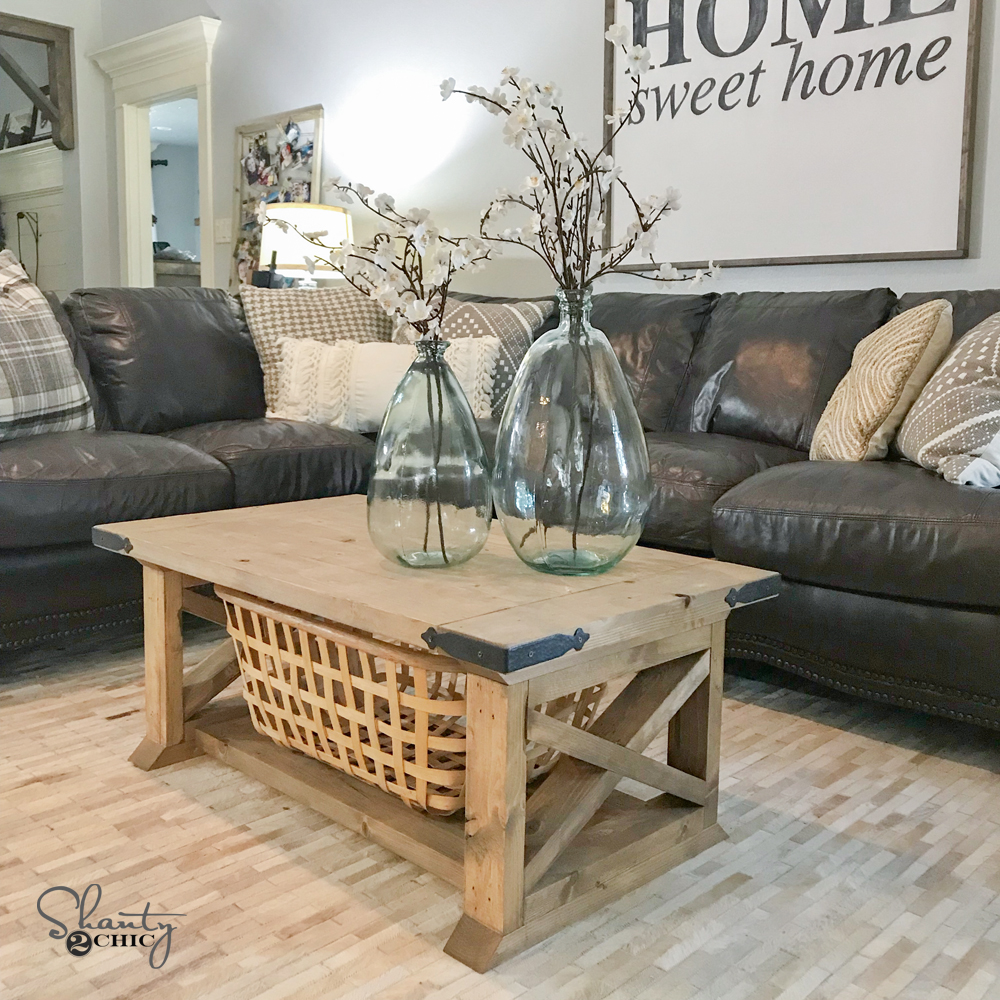
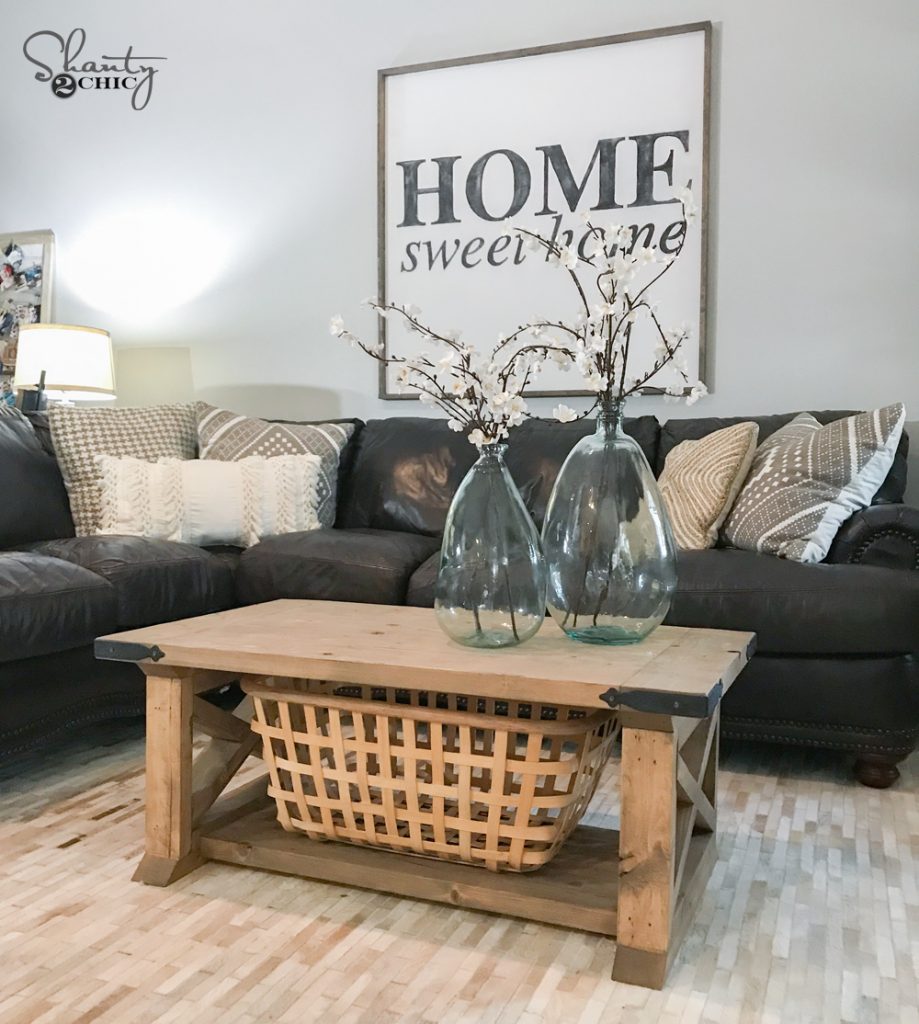
I LOVE how this one turned out! It’s the perfect mix of rustic and modern farmhouse design, the durability, with the framing lumber, is kids-friendly and you really can’t beat the price too! You can download and print the FREE PLANS HERE!
Still looking for the perfect coffee table to build? You can choose from over 15 of our DIY Coffee Table Plans!

Could you expand on this in the future? I really enjoyed this article. The research behind this is impressive.
I’m just wrapping up this project. Very heavy duty. It turned out great. I adjusted the H x W x D dimensions to better fit in with my living room and furniture. I also skipped the X pieces and went with mission style vertical slats.
really nice where can i get the plans
This looks so nice! What do the finished measurements end up being?
I like the Design!
I am currently building one for my college-age son. I do have a question though about the runner size. The cut list calls out a 2 x 4, and the photos show a 2 x 4, however, in the video it appears to be a 2 x 6. Am I seeing things? What is the recommended size?
Thanks
I have built 2 of these so far. One with a dark lacquer and the other with an Oil stain. Ton of screws but all in all an easy build. You gals do really good designs. The only change I made was instead of the decorative X boards I made these actual support and ripped them to fit the space
Thank you Ashley and Whitney for the plans, the video, and especially the inspiration! I followed the plans exactly and it looks fabulous…we all love it 🙂
What are the dimensions?
Great design! Building one for our patio now. I changed up my dimensions and types of wood to work with our space and couch. After finishing I don’t see the point of having the horizontals above and below the “X”. These are colored orange on the plans. Nothing really connects to these members, I think they could have been omitted. And just use the decorative top and bottom alone. Thanks again though for the idea!
I want to confirm the color you used. You mixed 50% natural premium Varathane (none fast drying) with 50% Varathane Briarsmoke (fast drying). Correct??
I just build the coffee table and it turned out like something I would buy at the store…by far the best plan and teachers I have seen yet! Thanks so much for putting this out there! I learned a lot from you ladies.
What are the dimensions of the table?
I have made variations of the table top over. I used kreg screws with the wood separating. I used Kreg screws and glue with the wood splitting at the screw joints. I used biscuits and the wood it self splits. I have had the worst time with this project. I am using Douglas fir from the box store and lumber yards. This is a project that I feel is misleading. I can send you pictures of the cracks and warps of the tops.
I’m a full time RV-er would love to see you gals create furniture on a small scale
for Class A RV’s such as a narrow Bar & Bar stools,End tables or utility table to
place a Microwave or electric oven to bake Pizza. end tables each side of the sofa
My RV has (4) slide outs want to use one of the front slide outs after removing an older couch replacing it with a multi media cabinet has a TV Lift unit, storage for
stereo, satellite receiver back lit with led rope lighting, floating shelves for surround
sound speakers. the opposite slide out installed a comfortable long Thomas Payne couch, what do you think of this custom RV upgrade Ideas ? Have a blessed day…