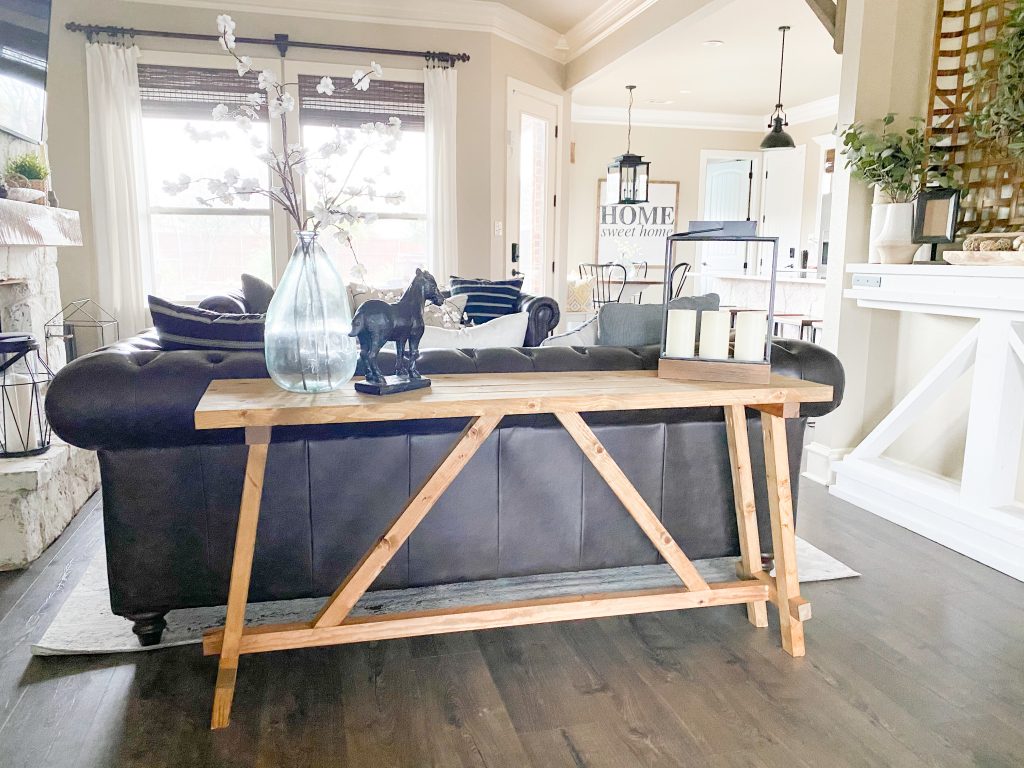
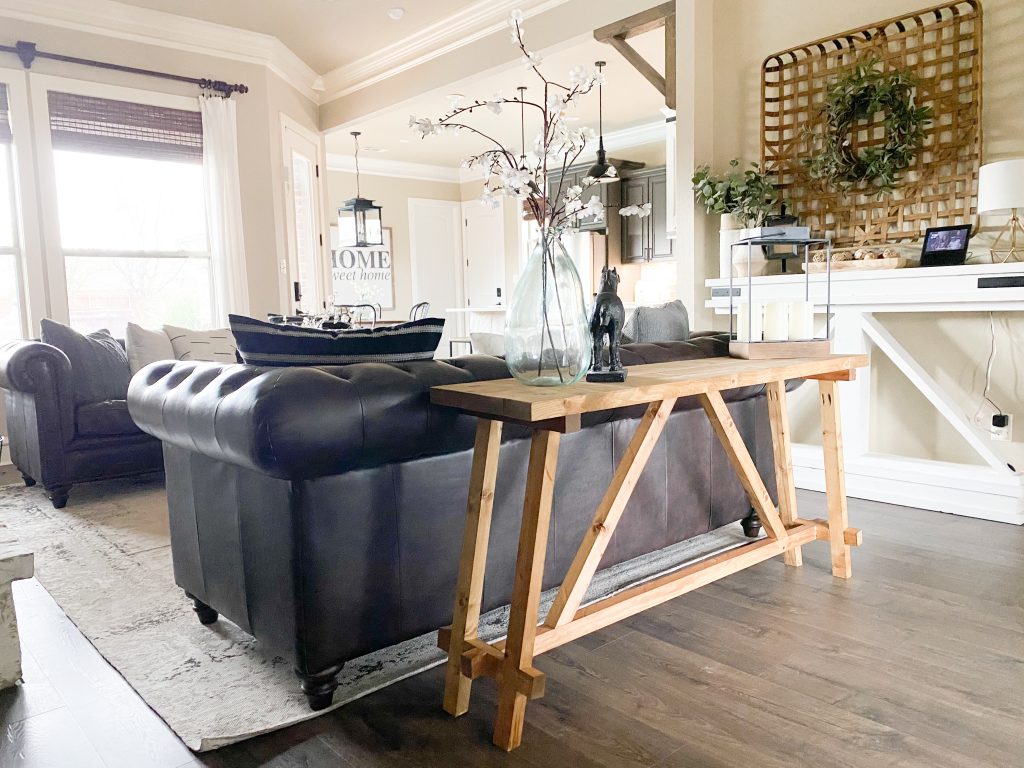
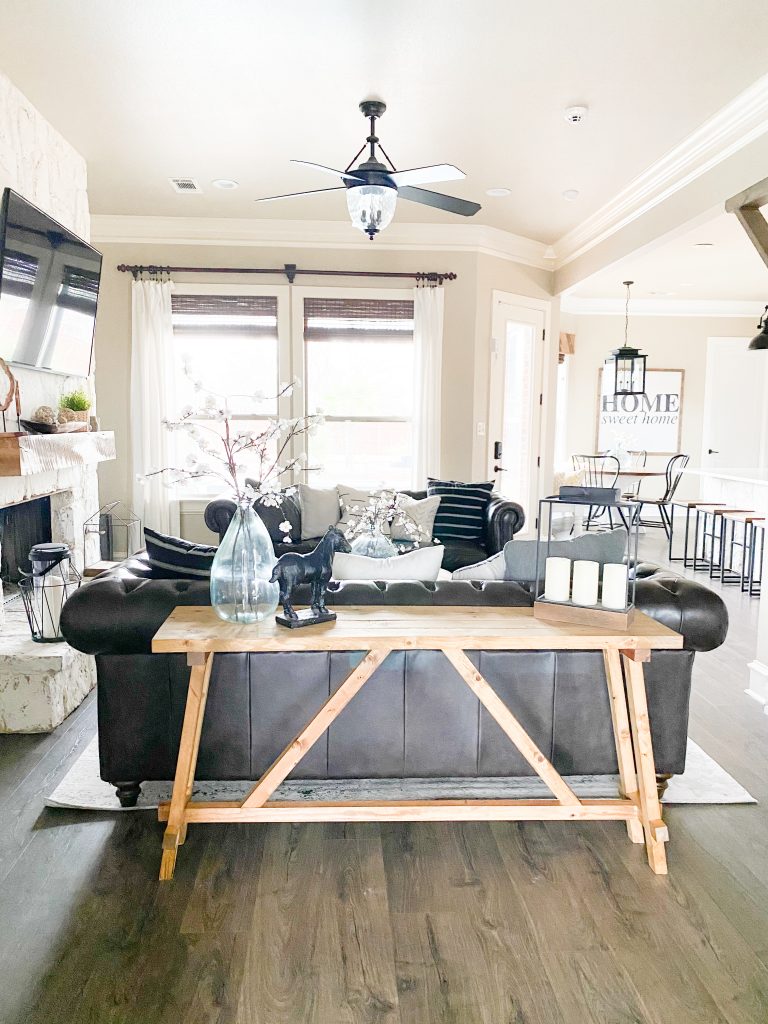
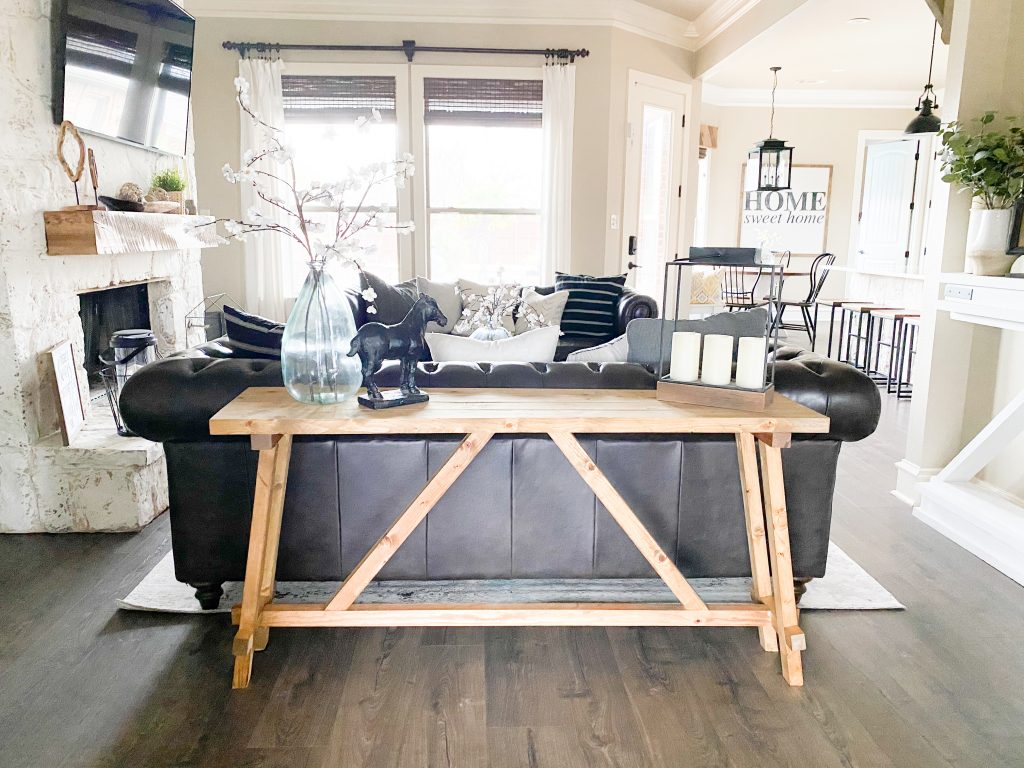
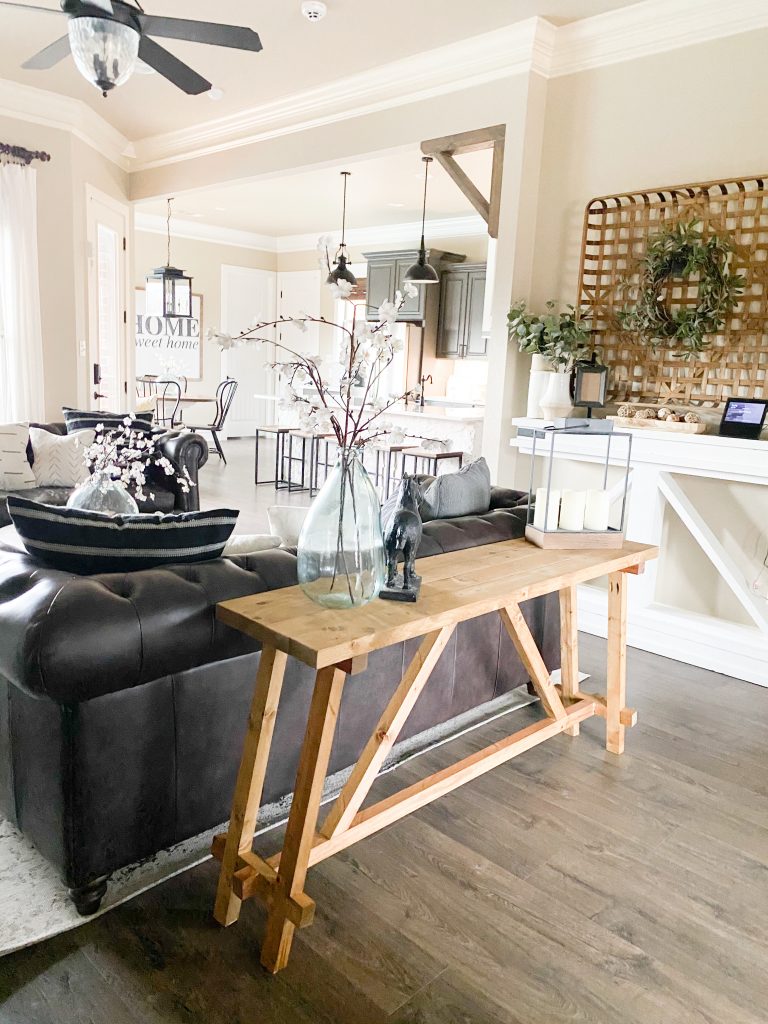
Learn how to build this easy DIY Angled Console Table with free printable plans, how-to instructions and a how-to video by Shanty2Chic!
Grab a cup of coffee and come watch us build it! Just click play in the box below!
So easy and affordable! Now let’s get to building!
Table of Contents
How to Build a DIY Angled Console Table
Supplies
- 6 – 2x4x8
- 2 1/2″ pocket hole screws
- 2 1/2″ wood screws
- 2 1/2″ finish nails
- Wood Glue
Tools
Building the Top
Step 1: Pocket Holes
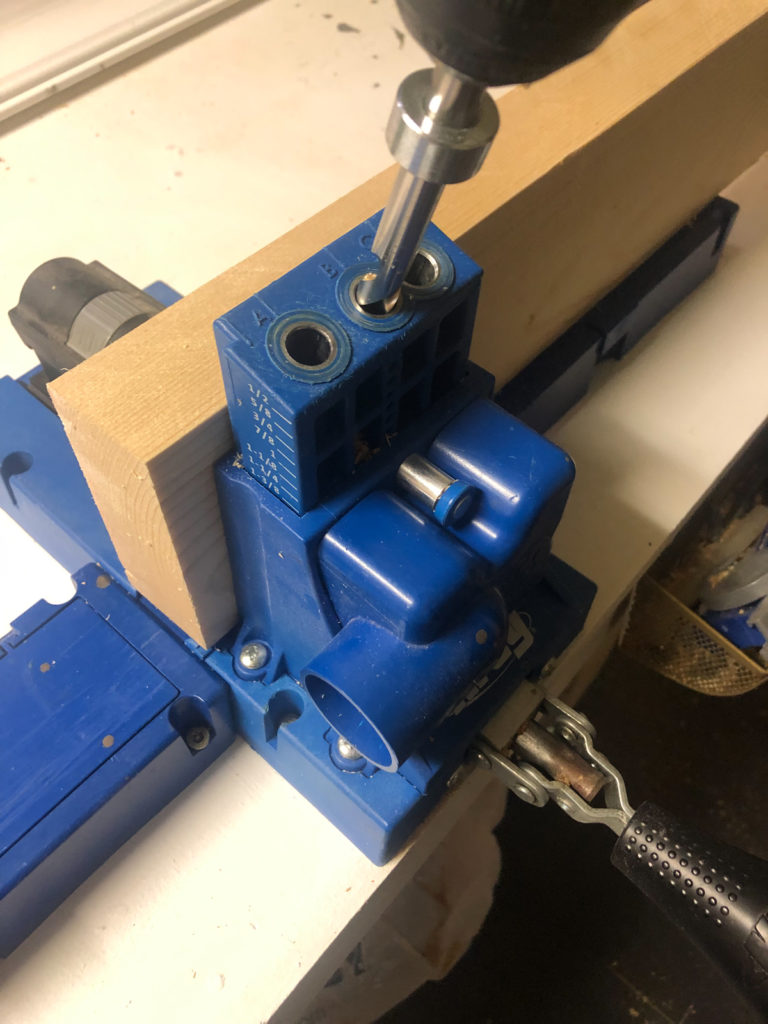
Cut the planks to size and drill 1 1/2″ pocket holes along one edge of 3 of the planks with a Kreg Jig.
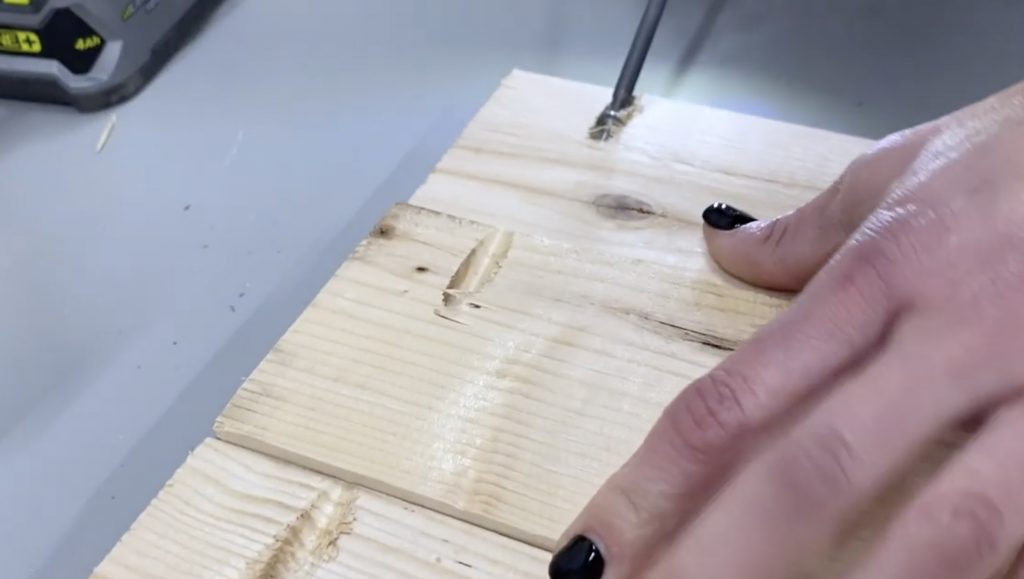
Attach the planks together with 2 1/2″ pocket hole screws and wood glue.
Building the Base
Step 1: Build the Legs
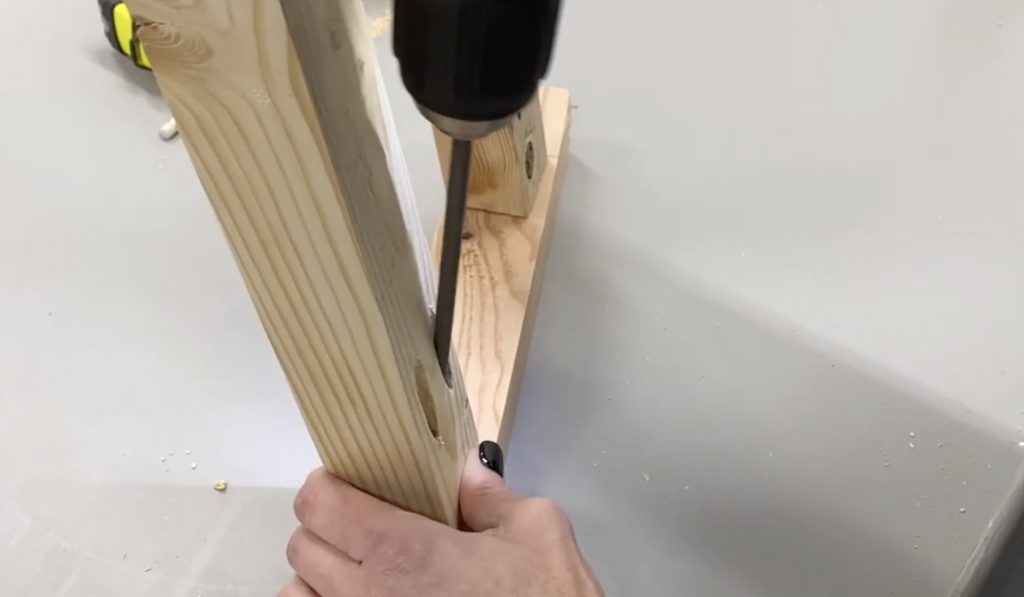
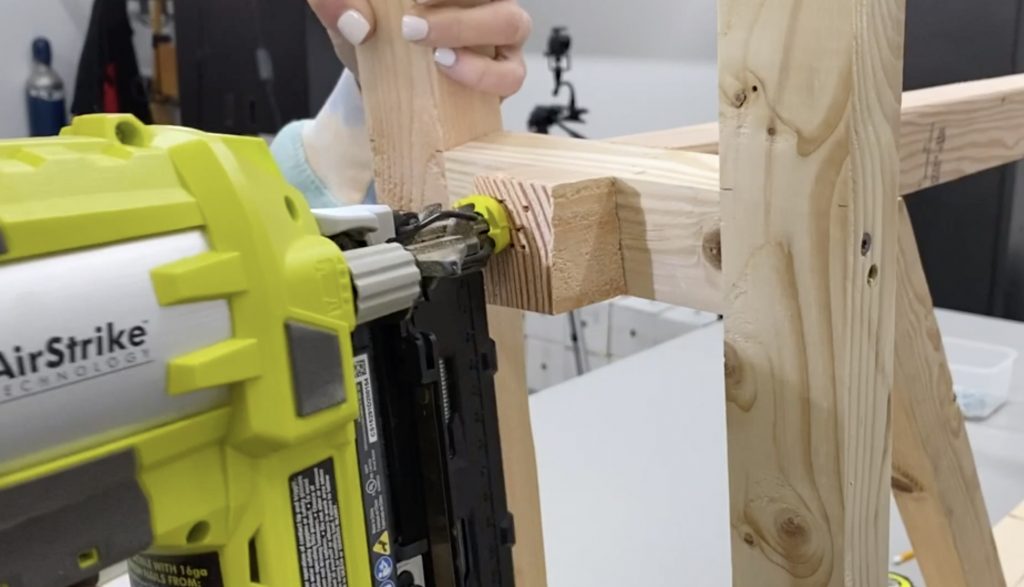
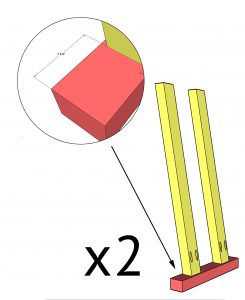
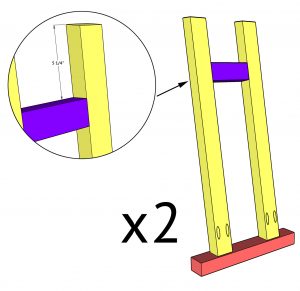
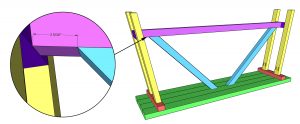
Cut the legs and top supports to size and drill 1 1/2″ pocket holes at the long point ends of each leg. Attach them to the top supports with 1 1/2″ pocket hole screws and wood glue. Build 2 leg assemblies.

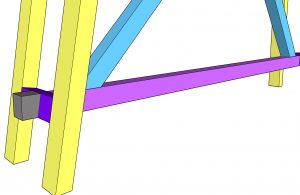
Cut the bottom supports to size and attach them between the legs with 2 1/2″ wood screws and wood glue. Do this for both leg assemblies.
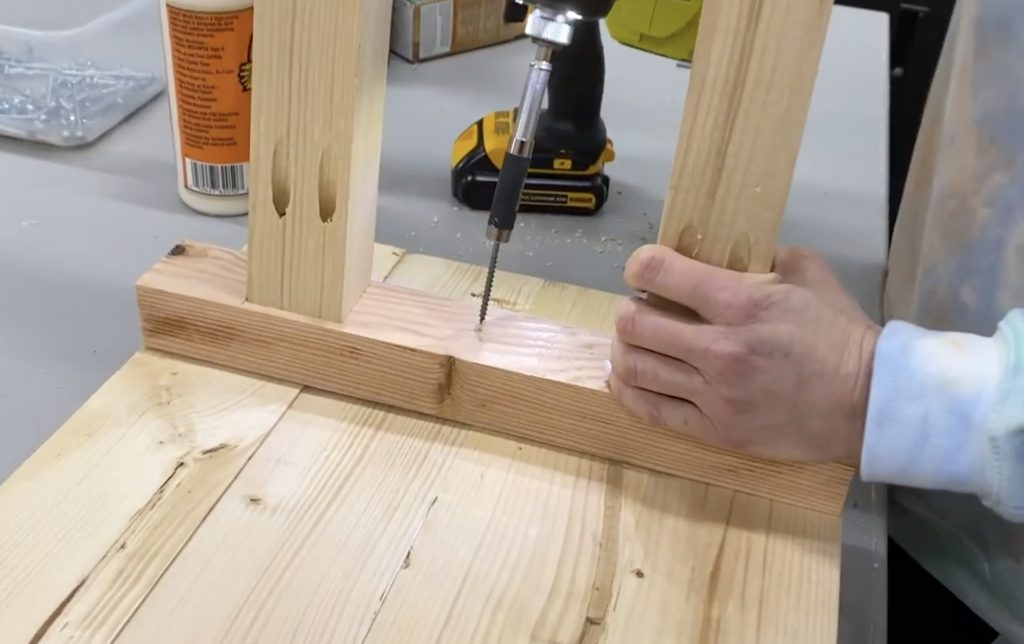
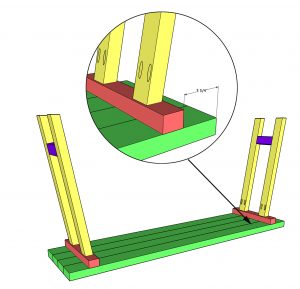
Attach the leg assemblies to the bottom of the planked top with 2 1/2″ wood screws and wood glue.
Step 2: Supports

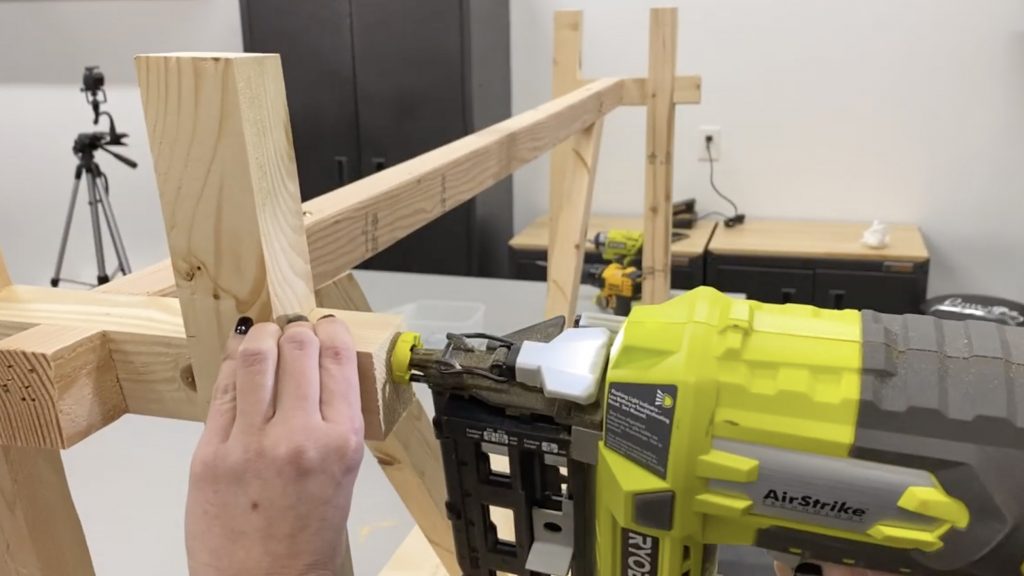
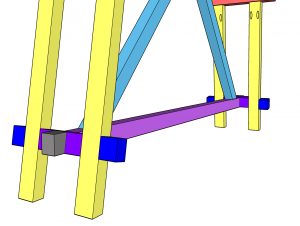
Cut the runner to size, center it on the bottom leg supports and attach it with 2 1/2″ wood screws and wood glue from the outside of the supports and into the runner.

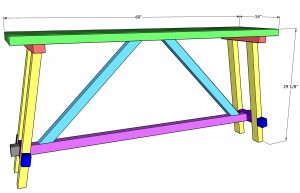
Cut the cross supports to size and attach them to the bottom of the planked top and the top of the runner with 2 1/2″ wood screws and wood glue.
Step 3: Extensions
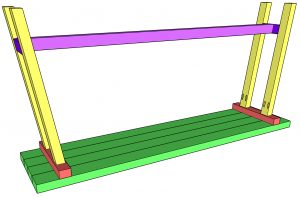
Cut the runner extensions to size, center them and attach them to the bottom leg supports with 2 1/2″ finish nails and wood glue.
Cut the leg extensions to size and attach them to the outside of the legs with 2 1/2″ finish nails and wood glue.
Step 4: The Finish
Now, just fill your nail and pocket holes, sand it down and add a finish!
Make sure to share your builds with us on social media and use #shanty2hic so we can share them too!
DIY Angled Console Table
Tools
- Miter Saw
- Drill
- Kreg Jig
- Nailer
- Table Saw (optional)
Supply List
- 6 2x4x8 Framing Lumber
- 1 1/2" Pocket Hole Screws
- 2 1/2" Wood Screws
- 2 1/2" Finish Nails
- Wood Glue
Instructions
Cut List
- Cut List 1


The Build
- Cut the planks to size and drill 1 1/2" pocket holes along one edge of 3 of the planks. Attach them together with 2 1/2" pocket hole screws and wood glue.

- Cut the legs an top supports to size and drill 1 1/2" pocket holes at the long point ends of each leg. Attach them to the top supports with 1 1/2" pocket hole screws and wood glue. Build 2 leg assemblies.

- Cut the bottom supports to size and attach them between the legs with 2 1/2" wood screws and wood glue. Do this for both leg assemblies.

- Attach the leg assemblies to the bottom of the planked top with 2 1/2" wood screws and wood glue.

- Cut the runner to size, center it on the bottom leg supports and attach it with 2 1/2" wood screws and wood glue from outside of the supports and into the runner.

- Cut the cross supports to size and attach them to the bottom of the planked top and the top of the runner with 2 1/2" wood screws and wood glue.

- Cut the runner extensions to size, center them and attach them to the bottom let supports with 2 1/2" finish nails and wood glue.

- Cut the leg extensions to size and attach them to the outside of the legs with 2 1/2" finish nails and wood glue.

- Now, just fill your nail and pocket holes, sand it down and add a finish!Make sure to share your builds with us on social media and use #shanty2chic so we can share them too!


I am a contractor and I have to say that these instructions are so bad!
That’s amazing. I love your table. Thank you so much
I have a question regarding ripping the 2x6s down to 3 1/2. I assume the ripping is to get clean edges so the 4 boards can be screwed together giving as level a surface as possible. What about the unripped side of the board what has the smooth curves as if comes from the store. I can’t rip it any further or I won’t get the 2″ piece i need for the build correct. Not sure this is making any sense. LOL
I am in the same boat, it makes no sense to me!
The dimensions are good in this aspect but I want the bigger size one. I think it should work if I double the size of the
MyBoy APK, did you end up making this in a bigger size? I am also keen to make a longer one and wondering if it would have enough support or if you added anything else? We want to double it for a 3m length.
Beautiful console. My husband and I built it today. I think the measurement on step 2 is incorrect. Distance between top support beam and leg is less than 2 3/8. at least it didn’t add up for us 🙂
Super great instructions tho! Thank you