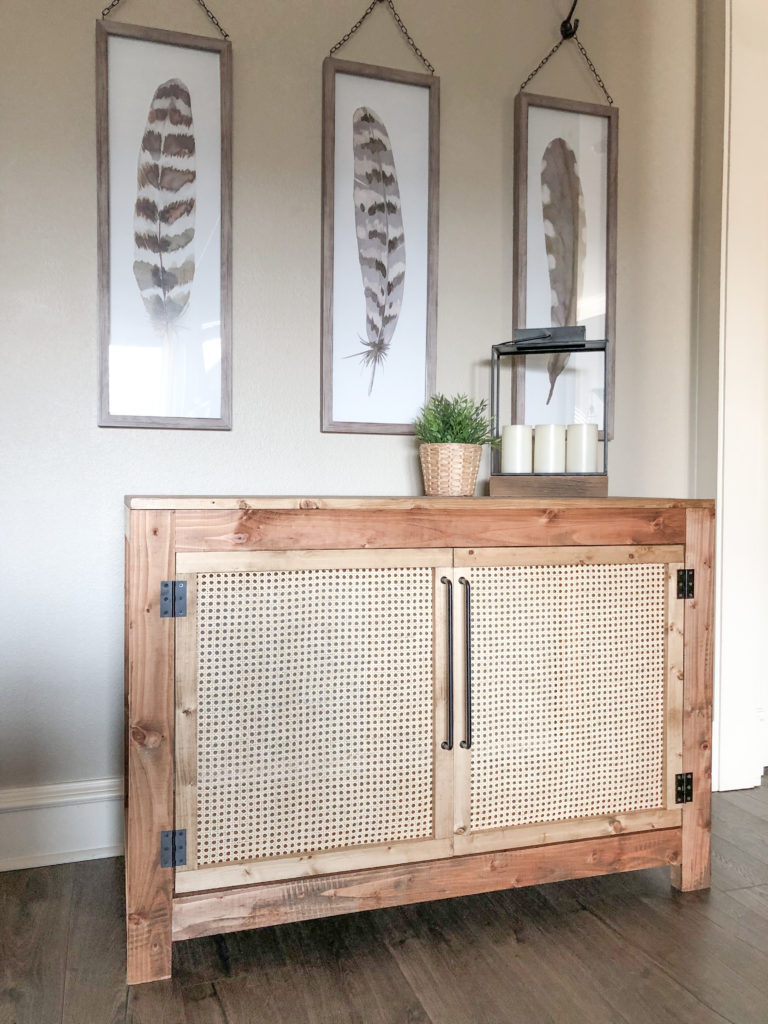
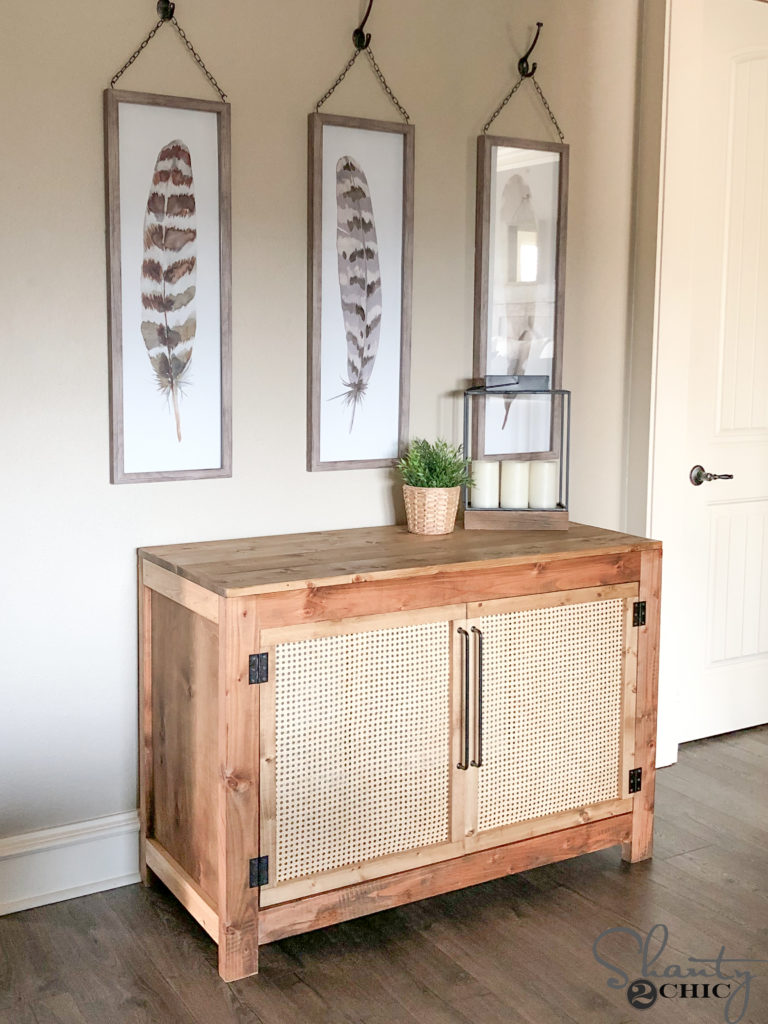
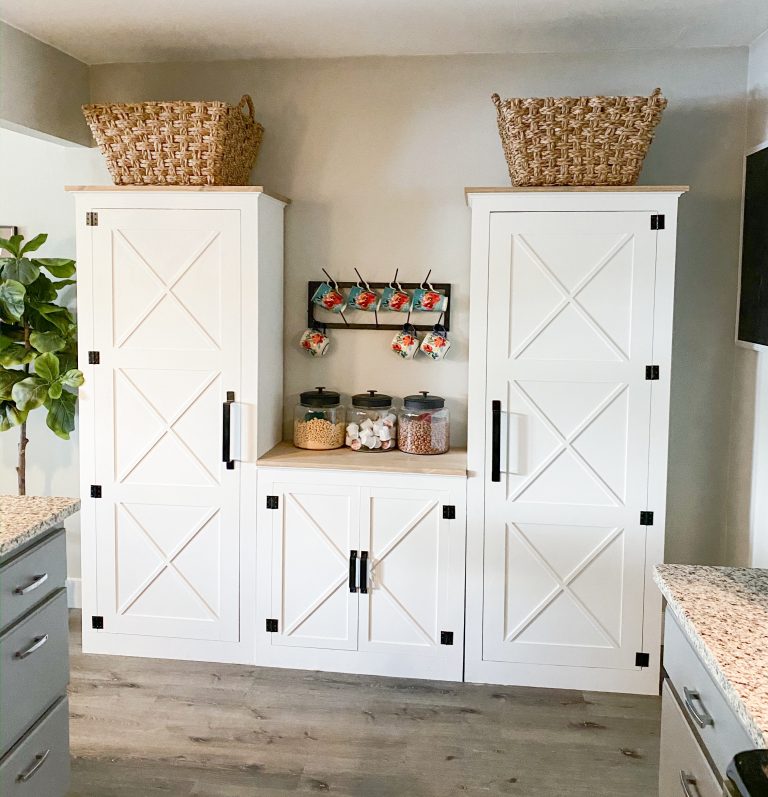
Learn how to build this DIY Cane Cabinet with free plans and how-to instructions by Shanty2Chic! This is the perfect storage console for any space and the cane webbing on the doors gives it a modern rustic look! We teamed up with Buildsomething.com to share these plans today! Buildsomthing.com is an online community where you can share your plans with other creators, find plans that inspire you and vote on your favorites! We shared this plan on Buildsomething.com. You can find it HERE and check out the 1000’s of other plans that have been shared!
I am LOVING all of the cane furniture pieces that I’m seeing lately! Whitney and I recently tried our hands at our first cane piece, a DIY Cane Bed! You can see that HERE if you missed it! I loved that so much that I decided to design and build a DIY Cane Console! This is a super simple build that only requires basic tools! So, come build it with us!
You can find the FREE Printable Plans at the end of this post!
CLICK HERE TO JUMP TO THE FREE PRINTABLE PLANSTable of Contents
Supplies
- 1 – 1x2x6
- 2 – 1x2x8
- 1 – 1x3x8
- 1 – 1x4x8
- 4 – 1x6x6
- 4 – 2x4x8
- 1 – 3/4″x48″x96″ Hardwood Plywood
- 1 – 1/4″x48″x48″ Hardwood Plywood
- 1 1/4″ brad nails
- 3/8″ Staples
- 1 1/4″ Pocket Hole Screws
- 2 1/2″ Pocket Hole Screws
- 24″x48″ Cane Webbing
- Wood Glue
- 4 – 3″ Hinges
- 2 – Pulls
Tools
Prep to Build the DIY Cane Console
Step 1 – Rip the Round Edges off of the 2×4’s
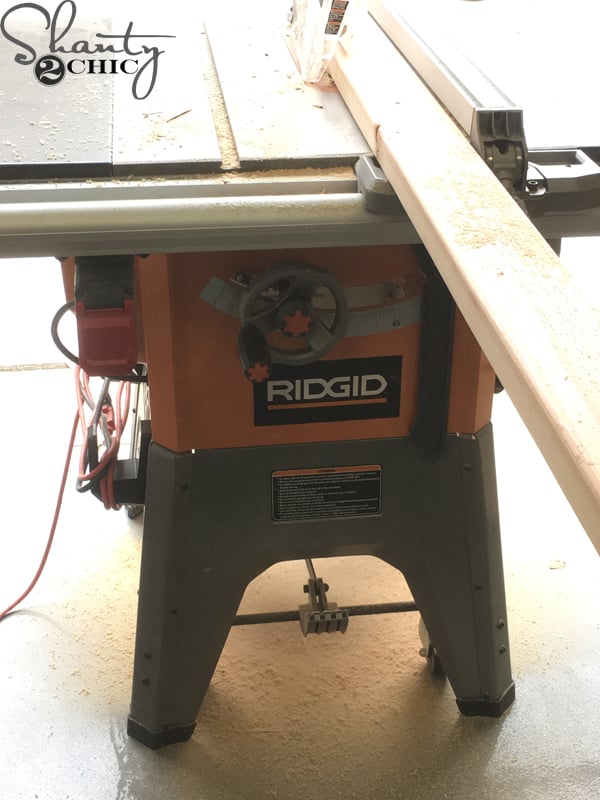
The first step is to rip the round edges off of the 2×4 boards, to make them 3″ wide. This is not a necessary step but if you choose not to rip your boards, make sure to adjust the measurements. You can watch our how-to video on this process HERE!
Step 2 – Cut the Plywood
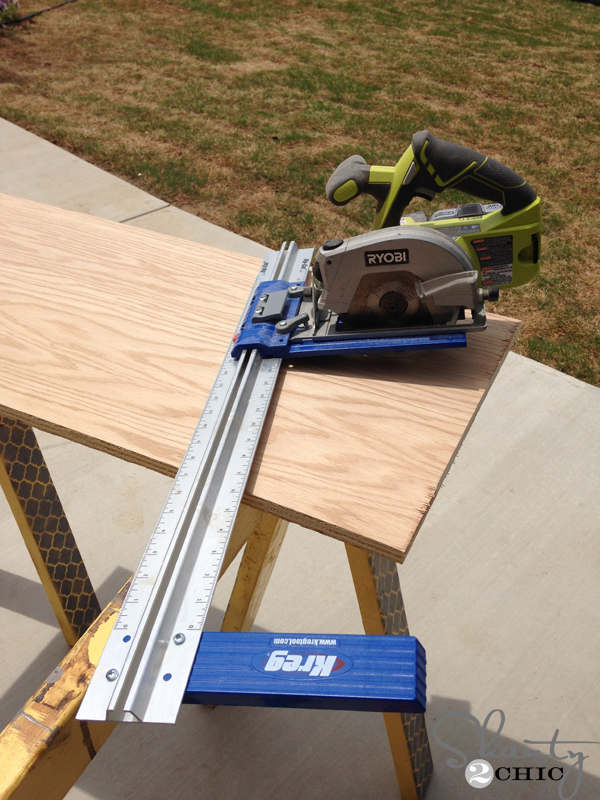
We used our Kreg Rip Cut to rip all of the plywood to size. You can also have the hardware store rip the plywood for you.
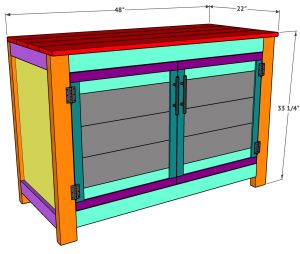
How to Build the DIY Cane Cabinet
Side Panels
Step 1 – Drill Pocket Holes
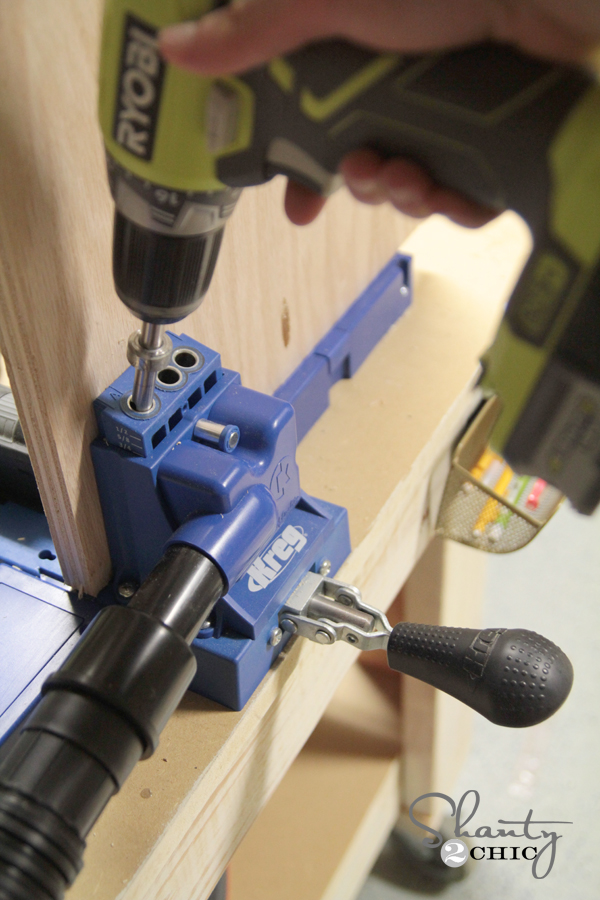
We cut the plywood and legs to create the side panels and used our Kreg Jig to drill 3/4″ pocket holes into each side of the plywood.
Step 2- Attach the Legs
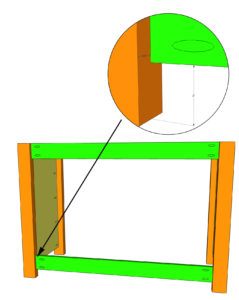
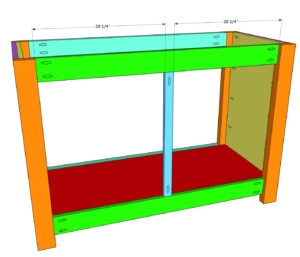
Then, we attached a leg to each side with 1 1/4″ pocket hole screws and wood glue. The top of the legs should be flush with the top of the plywood and there should be a 3/4″ gap on the front of the panels and a 1 1/2″ gap on the back. Build two assemblies. Tip: put a scrap 1x board under each panel to give the 3/4″ gap needed on the front.
Step 3 – Attach the Trim
Next, we measured and cut the top and bottom, side panel trim to size. We flipped the side panels right-side-up and attached the trim pieces to the front of the side panels with our cordless brad nailer with 1 1/4″ brad nails and wood glue.
Aprons
Step 1 – Drill Pocket Holes
With both side panels built, we moved on to attaching them.
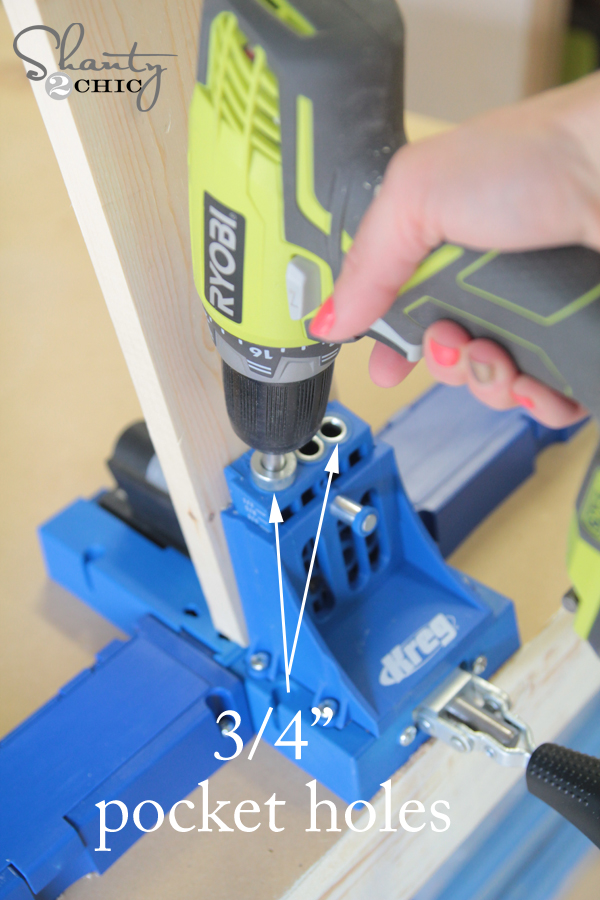
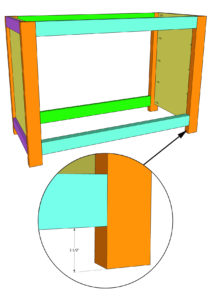
We cut the front and back aprons to size and drilled 3/4″ pocket holes on the back aprons.
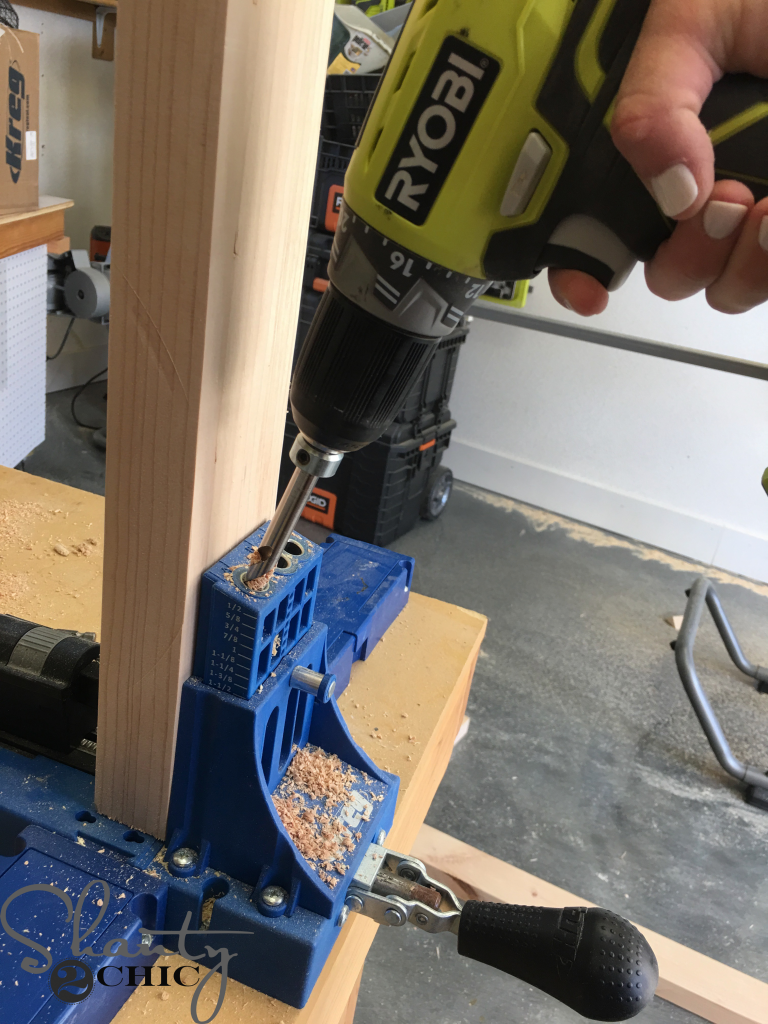
Then, we drilled 1 1/2″ pocket holes into the front aprons.
Step 2 – Attach Aprons
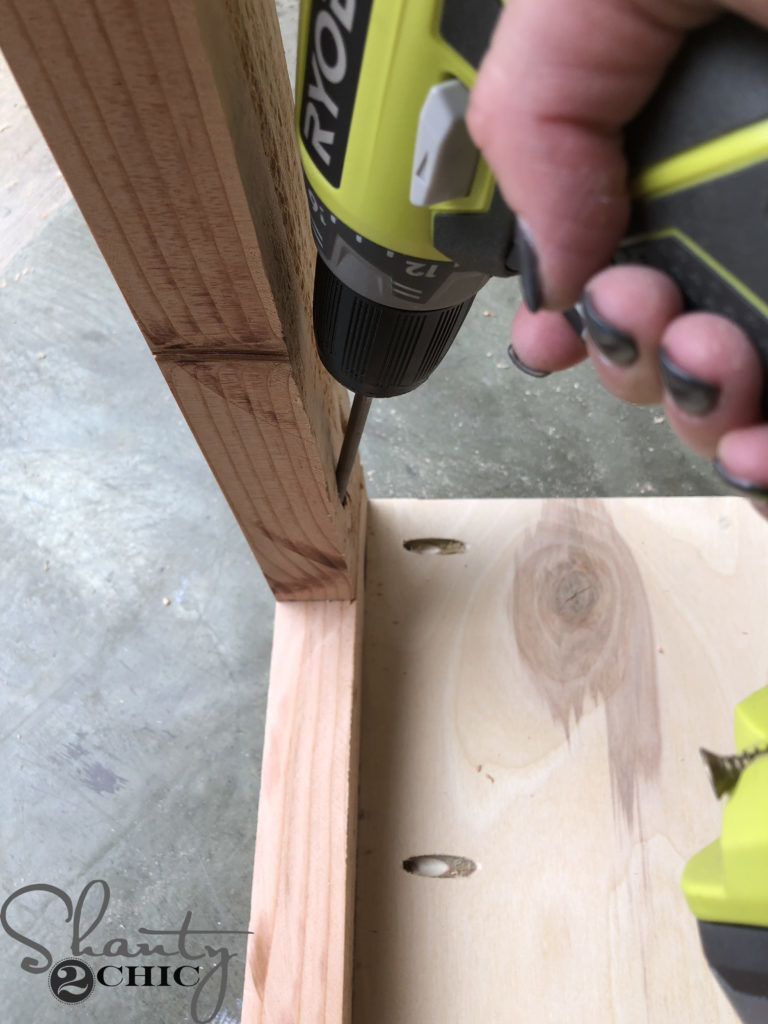
We attached the aprons to the legs with 3/4″ and 1 1/2″ pocket hole screws and wood glue. Refer to the plans for the proper placement of the aprons on the legs.
Bottom
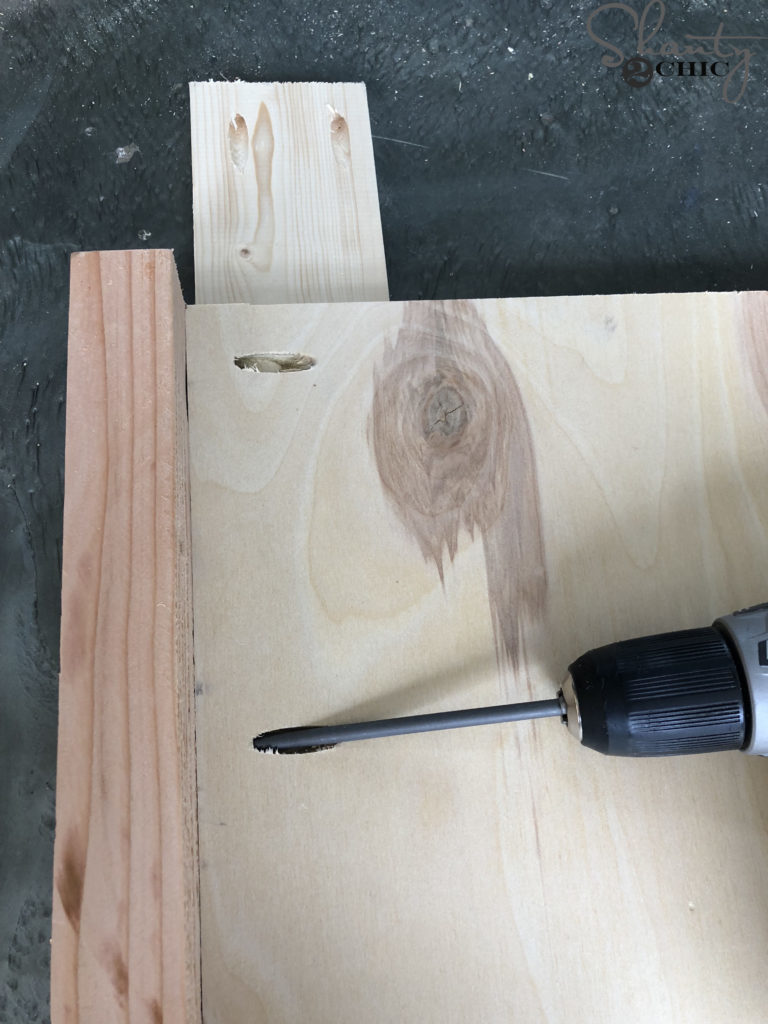
Step 1 – Attach the Supports
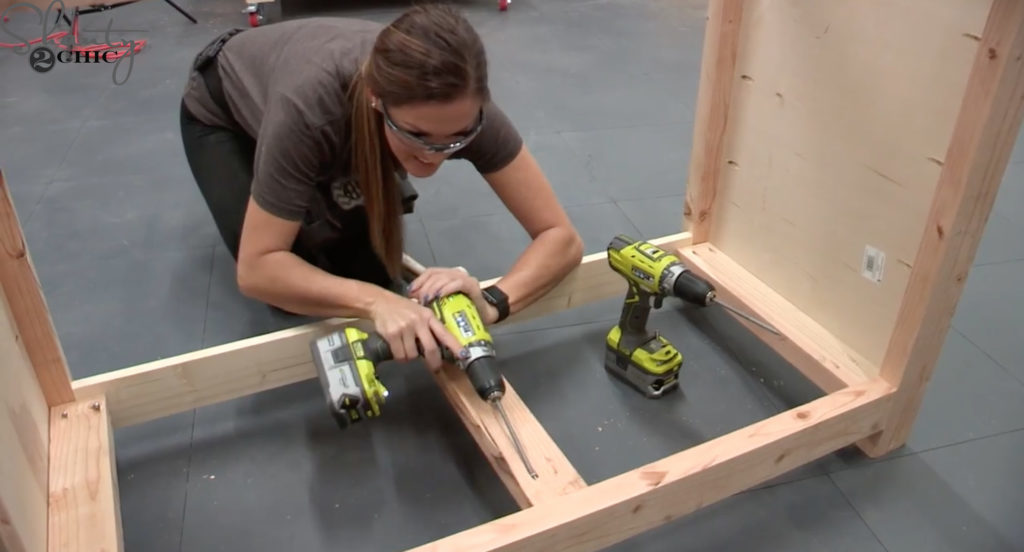
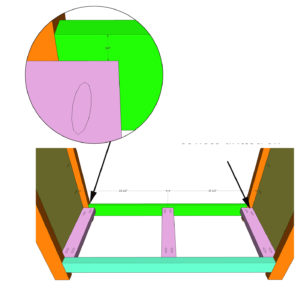
We cut the bottom support pieces to size and drilled 1 1/2″ pocket holes into the ends that attach to the front apron. Then, we drilled 3/4″ pocket holes on the other ends. We attached the supports to the aprons with 1 1/4″ and 2 1/2″ pocket hole screws and wood glue.
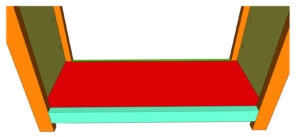
Step 2 – Attach the Bottom
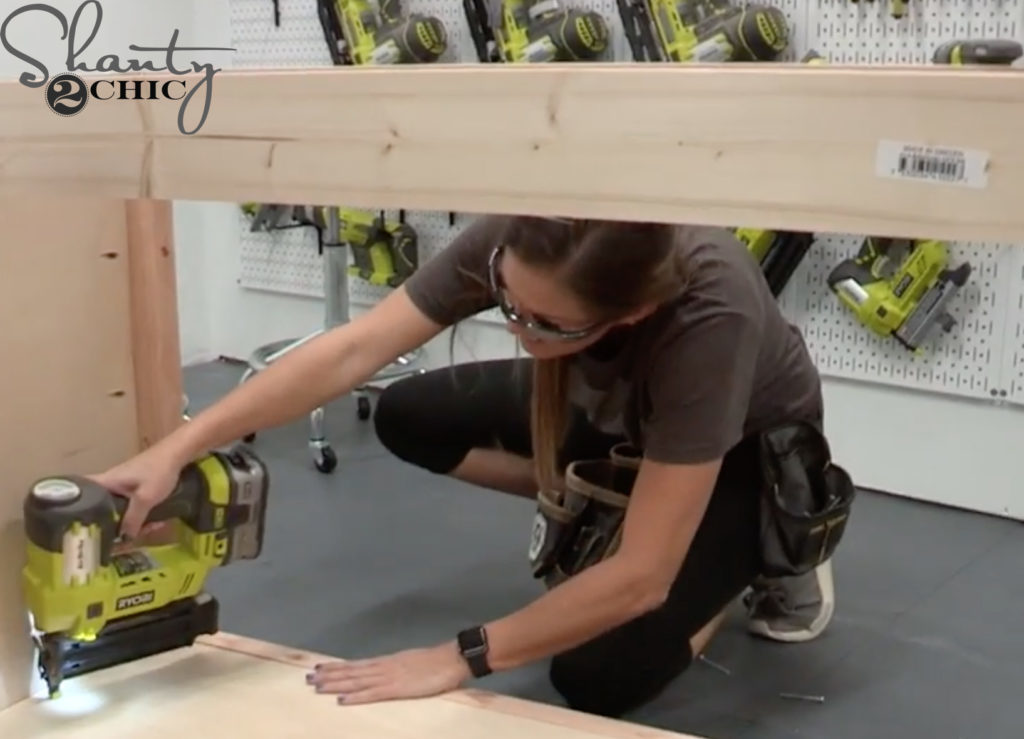
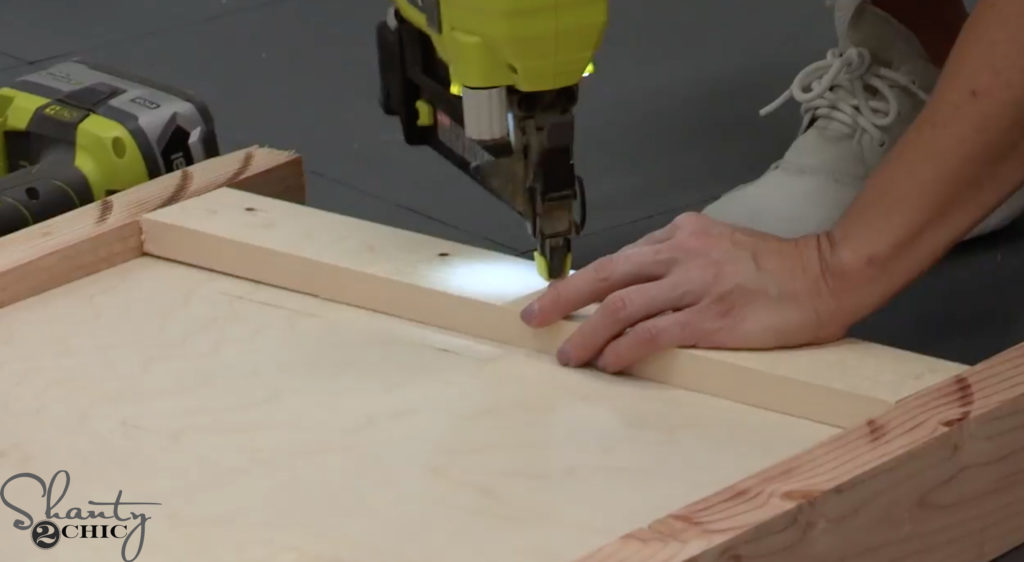
Next, we cut the plywood for the bottom of the vanity, applied wood glue to the top of the bottom support pieces and laid the plywood on top of the supports. We used our 18 gauge brad nailer with 1 1/4″ brad nails to attach the plywood to the supports.
Middle Supports
We cut the middle support pieces to size and drilled 3/4″ pocket holes into both ends. We centered them on the aprons and attached them to the aprons with 1 1/4″ pocket hole screws and wood glue. Refer to the plans for the exact placement of the middle support pieces.
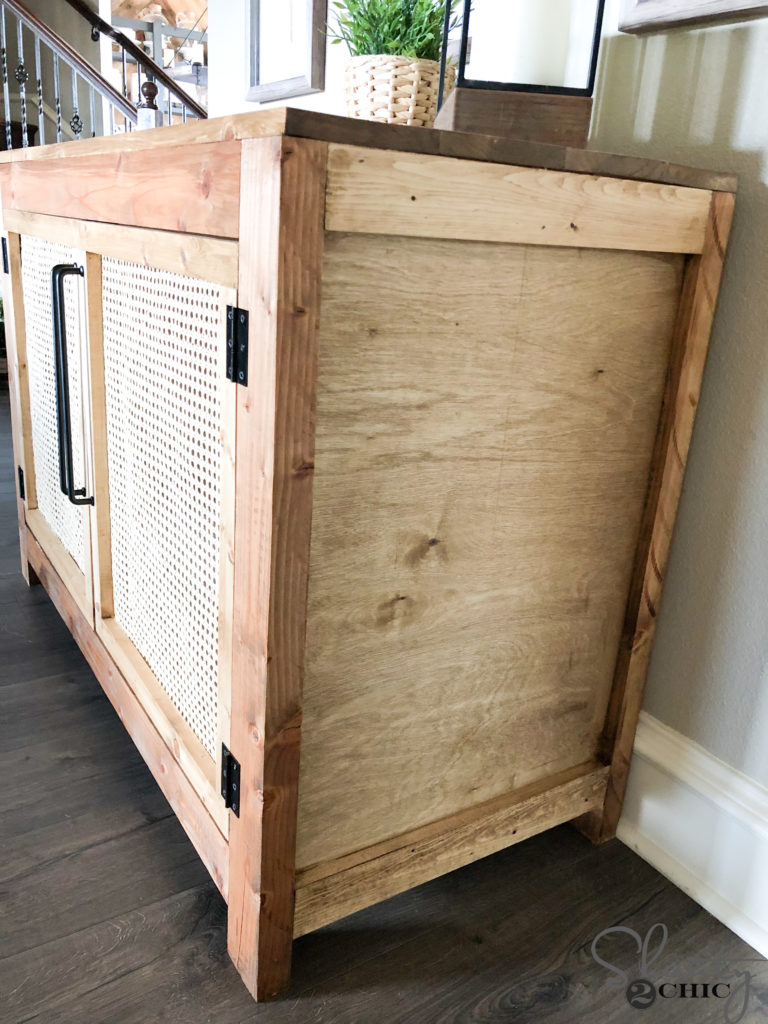
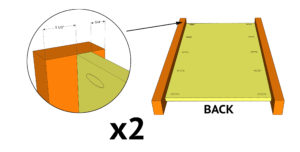
Back
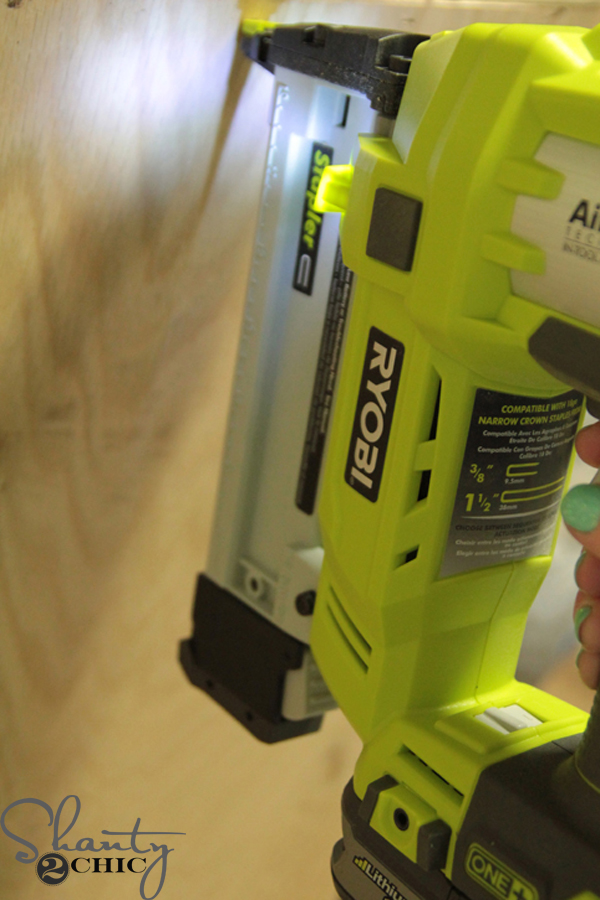
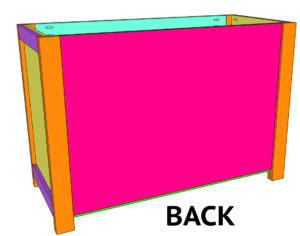
We cut the 1/4″ plywood back to size and used our cordless stapler to attach it to the back of the back aprons with 3/8″ staples. If you don’t have a stapler, you can use a nailer.
Doors
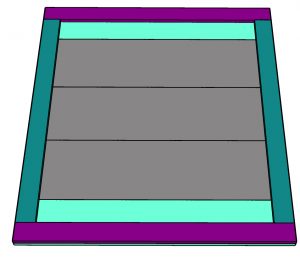
Step 1 – Build the Frame
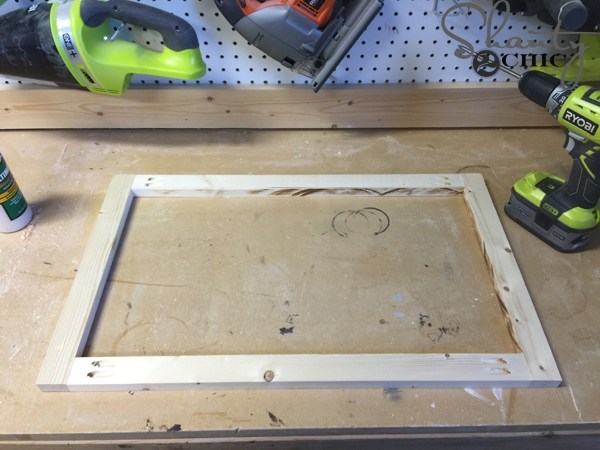
We cut the frame pieces to size and drilled 3/4″ pocket holes into both ends of the side pieces. Then, we attached the side pieces to the top and bottom pieces with 1 1/4″ pocket hole screws and wood glue.
Step 2 – Attach the Cane Webbing
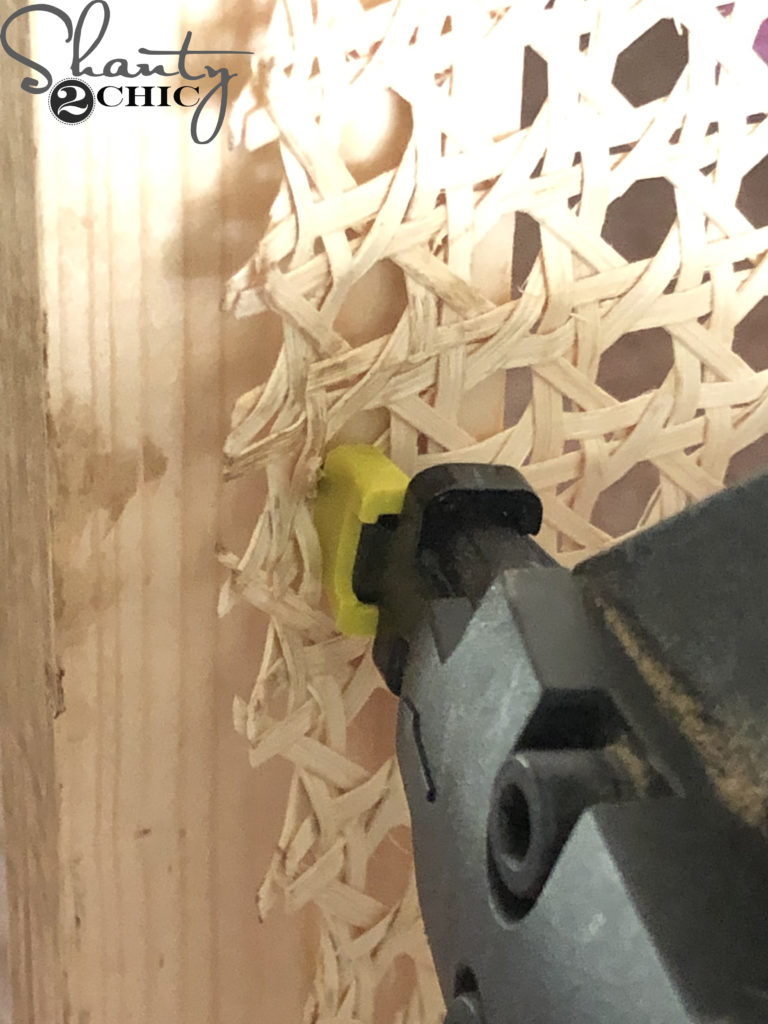
To finish the doors, we cut the cane webbing to size and attached it to the back of the door frames with 3/8″ staples.
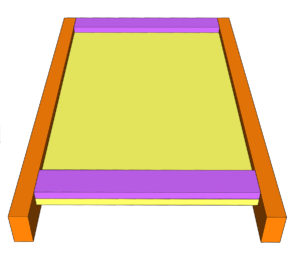
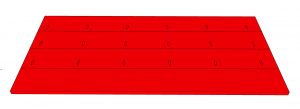
Planked Top
Step 1 – Attach the Planks
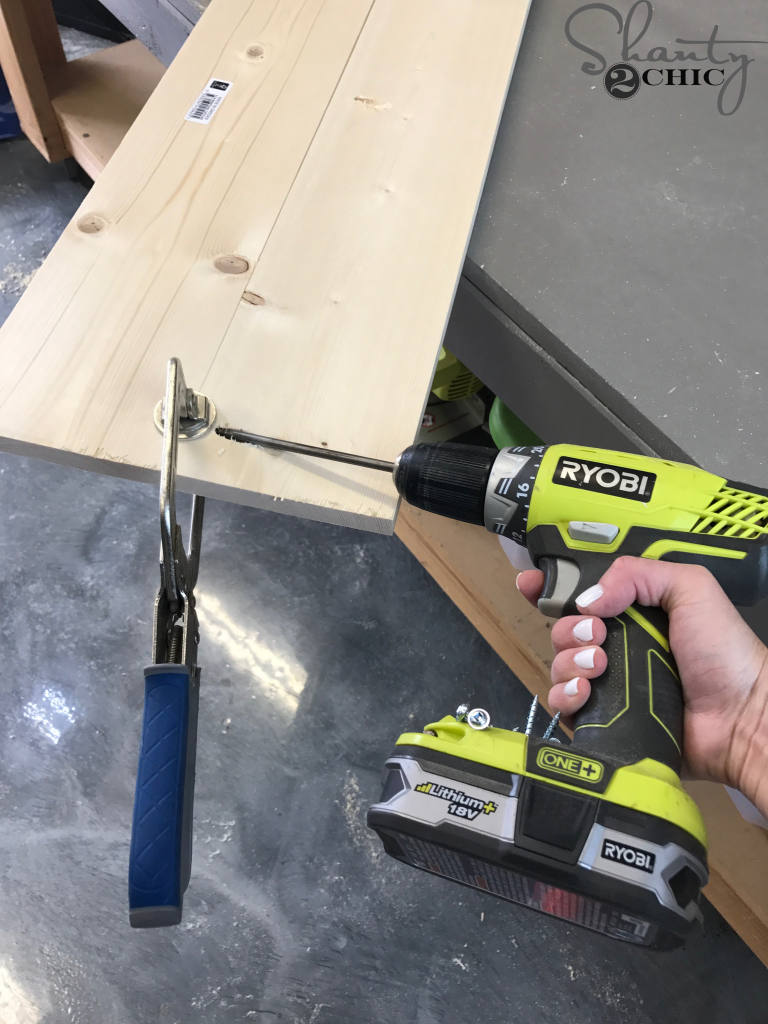
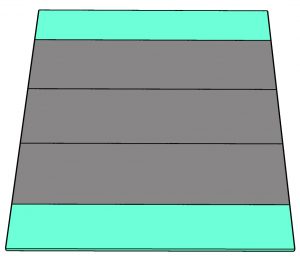
To assemble the planked top, we cut the 1×6 boards to size and drilled 3/4″ pocket hole screws along one edge of three of the planks. Attach them together with 1 1/4″ pocket hole screws. We like to use our Kreg Face Clamps at each pocket hole joint to get a smooth finish between the planks.
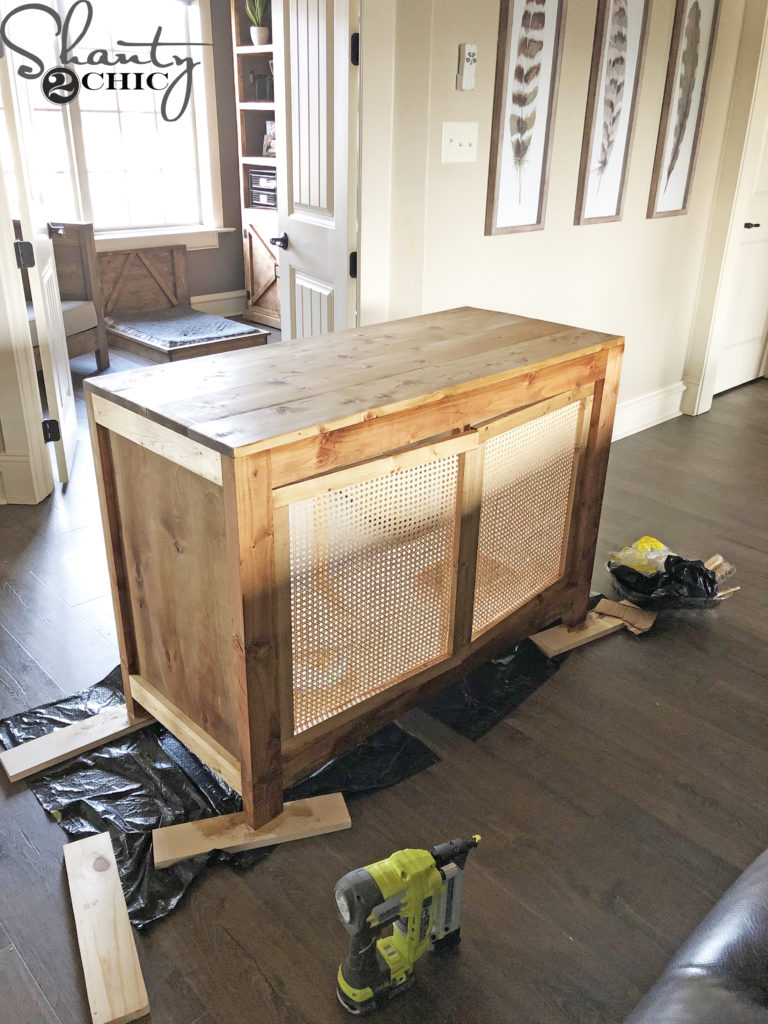
Step 2 – Attach the Top
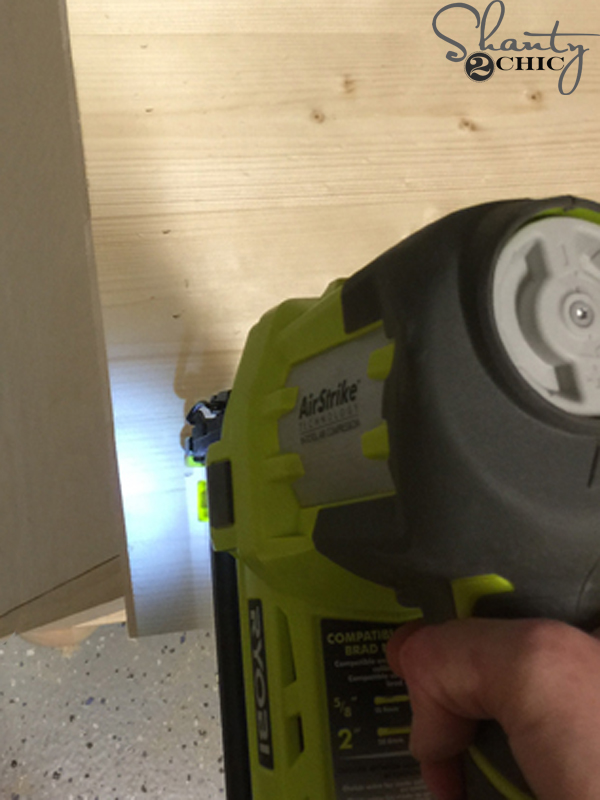
We attached the planked top to the cabinet with 1 1/4″ brad nails and wood glue.
Add a Finish
Once the cabinet was assembled, we added one coat of stain. When the stain dried, we applied a top coat to protect the finish.
Hardware
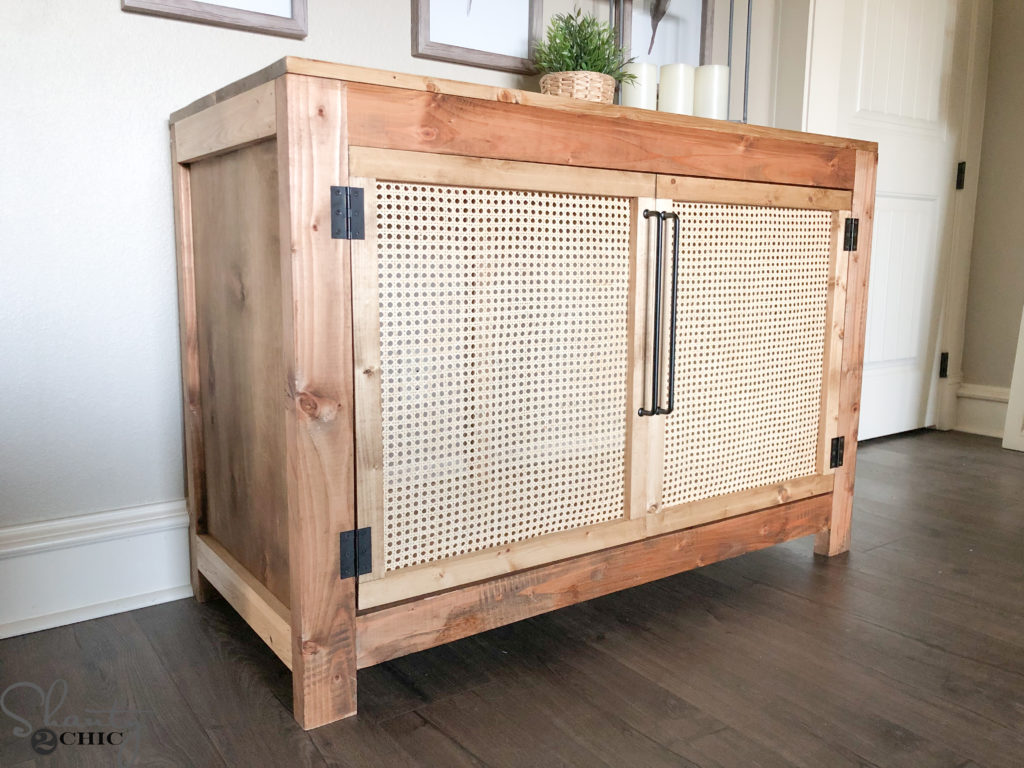
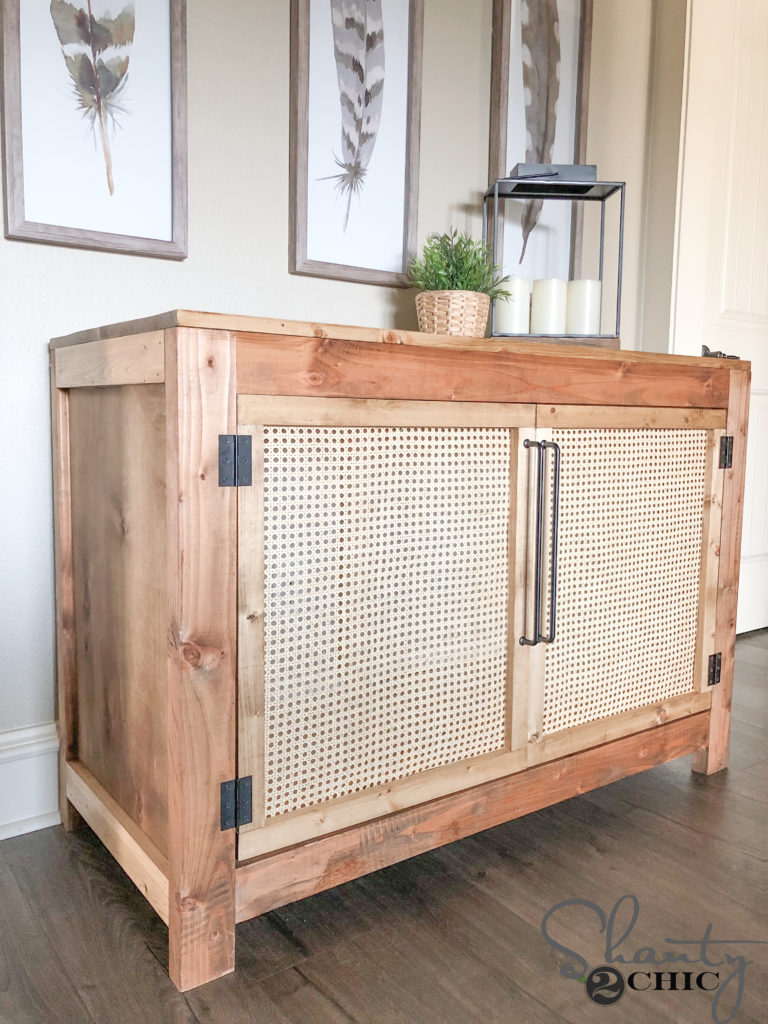
Once the stain dried, we attached the door with hinges and attached the barn door pulls to the doors.
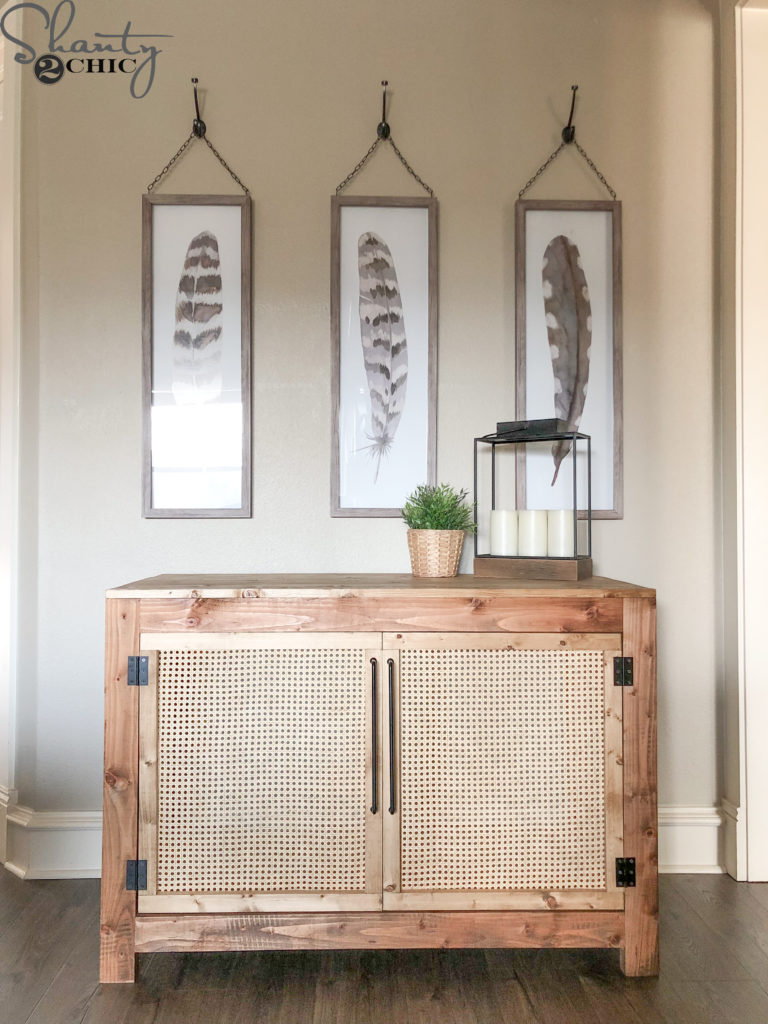
I just LOVE how this DIY Cane Console turned out. It’s the perfect combo of rustic and modern!
Make sure to share your builds with us on social media and use #shanty2chic so we can share them too!
Happy Building!
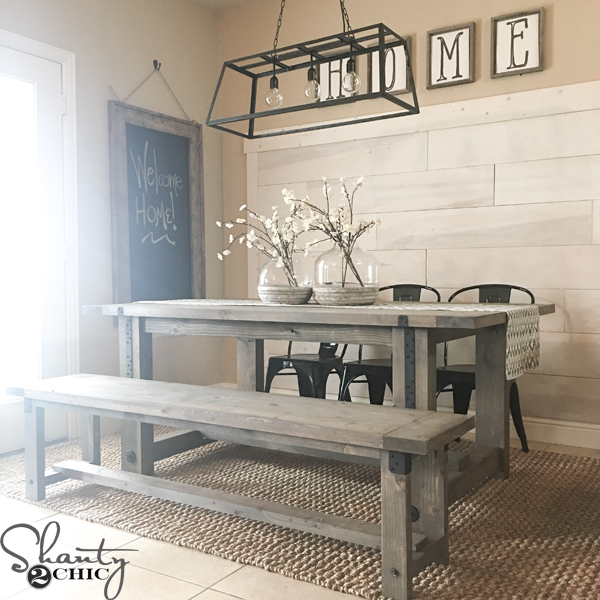
You can get the info to everything else in this space below!
- Feather Prints are from Target but they don’t sell them anymore. We do have a free printable for similar ones HERE.
- Learn more about my water-resistant laminate flooring
- Find out what paint colors I have in this space
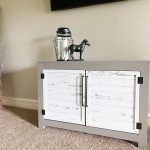
DIY TV Console
Tools
- Miter Saw
- Kreg Jig
- Drill
- Nailer
- Table Saw (optional)
- Stapler (optional)
- Kreg Rip Cut (optional)1
Supply List
- 1 1x2x6 Whitewood or Common Boards
- 2 1x2x8 Whitewood or Common Boards
- 1 1x3x8 Whitewood or Common Boards
- 1 1x4x8 Whitewood or Common Boards
- 4 1x6x6
- 4 2x4x8 Framing Lumber
- 1 3/4"x48"x96" Hardwood Plywood Birch
- 1 1/4"x48"x48" Hardwood Plywood Birch
- 1 1/4" Brad Nails
- 3/8" Staples
- 3/4" Pin Nails
- Barn Wood Linked at the top of this post!
- 1 1/4" Pocket Hole Screws
- 2 1/2" Pocket Hole Screws
- Wood Glue
- 4 3" Hinges
- 2 Pulls
Instructions
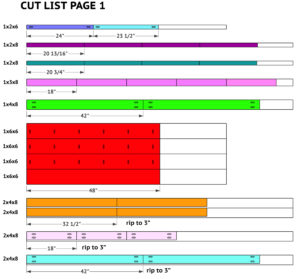
- Cut List Page 1

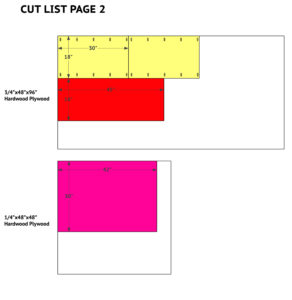
- Cut List Page 2

- Cut the plywood and legs to create the side panels. Drill 3/4" pocket holes into each side of the plywood. Attach a leg to each side with 1 1/4" pocket hole screws and wood glue. The top of the legs shoudl be flush with the top of the plywood and there should be a 3/4" gap on the front of the panels and a 1 1/2" gap o nthe back. Build two of these assemblies.

- Measure and cut the top and bottom, side panel trim to size. Flip the side panels right-side-up and attach the trim pieces to the front of the side panels with 1 1/4" brad nails and wood glue.

- Cut the back aprons to size and drill 3/4" pocket holes into both ends. Attach them to the back legs with 1 1/4" pocket hole screws and wood glue, flush with the inside of the legs. The bottom apron should be 2" from the bottom of the legs and the top apron should be flush with the top of the legs.

- Cut the front aprons to size and drill 1 1/2" pocket holes into each end. Attach the aprons to the front legs with 2 1/2" pocket hole screws and wood glue. The top apron should be flush with the top of the legs and the bottom apron should be attached 2 1/2" from the bottom of the legs.

- Cut the bottom support pieces to size and drill 1 1/2" pocket holes into the ends that will attach to the front apron. Drill 3/4" pocket holes on the other ends. Attach the supports with 1 1/4" and 2 1/2" pocket hole screws and wood glue.

- Cut the plywood for the bottom of the cabinet. Apply wood glue to the top of the bottom support pieces, lay the plywood on top of the supports and attach it to the supports with 1 1/4" brad nails.

- Cut the back supprot piece to size and drill 3/4" pocket holes into both ends. Center it on the back aprons and attach it to the back aprons with 1 1/4" pocket hole screws and wood glue.

- Cut the front divider to size and drill 3/4" pocket holes into each end. Center it on the front aprons and attach it to the front aprons with 1 1/4" pocket hole screws and wood ge. luThe back of the divider should be flush with the back of the aprons and set back 3/4" from the front.

- Cut the 1/4" plwyood to size and attach it to the back of the cabinet with 3/4" staples and wood glue.

- Measure and cut the door plank pieces to size and line them up side-by-side on a flat surface.

- Cut the door trim pieces to size and attach them to the front of the door planks with 3/4" pin nails and wood glue.
- Cut the top planks to size and drill 3/4" pocket holes along one edge of three of the planks. Attach them together with 1 1/4" pocket hole screws.

- Attach the planked top to the cabinet with 1 1/4" brad nails and wood glue. Attach the doors with hinges and add a finish! Make sure to share your builds with us on social media and use #shanty2chic so we can share them too! Happy Building!


Made this, changed a few measurements but kept the design pretty much idential.
We bought a separate kitchen countertop piece to put on top, rather than making our own one. We also painted the surfaces, and put a shelf in the middle to split the interior space into two halves.
Overall, very happy with it and the build guide was extremely useful and clear.
I can’t seem to find the cut list. When I click the link, no cut list appears. Please help. Can’t wait to make this.
Where’d you get the feather pictures?
Nice stuff. Very cool finish.
But instead of board, can one use solid wood?