Learn how to German Schmear your fireplace with this easy-to-follow how-to video by Shanty2Chic. This can be done on any brick or stone in your home!
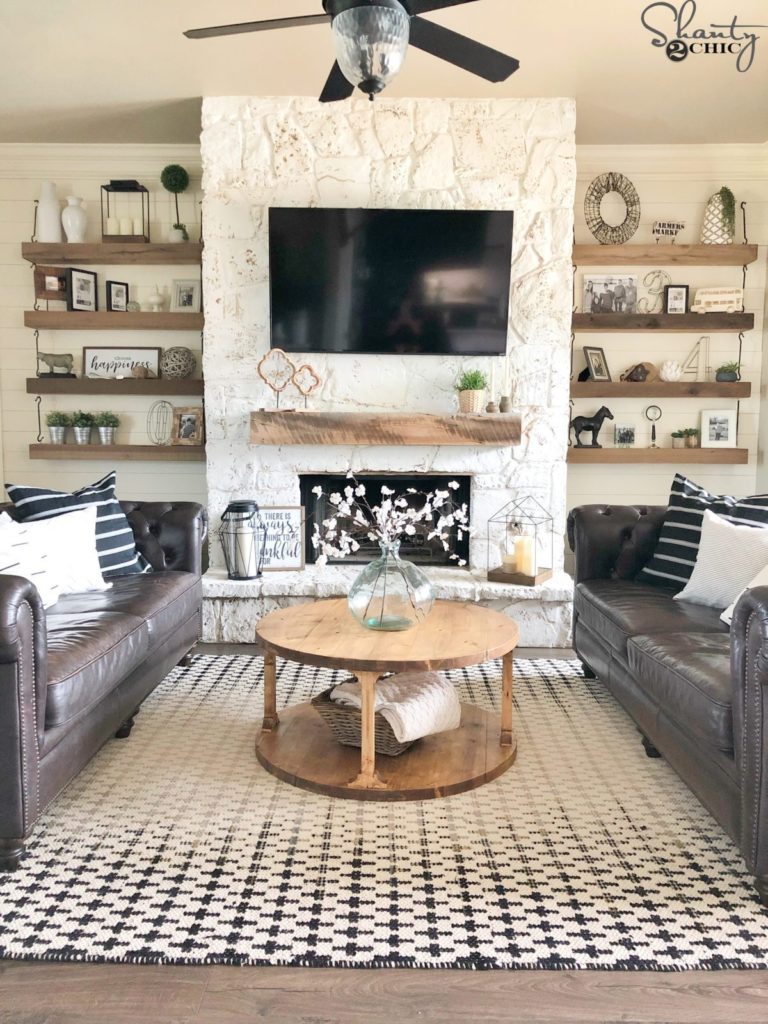
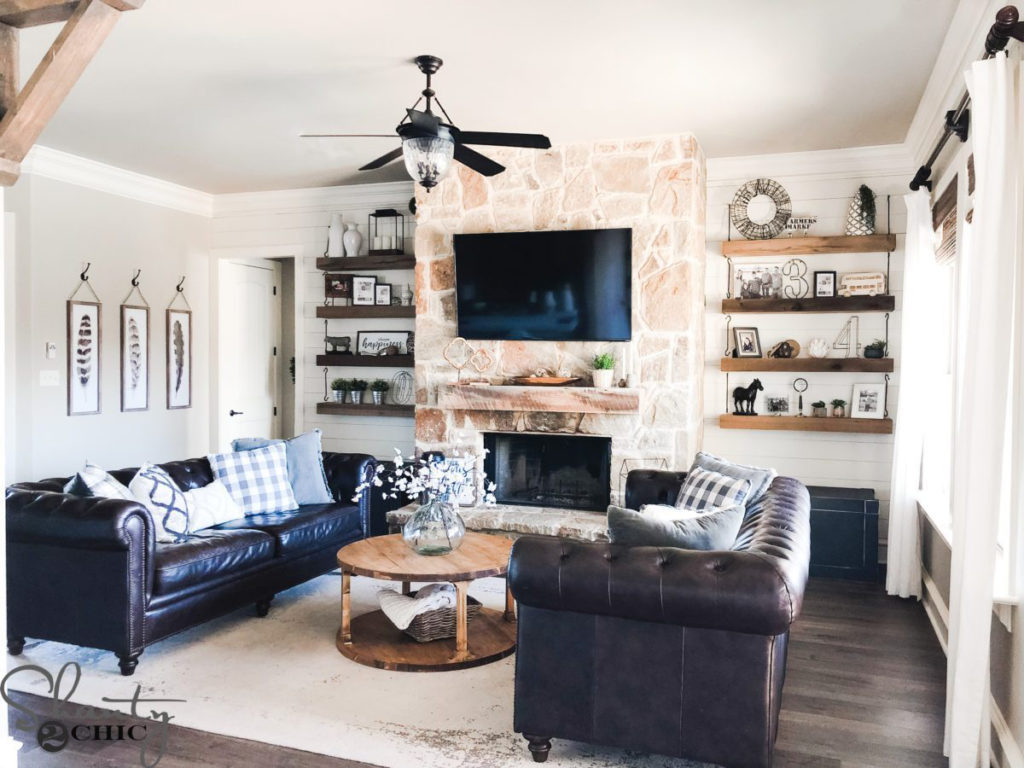
I have been staring at my stone fireplace for two years now envisioning how I could give it a more modern look. I love natural stone but it is very rustic and it really limits me on what I can do in my living room. After I saw Whitney German Schmear her stone fireplace, I had to do it too! For only $65 I was able to give my Rustic Stone Fireplace a completely new and modern look! We thought it would be a great idea to share a how-to video when we tackled my fireplace so come check out our new How to German Schmear a Fireplace video! Just click the play button in the box below!
How easy, fun and inexpensive was that? And it really gave my entire living room a new, updated look! My daughter is still commenting on how bright our house feels now 🙂
Table of Contents
Supplies
You don’t need a huge laundry list of supplies. This is all you need!
How to German Schmear a Fireplace
The Prep
Step 1 – Builder’s Paper

To start, we rolled builder’s paper out to cover the floor surrounding the fireplace. Make sure to cover more of the floor than you think because you can fling mortar as you paint.
Step 2 – Tape Off
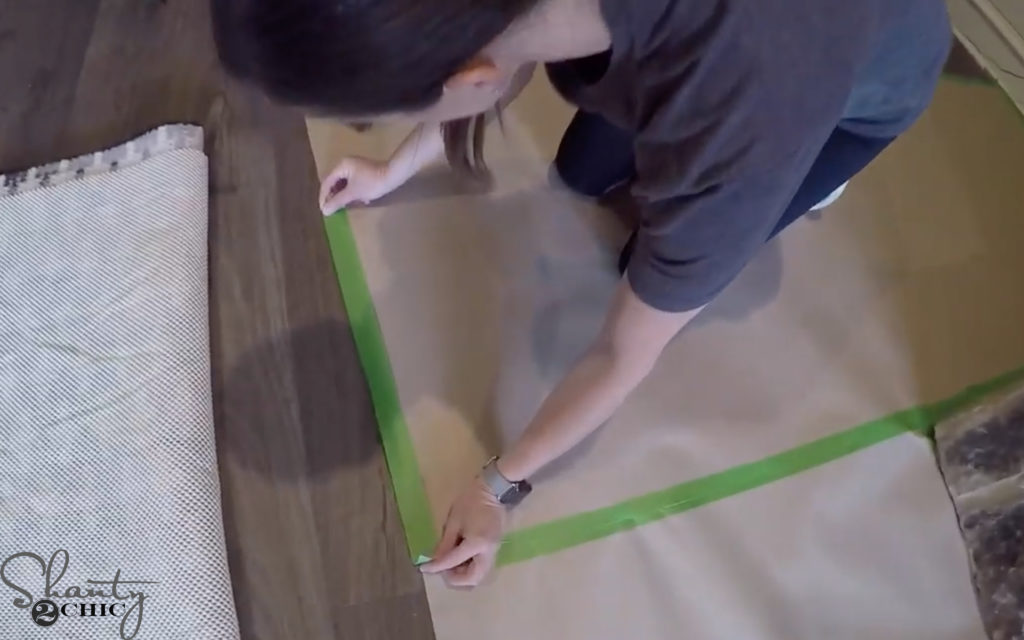
After rolling out the Builder’s Paper, tape it to the floor with painters tape. Tape off around the perimeter of the fireplace as well.

You will also need to tape off up the wall.
Mortar
Step 1: Scoop the Mortar into the 2-Gallon Bucket
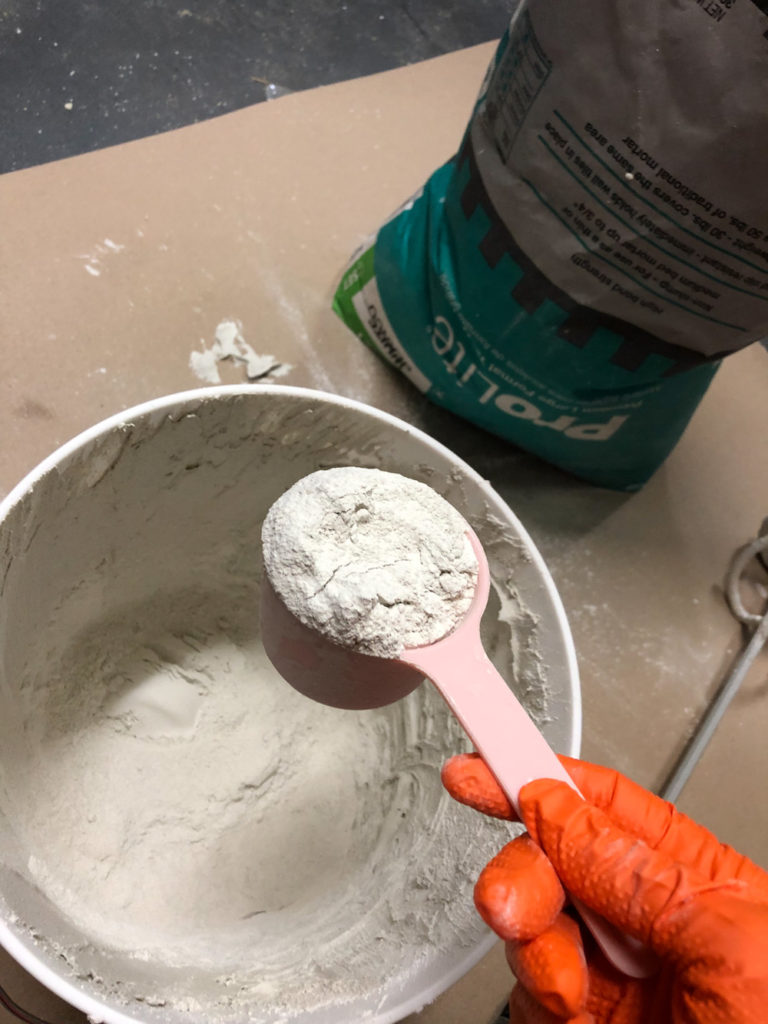
Scoop the mortar into the 2-gallon bucket then add water. We did about a 50/50 ratio for my fireplace. You can add more mortar or more water to get the consistency that you prefer.
Step 2 – Mix the Mortar
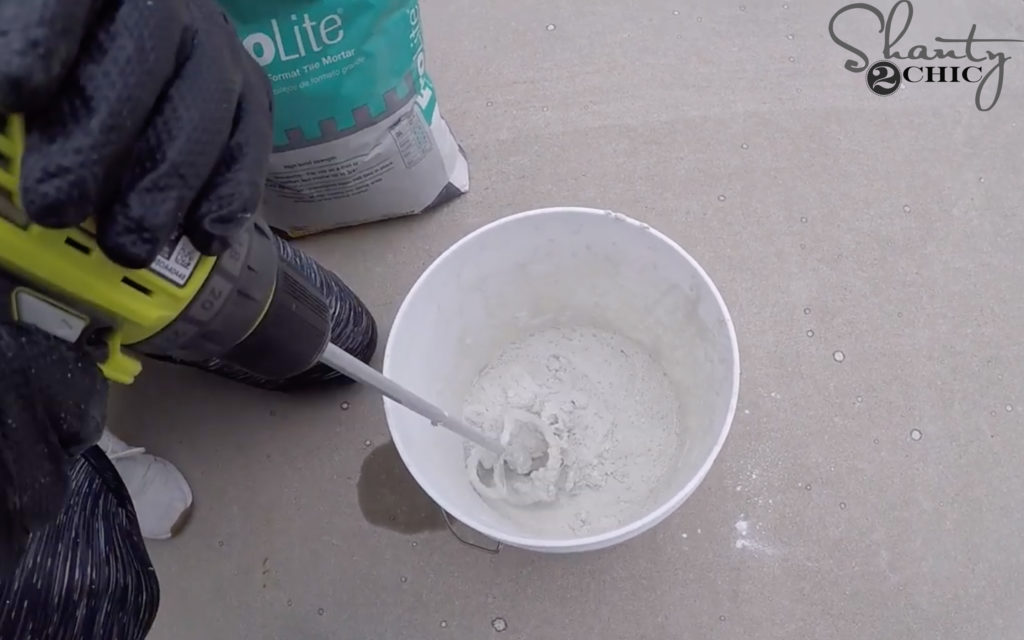
With the mixing attachment on a drill, mix the mortar and water together. We went with a toothpaste consistency for my fireplace. Start mixing on low to avoid making a mess.
How to German Schmear
Step 1 – Paint on the Mortar
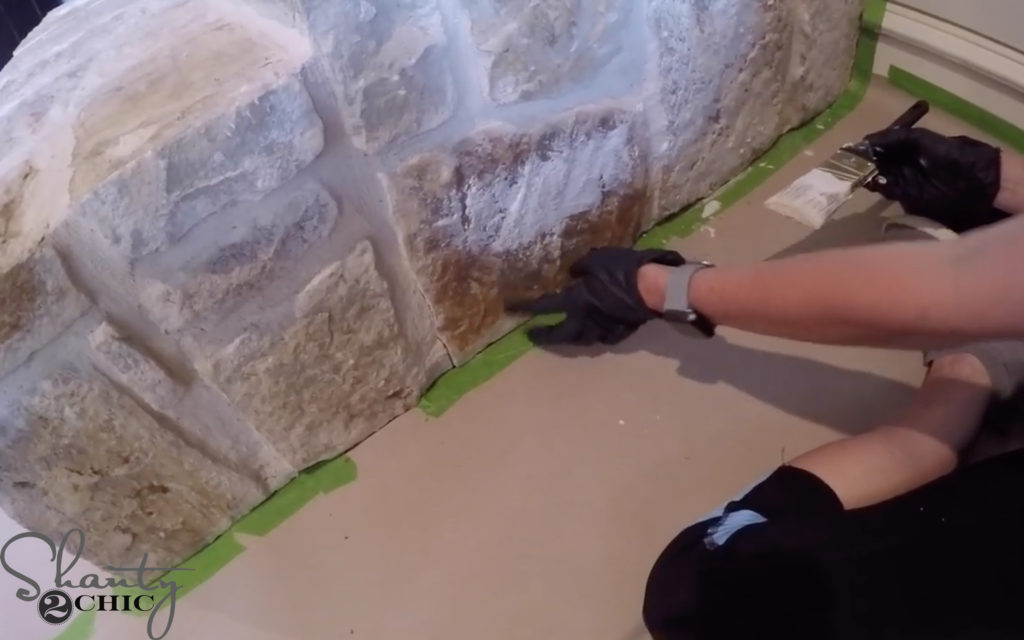
Using a paint brush, dip the brush into the bucket of mortar and paint it on the stone. We decided not to fill the stones in completely and let some of the natural stone color peek through.
Step 2 – Wipe the Mortar with a Sponge
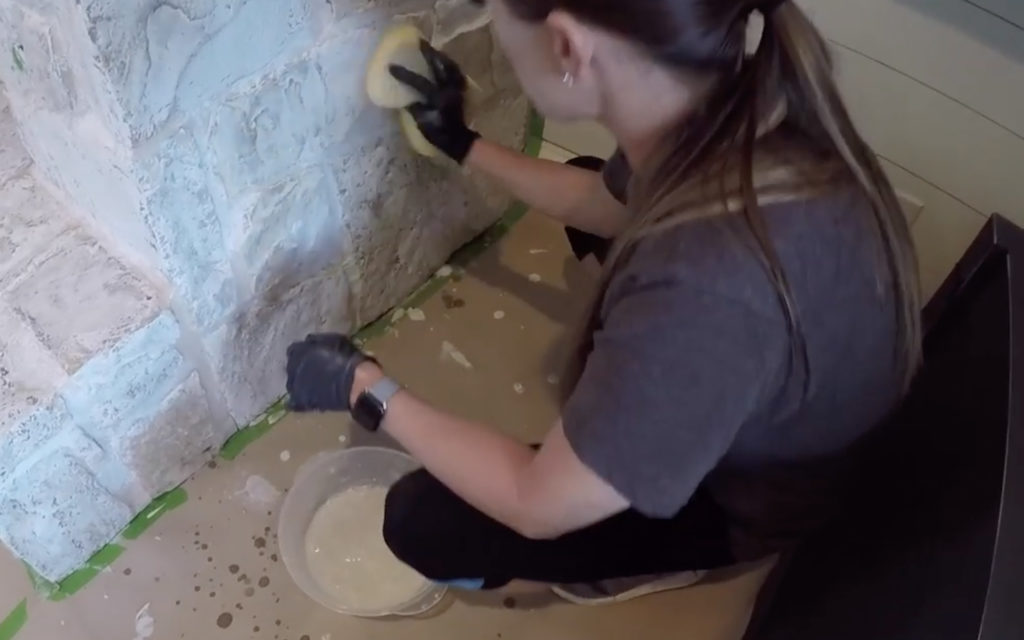
Before the mortar sets, dip a sponge into a clean bucket of water and wipe down the mortar if you think it is too thick in spots. This will also give the stone a more whitewashed look. I didn’t do this to my stones very much but if you want to reveal more of the stone, do this every 20 minutes or so as you are painting.
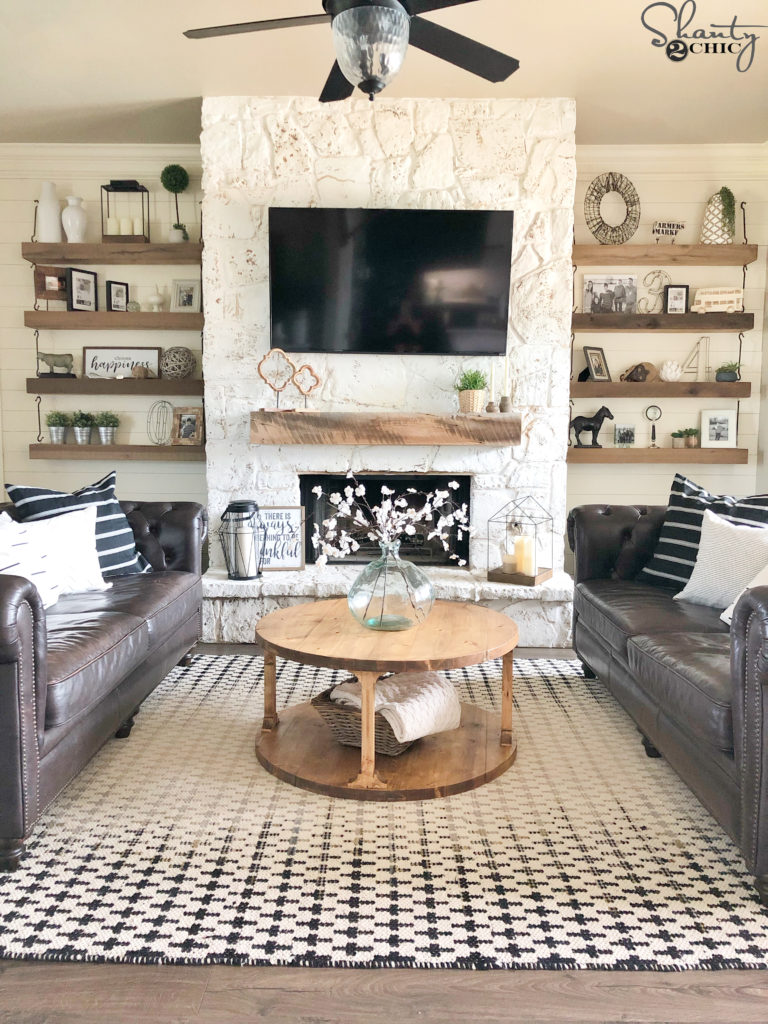
That was IT! How easy was that? I love how my new German Schmear Fireplace looks in my living room. It adds so much light to the room and makes it feel more open and modern!
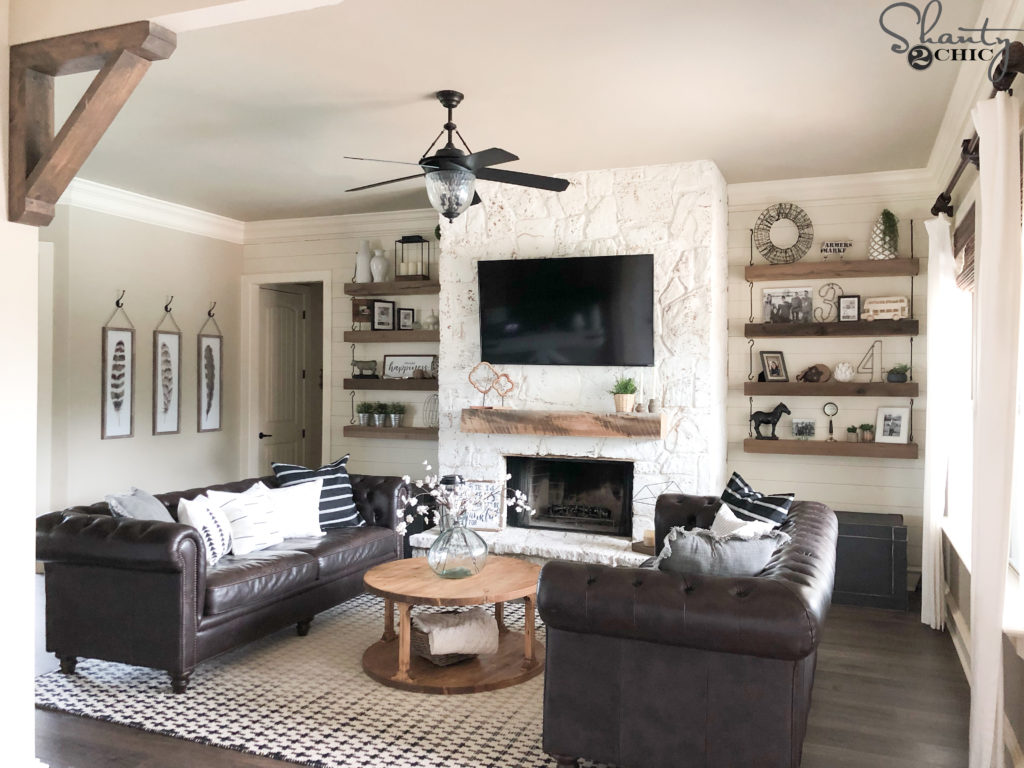
Here’s the before!
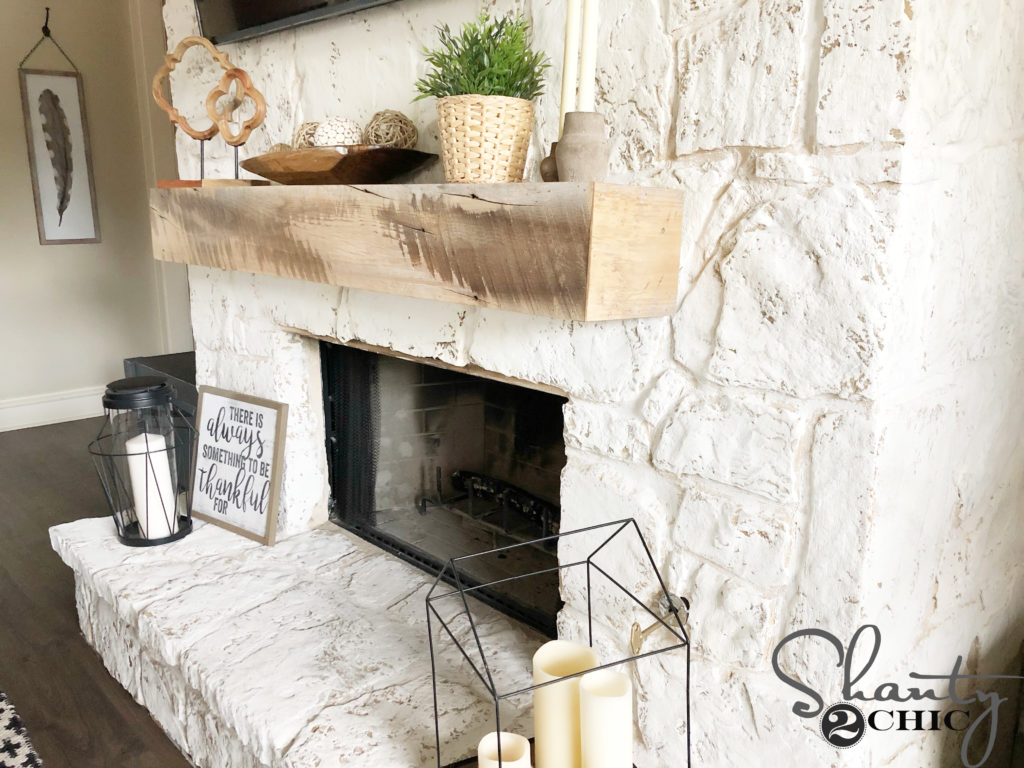
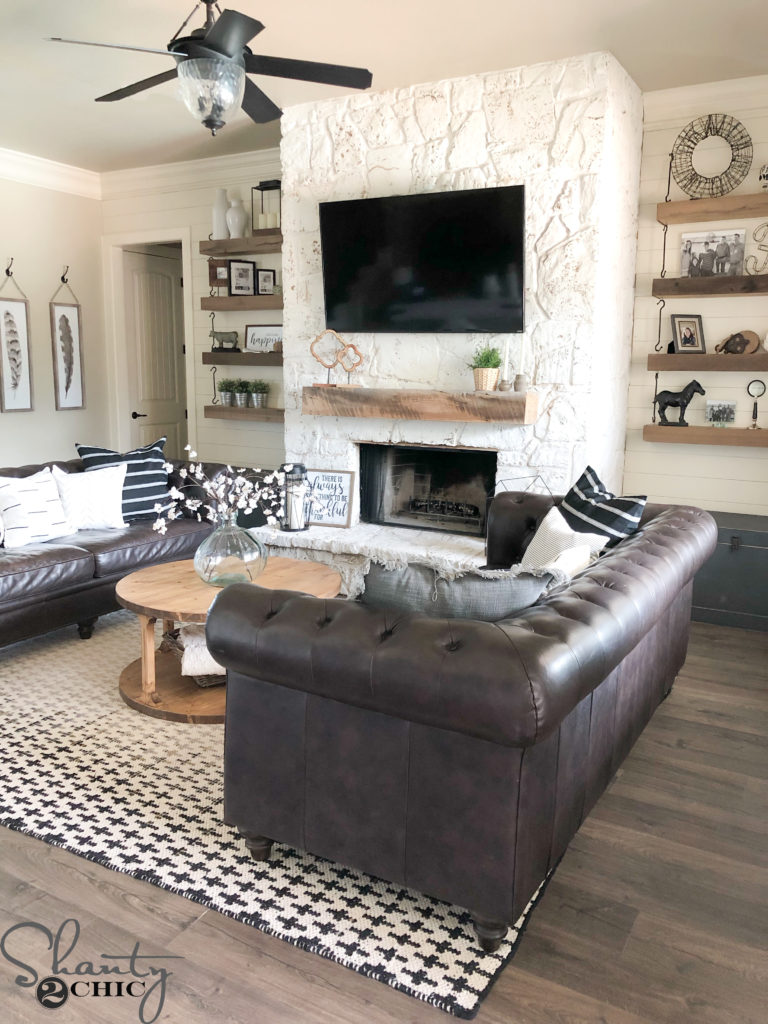
I also love how the natural wood tones stand out on the white!
At $65 in materials and about 2 hours worth of work, that’s a lot of bang for your buck! Do you have a spot in your home you are dying to try this out on? Let us know in the comments!
Decor Items in My Living Room
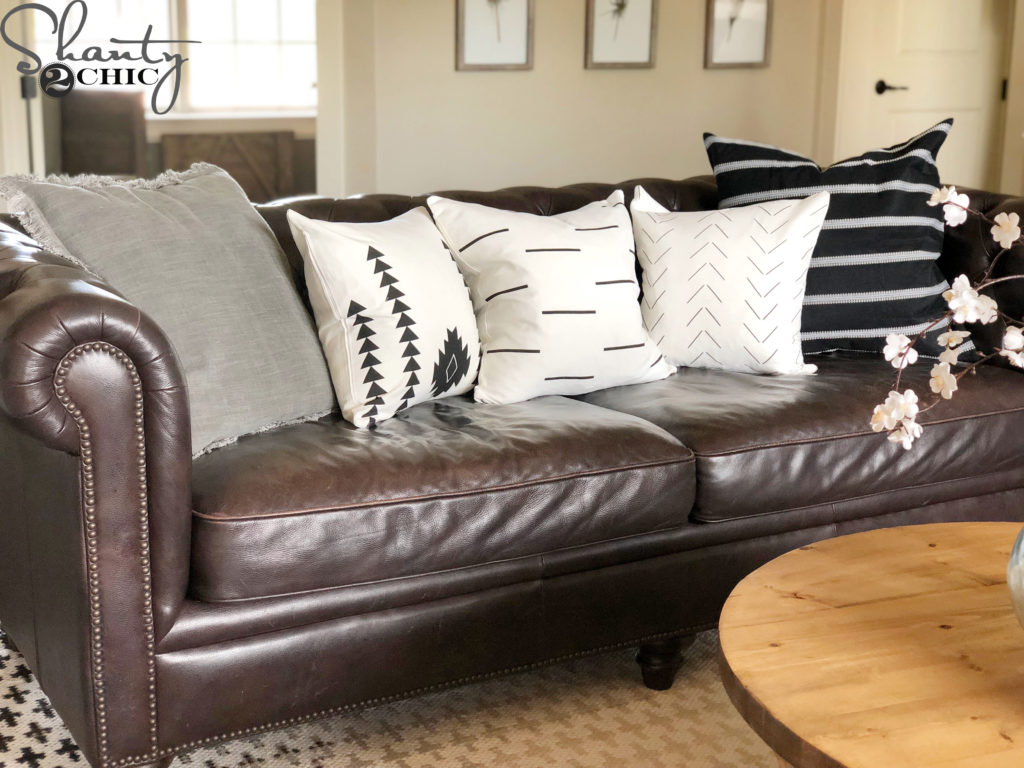
Pillows
Before you go, I have to share where I got these cute pillow covers! Not all of my old pillows were inserts with covers. The pillows that were whole pillows, I just put inside these covers! So much more affordable and a great way to reuse a dingy decorative pillow!

Pillows Linked Left to Right
You can get info on all of the other items in my living room below! Thanks so much for stopping by!
Happy Building!
Other Items in My Living Room


This is a great demonstration of how the German schmear technique can completely change the character of a fireplace. The finish adds texture and depth while still allowing the natural brick pattern to remain visible, which creates a very authentic and timeless look. The step-by-step explanation makes the process much easier to understand.
From an interior industry perspective, textured wall finishes like German schmear are becoming increasingly popular in residential and hospitality interiors because they add visual warmth and character without requiring major structural changes. Techniques like this show how surface treatments can transform architectural elements within a space. We’ve also been following similar surface and material trends across the interior industry here: https://plywoodbazar.com/
Can you tell me what color of mortar you used? Looks great I’m going to try it!
I recently did mine, but didn’t cover it as much. Love it
could you do this on a walkway of stone? Thinking of doing this to some stone that is in our patio and foyer
Thanks. Great idea but it looks very heavy. Sorry but me the application had too much. Not enough was removed.and it looks like it was painted, almost. The light colored stone needed a light touch.
Ditto to the comment left by Angie on 06/13. I have been searching for a ceiling fan with light to goes well with the rustic farm style. Thanks!
Would you please give info about your ceiling fan? I love the seeded glass shade w the black blades. Thanks