Build your own DIY cowhide bench with these free printable plans! This beginner-friendly project uses simple 2×4 lumber, real cowhide upholstery, and sleek metal legs to create a modern rustic look you’ll love.
I am so excited to share the newest piece I built for our home! A couple of months ago, I made a DIY Modern Console Table, and since then I’ve been on the hunt for a bench or ottomans to pair with it. After finding a designer cowhide bench priced around $3,000 (ouch!), I decided to build my own version for a fraction of the cost. The best part about designing and building your own furniture is that you can customize the size, finish, and fabric to fit your space – and save a ton of money while getting the same high-end look.
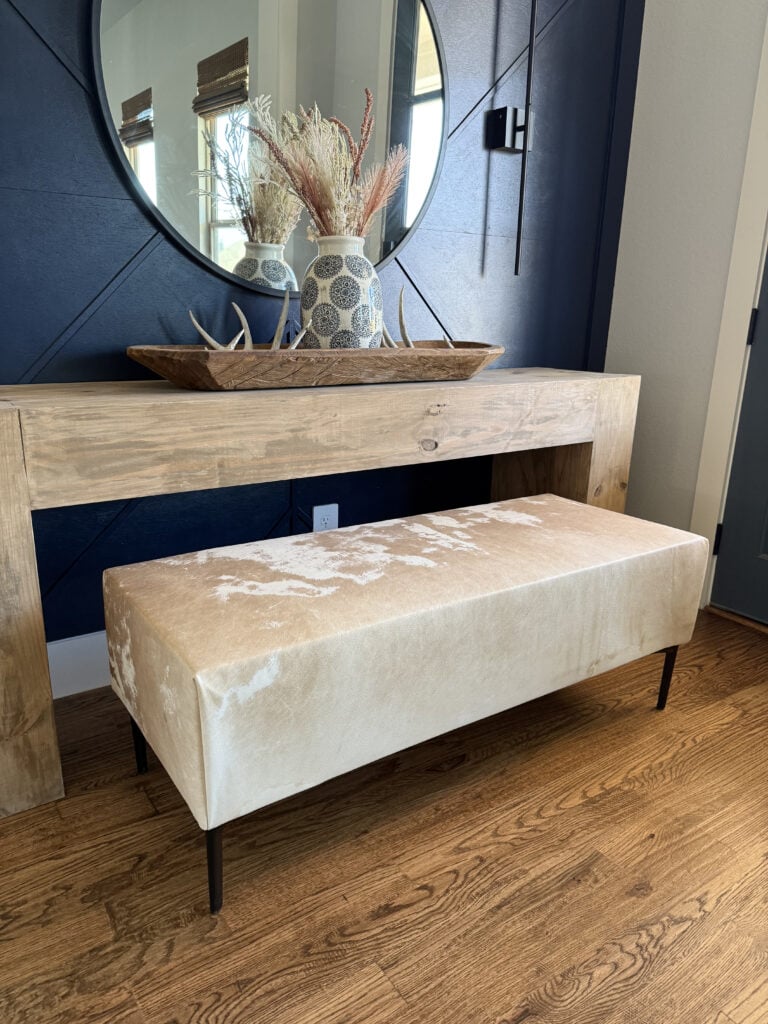
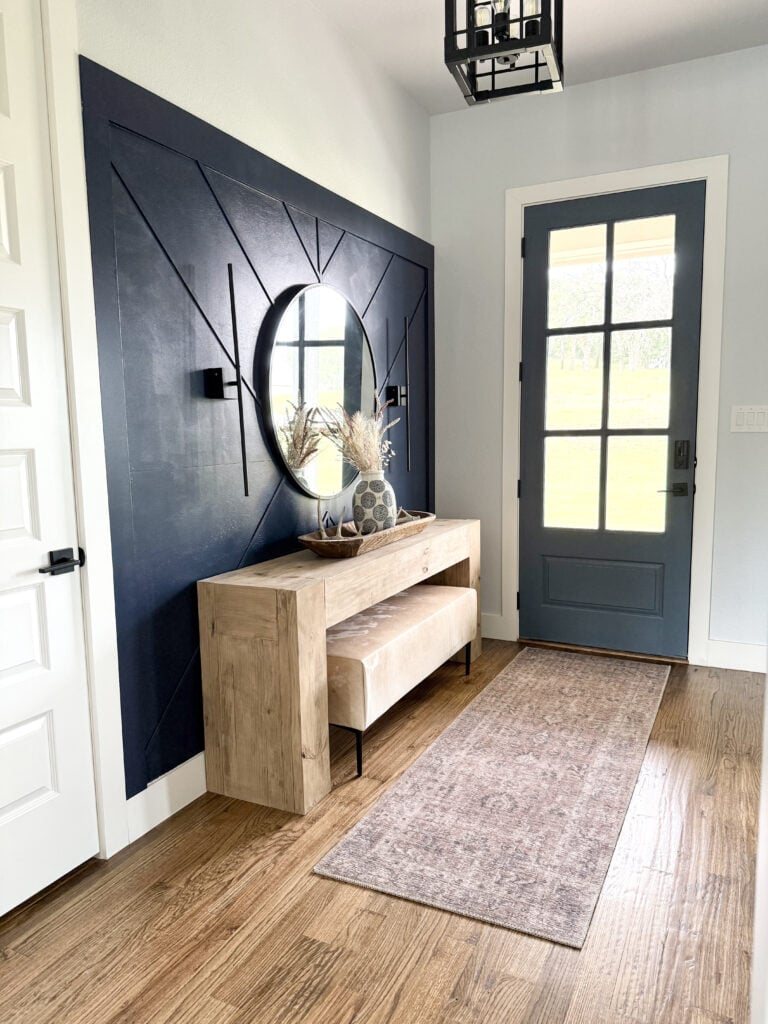
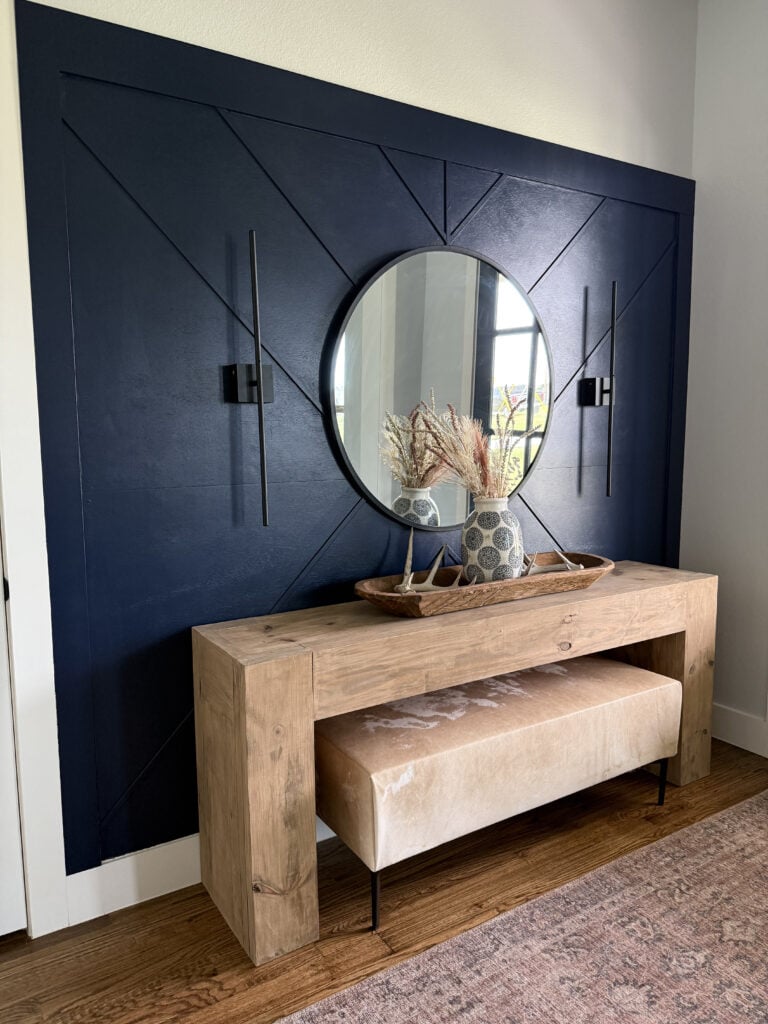
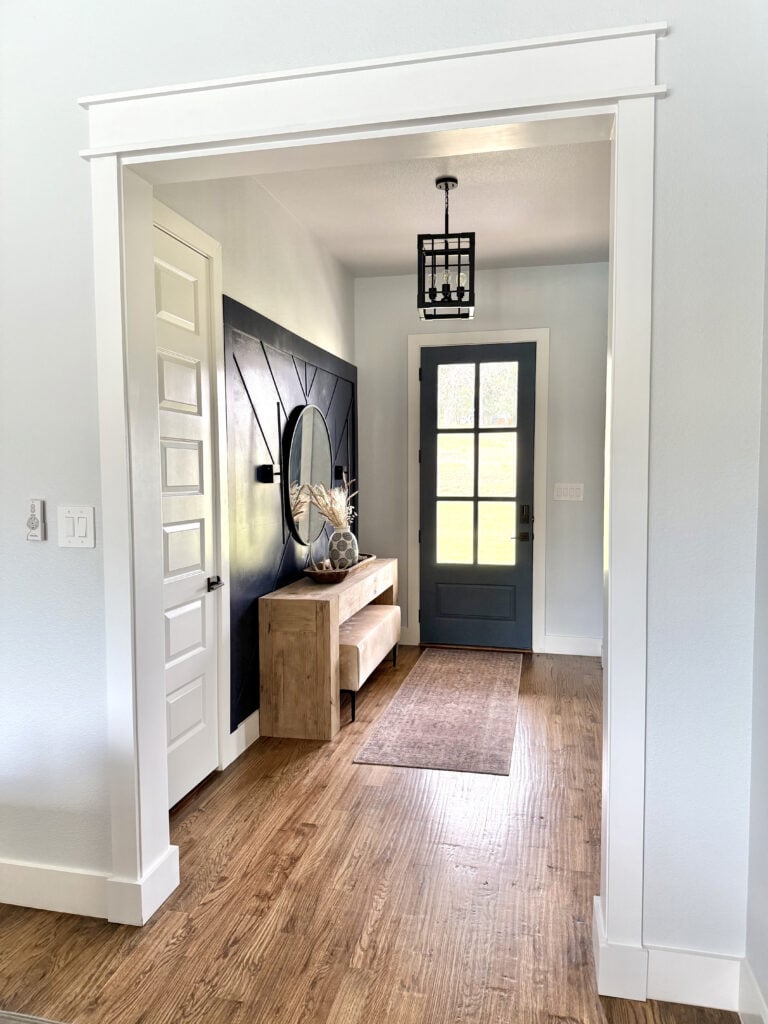
This project turned out even better than I hoped, and I love how versatile it is. My DIY cowhide bench works perfectly in our entryway, but it would also look amazing at the end of a bed, tucked behind a sofa, or along a bare wall that needs some personality.
And the best part? It’s an easy DIY bench project that anyone can build – even beginners! Follow along with the step-by-step tutorial below, watch the video, and don’t forget to grab the free printable woodworking plans to build your own.
Table of Contents
How to Build a DIY Cowhide Bench
Cowhide Bench How-to Video
What You’ll Need to Build a DIY Cowhide Bench
Tools
- Miter Saw (can use a circular saw or a hand saw)
- Kreg Jig
- Drill
- Stapler (manual, electric or cordless)
Supplies
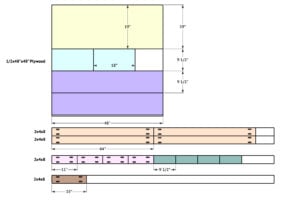
- 1 – 1/2″ x 48″ x 48″ Hardwood Plywood
- 4 – 2x4x8
- 2 1/2″ Pocket Hole Screws
- 1″ Staples
- 4 – Metal Feet
- Batting
- Cowhide (can use imitation)
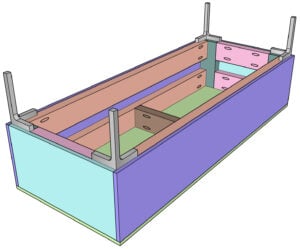
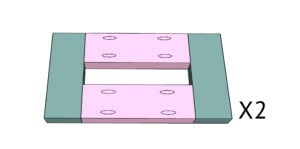
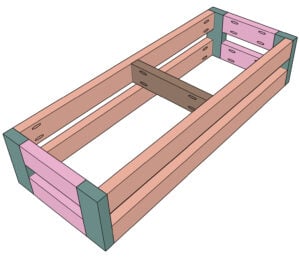
Step 1: Build the Side Frame Assemblies

Cut your side frame pieces to size and drill 1 ½” pocket holes at the ends of the vertical pieces.
- Find the Kreg Jig 720Pro
- Find the Kreg 20-Volt Ionic Drive Drill
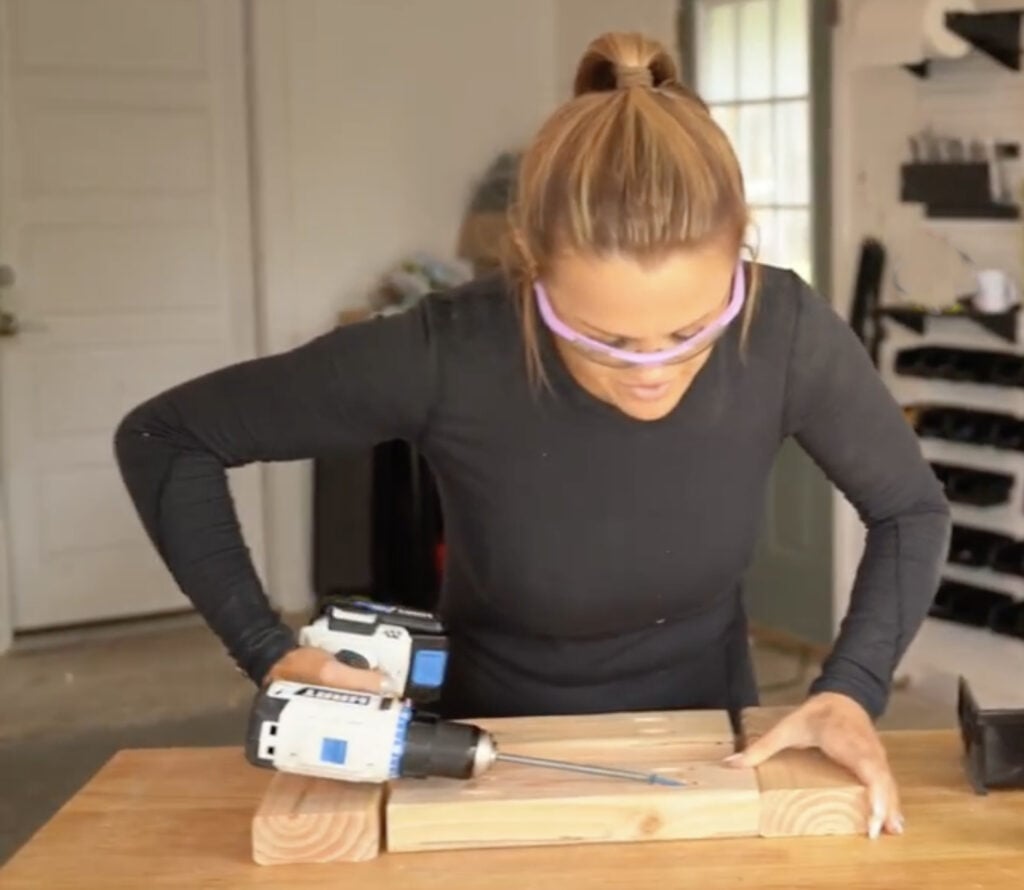
Attach the verticals to the horizontal pieces using 2 ½” pocket hole screws and wood glue. You’ll need to build two identical side assemblies.
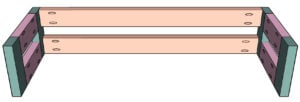
Step 2: Connect the Long Frame Pieces
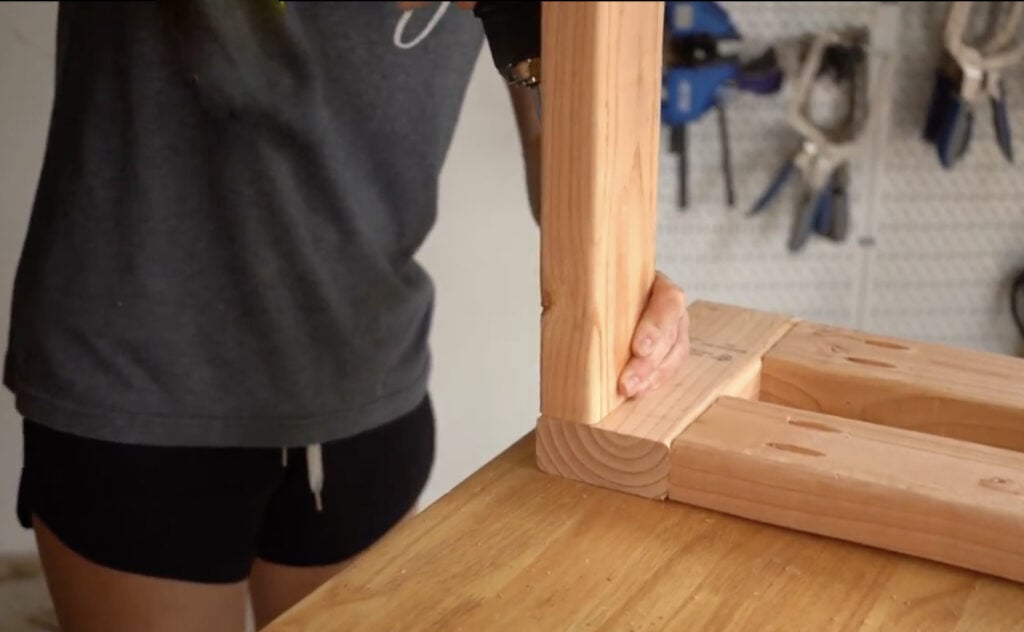
Cut the long frame pieces to length and drill 1 ½” pocket holes on both ends. Attach them to the side assemblies with 2 ½” pocket hole screws and wood glue.
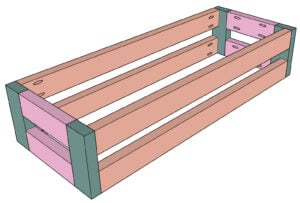
Step 3: Complete the Frame
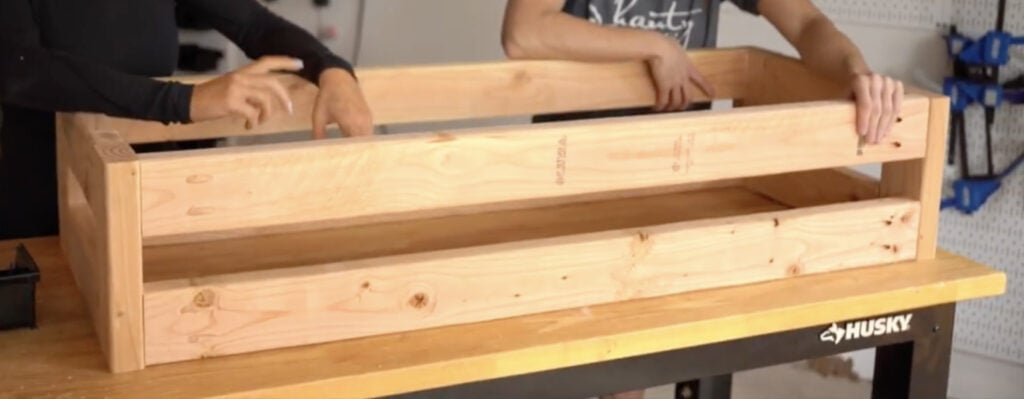
Repeat the process for the opposite side to form the full rectangular bench frame.
Step 4: Add the Center Support
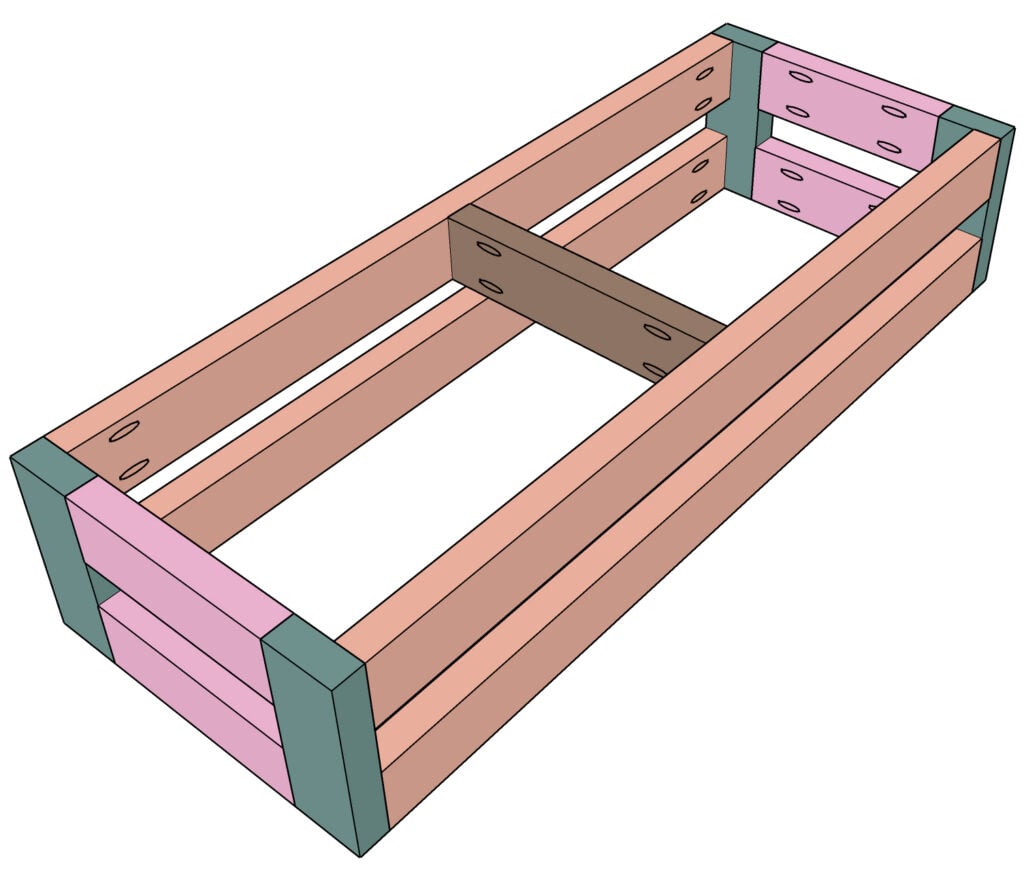
This piece is optional. Since my bench was not going to be used aside from esthetics, I decided not to add one. If you would like to include a support piece, measure and cut a center support piece. Drill 1 ½” pocket holes on both ends, center it between the top long supports, and attach it with 2 ½” screws and glue. This will give your bench added strength.
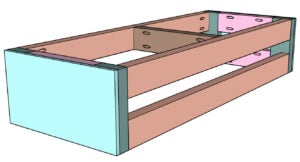
Adding the Plywood Panels
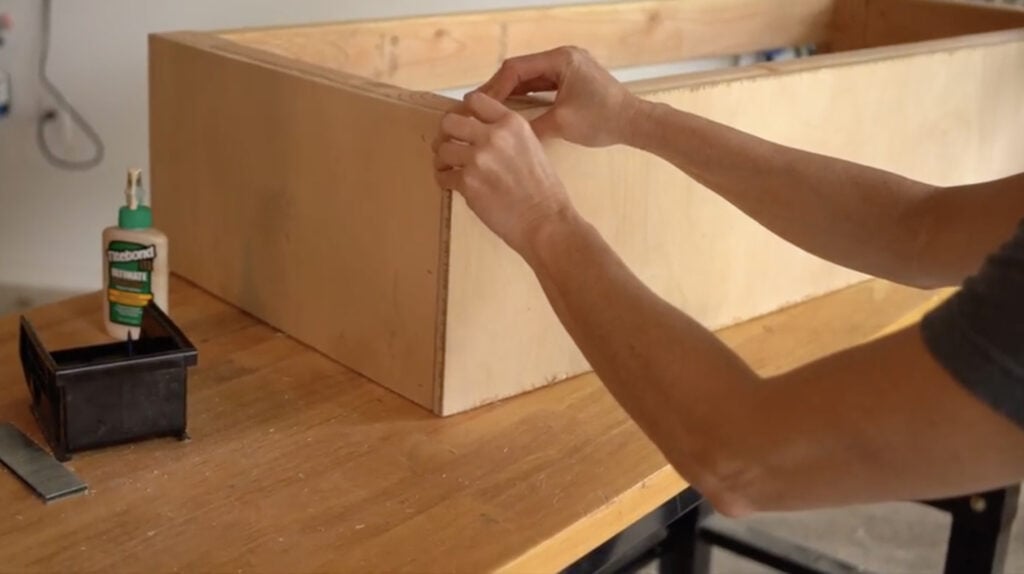
Step 5: Attach the Side Panels
Cut your side plywood pieces to size. Using 1″ staples, attach them to each end of the bench frame.
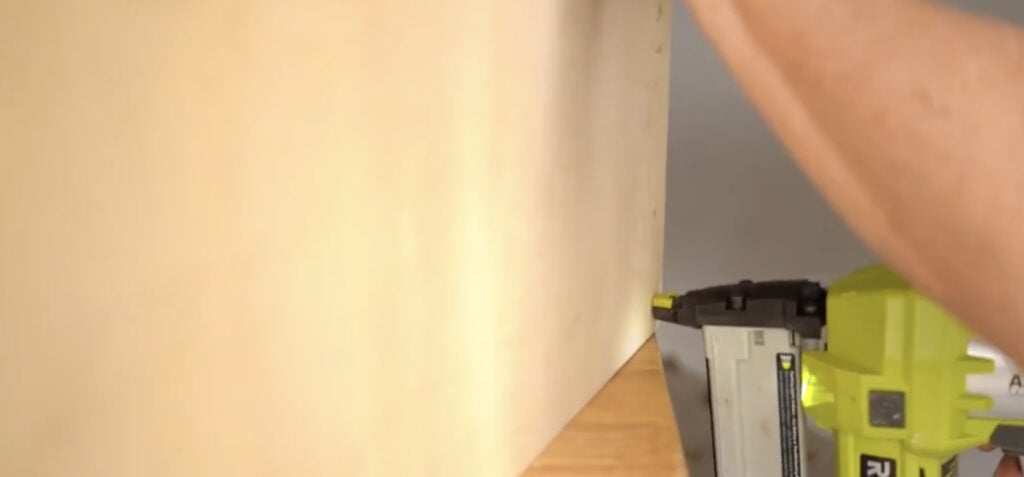
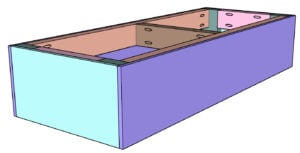
Step 6: Add the Front and Back Panels
Measure and cut the plywood for the front and back. Attach with 1″ staples and wood glue, securing them tightly to the frame.
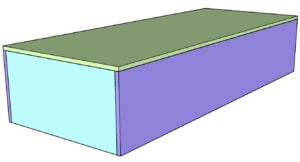
Step 7: Install the Top Panel
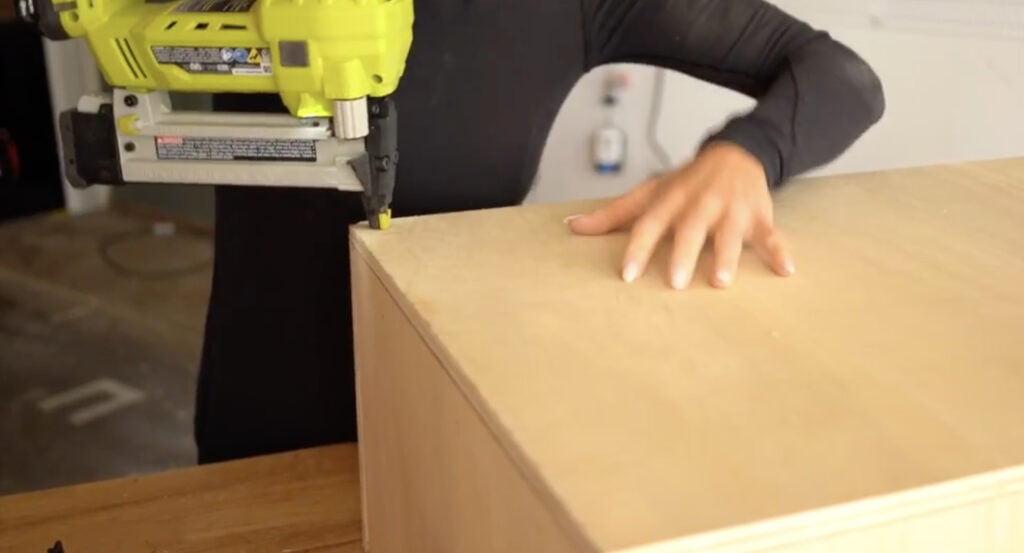
Cut the top plywood piece to fit the bench frame and attach it using 1″ staples and wood glue. This creates a solid surface for your batting and upholstery.
Upholstering the Cowhide Bench
Step 8: Add Batting
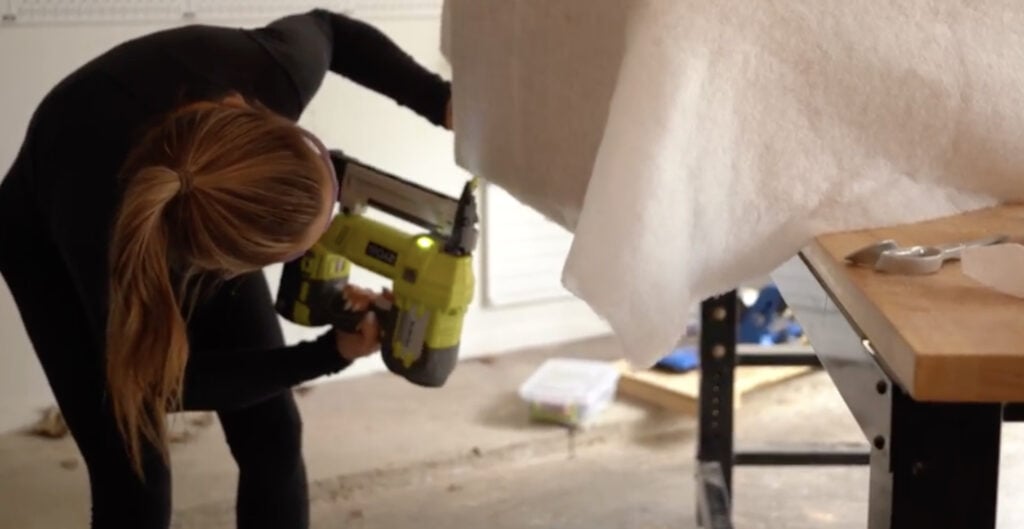
Cut batting to size and lay it over the top and sides of the bench. Staple it to the underside of the plywood, pulling firmly as you go to create a smooth surface.
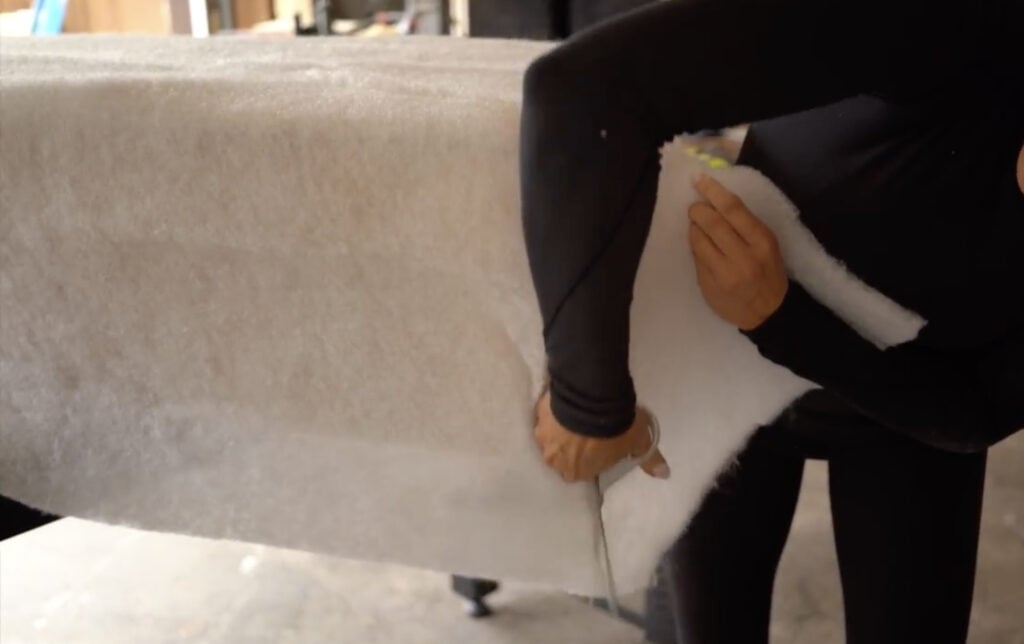
Start one the four sides and leave the corners last. Cut the excess batting down the length of the corner, tuck the corners and staple them to the bench frame.
- Find the batting we used
Step 9: Staple on the Cowhide
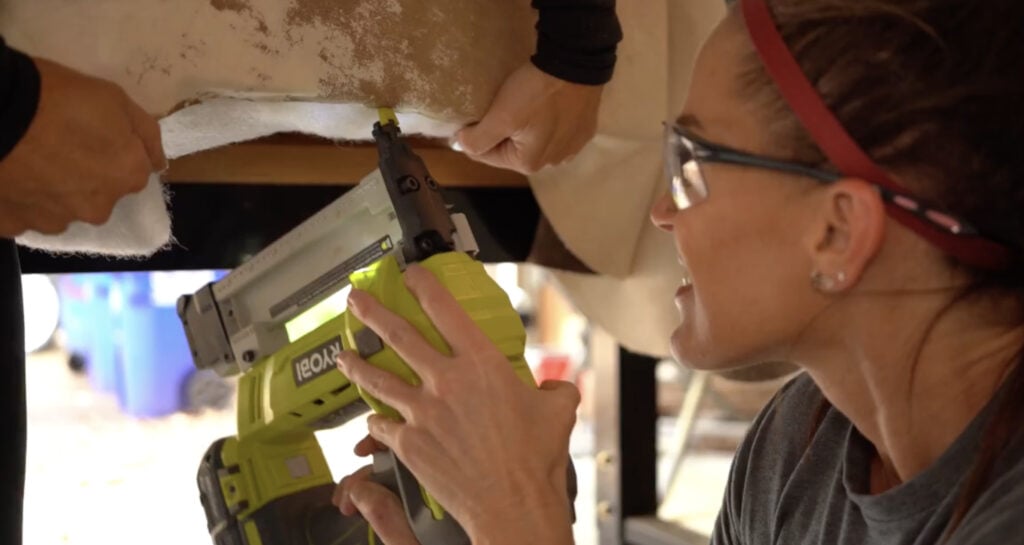
Lay your cowhide over the bench, starting with the sides. Pull the hide tight and staple it along the underside of the frame, just like you did with the batting. Continue working around the bench, pulling the material taut for a snug, professional finish.
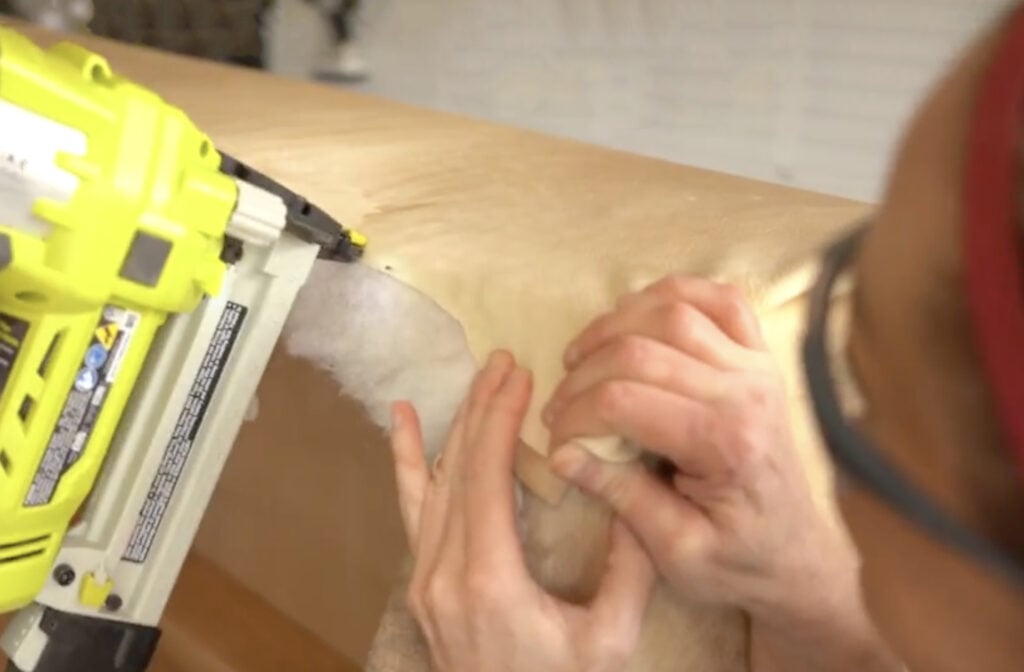
Step 10: Finish the Corners
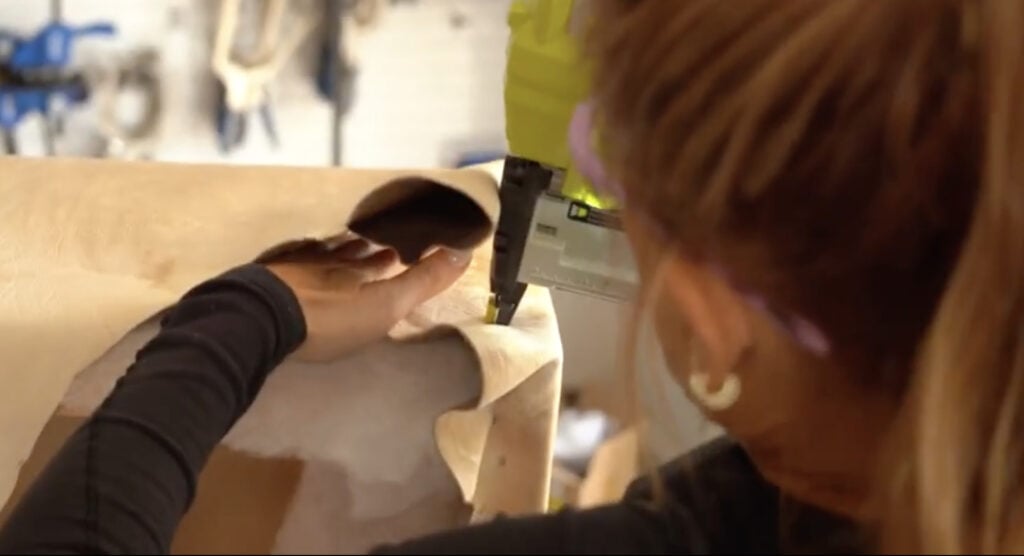
Fold the corners neatly, just like wrapping a gift. Staple down the first fold, then fold over the second layer to cover the staples and secure it to the underside of the bench.
- Find the cowhide we used
Attaching the Metal Legs
Step 11: Install the Feet
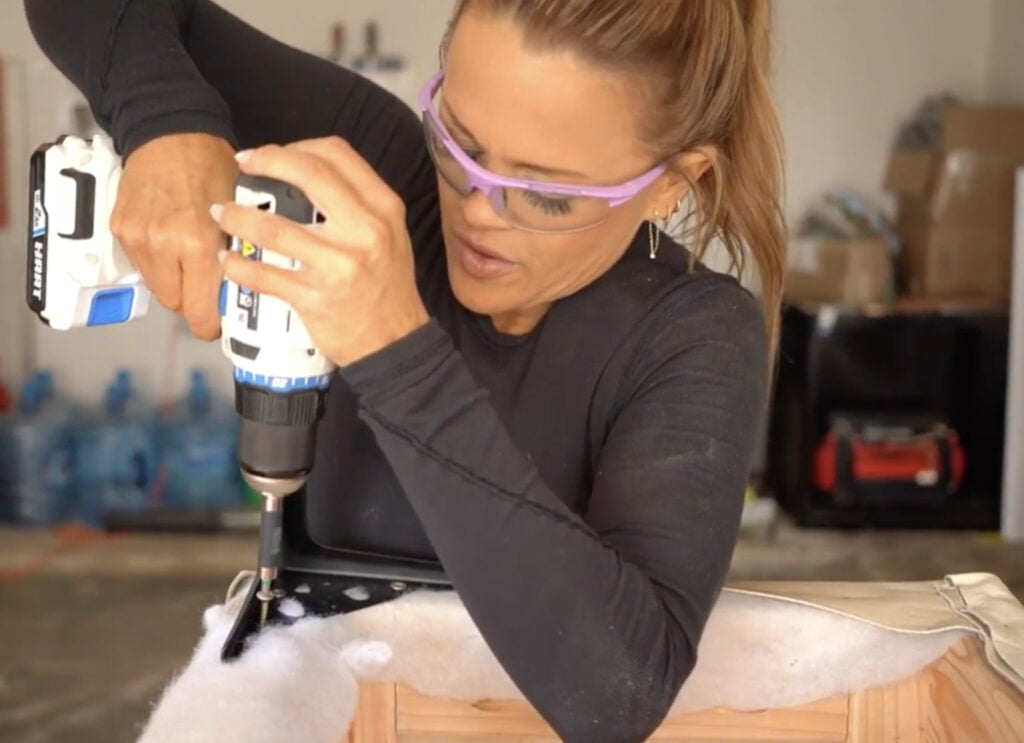
Once the bench is fully upholstered, flip it over and attach the metal feet. I’ve linked the exact legs and cowhide fabric I used on this post so you can easily source the same materials.
- Find the metal feet
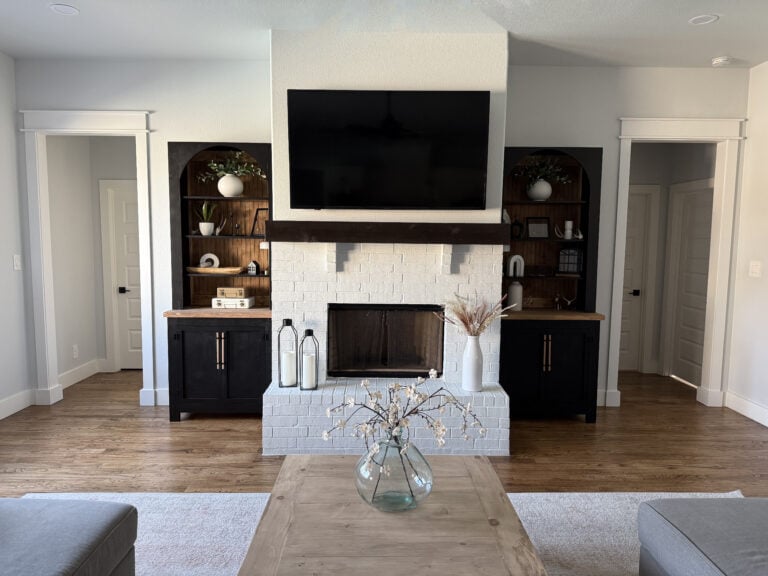
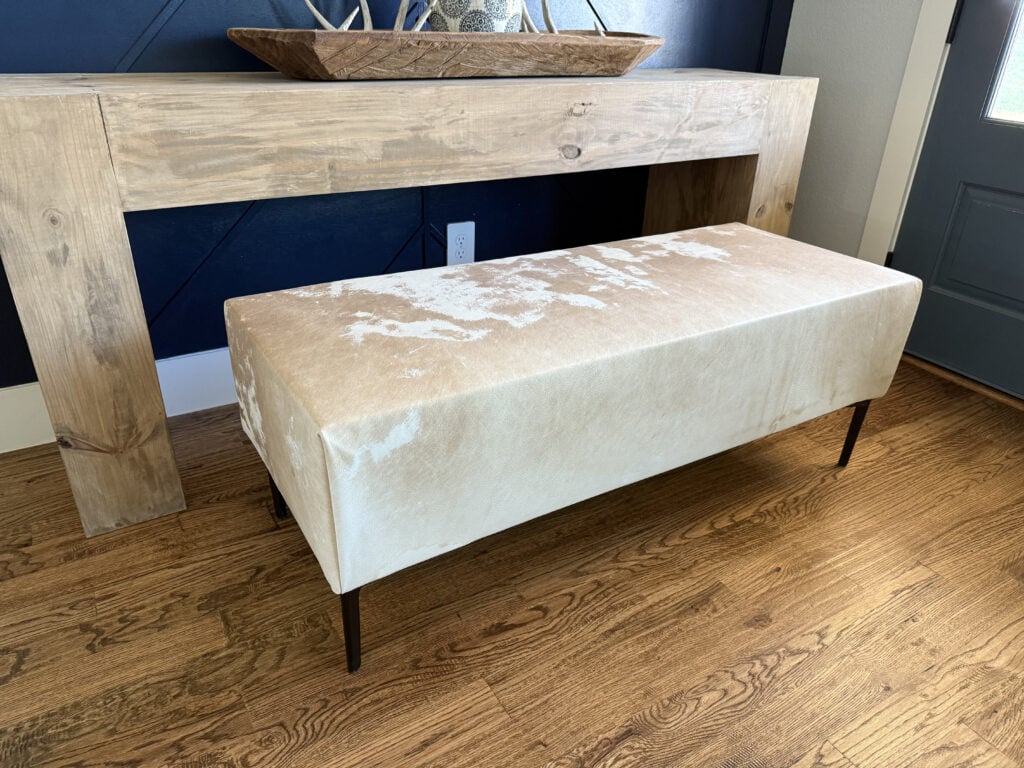
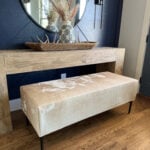
The Finished Cowhide Bench
All finished, and I couldn’t love this DIY cowhide bench more! It’s such a versatile piece and adds the perfect mix of rustic and modern to our entryway. I was able to build it for around $200, which is a huge savings compared to the $3,000 inspiration piece.
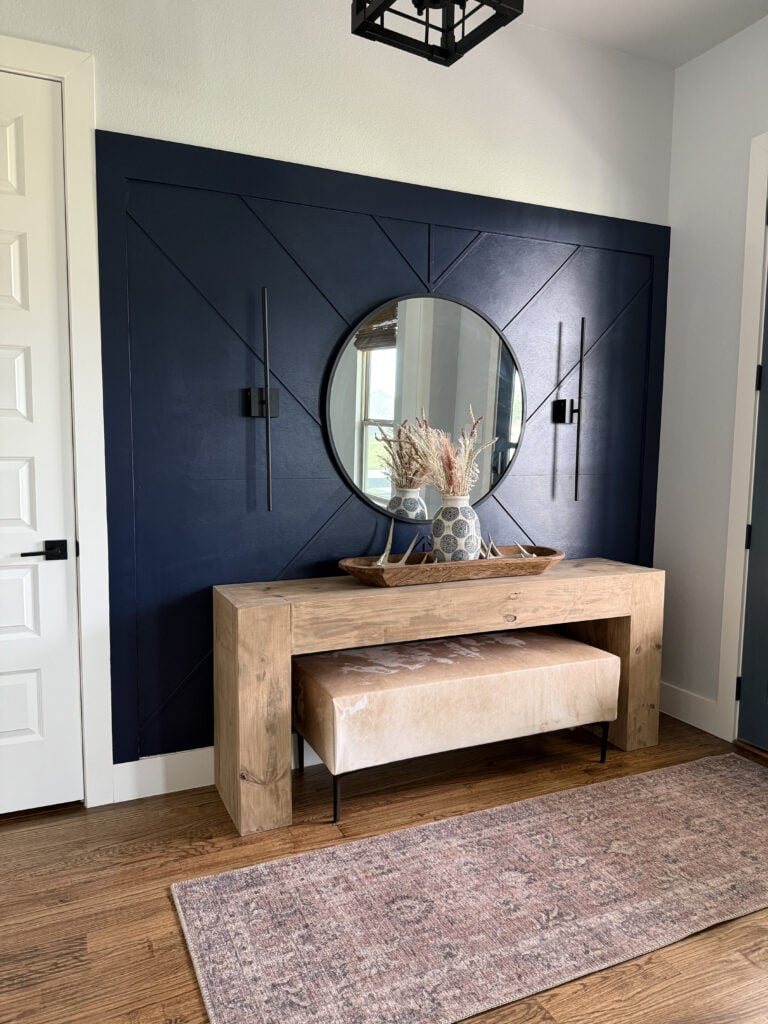
This DIY upholstered bench adds so much character to my entryway, but it would also be perfect at the foot of a bed or as stylish extra seating in the living room.
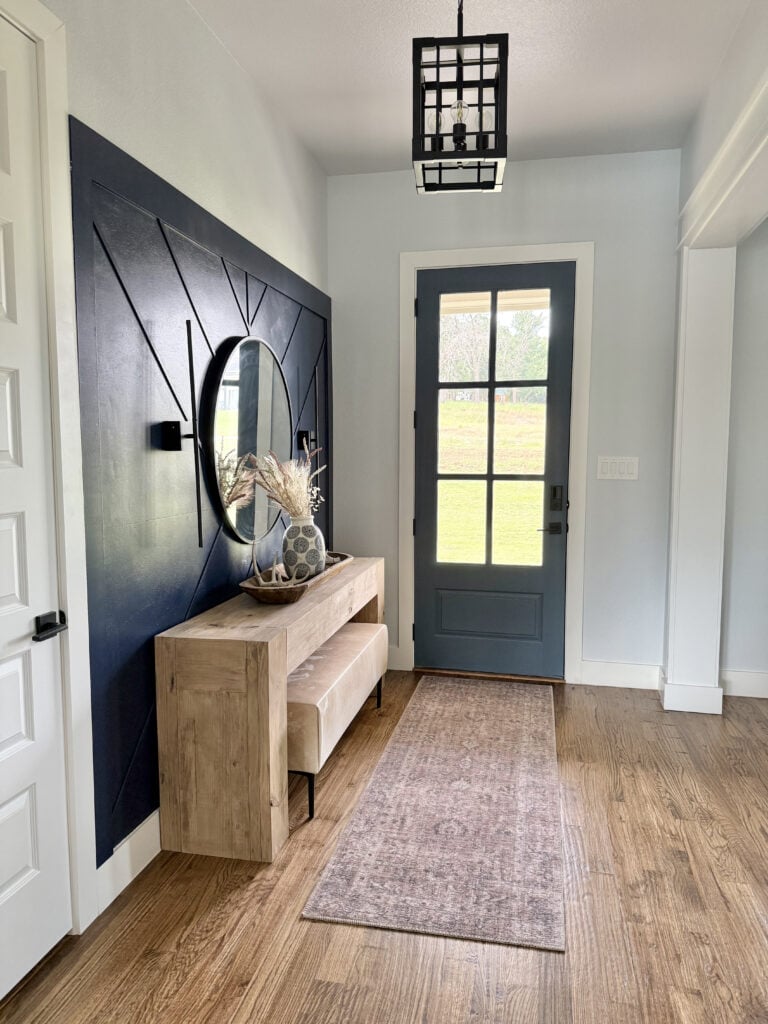
If you’re styling your own entryway, I’ve linked the other projects and sources from mine below so you can easily recreate the look.
Shop My Entryway and Related Tutorials
Related Tutorials With Free Plans
Entryway Products
Free DIY Cowhide Bench Plans (Printable Version)
Ready to build your own cowhide bench? Use the free printable plans below for step-by-step instructions. They include all the measurements, cuts, and assembly details you’ll need to complete this beginner-friendly project.
DIY Cowhide Bench – Free Plans
Tools
- Miter Saw
- Kreg Jig
- Drill
- Stapler (manual or cordless)
Supply List
- 1 1/2" x 48" x 48" Hardwood Plywood
- 4 2x4x8
- 2 1/2" Pocket Hole Screws
- 1" Staples
- 4 Metal Feet
- Cowhide
- Batting
Instructions
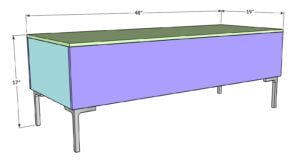
Cut List
- Cut List

Building the Cowhide Bench Frame
- Cut the side frame pieces to size and drill 1 1/2" pocket holes at the end of both vertical pieces. Attach them to the horizontal pieces with 2 1/2" pocket hole screws and wood glue. Build 2 side frame assemblies.

- Cut the long frame pieces to size and drill 1 1/2" pocket holes at both ends. Attach them to the side assemblies with 2 1/2" pocket hole screws and wood glue.

- Do the same thing for the other side of the side assemblies to create the full bench frame.

- Measure and cut the center support piece. Drill 1 1/2" pocket holes at both ends, center it between the top two long supports and attach it to the supports with 2 1/2" pocket hole screws and wood glue.

Adding the Plywood Panels
- Measure and cut the side pieces to size. Attach them to the end of the bench frame with 1" staples from the side pieces into the side frames. Do this on both sides of the bench frame.

- Measure and cut for the front and back plywood pieces. Attach them to the front and back of the bench frame with 1" staples and wood glue.

- Cut the top plywood piece to size and attach it to the top of the bench frame with 1" staples and wood glue.
Adding the Bench Feet
- Once the bench is covered in your fabric, flip it over and attach the feet. You can find links to the feet and the fabric in the post above.

- All finished! Make sure to share your builds with us on social media and use #shanty2chic so we can share them too!Happy Building!