Hey friends! I am SO excited to share these table plans today! I love this dining table! We love the look of a big, chunky pedestal but they can be PRICEY! So, we decided to come up with our own! We are thrilled with how beautiful it turned out! Our good friends (who also happen to be our producers) just moved here. They bought an older, outdated ranch home and have spent the last several months turning it into a glam farmhouse. It’s gorgeous! They have truly done an amazing job, and now we get to go in and build all their furniture! How fun 🙂 So, this is episode 2 of the Alvarez series! Before we get started, be sure to check out the DIY Farmhouse Pedestal Table video HERE or below!
How pretty is she now??

DIY Farmhouse Pedestal Table – The Plans
I’ll walk you through it here, and be sure to download and print the FREE PLANS by clicking HERE!
And because you will all ask 😉 here are links to all the goodies we used!
DIY Farmhouse Pedestal Table – Feet Assemblies
Start by building 4 feet assemblies. These are 2×8 framing boards that we ripped to 7” with our table saw. You don’t have to rip them with this plan, but it will change the dimensions just a bit. These are 30˚ angles on each board. Attach the small piece on top and center of each larger piece using lots of wood glue and 2.5” Spax or wood screws.

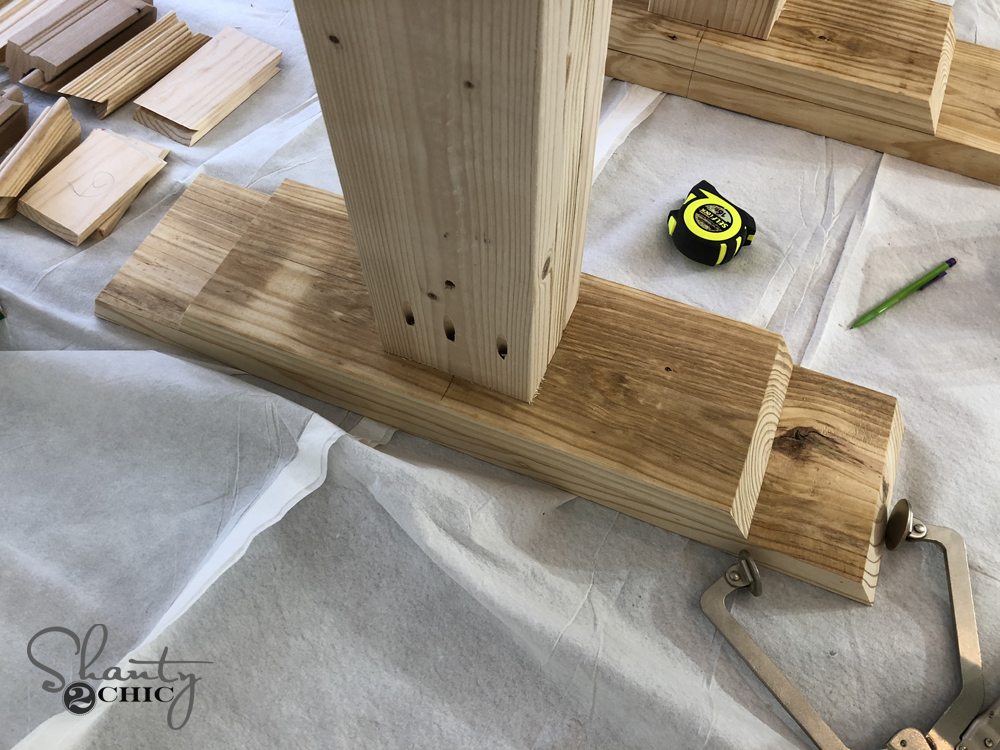
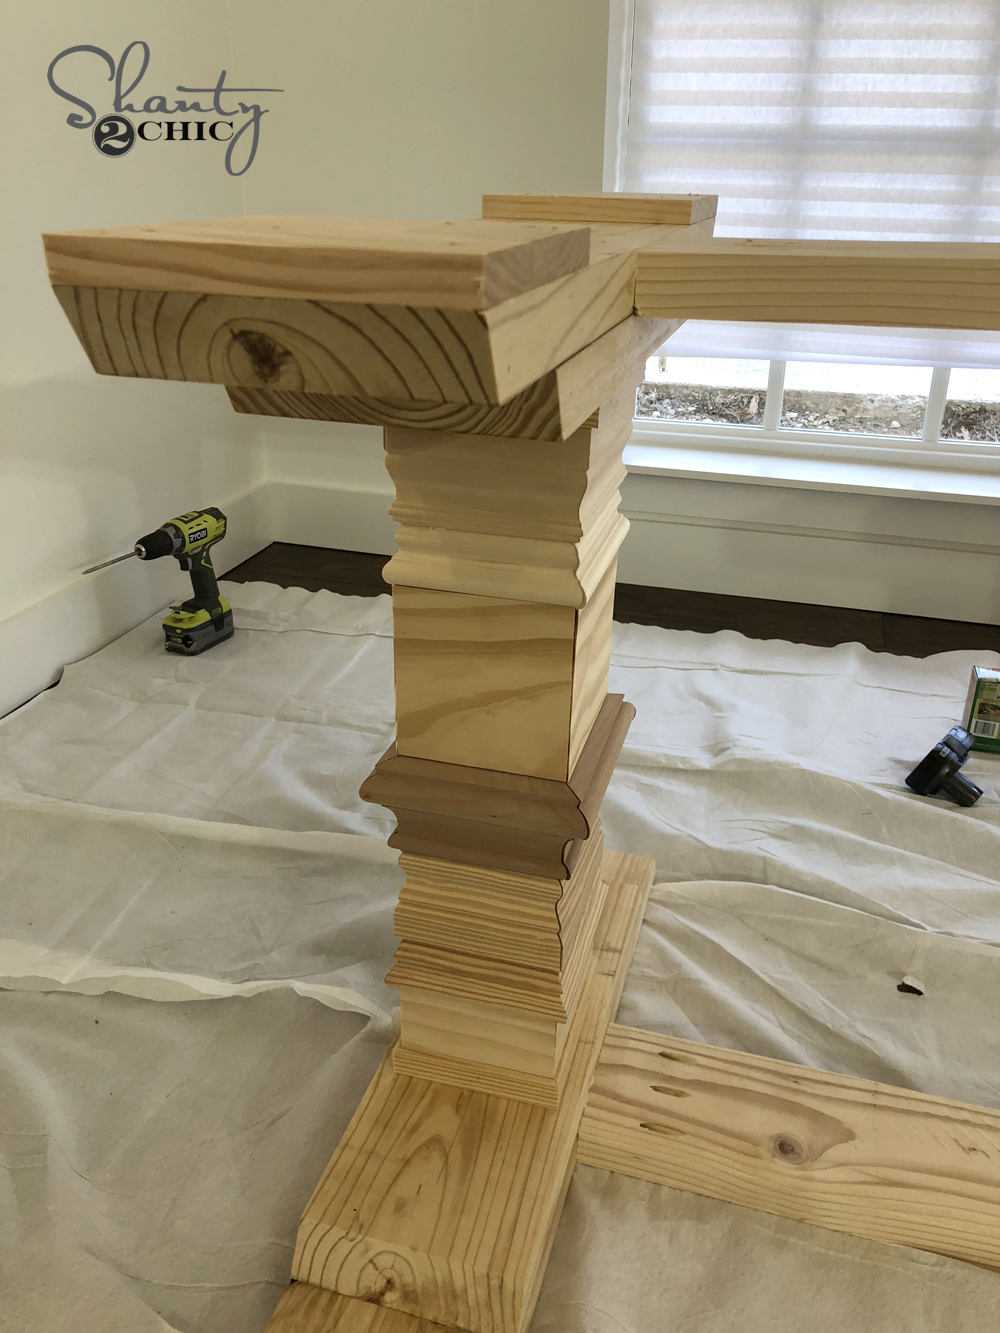
DIY Farmhouse Pedestal Table – Leg Assemblies
Now attach the first of the 6 leg boards to 2 of the leg assemblies. Attach it centered on both and use wood glue and 2.5” pocket hole screws through the 1.5” pocket holes. The leg boards are just 2×6 boards that we didn’t rip down. They will be covered with trim and we wanted to keep the legs as large as possible, so no need to rip these boards.

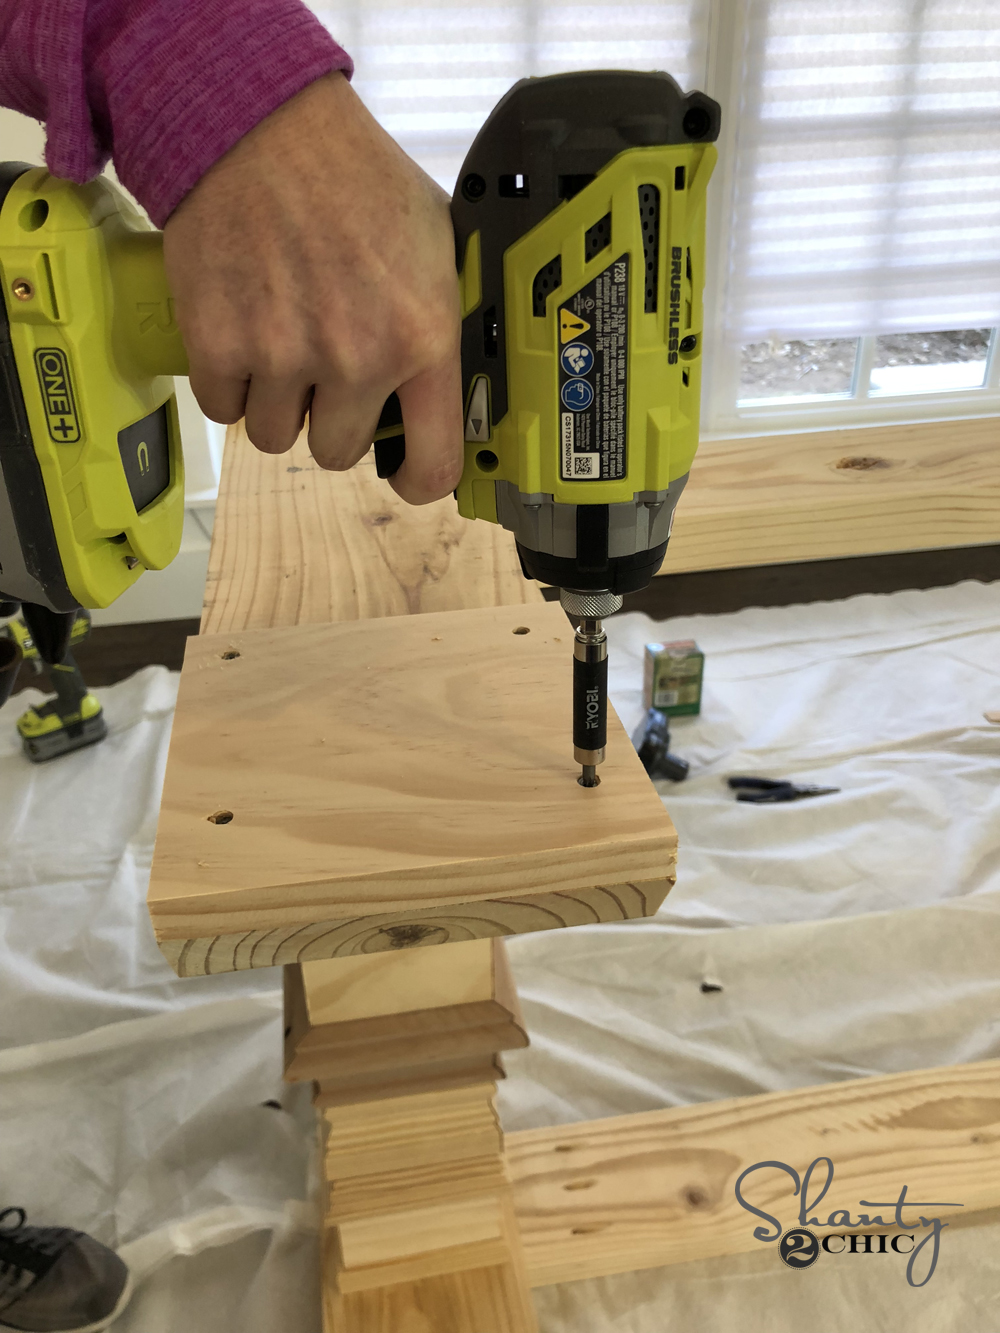
Now attach the other 2 boards the same way. They will sit flush against the middle leg board and you will attach them with 2.5” pocket hole screws through the 1.5” pocket holes. The pocket holes will face the outside on both sides. Be sure to use lots of wood glue in between each leg as well.

DIY Farmhouse Pedestal Table – Foot Pads
Now add the footpads. These are 1×8 boards that will sit the table off the ground a bit. It will give it stability and we love the look! Attach each footpad using wood glue and 1.5” Spax or wood screws.
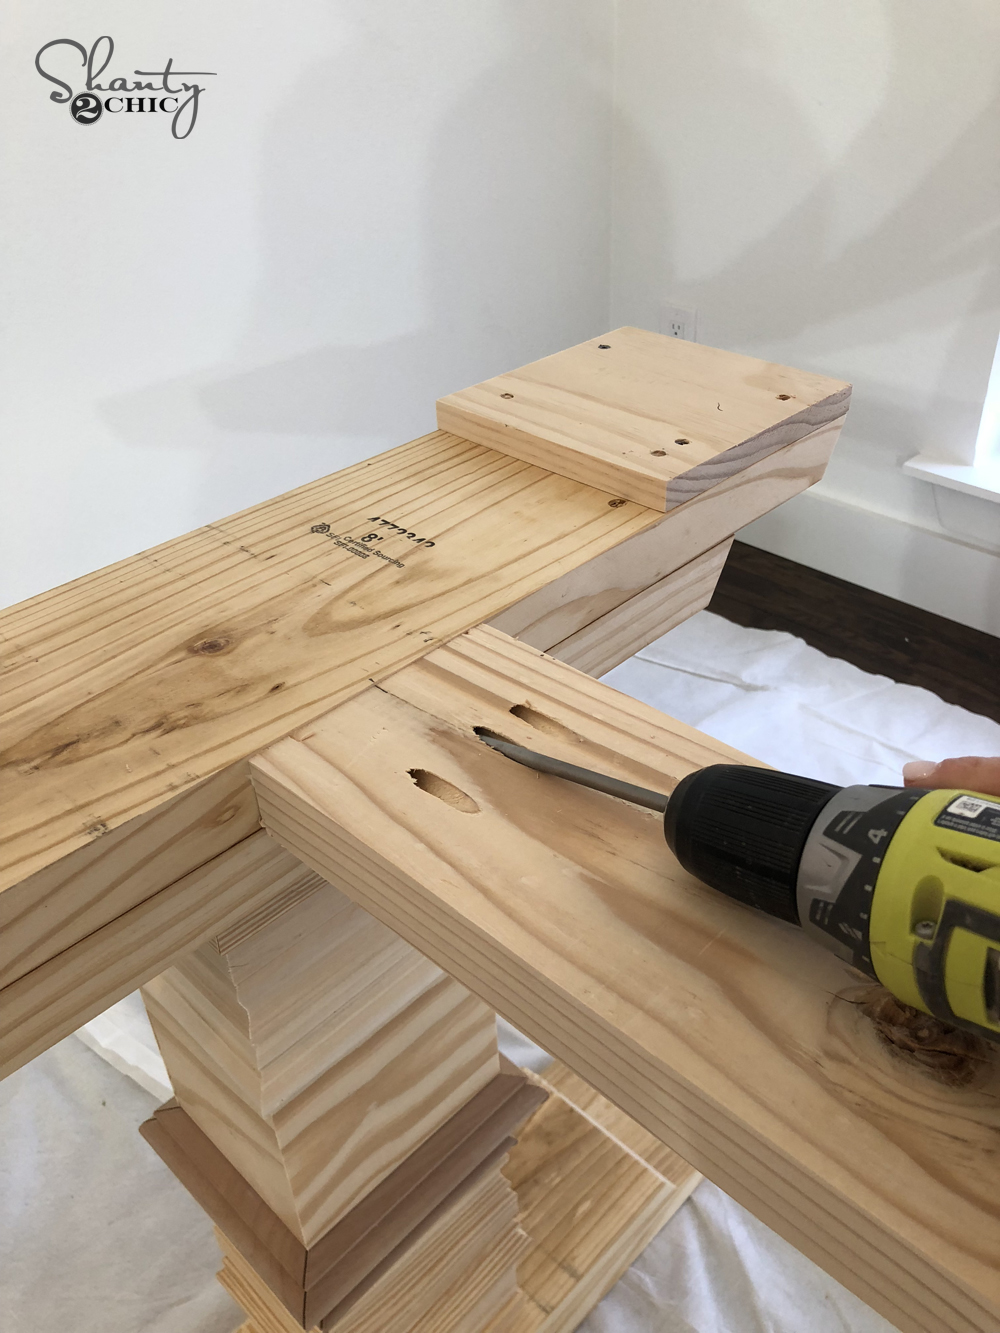
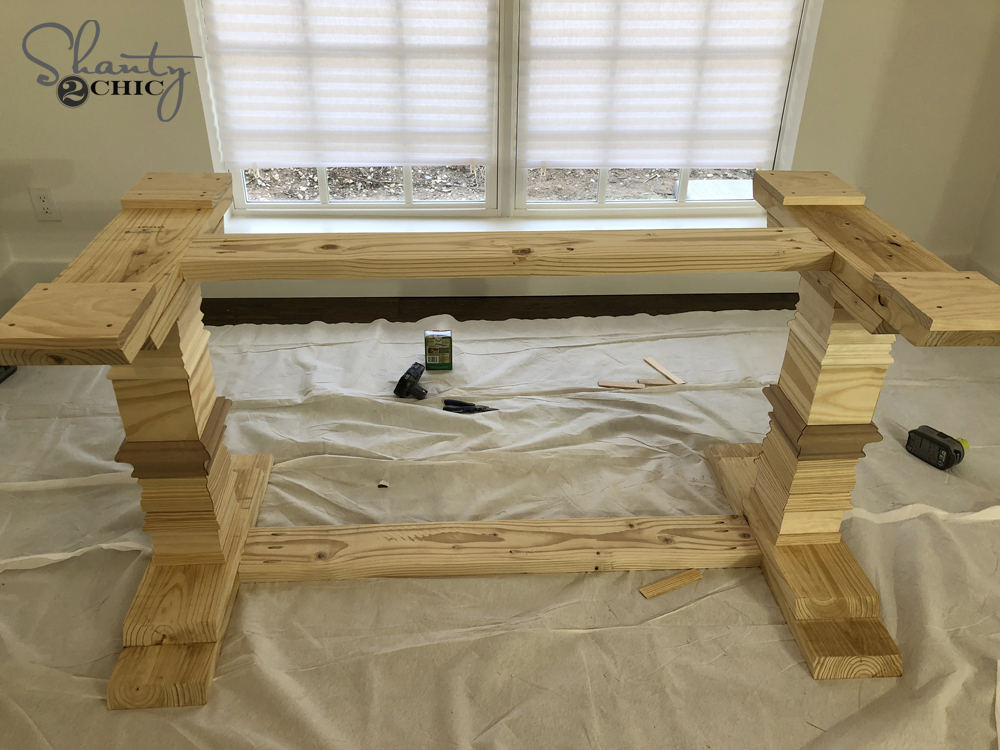
DIY Farmhouse Pedestal Table – Attach Runners
Attach both runners next. These are 2×6 boards that we ripped to 5”. The top runner will have 1.5” pocket holes that face up, and the bottom runner will have 1.5” pocket holes that face down. Attach both runners to the center of each leg assembly using wood glue and 2.5” pocket hole screws.

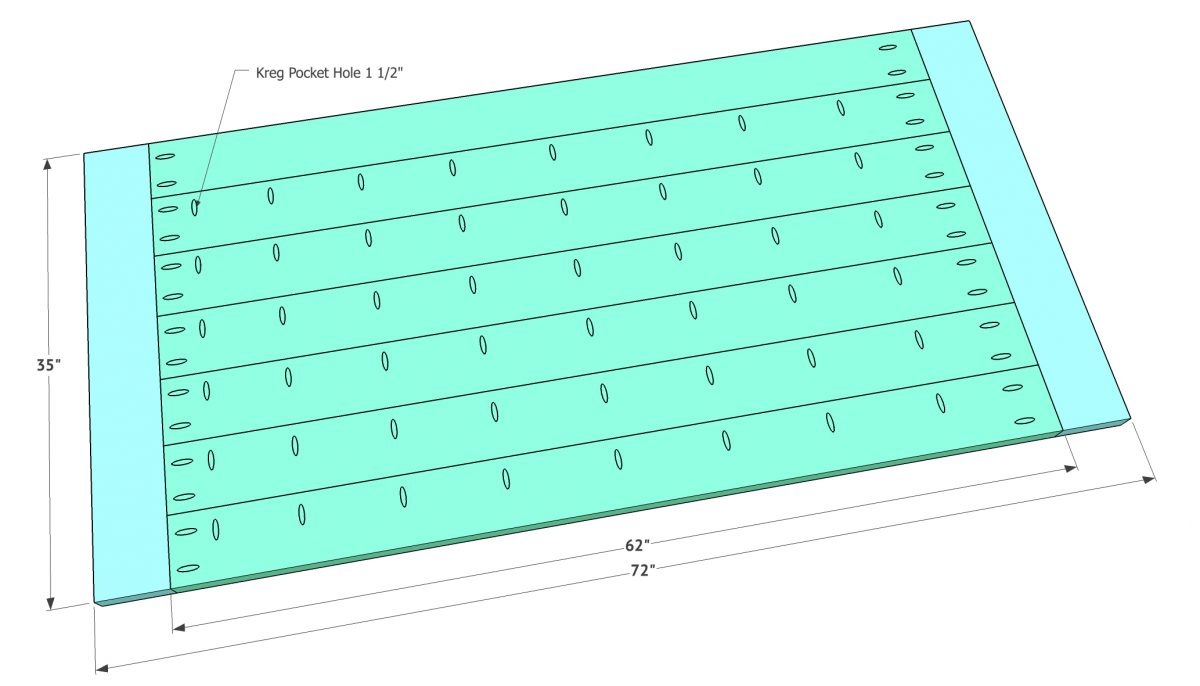
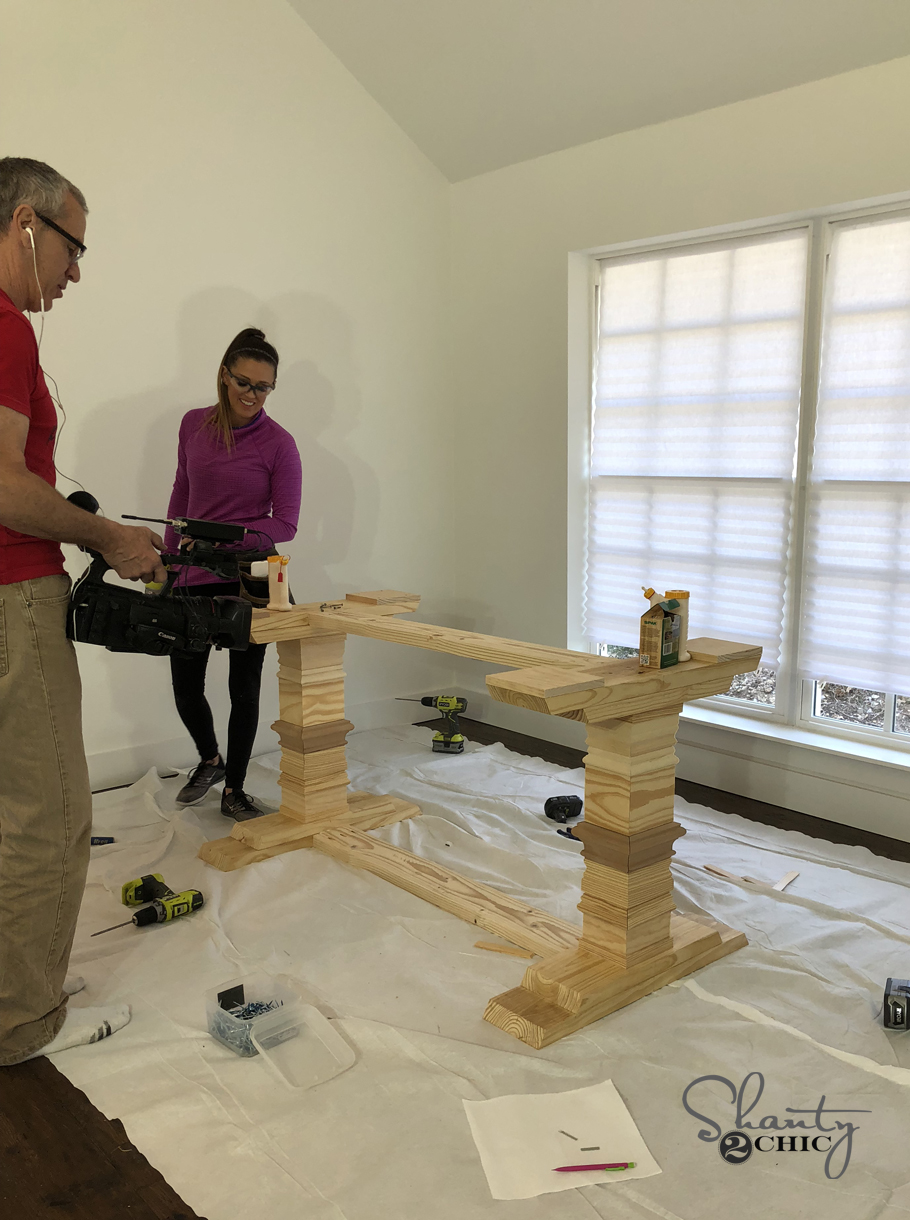
DIY Farmhouse Pedestal Table – Build The Top
Now build the top! These are also 2×6 boards that we ripped down to 5”. All but one of the longer plank boards will have 1.5” down one long side. All of the longer plank boards will also have 1.5” pocket holes on each short end. Attach the planks together using 2.5” pocket hole screws. Then, measure and cut the bread boards and attach them with the same screws through the end of each plank.
Attach the top of the table to the base with 3” Spax screws and wood glue through the top feet assemblies and the top runner and into the table top. Then, it’s time for the fun part! TRIM! You can have fun with this part. Go as basic or as ornate as you want. Starting at the bottom, attach different types of casing trims and baseboard trims around each leg. Work your way up until you have covered the 2×6 leg boards completely. Attach the trim using wood glue and a pin or brad nailer and wood glue. Be sure to watch our video on tips for this part!
And one more time… How cute is this baby? You can have fun with the trim! We used mainly base moldings, casings and chair rails, but the options are really limitless on this part! You can also go with primed MDF trim to save on the cost. Remember to check out the video for tips on cutting and attaching the trim.
Explore the complete list of Shanty2Chic dining table builds!


I absolutely love the design of this farmhouse pedestal table! The video tutorial made it so easy to follow, and I can’t wait to try building it myself. Thank you for sharing the free plans!
I absolutely love the design of this farmhouse pedestal table! The video tutorial made it so easy to follow along. Can’t wait to give it a try and update my dining space. Thanks for sharing such detailed plans!
I absolutely love this DIY farmhouse pedestal table! The plans are so easy to follow, and the video tutorial is super helpful. Can’t wait to try building one for my dining room. Thanks for sharing!
I absolutely love this DIY Farmhouse Pedestal Table! The plans are so easy to follow, and the video tutorial makes it even better. Can’t wait to try it out in my own home! Thanks for sharing such a fantastic project!
This DIY farmhouse pedestal table looks amazing! I love the plans and the video tutorial makes it so easy to follow. Can’t wait to try making one for my dining room! Thank you for sharing!
I absolutely love the design of this farmhouse pedestal table! The plans are so easy to follow, and I can’t wait to give it a try. Thanks for sharing the video tutorial as well—it’s super helpful! Looking forward to seeing more DIY projects from you!
I absolutely love this DIY Farmhouse Pedestal Table! The plans and video tutorial are so easy to follow. Can’t wait to get started on my own. Thanks for sharing such a great project!
I absolutely love this DIY Farmhouse Pedestal Table tutorial! The plans are so straightforward, and the video really helped clarify some tricky parts. Can’t wait to get started on my own table—thank you for sharing such detailed instructions!
I absolutely love this DIY farmhouse pedestal table project! The design is beautiful and it looks like a fun build. Can’t wait to try out the free plans and follow the video tutorial! Thanks for sharing!
Hello,
Would you recommend using biscuits to strengthen the table top? Also, how did you get the worn edges on the legs and what color paint/stain did you use?
Thanks!
such useful information thanks for sharing with us visit our site.
Why don’t they answer any of these questions???? I’d really like to know exactly which moulding you girls used, it is very overwhelming looking at so much moulding.
Because it make not be in stock anymore. It would be difficult to tell you the exact moulding. It’s something you’ll just have spend some time on that aisle and find what you need 🙂
I am wanting to build this as an 8 seater table (8′ long with bread boards on the ends so total 8′ 10″ with the same width). I am wondering if there is a formula for how close the pedestals need to be to the end to provide proper support for the top and bread boards. Thank you!
If I wanted to make the table shorter in length, how would I calculate the differences for the other pieces. Thank you.
Where did you get the couch/bench?
The plans for this needs to be edited. I see Comments from last year now after I have bought my materials the 2x8x8s should be 2x8x10s. Please fix for future builders.
Thanks still love you girls!