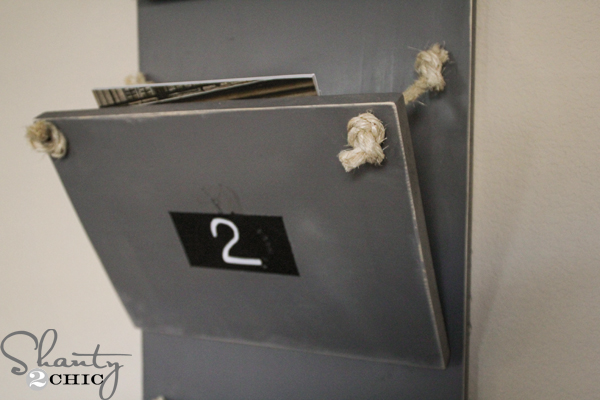
Hey there! To me, nothing quite beats drinking a cup of coffee and reading through magazines in the fall! I love fall, fall decor and fall decor magazines and I’m loving this DIY Magazine rack that I made to display magazines in our family room!
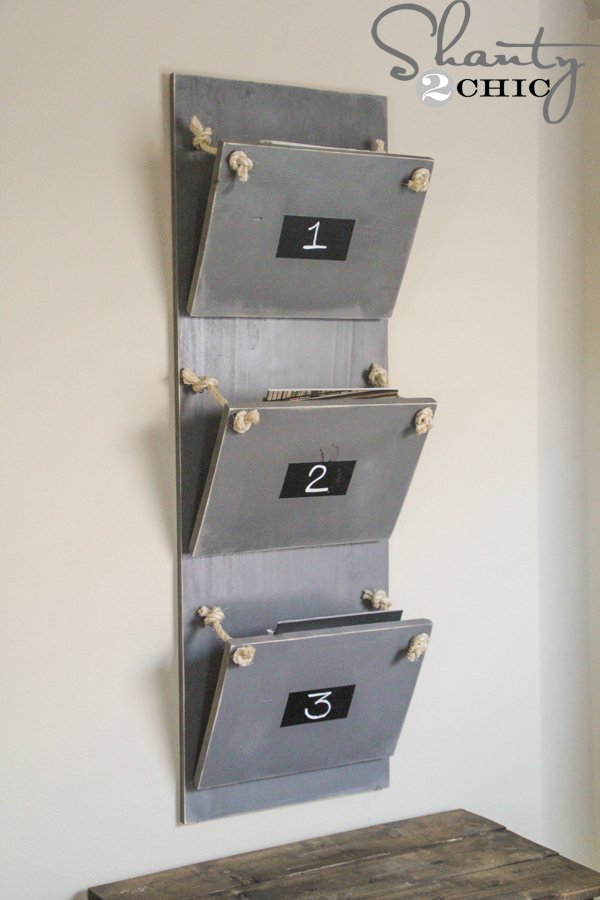 It has a lot of my decor favorites, gray, rope and chalkboard paint! It was super easy to make, all you need is a drill and it cost me under $20!
This is also the project that I was inspired to make for the Scotch Blue, Ready, Set, Paint Blog Hop Party! Oh, I should also mention we are holding a giveaway for a $200 Home Depot Gift Card! More on that later! Whoop 🙂

So, here’s how I made the DIY Magazine Holder!

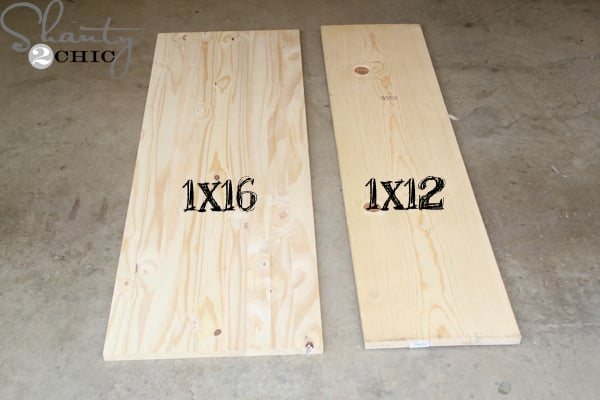 I started by purchasing a 1×16 @ 4ft. project panel and a 1×12 @4 ft.
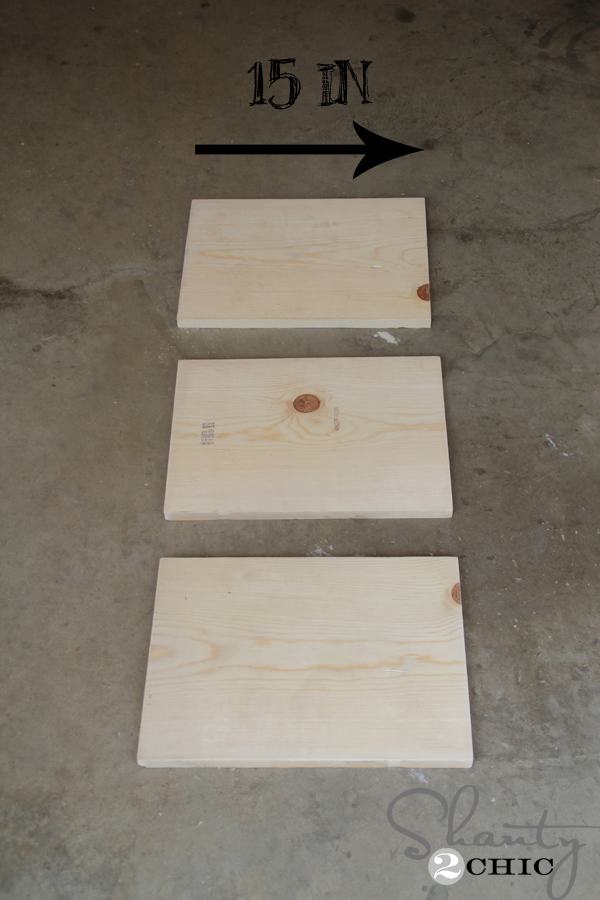 Cut 3 – 1×12 @ 15″. If you don’t have a saw, just have your hardware store make these cuts!
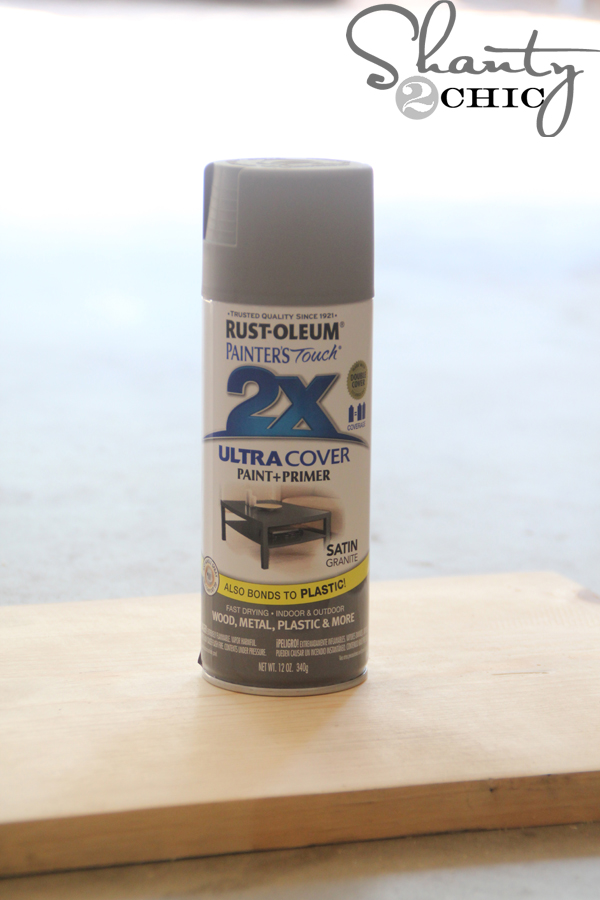 Next, I spray painted the 1×16 and 1×12’s with Rust-Oleum Granite. Spray paint the front and backs of the 1×12’s.
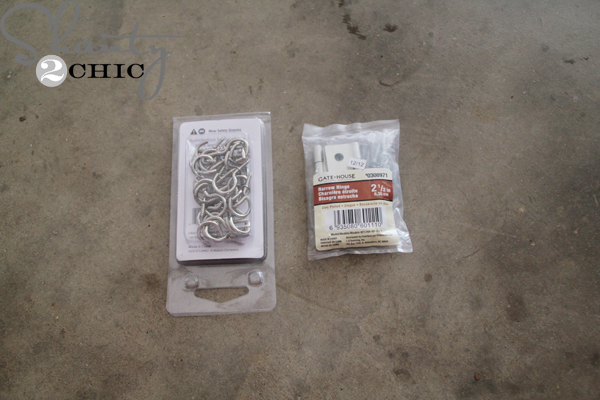 I also purchased a package of 7/8″ cup hooks and a 3 sets of 2 1/2″ hinges.
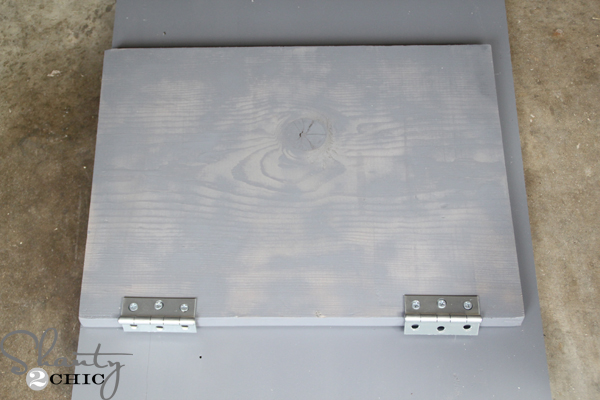 I installed 2 hinges on the back of each 1×12, 1 1/2 inches from each side.
 Next, I flipped the 1×12’s over and attached them to the 1×16 with the hinges. I marked the center of the 1×16 and attached the middle board first. Then, I just eyeballed the top and bottom boards.
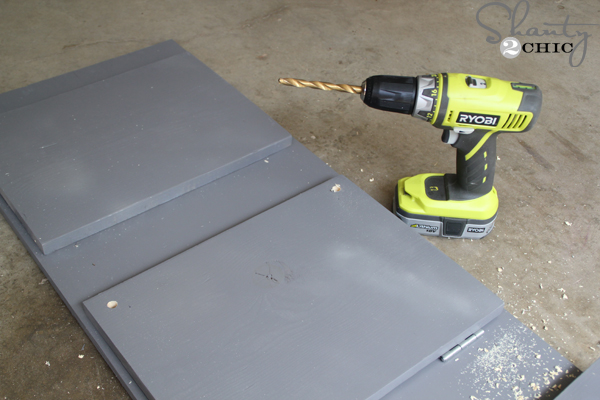 Now, using a 10mm drill bit, I drilled 1 hole in the top corner of each 1×12. I put mine 1″ from the top and side.
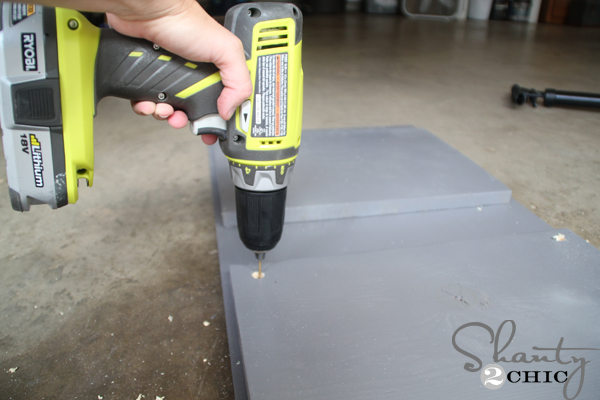 Now, using a 1/16″ drill bit, I drilled through the holes in the 1×12 through to the 1×16 board. This is just a small hole for the cup hooks so you don’t need to drive the bit very far.
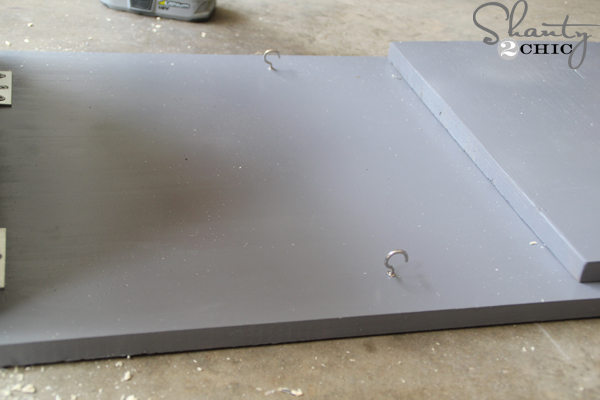 To follow up, just screw a cup hook in to each hole. Finish twisting with the open end of the cup hook facing the top of the 1×16.
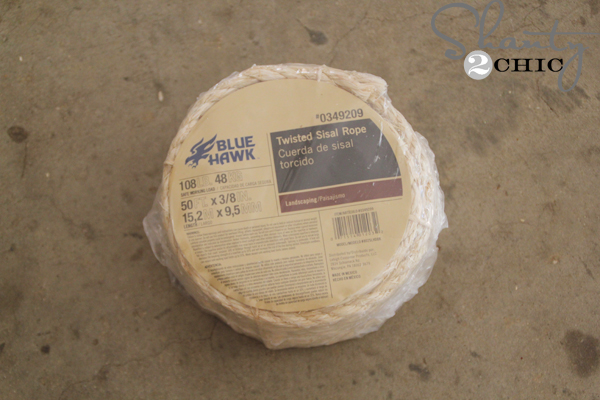
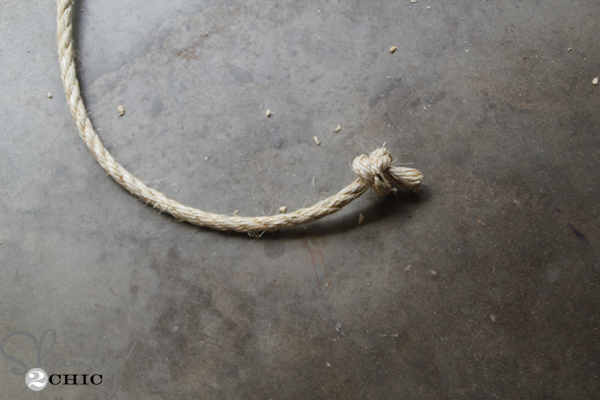 I purchased a roll of Sisal Rope and cut 6 14″ pieces and tied a knot at the end of each piece.
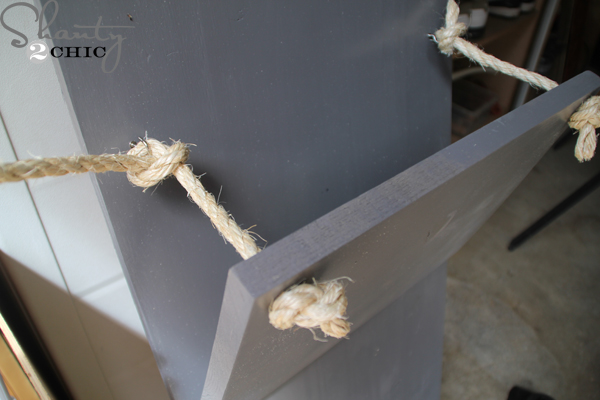 Thread each piece of rope through the hole in the 1×12, tie a knot at the other end (I put my knots 5″ apart) and hook the middle of the new knot onto each cup hook.
Now for some fun!
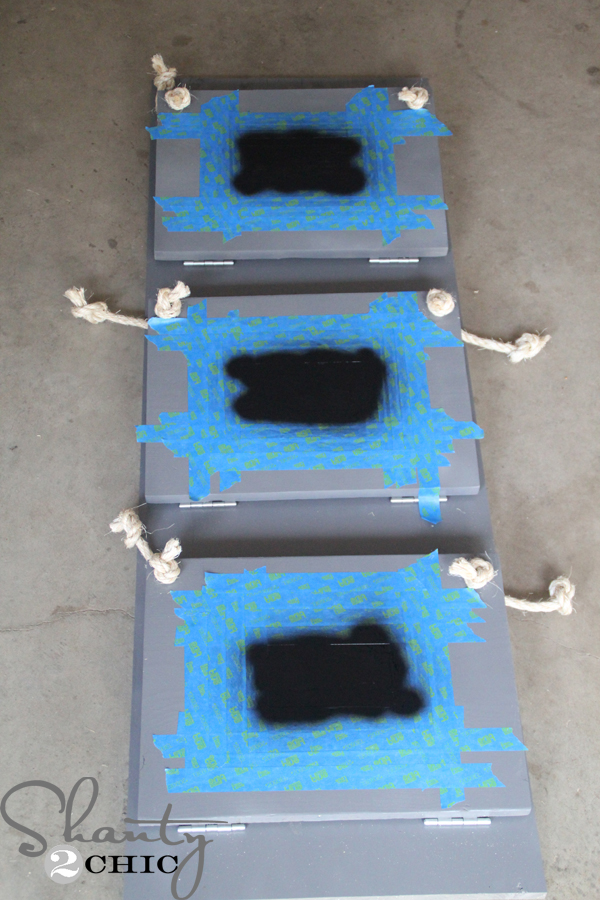
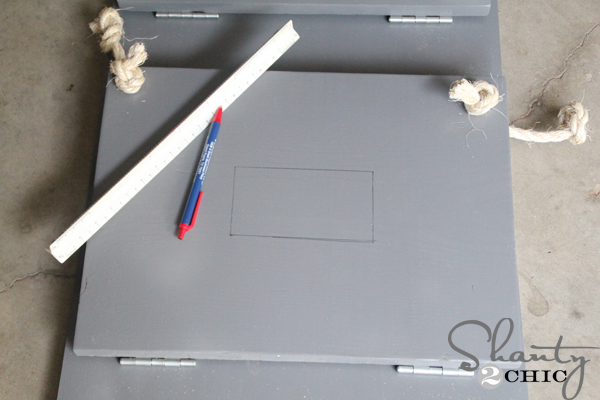 I decided to put chalkboard labels on each magazine holder. To do this, I marked off a 5×3 rectangle, right in the middle of each board, with a pen and a ruler.
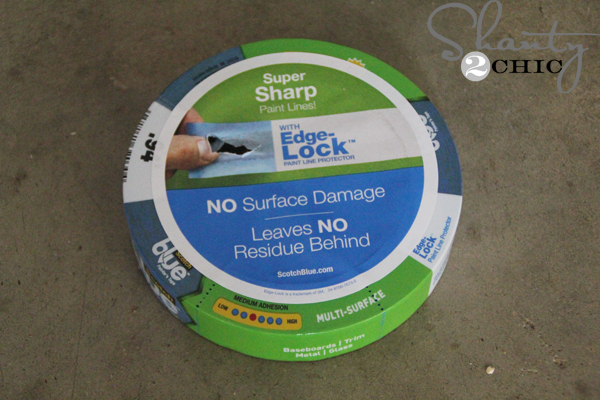 Now, using ScotchBlue™ Painter’s Tape
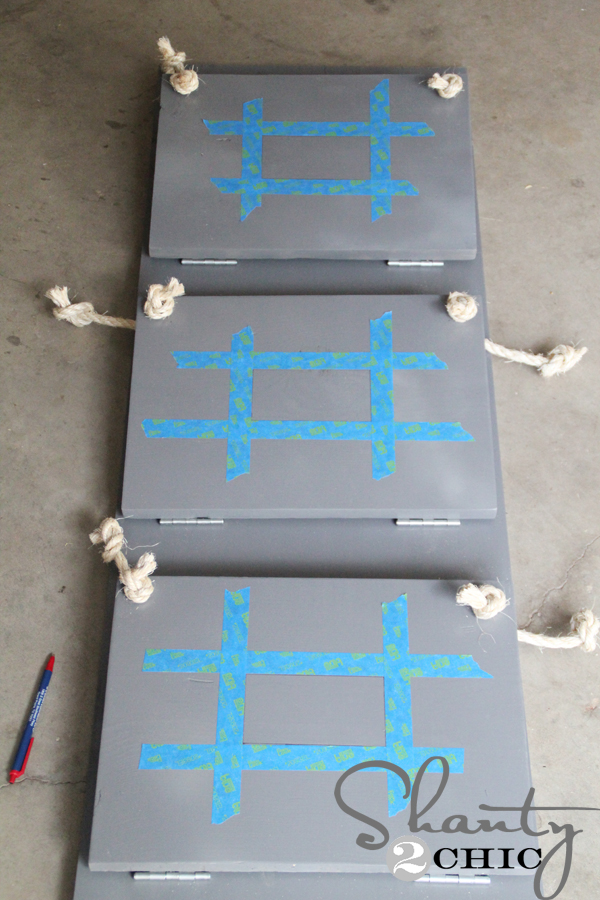 I taped off around the 5×3 rectangle.

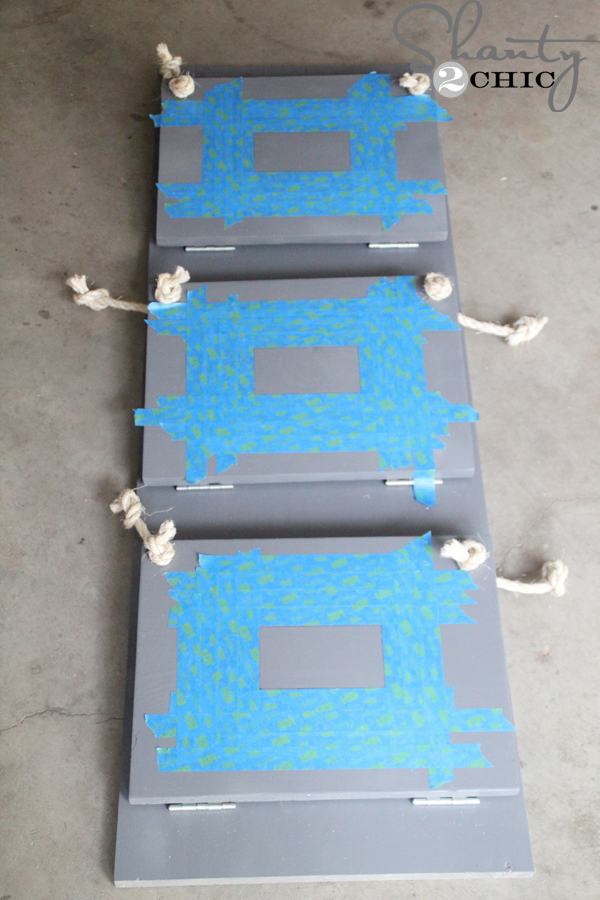 and added more tape to prevent overspray!
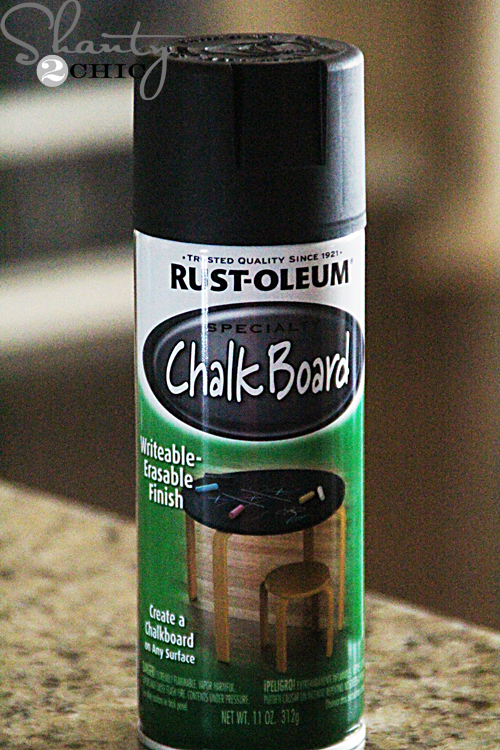 I sprayed two coats of Rust-Oleum Chalkboard spray paint in the middle of each rectangle
 let it dry
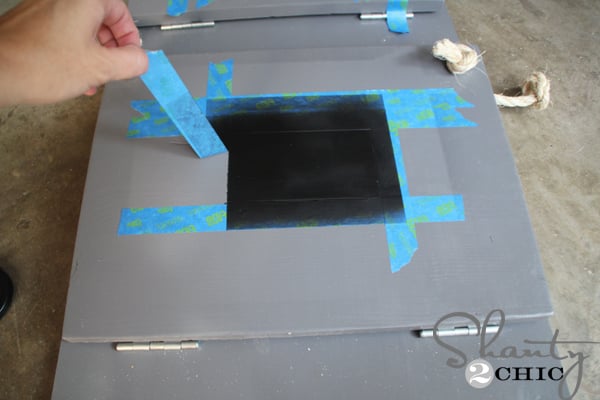 and peeled the tape away!
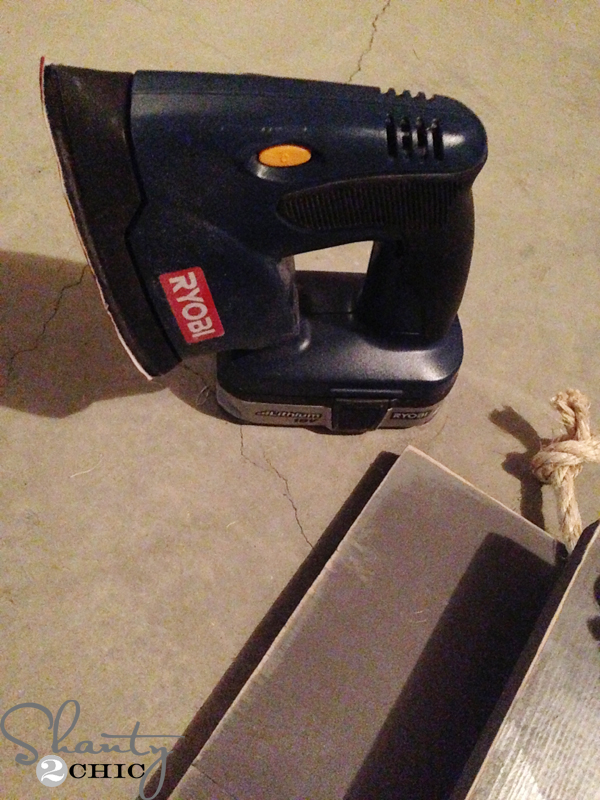 As an after-thought, I decided to distress the edges. This step would be best to do before you add the rope and hardware but I didn’t know if I wanted it distressed at that time. I used my Ryobi Corner Cat to distress every edge.
That was it!
A quick, easy and cute way to display all of my magazines for the Fall! I’m thinking my guests will love this too 😉


This post was brought to you in partnership with The Home Depot and ScotchBlue™ Painter’s Tape.
Now for the giveaway!!! One winner will receive a $200 Home Depot Gift Card! That’s a LOT of DIY 😉
After you have entered, check out all of the fun projects from other bloggers in the Ready, Set, Paint Blog Hop!
Centsational Girl – Textured Panel Dresser Makeover,  Thrifty and Chic Framed Stencil Wall,The Design Confidential DIY Concrete Color Block Painted Tables
  Sand & Sisal Faux Etched Glass,
 The Girl Creative Summer Chalkboard,
 PB & J Stories Dipped Effect Outdoor Bench and Front Patio Makeover ,In My Own Style How to Paint Outdoor Furnitur,Making this Home Embellish with a Paint Border
 Rustic Bench Gets Modern Moroccan-Inspired Makeover
 DIY Game Table
  Fun with Fireworks
 Charles & Hudson – Wood Block Planter
 Love of Family and Home – DIY Striped Curtain
 LollyJane – Mailbox Makeover
  Nesting Place – Painting with Chalk
 Thistlewood Farms: How to Paint Stripes
  Live Laugh Rowe: DIY Drop Cloth Table Runner
  SawdustGirl – Spray-Painted-Striped Lemonade Stand Canopy
 Make It: Painted Horseshoes
  DIY Pet Food Station
  Spearmint Color Blocked Vintage Wicker Headboard
 DIY Mason Jar Dining Caddy
 Build a Large Wall Frame for a Chalkboard or Mirror
 Build a Large Wall Frame for a Chalkboard or Mirror

I just finished making a table for my two boys. I really would love to make a bed for my oldest son. He has grown out of his toddler bed too soon for me. *sigh*.
I have so many magazines, I might just have to try this! I love painting just about anything I can to give something a new look!
Love this idea. Have been looking for one for my husband office and kids computer room. I also loved your key holder too and had my hubby make one. Thank you.
Looks great! Useful as well as decorative projects are right up my alley, thanks for sharing the how to.
That is absolutely gorgeous! I love all of the details, and it looks simple enough to try…thanks girls!!!
I am loving all of the pallet artwork out there right now & I love your hanging wall sconces too! 🙂
Your hanging bathroom shelf is my favorite! Almost done with mine!
You gals make all this look so easy! Lovin’ the magazine holder.
Thank you Dori!!
I love transforming closets into hidden gems of awesomeness!
I am loving all the chalkboard ideas out there right now.
Gorgeous!!!!!
My favorite DIY painting project right now is this magazine holder!
Looks good! I totally thought that was metal!
This looks great! I don’t know how y’all come up with so many great ideas!
Anything that I get to use my kreg jig on is my “favorite” project! LOVE THAT TOOL!
So, This is not one of your “favorite” projects 🙂