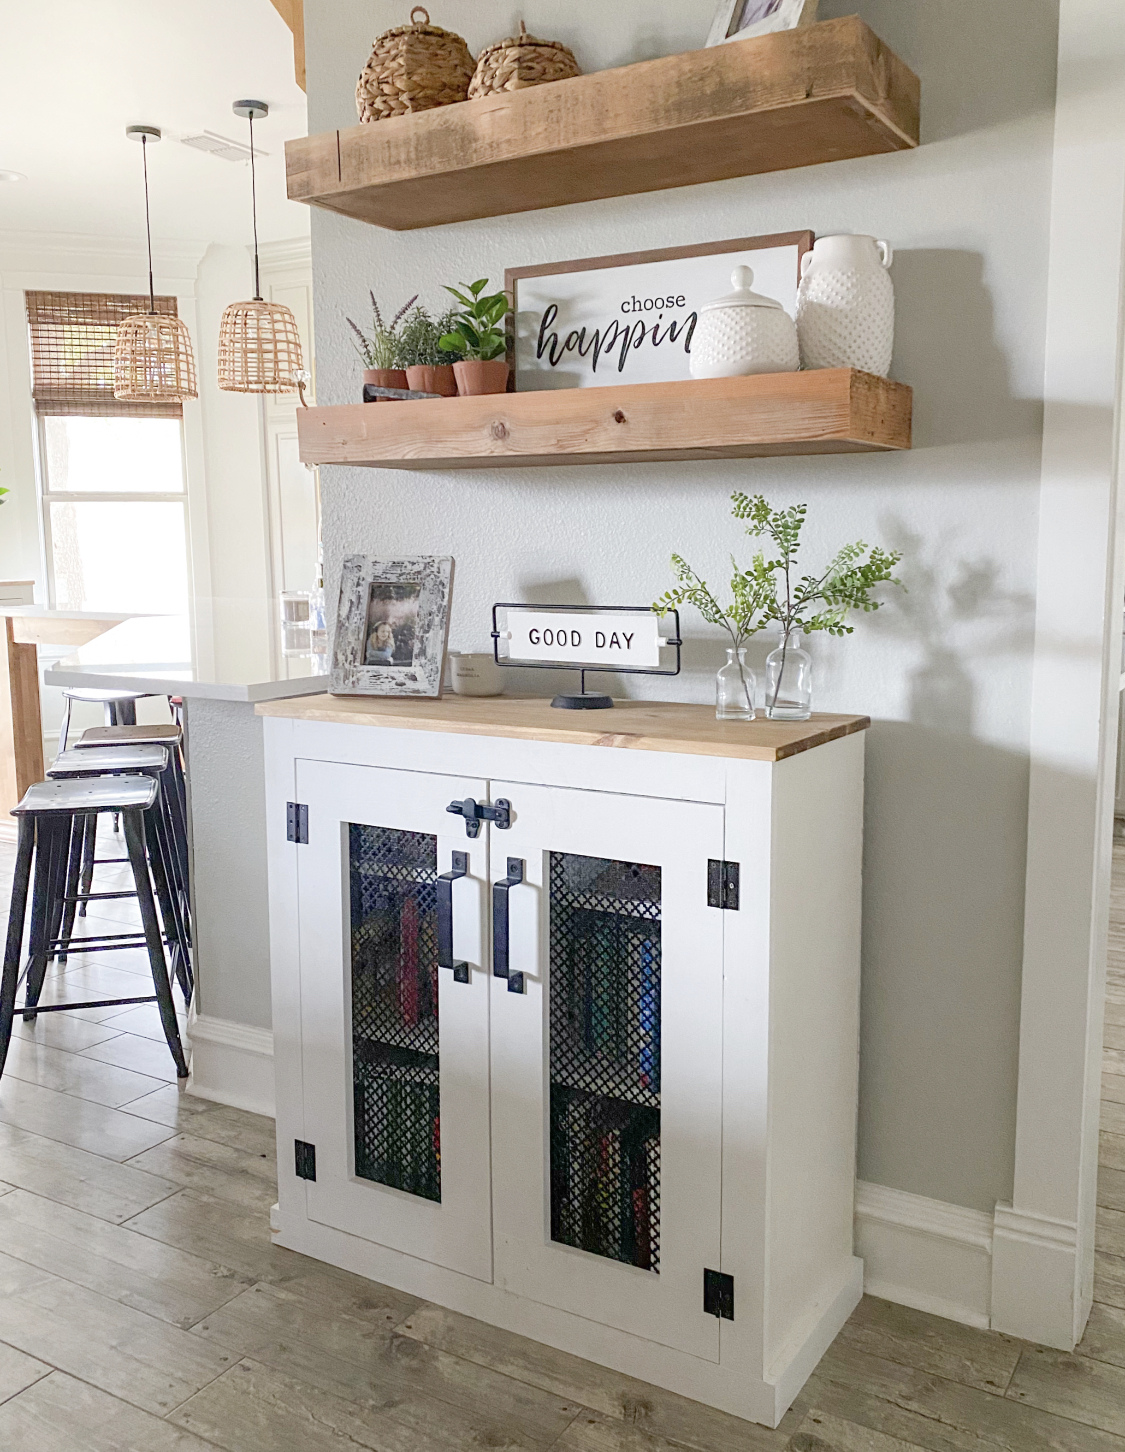
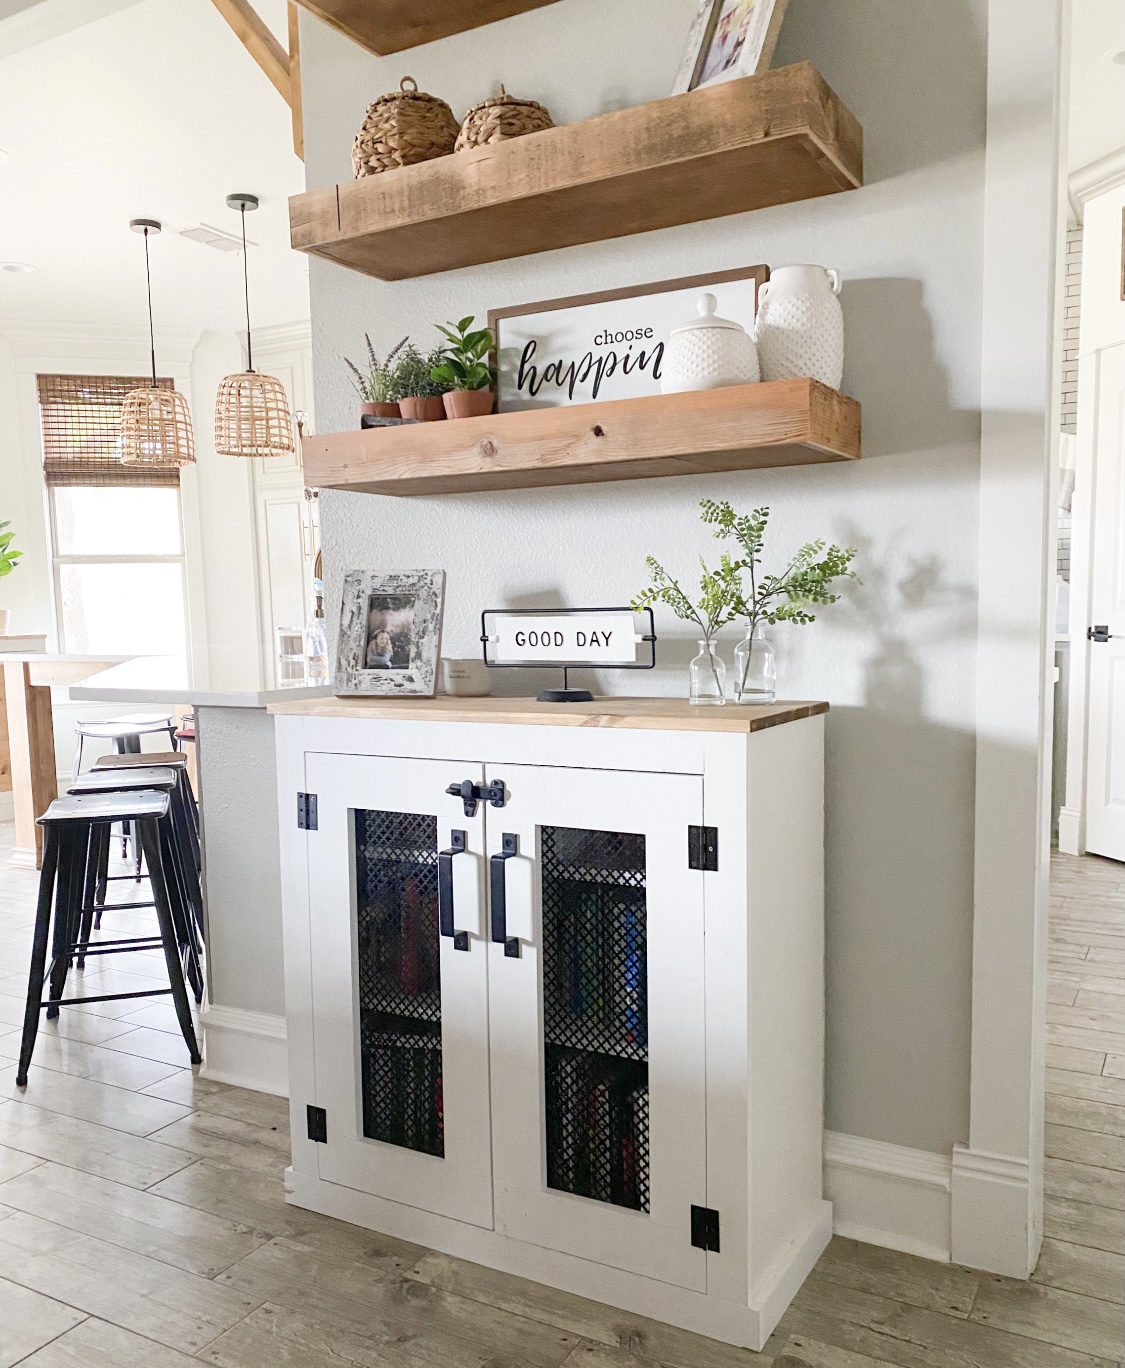
Hey friends!! I hope you all had an amazing Christmas! We did for sure! As many of you know, my youngest little boy is autistic. One thing that he loves more than anything in this world is books. He loves them more than any toy. We gifted him several new ones at Christmas, and I am always adding to his collection. The books were taking over my living room, and I needed a place to store them. So, I built him the cutest DIY Library Cabinet. He loves it, and I love that we have a place to store his collection… Win win! I teamed up with Purdy Paint Products on this project! Look how cute it turned out!
Before we get started, be sure to download the FREE plans for the coffee cabinet by clicking HERE! This is the same basic design as our DIY Tin Door Cabinet, so those are the plans you will follow. The only modification will be how you do your doors, and the number of shelves which I have noted in this post! Here we go!
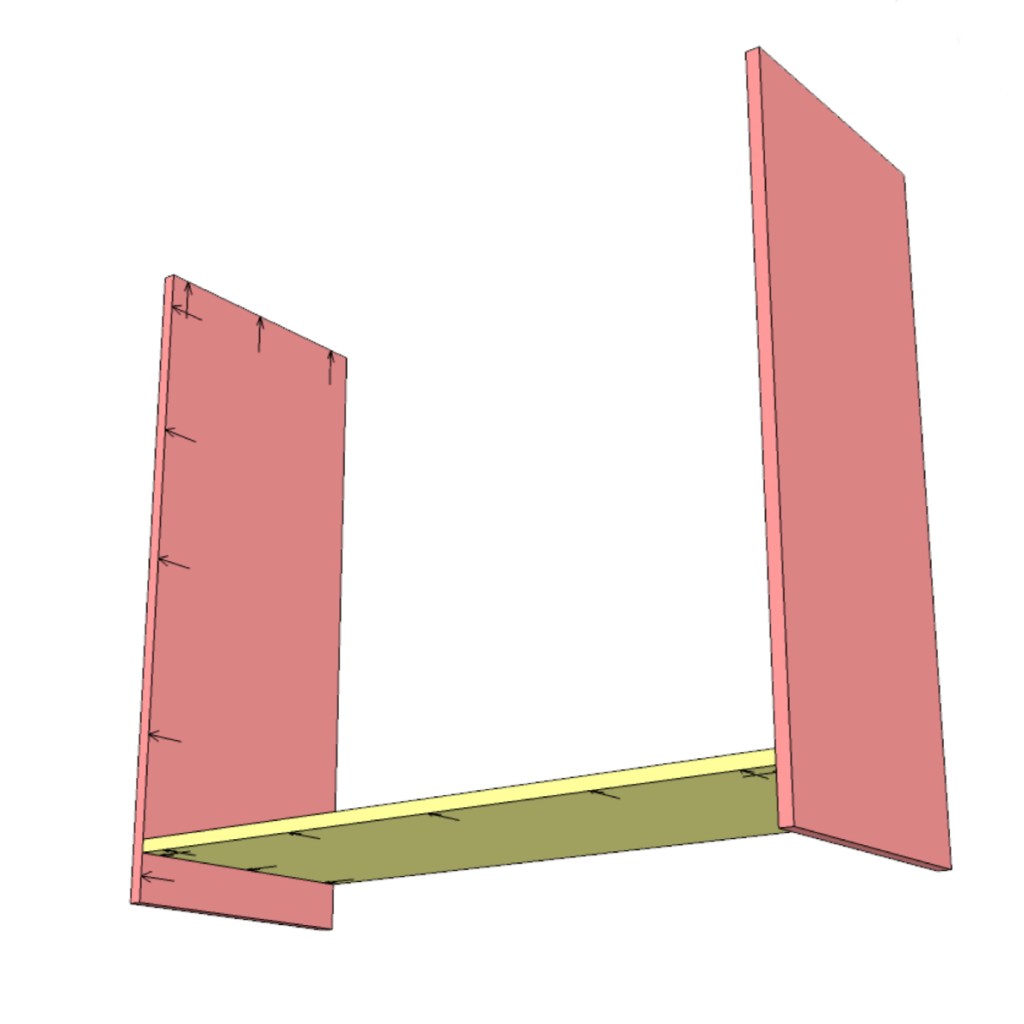
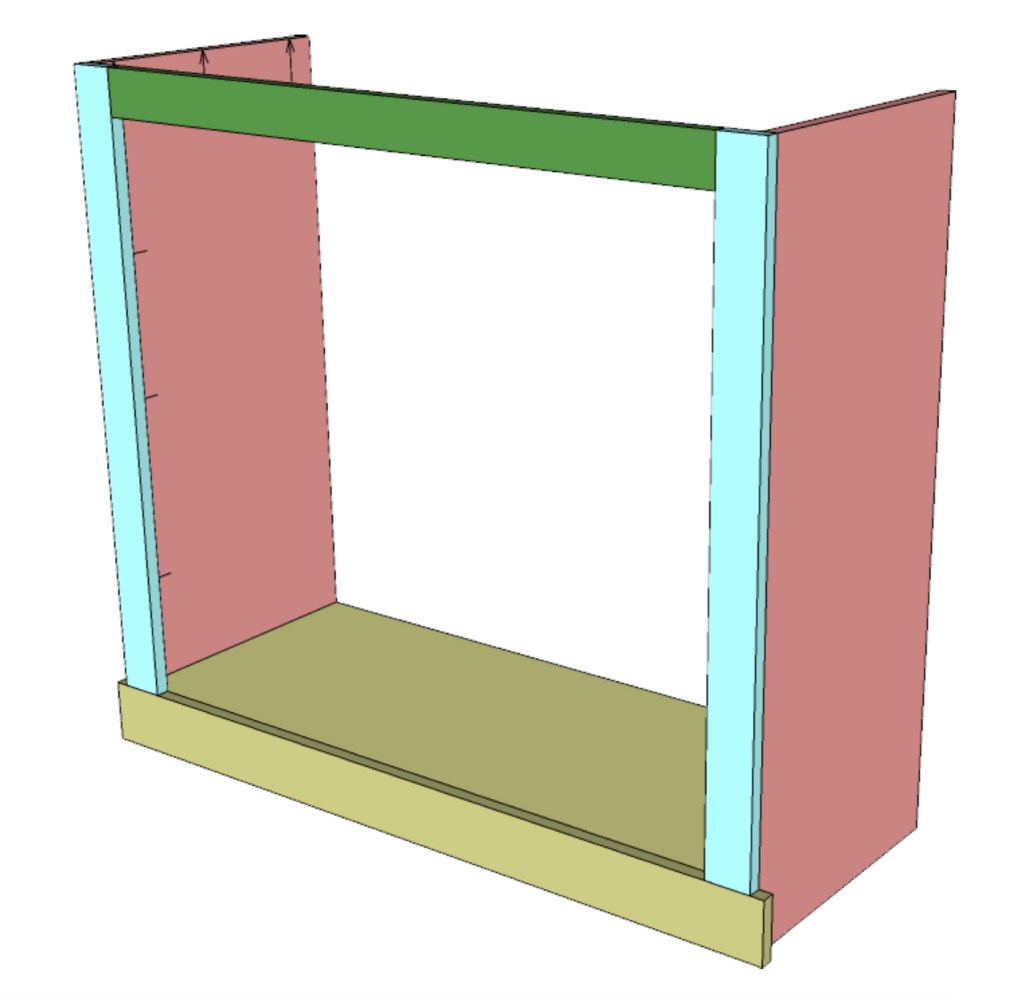
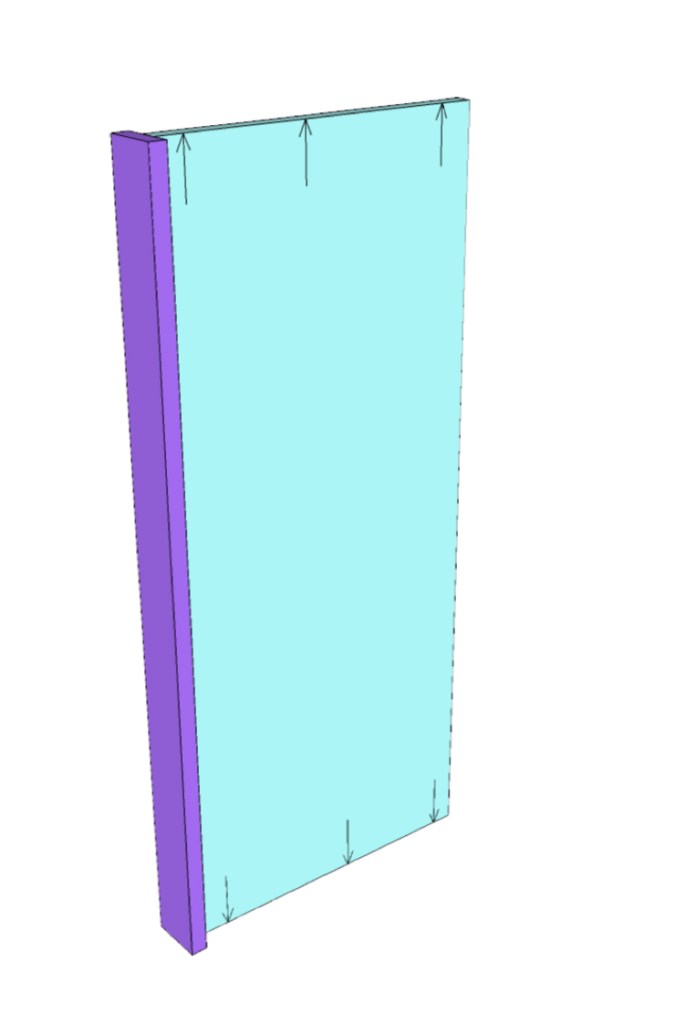
Use wood glue at every joint in this project. Secure the bottom panel to to side panels. Make sure the pocket holes are positioned on all of the pieces to later attach the front face frame. The top of the bottom shelf should be 3-1/2” from the ground. I used my Kreg Jig to create the ¾” pocket holes for this whole build.
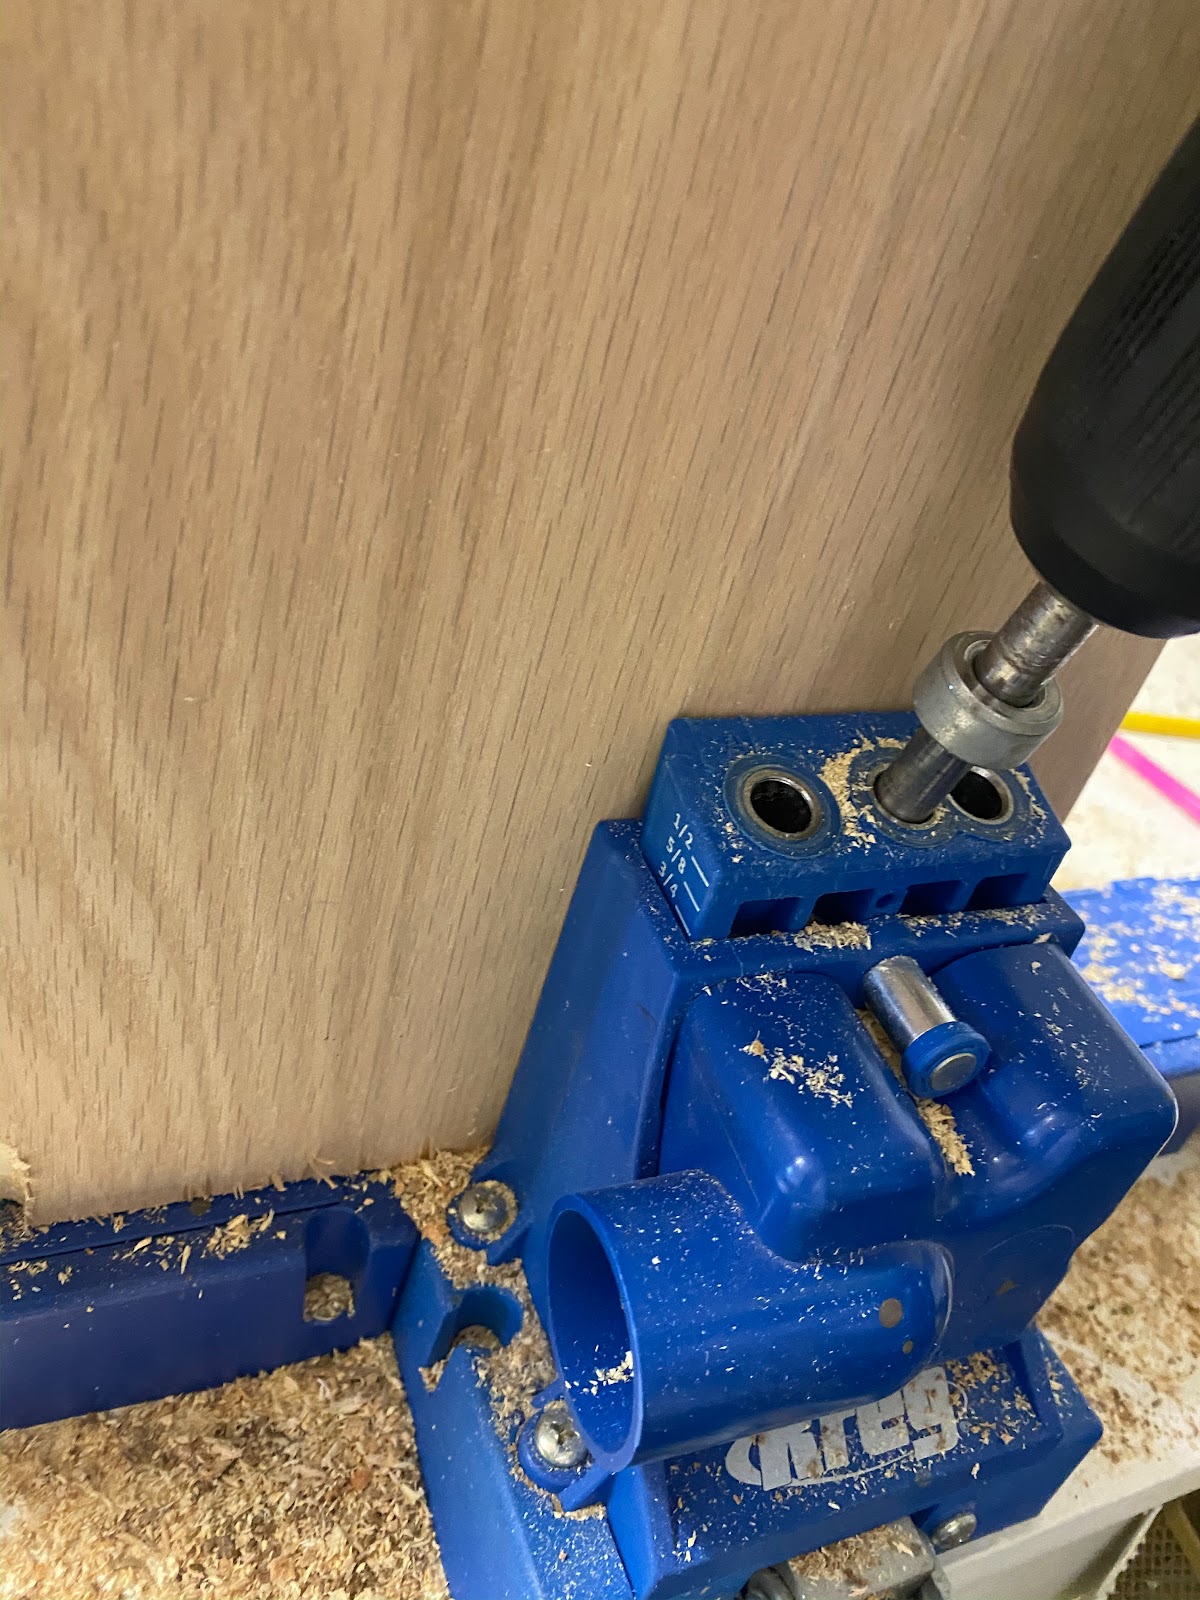
You can find our favorite Kreg Jig model here! We use this for almost every single build!

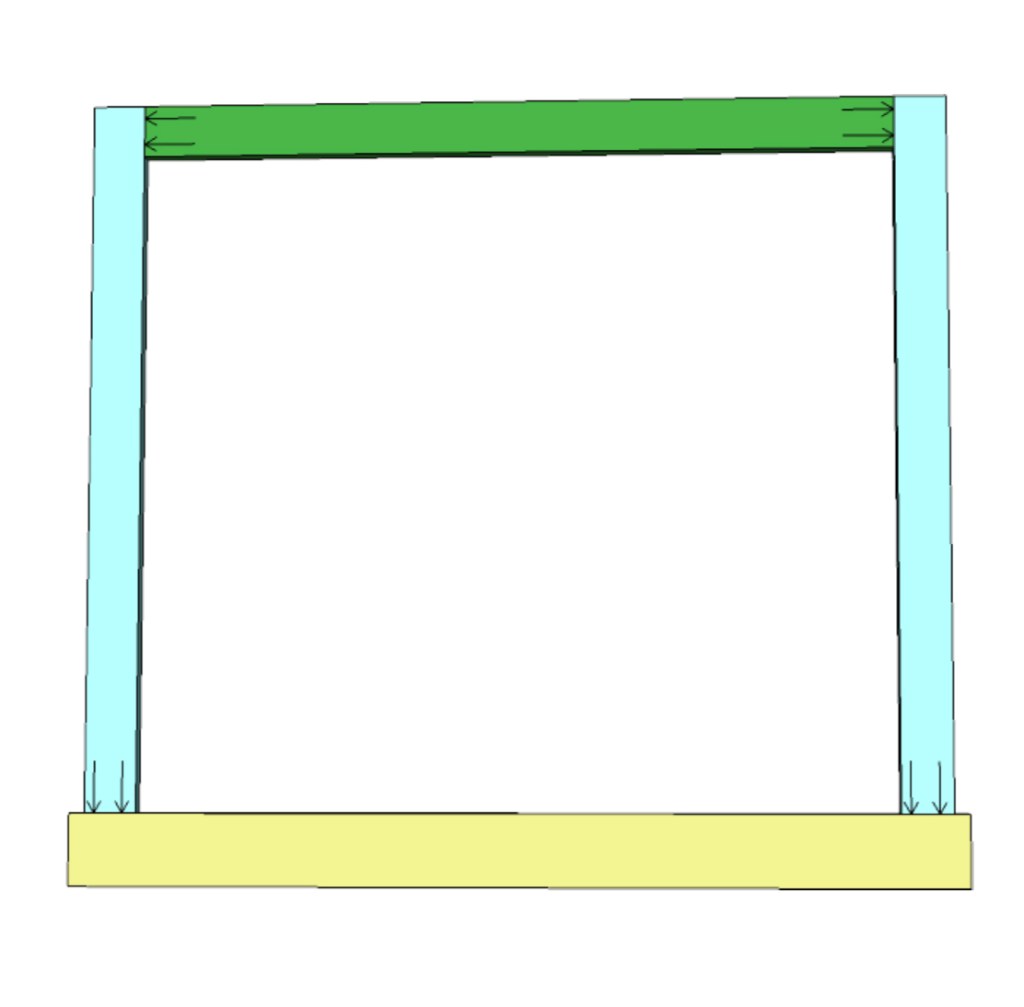
Assemble the face frame with pocket hole screws. The bottom board is centered with 3/4” overhang on both ends.
Glue and screw the front face frame onto the plywood panels.
Using glue and brad nails, attach the lower side trim boards.
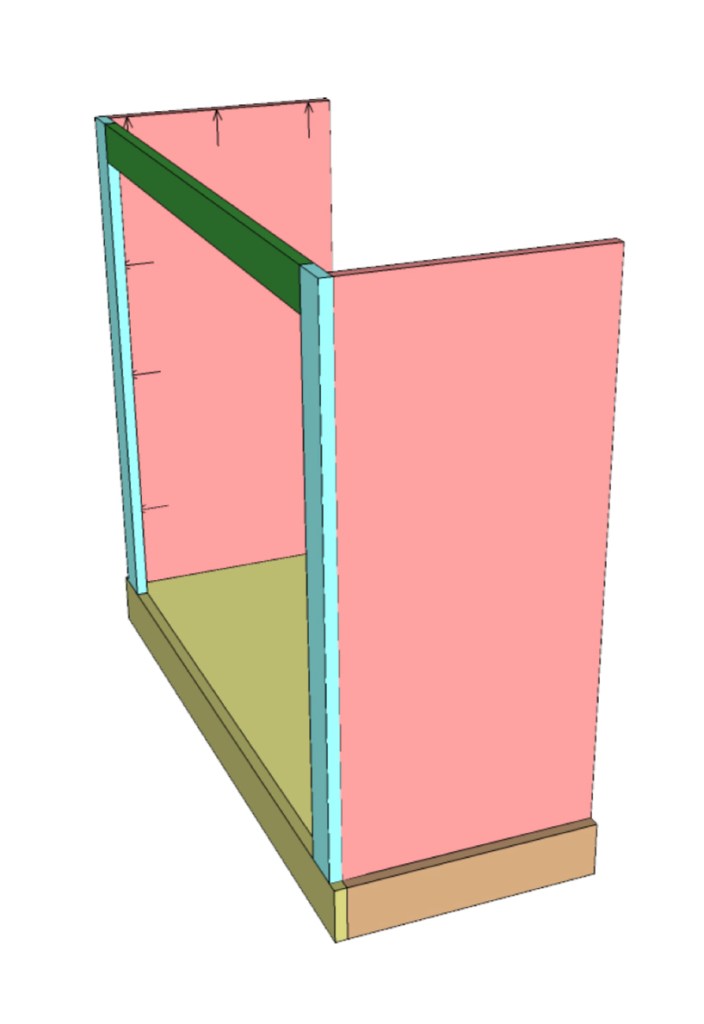
Using glue and brad nails, attach the center trim board to the middle divider. This trim board should be centered on the plywood.
Secure the center divider in place with pocket hole screws on the bottom end with brad nails through the top of the center trim board into the top of the face frame.
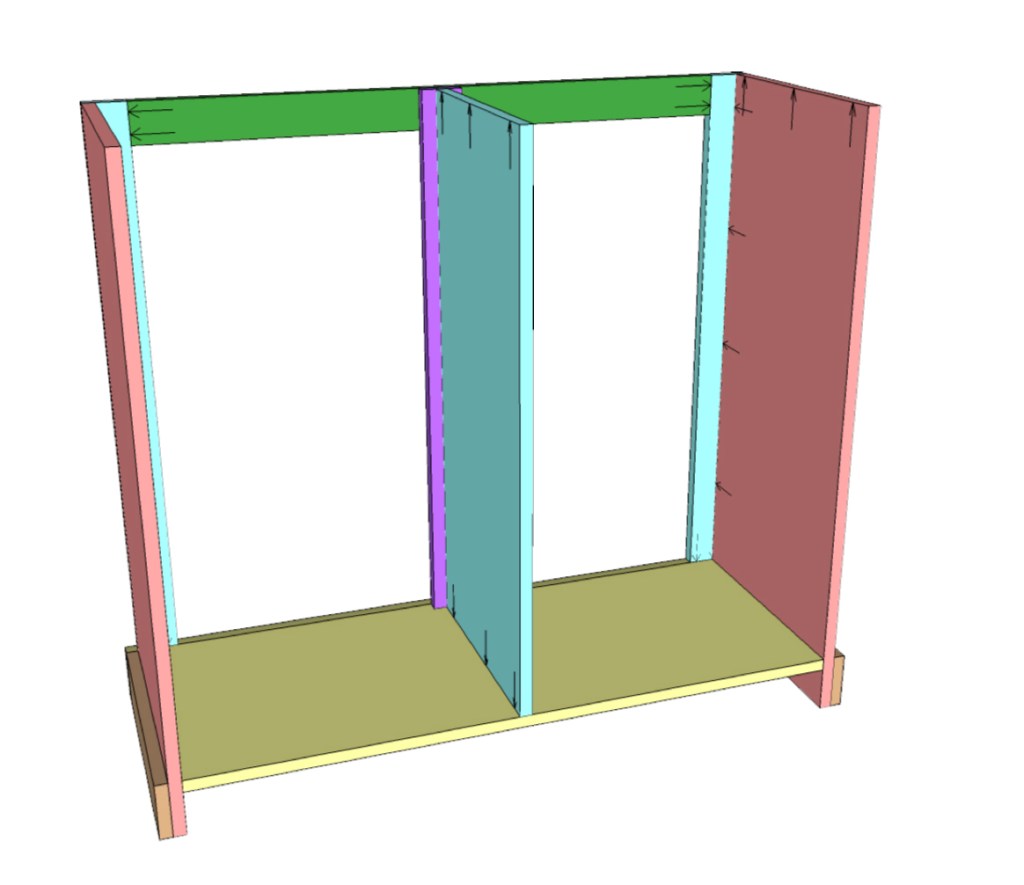
Add the shelves. I decided to add two shelf boards on each side of my cabinet allowing me 6 different shelves to store books. You can add as few or many as you would like to fit what you will be storing in your cabinet.
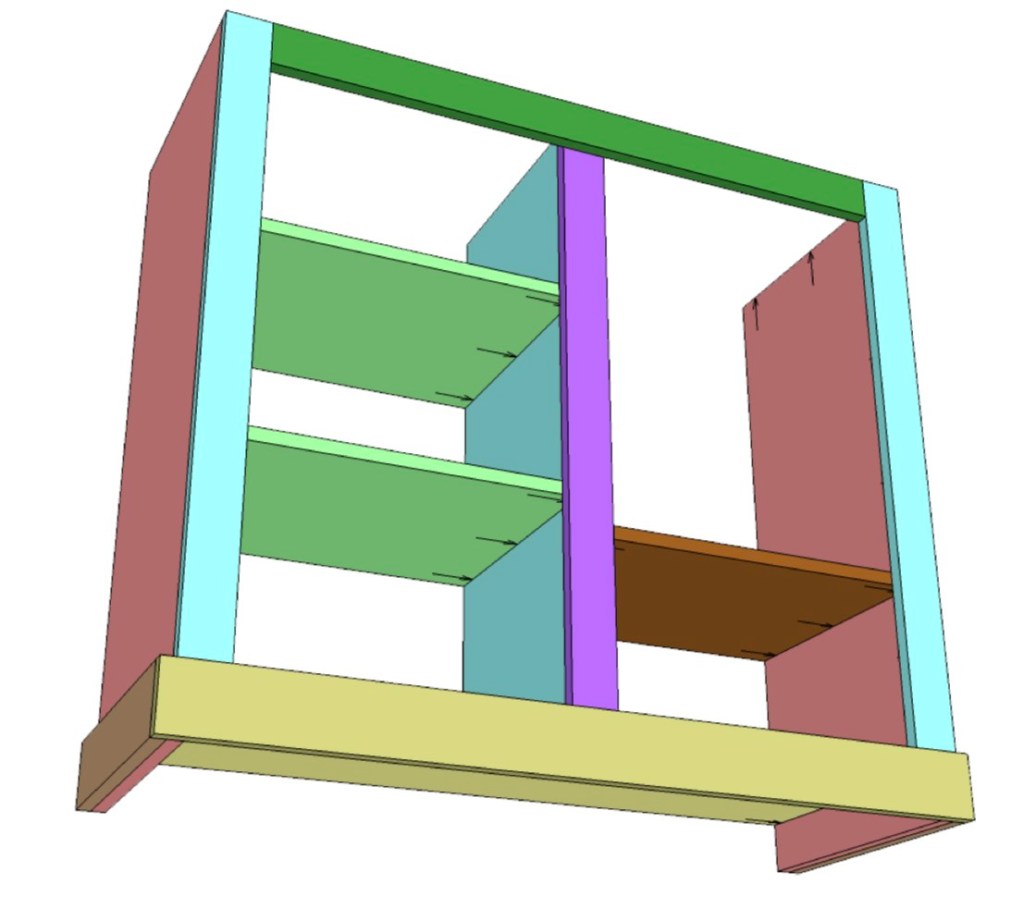
Assemble each of your shelves. This plan calls for pocket holes on the bottom of the plywood but you can use brad nails if you want.
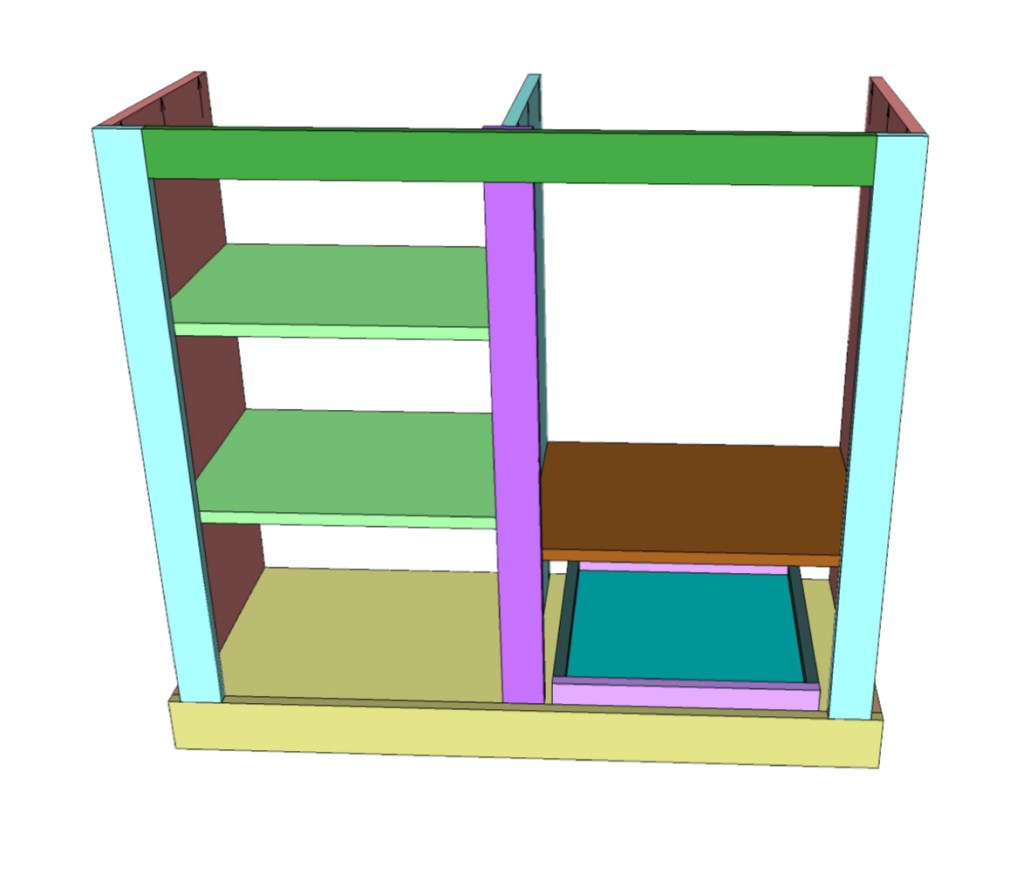
Use pocket hole screws to assemble the planked top. You can also use a project panel for your cabinet top. Make sure to get a “stain grade” sample if you plan to stain yours like I did. Center it on the cabinet and attach it with pocket hole screws through the vertical sides and center divider. Attach your 1/4” plywood panel for the back with glue and brad nails.

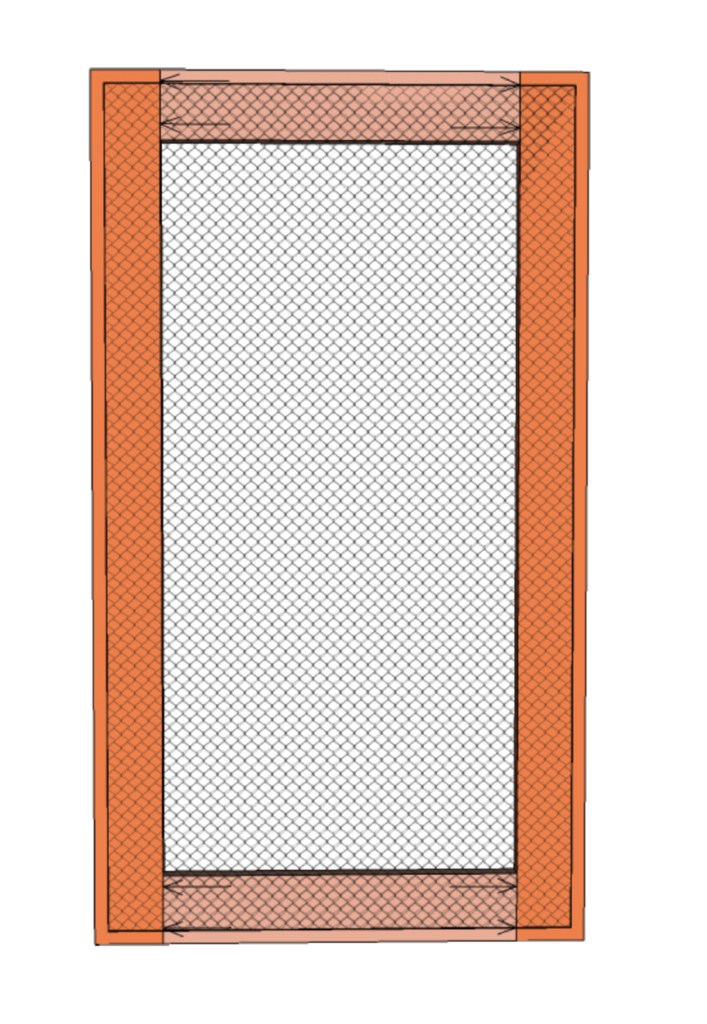
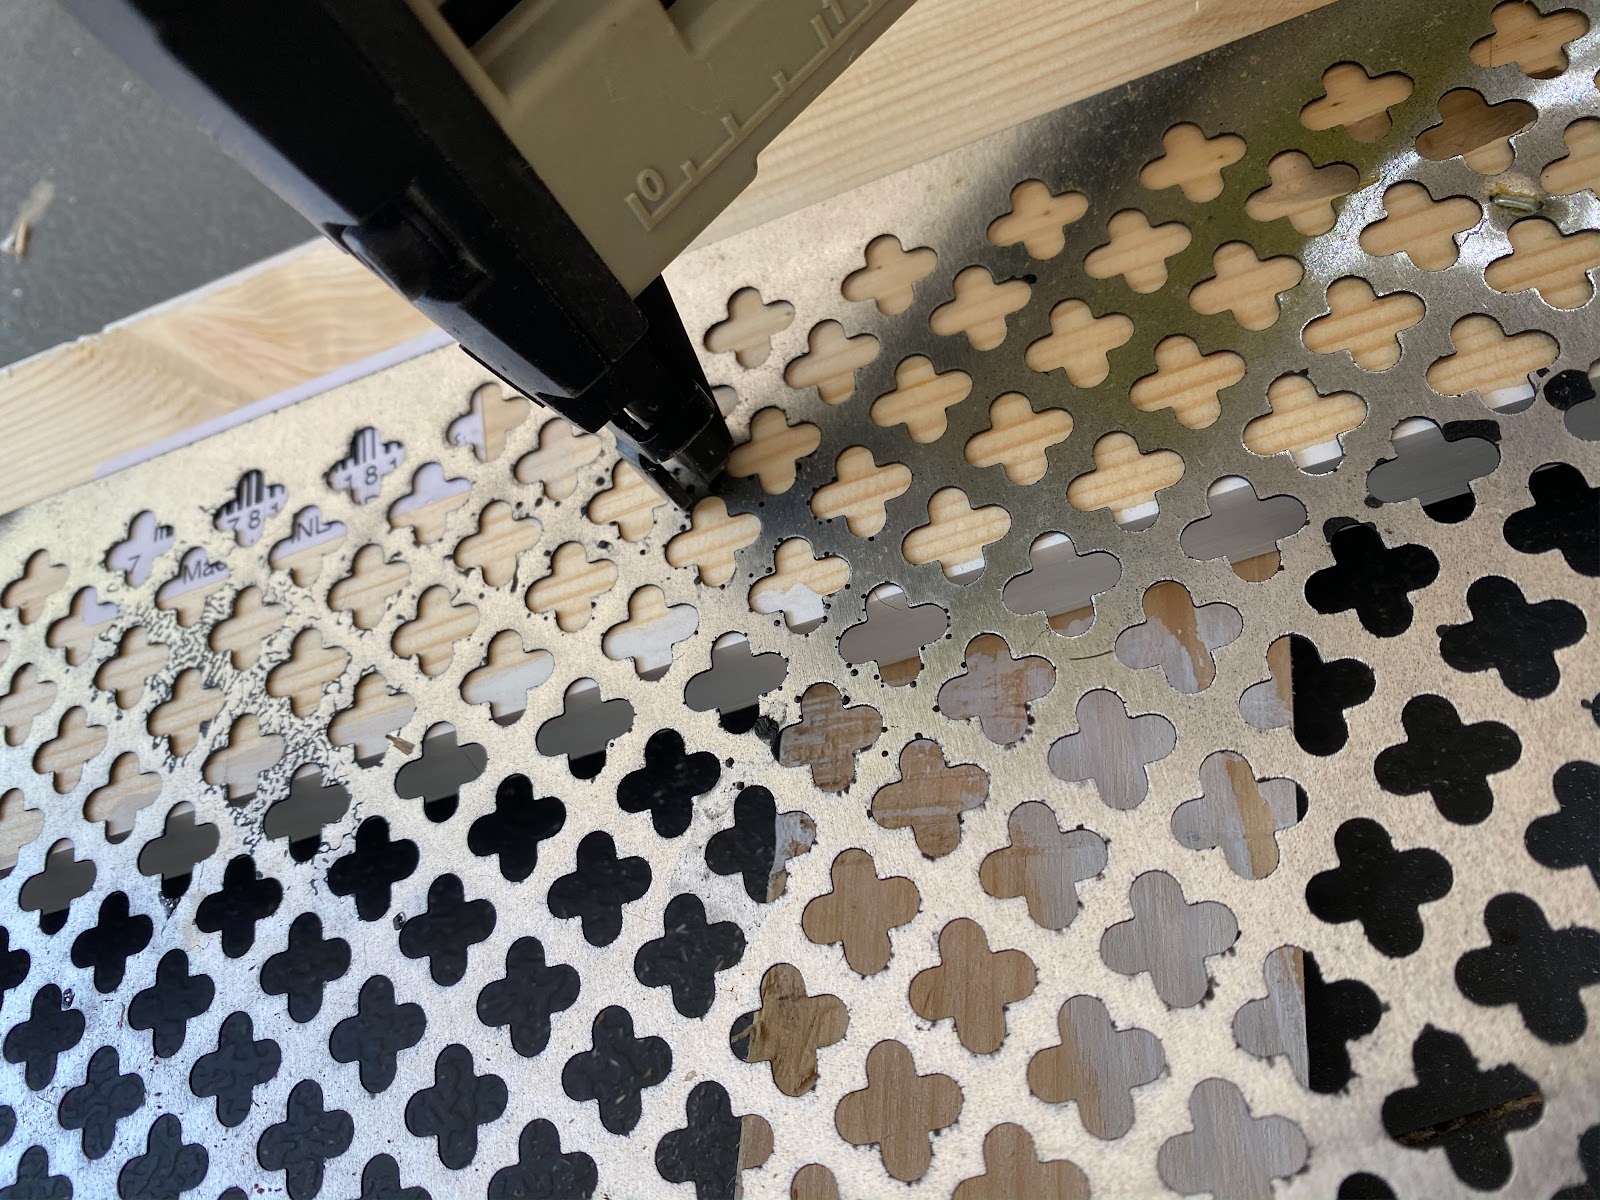
Assemble both door frames with glue and pocket hole screws. Adjust your dimensions as needed. The measurements in this plan will leave a 1/8” spacing around the door. Before you add the metal sheet, paint the frame of the door and let it dry. You also need to paint your metal sheet if you plan to at this point. I used black spray paint on mine. Then staple the metal sheet to the inside of the door panels. I found my metal sheet at a local craft store, but you can also find them HERE on Amazon or HERE at Lowe’s.
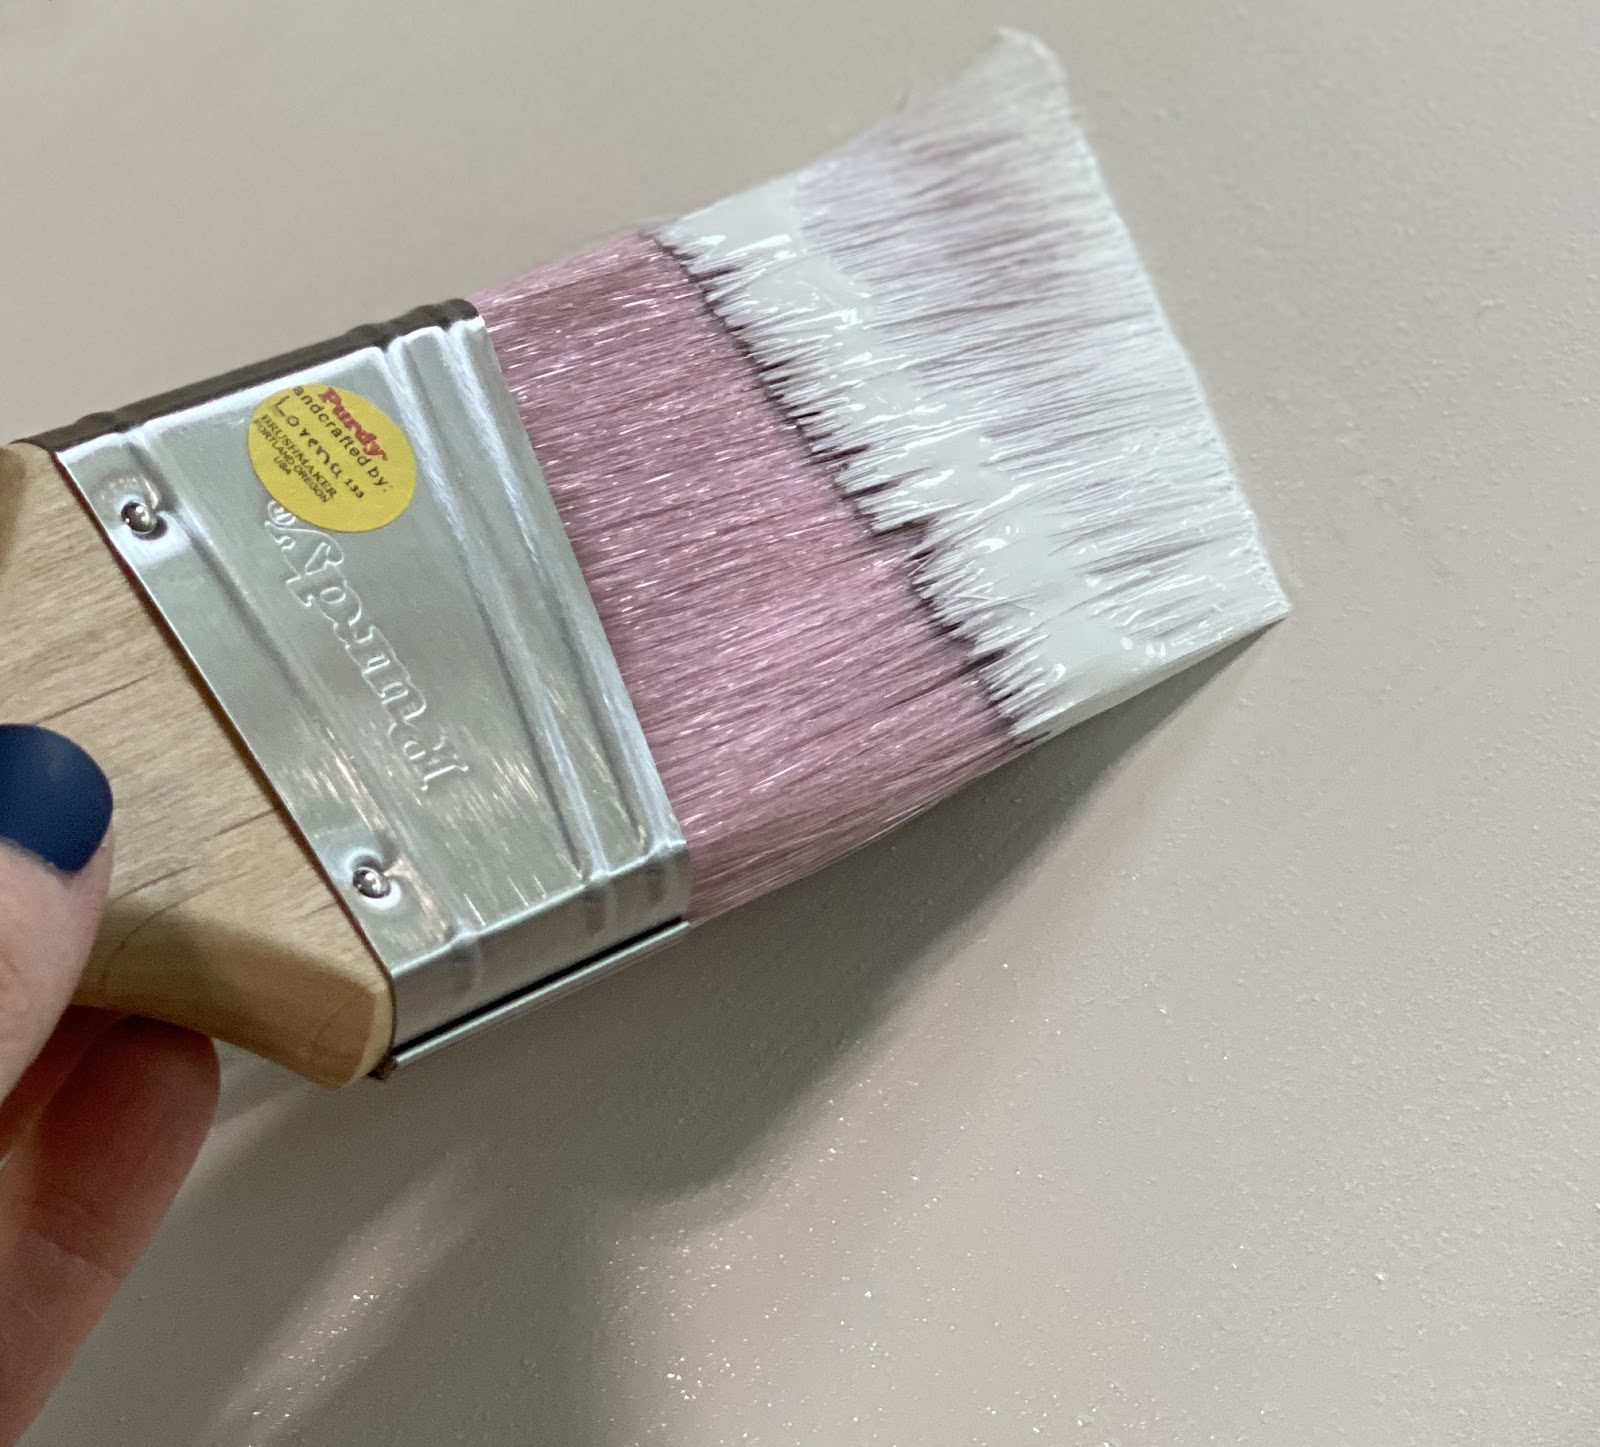
Fill any nail holes, sand, and apply your finish of choice. This is where my Purdy tools came in handy! I used different brushes for each application.
For the cabinet itself, I knew I wanted a smooth painted finish. For this project, I used my Purdy Pail with Purdy Pail liners and I also used my Purdy Nylox brush.
You can find these products and see all of their other great products by visiting Purdy’s website HERE!
For those of you that don’t own the Purdy Pail, it’s time to get one. This thing is a game changer when it comes to painting projects.
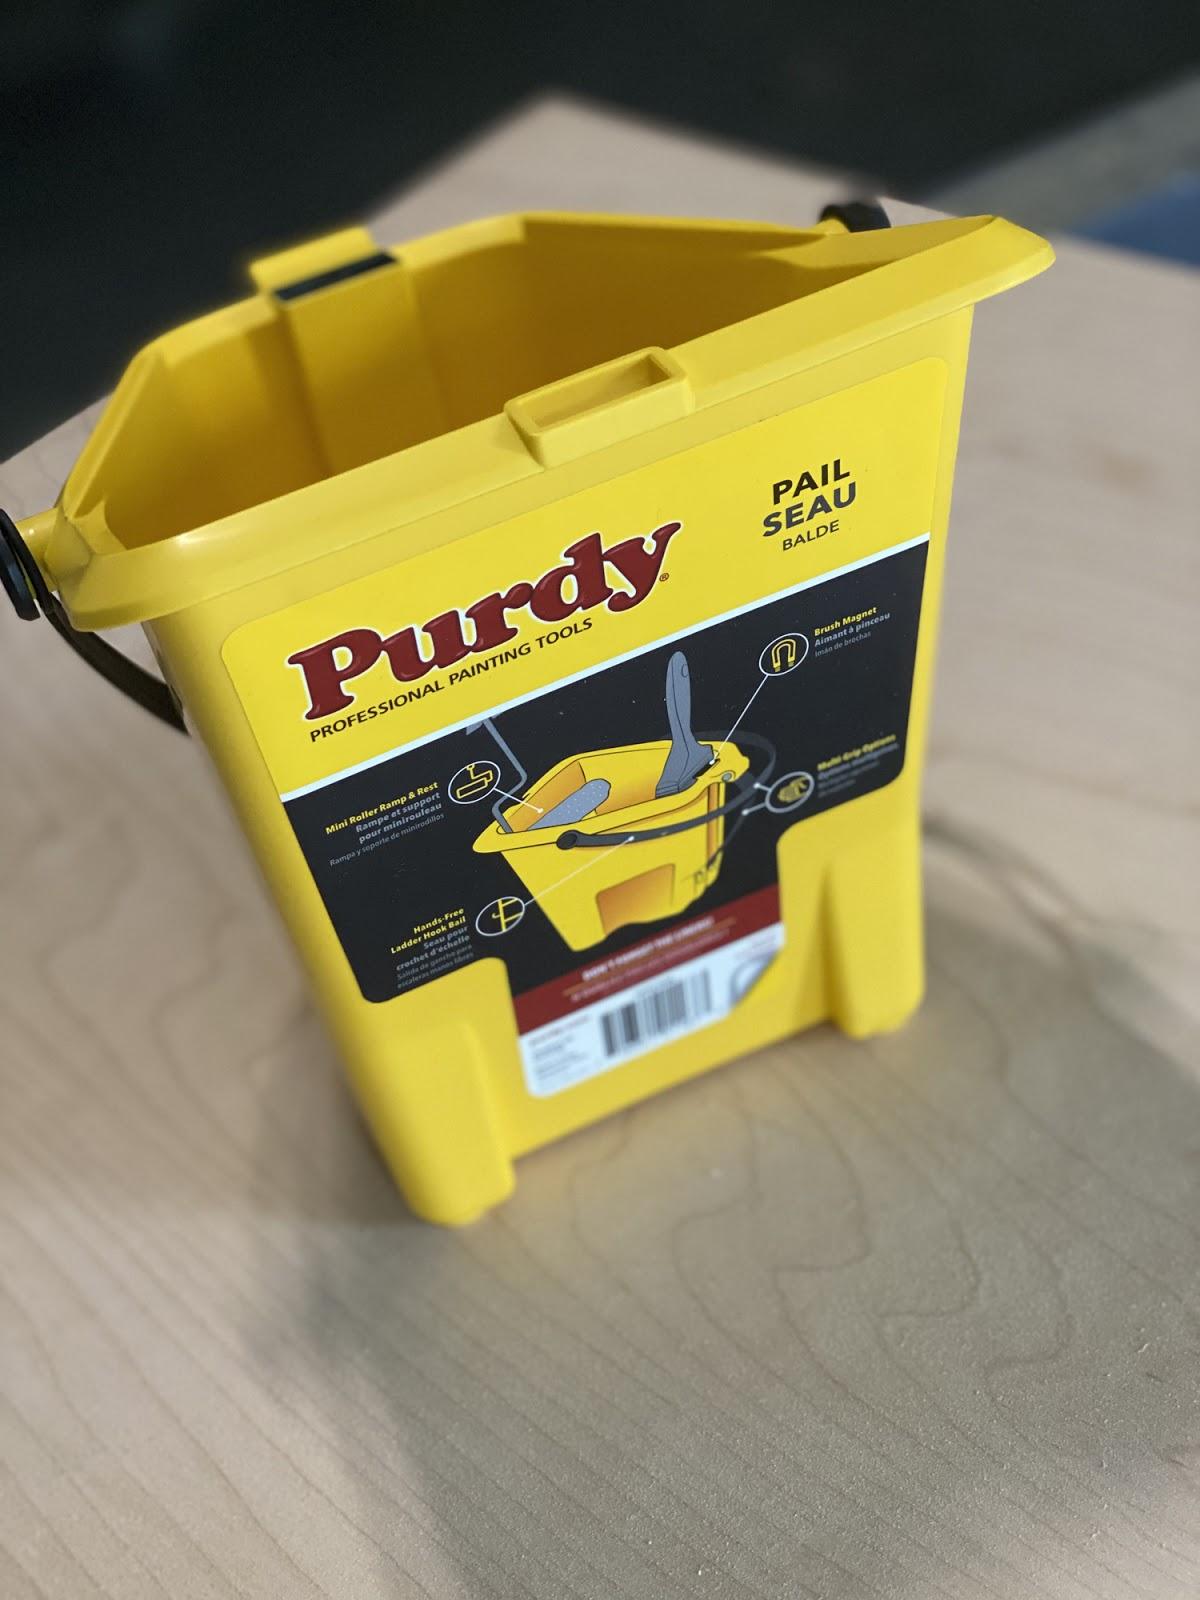
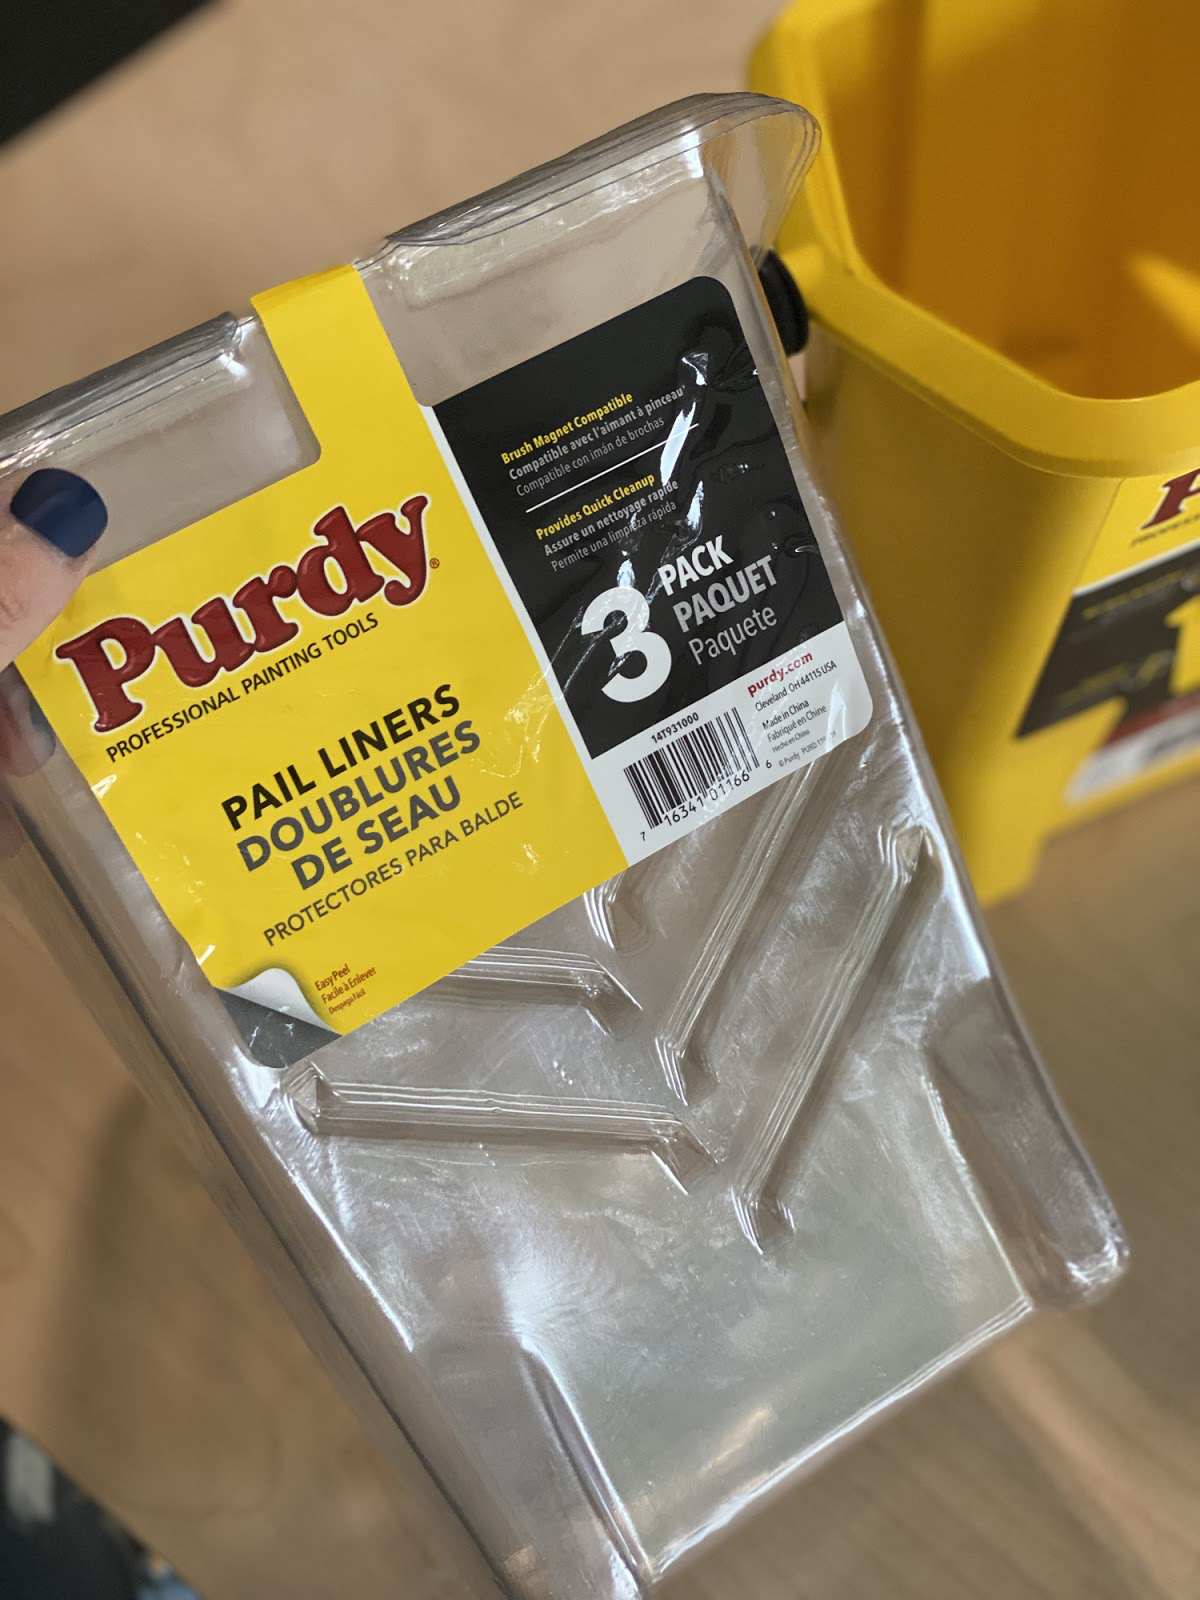
It’s an awesome pail for holding your paint. You buy the disposable liners to go on the inside so you can easily add one for each new project. That makes cleanup SO easy.
Once you add the liner in, you fill the pail with your paint. For my cabinet, I am using Pure White by Sherwin-Williams.
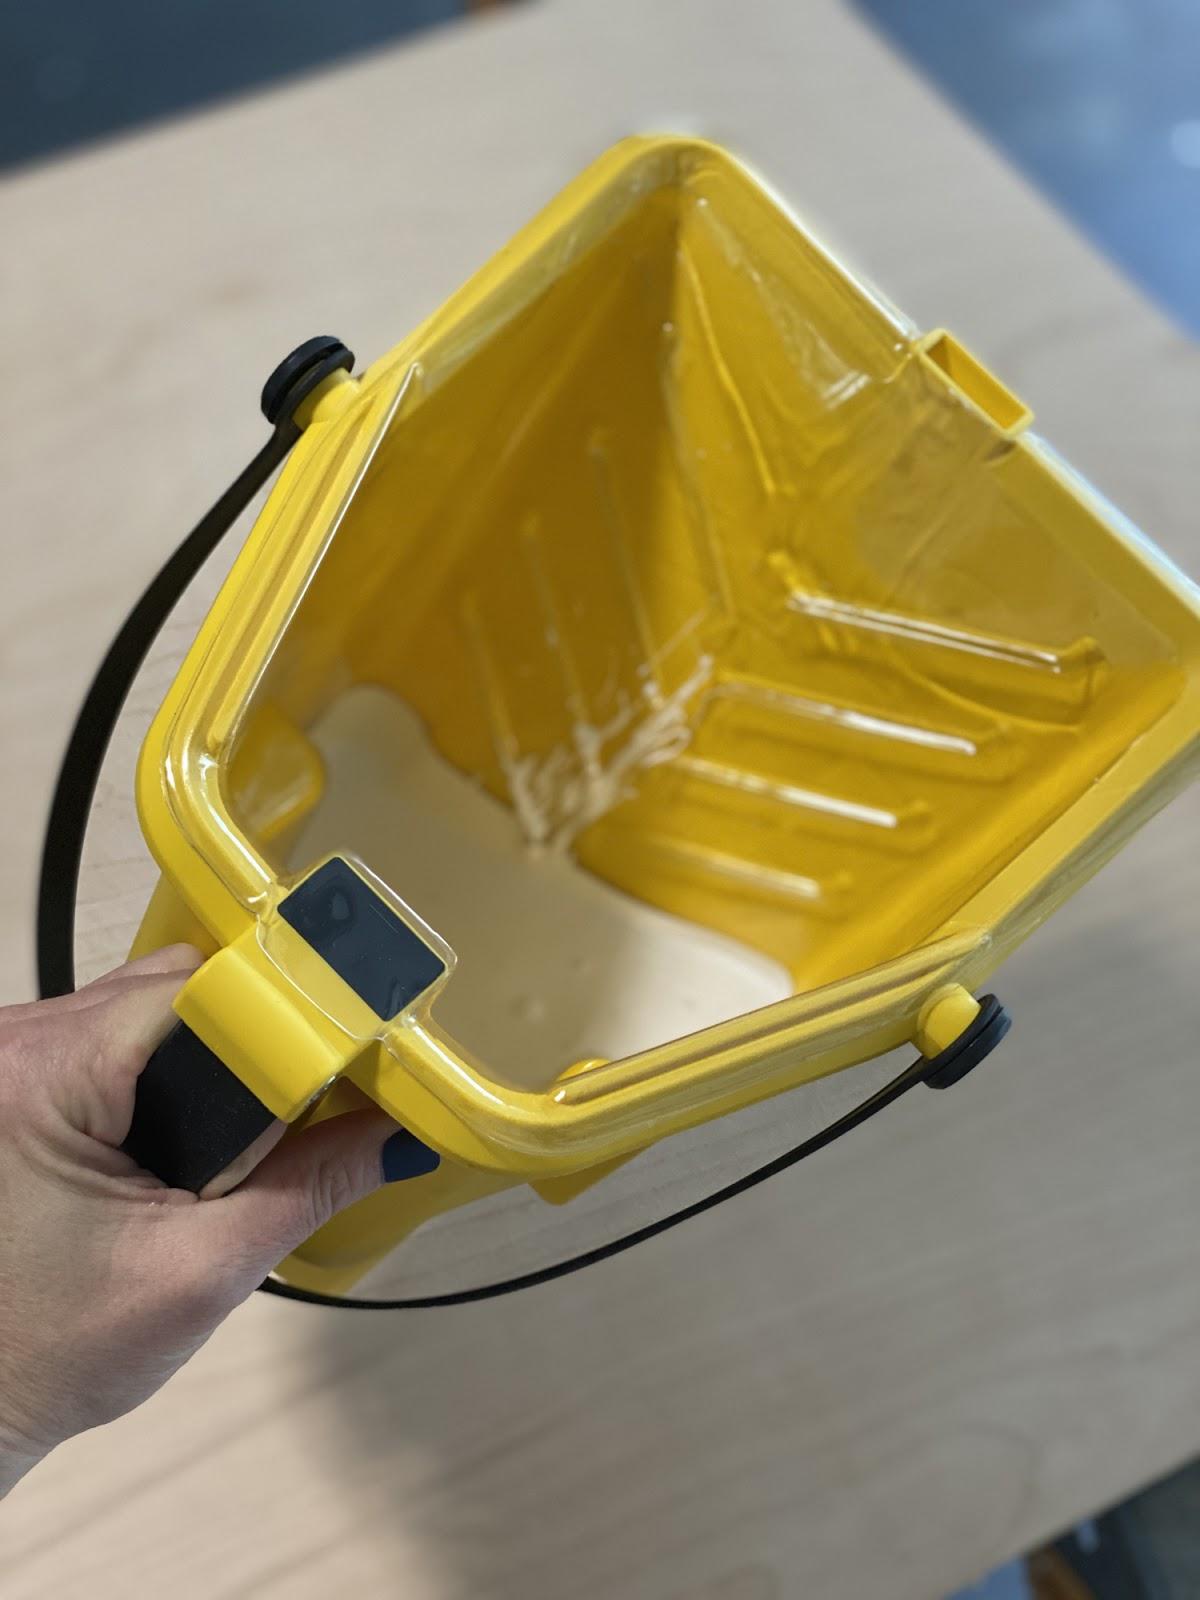
My favorite feature is the brush magnet. The magnet is like having an extra hand to hold your brush. I will paint an area and when I need to move or take a quick break I just set the brush against the magnet. It saves time and keeps you from making a mess with the paint.
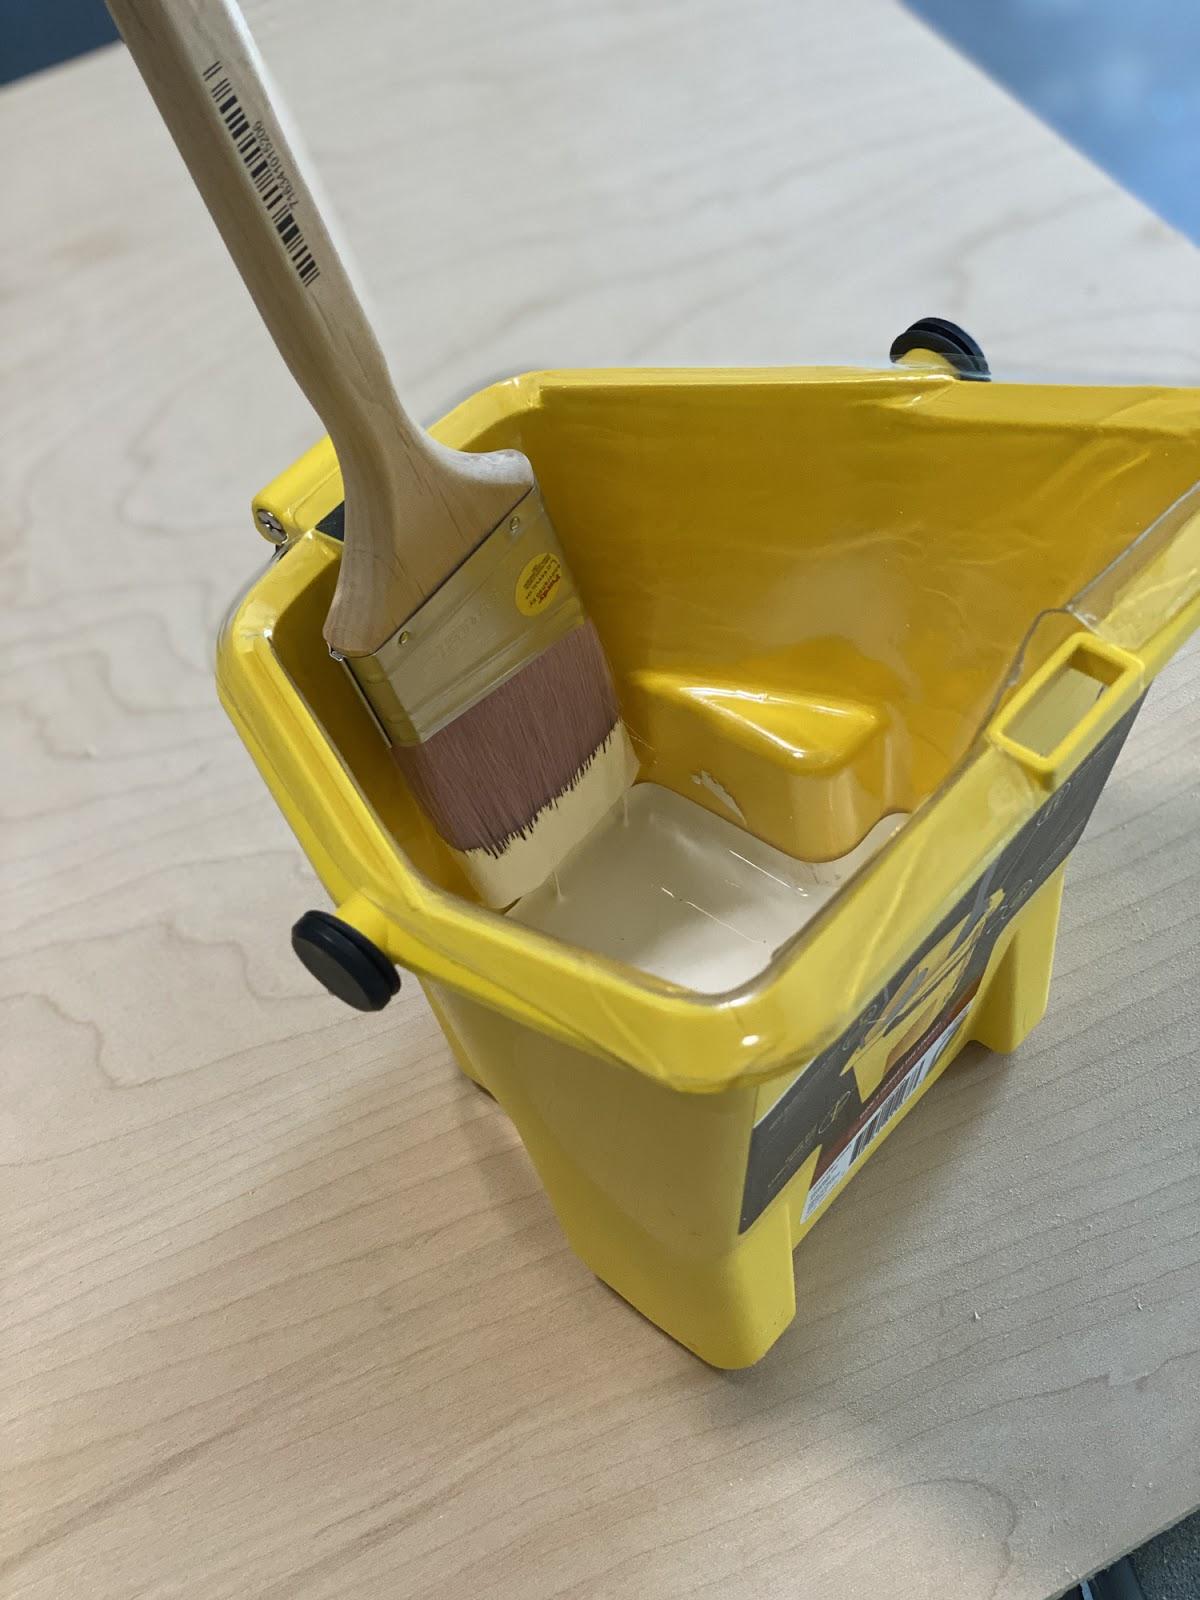
I chose to use my Purdy Nylox brush to paint the cabinet. I really wanted a smooth finish and these brushes are perfect for achieving a smooth finish without any brush marks.

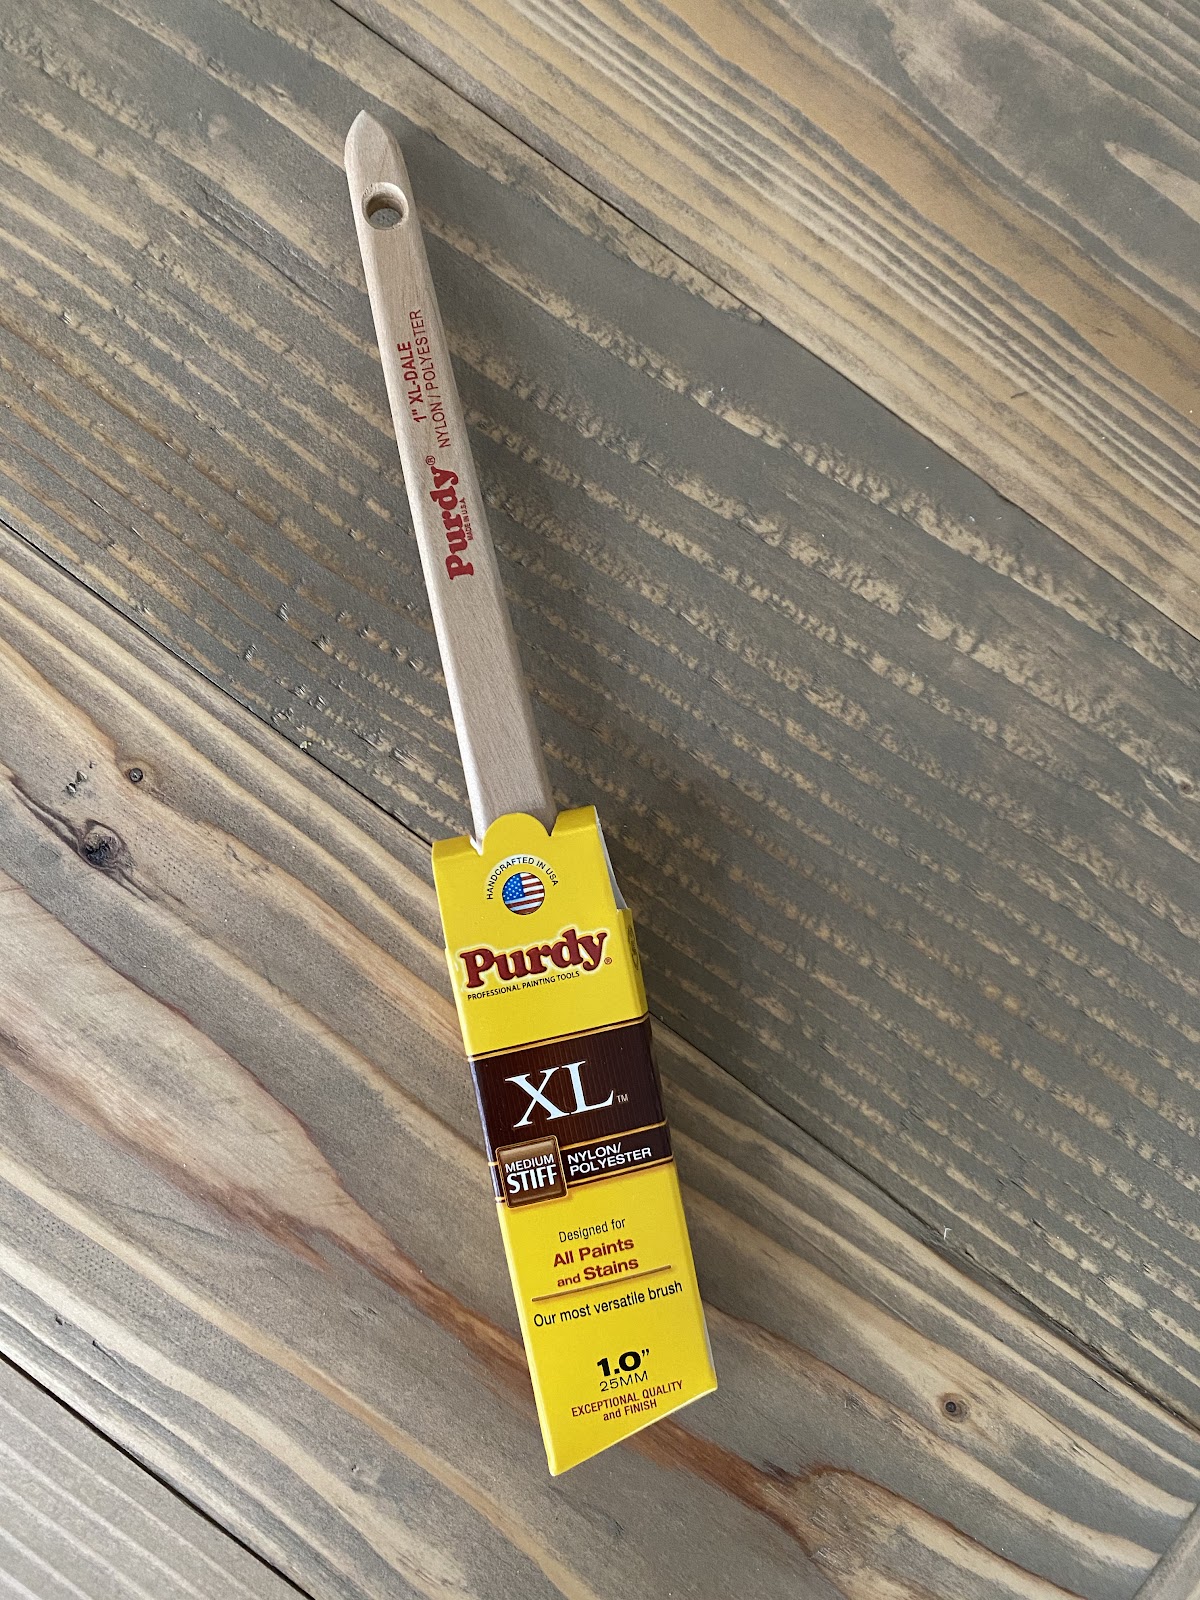
I stained the top of my cabinet with a different Purdy brush. I used a Purdy XL brush for the stained top. These brushes are great for both indoor and outdoor projects and work with all paints and stains. They are designed to be cleaned easily too which I love! After sanding my surface, I applied the stain with the brush going with the grain of the wood, and then wiped the excess with a painter’s cloth. Easy!
Picking the right tools for the job takes your finish to another level. It also saves time.
Once everything is dry, attach the doors to the cabinet with your decorative hinges. Add any door pulls you wish to use and personalize it however you wish. Make it look awesome! I know many of you may not have a need to store 24 Sandra Boynton board books, but this cabinet would be so cute in any room storing just about anything!
You can find the Purdy Pail and other Purdy tools at Sherwin-Williams stores. And don’t forget your liners! Get lots ? You will thank me!
You can find the Purdy Chinex Elite brushes at all Purdy retailers.
This project was sponsored by Purdy, but all opinions and words are entirely my own.
To learn more about The Purdy Difference and Purdy products, CLICK HERE!
To find the right Purdy tool for your next project CLICK HERE!

This is an impressive DIY project that combines elegant design with exceptional functionality. The library cabinet offers ample storage while adding a timeless, custom-built look to any space. The detailed plans and step-by-step instructions make it an excellent resource for anyone interested in creating high-quality furniture.
Projects of this scale truly benefit from using durable plywood and premium woodworking materials to ensure strength, longevity, and a refined finish. For DIY enthusiasts, furniture makers, and homeowners looking to source quality plywood, boards, laminates, and other interior materials, **https://www.plywoodbazar.com** is a valuable resource worth exploring.
Thank you for sharing such a detailed and inspiring tutorial. It’s a fantastic guide for anyone looking to build beautiful, functional furniture from scratch.
Do you have links to the latch and handle hardward you used on this please.
I love your design and your decoration. How long did you finish this work?
Hi! Do you have links to the latch and handle hardward you used on this? i cant seem to find a latch that small.
Love it!
This is so cute! Do you have the plans for download on this build?
I believe it is the same as the coffee cabinet at the bottom of the page. The only difference would be how you do the doors
I built this with the linked plans and there were several issues I encountered with sizes of materials and just the build in general. I had to adjust many things on the fly (for example, the shelves themselves were about 3/4 inch short of the back piece and because the middle divider is inset 3/4 of an inch the shelves had a 3/4 gap between the shelf face and the face frame.
This is the first time that I have been disappointed with the plans provided for a shanty-2-chic project.