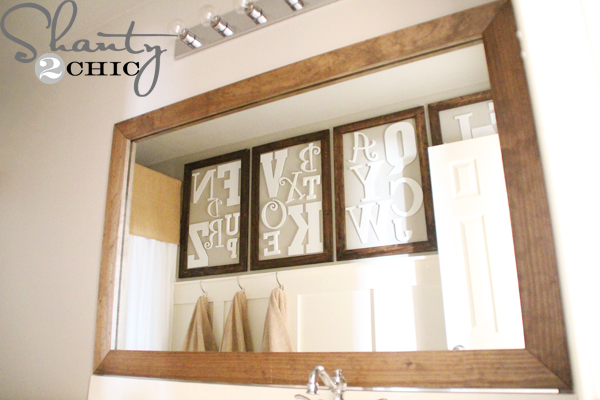
Many of you are probably in my position and have those boring, builder-grade mirrors in your bathrooms. They are great because they are HUGE but there is no character to them! Well, I had a light bulb moment this week and came up with an easy and quick way to upgrade my kids boring bathroom mirror. The best part of it is that it is not permanent! It can be removed easily with no damage to your mirror, which is great for the fickle-minded like myself! It’s also perfect if you are a renter and you can’t do anything permanent!
My mirror is about 4 ft. long so I was able to get the job done with 2 1×4’s @ 8ft. long. I opted to pay a bit more and purchase select pine to make sure my boards were straight. You can even upgrade to oak but I was happy with the select pine that I had to choose from. The supplies I needed for this entire frame only cost me $20!
Here’s how I made it happen!

DIY Mirror
I started by cutting my boards. All of your cuts will be mitered at 45 degrees. Not all mirrors measure the same so I will not share my cuts with you. I started by measuring the length of my mirror and added about an inch to the measurement (my measurements were short point to short point and they will not be parallel). I love my miter and was happy to use it for this project! It’s a very smooth and accurate cut and it makes my job so EASY!
If you don’t have this cutie, don’t worry! You can purchase this handsaw and miter box to get the job done! This is the perfect tool for a small project like this and you will get lots of use from it!
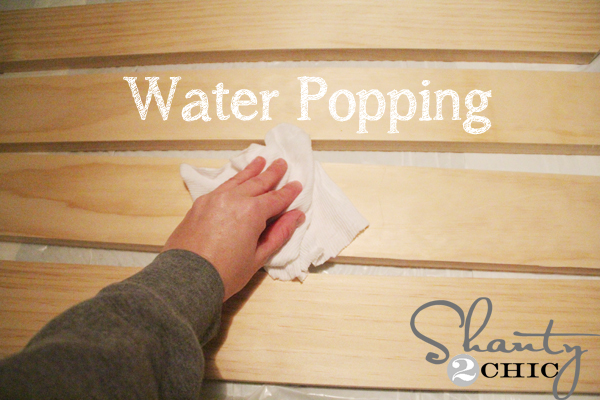 Now for the finish! I tried a cool technique, for staining, that we learned at an event we attended. It’s called water popping and it gives a very nice and smooth finish to your stain. Just dip a clean cloth in a bowl of water and wring it out. Then wipe the boards down where you will be staining them. This will open the pores in the wood, allowing it to soak even more of the stain in! *Because the pores will be open, make sure not to touch the boards with your hands until the water popping technique has dried. The oil from your hands will leave spots*
 Cuts look good:) We will attach them after we stain!
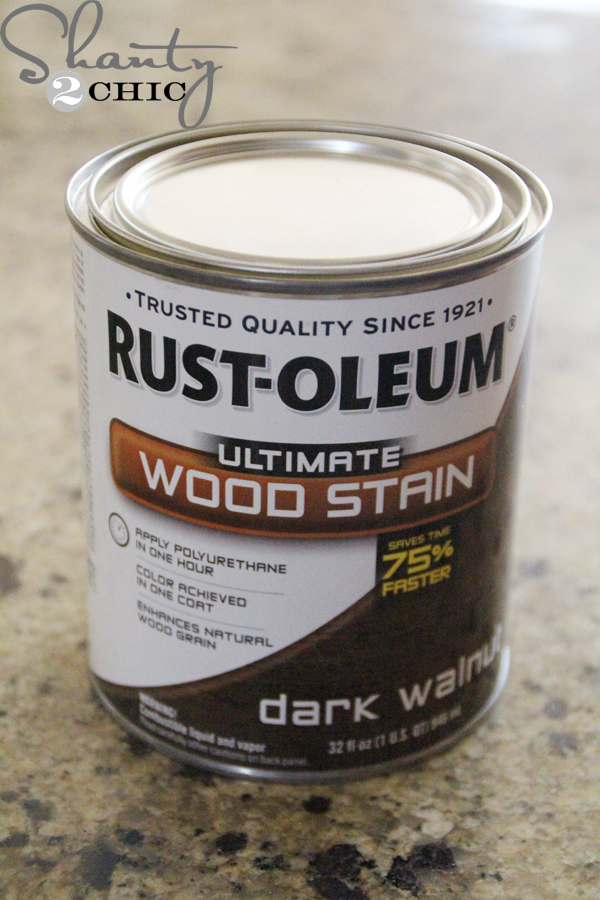 I opted for my favorite Dark Walnut stain. I applied 1 coat and wiped it with a clean cloth after about 5 minutes. You don’t want to wipe the excess stain off completely. You are wiping to distribute the stain evenly. Because we are putting this on a mirror, you will want to stain both sides so that you don’t see the unfinished back through the mirror! It will drive you crazy:)
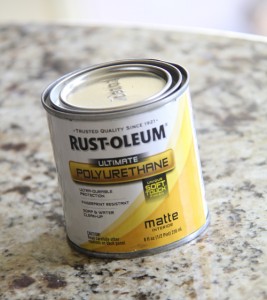
Once both sides dried, I used Polyurethane in a matte finish. This step is important! You want to protect the wood finish since it will be around water. I applied one coat with a bristle brush.
Time to build the frame!
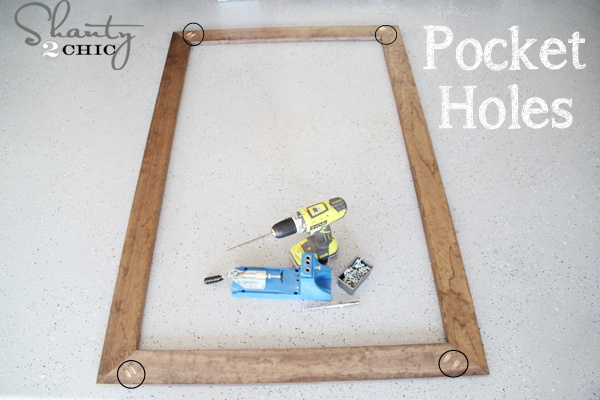 I used my Kreg Jig to drill pocket holes into the short boards. To drill the holes, just place the board in your Kreg Jig with the angle resting flat on the base. Your holes will drill into the boards at an angle as shown in this picture! Super easy!
Time to hang it up:)
 As I said, I am fickle and the idea of gluing a frame on the mirror was killing me! That’s when I had that light bulb moment! I love 3M Command Strips and knew they would work like a charm for this mirror! I bought 1 package of 4 sets of large strips! It holds up to 16 lbs which is plenty for this frame! Just follow the instruction on the back to hang to the mirror! I suggest waiting 24 hours for the finish to dry completely before applying the Command Strips!
***I removed all of my mirror clips so that my frame fit. My mirrors are very secure but if you are concerned about removing yours, you can buy very thin plastic mirror clips, at The Home Depot, to replace them. The frame will fit over the thinner style clips:)***
That’s it!!!
Here’s the before:
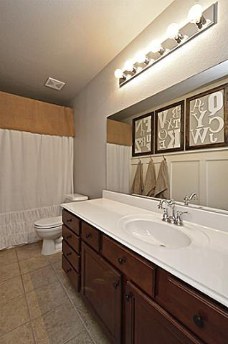 Before photo.
I love, love, love! And, the best part ~ If I change my mind tomorrow, I can just pop it off the mirror and pull the command strips down! Can’t believe I didn’t do this sooner!
Thanks so much for stopping by! If you love this idea, I would love your pins!
~Ashley

Hello! I built this following direction and I thought I purchased the “very thin” plastic mirror clips at Home Depot but when going to hang the frame the plastic clips comes out too far for the command hooks to actually connect. Do you possibly have a link to the correct clips that I should be using? Thanks!
If/when, you want to remove the frame, how will you reach the pull down tab on the command strips? Or will it just come off with pulling the frame itself?
Good to know about the thinner mirror clips. Mine are big and ugly very old ones.
Is your mirror attached to the wall with command strips too? I’m ripping out an old medicine cabinet and this project is perfect. I’m purchasing the mirror and it appears to just come with ugly clips.
????? Super excited because I built this myself and it turned out so beautifully! SO happy! I used the plans at WoodworkPlans.info to build mine – I highly recommend you visit that website and check their plans out too. They are detailed and super easy to read and understand unlike several others I found online. The amount of plans there is mind-boggling… there’s like 16,000 plans or something like that for tons of different projects. Definitely enough to keep me busy with projects for many more years to come haha ???
☁☁☁☁☁☁☁☁☁
☁☁??☁??☁☁
☁???????☁
☁???????☁
☁???????☁
☁☁?????☁☁
☁☁☁???☁☁☁
☁☁☁☁?☁☁☁☁
☁☁☁☁☁☁☁☁☁
Go to www. WoodworkPlans.info – click the pink link above for some more plans! Best of luck on your building adventures!
?✨?✨??
I am a little confusing on how the mirror is on the wall if you took the mirror clips off. Don’t the clips hold the mirror to the wall? So, if you took those off to get the frame on, how does the mirror stay secured to the wall?
Thanks,
Lauren
I love this idea! I recently moved into my college apartment and I would love to make some changes to the bathroom and since I am only renting and have limited finances this is perfect!! I just have one question. Could this idea be completed using trim to give it a more picture framed look?
Wow this is great. I don’t get the ‘short-to-short’ measurements thought. If adding an inch to the short-to-short, wouldn’t the frame be too big for the mirror? I could understand adding an inch to the long-to-long measurement.
Help! I read through the comments and still don’t get what pocket holes are and why they are needed.
They pocket holes are a way to join two boards. They drill a pocket, at an angle, allowing the screw to go in at an angle, creating the strongest joint. They also hide the screws. Hope this helps! If you search our videos section we have a pretty detailed video about it!